Description
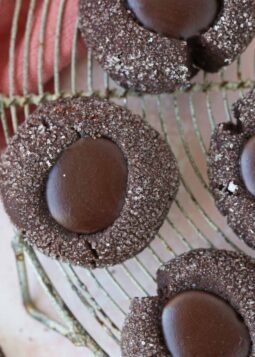
These easy Chocolate Thumbprint Cookies filled with a rich chocolate ganache are made in under 30 minutes. They are tender, moist and intensely chocolate.
Ingredients
Units
Scale
- 1/2 cup unsalted butter, softened (113g)
- 1/3 cup powdered sugar (36g ) 1 cup all-purpose flour (126g)
- 1/3 cup dutch processed cocoa powder (40g)
- 1/2 teaspoon kosher salt
- 1 teaspoon vanilla extract
- 1/4 cup granulated sugar, for rolling
- 1/3 cup jam, optional
- 1/2 cup bittersweet chocolate, chopped or morsels
- 1/2 cup heavy cream
Instructions
Make & bake the cookies:
- Step 1: Preheat the oven to 325°F conventional (no fan) and line one baking sheet with parchment paper. I do not recommend using the convection setting for these cookies.
- Step 2: In the bowl of a stand mixer fitted with the paddle attachment, add all the ingredients. (Butter, powdered sugar, all-purpose flour, cocoa powder, kosher salt, and vanilla extract.) Mix on medium-low speed until a smooth dough forms.
- Step 3: Pinch off pieces of dough about an inch across. Roll into a ball and then roll in granulated sugar. You will have approximately 15 cookies.
- Step 4: Place on parchment lined baking sheet about an inch apart, offset slightly. Press your thumb or forefinger into the center of each cookie gently, making an indentation. It should go about halfway into the cookie. Fill with jam before baking, but bake unfilled for a chocolate filling.
- Step 5: Bake in preheated oven for 12-15 minutes or until the surface looks matte and no longer glossy. I rotated my trays after 6 minutes.
- Step 6: If you are filling with ganache, press the baked centers down slightly to make a little more space for your filling. The cookies puff slightly in the oven and this just allows for a nice amount of chocolate filling.
Prepare the Ganache:
- Step 1: While the cookies bake, prepare the ganache. Place chocolate in a bowl set on a folded tea-towel. Heat cream just until it comes to a boil then pour over the chocolate.
- Step 2: Allow the cream to sit on the chocolate undisturbed for 2 minutes. This melts the chocolate and will allow you to emulsify the ganache easily with less whisking. Less whisking means less of a chance for the ganache to break.
- Step 3: Start whisking in one direction in the center of the chocolate until you see a smooth ganache beginning to form. Then gradually make your whisking strokes larger, pulling in more of the cream. Once a smooth ganache forms, stop whisking. Add any flavorings you desire at this point.
- Step 4: Transfer to a piping bag or cover the surface with plastic wrap and allow to cool while the cookies finish baking and they cool completely.
Fill Chocolate Thumbprints with Ganache:
- Step 1: Once the cookies are completely cool, pipe or spoon some of the ganache into each thumbprint. Piping the ganache will make for more perfect thumbprint cookies.
- Step 2: Let the thumbprints set, or don’t! They will taste delicious even if you are too impatient to wait for the ganache to set.
Notes
Yield – 15 cookies
Presentation – Fill with the chocolate ganache after baking or fill with your favorite jam before baking.
Variations – Try adding 1 tablespoon liquor to the ganache.
Storage – Store these cookies in an airtight container at room temperature for up to 10 days. They taste best when eaten within 5 days, but those filled with jam will stay soft & moist for 10 days!

