These Asiago hoagie rolls have Italian seasoning and melty cheese inside and on top! They are the perfect roll for your next sandwich!
Happy Labor Day, friends! I hope your weekends so far have been filled with family, friends, cookouts and beach days and any and all other possible ways to squeeze out the last bits of summer before autumn rolls in.
I’m not going to lie to you guys — I had a pumpkin mocha on Friday. I KNOW. I tried my best to avoid the premature pumpkin craze but, just like when I made pumpkin cheesecake ice cream last year, I got the bug early. So I am officially on Team Pumpkin now. Please forgive me. I brought you some cheesy, herby hoagie rolls today as a peace offering.
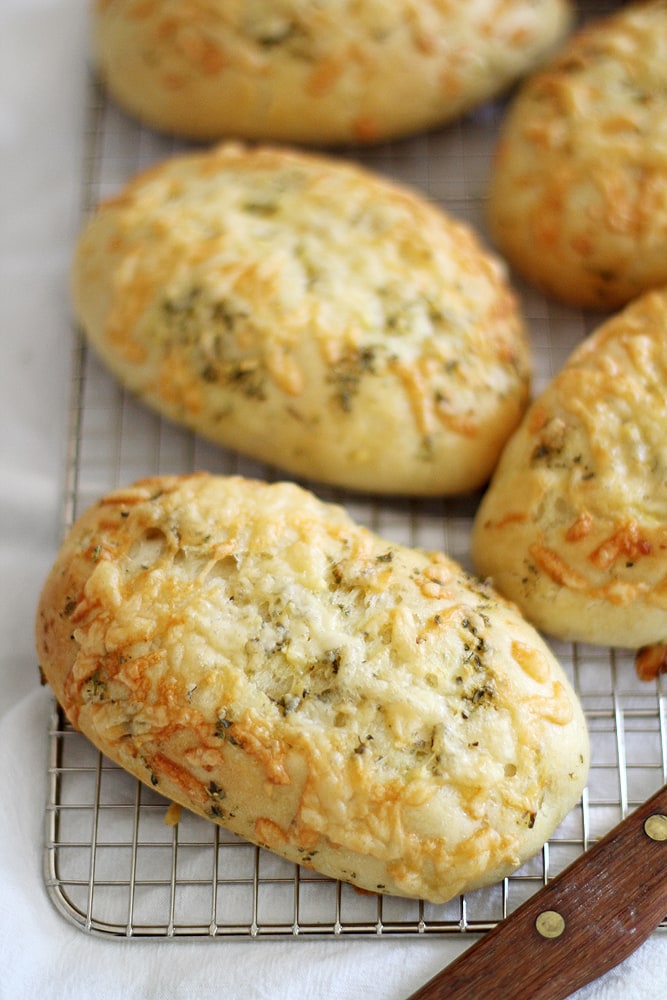
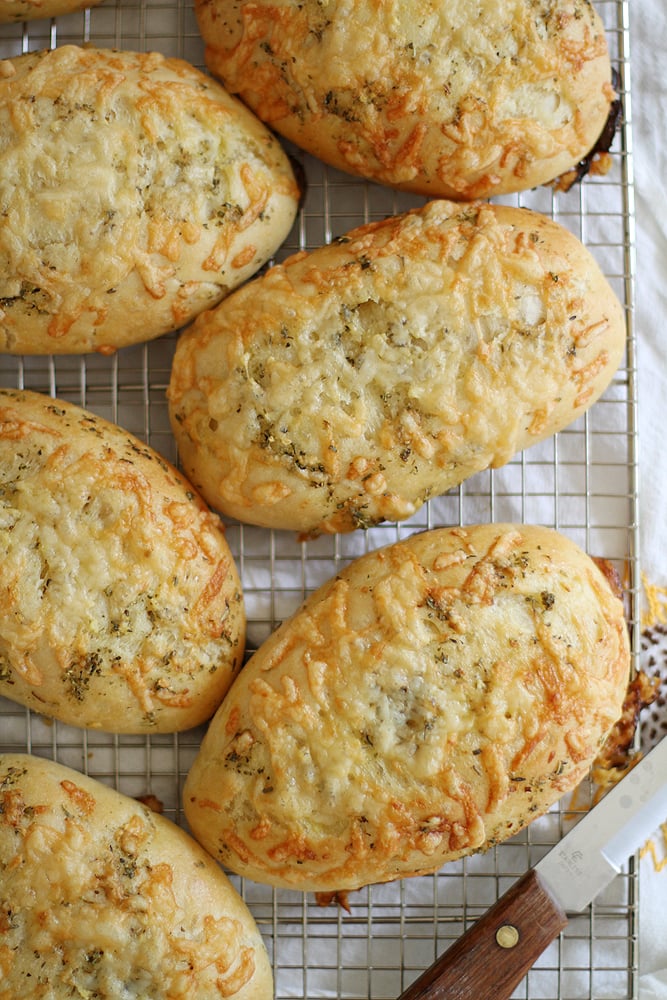
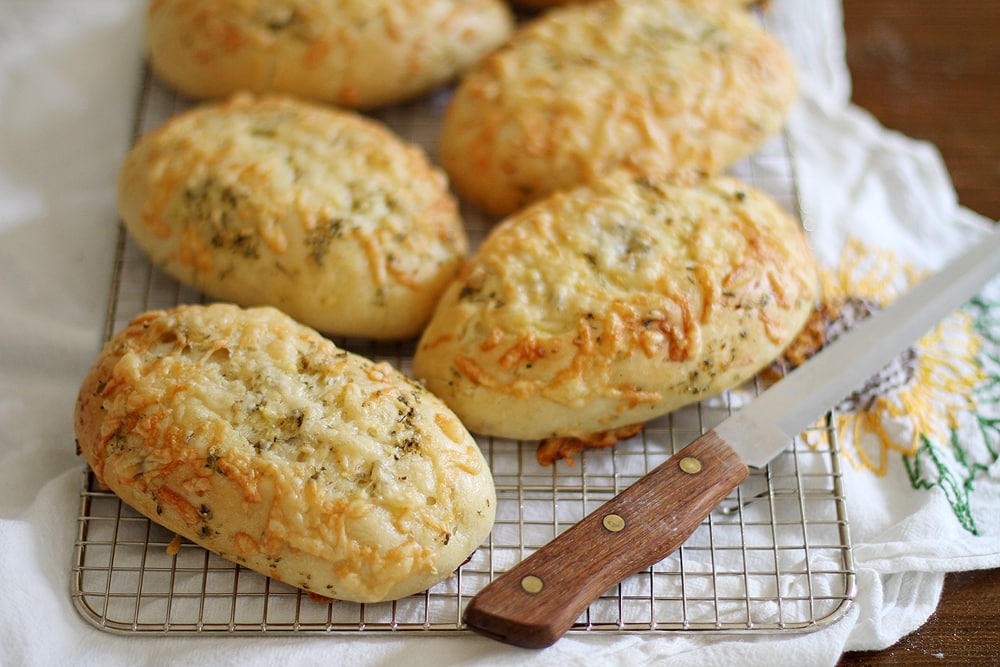
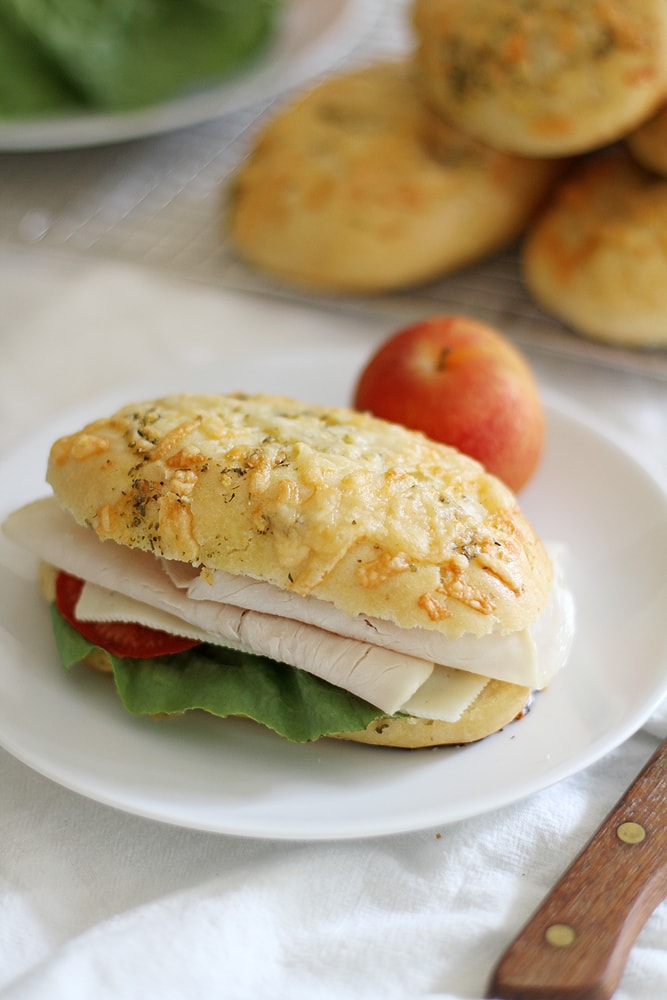
I think we can all agree by now that there is no better sandwich than one with homemade bread, amiright?? It’s not a question, really. That is especially the case when said bread is topped with a garlic-herb butter spread and shredded Asiago cheese that gets all melty and browned in the oven. Garlic and cheese are a match made in heaven I also explore in my cheesy garlic pull apart bread! The smell alone wafting from the oven when I baked these beauties was good enough to lick the air. Yeah, it got strange. I’ll own up to that.
But back to the rolls. In case you have a hankerin’ for a decent sammich, have plans for last-minute Labor Day eats that could get a really good boost from Asiago herb hoagie rolls or want to join me on my recent cheese and carb-baking bender, this recipe is for you.
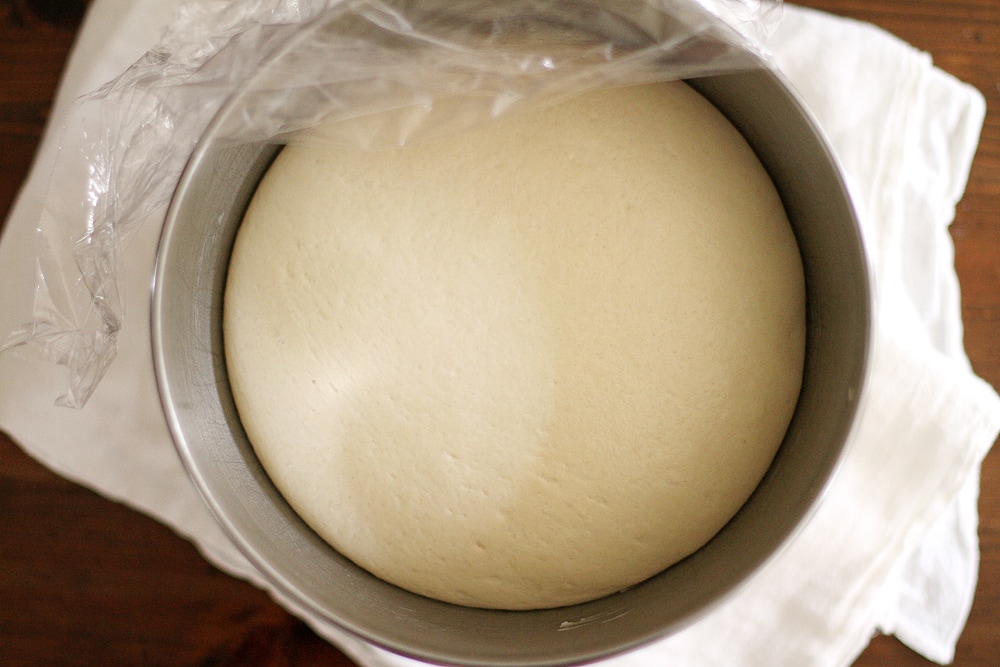
The dough base is one of my favorites to work with — because I’m weird in that I really get a kick out of well-textured doughs, and this one is extra smooth and elastic. It bakes up all soft and fluffy-like, but the top is crusty from the melty browned cheese. And of course, let us not forget the herb butter mixture that gets brushed on top just before baking. OMGAHHH = the most appropriate thing to say about it.
Side note: Did you know that if you let the dough rise in a covered bowl in the microwave (turned off, with the door closed), it helps retain the heat that helps the dough rise well? Pro tip fer ya, there. It’s what I did for these rolls and the results were awesome. Here are a few more baking tips from Red Star Yeast.
But I haven’t even told you the best part about this recipe: It all happens within the span of about two hours. That is correct, ladies and gentlefolk. So if you’re reading this during breakfast, you can have these rolls for lunchtime. Or, if you’re reading this at lunchtime, you can have these rolls for dinnertime. Or, if you’re reading this at dinnertime, you can have these rolls for dessert/midnight sandwich eating snacktime. All of these options are totally legit and highly recommended by yours truly.
Let’s also talk about possible filling options: Um, a deli sandwich, obviously. It’s classic yet delicious. But also meatball subs (making these italian meatballs in crockpot will do nicely), or thin-sliced Italian beef with peppers and au jus, or Philly cheesesteaks, or even cold meatloaf (if you haven’t ever done this yet, DO IT. It’ll change your life). I’d even slice these in half and turn them into spectacular garlic bread, or open-face pizzas. The moral of the story = the options are endless. As are my cravings for these rolls.
Now if you’ll excuse me, I’m off to enjoy my Labor Day in cheesy, herby sandwich form. I hope you, too, have excellent plans for your holiday.
Recommended Roll Recipes

Rolls & Biscuits

Breakfast & Brunch

Yeast Breads

Yeast Breads
If you enjoyed this recipe, please leave a star rating and let me know how it goes in the comments below! I love hearing from you and your comments make my day!
Asiago Hoagie Rolls

Ingredients
- 3 teaspoons granulated sugar, divided
- 2 ¼ teaspoons active dry yeast, 1 packet
- 1 ½ cups warm water, about 110 to 115 degrees F, divided
- 2 tablespoons vegetable oil
- 4 to 4 ½ cups all-purpose flour, divided
- 1 ½ teaspoons salt
- 3 tablespoons water
- 2 tablespoons unsalted butter, melted and slightly cooled
- 1 egg yolk
- 1 garlic clove, minced
- 2 teaspoons Italian seasoning
- 1 teaspoon salt
- ½ teaspoon garlic powder
- ½ teaspoon onion powder
- 1 ½ cups Asiago cheese, shredded
Instructions
- In a large bowl or the bowl of a stand mixer, combine 2 teaspoons sugar and the yeast. Add 1/2 cup of the warm water; stir to dissolve. Let stand 5 minutes until yeast is foamy, then add remaining sugar and water, oil, 3 cups of the flour and the salt. Stir to combine.
- Using dough hook on medium speed, knead dough in stand mixer 5 minutes, adding enough of the remaining flour until a smooth, elastic and only slightly sticky dough forms; OR, turn dough out onto a floured surface and knead by hand 10 minutes, adding enough of the remaining flour until a smooth, elastic and only slightly sticky dough forms.
- Shape dough into a ball and place in a lightly greased bowl; turn to coat. Cover with plastic wrap and let rise in a warm place 1 hour until doubled.
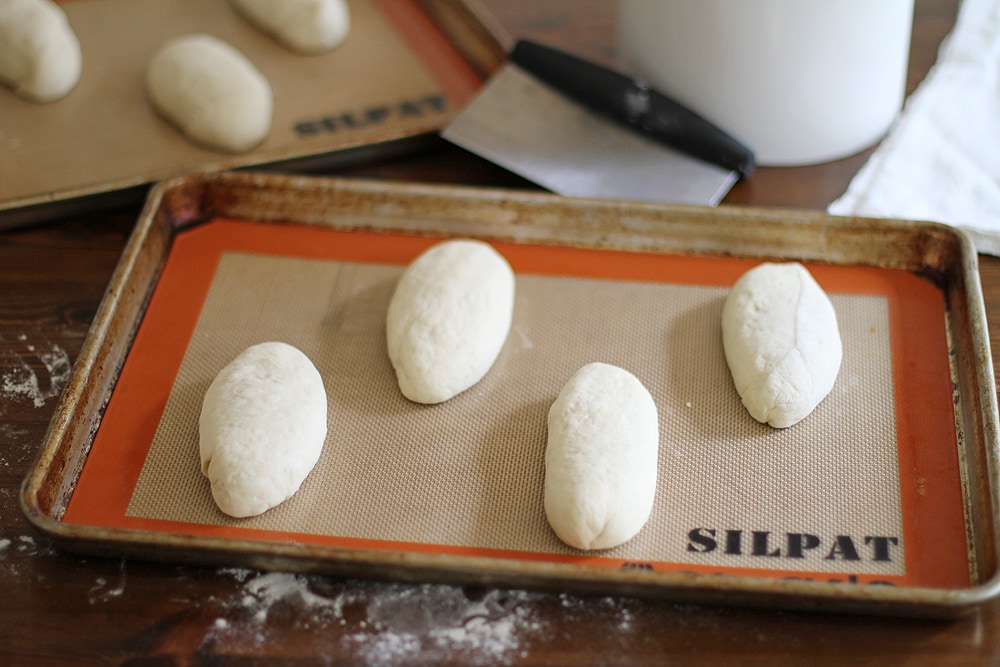
- Punch down dough. On a lightly floured surface, divide into 8 equal pieces. Shape each piece into an elongated oval shape about 5 inches long, then transfer to lightly greased or silicone mat-lined baking sheets, leaving about 2 inches between each piece of dough.
- Use a sharp serrated knife to slash tops of dough about 1/4-inch deep. Cover baking sheets with a tea towel or greased plastic wrap and let sit 30 minutes until dough is nearly doubled and puffy.
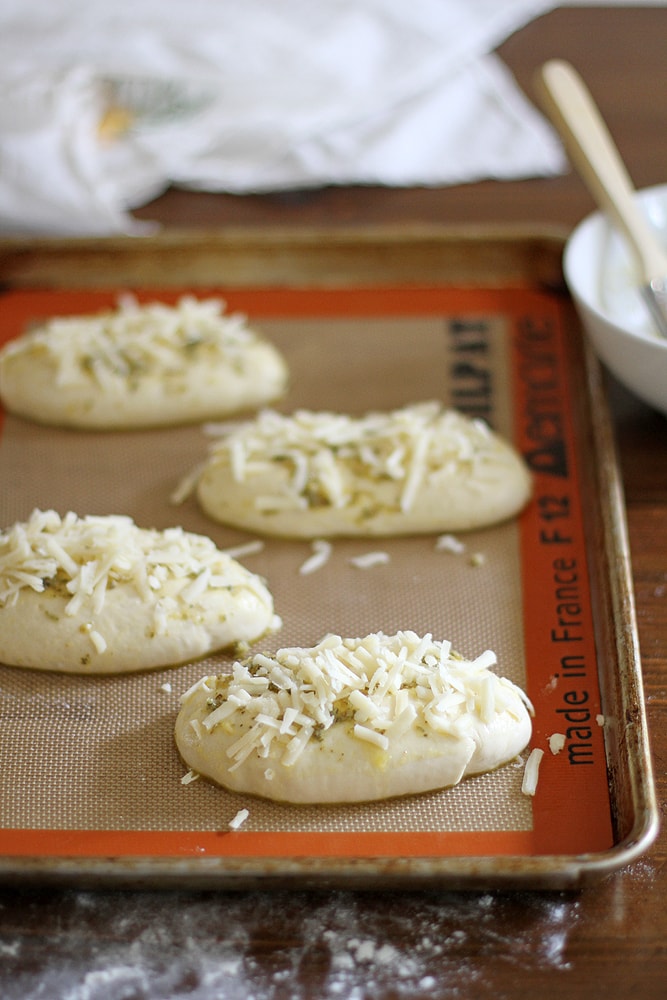
- While dough is rising, heat oven to 400 degrees F. In a medium bowl, whisk together water, melted butter, egg yolk, minced garlic, Italian seasoning, salt, garlic powder and onion powder. When dough is ready to bake, brush tops and sides with herb mixture. Sprinkle with the shredded Asiago cheese.
- Bake 20 minutes, rotating pans halfway through, until rolls are baked through and cheese on top is melted and browned. Cool rolls completely on a cooling rack before slicing.
Nutrition
Nutrition information is automatically calculated, so should only be used as an approximation.
 Like this recipe? Rate & comment below!
Disclosure: I received compensation from Red Star Yeast for recipe development purposes. All opinions are my own.


Can I freeze these? Or just freeze the dough for later use? I’m thinking that I could make the ahead of time for left over turkey sandwiches after thanks giving.
Hi Catheleen! You could freeze these for sure. If you want to freeze the baked rolls, do it once they are completely cool. You can thaw them at room temp or warm them in the oven to refresh them a bit. In my opinion that would be easier than freezing the dough, because they’d be pretty much set for your turkey sandwiches! (great idea btw!) Happy Thanksgiving and Happy Baking! ~gvd team
A very nice balance of the herb blend to the bread, and the taste was wonderful; my family received it with enthusiasm. I have made it with both Asiago and Provolone cheese; both work quite well.
The size of the rolls was enormous, however; I will make either 10 or 12 in the future. Thank you for such a good recipe.
Hi Lola! That sounds delicious, I’m so happy to hear this was a hit with your family! Thanks for coming back and sharing your experience, it always makes our day. ~gvd team
These rolls are amazing. For variation I used Herbs de Provence instead 0f Italian seasoning. I also use them for breakfast instead of bagels with cream cheese.
That sounds amazing, Laurie!
These are fantastic! The topping is delicious. The cheese gets nice and crispy. The buns are soft with a slight chew. I subbed sourdough discard for some of the flour and water, and also added 1/2 tsp each of garlic and onion powder, as well as 1 tsp Italian seasoning to the dough, which added flavour. The dough came together easily by hand, and was soft and smooth after kneading till it passed the windowpane test. I had to sub fresh parmesan cheese for the Asiago and used less than 1 1/2 cups. My yield was 7 big beautiful buns (133 g dough per bun).
These turned out amazing! Great oven spring. Tasted even better. I will be making these again. Would be good for meatball subs.
I made these with 3 cups AP flour and 1 cup bread flour because that’s what I had on hand. Beautiful, soft dough that baked up into slightly crispy yet soft mini loaves. Thank you for a great recipe!