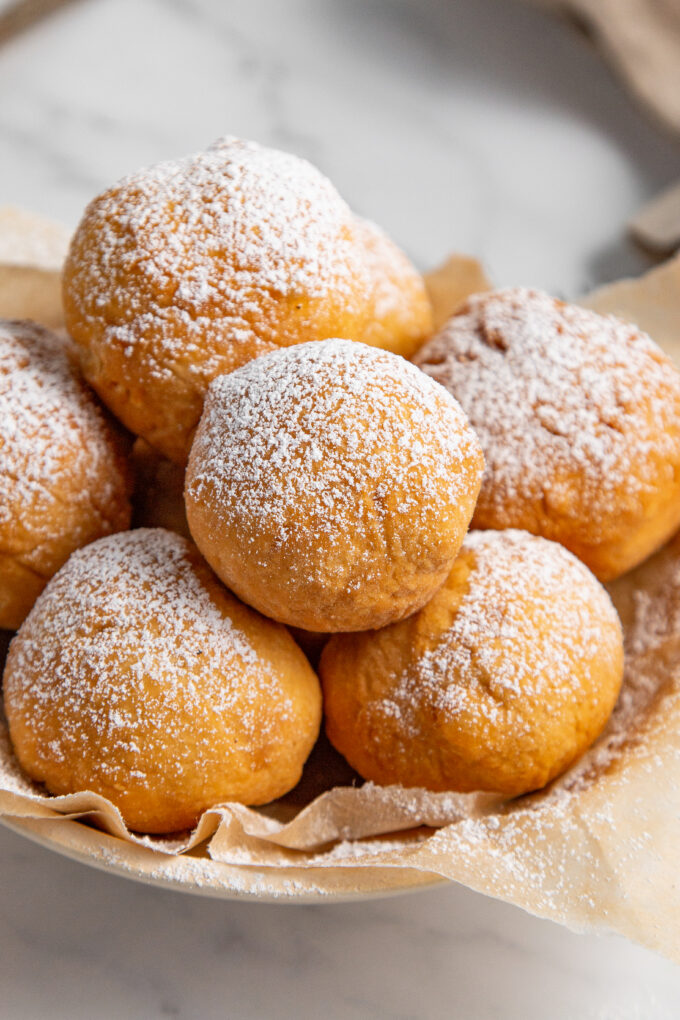
Make delicious, crispy, buttery, and airy fried dough at home in less than 20 minutes! It is even better than the fried bread at the country fair. This melt-in-your-mouth treat is perfect with a sprinkle of powdered sugar. Fried dough can be topped with a variety of sweet or savory toppings, making it the perfect snack or dessert!
Why You’ll Love This Recipe
- This homemade fried dough recipe is easy to make.
- The dough only requires a few simple ingredients.
- You probably already have all of the ingredients in your kitchen pantry!
- This recipe takes just 20 minutes in total.
- It is versatile.
- Top it with a variety of sweet or savory toppings.
- It is delicious comfort food.
- This fried bread is crispy on the outside and soft and doughy on the inside.
- It’s the perfect combination of sweet and savory.
- Check out these Baked Donuts for another fun recipe!
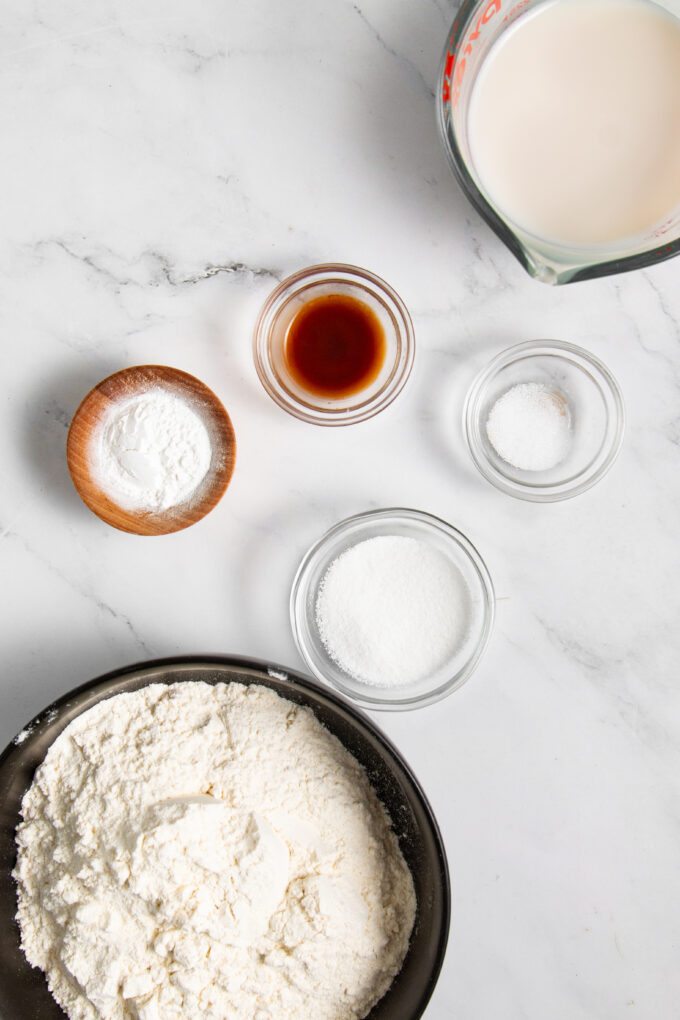
Ingredients & Substitutes
These are the ingredients and substitutions for fried dough. Scroll down to the bottom for the full recipe.
Use all-purpose flour for this recipe. I have not tested another flour yet.
Granulated sugar adds a touch of sweetness.
Baking powder helps these dough bites remain light and airy.
A touch of salt balances out the sweetness.
Milk helps to thin out the batter. Feel free to use any type of milk. I used 2% for these photos.
Vanilla extract adds a cozy homemade flavor.
Fry the dough in vegetable oil for the best results.
Lastly, add your favorite toppings! Powdered sugar is my favorite.
Taste & Texture
This fried dough is sweet and buttery. The powdered sugar on top adds more sweetness.
The texture is crispy on the outside and light and airy inside.
Add your favorite toppings for a customizable flavor!
How to Make
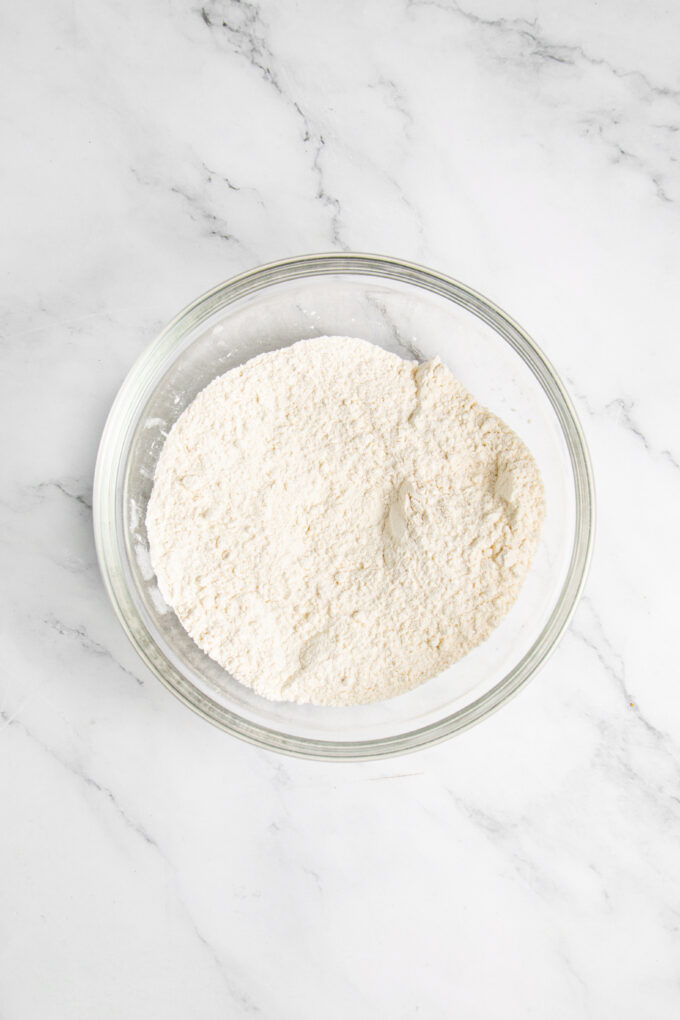
Step 1
In a mixing bowl, whisk together the all-purpose flour, granulated sugar, baking powder, and salt.
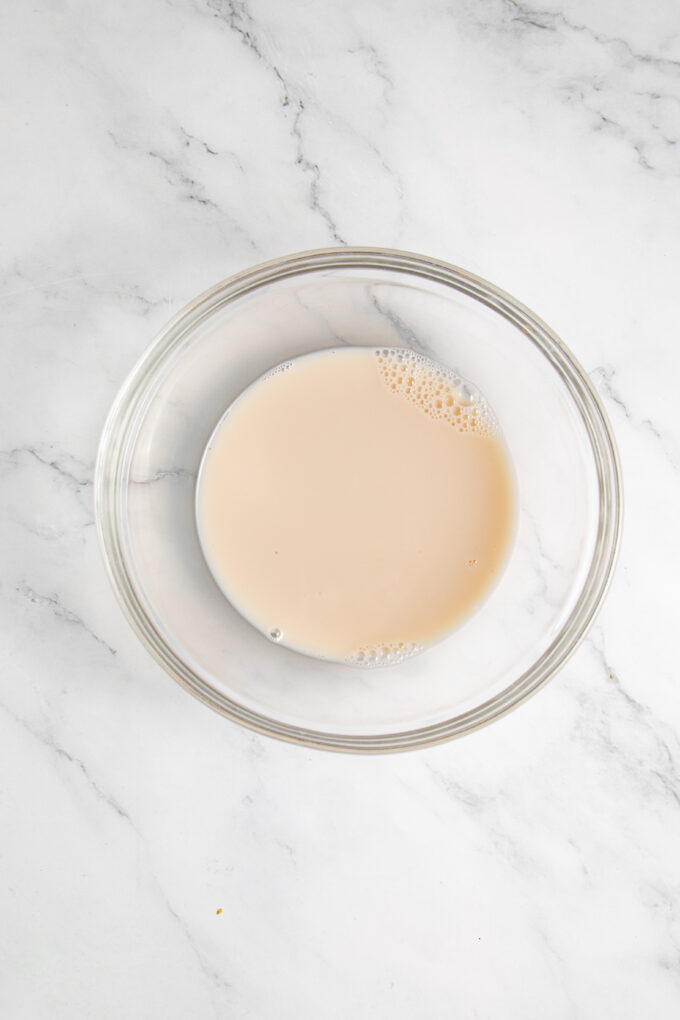
Step 2
In a separate small bowl, mix together the milk and vanilla extract.
Step 3
Gradually pour the milk mixture into the dry ingredients, stirring until a sticky dough forms. If the dough is too dry, add a little more milk, a tablespoon at a time, until the dough comes together.
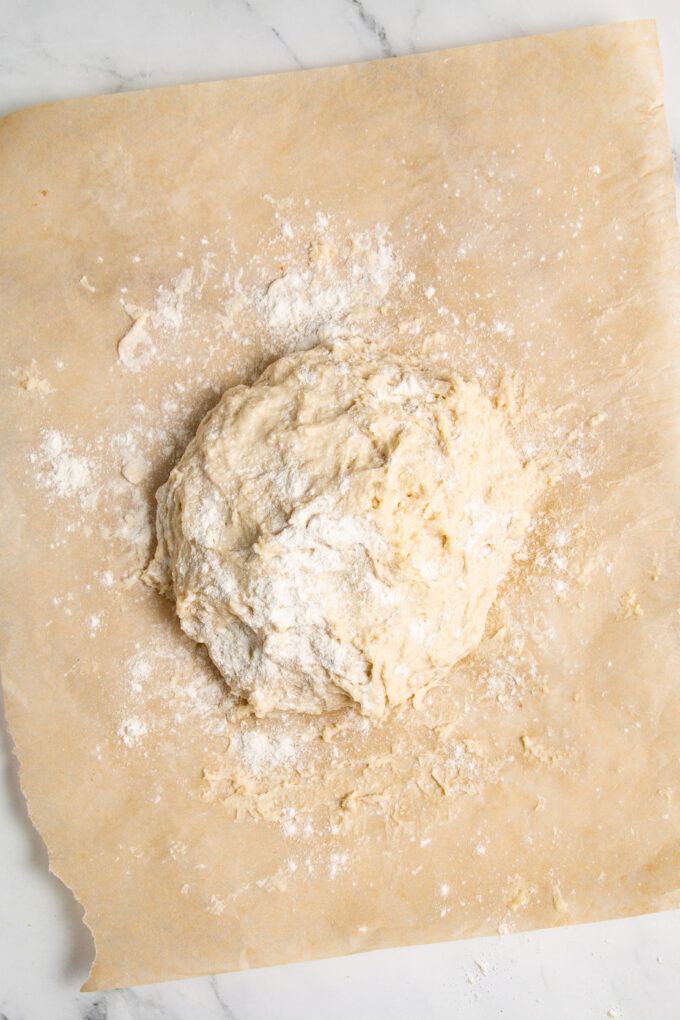
Step 4
Transfer the dough to a lightly floured surface. Knead it gently for a minute to ensure it’s well combined.
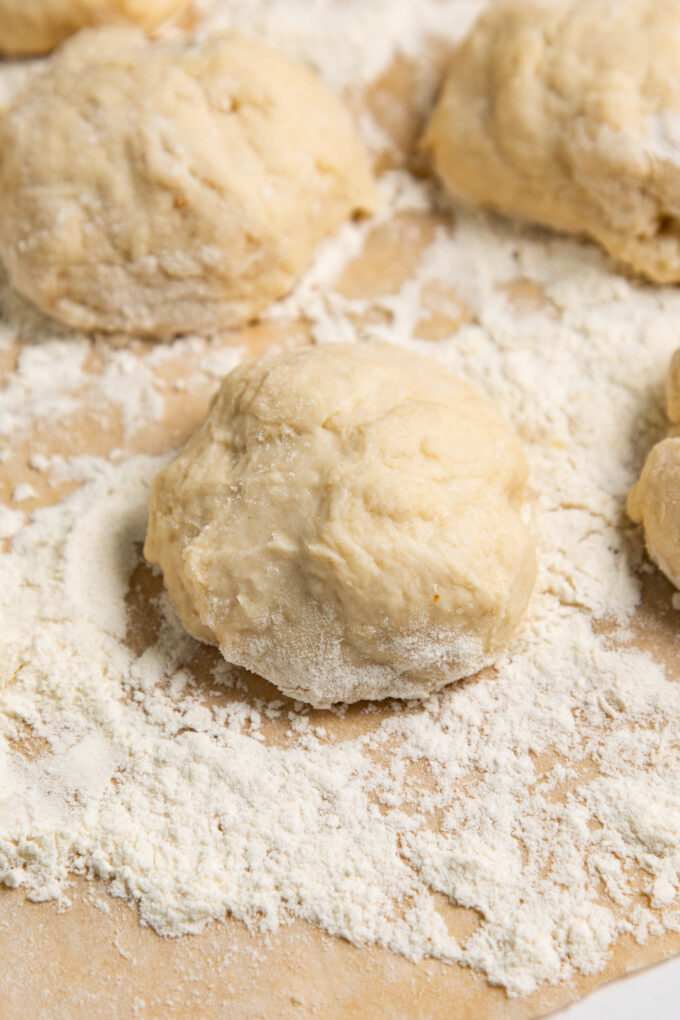
Step 5
Divide the dough into smaller portions, about the size of a golf ball, and roll each portion into a ball.
Step 6
In a deep, heavy-bottomed pot or skillet, heat about 2 inches of vegetable oil over medium heat until it reaches a temperature of 350°F (175°C). Use a candy thermometer or an instant-read thermometer to monitor the temperature.
Step 7
Carefully drop a few dough balls into the hot oil, being cautious not to overcrowd the pot.
Step 8
Fry them for about 2-3 minutes on each side, or until they turn golden brown.
Step 9
Use a slotted spoon or tongs to remove the fried dough from the oil and transfer them to a paper towel-lined plate to drain excess oil.
Step 10
Repeat the frying process with the remaining dough balls until all are cooked.
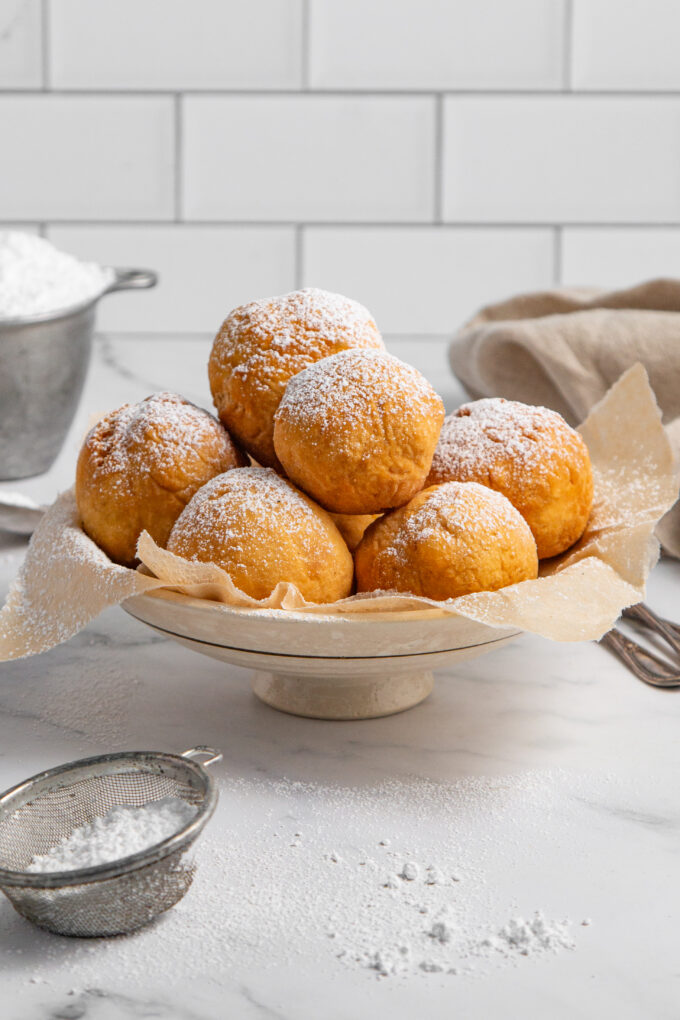
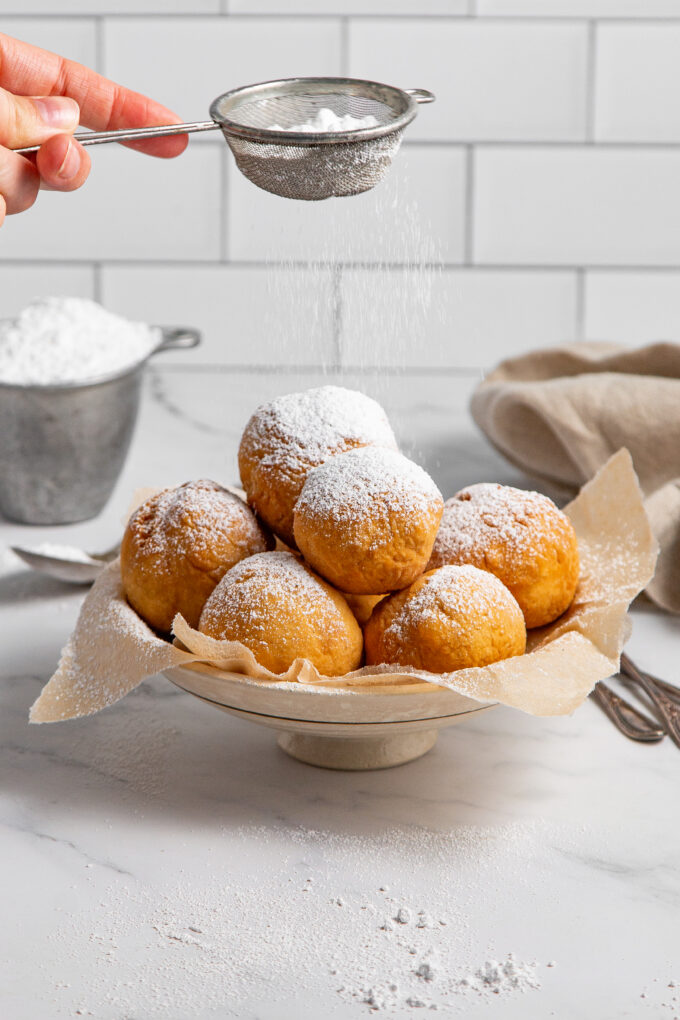
Step 11
Allow it to cool slightly before serving. Optionally, dust them with powdered sugar or sprinkle them with cinnamon sugar for added flavor.
Step 12
Serve the fried dough warm and enjoy!
Expert Tips for Success
Here are a few expert tips and tricks for making the best fried dough at home.
Use a light touch when mixing the dough. Overmixing will make the dough tough.
Heat the oil to the correct temperature before frying the dough. This will help prevent the dough from absorbing too much oil and becoming greasy.
Don’t overcrowd the pan when frying the dough. This will lower the temperature of the oil and make the dough soggy.
Flavor Variations & Add-Ins
This fried dough recipe is a blank canvas, so you can customize it to your liking. Here are a few flavor variations and add-ins to try.
- Sweet toppings: powdered sugar, cinnamon sugar, Nutella, fruit, maple syrup
- Savory toppings: cheese, bacon, garlic, onion powder, herbs
How to Serve & Store
Fried dough is best served warm and fresh.
You can top it with your favorite toppings and enjoy it immediately.
My favorite way to serve fried dough is topped with powdered sugar!
This sweet treat can also be stored in an airtight container at room temperature for up to 24 hours.
Fry Bread Versus Fried Dough
| Characteristic | Fry Bread | Fried Dough |
| Ingredients | Flour, baking powder, salt, water | Flour, baking powder, salt, water, sugar, milk |
| Texture | Dense, chewy | Light, crispy |
| Flavor | Neutral | Sweet, distinct |
| History & Culture | Native American cultural significance | American |
Frequently Asked Questions (FAQs)
You can use other types of flour, such as whole wheat flour or gluten-free flour. However, the texture of the dough may be different.
I highly recommend using vegetable oil for this recipe.
Yes, you can make the dough ahead of time and refrigerate it for up to 24 hours. When you are ready to fry the dough, simply let it come to room temperature before frying.
Elephant ears and fried dough are the same delicious treat. They are made with a simple dough that is deep-fried and served with your favorite toppings.
Pizza dough and fried dough are similar, but they are not the same thing. Pizza dough is typically made with yeast, flour, water, salt, and sugar. It is then kneaded and allowed to rise before being shaped into a pizza and baked. Fried dough, on the other hand, is typically made with flour, baking powder, salt, and sugar. It is then mixed with water or milk and fried in hot oil until golden brown.
Fried dough is a popular treat all over the United States, but it is especially popular in New England. It is often sold at fairs, carnivals, and amusement parks in the region. It is also a popular menu item at many seafood restaurants and clam shacks in New England.
Equipment Needed
Use a candy thermometer to accurately measure the temperature of the oil.
You May Also Enjoy
- Pizza Dough Recipe
- No Knead Dutch Oven Bread
- Italian Bread
- Sourdough Cinnamon Rolls
- Puff Pastry Dough
If you enjoy this homemade fried dough recipe, please leave a rating and review! You can find more great recipes on Facebook, Instagram, and Pinterest. Check out these Dessert Recipes for more recipes!
Fried Dough

Ingredients
- 2 cups all-purpose flour
- 2 tablespoons granulated sugar
- 2 teaspoons baking powder
- ½ teaspoon salt
- ¾ cup milk
- 1 teaspoon vanilla extract
- Vegetable oil, for frying
- Powdered sugar, for dusting (optional)
- Cinnamon sugar, for dusting (optional)
Instructions
- In a mixing bowl, whisk together the all-purpose flour, granulated sugar, baking powder, and salt.
- In a separate small bowl, mix together the milk and vanilla extract.
- Gradually pour the milk mixture into the dry ingredients, stirring until a sticky dough forms. If the dough is too dry, add a little more milk, a tablespoon at a time, until the dough comes together.
- Transfer the dough to a lightly floured surface and knead it gently for a minute to ensure it’s well combined.
- Divide the dough into smaller portions, about the size of a golf ball, and roll each portion into a ball.
- In a deep, heavy-bottomed pot or skillet, heat about 2 inches of vegetable oil over medium heat until it reaches a temperature of 350°F (175°C). Use a candy thermometer or an instant-read thermometer to monitor the temperature.
- Carefully drop a few dough balls into the hot oil, being cautious not to overcrowd the pot. Fry them for about 2 to 3 minutes on each side, or until they turn golden brown.
- Use a slotted spoon or tongs to remove the fried dough from the oil and transfer them to a paper towel-lined plate to drain excess oil.
- Repeat the frying process with the remaining dough balls until all are cooked.
- Allow the fried dough to cool slightly before serving. Optionally, you can dust them with powdered sugar or sprinkle them with cinnamon sugar for added flavor.
- Serve the fried dough warm and enjoy!
Notes
- The dough should be sticky.
- Use flour on your hands and the working surface as needed.
- Use a candy thermometer to measure the temperature of the hot oil.
- The fried dough really only needs a few minutes. Do not fry too long.
- This is best eaten soon after making.
- The calories do not take into account any oil absorbed during frying or powdered sugar dusting.
Nutrition
Nutrition information is automatically calculated, so should only be used as an approximation.
 Like this recipe? Rate & comment below!
soo good
thank you for coming back and sharing it always makes our day!!
Loved these! Had a craving for doughnuts and needed to save some money – thanks so much! All the way from Lebanon <3
Hi Christina! All the way from Lebanon! love that! I’m so glad these hit the doughnut craving and saved a few bucks. Thanks for taking the time to share, messages like this make our day! ~gvd team
Love these! I made them tonight they were a hit. Thank you
Hi Kristy! So happy to hear that, thanks for coming back to comment! ~gvd team
Can I use whole wheat flour to make these?
Hi Angela! Yes, you can use whole wheat flour here. Whole wheat will make the dough a bit denser and less fluffy, but it will still work. You can always start by swapping just part of the flour if you want to keep the lighter texture. Happy frying! ~gvd team
My family loves these, and I love that they are easy to make and can be customized to everyone’s cravings. I like to pipe in some raspberry jam or Nutella in the middle. Coating them in cinnamon sugar is also a great option.
Sorry, nothing American about these. The Spanish brought these here. There’s a variation in about every country, but Spanish and Latin Americans do them this way. Still, the recipes is good.
Hi Becki! You’re absolutely right that versions of fried dough exist across many cultures. I’m so glad you still enjoyed the recipe! ~gvd team
Aren’t these essentially beignets without powdered sugar
Hi Nathaniel! They’re actually a little different from beignets. Beignets are a yeasted dough, so they’re puffier and more bread-like. This recipe uses baking powder, which makes the inside lighter and more airy with a crispier outside. Same vibe, different texture! Hope that helps, and happy frying! ~gvd team
Might I be able to put something inside it? For example, wrap the dough around a piece of boiled egg or a chunky filling?
Hi Mamzy! Great question! That sounds delicious! You’d just need to make an adjustment during step 5. You could gently flatten the dough balls before frying, place your filling in the center, and then carefully folding the dough around it to seal. Just make sure to pinch the edges securely so the filling doesn’t leak out during frying. Be gently but make sure it fries all the way through. Happy experimenting and let me know how it goes! ~gvd team