Soft, tender overnight sourdough cinnamon rolls made with sourdough discard! In about four basic steps, and in the length of time it takes to get a good night’s sleep, you’ll have tantalizing homemade rolls ready to enjoy with very minimal effort.

A Quick Look At The Recipe
This is a brief summary of the recipe. Jump to the recipe to get the full details.
Prep Time
40 minutes
Cook Time
50 minutes
Proof Time
8 hours
Total Time
9 hours 30 minutes
Servings
8 rolls
Difficulty
Intermediate yet easy, with clear, guided steps.
Calories *
443 kcal per serving
Technique
Make dough, proof overnight, assemble rolls, proof, bake, top with frosting.
Flavor Profile
Soft, tender rolls with a gooey cinnamon swirl and cream cheese frosting.
* Based on nutrition panel
Easy to follow instructions, and the best cinnamon rolls! This will be my new go-to recipe! ⭐⭐⭐⭐⭐
Corinne
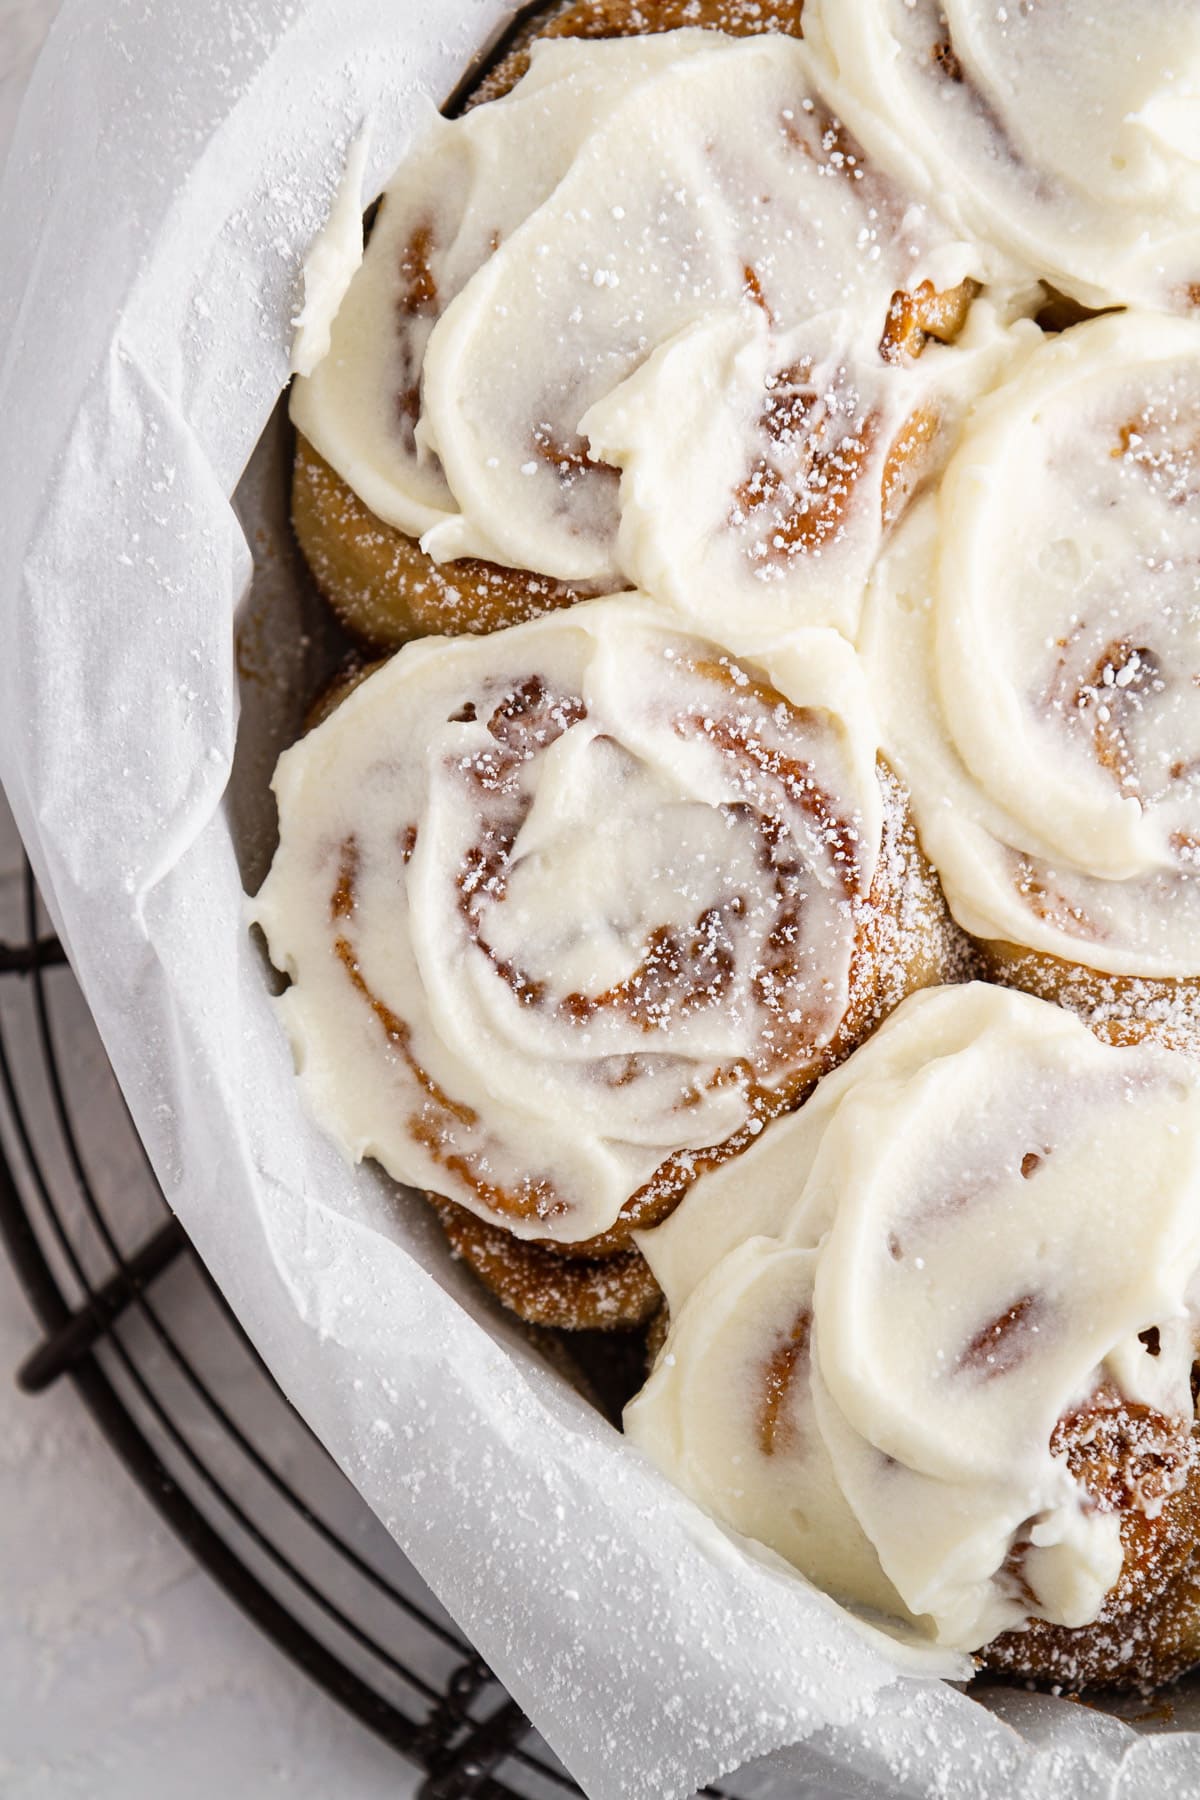
These sourdough cinnamon rolls are impeccably soft and fluffy, with a slight chew and pull from the glutinous swirls. Every warm, ooey-gooey bite is delicately sweet and spiced with a rich cream cheese frosting! When you’re ready to move from my savory sourdough bread recipe, sourdough dinner rolls, or sourdough focaccia recipe, then these cinnamon rolls are here for you!
You will need a sourdough starter for this recipe, but if you don’t have one yet, then jump to my sourdough starter recipe and get one going. In the meantime, you should make my overnight cinnamon rolls because no one should have to wait a whole week for one!
Table of contents
Why You Will Love these Easy Sourdough Cinnamon Rolls
- Soft, fluffy, slightly chewy texture. The added tang and tenderness from the sourdough starter, make these a step above traditional cinnamon rolls in all the very best ways.
- Sweetly spiced buttery filling in each bite. No need to all fight over the center of the cinnamon roll with the buns! Every bite is as good as the next.
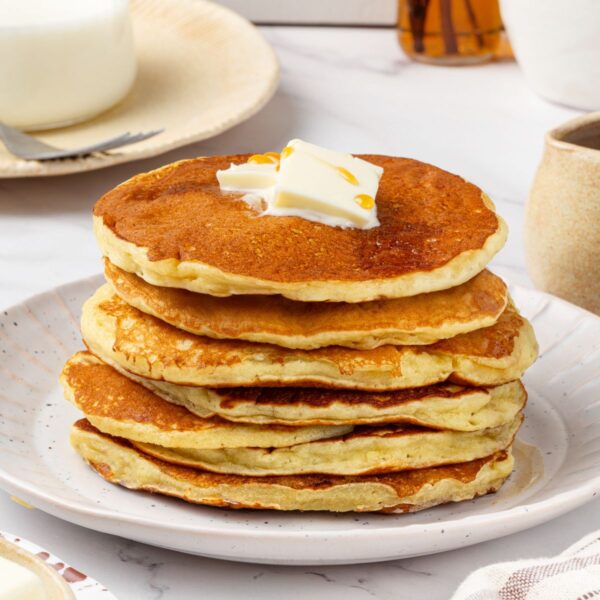
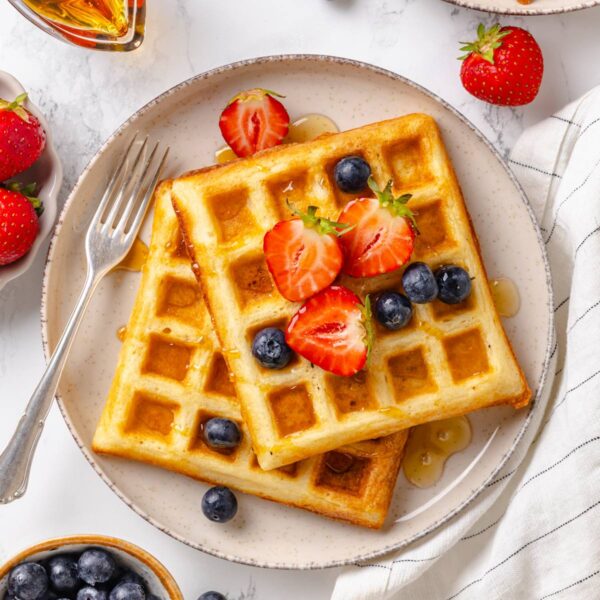
- These cinnamon rolls are made with sourdough discard! These fantastic rolls are made at night, when you are usually feeding your starter, and you can take that excess discard and use it to make the most delicious cinnamon rolls to bake the next morning! You can also use that discard to make perfect sourdough pancakes, sourdough waffles and sourdough blueberry muffins!
- The magic of this recipe is that the bulk fermentation is done overnight, rather than shaping them and final proofing them overnight. That means that the gluten network is also strengthening all together, which will make the rolls easier to shape!
Pro Tips for Making Sourdough Cinnamon Roll
- Use a gentle hand and a floured surface when working with this dough. The dough for these rolls is very soft and slack, so if it sticks, toss some flour under it or on your hands and rolling pin and keep going!
- Employ a double frosting technique: This is a pro tip I learned from fellow blogger Sarah Kieffer: To get those ooey-gooey rolls without all the frosting melting off the top, frost each roll with a thin layer of frosting while still warm, then top with the remaining frosting once the rolls have fully cooled. Tell me that didn’t just blow your mind!
- Make sure the butter for the filling is VERY soft: If it isn’t practically one step away from melted, then you’ll have a hard time spreading it over the dough. I sometimes use my fingers for this step when a small offset fails. That being said, if it doesn’t spread completely evenly, don’t fret — the butter will melt as the rolls bake and they’ll all taste incredible in the end.
- Use recently fed sourdough discard or active starter. I don’t want to overcomplicate things but I use discard that has been fed within the past 24-36 hours. You can use sourdough starter at its peak if that is what you have when the craving strikes or you’ve just mixed whole wheat sourdough bread, for example.
Ingredients & Substitutions
You know when you see a recipe that calls for butter and three types of sugar, you’re in for something gooooood.
- Milk: For the best flavor and texture use whole milk or 2% milk if you can; the fat is important for both.
- Butter: I use unsalted butter (or sweet cream butter) in bread so that I can control the saltiness of the final product. If you only have salted butter, just omit the salt.
- Egg:
- Sourdough Starter: I used sourdough discard for this recipe, but it was active and had been fed 24 hours prior. You can also use an active sourdough starter that is at its peak. I do not recommend using unfed, older discard from your fridge in this recipe. You can use unfed starter for my sourdough discard crackers! You can also use fed starter. If you do not have a starter, jump over to my sourdough starter recipe and get started! If your starter is a little sad, I run through all the in’s and out’s of how to feed sourdough starter in this post.
- Granulated Sugar
- All-purpose Flour: I use all-purpose flour in all my cinnamon rolls recipes including these ooey-gooey overnight cinnamon rolls. It provides the perfect amount of structure without too much chew. You could use bread flour or even substitute 1 cup whole wheat flour like I did for rye flour in these hazelnut rye cinnamon rolls.
- Kosher Salt: I prefer kosher salt for baking. It has larger crystals and is less salty per teaspoon than table salt or fine sea salt.
- Brown Sugar: You can use light or dark brown sugar for the filling. I love the extra molasses flavor from dark brown sugar, but whichever you have on hand is best.
- Spices for the filling: I use cinnamon, nutmeg, and allspice. If you’re a major cinnamon fan, you can always add up to 2 tablespoons of cinnamon to the filling! You can also simply omit the nutmeg and allspice if you would prefer a pure cinnamon-sugar filling.
- Cream Cheese: You’ve heard it everywhere else, but my opinion is no different. Full fat brick-style cream cheese is the best for cinnamon roll frostings (and also cream cheese frosting) because the fat makes it more stable. You can use reduced fat but I would not recommend whipped cream cheese spread.
- Vanilla Extract: This is in the icing, so use the best pure vanilla extract that you can afford. I am always a fan of Nielson Massey’s Vanilla Extract but I recently purchased Native Vanilla brand and I find it to be excellent.
- Powdered Sugar
See the recipe card for full information on ingredients and quantities.
Possible Variations
- Use a different mix of spices to add variety to your morning! Replace half the cinnamon with this pumpkin spice recipe or apple pie spice recipe. You could also add a dash of ground cardamom like in cardamom buns.
- Get creative with the dough or filling variations: If it is the holiday season and you’re feeling festive, try pumpkin cinnamon rolls, sweet potato cinnamon rolls, or even gingerbread cinnamon rolls! For Easter try a sourdough variation of my hot cross cinnamon rolls instead of hot cross buns this year! You can also never go wrong with a sprinkle of chocolate chips, cinnamon chips or butterscotch chips! I even used a sprinkle of frozen raspberries in these raspberry cinnamon rolls!
- Infuse the milk: Borrow a technique from my cereal milk cinnamon rolls and infuse the milk with spices, cereal, coffee, and whatever else you can think of!
- Get creative with the form of the cinnamon rolls! Make a wreath like I did in this chocolate cinnamon roll wreath for Christmas morning, or make the rolls smaller and shape it on a baking sheet like this chai-spiced cinnamon roll pull apart bread!
Sample Baker’s Schedule for Sourdough Discard Cinnamon Rolls
The Night Before Baking: 8:00 PM begin preparing the dough. You’ll be done with active prep by 9 PM.
The Next Morning: Between 6-7:30 AM, the dough should be ready for rolling. Between 8-8:30 AM, you’ll be ready to bake. I recommend preheating your oven when you finish rolling. With this rough schedule, the rolls should be ready to serve between 8:45-9:15 AM.
How to Make this Sourdough Cinnamon Roll Recipe
If you’ve made homemade cinnamon rolls before, you’ll be happy to know that these sourdough cinnamon rolls are made almost exactly the same way! The overnight process is a breeze. Here’s how it’s done.
Make the dough: The night before.
Step 1: In a small saucepan over low heat, heat 2/3 cup milk and 2 tablespoons butter until milk is warm and butter is just melted. Remove from heat; cool slightly.
Step 2: In a large bowl using a wooden spoon or in the bowl of a stand mixer fitted with the paddle attachment, add the egg, starter and sugar and mix on low speed until just combined. Slowly mix in the warm milk mixture until just combined.
Step 3: Add the flour and 1/2 teaspoon salt to the bowl. Mix or stir on low speed about 1 minute until a rough dough forms. Scrape down the sides of the bowl, then cover bowl with plastic wrap and let rest 30 minutes.
Step 4: Uncover fully-rested dough; replace paddle attachment with dough hook attachment on the stand mixer. Knead the dough on medium-low speed 6 to 8 minutes, or until dough is smooth, shiny, elastic and only slightly sticky. If you don’t have a stand mixer, you can knead the dough on a lightly floured surface until you achieve the same results.
Step 5: Transfer the dough to a lightly oiled, large mixing bowl; turn once to coat. Cover bowl with plastic wrap and let dough rise in a warm place for 8 to 12 hours or until doubled in size.
Assemble Cinnamon Rolls: The next morning.
Step 6: Gently transfer risen dough to a lightly floured work surface. Use a floured rolling pin to roll out dough to a rough 12×12-inch square or rectangle for smaller cinnamon buns.
Step 7: Add the filling. Use an offset spatula or spoon to gently spread the 4 tablespoons of very soft butter over the dough. You might struggle a bit to get the butter to spread evenly over the dough, but just do the best you can; it doesn’t need to be perfect! Sprinkle buttered dough evenly with brown sugar, cinnamon, nutmeg and allspice.
Step 8: Using floured hands, gently roll up dough from one end, keeping the swirl as tight as possible without tearing the dough. Roll up until the seam is facing down against the work surface.
Step 9: Using a very sharp knife, serrated knife, or looping and cutting with dental floss, gently cut the dough into 8 equal rolls, each about 1 1/2 inches wide.
Some people swear by cutting cinnamon buns with dental floss. I prefer to use a sharp serrated knife but if you do use floss, be sure it is unwaxed and not flavored. Gross.
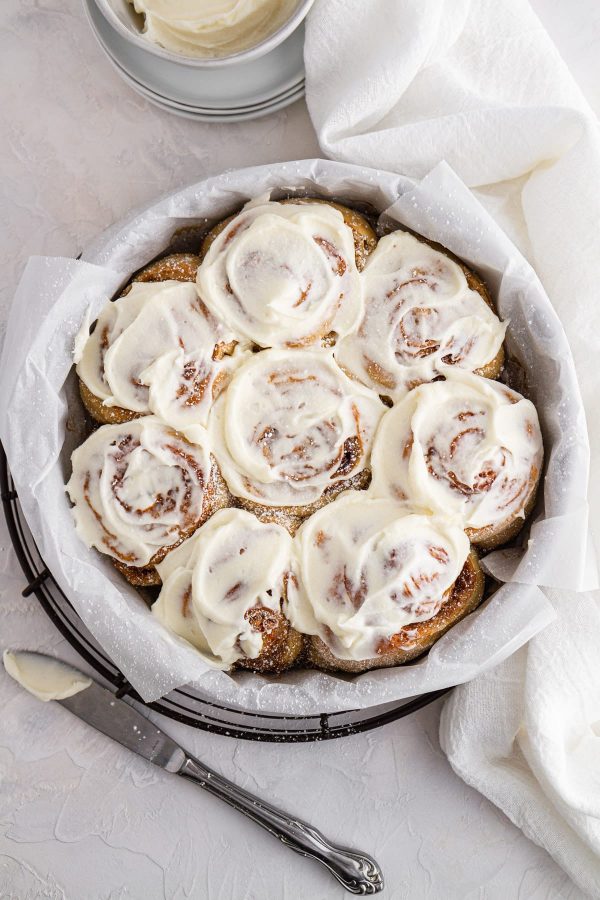
Step 10: Line the bottom and sides of a 9-inch round baking pan or 8-9 inch baking dish with parchment paper.
Step 11: Gently transfer rolls, cut side-up, to baking pan; space evenly apart. Cover pan with plastic wrap and let dough rise 1 hour to 1 hour 30 minutes until puffy.
Bake Cinnamon Rolls:
Step 12: Heat oven to 350°F. Once rolls are puffy, uncover and bake 40 to 45 minutes or until dough is baked through and rolls are golden brown. Transfer pan to a cooling rack.
I like to preheat the oven after the rolls have proofed for about 30 minutes. This way the oven will be ready when they are ready!
Step 13: While rolls cool slightly, make the cream cheese frosting: In a small bowl using a spatula or an electric hand mixer, mix the 4 tablespoons butter and cream cheese until smooth and creamy. Add vanilla and pinch of salt; beat to combine. Gradually beat in powdered sugar until mixture is smooth and combined, then beat in 1 to 2 teaspoons milk until frosting is soft and spreadable.
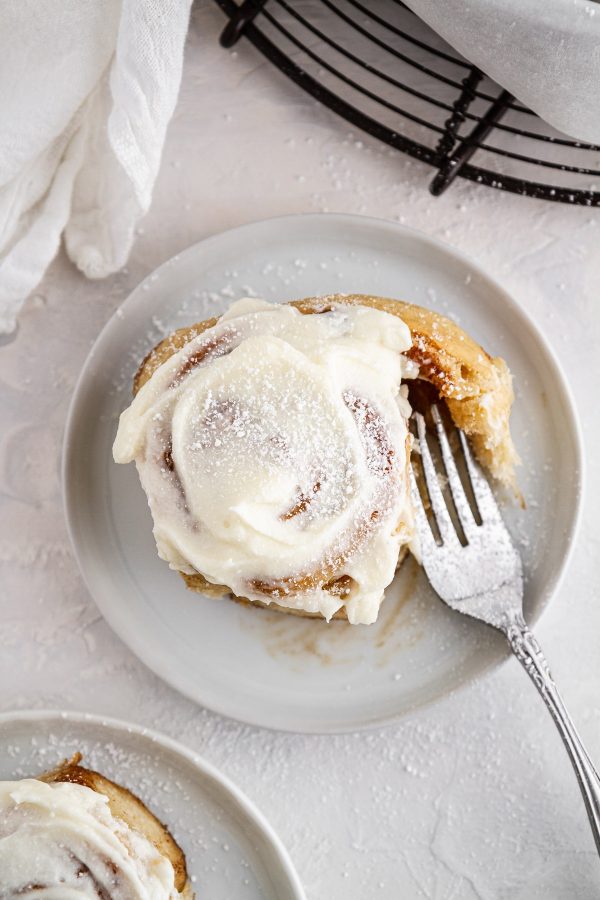
Step 14: Use an offset spatula or spoon to spread frosting evenly over warm rolls. Sprinkle rolls with more powdered sugar just before serving, if desired.
The dough for these rolls is a little softer and looser than typical cinnamon roll dough, so be sure to use a gentle hand and lightly flour all surfaces before handling the dough.
Serve rolls warm or at room temperature; they’re delicious either way.
Frequently Asked Questions
Store leftover cinnamon rolls in an airtight container at room temperature for up to 1 day, or in the refrigerator for up to 3 days.
I find nothing compares to freshly baked cinnamon rolls, so I do not love freezing already baked cinnamon rolls. You can freeze the cinnamon rolls in the pan right after slicing and arranging. Wrap very well in plastic wrap and place in the coldest part of your freezer. The length of time will depend on the freezer temperature and your sourdough starter. It could be anywhere between 1 week to 1 month. You can remove them and finish proofing at room temperature at any time, but they will need to be baked before they overproof. If they start pressing against the plastic wrap, just bake from frozen.
Since these rolls use sourdough starter for the fermentation and no commercial yeast, you’ll need to ferment them 12-16 hours. To shorten the process, I recommend adding ½ packet instant yeast or using active sourdough starter at its peak rather than sourdough discard.
If you enjoyed this recipe, please leave a star rating and let me know how it goes in the comments below! I love hearing from you and your comments make my day!
Sourdough Cinnamon Rolls
Ingredients
For the dough:
- ⅔ cup milk, 2% or whole
- 2 tablespoons unsalted butter
- 1 large egg
- ½ cup sourdough starter discard, 100 g, fed within past 36 hours
- 2 tablespoons granulated sugar
- 2 ½ cups all-purpose flour
- ½ teaspoon salt
For the filling:
- ¼ cup unsalted butter, very soft
- ⅔ cup dark brown sugar, packed
- 4 teaspoons cinnamon
- ½ teaspoon nutmeg
- ⅛ teaspoon allspice
For the cream cheese frosting:
- ¼ cup unsalted butter, room temperature
- 2 ounces cream cheese, room temperature
- ½ teaspoon vanilla
- pinch salt
- ½ cup powdered sugar, plus more for topping if desired
- 1-2 teaspoons milk
Instructions
Make the dough :
- In a small saucepan over low heat, heat 2/3 cup milk and 2 tablespoons butter until milk is warm and butter is just melted. Remove from heat; cool slightly.
- In a large bowl using a wooden spoon or spatula or in the bowl of a stand mixer with the paddle attachment, stir together the egg, starter and sugar on low speed until just combined. Slowly stir in the warm milk mixture until just combined.
- Add the flour and 1/2 teaspoon salt to the bowl. Stir on low speed about 1 minute until a rough dough forms. Scrape down the sides of the bowl, then cover bowl with plastic wrap and let rest 30 minutes.
- Uncover fully-rested dough; replace paddle attachment with dough hook attachment on the stand mixer. Knead the dough on medium-low speed 6 to 8 minutes, or until dough is smooth, shiny, elastic and only slightly sticky. If you don’t have a stand mixer, you can knead the dough on a lightly floured surface until you achieve the same results.
- Transfer the dough to a lightly oiled bowl; turn once to coat. Cover bowl with plastic wrap and let dough rise in a warm place for 8 to 12 hours or until doubled in size.
- The next morning, lightly flour a work surface and gently transfer risen dough to surface. Let rest 5 minutes to allow gluten to relax, then use a floured rolling pin to roll out dough to a rough 12×12-inch square.
Make the filling & bake:
- Use an offset spatula or spoon to gently spread the 4 tablespoons of very soft butter over the dough. You might struggle a bit to get the butter to spread evenly over the dough, but just do the best you can; it doesn't need to be perfect! Sprinkle buttered dough evenly with brown sugar, cinnamon, nutmeg and allspice.
- Using floured hands, gently roll up dough from one end, keeping the swirl as tight as possible without tearing the dough. Roll up until the seam is facing down against the work surface. Using a very sharp serrated knife, gently saw the dough into 8 equal rolls, each about 1 1/2 inches wide.
- Line the bottom and sides of a 9-inch round baking pan with parchment paper. Gently transfer rolls, cut side-up, to baking pan; space evenly apart. Cover pan with plastic wrap and let dough rise 1 hour to 1 hour 30 minutes until puffy.
- Heat oven to 350°F. Once rolls are puffy, uncover and bake 40 to 45 minutes or until dough is baked through and rolls are golden brown. Transfer pan to a cooling rack.
- While rolls cool slightly, make the cream cheese frosting: In a small bowl using a spatula or an electric hand mixer, mix the 4 tablespoons butter and cream cheese until smooth and creamy. Add vanilla and pinch of salt; beat to combine. Gradually beat in powdered sugar until mixture is smooth and combined, then beat in 1 to 2 teaspoons milk until frosting is soft and spreadable.
- Use an offset spatula or spoon to spread frosting evenly over warm rolls. Sprinkle rolls with more powdered sugar just before serving, if desired.
Notes
- Recommended schedule: Start preparing the dough at 8 p.m. the night before you plan to bake. You’ll be done with active prep by 9 p.m. The next morning between 6-7:30 a.m., the dough should be ready for rolling. By 8/8:30 a.m., you’ll be ready to bake. With this rough schedule, the rolls should be ready to serve by 8:45/9:15 a.m.
- The dough for these rolls is a little softer and looser than typical cinnamon roll dough, so be sure to use a gentle hand and lightly flour all surfaces before handling the dough.
- Big fan of cinnamon? Add up to 2 tablespoons of cinnamon to the filling for extra spice.
- Serve rolls warm or at room temperature; they’re delicious either way.
- Store leftover rolls in an airtight container at room temperature for up to 1 day, or in the refrigerator for up to 3 days.
Nutrition
Nutrition information is automatically calculated, so should only be used as an approximation.
 Like this recipe? Rate & comment below!
Before You Go
I hope you enjoyed this cinnamon roll recipe! Don’t miss any of our sourdough recipes, or, in the rare event you have leftovers, try this caramel apple cinnamon roll breakfast bread pudding! It’s worth getting out of bed for!


Biscuit crumb and nota fan of the cloves.
Thank you for coming back to share! A biscuit-like crumb usually means the rolls needed a little more time to warm up from the cold proof before baking. As for the cloves — there aren’t any in this recipe! You may have added them yourself or mixed it up with another recipe. The filling is just cinnamon, allspice nutmeg and sugar. ~GVD team
These cinnamon rolls are AMAZING! I made these dairy-free by substituting almond milk and DF butter (and I did a simple almond milk and powdered sugar frosting). I baked them at the same temp as the recipe but for only 35 minutes. In addition, I live at high elevation (8600′) and didn’t need to change anything about the recipe to accommodate for that. The rolls are flaky, light, and absolutely devine. I’ll absolutely be making them again!
Sara, What a gift of a comment, thank you! So thrilled the almond milk + DF butter swap worked beautifully, and an almond milk powdered sugar frosting sounds like the perfect finishing touch. Your bake time note and especially the high-altitude confirmation at 8,600 feet are SO helpful for other bakers, that’s a question we get often and now we have a real answer! Flaky, light and divine is everything. So glad you’ll be making them again! ~GVD team
I rolled out the dough, used only 1 1/2 TBSP softened butter before sprinkling with sugar mixture. I cut the roll in 1 inch pieces for 12 rolls and used a parchment lined 9x 13 baking pan placing 1/2 inch apart. I cold proofed overnight and they “puffed up” slightly. Baking now. ?
Love that you pushed through and got them in the oven! Cold proofing overnight and seeing that puff is such a good sign — that’s exactly what you want. A 9×13 with parchment and 1 inch cuts sounds perfect. Can’t wait to hear how they turned out! Fingers crossed for the most beautiful, fluffy rolls ~GVD team
In the actual recipe instructions you neglected to tell when to add the milk and butter. I this k you meant after the starter,egg,sugar,and salt?
Hi April, The post does state that the milk and butter are combined and warmed in Step 1, then in step 2 , along with the sourdough discard, egg, sugar and salt, before adding the flour. It’s easy to miss in a longer recipe! Hope that clears it up and that the rolls turned out beautifully. ? ~GVD team
After only 30 minutes at 350 they were hard and all the filling was a rock on the bottom of my pan ? I will definitely try a different recipe.
So sorry that happened! A few things could cause the rolls to be hard — underproofing, mis-measurements, or an inaccurate oven temperature. The filling sinking to the bottom is usually caused by too much butter or sugar in the filling, or rolls that weren’t tightly rolled enough. We hope you’ll give them another try — they really are worth it! ~GVD team
Excellent recipe! There is a slight learning curve. I added a little more flour to the recipe. Very warm and humid environment here in Orlando. Worked great! Was the breakfast hero this morning!
Hi Erich! So glad they were a hit! In a very soft and slack dough like this, humidity absolutely makes a difference. Adding a bit more flour as you did is perfect! Happy baking! ~gvd team
Honestly, I love that I can do half the work the night before and wake up and have cinnamon rolls in two hours. It is genius. Perfect for Christmas mornings, I would like to try and see if I can get them assembled and set overnight to bake!
Easy to follow instructions, and the best cinnamon rolls! This will be my new go-to recipe!