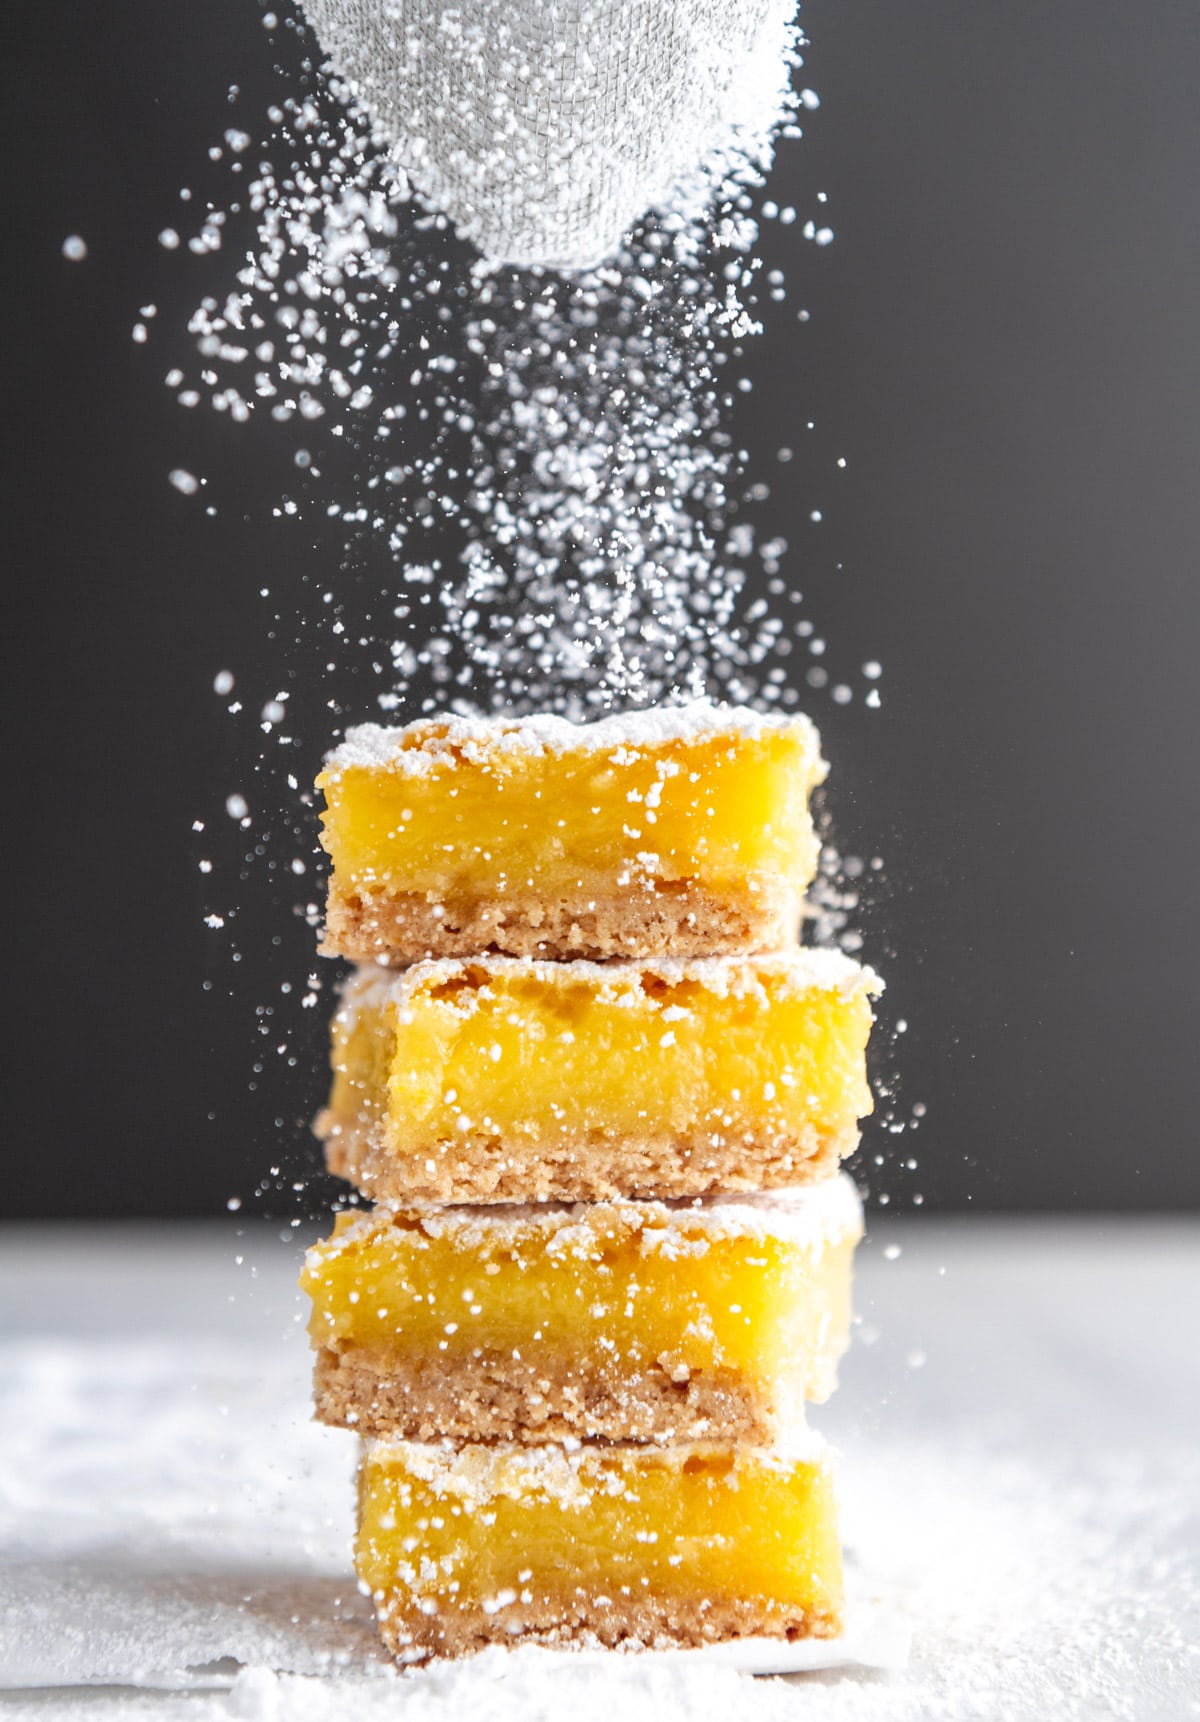
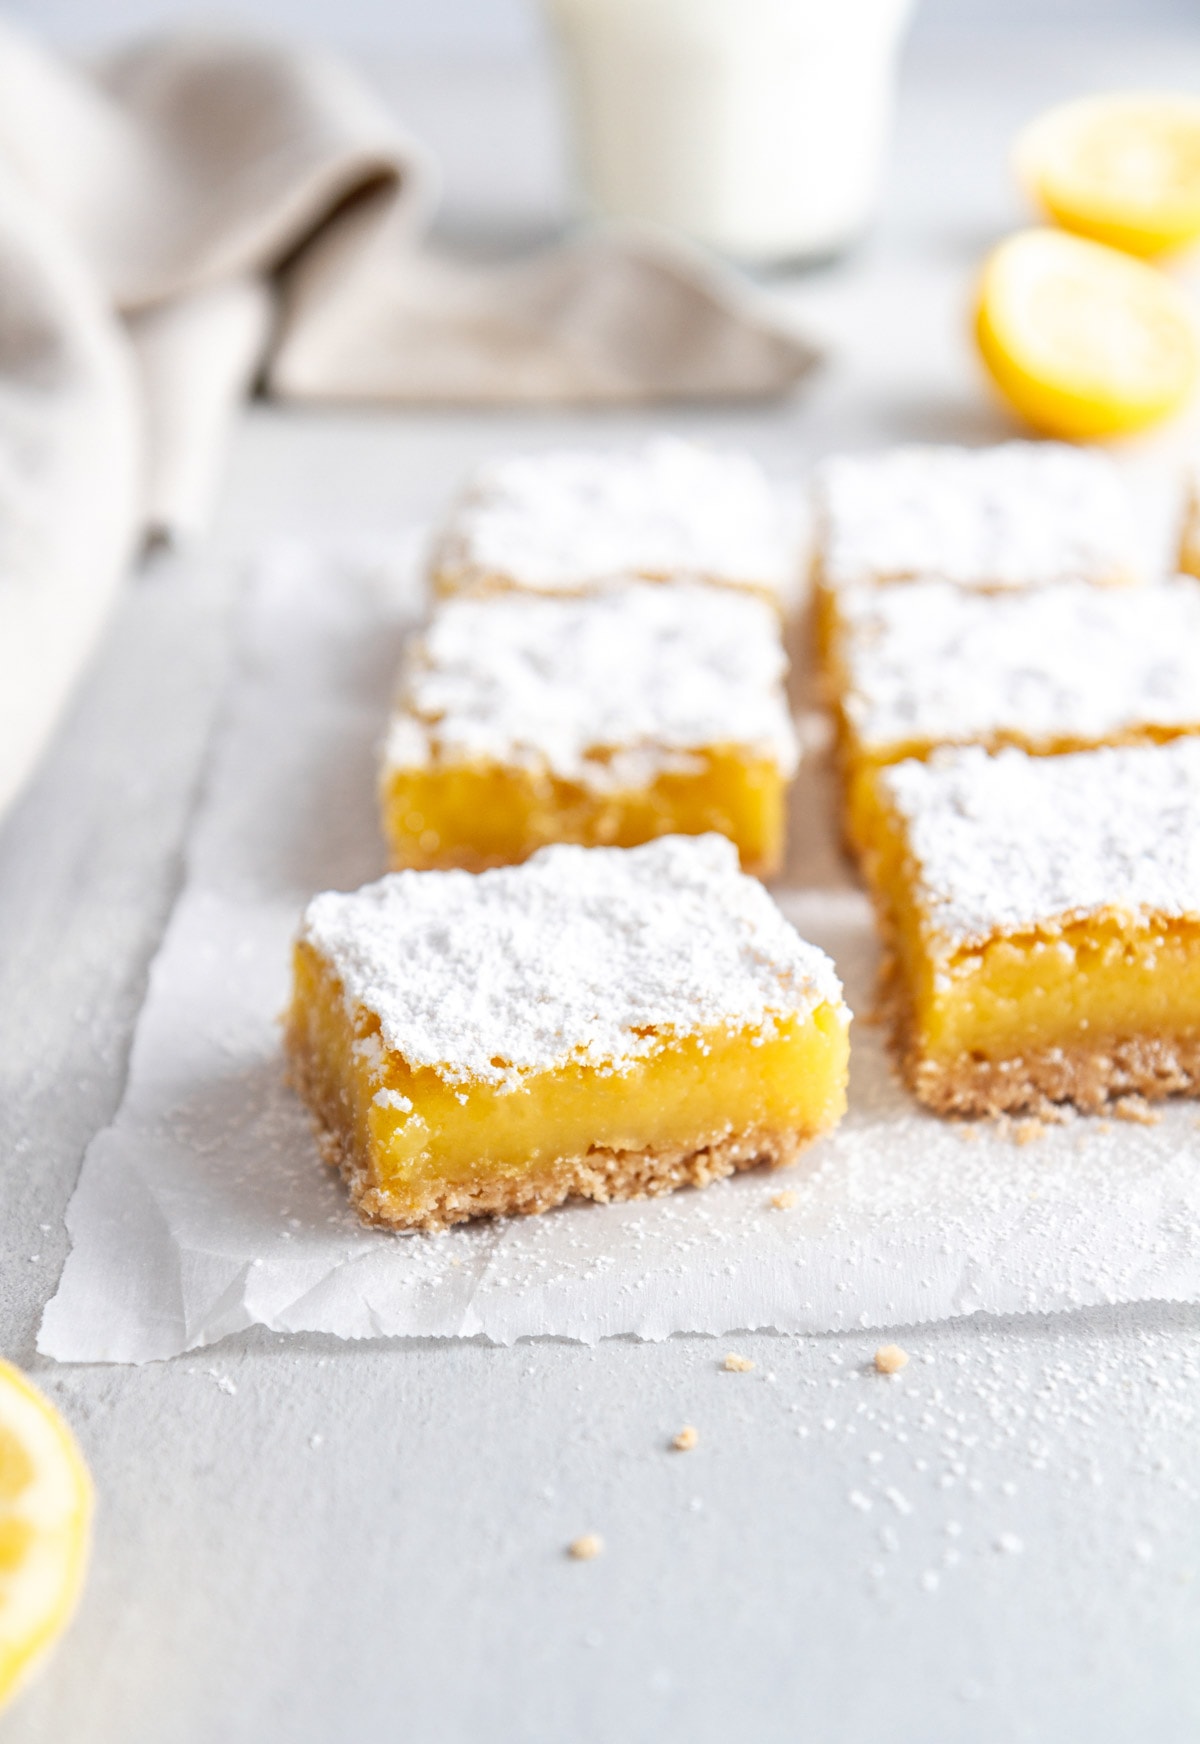
Gluten free lemon bars with a brown butter shortbread crust and a silky lemon filling that sets up perfectly every time. These are the bars you bring to every gathering and come home with an empty pan.

A Quick Look At The Recipe
This is a brief summary of the recipe. Jump to the recipe to get the full details.
Prep Time
30 minutes
Cook Time
50 minutes
Rest Time
3 hours
Total Time
4 hours 20 minutes
Servings
24 bars
Difficulty
Intermediate
Calories *
248 kcal per serving
Technique
Baked, layered bar method.
Flavor Profile
Bright, tangy, buttery, lightly sweet.
* Based on nutrition panel
“I made these for a family brunch and every single person asked for the recipe. The brown butter crust is what sets these apart! It smells incredible while it bakes and has this deep, nutty flavor that works so well with the tart lemon filling.”
⭐⭐⭐⭐⭐
Renata
Why You Will Love This Recipe
- Brown butter crust. The shortbread base is made with browned butter, which gives it a deep, nutty flavor that plain melted butter just can’t replicate. It takes about an hour to chill back to a solid, but the payoff in flavor is worth every minute. Make sure you try these sourdough chocolate chip cookies next, they are also made with brown butter!
- A filling that actually sets. The lemon filling bakes up smooth and firm, so you get clean slices every time. Pressing the crust about half an inch up the sides of the pan keeps the filling from seeping beneath it as it bakes.
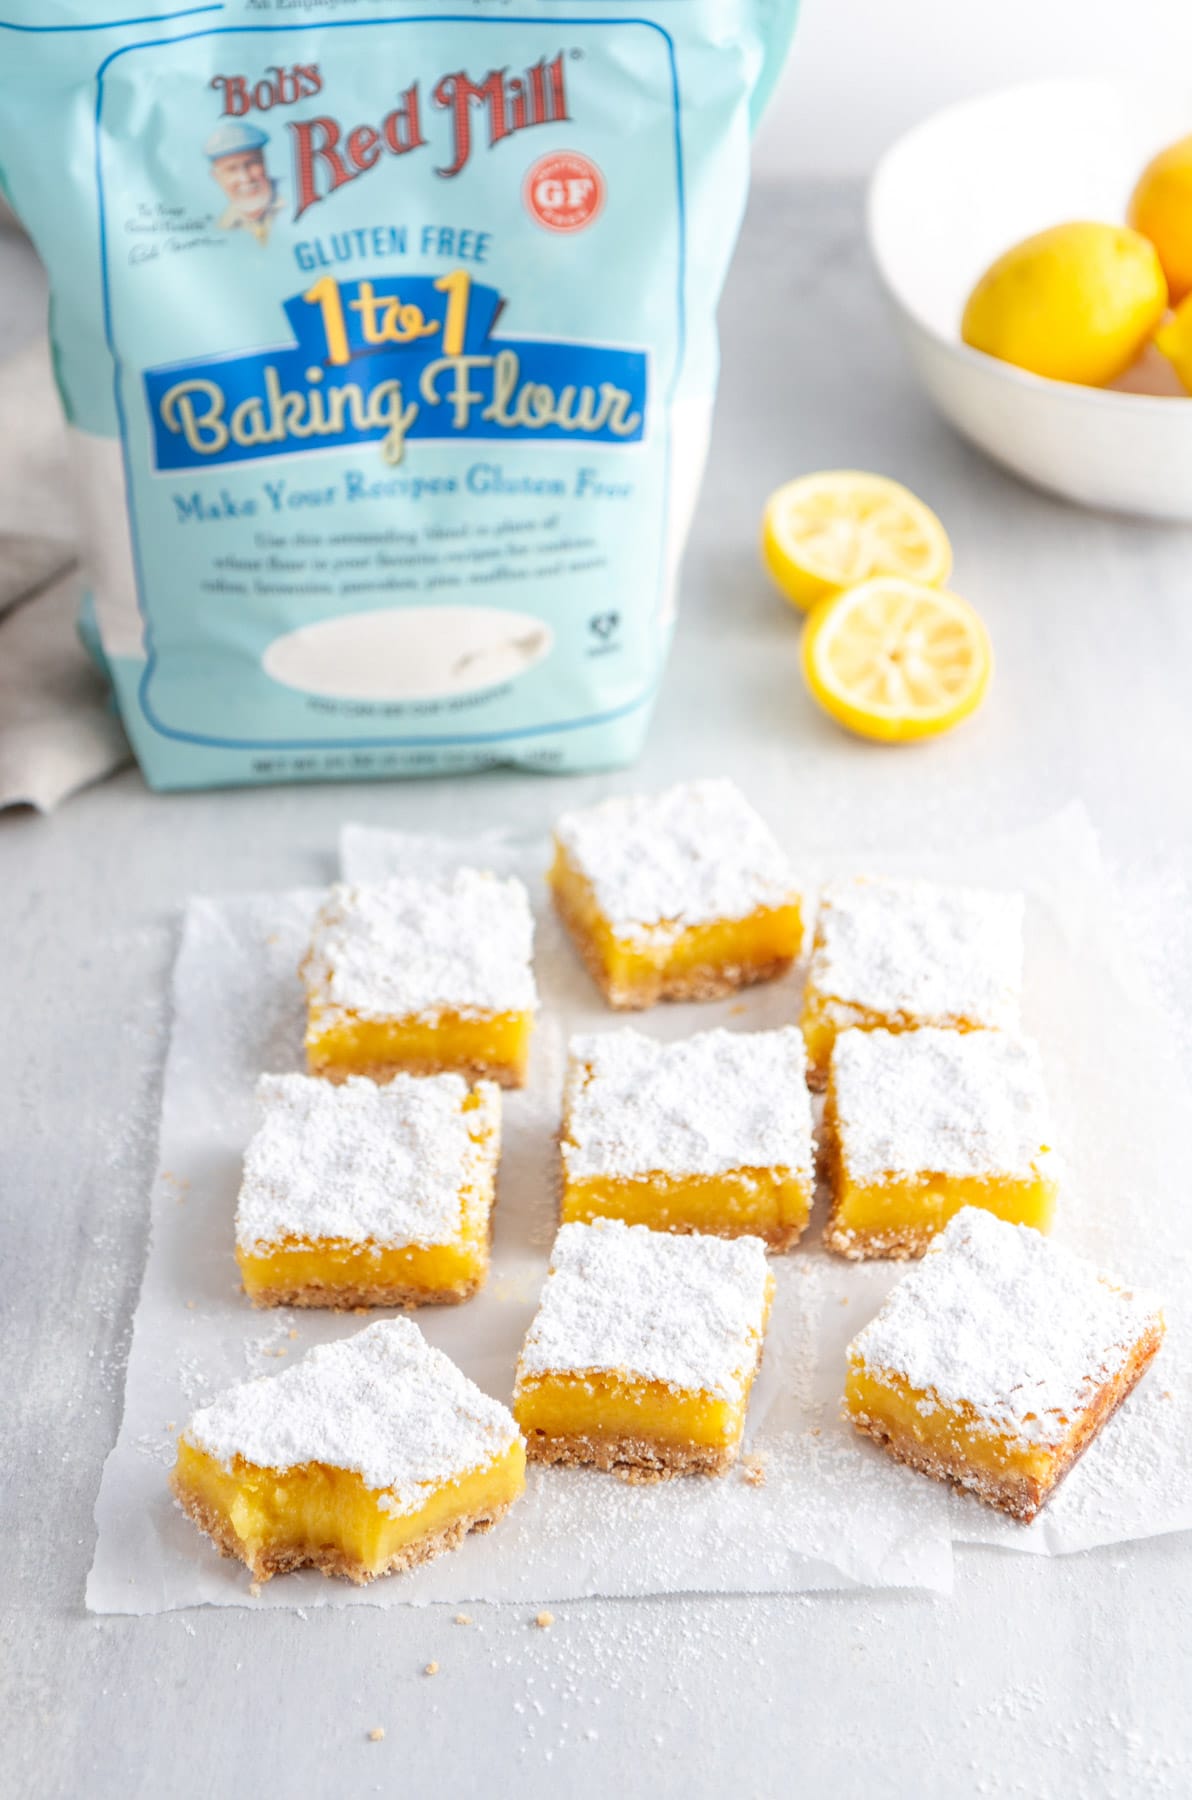
- Gluten free without compromise. These use a 1-to-1 gluten free baking flour, so the texture and structure stay exactly where they should be. No gummy layers, no crumbly crust that falls apart when you lift a bar.
- Bright lemon flavor. Fresh lemon juice and zest from 4 to 6 lemons go straight into the filling, so the citrus flavor is real and sharp. If you love lemon desserts, my raspberry lemon bars are another bar worth keeping in rotation.
Lemon bars have always been one of those desserts that disappear fast at any table — and this version, with the brown butter crust, disappears even faster. I’ve made these for spring gatherings, summer potlucks, and honestly just a random Tuesday when I needed something bright and citrusy.
These bars are a natural fit alongside other lemon desserts when you want a full spread, and they hold their own just as well on a solo plate with a dusting of powdered sugar. If you love the lemon and buttery shortbread combination here, my lemon buttermilk sugar cookie tart is another recipe that leans into that same pairing. Or you can make this magnificent lemon poppy seed cake!
Ingredients & Substitutions
- Unsalted Butter: This is the base of the shortbread crust, and it gets browned first to develop a deep, nutty flavor that plain melted butter just can’t match. The most common mistake here is rushing the browning process or walking away from the pan. Stay close, stir constantly, and pull it from the heat the moment it turns golden brown, because it can go from perfect to burnt very quickly, just like when making these brown butter brownies!
- Granulated Sugar
- Gluten Free 1-to-1 Baking Flour: This is the flour that makes these bars work without any gluten. A 1-to-1 blend (Bob’s Red Mill is my go-to) already contains xanthan gum, which means it swaps directly into this recipe with no additional binders needed. It’s used in both the crust and the filling. I would not substitute a different type of gluten free flour, like almond flour or oat flour.
- Salt
- Large Eggs: The eggs set the lemon filling as it bakes, giving it that smooth, firm-but-creamy texture. Whisk them well before adding the other filling ingredients so the mixture comes together evenly.
- Lemon Zest: Zest adds a bright, concentrated lemon flavor that juice alone doesn’t deliver. Use fresh lemons and zest them before you juice them, which is a much easier order of operations than trying to zest an already-squeezed lemon.
- Fresh Lemon Juice: Fresh juice gives these bars their sharp, authentic lemon flavor. You’ll need a good number of lemons, so plan ahead. If you love lemon desserts, my lemon curd is a great use for any extra juice and zest you have left over.
- Powdered Sugar
Variations for Gluten Free Lemon Bars
- Swap the citrus. Swap the lemon zest and fresh lemon juice 1:1 for Meyer lemon, lime, orange, or even key lime juice. Or you could make these key lime pie bars!
- Change the crust! You can make this with the shortbread crust from these no bake lemon bars or the base from these raspberry crumble bars!
- Lemon meringue pie bars! Hi, huge opportunity to make these amazing! You can top with a marshmallow fluff recipe and torch it or follow the baking instructions for this lemon meringue pie!
Professional Tips for Perfect Gluten Free Lemon Bars
- Don’t skip chilling the browned butter. The butter needs to return to a solid, soft state before you cream it with the sugar. Like when making these brown butter cardamom snickerdooles If it’s still liquid or too warm, you won’t get the light, fluffy crust base the recipe depends on, and the shortbread will bake up greasy and dense.
- Press the crust up the sides of the pan. The instructions call for about a half inch of crust up the sides, and this step actually matters. Without it, the lemon filling seeps underneath the crust during baking, and you lose that clean, layered slice.
- Pour the filling onto a hot crust. Don’t let the crust cool completely before adding the filling. Going straight from the oven to filling helps the two layers bond cleanly and gives you a filling that sets evenly across the whole pan.
- Cool completely before cutting. Two hours on a cooling rack isn’t a suggestion; it’s what gives you clean, firm squares. Cut too soon, and the filling is still soft in the center, which means ragged edges and a filling that smears instead of slices. I would also suggest a short siesta in the fridge before cutting.
How to Make Gluten Free Lemon Bars
Use these step-by-step instructions to make gluten-free lemon bars with a nutty brown butter shortbread crust and a smooth, bright lemon filling that slices cleanly every time. Further details and measurements can be found in the recipe card below.
Step 1: Prep the pan and oven. Heat your oven to 350°F and line a 13×9-inch baking pan with foil, leaving enough overhang on two opposite ends to use as handles when you lift the bars out later. Press the foil flat against the pan’s corners so the crust bakes into a clean, even layer.
Step 2: Brown the butter. Place the butter in a small saucepan over medium heat and let it melt completely, then keep cooking and stirring constantly. You’ll watch it go through a few stages: it’ll get creamy, then foamy, then the foam will clear and you’ll start to see golden-brown bits forming at the bottom of the pan. That’s the moment to pull it. Remove the pan from the heat immediately and pour the browned butter into a small heatproof bowl so it stops cooking.
Step 3: Chill the browned butter. Refrigerate the browned butter until it returns to a solid but still soft state, about 1 hour. It should look and feel like slightly softened regular butter, not liquid, not hard. If it sets up too firm, let it sit on the counter for a few minutes before moving to the next step.
Step 4: Chill the browned butter. Add the chilled browned butter and the first portion of granulated sugar ½ cup to a large bowl. Using an electric hand mixer or a stand mixer fitted with the paddle attachment, cream them together on medium speed until the mixture is light and fluffy, about 2 to 3 minutes. It’ll look pale and airy, which is exactly what you want for a tender shortbread base.
Step 5: Mix and press the crust. Stir in the gluten free 1-to-1 baking flour and salt just until a soft dough forms. It will come together quickly and feel slightly crumbly at first, which is normal. Press the dough evenly into the bottom of the prepared pan, then press it about half an inch up all four sides. Take your time here and make sure the sides are actually built up, not just touched.
Step 6: Chill the crust. Refrigerate the pressed crust for 15 minutes before baking. This short chill helps the crust hold its shape in the oven and keeps the edges from slumping down before the dough sets.
Step 7: Bake the crust. Slide the chilled pan into the oven and bake for 17 to 23 minutes, until the crust is just set in the center and lightly golden around the edges. It shouldn’t look raw or shiny in the middle, but it also doesn’t need to be deeply golden — a pale, even color across the surface is exactly right. Set the pan on a cooling rack while you make the filling.
Step 8: Make the lemon filling. Whisk the eggs in a large bowl until fully beaten, then slowly beat in the second portion of granulated sugar 3 cups, the lemon zest, and the fresh lemon juice until everything is well combined. Add the second portion of gluten free flour gradually, beating until the mixture is completely smooth with no lumps remaining. It’ll look bright yellow and pourable, almost like a loose curd.
Step 9: Bake the bars. Pour the lemon filling directly over the hot crust and return the pan to the oven. Bake for 30 to 35 minutes, until the filling is just set. It should no longer jiggle in the center when you nudge the pan, but it won’t look completely firm either. A slight, uniform firmness across the surface is the cue you’re looking for.
Step 10: Cool completely. Transfer the pan to a cooling rack and let the bars cool for about 2 hours, until they’re completely room temperature before cutting. It’s tempting to cut early, but the filling needs that full cooling time to firm up enough to slice cleanly. If they’re even slightly warm, the filling will smear.
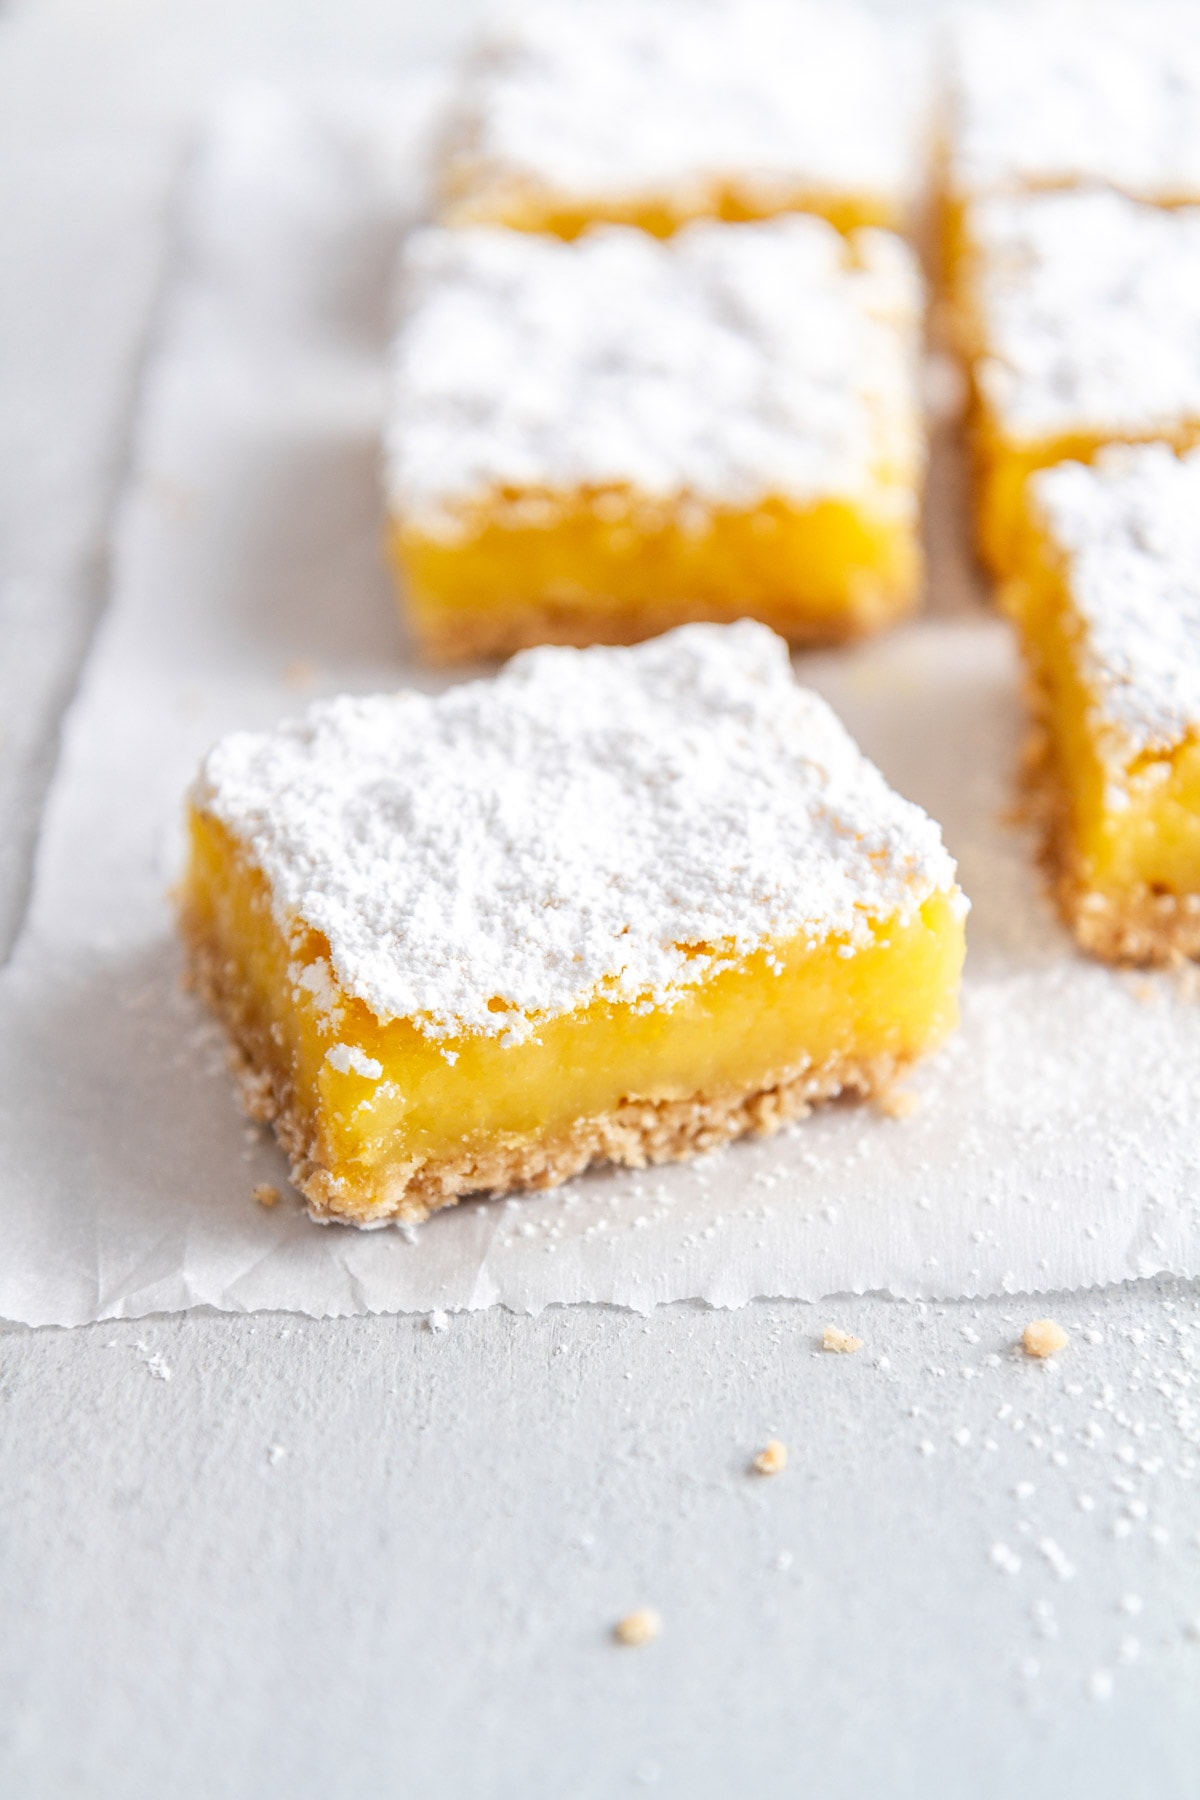
Step 11: Cut and finish. Use the foil overhang to lift the bars out of the pan and onto a cutting board. Cut into 24 squares using a very sharp, clean knife, wiping the blade between cuts to keep the edges tidy. Dust generously with powdered sugar just before serving.
Recipe FAQs
Store the bars covered in the refrigerator for up to 3 to 4 days. I like to wait to dust them with powdered sugar until just before serving, since the sugar can dissolve into the filling as they sit in the fridge. They’re best eaten cold or at room temperature after a few minutes on the counter. You can also freeze them for up to 1 month. Allow them to temp in the fridge.
Yes, absolutely. You can bake them completely, let them cool, and refrigerate them (still in the pan with the foil) up to a day in advance. Just wait to cut and dust with powdered sugar until you’re ready to serve. They hold up really well overnight, which makes them great for parties or gatherings.
A small amount of jiggle like when making a lemon meringue cheesecake in the very center when you pull the pan from the oven. The filling sets fully as it cools, so the most common mistake is cutting into the bars before they’ve had a full 2 hours to cool completely on a rack. If the filling is liquid or runny all the way through, it likely needs another few minutes in the oven.
The recipe is developed specifically for a Gluten Free 1-to-1 Baking Flour, which is a cup-for-cup blend designed to substitute directly for all-purpose flour without other adjustments. Swapping in almond flour, coconut flour, or a blend without xanthan gum will change both the crust texture and the filling consistency in ways that are hard to predict. Sticking with a 1-to-1 blend gives you the most reliable results here.
Recommended Lemon Recipes

Cakes & Cupcakes

Sauces & Spreads

Cakes & Cupcakes
Cookie Recipes
Gluten Free Lemon Bars

Ingredients
For the crust:
- 1 cup unsalted butter
- ½ cup granulated sugar
- 2 cups Gluten Free 1-to-1 Baking Flour
- pinch kosher salt
For the filling:
- 6 large eggs, room temperature
- 3 cups granulated sugar
- 2 tablespoons lemon zest, from about 4 to 6 lemons
- 1 cup fresh lemon juice
- 1 cup Gluten Free 1-to-1 Baking Flour
For topping:
- Powdered sugar, for dusting
Instructions
- Heat the oven to 350°F. Line a 13×9-inch baking pan with foil, leaving enough overhang on opposite ends to use as handles.
- Melt the butter in a small saucepan over medium heat. Continue cooking, stirring constantly, until the butter turns a golden brown color. Immediately remove from heat and pour into a heatproof bowl. Refrigerate until the butter returns to a solid but still soft form, about 1 hour.
- Cream the cooled brown butter and sugar in a large bowl using an electric hand mixer or stand mixer with the paddle attachment on medium speed until light and fluffy, about 2 to 3 minutes. Stir in the flour and salt just until a dough forms.
- Press the dough evenly into the bottom of the prepared pan using lightly floured hands or a spatula, pressing it about ½ inch up the sides. Chill for 15 minutes.
- Bake the crust for 17 to 23 minutes, until just set in the center and lightly golden. Set on a cooling rack while you prepare the filling.
- Whisk the eggs in a large bowl until beaten. Slowly beat in the sugar, lemon zest, and lemon juice until combined. Beat in the flour until the mixture is smooth and no lumps remain.
- Pour the filling over the hot crust. Bake for 30 to 35 minutes, until the filling is just set. Cool completely on a cooling rack, about 2 hours.
- Use the foil handles to lift the bars from the pan. Cut into 24 squares with a very sharp, clean knife. Dust generously with powdered sugar just before serving.
Notes
Technique: Pour the filling directly onto the hot crust as soon as it comes out of the oven. The heat helps the two layers bond as they bake together.
Flour: Use a Gluten Free 1-to-1 Baking Flour (a cup-for-cup blend with xanthan gum) for both the crust and filling. Almond flour, coconut flour, or blends without xanthan gum will change the texture in ways that are difficult to correct.
Storage: Store the bars covered in the refrigerator for up to 3 to 4 days. Wait to dust with powdered sugar until just before serving, since it dissolves into the filling as they sit. They’re best eaten cold or at room temperature after a few minutes on the counter.
Nutrition
Nutrition information is automatically calculated, so should only be used as an approximation.
 Like this recipe? Rate & comment below!
Before You Go
I hope these gluten free lemon bars become a regular in your baking rotation. Browse our other gluten-free recipes or make this oat flour banana bread next!


I made these for a family brunch and every single person asked for the recipe. The brown butter crust is what sets these apart! It smells incredible while it bakes and has this deep, nutty flavor that works so well with the tart lemon filling.
A recipe that has everyone asking for it at brunch? That’s the dream! So glad it was a hit with the whole family! ? ~GVD team
I love the brown butter in the crust! It really complemented the lemon flavor. I made these twice, once with gluten-free flour and once with cake flour, and both times they turned out great!
Do u have gluten free alternatives
Hi Pamela! You’re in luck, these lemon bars are already gluten free. Hope you give them a try and happy baking! ~gvd team
This was a major fail for me. I don’t see where I missed any of the steps or otherwise did not follow the recipe, so not sure what happened. The crust appeared just set and was golden when I took it out of the oven after the first bake and it had time to cool. The filling also appeared set and the top was golden after the second bake. But the filling leaked around/under the foil and cemented it to the baking dish. I tried to cut inside the edge of the baking dish and lift the bars out from the center, but not only was the filling very loose, the crust was mushy and wet. It was slop that went straight in the bin. If there’s something obvious I’ve missed, I’d love to know what that is.
Oh no, Stephanie. This hurts my heart. I don’t think you did anything wrong. The crust was soggy because the filling leaked down. I am the new owner, and haven’t made the recipe myself, but I am a professional pastry chef with a decade of experience in restaurant & bakery kitchens. It looks like this recipe is strongly based on Ina Garten’s recipe. The only differences other than the use of gluten free flour are that Ina says to build the crust up the sides of the pan by 1/2 inch before baking. That is to keep the filling from leaking down underneath. OTher than that the only things I see that it could be are that you skipped the lining of the pan with foil? I will update the recipe with Ina’s additional instruction. ~Lindsey
I made these for Father’s Day weekend because my husband LOVES lemon. They are incredible. I put them in the fridge to firm up a little faster because I inhaled the first gooey one after an hour on the counter when they weren’t quite set, haha. Delicious!!
These were so delicious!!! Thank you for a gluten free recipe. The photography is beautiful as well!
I don’t need to eat gluten free so can I substitute regular white flour or do adjustments need to be made?
Lori, Yes you can definitely use regular AP flour with great results!
the recipe step to pour the filling in the hot crust is a lie. I poured it in and it immediately sank to the bottom of the pan, ruining the cookie crust. thanks for a huge waste of time. 0 stars, try a different recipe
Sadie, So sorry to hear this recipe didn’t work out for you!
Can we freeze the lemon bars?
Chelsea — Yes, you can! I’d suggest cutting them first, then placing them on a baking sheet in the freezer uncovered until frozen. Then I’d wrap them individually, and then place them all (wrapped) in a bag/container in the freezer.
my four year old loves to bake with. me too!!