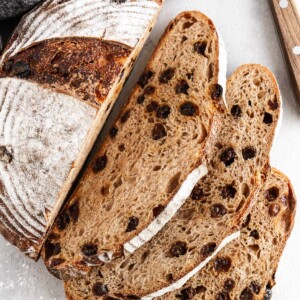
This cinnamon raisin sourdough bread has a wonderful chewy, slightly sour interior with a crunchy, craggy crust! It is packed with cinnamon and plump raisins, but no added sugar!
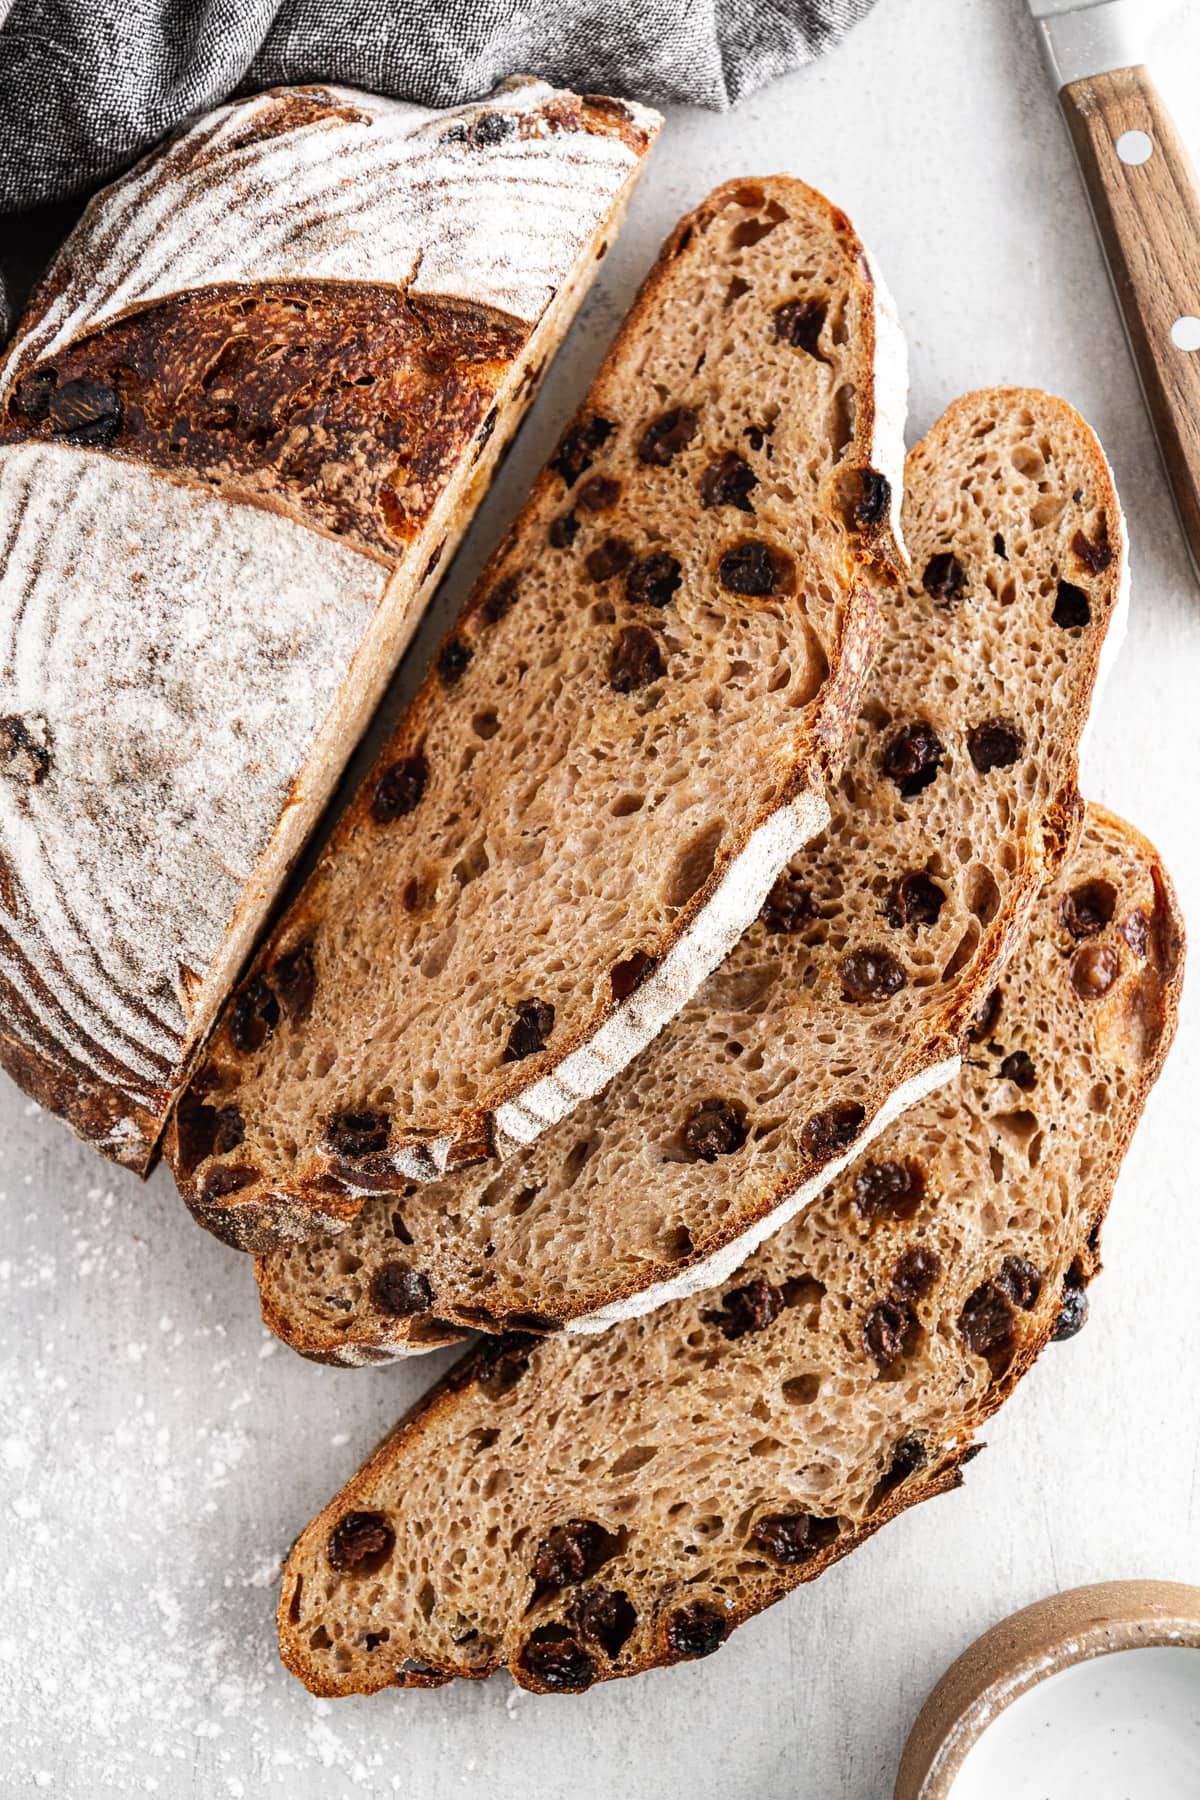
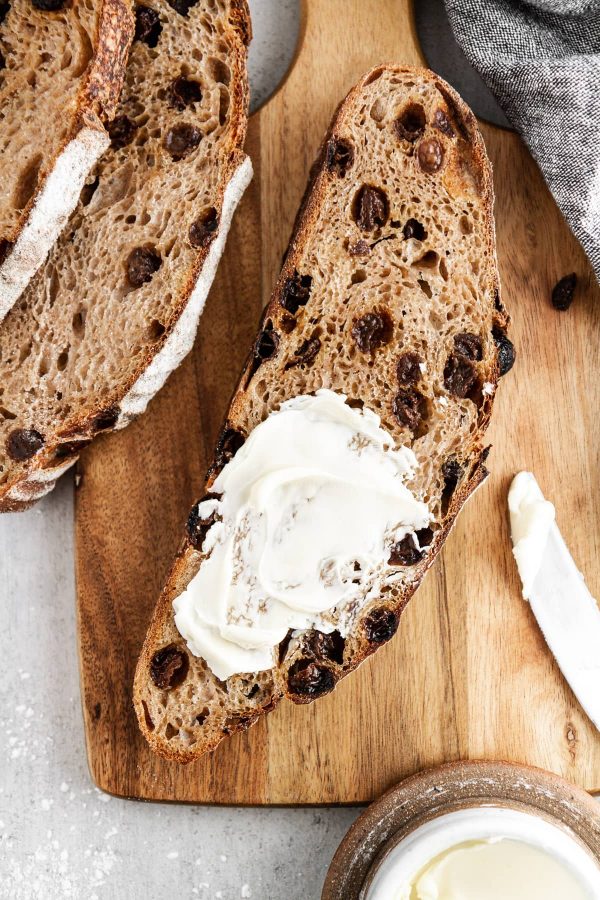
Sweet with spices and studded with raisins, every bite of this sourdough loaf is full of wholesome, heartwarming flavor. Top a toasted slice with butter and a sprinkle of sea salt for a *chef’s kiss* seriously perfect breakfast or snack.
I created this cinnamon raisin sourdough bread recipe from my tried and true sourdough bread recipe! It has the best features of cinnamon raisin bagels with all the things you love about sourdough. It has a wonderful chewy, slightly sour interior with a crunchy, craggy crust!
Table of contents
Why You Will Love this
- Easy, no-knead, no mixer recipe! If you would prefer to mix the dough in a stand mixer, follow the instructions in this easy sourdough bread recipe.
- No sugar cinnamon raisin bread. This recipe doesn’t have any added sugar other than the raisins. This makes it perfect for serving alongside a spicy soup, hearty Irish stew or toasted for breakfast! If you want a sweet, buttery sourdough raisin bread recipe, I am here for it and this one is the best. You could also just lean into the decadent and go with sourdough cinnamon rolls or my cinnamon swirl bread!
- Open, chewy crumb and crunchy crust! Since we still have a lean dough (no enrichments like sugar, butter or eggs), that means this bread has the texture of a high-hydration sourdough!

Ingredients & Substitutions
- Mature Sourdough Starter: You will need an active sourdough starter (not discard) for this recipe. If you’re just starting out on your sourdough journey use this sourdough starter recipe and then read all about how to feed sourdough starter to make it happy and healthy! You can use that discard for sourdough blueberry muffins, sourdough waffles or sourdough pancakes for breakfast!
- Bread Flour: You could also use all-purpose flour.
- Whole Wheat Flour: This recipe uses a mixture of whole wheat flour and bread to achieve a more open crumb while getting some of the nutrients and flavor of whole wheat. Try this 100% whole wheat sourdough bread recipe if you want a healthier whole grain flour option. You could even add raisins.
- Water:
- Raisins: Even though you are going to plump them up, every raisin eater knows that freshly opened box of raisins are plumper than those left lingering in the back of the cabinet.
- Ground Cinnamon
- White rice flour: Use white rice flour for dusting the proofing basket because it doesn’t absorb water as readily as glutenous flour. This will allow your proofed bread to pop out easily for baking.
- If you’re new to sourdough, you’ll also need several essential tools for sourdough baking, or if you are having difficulties getting your sourdough starter to consistently rise and fall, read my recently updated post on how to feed sourdough starter!
See the recipe card for full information on ingredients and quantities.
Variations
- Make it a cinnamon raisin swirl bread: Take a cue from my cinnamon swirl bread and roll out each piece of dough into a rectangle measuring approximately 9×14 inches with a rolling pin; brush dough with water and sprinkle with the cinnamon sugar mixture. Roll each up and place, seam side down in a loaf pan.
- Speed it up: Add up to 1 packet of dry active yeast to the warm water to bloom before mixing the dough. The addition of the commercial yeast will speed up the process and allow you to skip the overnight proof!
- Add a little sugar to the spice: I know, I know. I said there was no added sugar, but I did not say that you couldn’t add sugar. Add up to a ½ cup (113 grams) brown sugar or granulated sugar after you autolyse the dough.
- Mix up the spice! While we’re flying by the seat of our pants, why not change up the cinnamon for a little chai spice, pumpkin spice or even apple pie spice. You could chop up some apple pie filling and put it in the dough in place of the raisins! Too far?
Professional Tips
- Do not skip the step of soaking the raisins. You’ll want them to be nice and plump and hydrated so that, when you go to bake the bread, they stay moist and sweet instead of dry and sour. You can use this same pro tip in my raisin walnut pumpernickel bread!
- Be sure to mix the raisins and cinnamon into the dough as much as possible. If you end up with a clump of raisins in the dough, it is fine — they’ll disperse as you go through the turns in the bulk fermentation stage.
- Large amounts of cinnamon inhibit dough from rising. But this recipe doesn’t have enough cinnamon to affect the yeasts’ performance. There are other ingredients like rosemary, garlic and tomato that also inhibit rising, but rosemary is one of my favorite additions to bread! Try this rosemary garlic no knead bread and see for yourself!
- There is no wrong way to eat it. I 100% recommend serving this bread sliced and toasted with butter and a sprinkle of sea salt (or cinnamon sugar). It’ll change your life.
How to Make Cinnamon Raisin Sourdough
The process to make this cinnamon raisin sourdough bread is very similar to my sourdough bread recipe for beginners. Here’s how to make this sweetly spiced variation.
Prepare the Levain:
Step 1: Place a clean starter jar on a kitchen scale. Tare the scale so it reads “0”, then to the jar add 50g of your active starter, 200g whole wheat flour and 200g distilled water at room temperature. Stir the mixture vigorously until no dry bits of flour remain, then cover the starter jar loosely with a lid. Leave the levain in warm place for approximately 12 hours, until it has more than doubled in size or reached its “peak”.


Autolyse & Mixing the Dough:
Step 2: Place a large bowl on a kitchen scale. Tare the weight so it reads “0”, then, to the bowl, add 250 grams of the levain and 800 grams distilled water at room temperature.
Step 3: Stir the mixture with a wooden spoon or one hand (using your fingers like a whisk) until the levain is completely dissolved in the water, then add 800g bread flour and 200g whole wheat flour.

Step 4: Mix the dough with a spatula or, more effectively, with your hands until completely mixed together and no dry bits of flour remain.
Step 5: Once the dough is mixed, cover the mixing bowl loosely with plastic wrap and place the bowl in a warm spot in your kitchen (such as the oven with the light turned on) for 15-50 minutes.
Step 6: Meanwhile, in a separate medium bowl, soak raisins in room temperature water for 30 minutes to hydrate; drain and pat dry.
Step 7: Add the raisins, cinnamon, and salt to the dough with your hands or a stiff spoon until everything is completely incorporated. Scrape down the sides of the bowl with a bowl scraper or silicone spatula. Cover the bowl with plastic wrap and return it to its warm place. You are ready for the next step.
Bulk Fermentation & Gluten Development:
Step 7: Approximately 30 minutes after mixing the salt into the dough, uncover the bowl and perform a set of four turns. This means you take both hands, lift up the end of the dough farthest from you as high as you can lift it without tearing, then fold it over on itself towards you. Turn the bowl 180 degrees, then repeat. Turn the bowl 90 degrees, then repeat. Turn the bowl another 180 degrees, then repeat. This is ONE SET of turns.
Once the set is complete, cover the bowl again with plastic wrap and return it to its warm place.
Step 8: We will repeat these sets of turns six times at 30 minute intervals (see the sample baking schedule in the next section for an example on timing), then let the dough rest covered without any turns for another 1 hour 30 minutes.
This means bulk fermentation takes approximately 4 hours 30 minutes in total.
Shaping the Dough:
Step 9: (Divide) Using a spatula or bowl scraper to help coax it out, gently remove the dough from its bowl onto a well-floured surface. Use a bench scraper or sharp knife coated in flour to divide the dough in two equal size pieces.
Step 10: (Preshape) Working with one piece of dough at a time and using both hands, lift up the top half and fold it over about 3/4 of the way over itself. Grab the right side of the dough; stretch it out to the right and then fold it over the dough. Grab the left side of the dough; stretch it out to the left and then fold it over the dough. Finally, take the bottom half of the dough, lift it up and fold it completely over the dough to form a “letter.” Repeat with the second piece of dough.
Step 11: (Bench Rest) Cover each piece of dough with a bowl, towel or plastic wrap and let them rest on the counter untouched for 10 minutes.
Pre-shaping loaves helps create a uniform loaf and gently coaxes the dough into the shape that we want rather than trying to force it all at once.
Step 12: While the dough is bench resting, prepare your dough baskets or bowls for the overnight final proof. Sprinkle white rice flour over the banneton basket or linen for lining the bowl(s) until they have a light coating. Set them off to the side.
Step 13: (Final Shape) Cover your hands with flour and, as gently but as quickly as possible, rotate one piece of dough with your hands while leaving it on or close to the surface, shaping into a tight round. I usually cup my hands and gently pull the dough under itself towards my body then rotate and repeat to create a round shape with a tight surface. Use the surface tension or the stickiness of the dough on the bottom, to tighten the loaf into a boule, flouring only your hands as necessary. Repeat this process with the second piece of dough.
Step 14: Gently transfer each piece of dough, seam-side up, to a prepared basket/bowl. Sometimes, if I feel the dough is really slack, I’ll gently pinch the edges of the dough into the center once it is in its basket to help it maintain its shape. Cover each bowl with a plastic bag or plastic wrap, then seal with a clip, rubber band, etc. to avoid as much refrigerator air flow as possible.
Overnight Proof:
Step 15: Let the dough sit, covered, at room temperature for about 20 minutes, then transfer to the fridge for an overnight proof, approximately 15-16 hours.
Professional Tip: You can let the dough proof up to 36 hours in the refrigerator or up to 3 days in the freezer. If they proof this long, there is absolutely no benefit to allowing them a final proof at room temperature because they have achieved their best aeration and will be much easier to score when cold.
Baking Sourdough Bread:
Step 16: The next morning, or 15 hours later, place an oven rack in a place that allows enough space for the Dutch oven, combo cooker or bread pan. Preheat the oven to 500° F for one hour with the top and bottom of your bread baking vessel of choice inside.
Step 17: When the oven is fully preheated, remove one piece of dough from the fridge. Place a piece of parchment paper on top of the basket. Top the parchment with a cutting board. Gently but quickly invert the basket with the cutting board so the dough lands on the parchment paper on the cutting board. Remove the basket. You can use your fingers to gently release it if needed.
Step 18: Use a bread lame, razor blade, or really sharp knife to score the top of the loaf. You want to score into the loaf about a half-inch deep, on an angle (or straight). Score the dough in several places to allow steam to escape from the dough and for the oven spring to occur. Feel free to get creative here, or keep it simple! A box cut is always a good beginner choice.
Step 19: Using oven mitts, carefully remove the baking vessel from the oven, remove the top and then place the dough into the shallow side of the combo cooker or bread pan (or the pot of the Dutch oven), using the parchment paper to hold it. Cover with the deep side of the combo cooker/bread pan/lid of the Dutch oven, and place in the oven. Reduce the oven temperature to 450° F.
Step 20: Bake, covered, at 450° F for 30 minutes.
Step 21: Uncover the dough (place the top of the cooker/bread pan/Dutch oven next to the dough in the oven to keep it hot for baking the second loaf) and continue to bake another 20-25 minutes until the bread is a deep, dark golden brown and baked through.
An instant thermometer inserted in the center of the loaf should read around 210°F when it’s fully baked.
Step 22: Use the parchment paper to transfer the bread to a cooling rack to cool completely. Repeat the scoring/baking process with the second piece of dough.
I know this is tough to do, but let the bread cool completely before slicing into it! If it’s even the least bit warm, a knife cutting into the bread can make it squish together and “gum up,” which is just sad for everyone. Be patient and you’ll be rewarded!
Baking Schedule
There is no wrong time to make sourdough, so use a little math to adjust the schedule to fit your needs! Also note that since we aren’t controlling the dough temperature, which is another variable that might make your dough rise faster or slower than mine. Not wrong, just different.
Day 1:
- 9:15 PM: Prepare the levain and store in a warm spot 10-12 hours.
Day 2:
- 8:30 AM: Autolyse the dough without the salt, cinnamon, or raisins. Soak raisins.
- 9:20 AM: Finish mixing the dough and place in a warm spot for 30 minutes
- 10:00 AM: Perform the 1st set of turns. Cover and return to its warm spot.
- 10:30 AM: Perform the 2nd set of turns. Cover and return to its warm spot.
- 11:00 AM: Perform the 3rd set of turns. Cover and return to its warm spot.
- 11:30 AM: Perform the 4th set of turns. Cover and return to its warm spot.
- 12:00 PM: Perform the 5th set of turns. Cover and return to its warm spot.
- 12:30 PM: Perform the 6th, and final, set of turns. Cover and return to its warm spot to finish bulk fermentation.
- 2:00 PM: Divide and preshape the loaves. Cover on the bench and allow to sit for 10 minutes. Prepare baskets with white rice flour.
- 2:10 PM: Final shape the loaves, turn into prepared baskets. Cover and allow to proof 20 minutes at room temperature.
- 2:30 PM: Transfer the wrapped baskets to the refrigerator to proof an additional 15-16 hours.
Day 3:
- 7:30 AM: Preheat the oven to 500° F with the Dutch oven or baking vessel inside. You can do both loaves at a time if you have 2 different vessels and your oven allows!
- 8:30 AM: Transfer loaves to parchment, score the loaves, and then place carefully in the bottom of your chosen baking vessel. Replace the lid and place inside oven. Reduce oven temperature to 450° F and bake 30 minutes covered.
- 9:00 AM: Carefully remove the lid from the baking vessel and either remove it from the oven or leave it inside to stay warm for the next loaf. Continue baking the uncovered loaf for an additional 20-25 minutes.
- Cool completely!
Recipe FAQs
To maintain the crunchy crust, store at room temperature, cut side down on a cutting board. After that, store in a bread box or resealable plastic bag at room temperature for another 1-2 days. It will gradually lose moisture but it will store well at room temperature for up to a week. You can also store well wrapped in the freezer, however, I like to slice my bread before freezing.
If you haven’t sliced the loaf yet, but would like to rewarm it for serving, preheat an oven to 400° F. Place the loaf directly onto the oven rack and bake until heated through. It will take about 15-20 minutes. I know, forever!
You can perform the final proof in the freezer rather than in the refrigerator, but I recommend leaving it in the freezer for 2-3 days. The cold will slow down the fermentation but not stop it. Baking it from frozen will give you the best oven spring and will allow for a better scoring.
Recommended Sourdough Bread Recipes

Sourdough

Yeast Breads

No-Knead Breads

Yeast Breads
If you enjoyed this recipe, please leave a star rating and let me know how it goes in the comments below! I love hearing from you and your comments make my day!
Cinnamon Raisin Sourdough Bread
Ingredients
For the levain:
- 50 g mature starter
- 200 g whole wheat flour
- 200 g distilled water
For the dough mix:
- 250 g levain
- 800 g distilled water
- 800 g bread flour
- 200 g whole wheat flour
- 250 g raisins
- 20 g fine sea salt
- 16 g ground cinnamon
For the preshape:
- Bread flour or all-purpose flour, for shaping
For the shape:
- White rice flour, for dusting the baskets/linen-lined bowls
Instructions
- At 9:15 p.m. PREPARE LEVAIN: Place a clean starter jar on a kitchen scale. Tare the weight so it reads “0”, then to the jar add 50g mature starter, 200g whole wheat flour and 200g distilled water at room temperature. Stir the mixture vigorously until no dry bits of flour remain, then cover the jar loosely with a lid. Store in a warm place (such as the oven with the light on) for approximately 10-12 hours.
- At 8:30 a.m. (next day) PREPARE AUTOLYSE: The next morning, place a medium to large mixing bowl on a kitchen scale. Tare the weight so it reads “0”, then to the bowl add 250g levain and 800g distilled water at room temperature. Stir the mixture until the levain is completely dissolved. Add 800g bread flour and 200g whole wheat flour. Mix with your hands until mixture is completely incorporated. Cover bowl with plastic wrap and place in a warm place (such as the oven with the light on) for 50 minutes. Meanwhile, in a separate medium bowl, cover the raisins with room temperature water and allow to soak for 30 minutes. Drain and then pat dry.
- At 9:20 a.m. FINISH THE DOUGH MIX: To the mixing bowl add cinnamon, raisins and 20g fine sea salt. Mix with your hands until mixture is completely incorporated. Cover bowl with plastic wrap and place in a warm place (such as the oven with the light on) for 30 minutes.
- At 10 a.m. BULK FERMENTATION: After 30 minutes have elapsed, perform the first set of turns (see post for full description on how to perform a set of turns). Cover the bowl and return it to its warm place.
- At 10:30 a.m. Perform second set of turns. Cover and return to warm place.
- At 11 a.m. Perform third set of turns. Cover and return to warm place.
- At 11:30 a.m. Perform fourth set of turns. Cover and return to warm place.
- At 12 p.m. Perform fifth set of turns. Cover and return to warm place.
- At 12:30 p.m. Perform sixth and final set of turns. Cover and return to warm place to finish bulk fermentation, untouched.
- At 2:00 p.m. PRESHAPE: Gently transfer dough to a well-floured surface. Using a well-floured bench scraper or knife, divide dough into two equal pieces. Use floured hands shape dough into boule (see post for full description on how to preshape). Cover dough with bowls or plastic wrap and let rest on counter for 10 minutes.
- At 2:10 p.m. SHAPE AND PROOF: Dust two banneton baskets or linen-lined bowls with white rice flour. Remove covers from dough. Final shape the dough by using both hands to slide the dough across the table, tightening the surface. Rotate 90 degrees and repeat until a tight, smooth dough round stands proud on your work surface. If your hands stick, dust them with flour and continue. If you find the dough sticky, you can also use a bench scraper to rotate the dough. Carefully transfer dough to one prepared basket. Repeat with second dough.
- Cover each basket with a plastic bag; use a clip to seal bag. Let dough rest in bags or covered with plastic wrap at room temperature 20 minutes, then transfer to refrigerator for an overnight proof.
- At 7:30 a.m. (next day) PREHEAT: Place an oven rack in your oven with enough space that allows enough space for the Dutch oven, combo cooker or bread pan. Preheat the oven to 500° F for one hour with the top and bottom of your bread baking vessel of choice inside.
- Just before baking, remove one dough from refrigerator and uncover. Place a sheet of parchment paper and a cutting board on top of basket. Carefully invert basket with cutting board so dough lands on parchment paper. Remove basket. Use a bread lame to score top of dough.
- At 8:30 a.m. BAKE: Using oven mitts, carefully slide dough on parchment paper to shallow side of combo cooker. Place deep side of combo cooker on top to seal. Reduce oven temperature to 450 degrees F. Bake covered 30 minutes. Using oven mitts, remove top of combo cooker or Dutch oven and return to oven rack in oven to keep hot. Bake bread uncovered for another 20-25 minutes until a deep golden brown (an instant thermometer should read an internal temperature of approximately 210 degrees F).
- Transfer bread to a cooling rack to cool completely, about 1 hour 30 minutes. Repeat with second loaf.
Notes
- Yield – 2 loaves
- For step-by-step photos, printable schedules and plenty of tips, please head to my beginners sourdough bread recipe for full details.
- Store leftover bread cut side-down on a cutting board uncovered at room temperature up to 1 day; after that, store in a bread box or resealable plastic bag at room temperature for another 1-2 days.
- If you want to freeze your sourdough: Cool the loaf completely, then place in a resealable plastic bag. Freeze for up 2 months. Thaw bread overnight in its bag at room temperature.
- For best results, use exactly the types/amounts of flours indicated in the recipe. I cannot guarantee similar results with any substitutions. I have given the closest approximation to US volume measurements, but weighing the ingredients will yield the best and most consistent results.
Nutrition
Nutrition information is automatically calculated, so should only be used as an approximation.
 Like this recipe? Rate & comment below!
Before You Go
I hope you enjoyed this easy bread recipe! Be sure to peruse our sourdough bread recipes like this tried-and-true no-knead sourdough bread!


I LOVE this recipe. If my starter is freshly fed, I’ve skipped the levain part and it’s turned out well! Thank you for having a no added sugar alternative.
Hi Kim, Thank you so much, this made our day! So glad it’s been working well for you! And yes, we love that this bread is naturally sweetened just from the raisins. ~GVD team
I had waaaay too much starter. But I also used water I soaked raisins in as water in recipe, seemed a waste, worked great. But this dough was super sticky. I used high protein BF. Ended up adding more flour after first stretch n fold. It rose wonderful and came out great!
Hi Julie! Great idea using the raisin soaking water! This dough is meant to be sticky, it’s a lean, high-hydration dough. Bread flour can make it feel even tackier. Light flour on your hands or a little extra during turns is totally fine. Glad it rose well and baked up great! We love to hear it! ~gvd team