cinnamon raisin sourdough bread
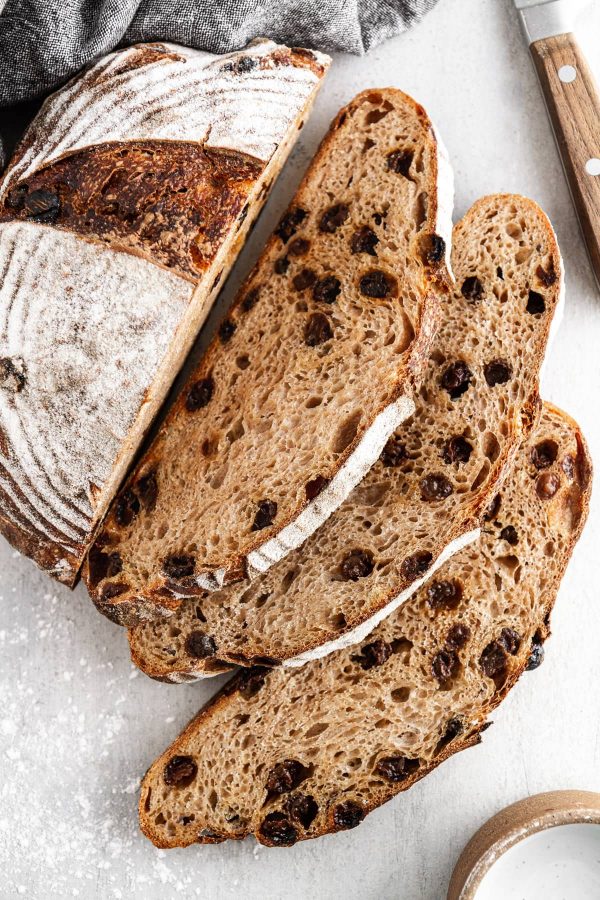
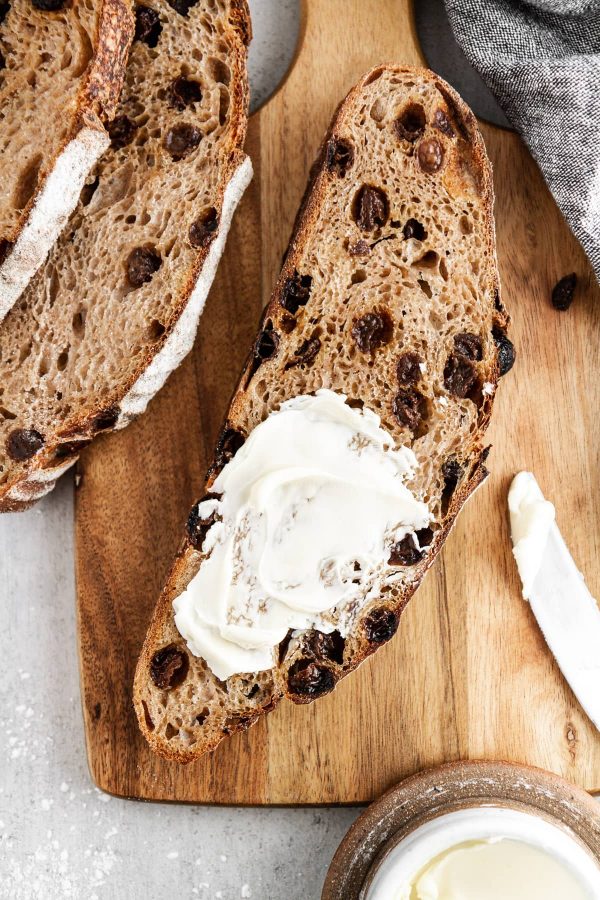
For fans of cinnamon raisin bread or sourdough bread, this Cinnamon Raisin Sourdough Bread is the perfect marriage of two beloved recipes! Sweet with spices and studded with raisins, every bite of this sourdough loaf is full of wholesome, heartwarming flavor. Top a toasted slice with butter and a sprinkle of sea salt for a *chef’s kiss* seriously perfect breakfast or snack.
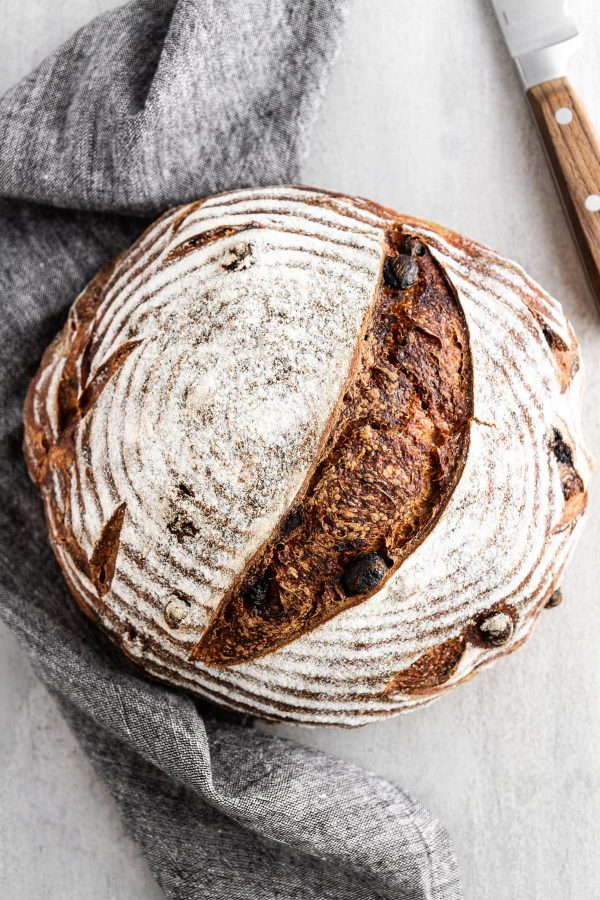
Cinnamon Raisin Sourdough Bread
OK hi, hello, I made you some bread. But not just any bread — my favorite sourdough bread, elevated with cinnamon and raisins! I’ve been wanting to bake up this variation on sourdough bread for a literal age, and now that we are here, I couldn’t be happier. Once you give it a try, you’ll feel the joy, too.
This cinnamon-spiced, raisin-studded sourdough loaf is a variation of my Favorite Sourdough Bread Recipe, with just a few tweaks — including the addition of cinnamon and raisins (duh) plus a change in the bake temperature and time. These updates are not interchangeable between the original recipe and this one — in testing this recipe, these updates are what work best for this particular variation. Just so ya know! I never want to lead you astray when it comes to our dear ole friend, Sourdough.
Ingredients for the Best Cinnamon Raisin Sourdough Bread
The best sourdough bread starts with the best ingredients, and the best cinnamon raisin sourdough bread ALSO starts with the best ingredients. What a coincidence! Here’s what you’ll need to get this delicious loaf of goodness in your life:
- A mature sourdough starter (here’s a complete how-to guide to make your own starter!)
- Whole wheat flour
- Distilled water (or filtered tap water), at room temperature
- Bread flour
- Raisins
- Cinnamon
- White rice flour for dusting and shaping (highly recommend using white rice flour for dusting and shaping, as it preserves the hydration of the bread because it doesn’t absorb as easily, and it gives the bread a pretty “dusted” look once baked)
If you’re new to sourdough, you’ll also need several essential tools for sourdough baking!
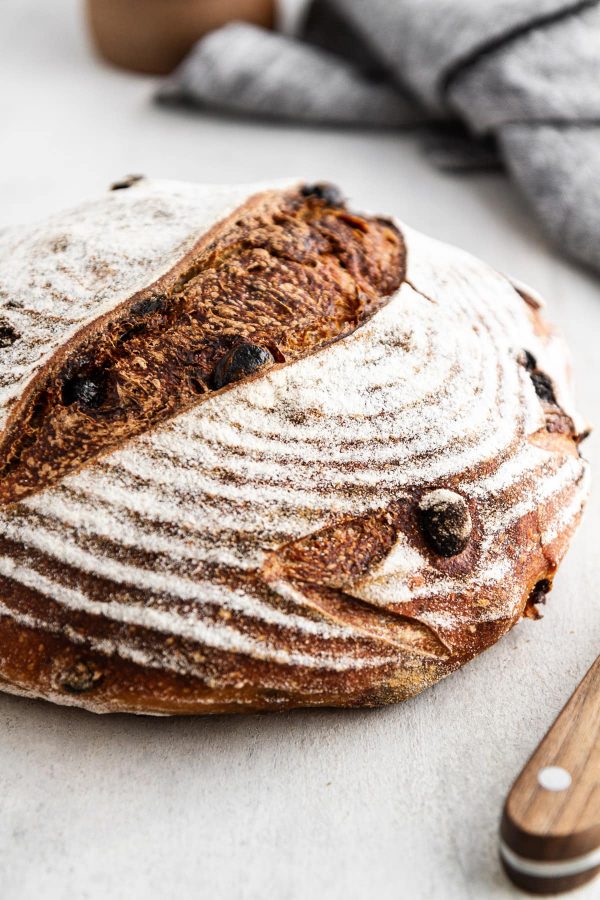
How to Make Cinnamon Raisin Sourdough Bread
The process to make this flavored sourdough bread is very similar to my original recipe, so I highly recommend getting yourself acquainted with the classic recipe first so you understand the fundamentals of sourdough (like “bulk fermentation,” how to shape a sourdough boule, how to score your loaves, etc.). If you’ve been baking sourdough for a while now, here’s how to make this sweetly spiced variation:
- Step 1: Make your levain.
- Step 2: The next day, mix your levain with more flour and water. Also, soak the raisins so they rehydrate and stay plump in the sourdough bread.
- Step 3: Add the raisins and cinnamon to the dough along with some salt and water. Mix it all up.
- Step 4: Bulk fermentation time! Perform six sets of turns every 30 minutes to strengthen the dough and let it rise.
- Step 5: Preshape the dough into two rounds, and let them rest.
- Step 6: Shape each dough round into a boule, place in their prepared bannetons or bowls, and proof in the fridge overnight.
- Step 7: The next morning, heat your oven with the combo cooker or Dutch oven inside.
- Step 8: Place the dough round on a sheet of parchment, score as desired, and transfer to the preheated combo cooker.
- Step 9: Bake the first loaf until deeply browned.
- Step 10: Repeat with the second loaf, and let both loaves cool completely.
This bread is indeed a labor of love, but you will be rewarded with a kitchen that smells like sweet spices and fresh bread and happiness and sunshine and rainbows and unicorns. And you’ll have fresh bread to eat, too. What could be better?
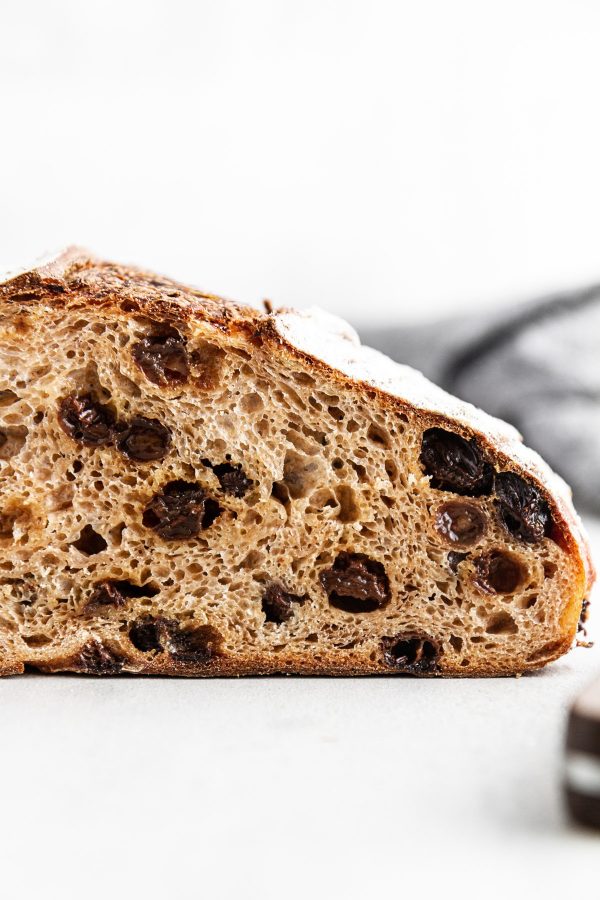
Tips for the Best Cinnamon Raisin Bread
I know you’re just itching to make this bread now, but let’s cover a few important tips before you run off to the kitchen:
- Do not skip the step of soaking the raisins. You’ll want them to be nice and plump and hydrated so that, when you go to bake the bread, they stay moist and sweet instead of dry and sour.
- Be sure to mix the raisins and cinnamon into the dough as much as possible. If you end up with a clump of raisins in the dough, it is fine — they’ll disperse as you go through the turns in the bulk fermentation stage.
- Some people have said that cinnamon inhibits the dough from rising during bulk fermentation, but I have not had this experience. If you get to the end of the bulk fermentation and your bread isn’t as risen as you’d like, let it rise an extra 30 minutes to 1 hour, tops.
- I 100% recommend serving this bread sliced and toasted with butter and a sprinkle of sea salt. It’ll change your life.
Here’s to our shared love of cinnamon raisin bread and sourdough bread coming together for a lifetime of joy and carb-filled happiness. Happy baking! I also love this Classic Banana Bread!
More Delicious Bread Recipes
- rosemary-garlic no-knead bread
- no knead ciabatta bread
- classic brioche loaf bread
- classic italian bread
- whole wheat bread
Cinnamon Raisin Sourdough Bread
- Prep Time: 36 hours
- Cook Time: 1 hour 30 minutes
- Total Time: 37 hours 30 minutes
- Yield: 2 loaves 1x
- Category: Bread
- Method: Bake
- Cuisine: American
Description
This cinnamon-spiced homemade sourdough bread is speckled with raisins for a sweet twist on my favorite sourdough bread recipe! Enjoy toasted and warm with butter for breakfast or as a snack and prepare for full-on bread bliss.
Ingredients
For the levain:
- 50g mature starter
- 200g whole wheat flour
- 200g distilled water
For the dough mix:
- 250g levain
- 800g distilled water, divided
- 800g bread flour
- 200g whole wheat flour
- 250g raisins
- 20g fine sea salt
- 16g ground cinnamon
For the preshape:
- Bread flour or all-purpose flour, for shaping
For the shape:
- White rice flour, for dusting the baskets/linen-lined bowls
Instructions
- (NOTE: Times are a suggestion. Please adjust as desired according to your schedule.) At 9:15 p.m. PREPARE LEVAIN: Place a clean starter jar on a kitchen scale. Tare the weight so it reads “0”, then to the jar add 50g mature starter, 200g whole wheat flour and 200g distilled water at room temperature. Stir the mixture vigorously until no dry bits of flour remain, then cover the jar loosely with a lid. Store in a warm place (such as the oven with the light on) for approximately 10-12 hours.
- At 8:30 a.m. (next day) PREPARE AUTOLYSE: The next morning, place a medium to large mixing bowl on a kitchen scale. Tare the weight so it reads “0”, then to the bowl add 250g levain and 750g distilled water at room temperature. Stir the mixture until the levain is completely dissolved. Add 800g bread flour and 200g whole wheat flour. Mix with your hands until mixture is completely incorporated. Cover bowl with plastic wrap and place in a warm place (such as the oven with the light on) for 50 minutes. Meanwhile, in a separate medium bowl, soak raisins in room temperature water for 30 minutes to hydrate; drain and pat dry.
- At 9:20 a.m. FINISH THE DOUGH MIX: To the mixing bowl add 20g fine sea salt and remaining 50g distilled water (at temperature calculated as described in this post to achieve final dough temperature of 78°F). Add raisins and cinnamon, as well. Mix with your hands until mixture is completely incorporated. Cover bowl with plastic wrap and place in a warm place (such as the oven with the light on) for 30 minutes.
- At 10 a.m. BULK FERMENTATION: After 30 minutes have elapsed, perform the first set of turns (see this post for full description on how to perform a set of turns). Cover the bowl and return it to its warm place.
- At 10:30 a.m. Perform second set of turns. Cover and return to warm place.
- At 11 a.m. Perform third set of turns. Cover and return to warm place.
- At 11:30 a.m. Perform fourth set of turns. Cover and return to warm place.
- At 12 p.m. Perform fifth set of turns. Cover and return to warm place.
- At 12:30 p.m. Perform sixth and final set of turns. Cover and return to warm place to finish bulk fermentation, untouched.
- At 2:00 p.m. PRESHAPE: Gently transfer dough to a well-floured surface. Using a well-floured bench scraper or knife, divide dough into two equal pieces. Use floured hands to gently but quickly shape each piece of dough into a tight round (see this post for full description on preshape). Cover dough with bowls and let rest on counter for 30 minutes.
- At 2:30 p.m. SHAPE AND PROOF: Lightly dampen and dust two banneton baskets or linen-lined bowls with white rice flour. Remove bowls from dough. Shape dough into boule (see this post for full description on how to shape into a boule). Carefully transfer dough to one prepared basket. Repeat with second dough.
- Cover each basket with a plastic bag; use a clip to seal bag. Let dough rest in bags at room temperature 20 minutes, then transfer to refrigerator for an overnight proof.
- At 7:30 a.m. (next day) PREHEAT: Place an oven rack on bottom third of oven. Place deep side of combo cooker facing down on one side of oven rack; place shallow side of combo cooker facing up on other side. Preheat oven to 500°F for 1 hour.
- Just before baking, remove one dough from refrigerator and plastic bag. Place a sheet of parchment paper and a cutting board on top of basket. Carefully invert basket with cutting board so dough lands on parchment paper. Remove basket. Use a bread lame to score top of dough.
- At 8:30 a.m. BAKE: Using oven mitts, carefully slide dough on parchment paper to shallow side of combo cooker. Place deep side of combo cooker on top to seal. Reduce oven temperature to 450°F. Bake covered 25 minutes. Using oven mitts, remove top of combo cooker and return to oven rack in oven to keep hot. Bake bread uncovered another 20-25 minutes until a deep golden brown (an instant thermometer should read an internal temperature of approximately 210°F). Transfer bread to a cooling rack to cool completely, about 1 hour 30 minutes. Repeat with second loaf.
Notes
- For step-by-step photos, printable schedules and plenty of tips, please head to my Sourdough 101 series for full details.
- NOTE: This recipe differs from my Favorite Sourdough Bread Recipe in terms of temperatures and bake time — PLEASE read through the recipe before you plan to make it!
- Store leftover bread cut side-down on a cutting board uncovered at room temperature up to 1 day; after that, store in a bread box or resealable plastic bag at room temperature for another 1-2 days.
- If you want to freeze your sourdough: Cool the loaf completely, then place in a resealable plastic bag. Freeze for up 2 months. Thaw bread overnight in its bag at room temperature.
- For best results, use exactly the types/amounts of flours indicated in the recipe. I cannot guarantee similar results with any substitutions.

Hi Stephanie:
Made your bread again today. It has become a staple in our family, we love it so much. I’m finding lately the
bottom of the bread is darker then I like it; even burnt. Do you think I can lower the temperature to 400F for the second 25 minutes of baking. I always check the temperature because I don’t want any surprises.
Thank you
Carol
Hi Carol, Yes, you certainly can lower the temperature and that should help. Everyone’s oven is different, so variations can happen — the lower temp should help you prevent the dark/burnt bottom!
Hi Stephanie: I have been making your bread now for several months. I don’t have bannetons so I’ve been
lining large bowls with parchment and using disposable shower caps for covers. The puffiness of the dough
is perfect when I put it in the fridge and in the morning seems to collapse, especially when I score them, and
does not rise in the Dutch oven. Would you have any suggestions to improve the rise in the oven?
Thanks for your help
Carol
Carol, This has happened to me before too, and it’s very frustrating! From my experience, this is because the bread has overproved, or hasn’t been shaped tightly enough before it goes into the bowl. I would take some time to really practice the shaping of the loaves (I watched a TON of YouTube videos :)) and see if that helps. Sometimes, it’s also just because it’s summertime and if your kitchen is on the warm side, it might be rising/proving quicker than usual. You can try to reduce the bulk fermentation time or fridge time and see if that helps.
Stephanie, those pictures are amazing, so beautiful! I saw that someone mentioned adding toasted walnuts to accompany the raisins and I think it’s a brilliant idea. Perfect recipe for my Dutch oven.
Hi Stephanie
I’m curious as to why there is so much extra Levain. The receipe calls for 50g starter and 200g each of flour and water, however the dough calls for 250g?
Can’t wait to try this loaf…autolyse is happening now!
Thank you
HI Maria! I am the new owner, so I am not 100% certain what Steph’s logic was with this recipe. I have to assume it is so that you have enough levain to feed and keep it going. If you make the exact amount that you need for a recipe then you won’t have any to feed for your next baking project! There is also always waste. Levain gets stuck in the jar, on the spatula used to mix, on the spatula used to portion! I would agree that this feels to be an excessive amount of extra. In a commercial setting we always added 10% for waste and for the next feeding. I hope that helps! Happy baking!
Hi Stephanie, thank you for sharing this recipe! I’m making it for the second time today. I doubled the recipe both times. I’m thinking of baking a loaf with half of the dough and making two loaves out of the other half. Do you think that will be fine and should the baking time change? Thanks again!
Hi Cherri! I am the new owner, but I am a professional pastry chef with a degree in commercial bread baking, so you can trust me! That is absolutely fine! If I am understanding correctly, you would like to make one standard loaf and two smaller loaves? If so, that is fine but the baking and proof time will change. Those smaller loaves will proof and bake faster. They will probably take closer to 20-25 minutes total. If you are baking in a Dutch oven, remove the lid after 10 minutes and then continue baking. This is an unenriched dough so the internal temperature should be 202 degrees F. ~Lindsey
Thank you for your reply and guidance, Lindsey. I made 1/2 of the recipe into 2 smaller loaves and baked them as you recommended. I haven’t cut into them yet, but they look perfect for sharing! The other half recipe is a full loaf and is baking now. Yum! Yum! Thanks again.
Wonderful, Cherri! THanks for coming back to report!