A no-knead rosemary garlic bread recipe with only 5 ingredients. It has a soft, chewy inside with a perfectly crusty crust!


A Quick Look At The Recipe
This is a brief summary of the recipe. Jump to the recipe to get the full details.
Prep Time
15 minutes
Cook Time
1 hour
Proof Time
8 hours
Total Time
9 hours 15 minutes
Servings
12 Slices
Difficulty
Easy, with hands-off fermentation and no kneading required.
Calories *
116 kcal per serving
Technique
Mix a no-knead dough, allow for a long overnight proof, then bake in a hot Dutch oven for a crisp crust.
Flavor Profile
Savory and aromatic with fresh rosemary and garlic, a chewy interior, and a deeply crusty exterior.
* Based on nutrition panel
I love love love a no knead bread! It is great to mix the bread and forget it. The final product is crisp and airy. I like to make it with bread flour and rosemary.⭐⭐⭐⭐⭐
Mara
Why You Will Love This
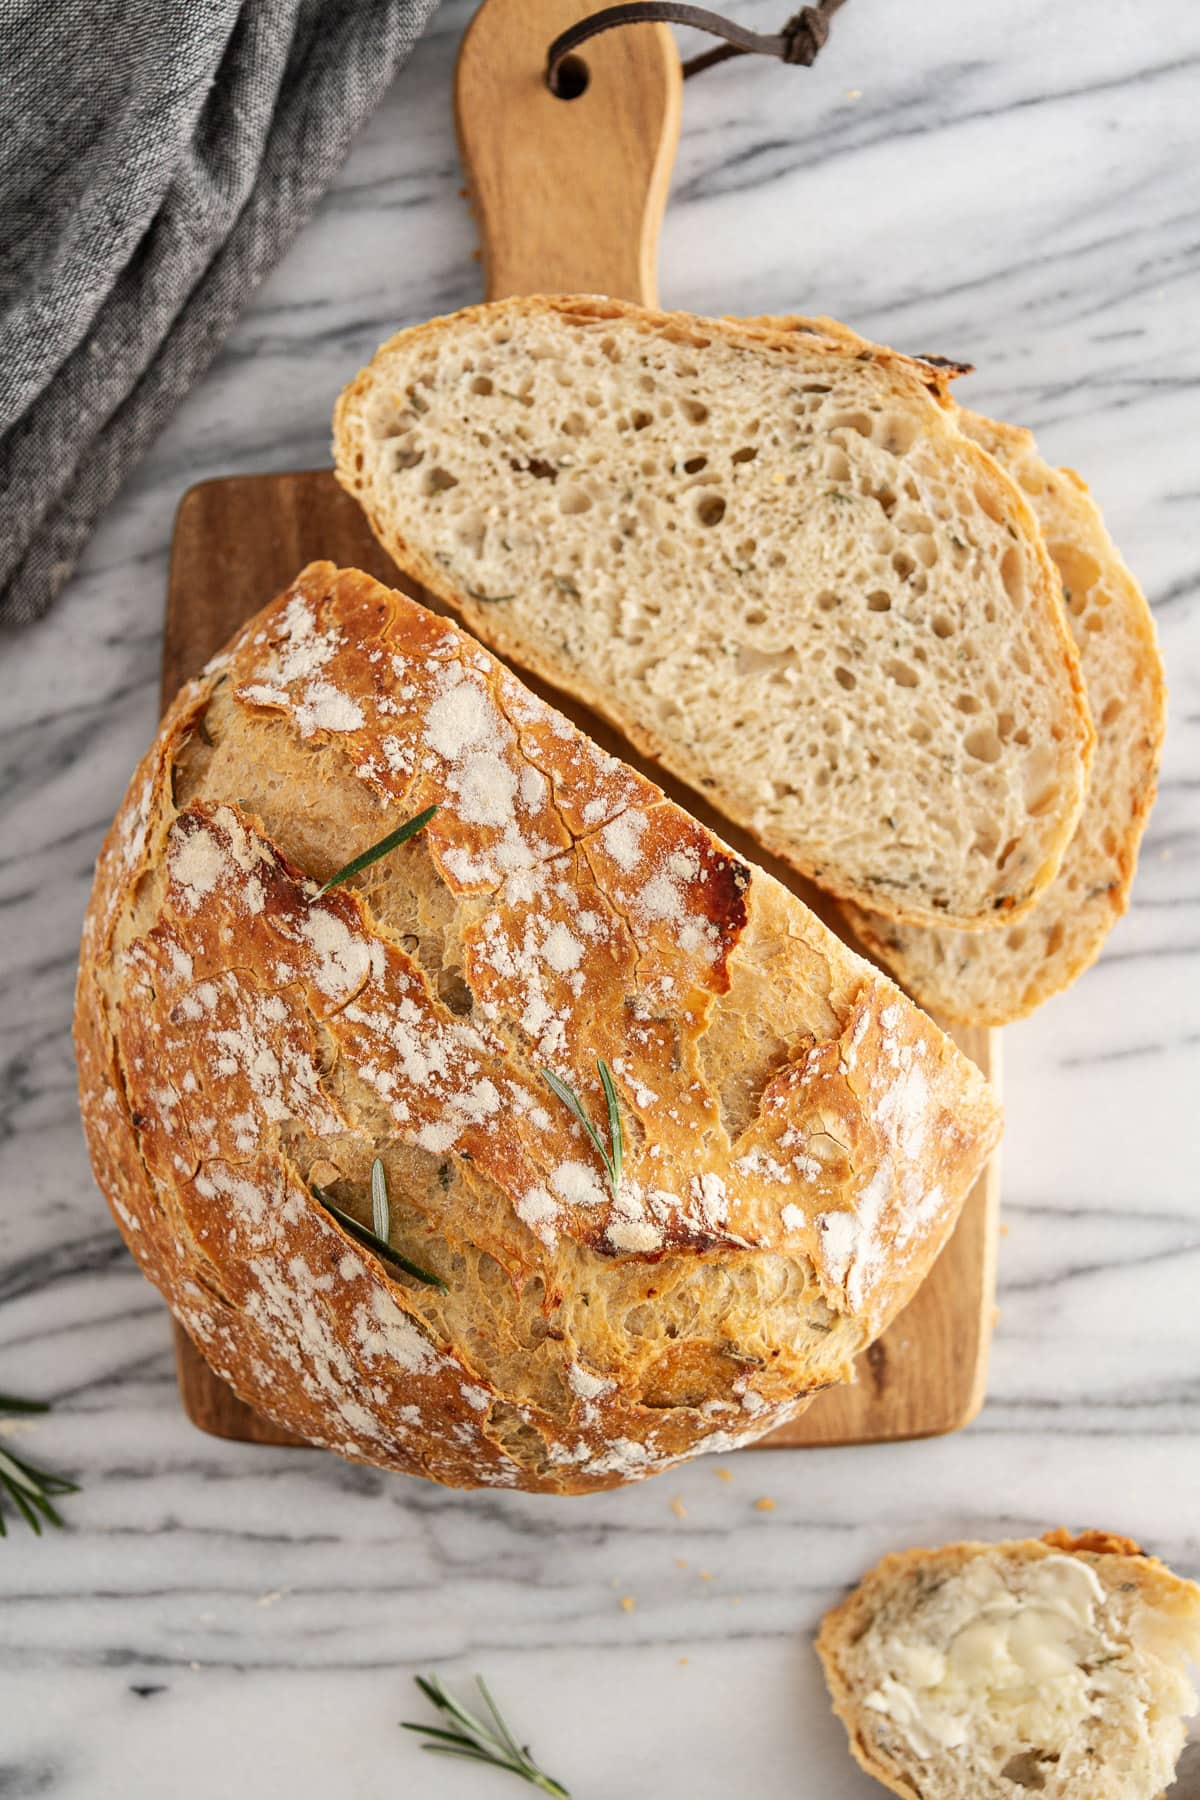
- Crusty, flaky crust with a soft, chewy interior. Thanks to the magic of gluten and baking in a Dutch oven, the texture of this bread is perfect especially considering all the work you didn’t have to do!
- Fresh rosemary & garlic are the perfect combination. Both flavors permeate the bread as it proofs and bakes, so when you slice into a warm loaf, your kitchen will be filled with the aromas of Italy.
- An easy and essentially foolproof bread recipe. This recipe couldn’t be simpler: As in, you stir a few ingredients together, let them sit overnight, and the next morning, you shape and bake a loaf of rosemary garlic bread. No folding, no kneading, no stand mixer.
- A versatile, flavorful artisan bread. Think beyond the side dish or bread-with dinner, and embrace this easy recipe as a sandwich bread (hi, bacon turkey bravo!) or repurpose leftovers into this breakfast casserole with bread!
Table of Contents
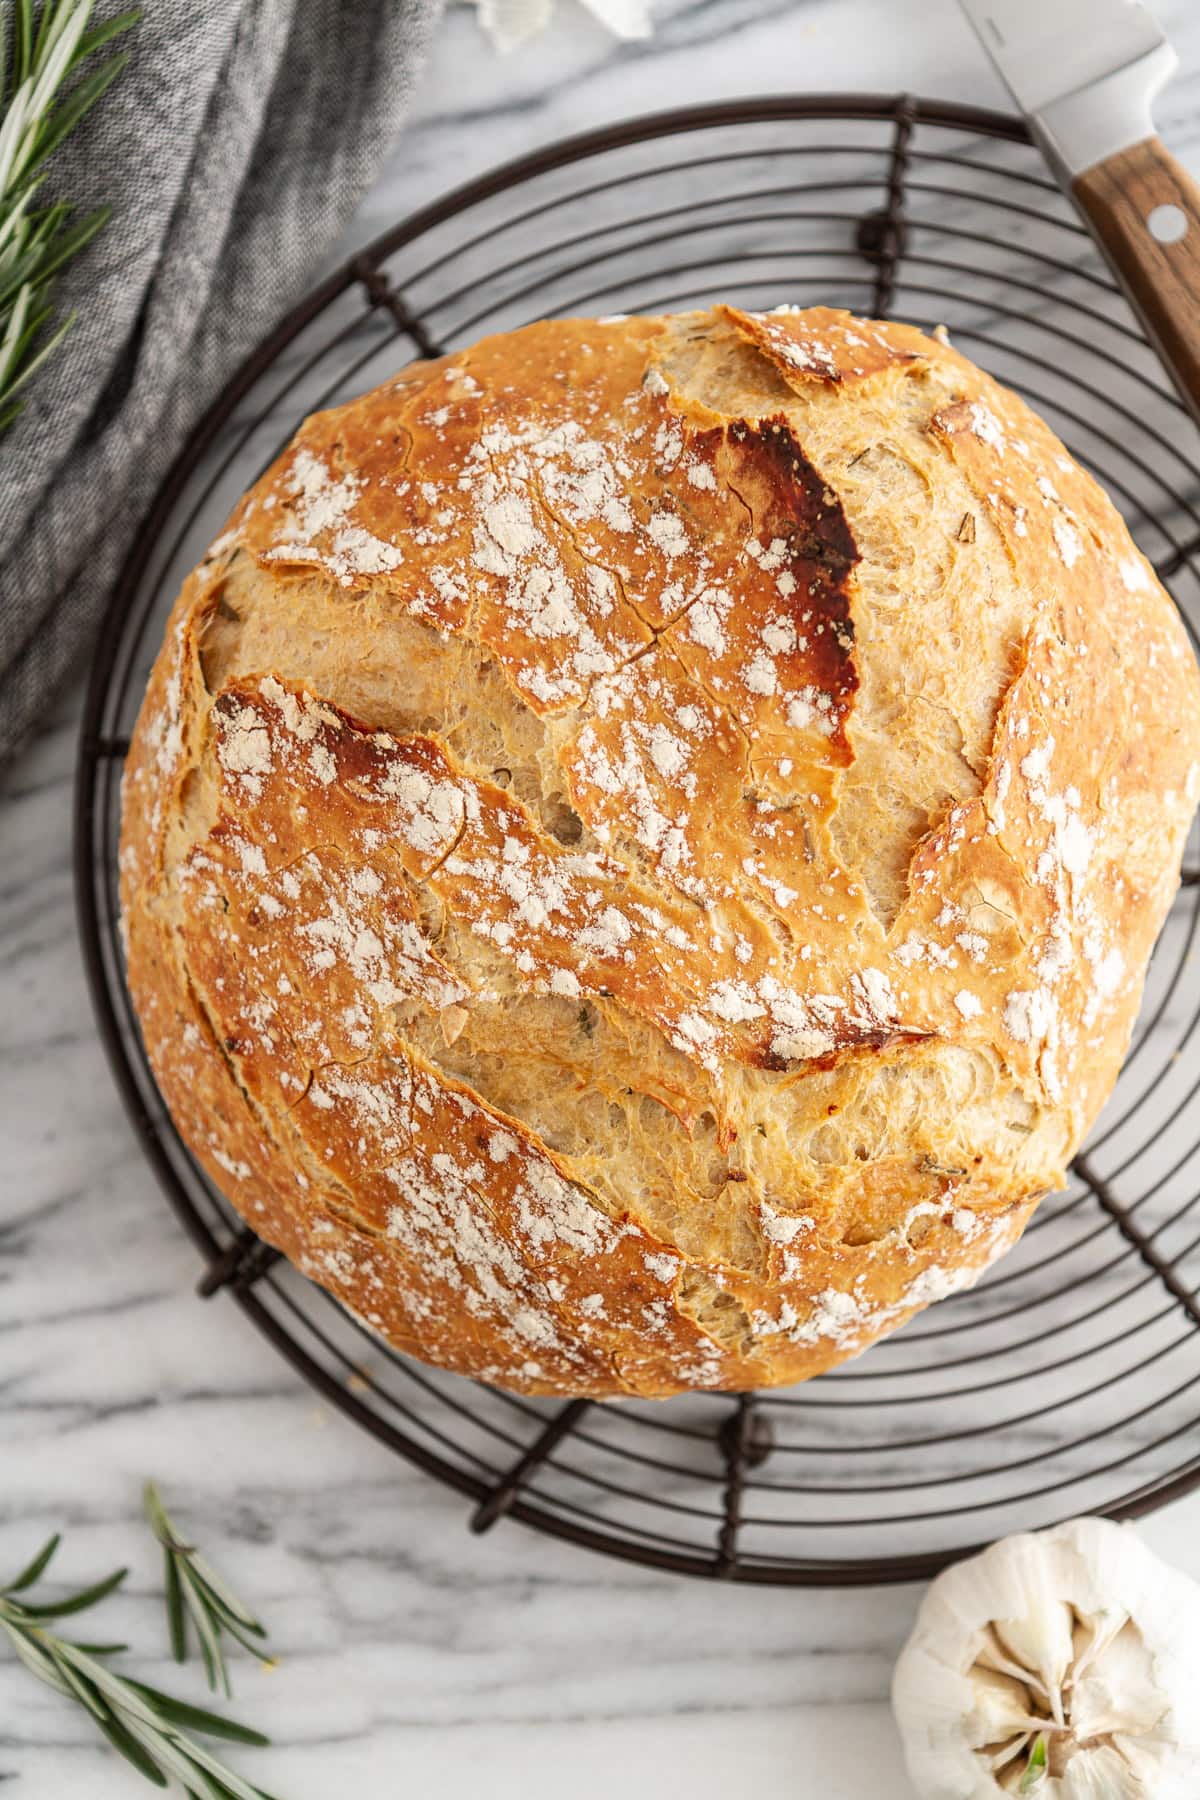
This rosemary garlic bread recipe is effectively my classic, and ever-popular, no-knead dutch oven bread, with the elevated flavor of fresh rosemary and garlic. A little stir, an overnight proof, and then in just one hour, you’ll have a perfectly puffed, round, golden-brown loaf of homemade bread.
Serve thick slices slathered with butter or olive oil for dipping alongside soups, lamb stew or with Italian meatballs. The rosemary and garlic compliment even unexpected dishes like this red chili recipe with ground beef.
Ingredients & Substitutions
- All-Purpose Flour: I use all-purpose flour in this easy bread recipe but you could also take a page from my same day sourdough bread recipe and use bread flour to develop more gluten, faster.
- Sea Salt
- Active Dry Yeast: I recommend using active dry yeast but instant yeast will also work. Active dry yeast has a slower, more consistent rise and will allow your bread enough time to develop a strong gluten network before attempting to shape it. You could try to cheat that gluten development by using bread flour.
- Warm Water: I use tap water for my yeasted bread recipes but you can use filtered water if you want.
- Rosemary: Feel free to adjust the amounts of rosemary to taste! If you’re a major rosemary lover, like moi, add an extra tablespoon or two of chopped fresh rosemary to the dough. Similar to my other rosemary bread recipe, I do not recommend substituting dried rosemary, because the resulting flavor will be dull and just different.
- Garlic: The original recipe by Stephanie recommends using freshly chopped garlic, but the overwhelmed mom of two in me says jarred minced garlic packed in water is almost as good and so much easier.
See the recipe card for full information on ingredients and quantities.
Pro Tips for Artisan Rosemary Garlic Bread
- Roast the garlic for extra depth of flavor. Slice a whole garlic head (all the cloves together) in half, wrap completely in foil and roast in a 400°F oven for about 30 minutes. Unwrap and let the garlic cool. Squeeze each clove out and add 3-5 cloves with the water. Mash the garlic as you mix the dough to distribute it evenly. Save the rest for epic garlic butter, spreading over pizza dough, topping no-knead focaccia, salads, and so much more!
- I always bake my bread with parchment paper because I find it easier to transfer it to a screaming-hot pot this way, but you do you. If you have a non-enamel-coated Dutch oven, the parchment paper is necessary to avoid sticking and burning.
- Preheating & baking in a Dutch oven makes that ideal loaf, butalso include instructions for baking this rosemary bread without a Dutch oven in the FAQ section below.
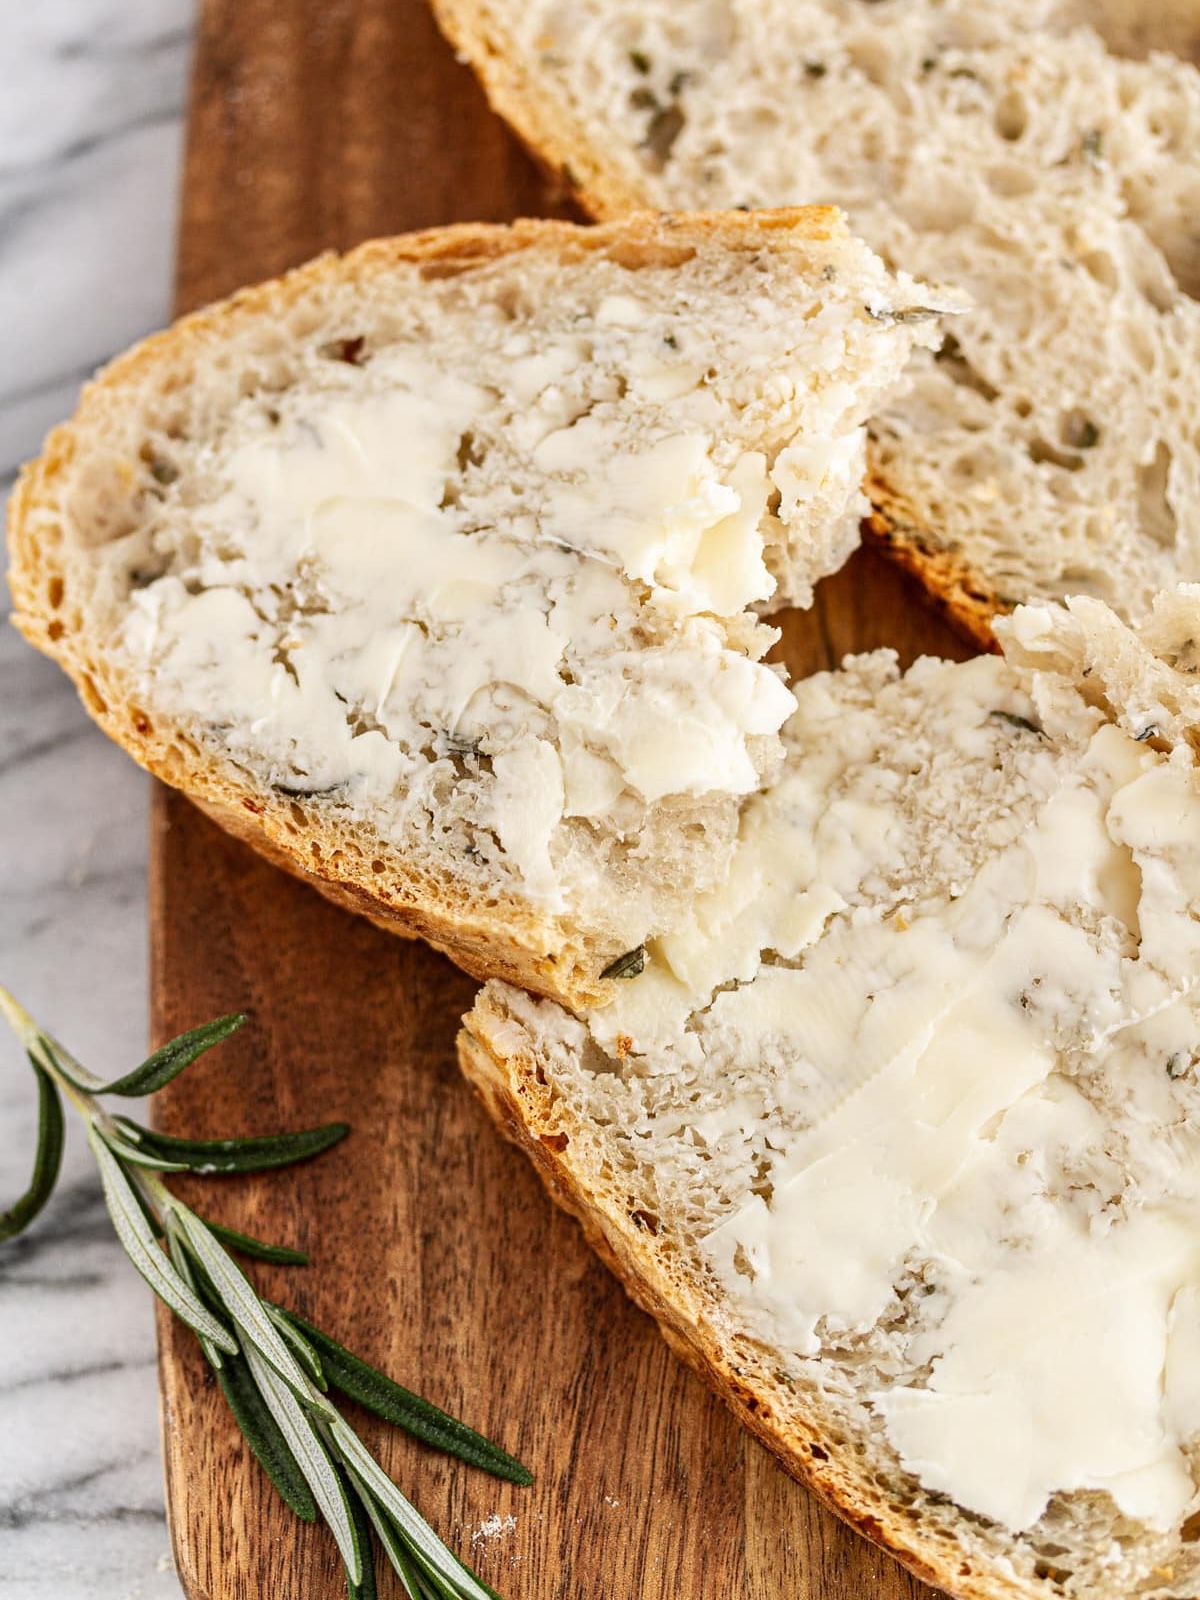
- Ideally let the bread cool until it’s just warm, then slice into it. Then I slather it liberally in salted butter. It’s just the right thing to do here. I know there is that irresistible temptation to tear right into this bread right outta the oven, while it’s hot and delicious. But if you do, be warned: It might end up a little gummy.
Variations
- Make a sourdough bread variation: Simply add fresh chopped rosemary and garlic to my no knead sourdough bread recipe or to my sourdough bread recipe for beginners. If you don’t already have an active starter, start with my sourdough starter recipe, then read all about how to feed sourdough starter before diving into more sourdough bread recipes.
- Get creative with the mix ins: Omit the garlic and lean into fresh rosemary like in my rosemary bread or add chopped sun-dried tomatoes like this sun dried tomato bread or parmesan cheese like this tomato basil bread. You can also roast the garlic whole and make this a roasted garlic rosemary bread like my cheesy garlic pull apart bread. Freshly cracked black pepper is also a nice savory addition.
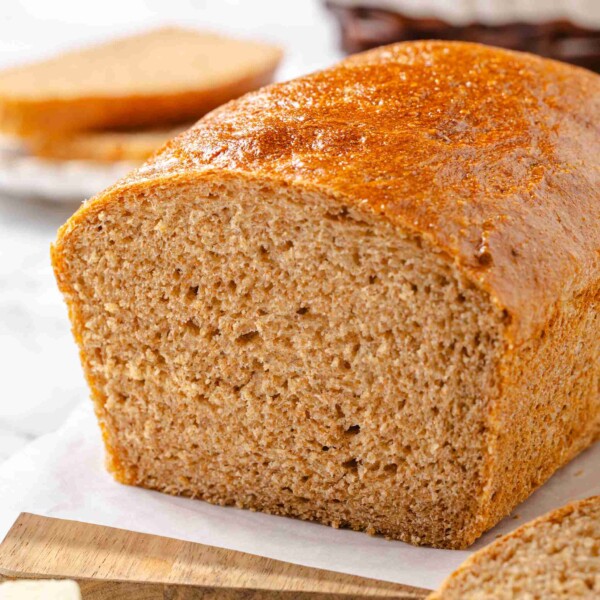
- Up the flavor and healthiness: Add some whole grains and seeds like in this whole grain seeded bread or by substituting some whole wheat flour and adding multigrain hot cereal like in my multigrain bread. It will take a little experimentation but isn’t that what baking is all about?! If you have no patience for experimenting, add fresh chopped rosemary and garlic to my peasant bread recipe and enjoy a no-knead, whole wheat bread in under 3 hours.
How to Make this Rosemary Garlic Bread Recipe
Use these instructions to make no-knead rosemary garlic bread! Further details and measurements can be found in the recipe card below.
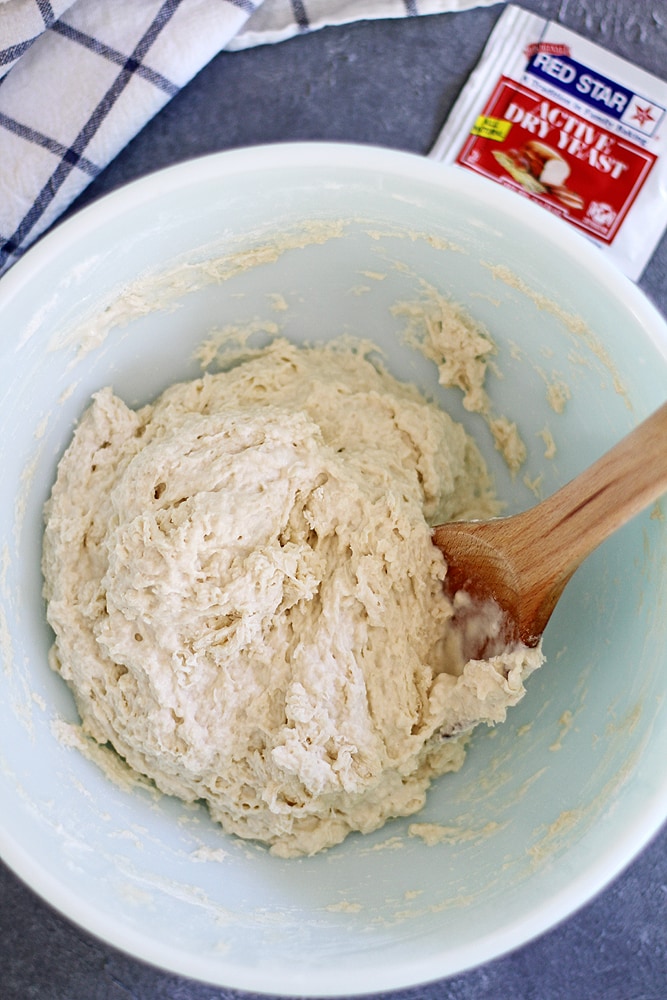

Step 1: In a large bowl, whisk flour, salt and yeast until well mixed. Pour in warm water, rosemary, and garlic. Use a wooden spoon to stir until a shaggy dough forms. The mixture will be wet and very sticky to the touch.
You can also add the rosemary and garlic with dry ingredients, but I find it easier to incorporate the garlic along with the water.
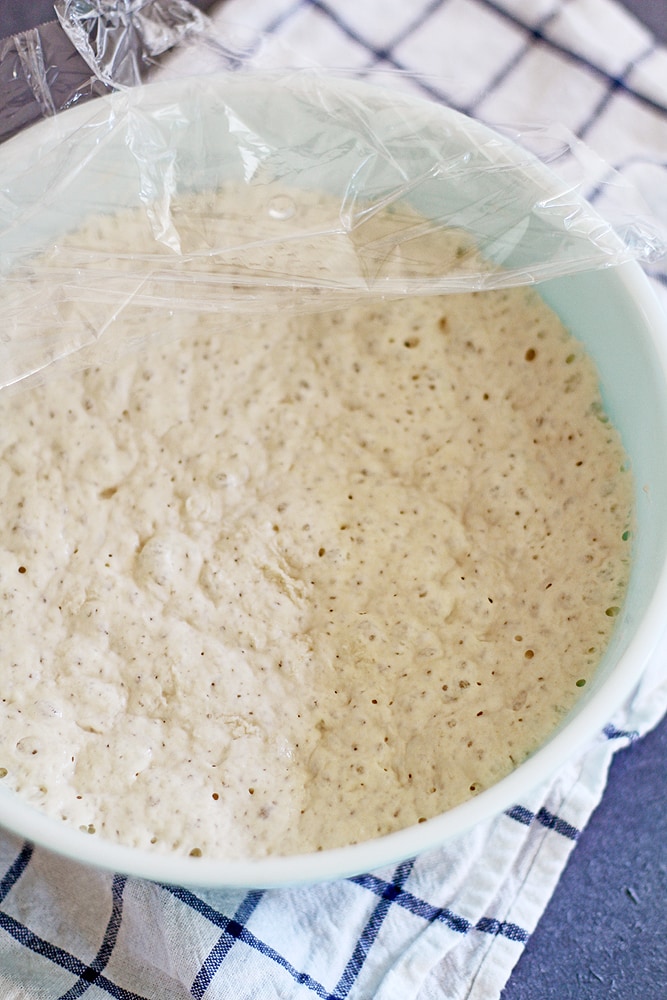
Step 2: Cover bowl tightly with plastic wrap and set aside in a warm place 8 to 18 hours until dough rises, bubbles and flattens on top.
Step 3: Heat oven to 450°F. Once oven is preheated, place a 6-quart Dutch oven (with cover) in oven 30 minutes before baking. You can also preheat the Dutch oven with the oven.
Step 4: Generously flour a smooth work surface or counter. Turn out the dough onto the floured surface with floured hands or a bowl scraper.
There is no need to degas or punch down the dough because just the act of transferring it will do that for you and you won’t get all sticky. This will make shaping easier.
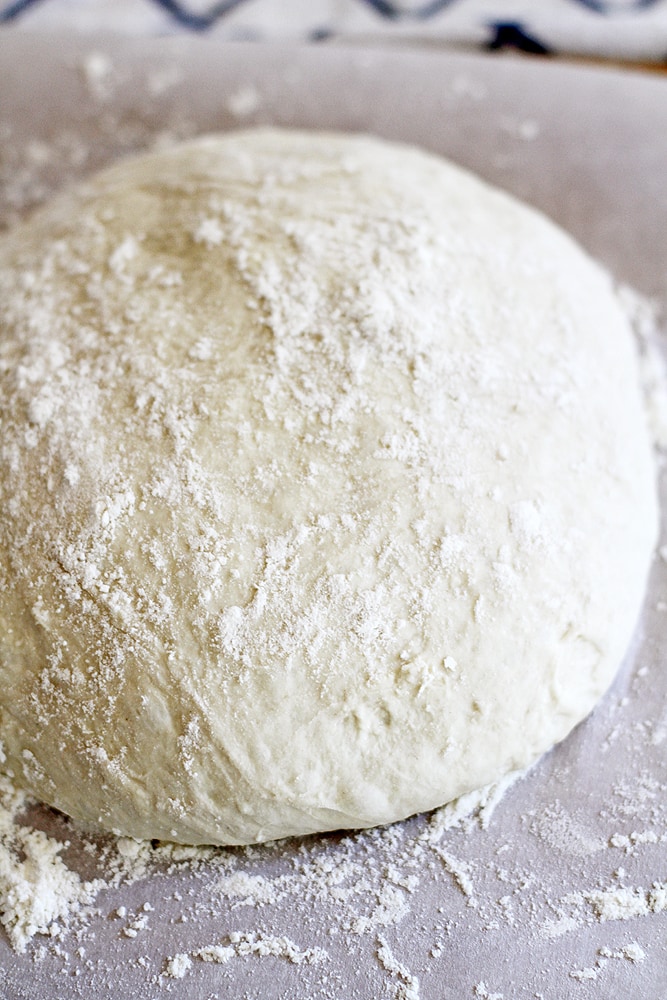
Step 5: Dust the top with more flour and working quickly, with floured hands, fold two sides in towards the center then flip over. Re-flour hands and gently shape the dough into a ball by rotating it with both of your hands and pulling it under itself.
It will not form as tight of a ball or have a smooth surface like a more developed dough such as whole wheat bread. That is expected and don’t try to force it or it will just get more and more sticky!
Step 6: Re-flour your hands and scoop up the dough and place it on a piece of parchment paper and sprinkle top lightly with flour. Top with a sheet of plastic wrap and let rest 30 minutes. Cut the parchment to be just a little larger than the bottom of your Dutch oven, as needed.
Step 7: Remove Dutch oven from oven. Uncover dough and carefully transfer to Dutch oven, with the parchment paper beneath. Place the lid on the Dutch oven and return it to oven.
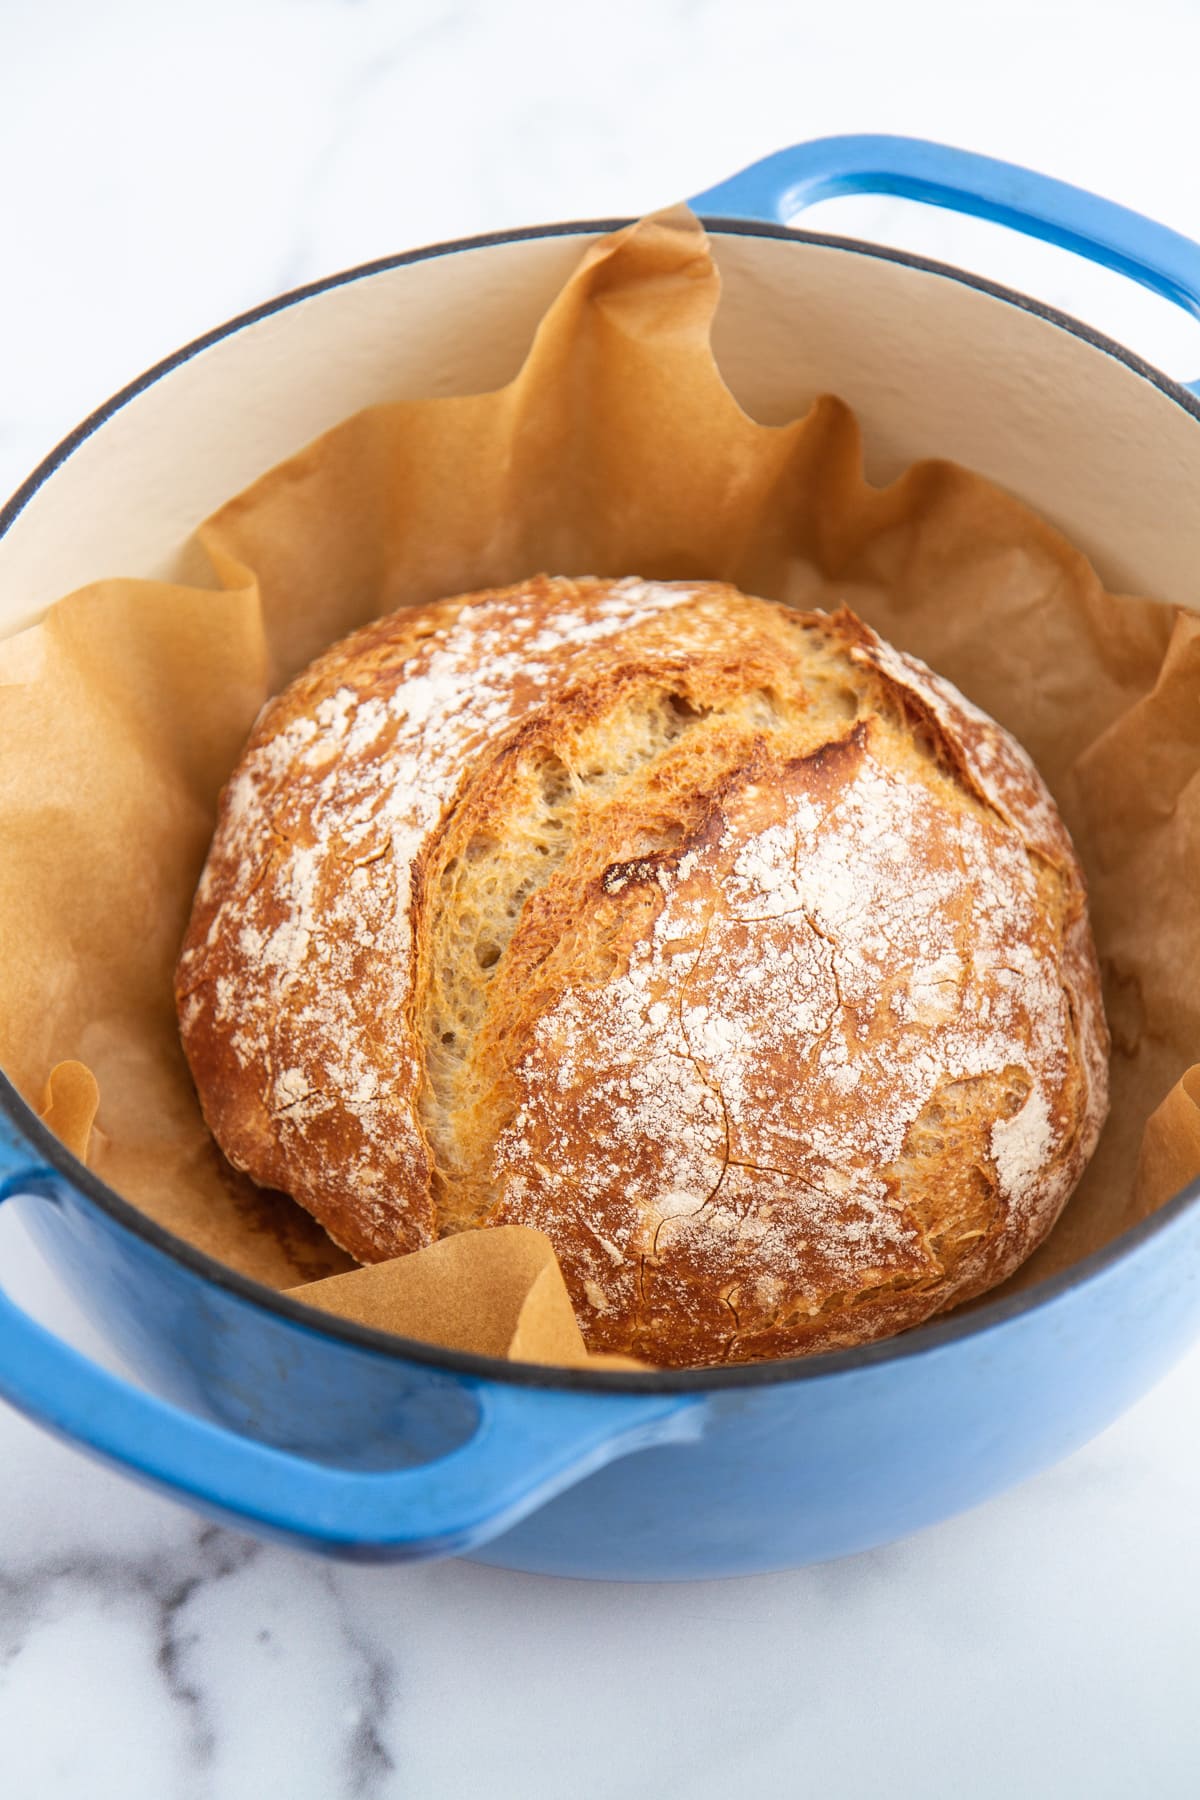
Step 8: Bake bread 45 minutes covered, then another 10 to 15 minutes uncovered until dough is baked through and golden brown on top. Cool completely before slicing, at least 1 hour.
Step 9: Slice with a sharp knife or, ideally, a serrated knife.
Recipe FAQs
To preserve the bread’s crunchy crust, you’ll need to store it at room temperature unwrapped either cut side down on a cutting board or in a bread box. You can store it in an airtight container at room temperature but it will lose the crispy crust almost immediately. Store at room temperature up to 5 days. It doesn’t keep as long as sourdough, so watch for signs of mold! I do not recommend storing in the fridge, as that will dry it out and soften it.
You can also store well wrapped in the freezer, however, I like to slice my bread before freezing so I don’t need to thaw the whole loaf at one time.
The best oven-spring, most open crumb and crusty crust will occur if baked in a Dutch oven or Challenger bread pan, but you can also preheat a baking sheet on the center rack and a large roasting pan on the bottom of the oven. When ready to bake, place the parchment paper with the scored loaf directly on the hot baking sheet and pour at least 2 quarts of hot water into the baking pan on the bottom. Close the door as quickly as possible. Release the steam after 30 minutes by opening the door.
If you haven’t sliced the loaf yet, but would like to rewarm it for serving, preheat an oven to 400° F. Place the loaf directly onto the oven rack and bake until heated through. It will take about 15-20 minutes. You can also toast a slice at a time. Reheating a partially sliced loaf will dry it out on one side.
Recommended No Knead Bread Recipes

Yeast Breads

No-Knead Breads

No-Knead Breads

Sourdough
If you enjoyed this recipe, please leave a star rating and let me know how it goes in the comments below! I love hearing from you and your comments make my day!
Rosemary Garlic Bread
Ingredients
- 3 cups all-purpose flour
- 2 teaspoons fine sea salt
- 1 teaspoon active dry yeast
- 3 tablespoons fresh rosemary, roughly chopped
- 3 cloves fresh garlic, minced
- 1 ½ cups warm water, 110°F to 115°F
Instructions
- In a large bowl, whisk flour, salt, and yeast. Pour in warm water and add rosemary and garlic. Use a wooden spoon to stir just until a shaggy dough forms – do be sure to mix until the garlic and rosemary are distributed throughout. The mixture will be wet and very sticky to the touch.
- Cover bowl tightly with plastic wrap and set aside in a warm place 8 to 18 hours until dough rises, bubbles and flattens on top.
- Heat oven to 450°F. Once oven is preheated, place a 6 quart Dutch oven (with cover) in oven 30 minutes before baking.
- Dust the top with more flour and working quickly, with floured hands, fold two sides in towards the center then flip over. Re-flour hands and gently shape the dough into a ball by rotating it with both of your hands and pulling it under itself.
- Re-flour your hands and scoop up the dough and place it on a piece of parchment paper and sprinkle top lightly with flour. Top with a sheet of plastic wrap and let rest 30 minutes. Cut the parchment to be just a little larger than the bottom of your Dutch oven, as needed.
- Remove Dutch oven from oven. Uncover dough and carefully transfer to Dutch oven, with parchment paper beneath. Cover Dutch oven and return to oven.
- Bake bread 45 minutes covered, then another 10 to 15 minutes uncovered, until dough is baked through and golden brown on top. Cool before slicing.
Notes
Flavor Tips – I do not recommend using dried rosemary or garlic in this recipe. The flavor does not come through.
Variations – Add parmesan cheese or a mix of fresh herbs like oregano, sage and thyme.
Storage – You can store this bread uncovered up to 24 hours, or in a bread box up to 2 days. Once sliced, store the bread sliced-side down on a cutting board at room temperature up to 24 hours (or in a paper bag).
Nutrition
Nutrition information is automatically calculated, so should only be used as an approximation.
 Like this recipe? Rate & comment below!
Before You Go
I hope you enjoyed this delicious rosemary garlic bread recipe. Check out all our no-knead bread recipes or just bake a loaf of quick banana bread while you wait!


I wasn’t expecting this to be that good for such an easy recipe. Mixing in the rosemary and garlic was so simple, and the dough came together beautifully on its own. The flavor blew me away! The garlic baked right into the crumb, and the crust was perfectly crisp.
I love love love a no knead bread! It is great to mix the bread and forget it. The final product is crisp and airy. I like to make it with bread flour and rosemary.