s’mores blondies
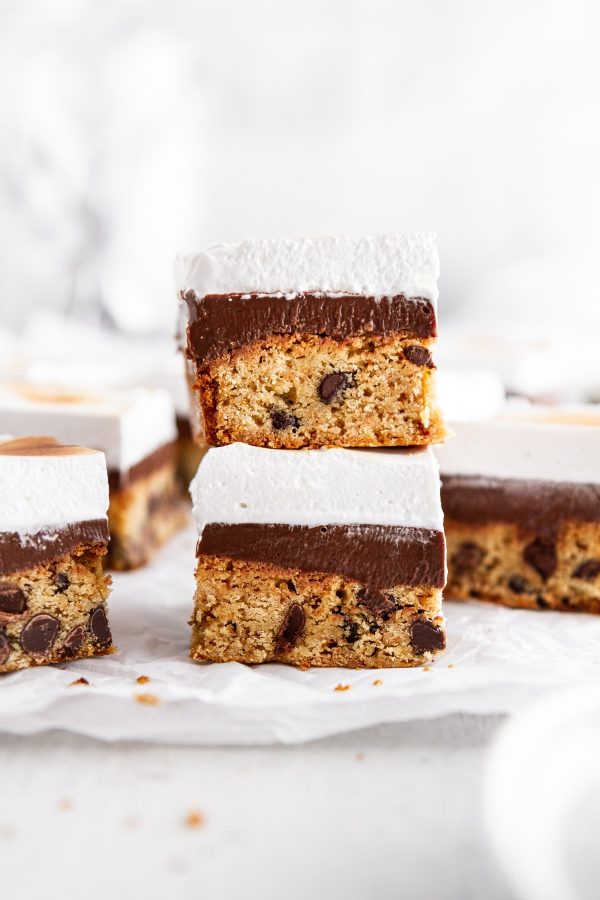
Triple-layered s’mores-flavored blondies, comin’ atcha! With a soft and chewy base of chocolate chip- and graham cracker-infused blondie bars, a middle layer of rich chocolate ganache and a pillowy topping of homemade marshmallow fluff, these bars are loaded with the classic s’mores flavors you know and love but with a fun twist! These stacked s’mores blondies are perfect for Fourth of July or any time you want something sweet this summer.
There are few things more quintessentially summer than the s’more. That sweet graham cracker, that melty chocolate, that toasty mallow — honestly, what could be better? These S’mores Blondies, that’s what. (Didn’t see that coming, did you?)
What Are S’mores Blondies?
S’mores are the perfect treat because they combine all the components of dessert goodness: Crunch, ooey-gooeyness and rich chocolatey-ness (these are all real words, trust me). And they’re easy! That’s why we save them for the kids and enjoy these s’mores blondies like the grownups we are. OK fine — the kids can have them, too.
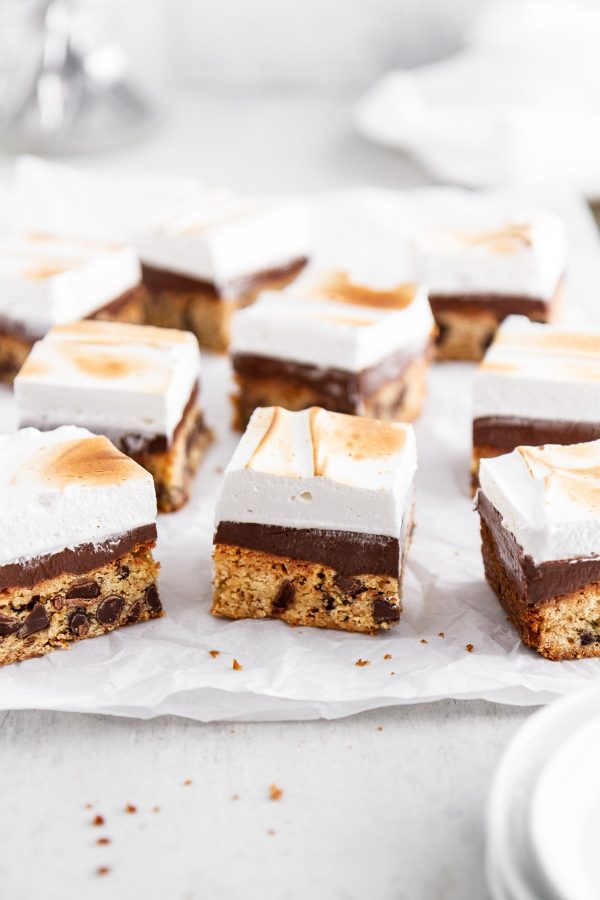
S’mores blondies are the elevated version of a s’more. They’re triple-layered dessert bars with a soft and chewy, chocolate chip- and graham cracker-loaded base that’s topped with a rich layer of chocolate ganache and finally finished with a toasted homemade marshmallow fluff. Phew. It’s OK — you can pick up your jaw from the floor now.
Like your favorite campfire treat, these s’mores blondies have all the aforementioned elements of dessert goodness, and then some. And while they take more time to make than the traditional s’more, they’re far more rewarding (and each batch makes 16 bars, so more to enjoy!).
Best Ingredients for S’mores Blondies
Since we’re going all in on the s’mores train with these bars, we might as well use the best possible ingredients so each bite is extra-tasty. Here’s what you’ll need to make these blondies:
- Melted butter, to make the blondies nice and chewy
- Brown sugar, to give the blondies a rich sweetness + softness
- Egg, for binding
- Baking powder, to give them a slightly cake-y texture
- Chocolate chips for extra chocolatey-ness
- Graham cracker crumbs for that s’mores-like flavor
Then, we have the ganache layer! You need just TWO ingredients to make this soft and rich chocolate yumminess:
- Chocolate chips
- Sweetened condensed milk (NOT evaporated milk)
Melt these together until smooth and when it sets, you get a ridiculously decadent layer of chocolate that you’ll want to eat with a spoon. But then, we add the homemade marshmallow fluff topping, which needs:
- Egg whites, for stability
- Sugar, for sweetness
- Vanilla, for flavor
- Salt, to enhance all the flavors
How to Make Homemade Marshmallow Fluff
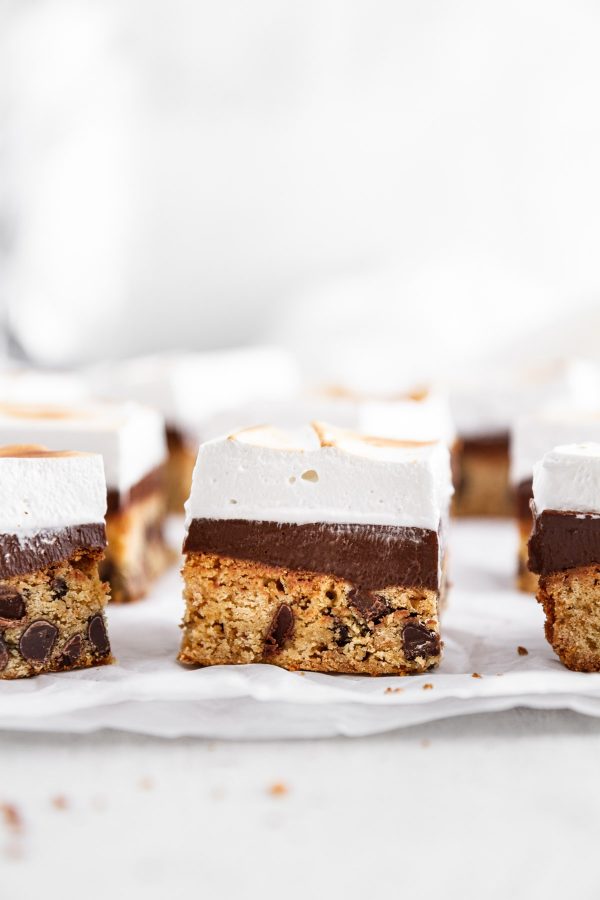
Homemade marshmallow fluff sounds intimidating, but it’s really not. And if you’ve ever tried homemade marshmallows or meringue topping, you’ll know they’re worth making from scratch. So, here’s how to do it:
- Step 1: Whisk the egg whites and sugar together in a heatproof bowl. Your stand mixer bowl is a great option, but any heatproof bowl will do.
- Step 2: Melt the sugar and whip the egg whites over a double boiler. WHOA-HO now — what is this sorcery you speak of? Relax — a double boiler is simple to make. Just heat some water in a small or medium saucepan until it reaches a simmer or just barely a boil. Then, you’ll place your heatproof bowl on top, making sure the water in the saucepan below doesn’t touch the bottom of the bowl. That’s a double boiler! (See Recipe Notes for a video link.) This technique allows your ingredients to heat and/or melt without heating them directly. You’ll whisk the egg whites + sugar constantly over the heat until the sugar is dissolved and the egg whites are foamy.
- Step 3: Using either your stand mixer with the whisk attachment or a hand mixer, beat the egg-sugar mixture well until it starts to come together into a bright-white, smooth meringue with a glossy sheen. You’ll want to beat it until soft peaks form on the tip of the whisk (aka, when you lift the whisk out of the bowl and the peak of the meringue folds over on itself, but still holds a shape instead of melting down).
- Step 4: Add the vanilla and salt, and continue beating the meringue until stiff peaks form (aka, when you lift the whisk out of the bowl and the peak of the meringue stays upright and holds its shape). At this point, your marshmallow fluff should be nice and white and sturdy and fluffy and glossy. That’s when you know it’s done!
- Step 5: Spread the fluff on top of your ganache-topped bars. Toast with a kitchen torch, if desired, and chill for a couple hours in the fridge so the fluff has a chance to set.
Tips for the Best S’mores Bars
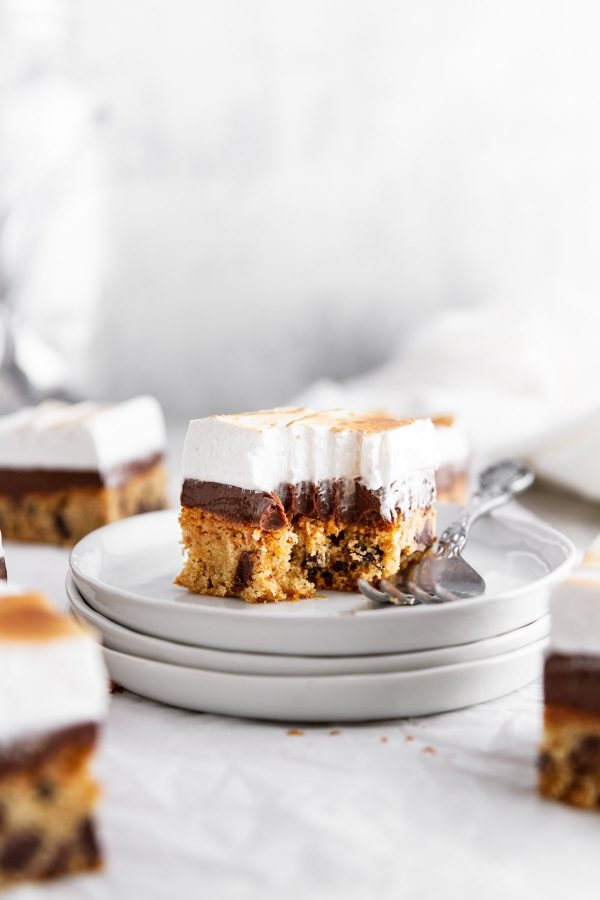
With the Fourth of July just around the corner, I know you’ll want to make these bars to celebrate. So let’s cover some quick tips to make sure your s’mores blondies are the best of the best:
- To get the bars out of the baking pan easily, create a parchment paper sling so you have handles to lift them out. Just cut a piece of parchment a few inches longer than the pan so there’s some overhang on two sides. When the bars are ready to cut, use the parchment to lift them out.
- I know it’s hard to be patient, but be sure to allow each layer to set so you can get nice, clean layers in each bar.
- If that homemade marshmallow fluff just sounds too intimidating or fussy, you can certainly use premade/storebought marshmallow fluff instead! The flavor will vary slightly, and you won’t be able to get as clean of cuts in your bars, but it’s a good alternative in a pinch.
- Be sure to store any leftover bars in the fridge as soon as you’re done serving. The fluff tends to start melting if it sits out too long.
Bakers, friends, I hope you love these blondies as much as we do. I wish you all a safe, happy and s’mores blondie-filled holiday!
Print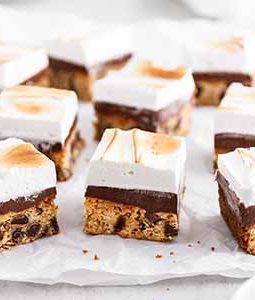
S’mores Blondies
- Prep Time: 45 minutes
- Cook Time: 35 minutes
- Total Time: 5 hours 20 minutes
- Yield: 16 bars 1x
- Category: Dessert
- Method: Bake
- Cuisine: American
Description
These s’mores blondies are a fun and tasty twist on your favorite campfire treat! A soft and chewy blondie base is loaded with chocolate chips and graham cracker, then topped with rich chocolate ganache and a cloud-like homemade marshmallow fluff. They’re basically destined to be your new fave summertime dessert.
Ingredients
For the blondies:
- 8 tablespoons (1 stick) unsalted butter, melted
- 1 cup brown sugar
- 1 egg
- 1 teaspoon vanilla
- 1/4 teaspoon sea salt
- 1 cup all-purpose flour
- 3/4 teaspoon baking powder
- 1 cup semisweet chocolate chips
- 1/2 cup coarsely crushed graham crackers
For the ganache:
- 1 cup semisweet chocolate chips
- 1 cup sweetened condensed milk
For the marshmallow topping:
- 2 egg whites
- 1/2 cup granulated sugar
- 1 teaspoon vanilla
- 1/4 teaspoon sea salt
Instructions
- First, make the blondies: Heat oven to 350°F. Line an 8×8-inch square baking pan with parchment paper, long enough to create “handles” on two sides. Spray paper and sides of baking pan with cooking spray.
- In a medium bowl, whisk melted butter and brown sugar until mixture is smooth. Whisk in 1 egg, 1 teaspoon vanilla and 1/4 teaspoon salt until well combined. Use a spatula or wooden spoon to stir in flour and baking powder, then stir in 1 cup chocolate chips and graham cracker crumbs until just combined.
- Press mixture evenly into bottom of prepared baking pan. Bake 20 to 25 minutes or until blondies are golden and a toothpick inserted in the center comes out clean. Cool completely in pan, about 1 hour.
- Next, make the ganache: In a small saucepan over medium-low heat, stir 1 cup chocolate chips and sweetened condensed milk, 4 to 5 minutes, until mixture is fully melted and smooth. Carefully pour chocolate mixture over fully cooled blondies in baking pan; spread to cover evenly. Transfer baking pan to fridge until ganache is fully set, about 1 to 1 1/2 hours.
- Finally, make the marshmallow topping: In the bowl of a stand mixer or in a large heatproof bowl, whisk 2 egg whites and sugar until combined. Place bowl over a medium saucepan with simmering or just barely boiling water on the stove top (to create a double boiler); be sure the water doesn’t touch the bottom of your bowl. Continue to whisk egg-sugar mixture constantly, about 5 minutes, or until sugar is fully dissolved and eggs are foamy. Transfer bowl to stand mixer fitted with a whisk attachment; beat mixture 10 to 12 minutes on medium-high speed until soft peaks form (if you’re not using a stand mixer, use a hand mixer to beat the mixture in your bowl to soft peaks). Add 1 teaspoon vanilla and 1/4 teaspoon salt. Continue to beat mixture on medium-high speed for about 5 to 7 minutes or until mixture is glossy and smooth and stiff peaks form.
- Spread marshmallow fluff evenly over chilled ganache topping; toast with a kitchen torch, if desired. Chill bars in fridge for 2 hours to allow fluff topping to fully set. Carefully remove bars from pan using parchment “handles.” Cut into bars.
- Store leftover bars covered in refrigerator for up to 3 days.
Notes
- If you’re not interested in making homemade marshmallow fluff, feel free to use the storebought version. Note that the premade fluff won’t set up as stiffly as the homemade fluff, so you might not get as clean of cuts with your bars.
- To ensure clean-cut bars, use a very sharp knife and clean it completely after each cut.
- Don’t have a kitchen torch? I highly recommend getting one not only for this recipe, but also if you want to make creme brulee, lemon meringue pie, etc. It’s a nifty gadget to have! If you don’t have or don’t want to buy a kitchen torch, I would not recommend placing these bars under a broiler; the fluff and ganache will melt before the marshmallow is fully toasted. Just serve the bars un-toasted; they’re still tasty that way!

These look amazing! I usually don’t have much time for blondies but I can’t wait to make these.
Rachel, Thanks! These are worth the time. 😉
great mash up of two things that I love, very creative and thank you!