
A Quick Look At The Recipe
This is a brief summary of the recipe. Jump to the recipe to get the full details.
Prep Time
1 hour
Cook Time
13 minutes
Chilling Time
30 minutes
Total Time
1 hour 13 minutes
Servings
66 cookies
Difficulty
Moderate
Calories *
118 kcal per serving
Technique
Make dough, color dough, roll and and shape, layer doughs, chill, slice, chill and bake.
Flavor Profile
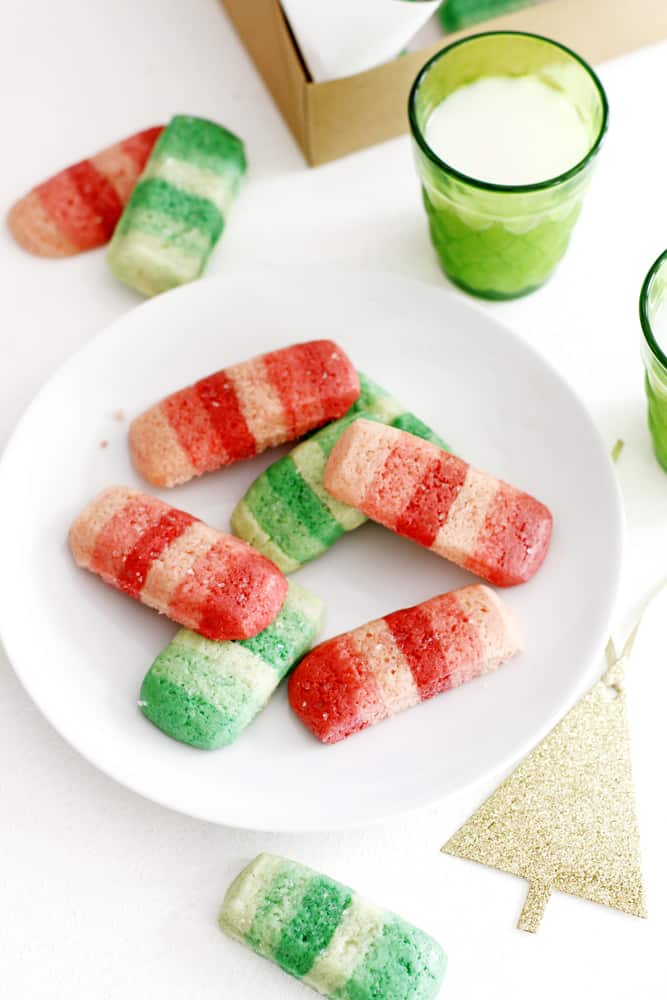
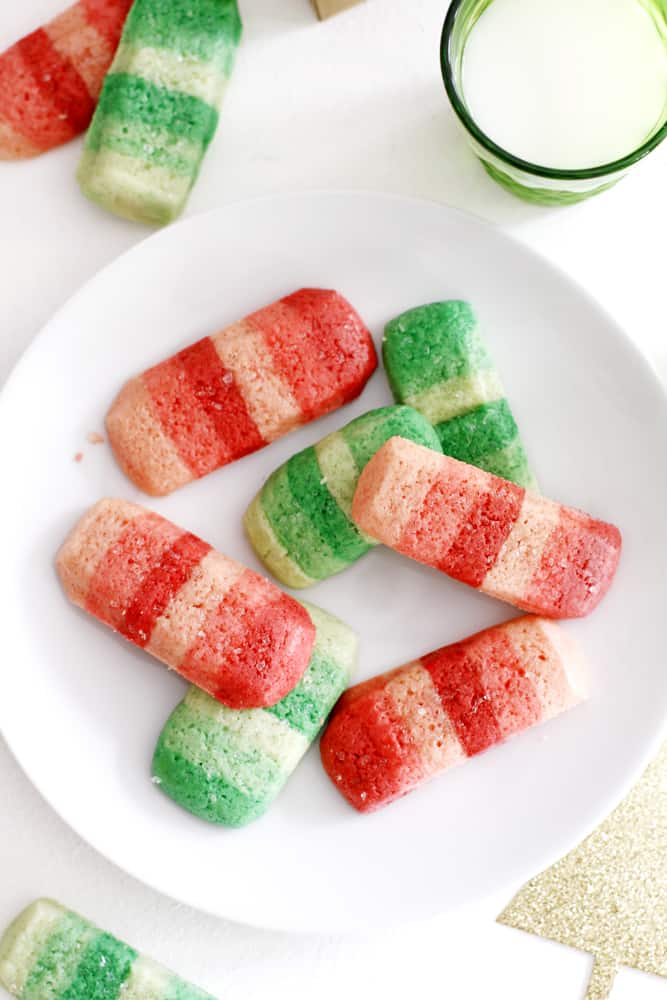
Peppermint slice and bake cookies.
* Based on nutrition panel
I love these cookies! I have made them two years in a row now! I also make them for Hanukkah, flavor them with vanilla, and color them ombre blue. They are always such a big hit. ⭐⭐⭐⭐⭐
Mara
Today is the day! The day of ALL THE COOKIES. It’s the Great Food Blogger Cookie Swap and these peppermint slice and bake cookies of an ombré nature are my contribution. It’s classic meets newfangled (is ombré even newfangled anymore? Do people even say “newfangled” anymore? My age is showing). It’s Christmas meets cookie meets get in my belly meets YUM.
The inspiration for this recipe comes from the cover of the December 2015 issue of Bon Appétit, which literally made me gasp with glee when I first saw it. The recipe in that issue for those particular cookies sounds pretty fantastic, but I needed a cookie that would hold up well being shipped cross-country, ergo the peppermint slice and bake route. I assure you, though, nothing was compromised in that decision.
I baked up a ton (no seriously, like A TON.) of these cookies and sent them on their merry way to Charles, Amber and Christy, and brought a few extra to a cookie exchange that weekend. The rest went to work with my husband, and a few also made their way into my belly. For quality control purposes, of course.
To me came giant chocolate cookies from Robin, oatmeal pumpkin cookies from Kathleen and gluten free no-bake dreamsicle cookies from Heidi. All of them are incredibly good and I can’t stop eating them, even though I’ve stashed them in the back of the freezer in hopes to keep myself from going full-on Cookie Monster. It has not gone well.
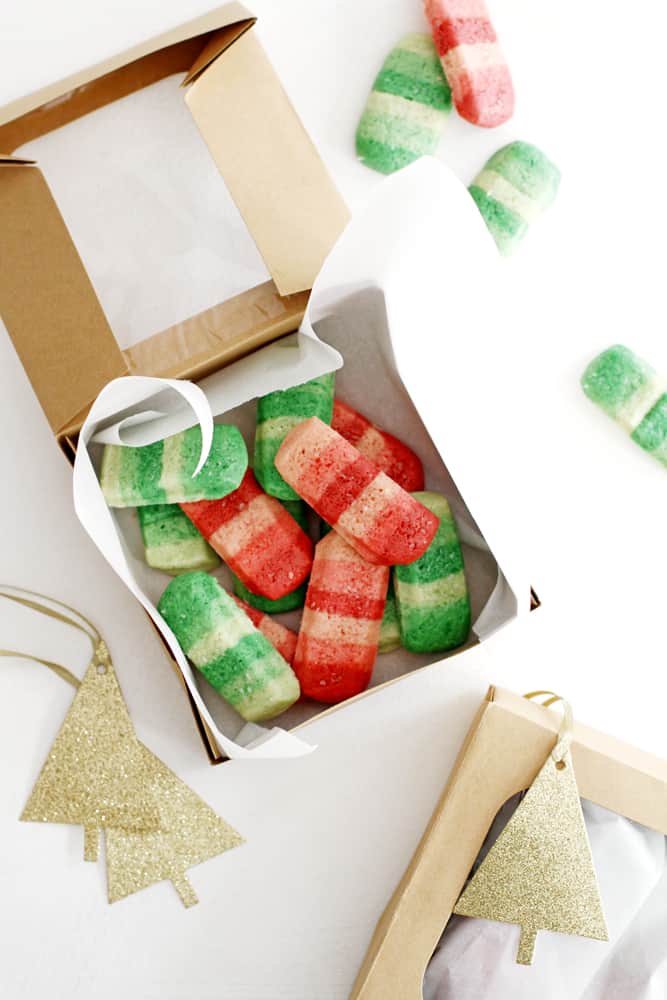
My contribution to the Great Food Blogger Cookie Swap, these cookies, requires a little bit of love and patience and time to put together, but they are worth every minute and bit of energy. Because in the end, you get a cookie so festive, so delicately peppermint-y, so delightfully ombré that you can’t help but share them with others. But keep some for yourself too, obviously. After all that hard work, you certainly deserve one or five.
So can we have this cookie swap, like, once a month? KTHANKSBYEEEEE.
P.S. Thanks so much to Julie and Lindsay for organizing this amazing swap to raise money for Cookies for Kids’ Cancer, and the 475 (!!) bloggers who participated this year. xo
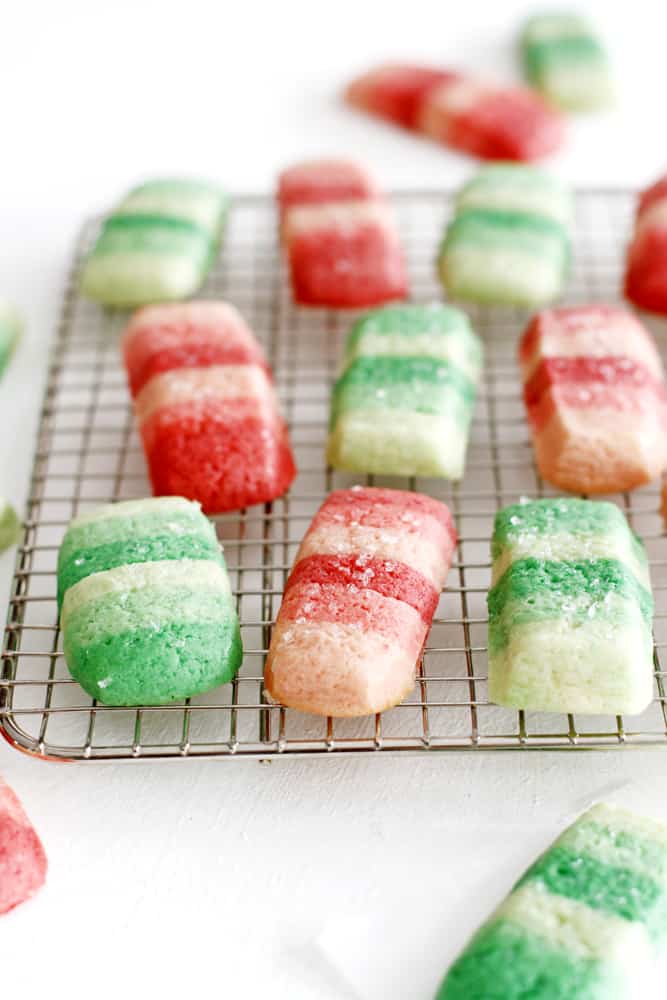
Ombré Peppermint Slice and Bake Cookies

Ingredients
- 2 cups granulated sugar
- 2 cup unsalted butter, room temperature
- ½ cup milk
- 2 teaspoons vanilla
- 2 teaspoons peppermint extract
- 2 eggs, lightly beaten
- 6 cups all-purpose flour
- 2 teaspoons baking powder
- 1 teaspoon salt
- Red and green food coloring, gel or liquid
- 1 egg white beaten, for egg wash
- Sparkling sugar, for topping (optional)
Instructions
- In very large bowl, cream sugar and butter until light and fluffy. Add milk, vanilla, peppermint extract and eggs; stir to combine. Add flour, baking powder and salt. Stir until just combined.
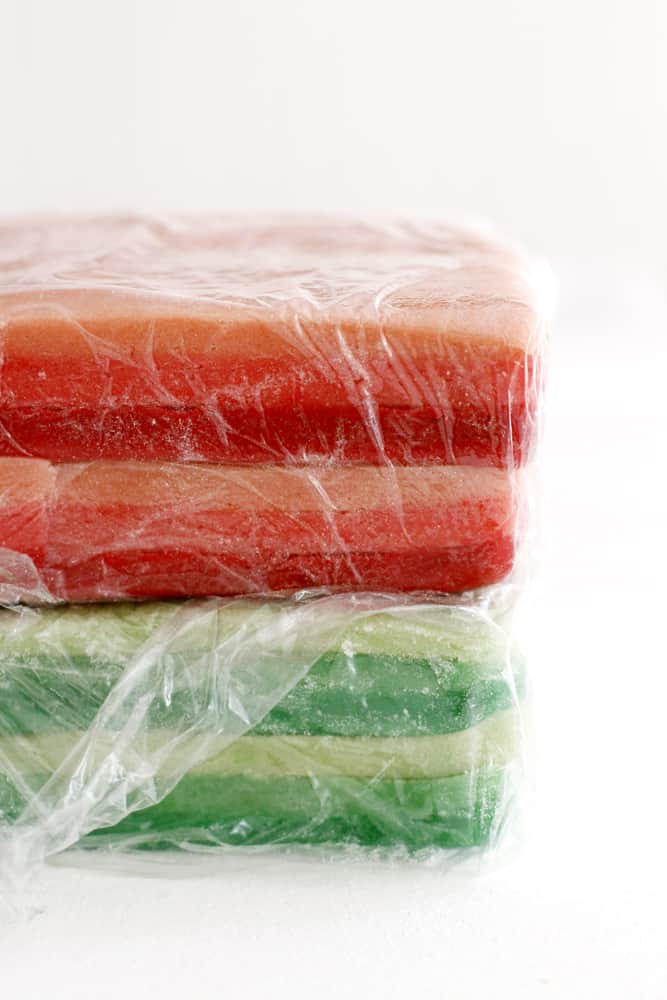
- Divide dough into 6 equal pieces; place each piece in separate small bowl. Dye 1 piece light green, another piece slightly darker green and another even darker green. Dye another piece light red, another piece slightly dark red and another even darker red.* Shape each piece into 7-by-7-inch square; wrap in plastic wrap and refrigerate at least 4 hours.
- Unwrap chilled dough and place on lightly floured surface. Starting with lightest red dough, brush top of dough square lightly with water. Top with slightly darker red dough, lining up edges. Press down slightly to adhere dough. Brush top of dough square lightly with water, then top with darkest red dough, lining up edges. Press down lightly to adhere dough. Cut dough in half, then brush top of one half with water. Top with other half, lining up edges, and press down firmly to approximately 4-inch tall rectangle. Wrap dough in plastic wrap and refrigerate 30 minutes. Repeat with green dough.
- Heat oven to 375 degrees F. Line baking sheets with parchment paper.
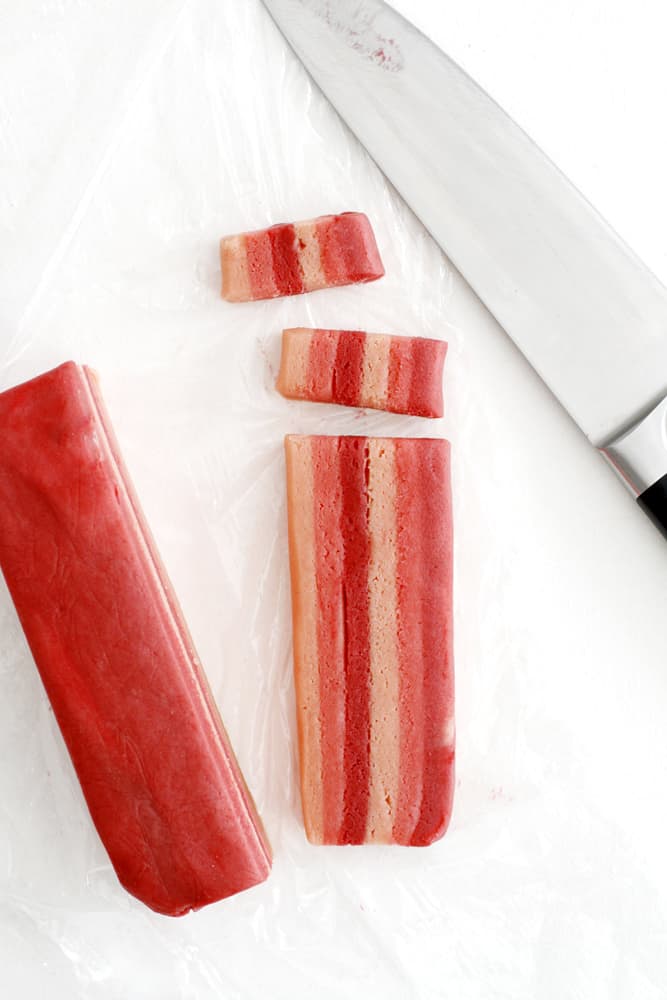
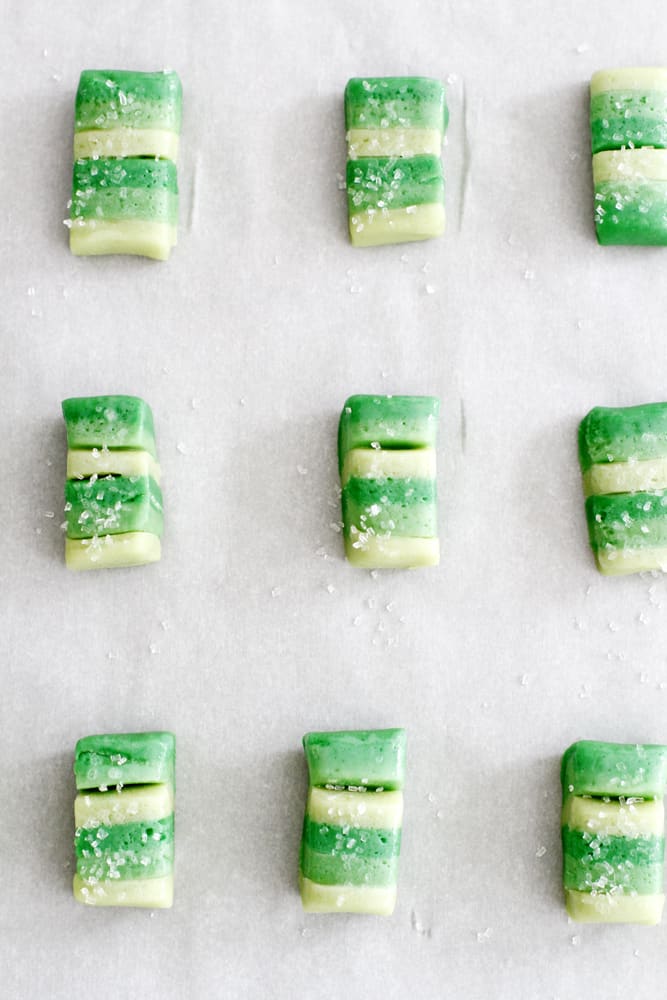
- Unwrap chilled dough and place on lightly floured surface. Using sharp knife, trim edges of both dough rectangles so edges are completely straight. From red dough, cut 1/2-inch strip lengthwise. Lay flat and cut into 1/2-inch strips/rectangles widthwise. Place cookies 2 inches apart on prepared baking sheets. Repeat with green dough. (Discard trimmed dough pieces or shape into spirals and bake with cookies.)
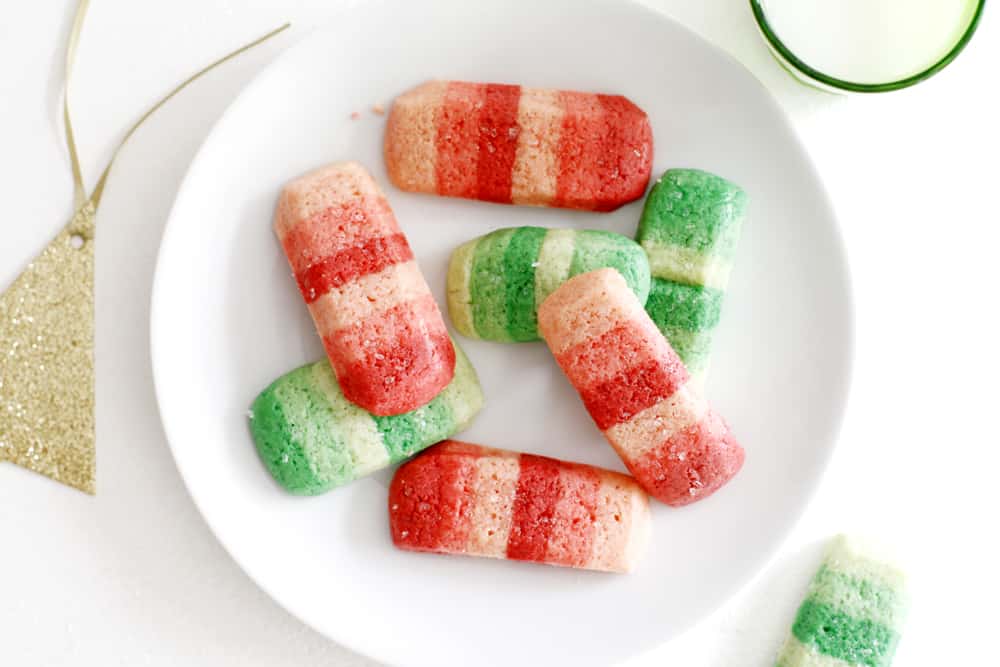
- Chill cookies in fridge 20 minutes or freezer 10 minutes, then brush tops with egg wash. Sprinkle with sparkling sugar, if desired. Bake 13 to 15 minutes until edges are set. Cool on baking sheet 5 minutes, then transfer to cooling rack to cool completely. If desired, trim edges of fully cooled cookies for straight edges.
Notes
Nutrition
Nutrition information is automatically calculated, so should only be used as an approximation.
 Like this recipe? Rate & comment below!


I love these cookies! I have made them two years in a row now! I also make them for Hanukkah, flavor them with vanilla, and color them ombre blue. They are always such a big hit.
These are really fun! I made a batch and when stacking the dough I had about 2” in height (recipe says it should be 4”). Typo? They are so pretty & tasty! Thanks for sharing.
Susan, so glad you liked them! It’s been awhile since I’ve made these so I’ll have to double-check on that height, but in any case, I’m glad they turned out well for you! xo
Sue — Of course! You can swap the peppermint extract for 1 teaspoon vanilla extract. That should take care of it. 🙂
Question–I do not like to make peppermint flavored cookies because I always give assorted gift tins, and I find that if I use peppermint, everything smells of peppermint.
Do you think these cookies would work with almond flavoring, or do you have other suggestions?
These cookies are truly amazing! I just had a run in with a slice and bake cookie – it was a fail, so I think it’ll be awhile before I try these! I’ll admire yours until then 🙂