
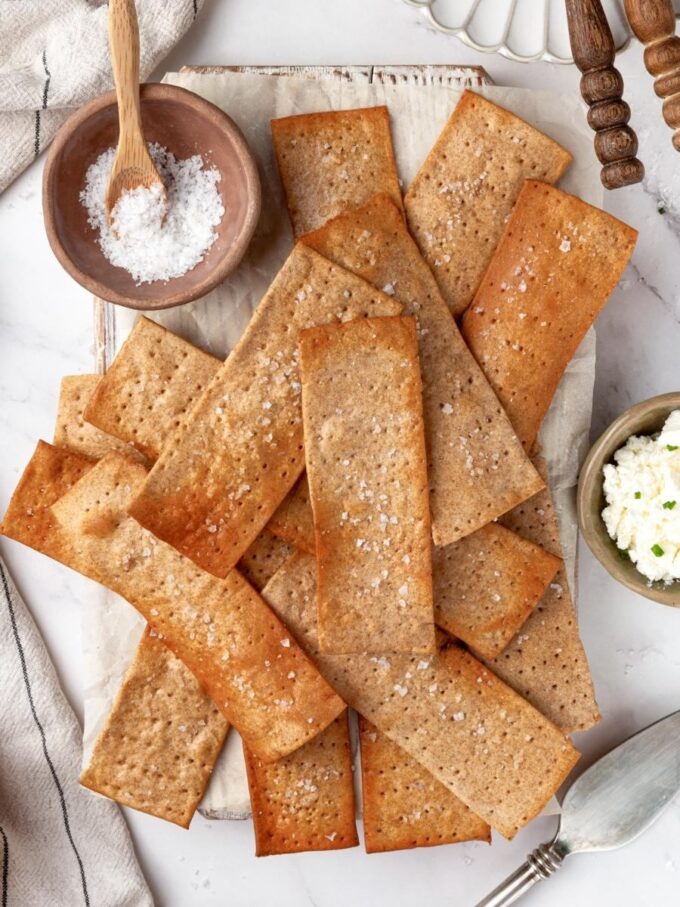
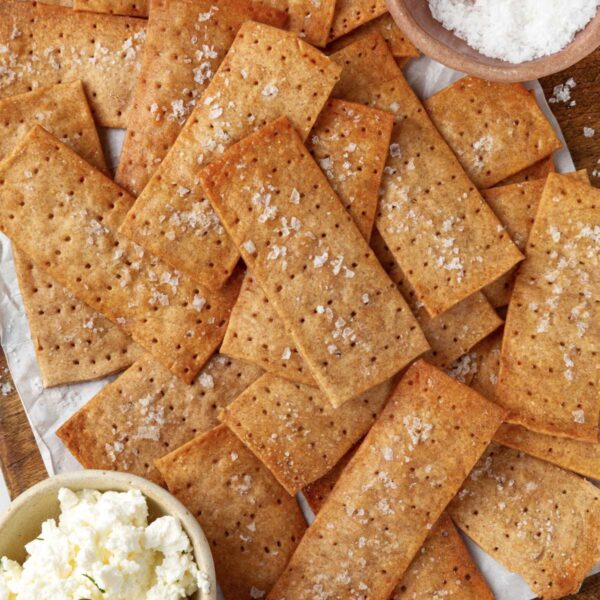
Swedish Knäckebröd is a thin, crispy rye crispbread with a deep, earthy flavor and a satisfying crunch that holds up to any topping you put on it.
A Quick Look At The Recipe
This is a brief summary of the recipe. Jump to the recipe to get the full details.
Prep Time
30 minutes
Cook Time
25 minutes
Proof/Rest Time
1 hour
Total Time
1 hour 55 minutes
Servings
12 crackers
Difficulty
Intermediate
Calories *
101 kcal per serving
Technique
Roll ultra-thin, fork-tine poking, bake in batches
Flavor Profile
Rustic rye, buttery, salty, lightly crisp
* Based on nutrition panel
I was nervous about getting the dough thin enough but followed the visual cues in the recipe and they came out perfectly crisp all the way through. Absolutely love the flavor of the dark rye.
⭐⭐⭐⭐⭐
Petra
Why You Will Love This Recipe
- Genuinely crisp texture, every time. Rolling the dough as thin as possible is the key, and this recipe walks you through exactly how to do it. Thin dough crisps all the way through in 12 to 15 minutes without any chewy spots in the center.
- No special equipment needed. A rolling pin, two forks, and a pizza wheel or chef’s knife are all it takes. If you already make sourdough discard crackers, you have everything you need for these too.
- Real rye flavor without complexity. Dark rye flour does the heavy lifting here, and a brush of melted butter plus flaky sea salt brings the flavor together. This is a lean dough by design, which lets the rye shine rather than getting buried under sweeteners or spices.
If you’ve never made homemade Swedish knäckebröd before, you’re in for a treat—these rye crispbreads are rustic, deeply flavorful, and so satisfyingly crunchy. I’ve tailored this recipe for the everyday baker, so you don’t need any fancy equipment—just a fork, a rolling pin, and a little patience for rolling the dough ultra-thin.
The brush of butter and sprinkle of flaky salt on top is what takes these over the edge, and I promise, it’s worth every minute. These are the kind of crackers I reach for on a cheese board or alongside soup, and they store well enough to make a double batch worth the effort. If you love baking with rye, my rye bread recipe or this sourdough rye bread (coming soon!) uses the same flour in a completely different way and is a wonderful next project.
Ingredients & Substitutions
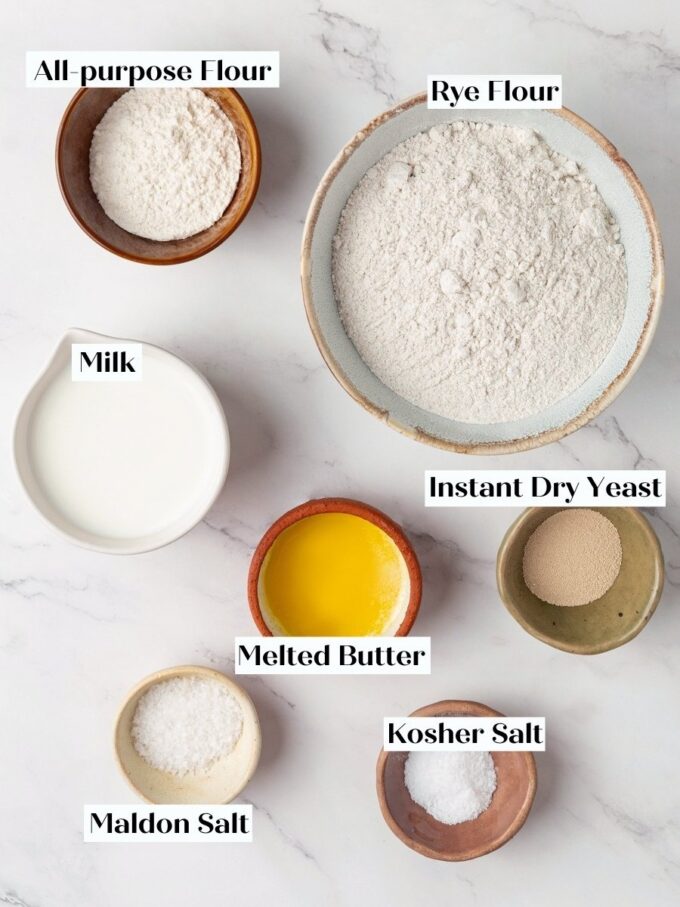
- Dark Rye Flour: This is the foundation of the recipe, giving knäckebröd its robust, nutty, earthy flavor and the dense, crispy structure that holds together under toppings. Because rye flour has very little gluten compared to wheat flour, it produces a cracker that snaps cleanly rather than bending, which is exactly what you want here.
- All-Purpose Flour: A small amount keeps the dough just pliable enough to roll paper-thin without tearing. It contributes almost nothing to flavor, but it makes a real difference in workability.
- Instant Dry Yeast: Provides a subtle lift that keeps the crispbread from being completely dense and flat. Pre-hydrating it in the milk before adding it to the flour gives it the moisture it needs to activate without throwing off the dough’s hydration. If you want to make these with natural yeast check out this sourdough crispbread!
- Kosher Salt: Seasons the dough from the inside out and balances the assertive earthiness of the dark rye. Kosher salt is less concentrated than table salt, so if you substitute table salt, use about half the amount called for.
- Milk: Adds just enough fat and richness to round out the rye’s strong flavor and keeps the dough pliable enough to roll thinly. Using whole milk is worth it here. Substituting water reduces the richness noticeably and can make the dough harder to handle.
- Flaky Sea Salt: Sprinkled over the top just before baking, it adds bursts of salinity and a delicate crunch on the finished cracker. Maldon is my go-to, though any coarse flaky salt works. If you love the combination of salt and crunch in a cracker, my whole wheat crackers are another recipe worth bookmarking.
- Butter: Brushed on just before baking, melted butter gives the crackers a golden color and brings the flavor together in a way that plain dough simply cannot. Omitting it produces a noticeably paler, less flavorful crispbread.
Variations for Swedish Knackebrod
- Seeded Crust. Press a tablespoon of sesame seeds, caraway seeds, or poppy seeds into the surface of each piece after rolling and before poking with the forks. The seeds toast slightly in the oven and add a layer of texture and flavor that plays well against the dark rye. You can also use the seed mix from my whole grain seeded bread or use my everything bagel seasoning!
- Round Traditional Format. Roll and cut the dough into rounds with a hole punched in the center instead of rectangles, which is the classic Swedish shape. The bake time stays the same; the shape simply makes them feel more ceremonial on a cheese board.
- Herb and Garlic. Mix half a teaspoon of dried thyme or rosemary and a pinch of garlic powder into the dry ingredients before adding the milk. The herbs mellow as they bake and give the finished crackers a savory, aromatic edge without overpowering the rye.
- Longer Cracker Format. Instead of the 1-by-4-inch cuts, roll each piece into a long, narrow strip roughly the width of a cracker but as long as the parchment allows. Keep the width under 3 inches to make sure the center bakes fully.
Professional Tips for Perfect Swedish Knackebrod
- A kruskavel rolling pin is worth it if you bake these often, but two forks work perfectly. A notched kruskavel rolling pin pokes and textures the dough in a single pass, which is a real time-saver if you make knäckebröd regularly. For an occasional batch, hold a fork in each hand and work quickly across the surface, pressing the tines in at a slight angle. A meat tenderizer also does the trick if that is what you have on hand.
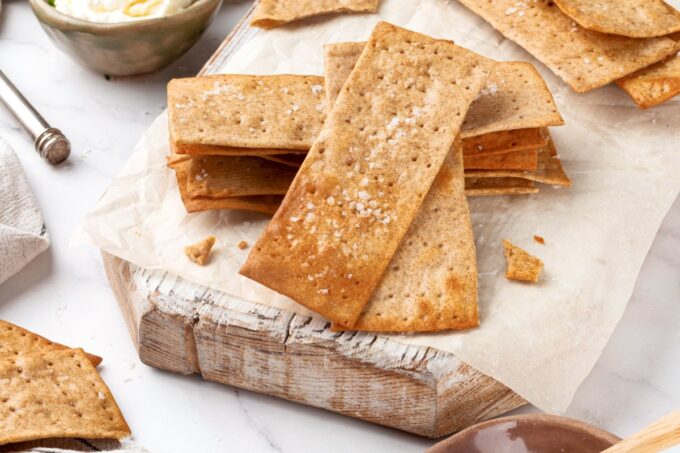
- Thin is everything. Roll each piece as thin as you possibly can, not just thin. Thick crackers stay chewy in the center no matter how long you bake them, because the edges overbrown before the interior dries out. When the dough starts sticking to the rolling pin, lay a second sheet of parchment on top and keep rolling right through it.
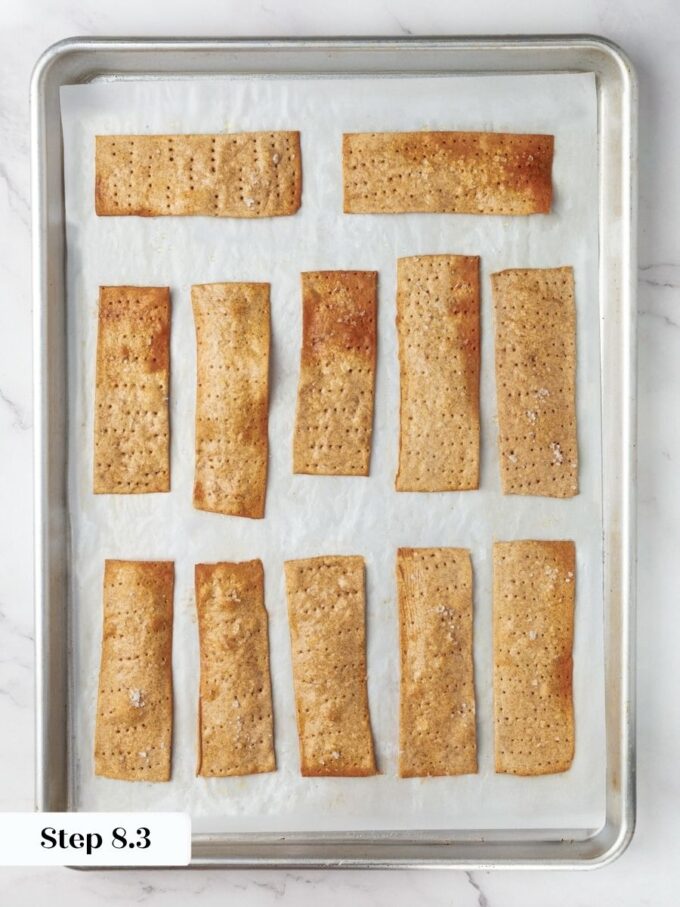
- Bake until golden brown and do not pull them early. The crackers should be a deep, even golden brown before they come out of the oven. They will feel slightly soft when hot, which is normal, but if they are still pale at 15 minutes, give them another two or three minutes. Underbaking is the single most common reason knäckebröd comes out of storage soft and disappointing.
- Press flat to prevent warping. After brushing with butter and sprinkling with flaky salt, lay a second sheet of parchment directly on top of the crackers and weight it down with a second rimmed baking sheet. This keeps them perfectly flat as they bake, though you will need to lift the top sheet partway through to check for color and doneness.
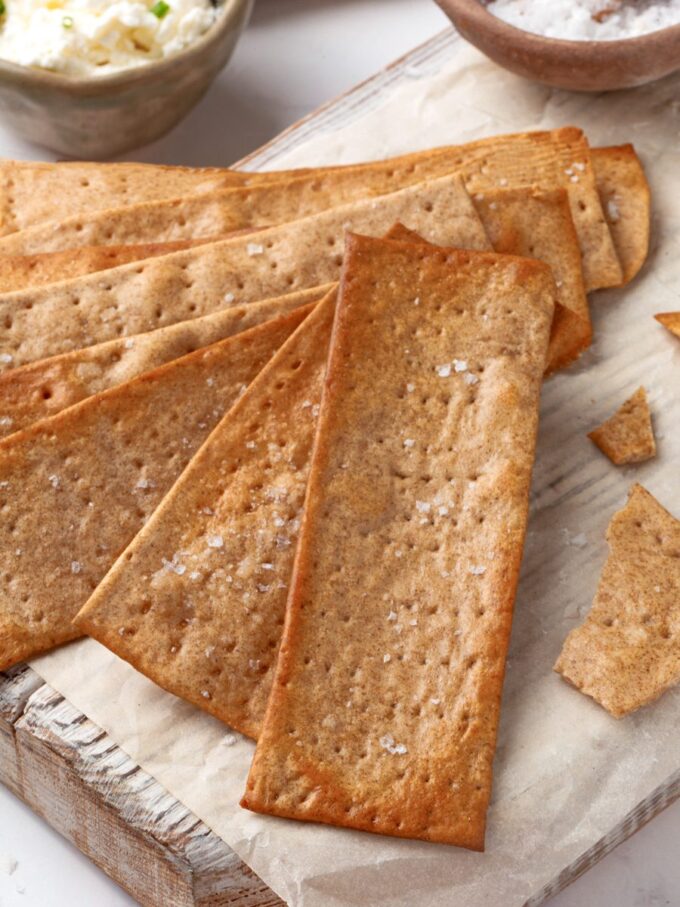
How to Make Swedish Knackebrod
Use these instructions to make crisp, rye-forward Swedish Knäckebröd with a satisfying snap and a deeply savory finish from butter and flaky salt. Further details and measurements can be found in the recipe card below.
Make the dough
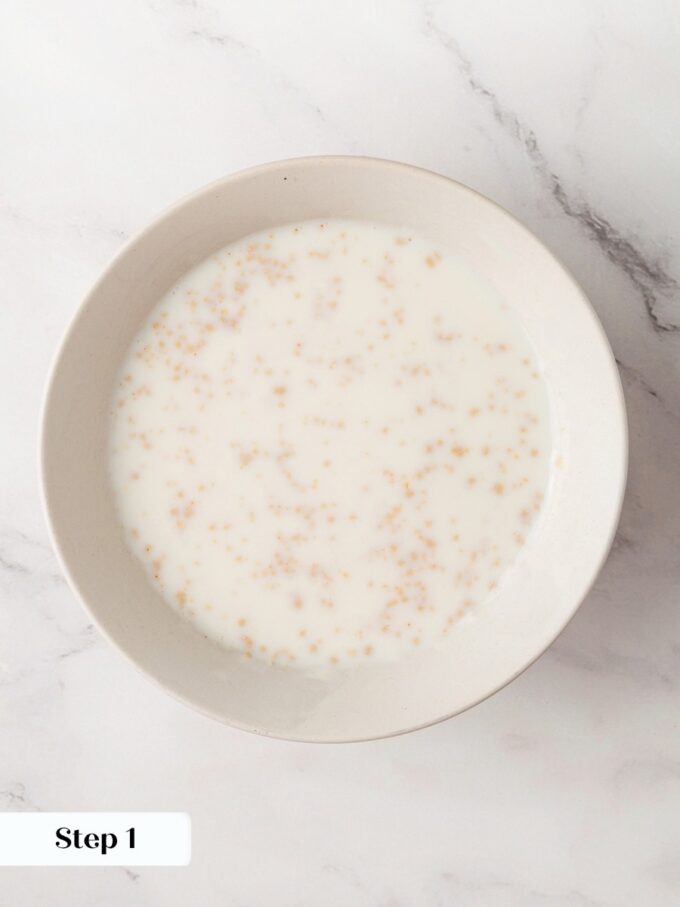
Step 1: Mix the Yeast and Milk. Pour the milk into a cup or small bowl, add the instant yeast, and whisk or stir with a fork until combined. The milk can be cold or room temperature. The mixture will look thin and a little cloudy, which is completely normal. (photo 1)
Pre-hydrating the yeast in the cold milk gives the instant yeast the moisture it needs to activate without throwing off the hydration of the dough.
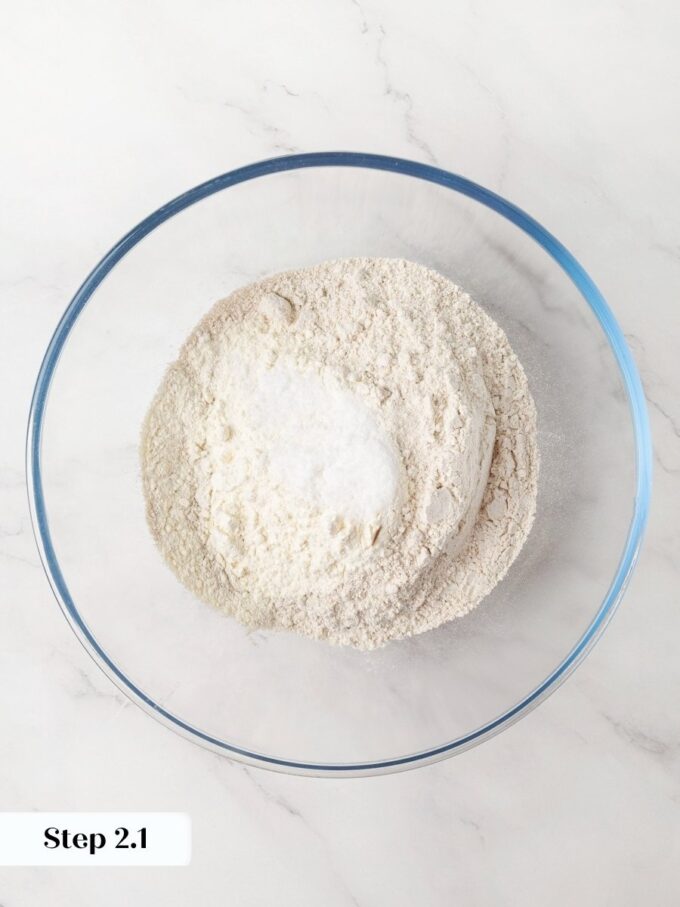
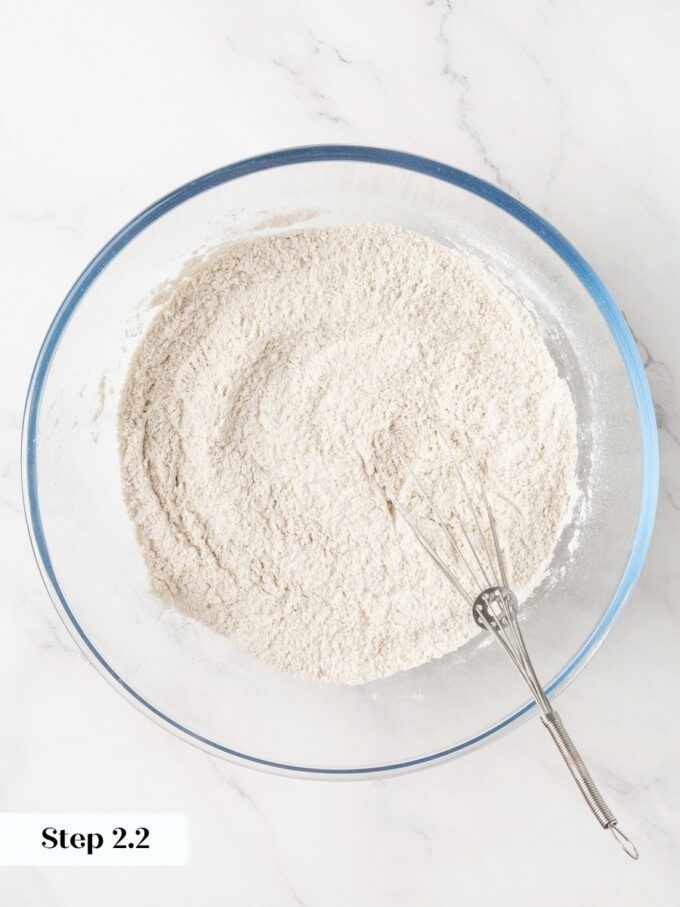
Step 2: Combine the Dry Ingredients. In a large bowl, whisk together the dark rye flour, all-purpose flour, and kosher salt until evenly distributed. The mixture will look and smell very much like rye flour because it mostly is, and that is exactly what you want here.(photos 2 & 3)
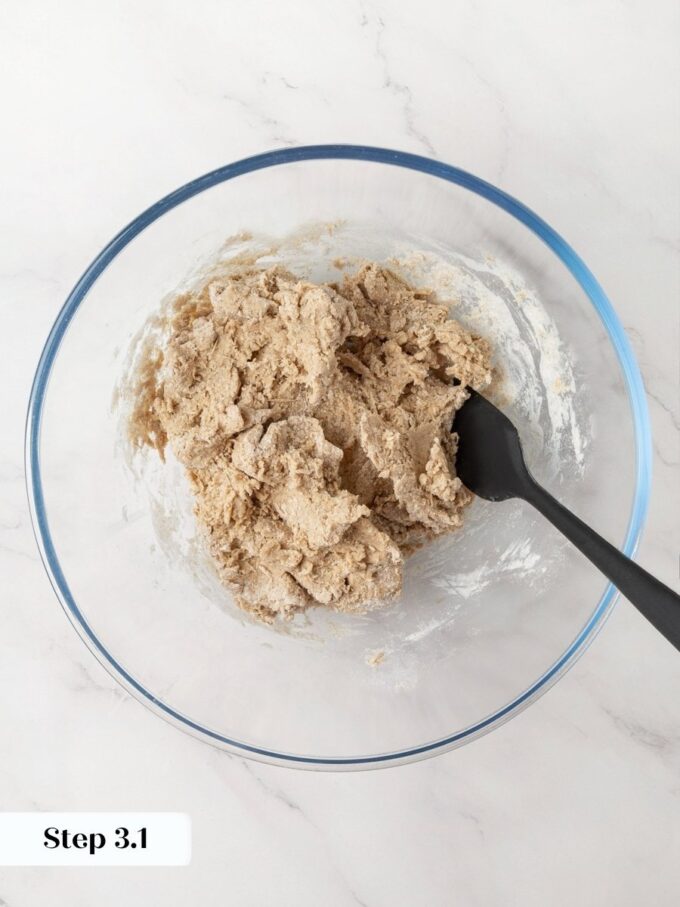
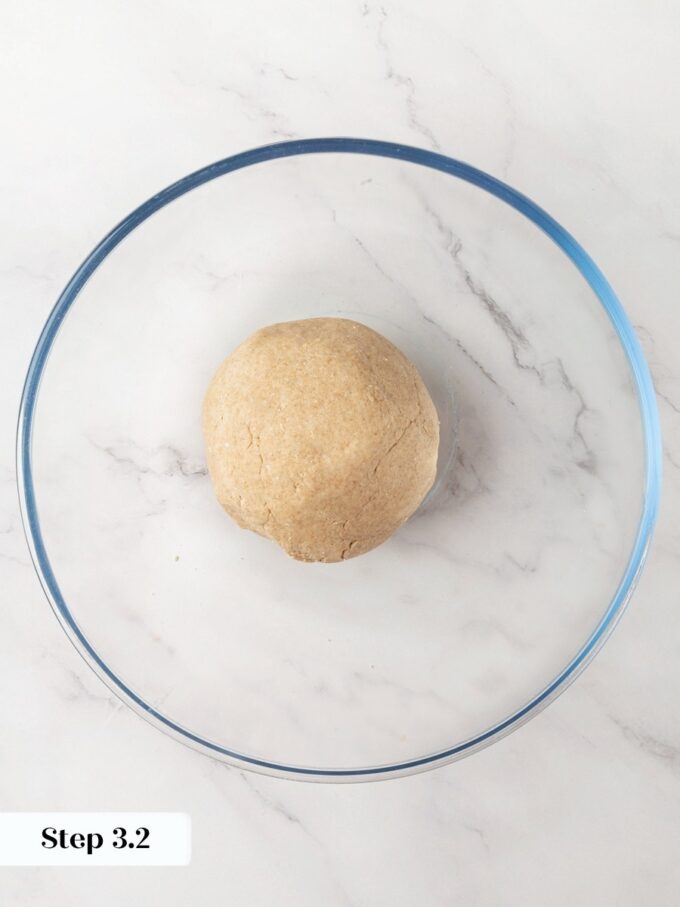
Step 3: Bring the Dough Together. Pour the milk and yeast mixture into the flour and stir with a large fork or spatula until the dough looks shaggy and the liquid is absorbed. Then switch to your hands and knead briefly in the bowl, just long enough for the dough to come together into a rough ball. (photos 4 & 5)
It will feel quite stiff and a little sticky, and that is correct. Rye flour has very little gluten, so this dough will never feel silky or smooth the way a wheat dough does. Do not add more flour.
Rest the Dough
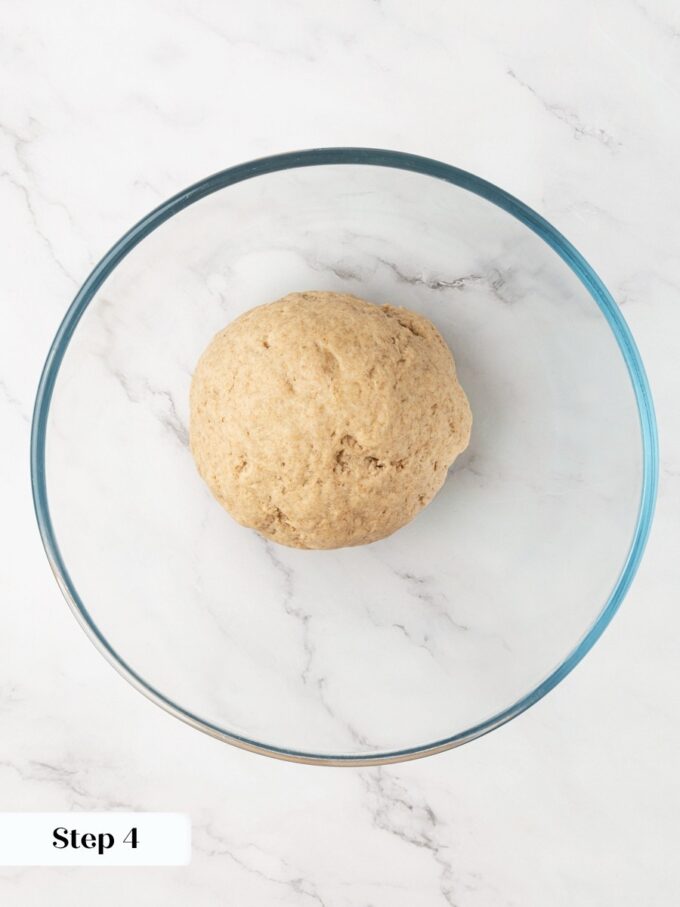
Step 4: Cover the bowl and let the dough rest at room temperature for 1 hour (photo 6). Two hours works just as well if you are moving in and out of the kitchen doing other things.
The dough will not double or look dramatically different, but the rest allows the rye flour to fully hydrate and makes the dough noticeably easier to roll out thin.
Divide and Shape
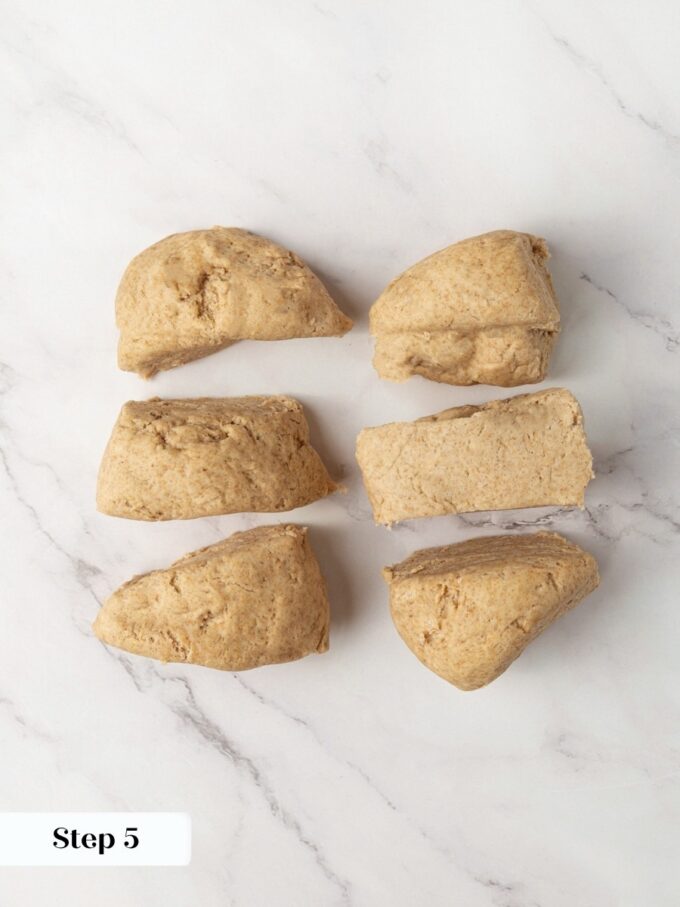
Step 5: Preheat the oven to 350°F. Divide the rested dough into 6 equal pieces and keep them covered with plastic wrap so they don’t dry out while you work (photo 7).
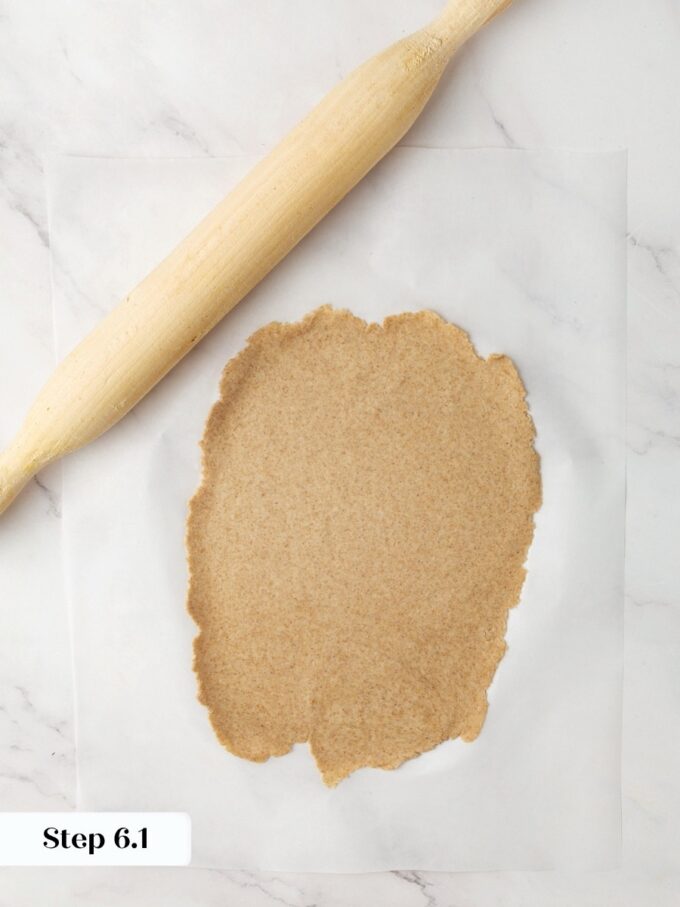
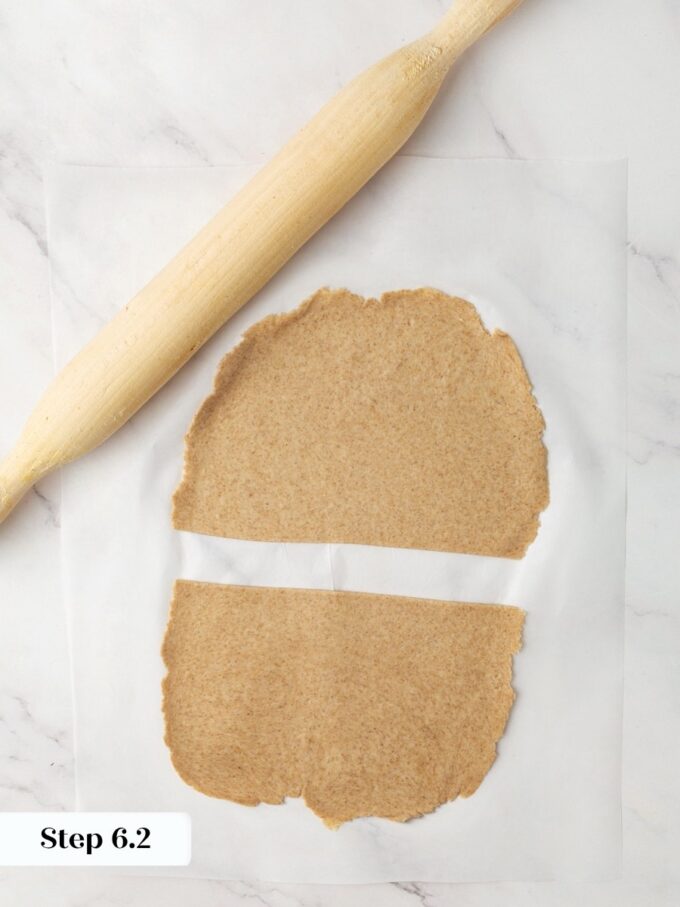
Step 6: Roll and Shape the Crackers. Working with one piece at a time, place the dough on a sheet of parchment paper and roll it into a thin rectangle, about 7 to 8 inches across (photos 8 & 9). When the dough starts sticking to the rolling pin, lay a second sheet of parchment paper directly on top and keep rolling.
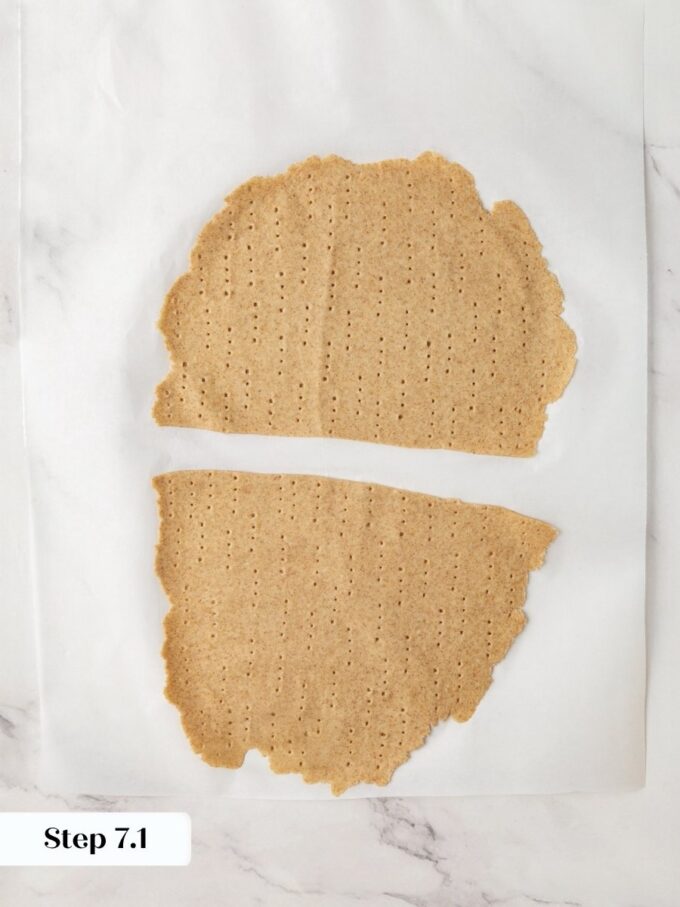
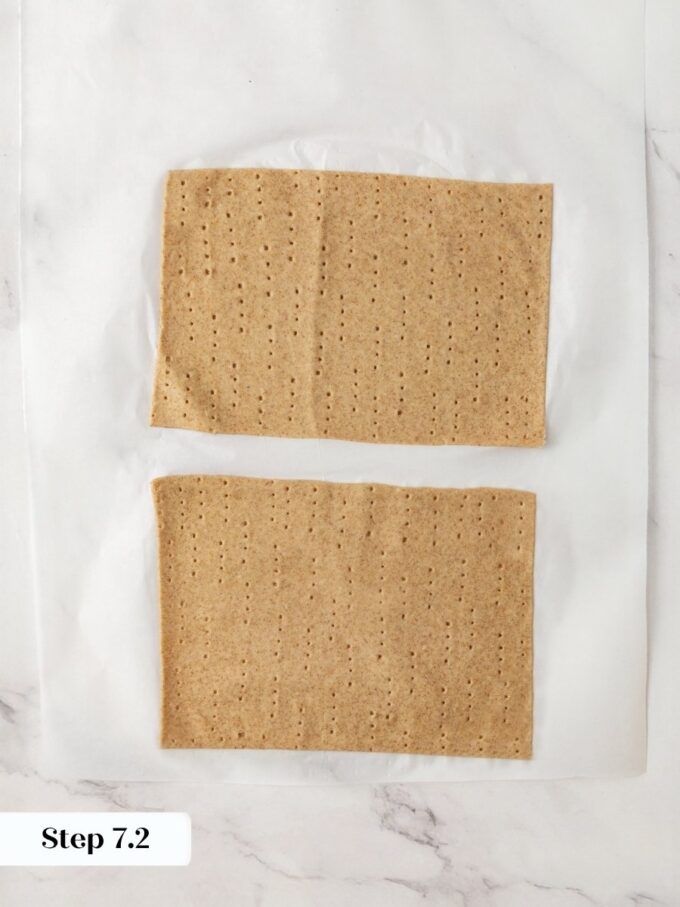
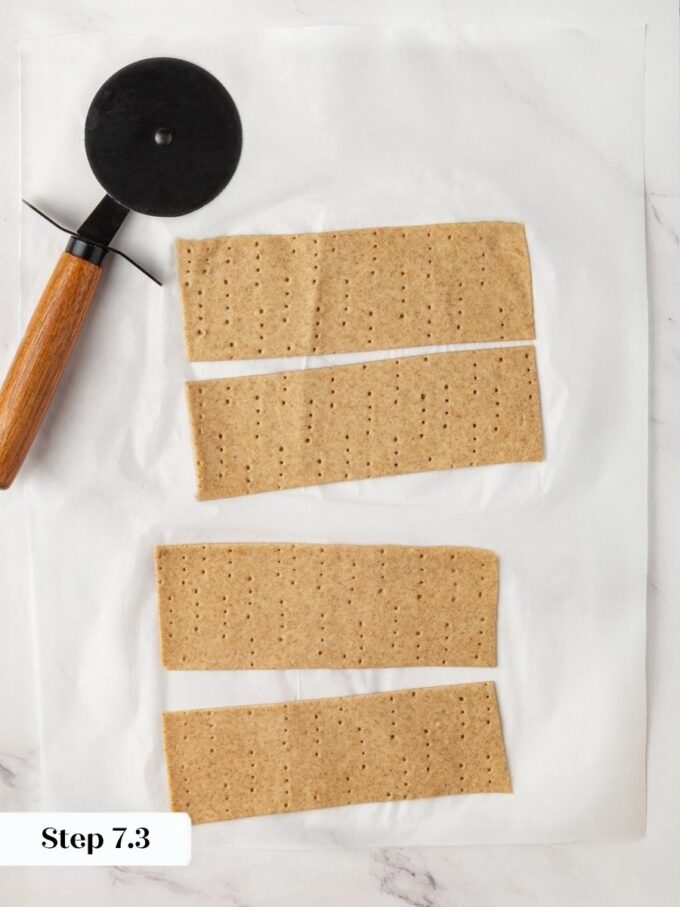
Step 7: Poke and Cut. Using a fork in each hand, poke the dough all over with the tines in an even pattern. A meat tenderizer works here too if you have one. Then use a pizza wheel or chef’s knife to cut the dough into whatever size and shape you want. (photos 10-12)
Bake
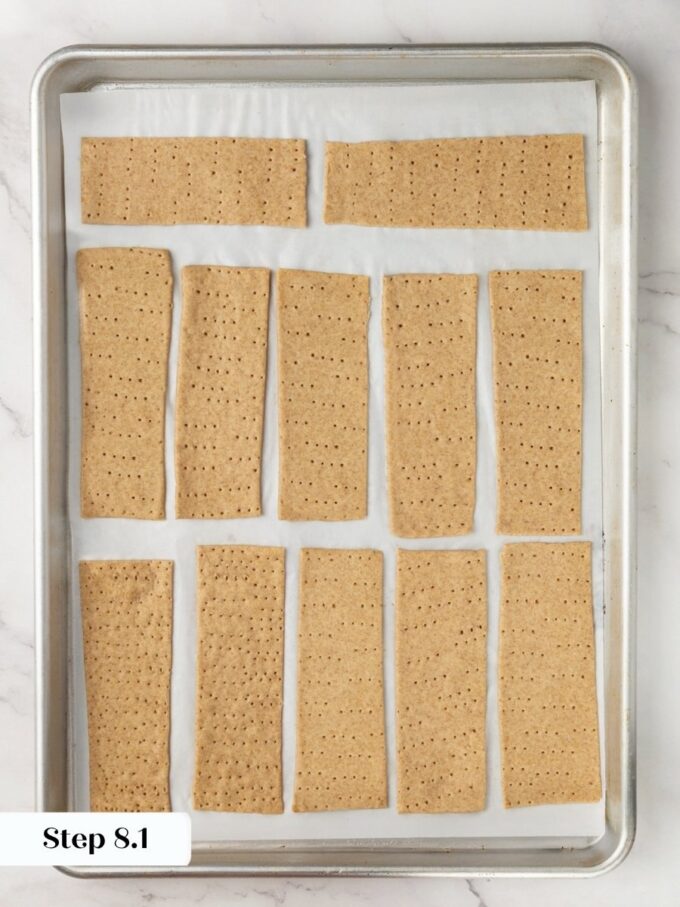
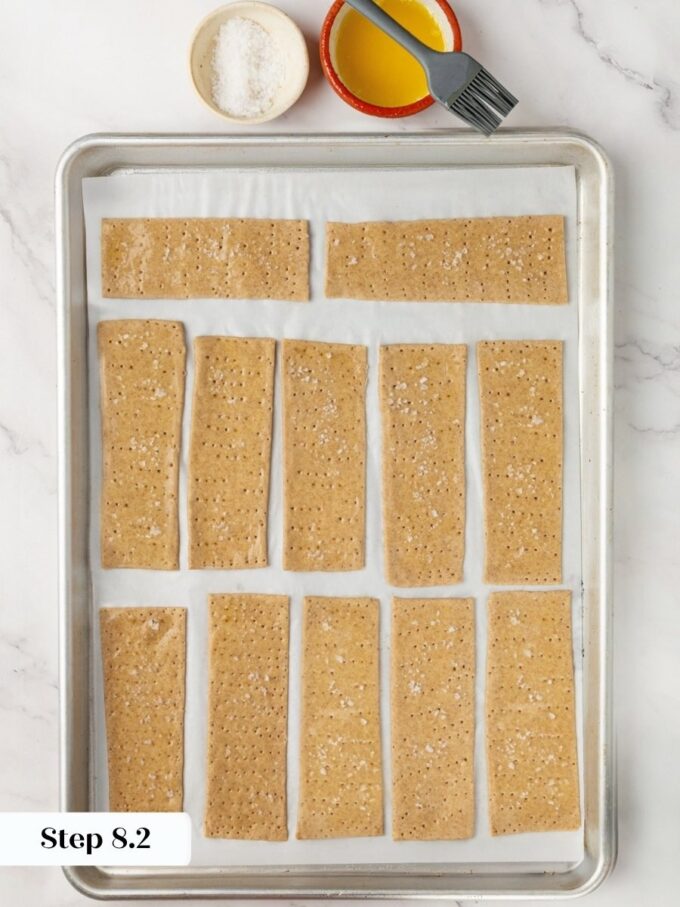
Step 8: Place the cut pieces slightly separated on a parchment-lined baking sheet. Lightly brush each piece with melted butter and sprinkle with flaky sea salt. (photos 13-15)
Step 9: Cool and Repeat. Transfer the baked crackers to a wire rack and let them cool completely before tasting. They crisp up further as they cool, so give them at least 10 minutes.
Recipe FAQs
Store fully cooled knäckebröd in an airtight container at room temperature for up to two weeks. The most important detail here is making sure every cracker is completely bone-dry before you seal them away. Any residual warmth or moisture trapped inside the container will soften them, and there is no crisping them back up the same way once that happens.
Yes, bake them fully, cool them completely, then store in an airtight container. Do not try to freeze the unbaked dough — the low-moisture structure of this dough does not hold up well to freezing, and baked crackers store so well at room temperature that there is no need.
This almost always comes down to two things: the dough was rolled too thick, or the crackers were pulled from the oven too early. Thick crackers cannot dry out fully before the edges overbrown, so the center stays chewy no matter how long you wait. Pull them only when they are a deep, even golden brown all the way across, not just at the edges. They will feel slightly soft when they first come out of the oven, which is normal, but they firm up completely as they cool on the rack.
Absolutely, and shape is one of the most fun things to play with here. The traditional format is a round with a hole punched in the center, but rectangles, long strips, and small squares all work. The key rule is to keep any single piece no wider than about 3 inches, because wider crackers take longer to bake through the center and the edges will darken before the middle dries out. Thinner, narrower cuts bake faster, so start checking them around the 10-minute mark if you go smaller than the 1-by-4-inch size I use.
Recommended Cracker Recipes

Appetizers & Snacks

Appetizers & Snacks

Appetizers & Snacks

Appetizers & Snacks
Swedish Knäckebröd
Ingredients
- 2 cups dark rye flour
- ¼ cup all-purpose flour
- 2 teaspoons instant dry yeast
- 1½ teaspoons kosher salt
- ¾ cup milk, cold or room temperature
- 2 tablespoons butter, melted, for brushing
- Flaky sea salt, such as Maldon, for sprinkling
Instructions
- Whisk the yeast into the milk in a small bowl or cup and set aside.
- In a large bowl, whisk together the rye flour, all-purpose flour, and kosher salt.
- Stir in the milk and yeast mixture. Mix with a large fork or spatula until shaggy, then briefly knead by hand in the bowl until the dough comes together into a stiff, slightly sticky ball.
- Cover the bowl and rest at room temperature for 1 hour. Preheat the oven to 350°F. Divide the dough into 6 equal pieces and keep covered with plastic wrap.
- Working with one piece at a time on a sheet of parchment, roll into a thin rectangle about 7–8 inches across. When it sticks to the rolling pin, lay a second sheet of parchment on top and continue rolling as thin as possible. Remove the top parchment and cut the piece in half. Separate the two halves on the parchment, replace the top parchment sheet, and roll each piece even thinner.
- Using a fork in each hand, poke the dough all over. Cut into your desired cracker size with a pizza wheel or chef’s knife. Pieces around 1 inch by 4 inches work well; avoid anything much wider than 3 inches or the center may not bake through before the edges brown.
- Arrange the cut pieces slightly separated on a parchment-lined baking sheet. Brush each piece lightly with melted butter and sprinkle with flaky sea salt.
- Bake 12–15 minutes, until golden brown and crisp all the way through. Do not pull them early — underbaking leads to soft, chewy crispbread.
- Transfer to a wire rack to cool completely. Repeat with remaining dough. Bake multiple trays at once if your oven allows.
- Once fully cooled, store in an airtight container at room temperature for up to 2 weeks.
Notes
Doneness: The crackers should feel firm and dry, not at all soft or springy, when you pull them from the oven. If in doubt, give them another 2 minutes. They will not crisp further once cool if they are underbaked.
Flat crackers: For an especially even, flat result, lay a sheet of parchment over the buttered and salted crackers and place a second rimmed baking sheet on top before baking. Check doneness by lifting the top pan after 10 minutes.
Storage: Store only once the crackers are completely cool and bone-dry. Any residual warmth or moisture trapped in the container will soften them. They keep at room temperature up to 2 weeks.
Nutrition
Nutrition information is automatically calculated, so should only be used as an approximation.
 Like this recipe? Rate & comment below!
Before You Go
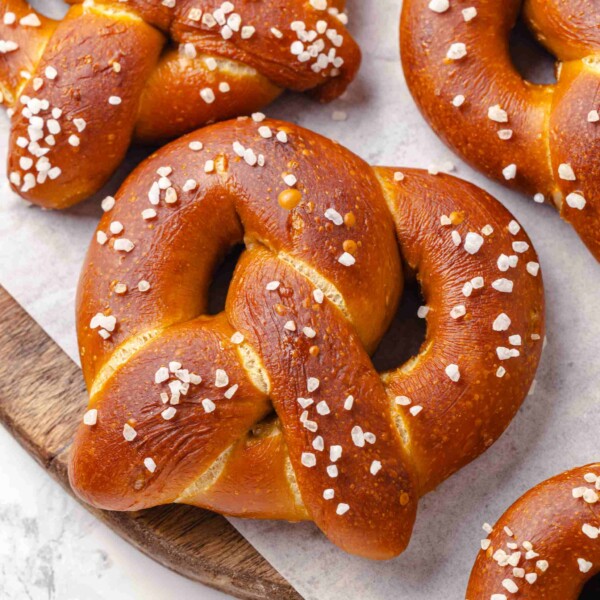
If this Swedish Knäckebröd has you hooked on homemade crispbread, there is plenty more waiting for you. Browse our Appetizers & Snacks Recipes or make this sourdough pretzel recipe next!

I was nervous about getting the dough thin enough but followed the visual cues in the recipe and they came out perfectly crisp all the way through. Absolutely love the flavor of the dark rye.
That’s wonderful to hear, Petra! So glad they were crisp and that the flavor was there! Thank you for taking the time and sharing! ~GVD team
Again, nada. Maybe when I’m home recuping from surgery No. 1 and you are supposed to be taking care of me I will get to taste one of these delicious looking breads or crisps or rolls or bagels or pretzels or ANYTHING.
The Swede in me absolutely LOVES these. They are gorge! Is that still the bread topping I gave you for one Christmas?
Yes, it is! I love that stuff. It’s lasting me forever.