This 5 ingredient peasant bread recipe makes a soft, wheat bread in under 3 hours. A simple no-knead bread easy enough for dinner tonight!


A Quick Look At The Recipe
This is a brief summary of the recipe. Jump to the recipe to get the full details.
Prep Time
15 minutes
Cook Time
35 minutes
Proof
2 hours 40 minutes
Total Time
3 hours 30 minutes
Servings
16 slices
Difficulty
Easy with a little waiting
Calories *
92 kcal per serving
Technique
Mix, fold, and proof dough; shape and bake until golden brown.
Flavor Profile
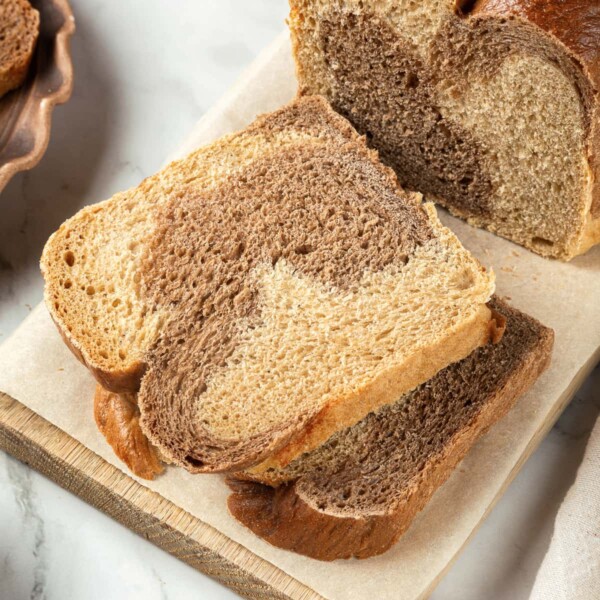
Soft, rustic wheat bread with mild flavor and crisp crust.
* Based on nutrition panel
I did manage to score the square on top of the bread! I appreciate this bread for what it is. She is delicious, and I love that I can have fresh-baked bread in a few hours. I had this with some chili so good! ⭐⭐⭐⭐⭐
Mara
Why You Will Love this
- Soft bread with a mild whole grain flavor. The interior texture of this simple bread is soft with a tight crumb, and it has a crusty crust while it is still warm, but softens as it cools.
- Revised and updated by a professional pastry chef. Chef Lindsey simplified the recipe by changing the instructions based on her professional experience and training in professional bread making at the International Culinary Center (now part of ICE). It produces better bread with almost no work.
- Only one set of folds! 4 folds during the bulk-fermentation then one more during shaping and you have a crusty, flavorful whole grain bread in under 3 hours!
- It is easier to slice warm. Quelle chance! Given that the goal is an easy, fast yeasted bread to serve with lunch or dinner, skipping the dreaded step of cooling is a huge bonus!
- It makes 2 loaves and freezes superbly well!
- No need to bake in oven-safe bowls.
Table of Contents
This peasant bread is delightfully nutty and the perfect pairing with soup, stews, chilis, and even just toasted with butter for breakfast! It is even easier than no knead dutch oven bread or my easy Italian bread recipe and just as delicious!
The quick rise, no knead nature of this simple bread means that it will not have the time or kneading required to form a strong gluten structure. This means it will not get as tall as my sourdough bread recipe (also no knead). If you are looking for a more traditional whole grain artisan bread try my whole wheat sourdough bread or for a recipe baked in a loaf pan, try my whole wheat bread or marble rye bread instead!
Ingredients & Substitutions

- Water: Warm but not hot water is key here. The heat will help jump-start the yeast and also the gluten development. Tap or filtered water both work fine.
- Active Dry Yeast: You can also use instant yeast instead of active dry yeast, and skip the blooming step in the water. I would recommend using room temperature or lukewarm water for mixing, if using instant yeast just to allow the gluten a bit more time.
- Kosher Salt: The salt is needed for flavor but it is also essential for strengthening the gluten network. This bread already has minimal development, so you don’t want to omit the salt. You can use half the amount of table salt or fine sea salt if you do not have kosher.
- Dark Rye Flour: Rye flour adds a deep, nutty flavor to this bread but does not contribute to gluten structure. I would not recommend increasing the amount without swapping out the all purpose flour for bread flour.
- Whole Wheat Flour: Whole wheat flour has a higher hydration than white flour, so if you change the amount of whole wheat flour in the recipe, you will end up with either a drier or stickier dough.
- Unbleached All-Purpose Flour: I use all-purpose flour but bread flour will also work if you have it on hand. Bread flour has a high gluten percentage, so there it will be able to create a stronger gluten network and you will get more rise out of your peasant bread.
See the recipe card for full information on ingredients and quantities.
Variations
- Change the flavor with mix-ins: Stir in nuts and dried fruit like my cinnamon raisin sourdough, or chopped herbs like my rosemary bread, or savory inclusions like in my sun dried tomato bread.
- You can bake the loaves Alexandra Stafford style in 2 pyrex bowls: Her method calls for mixing the dough, dividing it into two in the mixing bowl, then transferring to 2, 1-quart oven-safe bowls generously greased with unsalted butter. You allow the dough to rise to the rim of the bowl and then bake them. I am not here to tell you how to live your life, but I do love the extra structure and crunch of shaping and baking loaves in a Dutch oven.

Pro Tips for Making No Knead Peasant Bread
- Baking bread in a crock pot is a “no”. We shall all learn from Stephanie’s trials baking this bread in 2012. She says it best, “the long baking time overrode any time I could have saved [from skipping the second rise].” The crock pot made it flat because it didn’t get hot enough for that oven-spring.
- Scoring had a bigger impact on the rise than the method of baking. The effort of trying to score a square on the top of dough was worth the superior crumb, shape and rise. Regardless of the baking method, the crust and crumb remained essentially the same.
- Using a Dutch oven is certainly easier if you have that option. I tested using a pan with hot water and a typical Dutch oven technique like in my no-knead dutch oven bread or no-knead sourdough bread recipe. While using a Dutch oven in the other two recipes makes a huge difference, I found no material difference to the crust or crumb in this peasant bread. That is due to the lack of gluten development.
- Accept this simple peasant bread for what she is. I say it all the time, but one can rarely have a fast, no-knead bread with an open crumb. [Stay tuned for my same day sourdough bread for the exception!] Time or activation (kneading / folding) are essential to gluten development. Gluten development is what traps all those air bubbles created by the yeast during fermentation. This bread is too quick to create a network strong enough to trap large gas bubbles.
How to Make No Knead Peasant Bread
Use these instructions to make a whole grain loaf of bread in under 3 hours with minimal effort! Further details and measurements can be found in the recipe card below.
Mix & Bulk-Ferment the Dough:


Step 1: In a large mixing bowl, whisk together warm water and yeast. Let sit for 10 minutes until bubbly. I wasn’t persnickety about the temperature of the water. It’s not that serious. Just make sure it is warm, not hot, to the touch.
Step 2: To the large bowl with the yeast, add rye flour, whole wheat flour, all-purpose flour, and salt. Stir to combine with a large rubber spatula or wooden spoon. Scrape down the sides of the bowl.
Step 3: Cover with plastic wrap or a tea towel and allow to proof in a warm spot for 1 hour.


Step 4: Perform 1 set of folds. Using a bowl scraper to help, scoop up one side of the bread and fold over the center. Rotate 90° and repeat the folding until you have folded all the sides. Cover and continue to let the dough rise in a warm spot for an additional hour.
Divide & Shape the Dough:
Step 5: Prepare two 12-inch squares of parchment paper. Excess parchment paper won’t improve the crust. Dust the top of the dough (in the bowl) generously with flour and lightly flour a smooth work surface such as a countertop. Using a bowl scraper, turn the dough out onto the floured surface and divide it into two equal pieces.
Step 6: Working with one piece of dough at a time, fold each of the four corners into the center and then flip the dough packet over. Use both hands to pull and tighten the dough into a circle by pulling towards you quickly, then rotating 90° and repeating. Flouring your hands as needed.
The dough has minimal gluten development and is a wet dough, so it will be sticky. Working quickly is critical to minimizing the dough sticking to your hands, and using the stickiness of the dough on the bottom to your advantage will help you tighten the boule. This step not only shapes the loaves but also strengthens the gluten network, which will aid in trapping the air emitted during baking.
Step 7: Once shaped, place each piece in the center of a piece of parchment. Cover and final proof 40 minutes.
You can final proof them on the work surface but they will spread considerably, so I placed mine, parchment and all, in a medium mixing bowl to help retain the shape.
Baking Peasant Bread:
Step 8: Preheat the oven to 425°F convection (with the fan) if you have that option. Preheat the oven to 450°F conventional (no fan) if you do not. If you are using a Dutch oven to bake, preheat the top and bottom of the Dutch oven along with the oven.
If you are not using a Dutch oven, place a baking sheet on the middle rack of the oven and a roasting pan on the bottom rack of the oven during the last 15 minutes of proofing & preheating.


Step 9: When you are ready to bake, if proofing in bowls, lift the dough out using the parchment paper. Score using a bread lame or razor blade. I prefer to try to make a square on the top of the dough to encourage rising up but this is particularly difficult with this dough. Do not be discouraged.
This dough has minimal gluten development, is room temperature and is sticky, so try to score quickly and with confidence. Scoring will be difficult, and the cuts won’t be perfect.
Step 10: Working carefully and efficiently, remove the Dutch oven or baking sheet from the oven and close the oven door. Open the top of the pot and place the dough inside using the parchment paper. Replace the top and place it back in the oven.
Alternatively, place the dough on the preheated baking sheet using the parchment paper and place the whole sheet back in the oven. Pour 2-3 cups of water into the roasting pan at the bottom of the oven and quickly close the door to trap in as much steam as possible.
Step 11: Bake for 20 minutes and either remove the top of the Dutch oven or any remaining water (probably none), but opening the door will release any trapped steam and allow the crust to form.
Step 12: Reduce the oven temperature to 375°F convection (if using a fan) or 400°F conventional (if not). Continue baking an additional 15-20 minutes until the outside of the loaf has browned.
Step 13: Remove bread from Dutch oven or baking sheet and cool on a wire cooling rack.
I sliced with a serrated knife while it was still warm and it was actually easier! It tasted magnificent with butter and even my husband forgave me for putting extra kale in the Italian sausage soup. Hehe.

Recipe FAQs
The crust will soften naturally as it cools, so feel free to store the cooled bread in an airtight container, plastic bag or well wrapped in plastic wrap. It will keep at room temperature for 5 days or, for longer storage, freeze the loaves either whole or pre-sliced for easy grab-and-go-breakfasts!

Recommended Rustic Bread Recipes

No-Knead Breads

Yeast Breads

Yeast Breads
Yeast Breads
If you enjoyed this recipe, please leave a star rating and let me know how it goes in the comments below! I love hearing from you and your comments make my day!
Peasant Bread
Ingredients
- 1 ½ cups warm water
- 1 packet active dry yeast, (2 ¼ teaspoons)
- 2 ¼ teaspoons kosher salt
- ¼ cup dark rye flour
- ¼ cup whole wheat flour
- 2 ¾ cups unbleached all-purpose flour
Instructions
Mix & Bulk-Ferment the Dough:
- In a large mixing bowl, whisk together warm water and yeast. Let sit for 10 minutes until bubbly. I wasn’t persnickety about the temperature of the water. It’s not that serious. Just make sure it is warm, not hot, to the touch.
- To the large bowl with the yeast, add rye flour, whole wheat flour, all-purpose flour, and salt. Stir to combine with a large rubber spatula or wooden spoon. Scrape down the sides of the bowl.
- Cover with plastic wrap or a tea towel and allow to proof in a warm spot for 1 hour.
- Perform 1 set of folds. Using a bowl scraper to help, scoop up one side of the bread and fold over the center. Rotate 90° and repeat the folding until you have folded all the sides. Cover and continue to let the dough rise in a warm spot for an additional hour.
Divide & Shape the Dough:
- Prepare two 12-inch squares of parchment paper. Excess parchment paper won’t improve the crust. Dust the top of the dough (in the bowl) generously with flour and lightly flour a smooth work surface such as a countertop. Using a bowl scraper, turn the dough out onto the floured surface and divide it into two equal pieces.
- Working with one piece of dough at a time, fold each of the four corners into the center and then flip the dough packet over. Use both hands to pull and tighten the dough into a circle by pulling towards you quickly, then rotating 90° and repeating. Flouring your hands as needed.
- Once shaped, place each piece in the center of a piece of parchment. Cover and final proof 40 minutes.
Baking Peasant Bread:
- Preheat the oven to 425°F convection (with the fan) if you have that option. Preheat the oven to 450°F conventional (no fan) if you do not. If you are using a Dutch oven to bake, preheat the top and bottom of the Dutch oven along with the oven.
- When you are ready to bake, if proofing in bowls, lift the dough out using the parchment paper. Score using a bread lame or razor blade. I prefer to try to make a square on the top of the dough to encourage rising up but this is particularly difficult with this dough. Do not be discouraged.
- Working carefully and efficiently, remove the Dutch oven or baking sheet from the oven and close the oven door. Open the top of the pot and place the dough inside using the parchment paper. Replace the top and place it back in the oven.
- Bake for 20 minutes and either remove the top of the Dutch oven or any remaining water (probably none), but opening the door will release any trapped steam and allow the crust to form.
- Reduce the oven temperature to 375°F convection (if using a fan) or 400°F conventional (if not). Continue baking an additional 15-20 minutes until the outside of the loaf has browned.
- Remove bread from Dutch oven or baking sheet and cool on a wire cooling rack.
Notes
Nutrition
Nutrition information is automatically calculated, so should only be used as an approximation.
 Like this recipe? Rate & comment below!
Before You Go
I hope you enjoyed this simple and delightful peasant bread recipe. Check out our other yeasted bread recipes for your next bake, like these easy homemade bread bowls and my ciabatta bread recipe!


I did manage to score the square on top of the bread! I appreciate this bread for what it is. She is delicious, and I love that I can have fresh-baked bread in a few hours. I had this with some chili so good!
Not ugly at all. It’s rustic.
ugly or not it would be perfect for soup, stew or chili!!!
I just tried this a week or two ago. My bread was just as ugly as yours, but not quite as flat. I really think it was the ugliest bread I’ve ever made. Or second ugliest.
I bet it would make spectacular croutons, though.
Not Supermom — Yes, yes it would. 🙂
Beauty is the eye of the beholder coz this looks AMAZING to me. I have just about given up on baking bread as I have had too many time-consuming disasters but I love reading about everyone else’s baking 🙂
Hungry Mum — Thank you!
The crockpot version reminds me of ciabatta in a way … I don’t think it looks THAT ugly. 🙂 At least the taste did not disappoint!
P.S. Have I mentioned how much I appreciate the in-progress pics? Thanks for the details!
Pam — You’re right, it does sort of look like ciabatta! 🙂 And you’re welcome for the details: I’m so glad they’re helpful!
I am pro-ugly food (except when I’m trying to take blog photos). At bake sales, it’s the ugly cupcakes that are homemade, and, inevitably, beautifully frosted bakery cupcakes always disappoint.
Both your pretty and your ugly bread look great!
Kate — Thank you so much! I agree; sometimes the best-tasting recipes aren’t the prettiest. Thanks for the comment 🙂