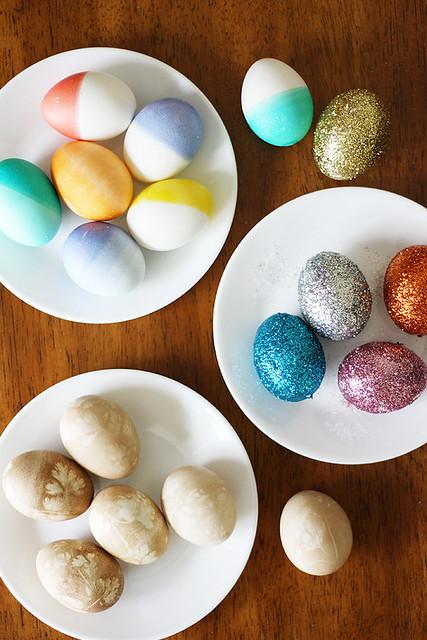
This Easter egg-dyeing situation happened out of a moment of sheer “OhmygoshI’malmosttwentysixyearsold” panic (which is still a good month and a half away, by the way, but I like to panic early). It’s why I rolled some eggs in glitter — for my inner preteen. It’s why I wrapped parsley leaves around eggs and stained them in tea — for my great-grandmother, who passed along to me good, healthy German genes and who used to dye her eggs this way. It’s why I dip-dyed eggs, too — because, well, because
my quarter-century self thinks its pretty. And I’d like to record this moment in time however I can.
(This is also my very first-ever crafty post, which I made with my mama on a recent mini getaway, so please bear with me on the less-than-stellar photography and missing step photos. I’ll blame it on being too mesmerized by the glitter.)
Let’s dye some eggs like YOLO! (Are people still saying that? I’m too old to know.)
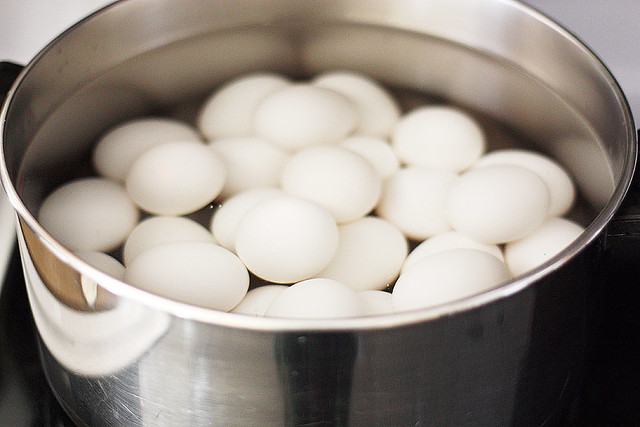
The first order of business is to
hard-boil some eggs — that is, unless you want to display them for several days. In that case, I recommend
this method for blowing out the eggs, which is super fancy and therefore exactly not what I did, so my fridge is hosting some very pretty eggs at the moment.
Let the eggs cool to room temperature.
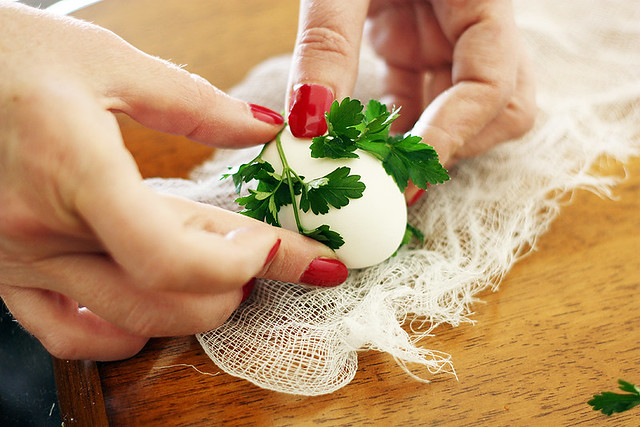
To make the tea-stained eggs with beautifully delicate parsley designs like my great-grandmama used to make,
heat a large pot of water and add a few tea bags to dye the water (you can use the leftover water in which you hard-boiled the eggs, if you want). Meanwhile, cut a few long strips of
cheesecloth (1 strip for every egg you dye) and place an egg near one end. Lay
flat-leaf parsley leaves around the egg (see Mom’s lovely demonstration in the photo).
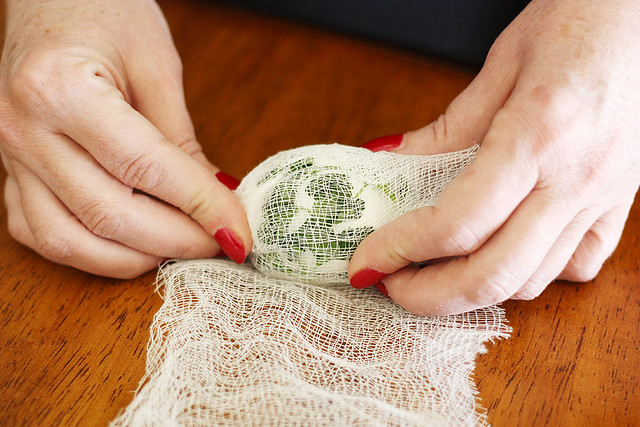
Roll the cheesecloth tightly around the egg, like so, then secure both ends with
string or twist ties.
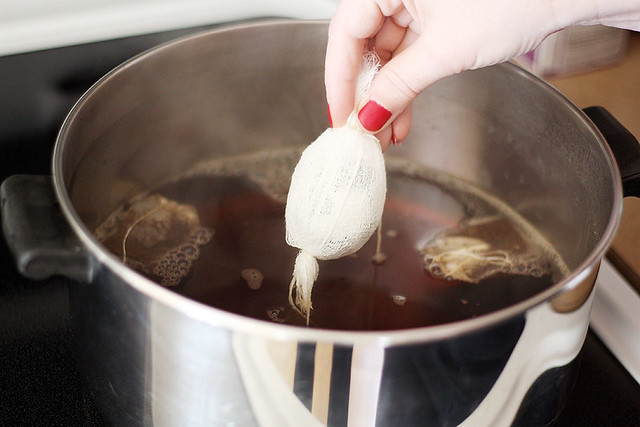
Carefully drop each egg into the warm (not boiling) water and let sit until egg is stained (depending on how much cheesecloth you used, how much tea is in the water and how dark you want them to be, this could take up to several hours. I would suggest not eating these eggs, as they might end up over-cooked when all is said and done).
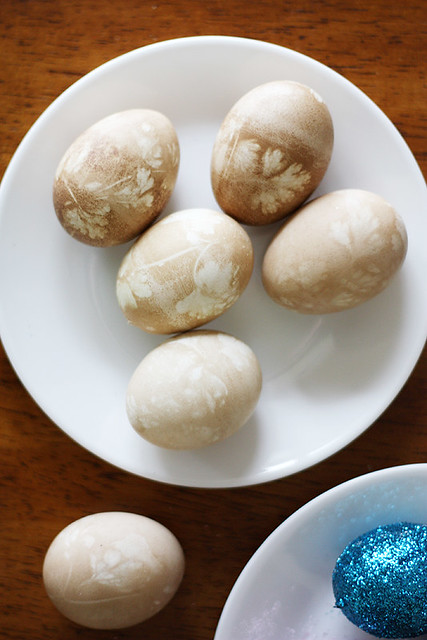
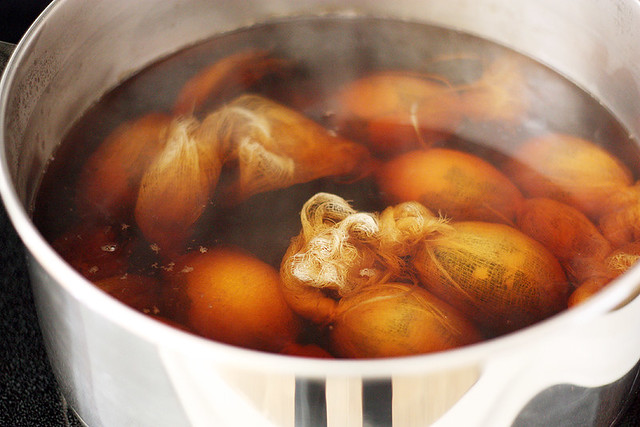
Unwrap the eggs carefully and
let them dry completely. So much gorgeousness.
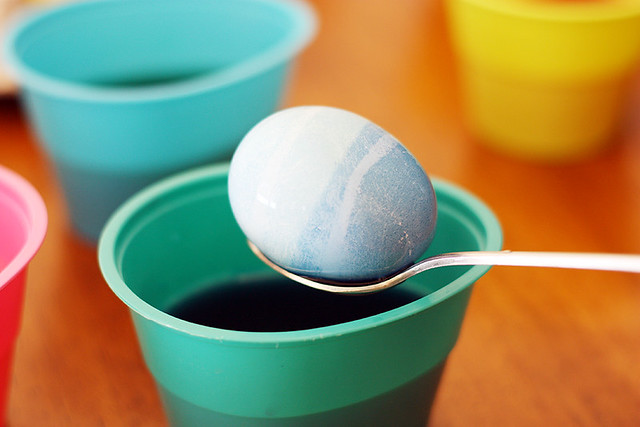
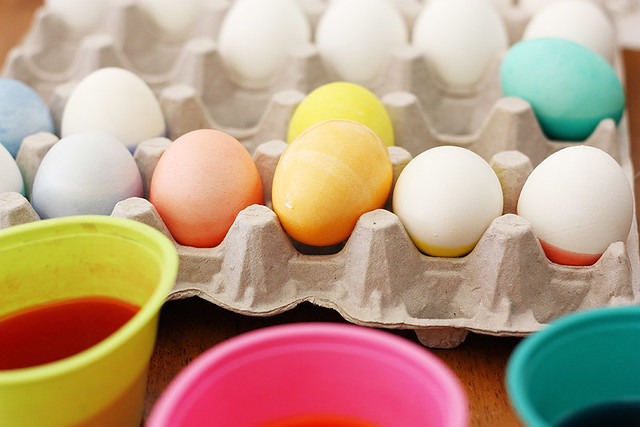
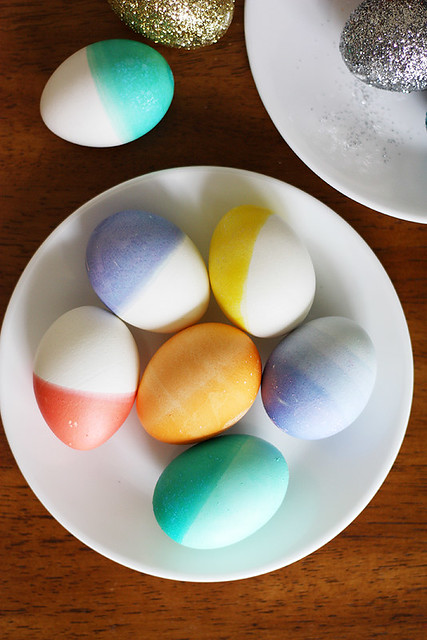
Now, to make the dip-dyed eggs: It’s a pretty straightforward dip-and-dye situation going on here, using
storebought Easter egg dye, so I’m not going to bore/belittle you on how to make them. I just think they’re fun and unique and I wanted to share them with you. Some of them I dipped only half the egg into the dye; others, I tried to do an ombre effect. If you’re really ambitious, you can dye them naturally
this way.
Time for glitter! I pinned this craft a bazillion years ago but just now have gotten around to it (as is my way). But I’m so glad I finally did it because they turned out to be my favorite Easter eggs, ever (things I can’t take my eyes off of: Sprinkled doughnuts, mullets, cat videos and now glitterized Easter eggs).
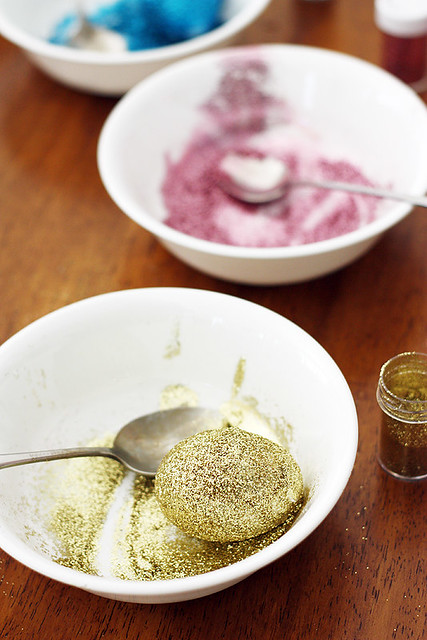
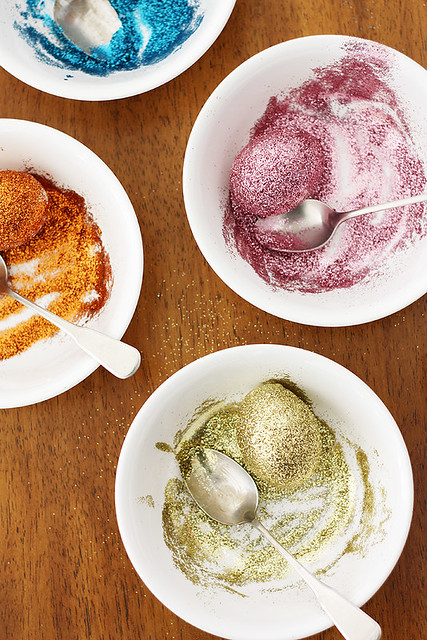
First, pour a
generous amount of glitter into a small, shallow bowl. Paint one egg at a time with a
light coating of craft glue (I used
Mod Podge), then carefully
roll the egg in the glitter or pour the glitter over the egg with a spoon. Since the glitter is sensitive, you might end up with a few bare spots; just let the first layer of glitter dry, then paint more glue on the spots and sprinkle with more glitter.
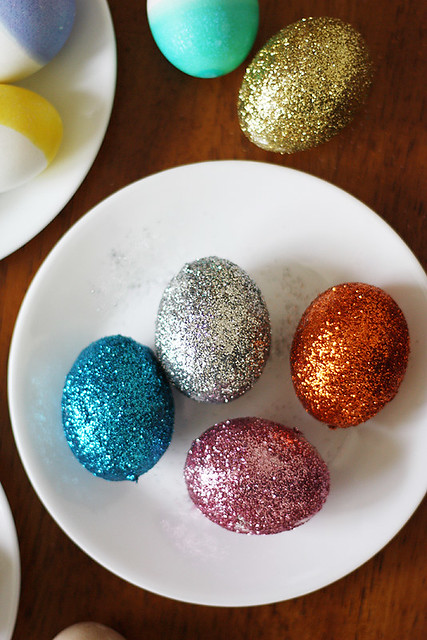
Shake off the excess glitter and prepare to get googly-eyed over all the sparkle.
So there we go — Easter egg dyeing for grownups. Or kids in grownup bodies. Or kids. Or — anyway, fun times with glitter and stuff.
Happy Easter, everyone!
This post contains affiliate links.
I’m obsessed with the glitter eggs. So, so pretty!
wow, I’m in LOVE with your eggs (ok that sounded really weird) but man, those glittery ones are up my alley. I actually think I saw those on your instagram and I actually went out and bought glitter because I wanted to glitter-fy my office, haha – loooove these, they’re so creative!!
These are beautiful! I love the sparkly ones! You are so creative!
a farmer in the dell — Thank you, love! And haha, I know, just a momentary unnecessary age freakout! 🙂
Laura — Thank you! I love them, too — I kind of wanted to stare at them all day 😉
Julie — Lol, thank you my dear! You should definitely glitter up your office — though if I did that I’d never get any work done because I’d be too distracted! 🙂 Thanks!
Amber — Oh, thank you so much!
I saw the eggs-and-tea trick in Pinterest and was worried it would be too good to be true (since the Kool-Aid dying was an abysmal failure last year!) so I’m very excited to see that this works!
OMG I AM twenty six!! How did this happen. I need to dye some eggs. STAT.
Krista — Totally works! You should try it 🙂
Joanne — Lol, you’re never too old to dye Easter eggs! At least that’s what I’m telling myself 🙂
These are the prettiest Easter eggs I ever did see!!! I’m amazed at how well each of the three variations turned out! I enjoy eating hard boiled eggs and now I can do so in style! Great tutorial from your momma and thanks for awesome Easter ideas!!
I love those glitter eggs!!
Julia — Well thank you, lady! Easter hard-boiled eggs always seem to taste better, methinks 🙂
Bernadette — Thanks, dear! I like them, too 🙂