A Blackberry Pie filled with juicy, thick blackberry filling. Baked in a flakey homemade pie crust, the blackberry filling is enhanced with a hint of lemon and thickened with tapioca for a wonderful filling that lets the berries shine.

This blackberry pie is simply delicious. Whether using ripe in-season or frozen blackberries, this pie will surely be a crowd pleaser. A truly simple filling that requires no pre-cooking, it uses lemons to brighten and tapioca as the thickener to ensure the blackberries shine. It is baked inside a flakey double crust to make every part of this pie exceptional.
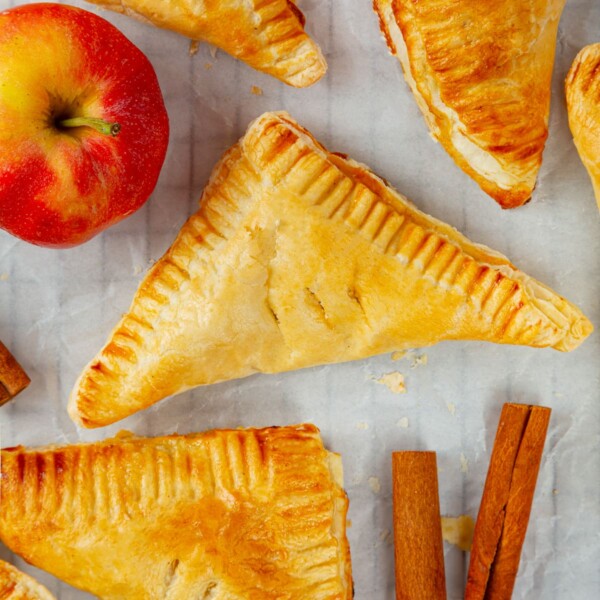
For more fruit pies, try the fan-favorite cherry pie or take this easy pie crust recipe and fill it with my apple pie filling. And where there’s one pie, this has to be another, so bring two pies to the party. Try my Mississippi mud pie, chocolate pumpkin pie, or a coconut peanut butter pie.
Table of contents
Why You Will Love This Blackberry Pie
- The pie crust of your dreams! Pie crusts, and I go way back! It’s always my mission to ensure every pie has a flakey, tender crust; this vodka pie crust is no exception.
- An easy, bright, and perfectly thick filling. The blackberries truly shine in this filling with granulated sugar just a hint of lemon and tapioca flour. Just combine the ingredients and bake. Super easy.
- Can be made year-round! This blackberry pie can be made with fresh or frozen blackberries. When using frozen fruit, I suggest looking for fruit that was frozen during peak season. Thaw before mixing and baking.

Professional Tips for Making Blackberry Pie
- Make sure your ingredients for the crust are cold. You want to make sure your butter and water are cold for the best pie crust. And the vodka and shortening are frozen. The cold ingredients will help reduce gluten development.
- Taste the filling before baking. Once you have combined the lemon, sugar, and berries, taste. Berries tend to have different levels of tartness, and you may need to adjust them to your desired flavor.
- Let the filling bubble fully. When your pie is baking, let the filling bubble for at least a minute. You want the filling to bubble throughout the whole pie, not just the center.
- Bake the pie on a baking sheet. Fruit pies tend to bubble over, so place the pie on a baking sheet covered in aluminum foil to prevent a mess in the oven.
Ingredients & Substitutions

- All-Purpose Flour: All-purpose flour has just the right amount of gluten to make a tender, flaky pie crust when handled properly. You could also use pastry flour.
- Kosher Salt
- Granulated Sugar: The granulated sugar is here for sweetness and to aid in the thickening process. Sugar absorbs moisture as the filling bakes, which results in a thicker fruit filling. It also helps shorten the gluten strand in the pie crust to aid in a flaky, tender crust.
- Butter: I use unsalted butter for baking because you want to control the amount of salt you add. The butter is integral to shortening the gluten strands by coating and keeping them from forming a strong network.
- Vegetable Shortening: Vegetable shortening along with the butter, will make the pie crust tender, flakey and crumbly.
- Vodka: I use the least expensive vodka I can find for my pie crusts. The quality of the vodka won’t affect the quality of your pie crust. And you won’t be able to taste the vodka because it will evaporate and fully bake out. Just be sure it is frozen to help aid in its job of keeping the gluten from developing.
- Water
- Blackberries: You can use fresh or frozen blackberries in this recipe. If using frozen, I would suggest letting the defrost slightly to strain some of the excess liquid or up the thickener by 1 teaspoon.
- Lemon Zest & Juice: The lemon juice helps brighten the flavor of the pie; you can swap it for orange juice and zest if you prefer.
- Tapioca Flour: I use tapioca to thicken my fruit pies. It thickens better than cornstarch and doesn’t have an off-putting flavor. I use Bob’s Red Mill tapioca flour. Different brands have different thickening powers; you may need more or less. It is trial and error. The same amount of instant tapioca should yield the same results. If you are using tapioca pearls, make sure they are small pearls. I usually grind them in a spice grinder to make them fine. Let the mixed filling sit for 30 minutes to allow the tapioca pearls to hydrate. You don’t have to let tapioca flour sit before baking.
See the recipe card for full information on ingredients and quantities.
Variations
- Change the topping. You don’t have to make a double crust. Try using the crumble topping from my dutch caramel apple pie, or the crunchy oat topping from my peach crisp.
- Add more fruit. Blackberries would pair perfectly with peaches, cherries or nectarines. You could also make a mixed berry pie by adding strawberries, raspberries, and blueberries.
- Infuse the filling. You can pre-cook the filling to infuse it. Try flavoring the blackberries with a spent vanilla bean, cinnamon sticks, mint, or ginger. Cook until the filling bubbles and then cool. Be sure to remove your infusion of choice from the filling before adding it to the pie.
- Change the pie crust. Try with an all-butter pie crust, almond pie crust, or a crisco pie crust. You could even use a chocolate cookie crust with a pre-cooked filling.
How to Make this Homemade Blackberry Pie Recipe
Use these instructions to make a perfect jammie blackberry pie every time! Further details and measurements can be found in the recipe card below.
Prepare the Crust: Additional instructions can be found in this easy pie crust recipe.
Step 1 & 2: Add salt and sugar to the flour, mix with a fork or pastry blender, cover, and put the bowl in the refrigerator until ready to use it. Cut up the butter, measure the shortening, and put it back in the refrigerator while you measure your vodka. Place some ice cubes into a cup of water. Put that vodka back in the freezer!
Step 3 & 4: Remove the dry ingredients from the refrigerator and drop the butter slices into the bowl. Cut the shortening and butter into the flour mixture with your pastry blender until the dough looks like a streusel topping with no unincorporated flour.
The flour mixture will also change color and hold shape when you squeeze it in your hand.


Step 5: Drizzle the vodka over the surface of the dough. Then measure ¼ cup of ice water into the same measuring cup used for the vodka and drizzle this evenly over the surface of the dough. Using a sturdy spatula (or your hands), mash the dough to mix the liquid into the crumbles. Scoop from the bottom and press against the sides of the bowl. This should come together very easily.
This can also be done in a mixer fitted with a paddle attachment. Cut the butter and shortening into the flour mixture on low, and drizzle in the vodka and water when there are pea-sized pieces of butter. Be careful not to over mix; it would be best to finish it by hand.
Step 6: Scoop up the dough, pat into a ball, and divide it in two. Flatten the dough into a disk, wrap tightly in plastic wrap, and refrigerate for at least an hour. This dough is sticky and moist, so I let mine chill for 3 hours, but overnight is even better.


Rolling the dough:
Step 7: Turn the larger disk of dough onto a floured work surface to roll out the bottom crust.
Although general wisdom recommends using a lightly floured surface, common sense dictates that a generously floured surface is necessary for this recipe.
Step 8: Lightly flour the top surface of the dough and the rolling pin. With a light touch and a fluid motion, roll the dough from the center up and back to the center, then from the center down toward you and back to the center. Pick up the rolling pin and repeat, going from the center to each of the sides. Lightly cup your dough in your palms and spin ¼ turns counterclockwise.
Step 9: Repeat the rolling until your dough is large enough to cover your pan and drape delicately over the sides.
If your dough sticks, lift the edge and throw some flour underneath. As your round gets larger, you will no longer be able to cup the edges and turn.
Step 10: At this point, gently slide your hands under the dough and then turn. For a regular 9-inch pie pan, your round should be approximately 12” in diameter.
Step 11: Repeat with the second pie of pie dough. I have a nice latticing tutorial if you are going to lattice the crust. If you are not making a lattice, make sure to cut ample holes using cookie cutters.
Assemble & Bake Pie:
Step 12: Preheat the oven to 350°F.
Step 13: Combine all the ingredients for the pie filling in a large bowl. Before adding the tapioca, taste the filling to ensure it isn’t too tart.
If using quick-cooking tapioca pearls, be sure to mix and allow the filling to sit for 30 minutes prior to baking. This hydrates the pearls and allows the filling to thicken evenly. This is not necessary for tapioca flour. You can also use cornstarch.


Step 14: Line the pie dish with one circle of pie dough by gently folding it in half and then in half again, unfolding it into your pie pan. Gently move the crust to the bottom of the pie tin so it is flush with the bottom and edge. Then, fill the bottom crust with the blackberry pie filling.
Step 15: Top with the second pie circle or latticed top and crimp edges decoratively. Chill the pie for at least one hour before baking.
You can brush tops with heavy cream and sprinkle with turbinado if desired. If using turbinado sugar, brush the heavy cream and use the turbinado sugar before you crimp the edges together. This will give the edge crust a swirl of the sugar inside.


Step 16: Bake in the preheated oven for 45-50 minutes or until the filling is bubbling in the center and the pie crust is a dark golden brown.
If the top crust starts to darken too much before the filling has baked, tent it with foil or just the edges. Double-crust pies bake better in metal pie tins than ceramic or glass. However, it can be challenging to get a fully baked bottom crust.


Step 17: Cool completely on a wire rack before slicing with a sharp knife. Serve within a week or wrap and freeze.
Bake your pie in a metal baking dish. This will ensure the bottom of the pie fully bakes and help the pie bake more evenly. You can definitely bake this pie in a glass or ceramic pie dish, but it will most likely take a little longer.
Frequently Asked Questions
Store the baked and cooled pie well-wrapped at room temperature for 3 days. It can also be stored for up to a week in the refrigerator or 3 months in the freezer.
The pie can be reheated from the freezer, refrigerator, or at room temperature. In a 350°F oven, heat the pie until the center becomes warm again. To test, take a cake tester or butter knife and insert it into the pie. Leave it in for a few seconds, then test it on your forearm or your top lip. If it is warm, the center of the pie is ready to serve.
Your filling could be runny if you used frozen berries and didn’t up the thickening agent or strain some of the juices. It is also possible the filling didn’t bubble for at least one minute to activate the thickener.
You can never go wrong with a heaping scoop of vanilla ice cream. For a fun flavor combination, try peach ice cream or use a simple whipped cream.
If you enjoyed this recipe, please leave a star rating and let me know how it goes in the comments below! I love hearing from you and your comments make my day!
Blackberry Pie

Ingredients
For the crust:
- 2 ½ cups all-purpose flour
- 1 teaspoon kosher salt
- 2 tablespoons granulated sugar
- 12 tablespoons unsalted butter, cold, cubed
- ½ cup vegetable shortening, cold, cut into small bits
- ¼ cup vodka, frozen
- ¼ cup water, cold
For the pie filling:
- 5-6 cups blackberries, rinsed, drained and patted dry
- ⅔ cup granulated sugar, use more to taste if your blackberries are tart
- 1 teaspoon lemon zest, from the same lemon as you juice
- 1 medium lemon , juiced
- ¼ cup tapioca flour , or quick cooking tapioca*
Instructions
- Prepare the Crust:
- Sift two cups of flour and re-measure 2 ½ cups into your mixing bowl. You can also use a kitchen scale, measure 310g, and skip the sifting.
- Add salt and sugar to the flour, mix with a fork or pastry blender, cover, and put the bowl in the refrigerator until ready to use it.
- Cut up the butter, measure the shortening, and put it back in the refrigerator while you measure your vodka. Place some ice cubes into a cup of water. Put that vodka back in the freezer!
- Remove the dry ingredients from the refrigerator and drop the butter slices into the bowl. Cut the shortening and butter into the flour mixture with your pastry blender until the dough looks like a streusel topping with no unincorporated flour.
- Drizzle the vodka over the surface of the dough. Then measure ¼ cup of ice water into the same measuring cup used for the vodka and drizzle this evenly over the surface of the dough. Using a sturdy spatula (or your hands), mash the dough to mix the liquid into the crumbles. Scoop from the bottom and press against the sides of the bowl. This should come together very easily.
- Scoop up the dough, pat into a ball, and divide it in two. Flatten the dough into a disk, wrap tightly in plastic wrap, and refrigerate for at least an hour. This dough is sticky and moist, so I let mine chill for 3 hours, but overnight is even better.
Rolling the dough:
- Turn the larger disk of dough onto a floured work surface to roll out the bottom crust.
- Lightly flour the top surface of the dough and the rolling pin. With a light touch and a fluid motion, roll the dough from the center up and back to the center, then from the center down toward you and back to the center. Pick up the rolling pin and repeat, going from the center to each of the sides. Lightly cup your dough in your palms and spin ¼ turns counterclockwise.
- Repeat the rolling until your dough is large enough to cover your pan and drape delicately over the sides.
- At this point, gently slide your hands under the dough and then turn. For a regular 9-inch pie pan, your round should be approximately 12” in diameter.
- Repeat with the second pie of pie dough. I have a nice latticing tutorial if you are going to lattice the crust. If you are not making a lattice, make sure to cut ample holes using cookie cutters.
Assemble & Bake Pie:
- Preheat the oven to 350°F.
- Combine all the ingredients for the pie filling in a large bowl. Before adding the tapioca, taste the filling to ensure it isn’t too tart.
- Line the pie dish with one circle of pie dough by gently folding it in half and then in half again, unfolding it into your pie pan. Gently move the crust to the bottom of the pie tin so it is flush with the bottom and edge. Then, fill the bottom crust with the blackberry pie filling.
- Top with the second pie circle or latticed top and crimp edges decoratively. Chill the pie for at least one hour before baking.
- Bake in the preheated oven for 45-50 minutes or until the filling is bubbling in the center and the pie crust is a dark golden brown.
- Cool completely on a wire rack before slicing with a sharp knife. Serve within a week or wrap and freeze.
Notes
Nutrition
Nutrition information is automatically calculated, so should only be used as an approximation.
 Like this recipe? Rate & comment below!
Before You Go
I hope you enjoyed this professional chef tested recipe. Check out our other delicious, chef-developed pie recipes!


I love a fruit pie! First off, the pie crust is amazing; it is so flaky and really easy to work with. And the blackberry filling is perfectly thick, and I love the slight tartness from the berries and the lemon.