my favorite sourdough bread recipe
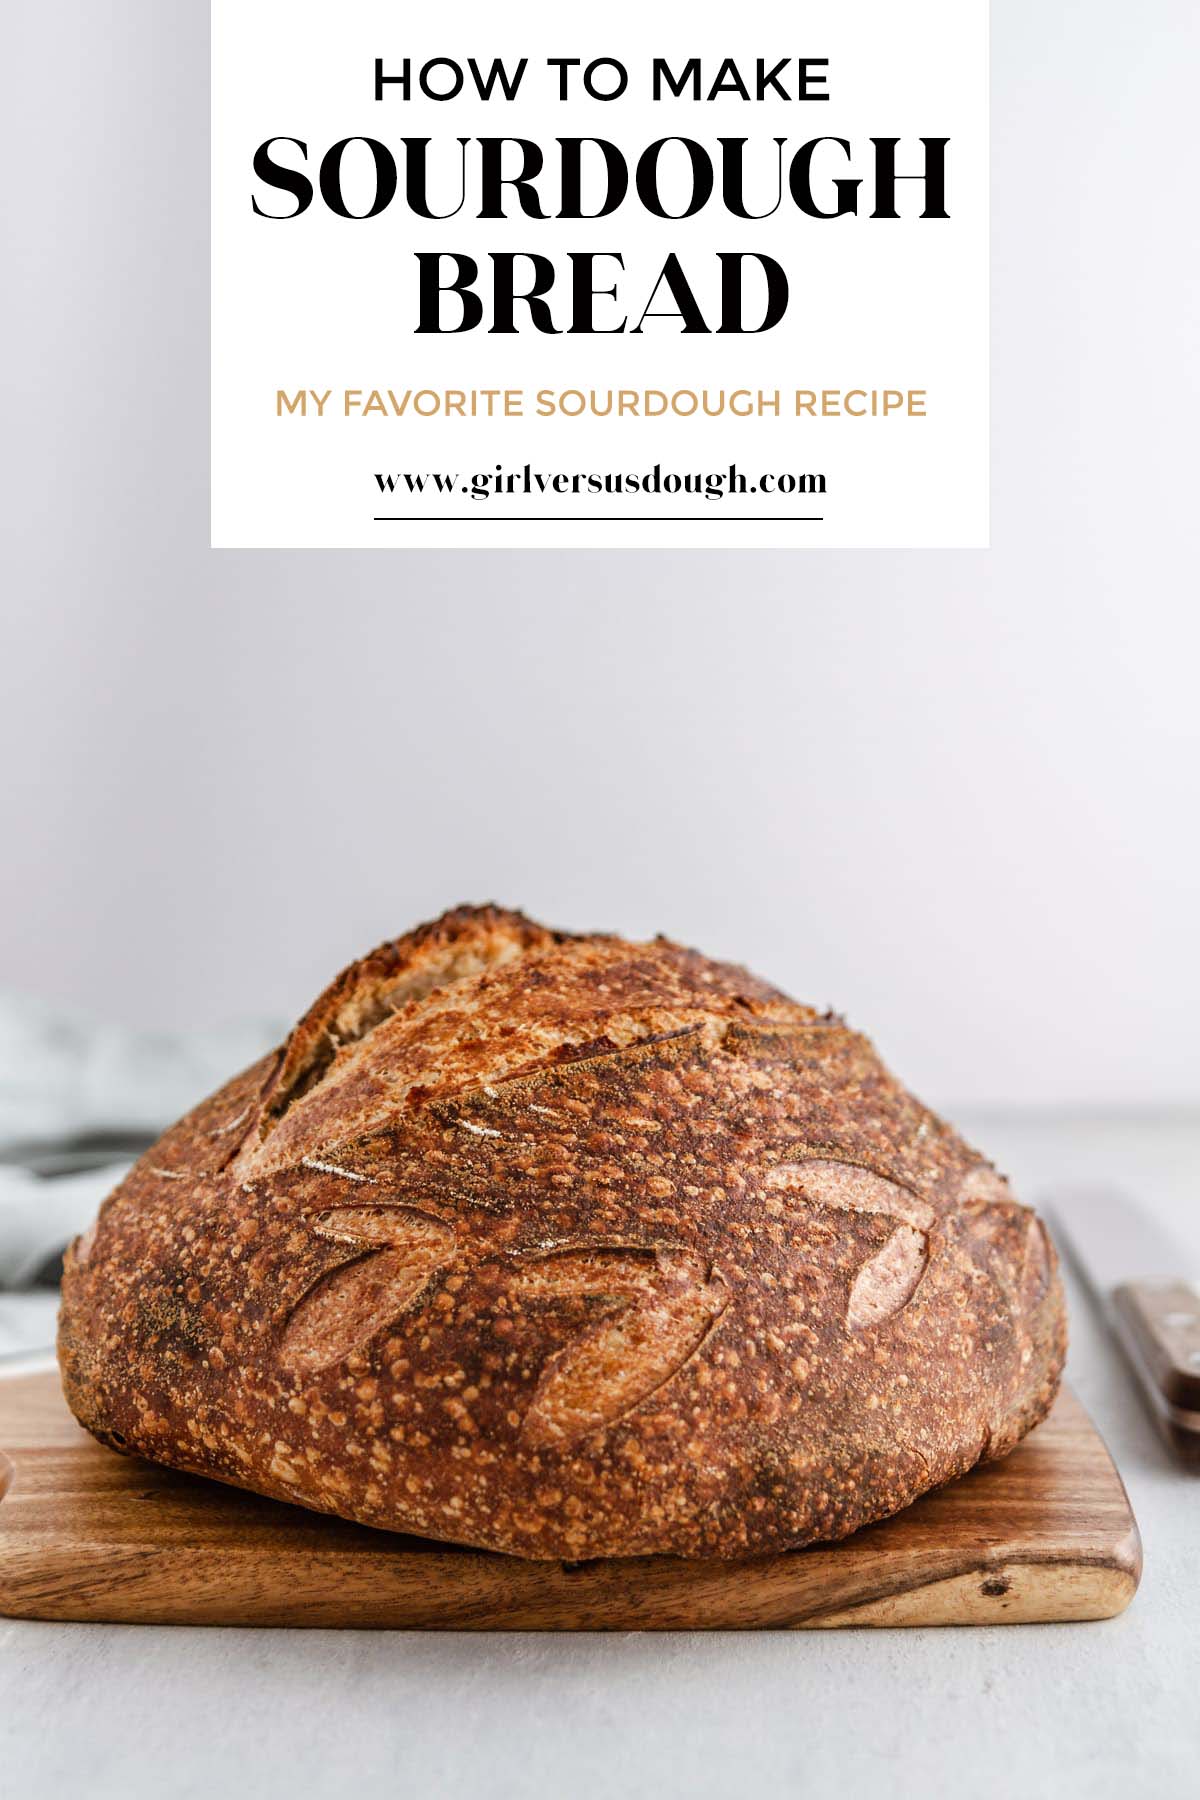
Welcome to the next post in our series, “How to Make Sourdough Bread.” Today’s post features my favorite sourdough bread recipe complete with step-by-step photos, definitions to sourdough baking terms and a sample baking schedule within the printable recipe. Follow along and in no time, you’ll have fresh homemade sourdough bread in your own kitchen.
Happy Monday! Today, I’m going to walk you through the entire process of what is my favorite sourdough bread recipe. I’ve tried several variations of sourdough bread recipes and this one is by far the easiest and most foolproof recipe that yields the best results.
This recipe is adapted from The Perfect Loaf’s high-hydration sourdough bread. I’ve made just a few slight changes based on my own personal experience with this recipe, but you can also refer to his post for added insight.
Let’s do this!
A FEW TIPS BEFORE WE GET STARTED
Before we dive into the recipe, let’s cover a few basics:
1. There are several terms you’ll come across in this post that might sound like gibberish to you at first – levain, autolyse, bulk fermentation, etc. Don’t worry! I’ll explain everything.
2. You can use any sourdough starter to make this recipe (including storebought), but my experience with this recipe has always been with my sourdough starter recipe.
3. I have always found it incredibly helpful to take notes in a notebook as I go through my sourdough baking processes. This way, I know exactly what measurements I used, the final temperatures of the ingredients and dough, the timing of each step, and the end result in terms of taste, crumb, texture, etc. If I have a written record of this process, I know what I can adjust for the next round.
4. Please refer to my essential sourdough tools post for all kitchen tools I use in this sourdough bread recipe.
5. Please refer to the sample baking schedule in the printable recipe at the bottom of this post for example times on when to prepare each step of the recipe. This is super helpful to make sure you have the timing right and can be available to make sourdough bread!
6. In your sourdough baking journey you’ll come across the term “hydration.” This recipe in particular is at an 80% hydration level, defined by the total amount of water divided by the total amount of flour. This post on Sour Flour explains it really well.
OK, I think we’re ready. ONWARD.
STEP ONE: PREPARE THE LEVAIN
For our first step, we will prepare the levain. Levain is actually the French term for a sourdough starter, but in this case, levain is also the mixture we use to feed a portion of our already-mature starter so it has the strength to give the bread lift, flavor, texture, etc. In other words, it’s what makes sourdough, well, sourdough.
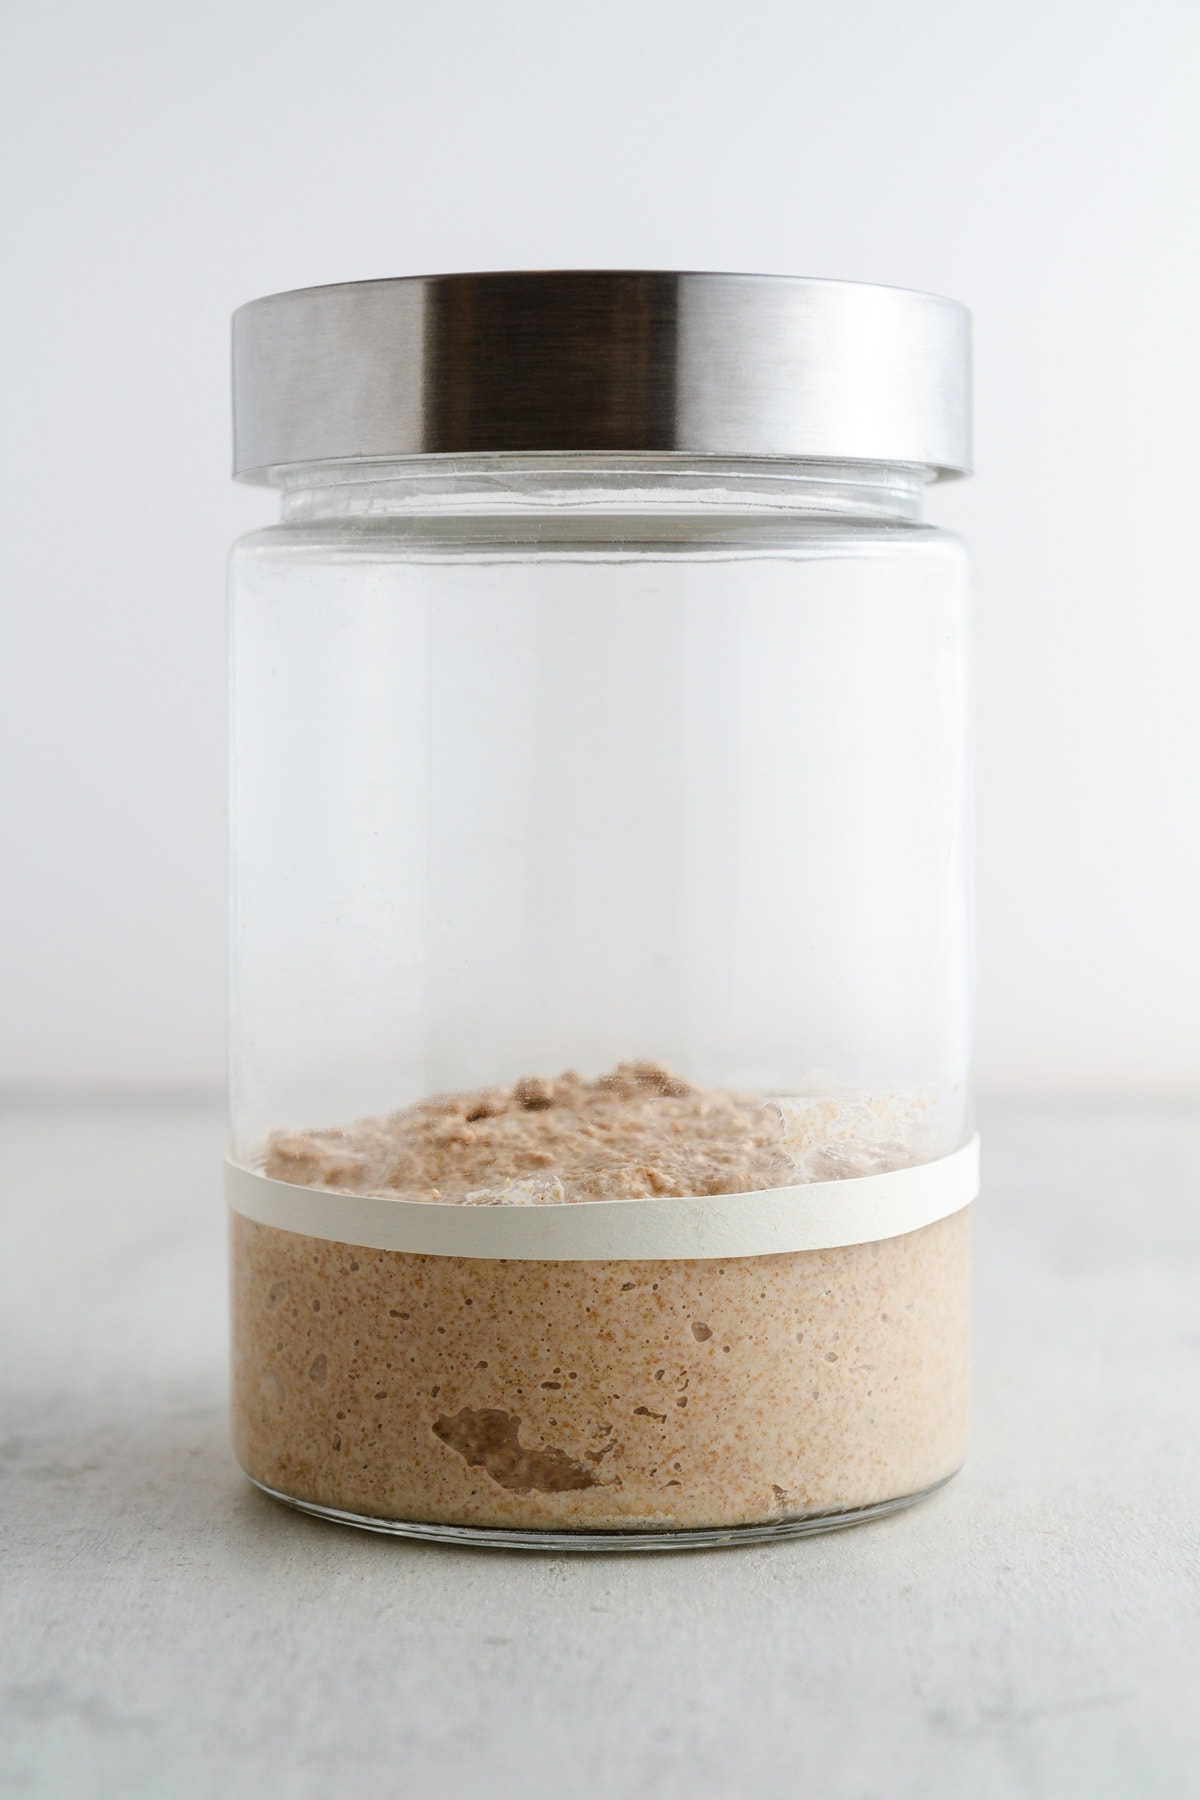
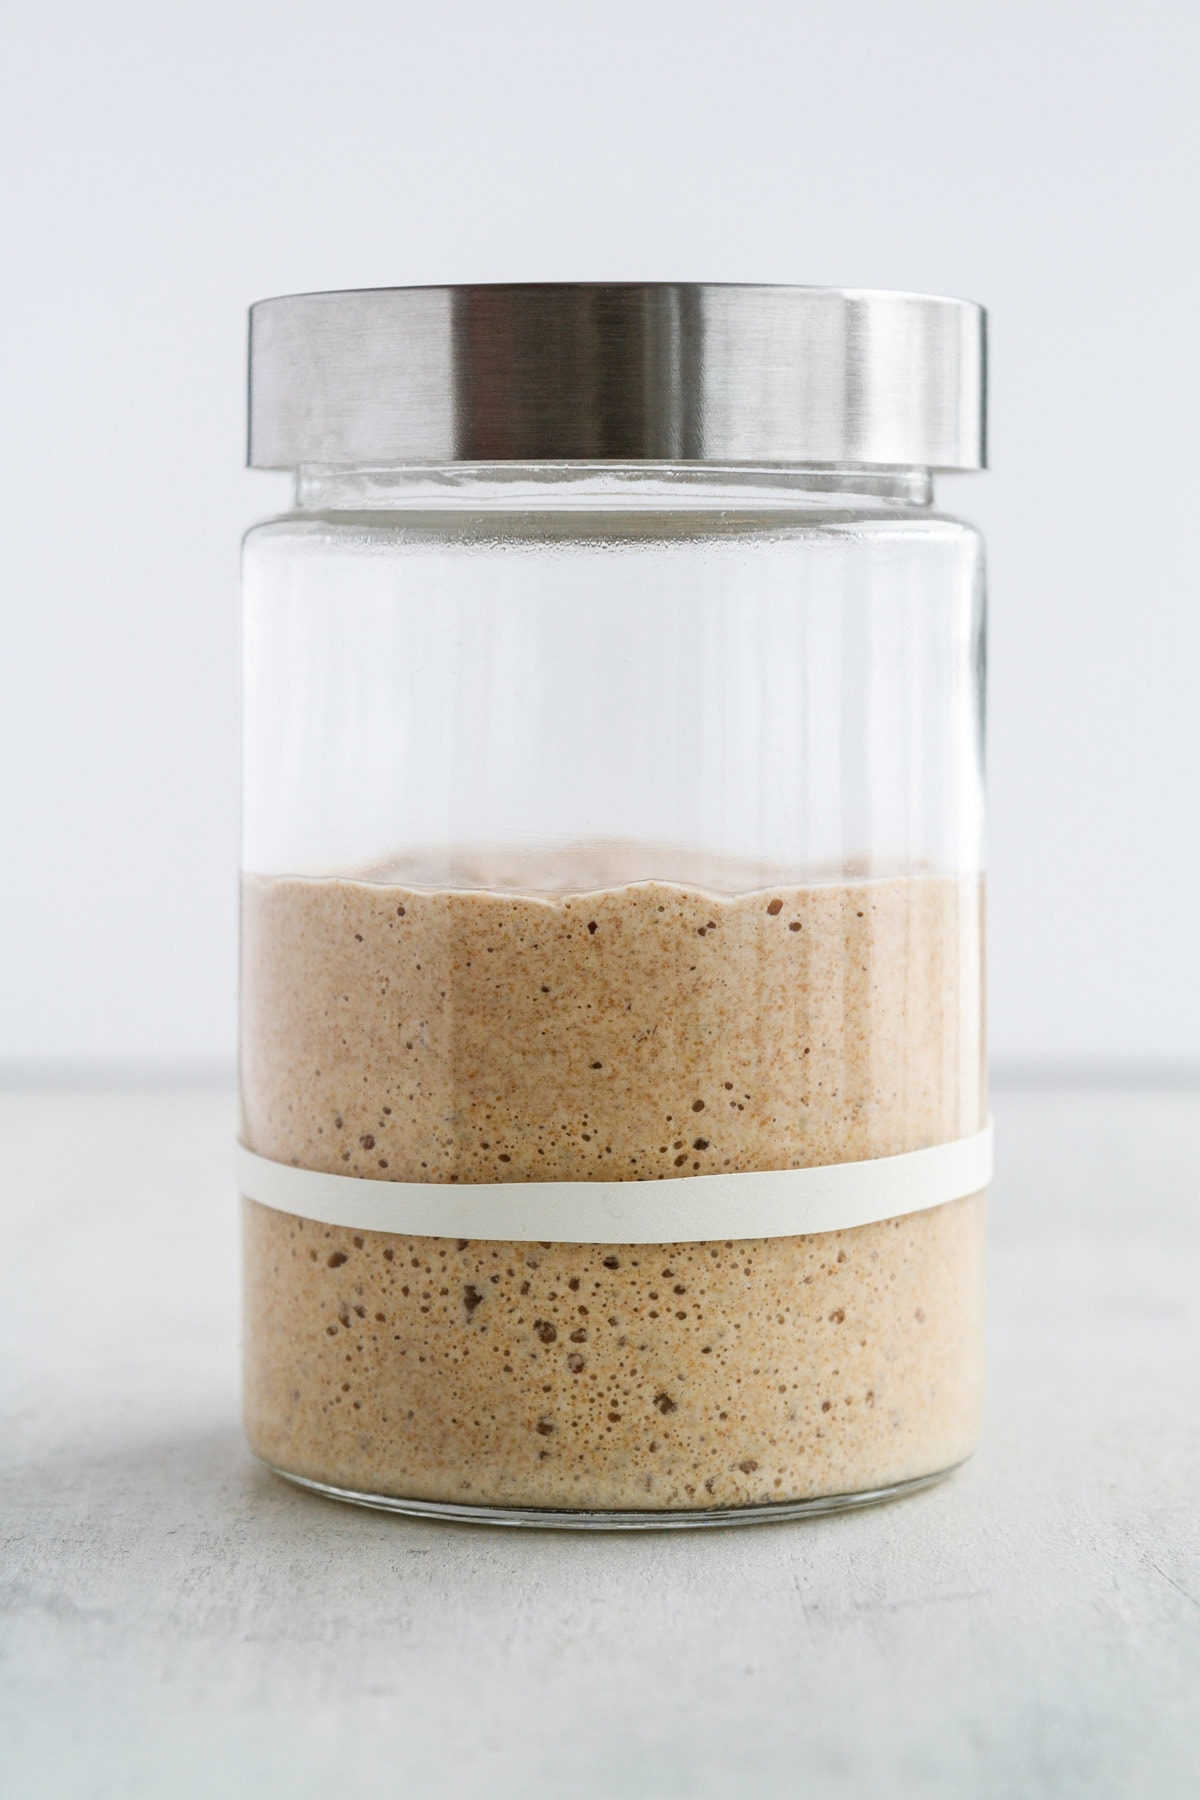
You’ll know the levain has reached its peak when it has grown considerably in size, there are bubbles all throughout, the top of the levain is not domed but instead very flat or even beginning to cave in on itself and there is a pleasant sour smell to it, not off-putting or too vinegar-y.
*NOTE: Please refer to the sample baking schedule in the printable recipe at the bottom of this post for a guideline of exact times on when to prepare each step!
HOW TO STORE A SOURDOUGH STARTER
Now you’re probably wondering: After I make the levain, what do I do with the remaining starter? Well, let me tell you.
IF YOU PLAN TO BAKE BREAD ON AN ALMOST DAILY BASIS: Place a clean starter jar on a kitchen scale. Tare the weight so it reads “0”, then to the jar add 20g of your mature starter, 50g whole wheat flour, 50g all-purpose flour and 100g distilled water at room temperature. Stir the mixture vigorously with a spatula until no dry bits of flour remain, then cover the jar loosely with a lid. Leave the starter in a warm place for 12 hours. Discard your excess starter. Repeat the feeding process approximately every 12 hours twice daily (ex. 8 a.m. and 8 p.m.) until you want to make sourdough bread again.
IF YOU PLAN TO BAKE BREAD ON A WEEKLY BASIS: Place a clean starter jar on a kitchen scale. Tare the weight so it reads “0”, then to the jar add 20g of your mature starter, 50g whole wheat flour, 50g all-purpose flour and 80g distilled water at room temperature. Stir the mixture vigorously with a spatula until no dry bits of flour remain, then cover the jar loosely with a lid. Let the starter sit out at room temperature for about an hour, then place it in the back of your fridge (where no one will touch it or, heaven forbid, accidentally throw it away).
In nearly one week’s time (about two days before you plan to bake another set of sourdough loaves) in the early evening (say, about 6 p.m.), take the starter out of the fridge. Let it come up to room temperature (about 2 hours), then feed it as follows (at about 8 p.m.): Place a clean starter jar on a kitchen scale. Tare the weight so it reads “0”, then to the jar add 20g of your mature starter, 50g whole wheat flour, 50g all-purpose flour and 100g distilled water at room temperature. Stir the mixture vigorously with a spatula until no dry bits of flour remain, then cover the jar loosely with a lid.
Store the starter in a warm place for approximately 12 hours, then repeat the feeding process (at about 8 a.m.). Continue to repeat the feeding process every 12 hours (8 a.m., 8 p.m.) until the starter has regained its full strength and you’re ready to bake. On average, I feed my starter four times this way before preparing the levain.
If you plan to bake bread even less often than weekly, I suggest reading this post on sourdough starter storage options. I don’t yet have personal experience with storing my starter this way.
STEP TWO: PREPARE THE DOUGH FOR AUTOLYSE
The autolyse stage is a fancy term for when the flour and water for the dough are mixed together and take a rest. This rest time is short and helps for all the ingredients to come together better. That’s the very unofficial way to explain it.
Before we make the dough mix for the autolyse, however, we need to measure the temperature of the levain. Use an instant-read thermometer to measure this temperature, then write it down. Also write down your kitchen’s ambient temperature, as well as the temperature of your flour (which is usually the same temperature as your kitchen’s ambient temperature). These numbers will come in handy shortly.
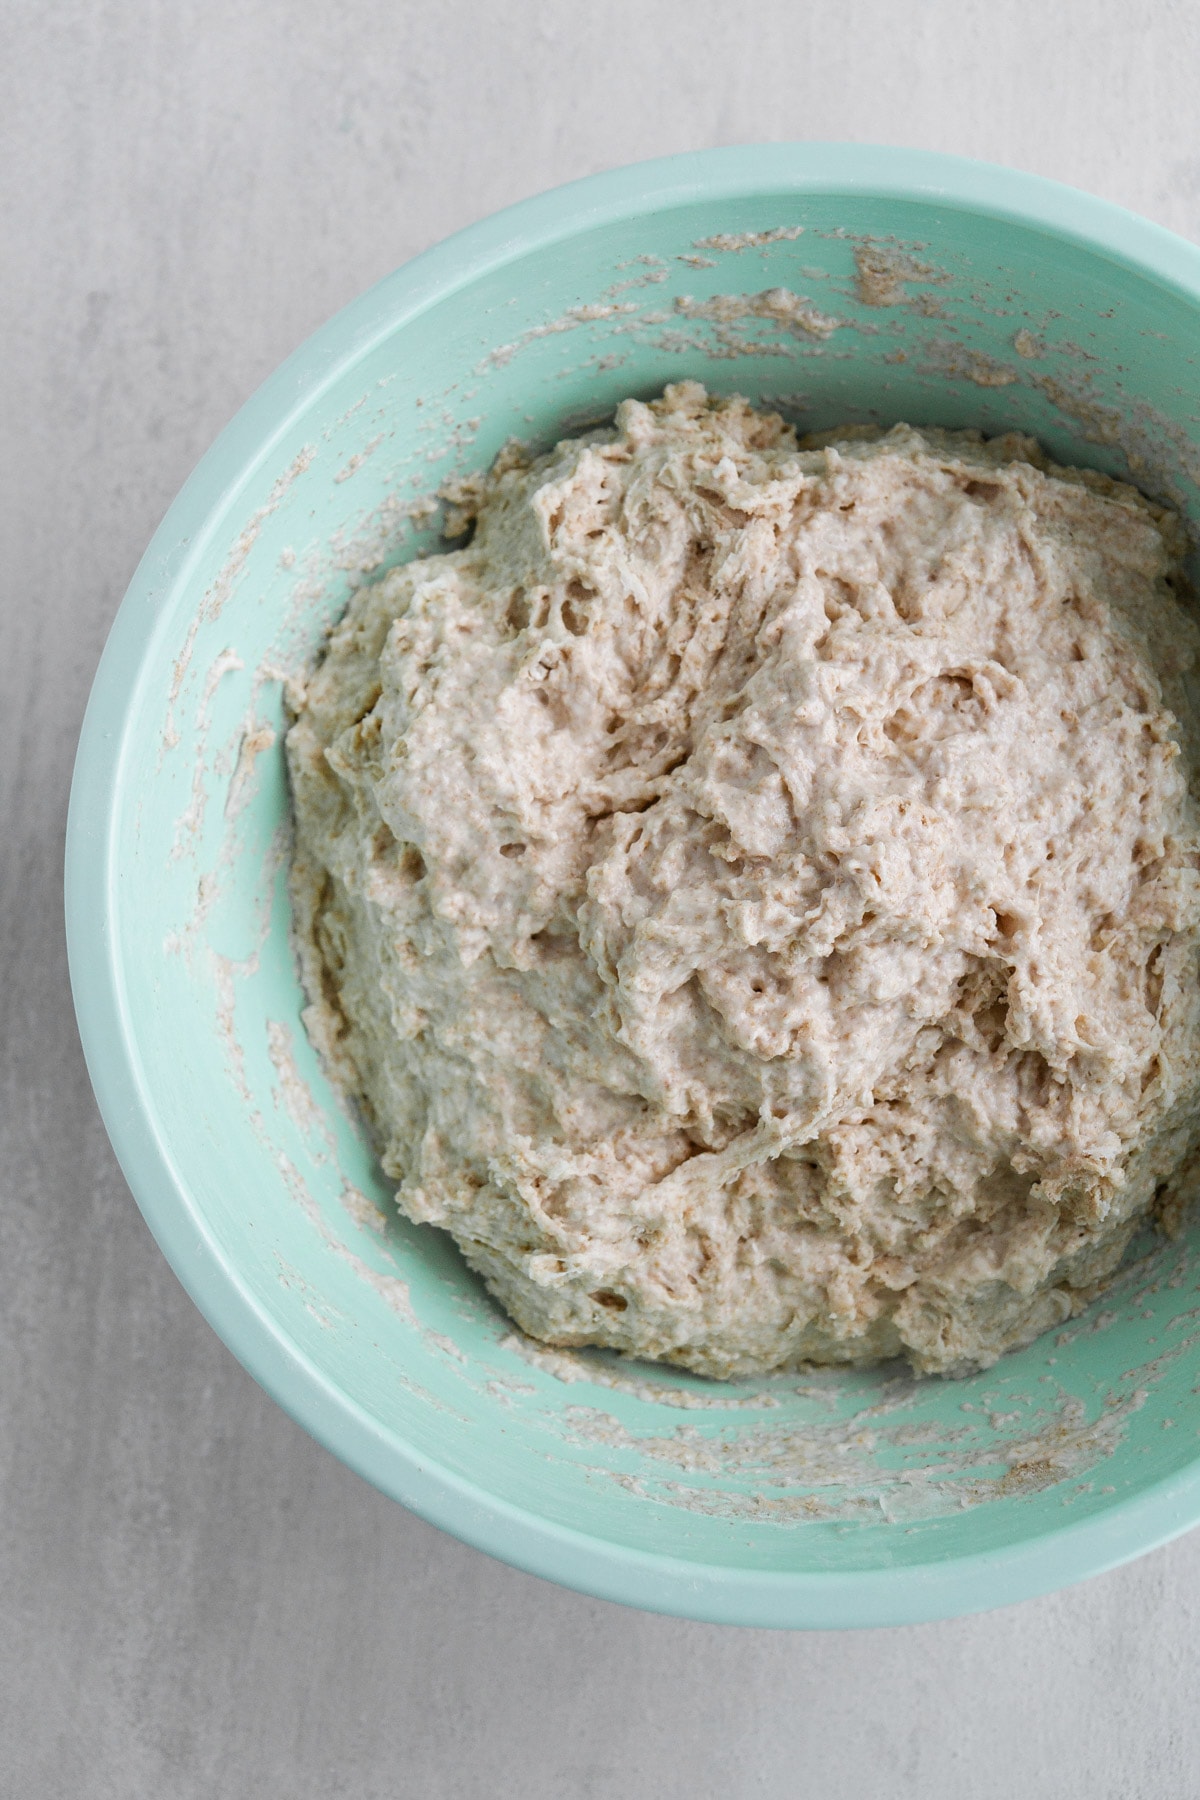
OK, onward! Approximately 11-ish hours after preparing the levain (see the sample schedule in the recipe for specific times!), place a medium to large mixing bowl on a kitchen scale. Tare the weight so it reads “0”, then to the bowl add 250g of the levain (you may have some left over to discard, or you may have none) and 750g distilled water at room temperature. Stir the mixture with a wooden spoon or spatula until the levain is completely dissolved in the water, then add 800g bread flour and 200g whole wheat flour. Mix the dough with a spatula or, more effectively, with your hands until completely mixed together and no dry bits of flour remain. It’s a messy process when you use your hands, but you’ve gotta just get in there.
Once the dough is mixed, cover the bowl loosely with plastic wrap and place the bowl in a warm spot in your kitchen (such as the oven with the light turned on) for 50 minutes.
HOW TO DETERMINE FINAL DOUGH TEMPERATURE
While the autolyse occurs, let’s do some math to determine what temperature the remaining water should be that we’ll add to the dough mix. This is where those numbers you recorded for the levain, flour and room temperature come into play. For sourdough, we want to achieve a final dough temperature of 78 degrees F precisely for all things to work together well. Temperature is so important in sourdough baking, it must be treated like another ingredient.
To determine the temperature you need for the remaining water, use The Perfect Loaf’s temperature calculator and plug in the numbers for the levain, flour and room temperature you recorded. This will give you the exact temperature you need to achieve 78 degrees F in your final dough temperature.
Once the dough has finished its autolyse, place the bowl on a kitchen scale. Tare the weight so it reads “0”, then to the bowl add 20g fine sea salt and 50g distilled water AT THE MEASURED TEMPERATURE YOU JUST CALCULATED. For me, sometimes this equates to 97 degrees F, or 92 degrees F, or even 102 degrees F. It really varies, but the point is: Don’t skip this step. It seems tedious, but a FDT of 78 degrees F is important for the best result possible.
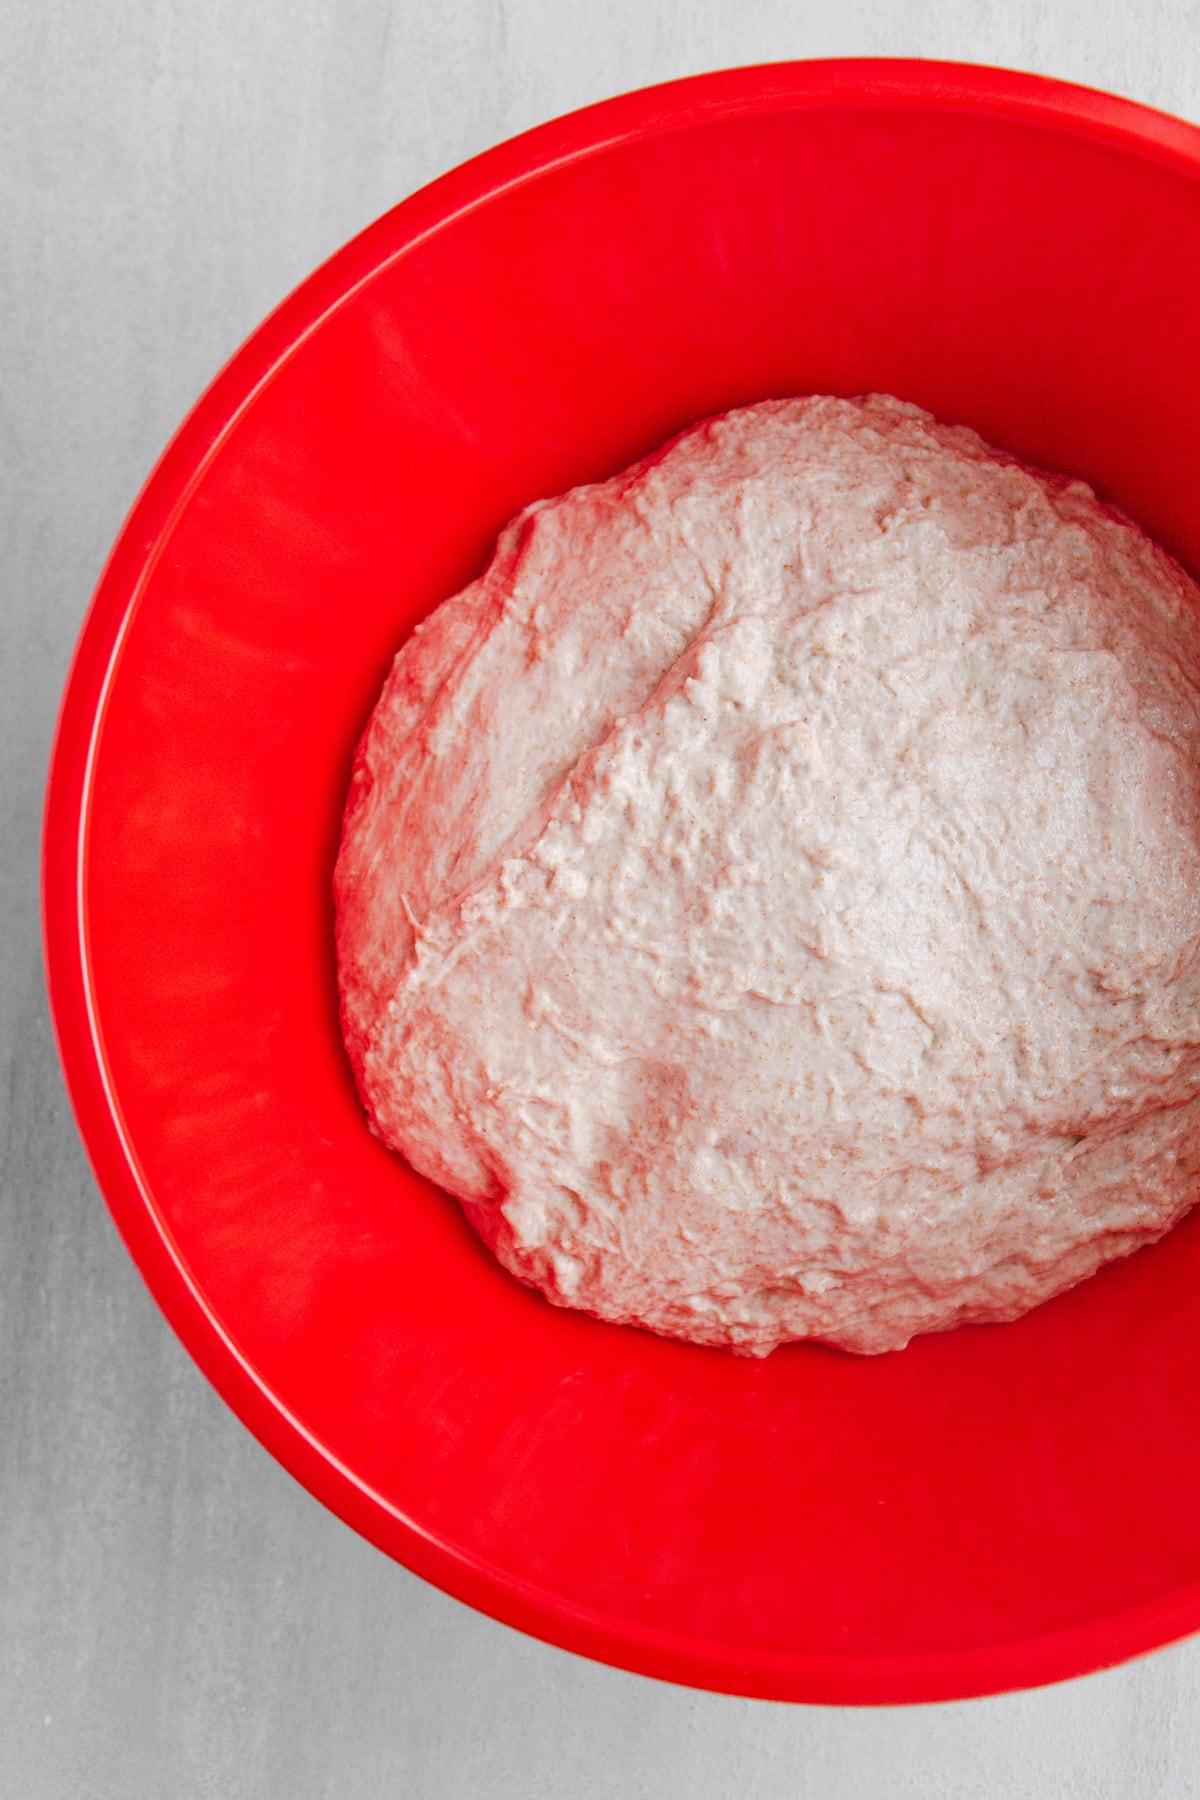
Once the salt and water are added, get your hands messy again and stir the dough mix together with your hands until everything is completely incorporated. Transfer the dough to a clean, large bowl.
Cover the bowl with plastic wrap and return it to its warm place.
STEP THREE: BULK FERMENTATION
Bulk fermentation is a proper way of saying “the time when the dough does its rising and, well, fermenting.” This is the time when the dough gains strength and height, and we’ll help it along to do so. Here’s how.
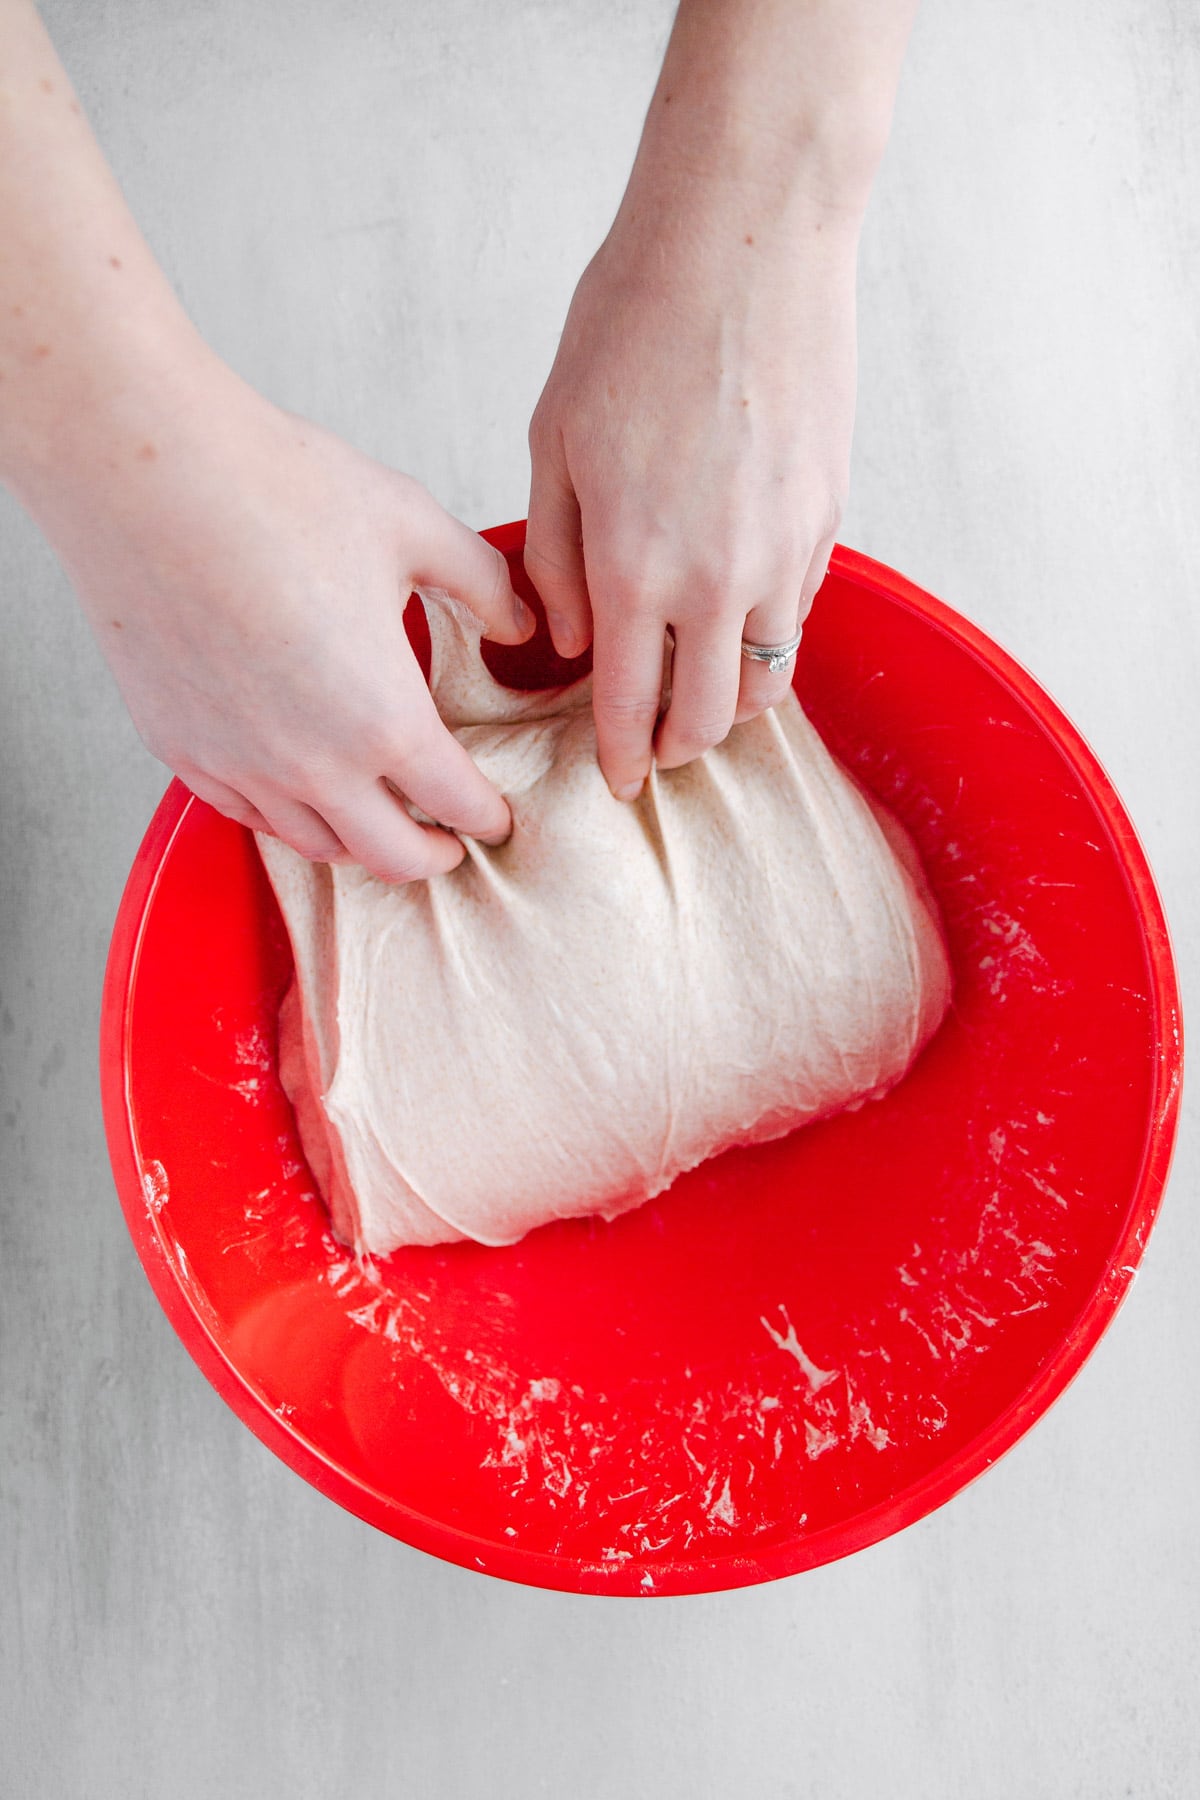
Approximately 30 minutes after mixing the dough, uncover the bowl and perform a set of four turns. This means you take both hands, lift up the end of the dough farthest from you as high as you can lift it without tearing, then fold it over on itself towards you. Turn the bowl 180 degrees, then repeat. Turn the bowl 90 degrees, then repeat. Turn the bowl another 180 degrees, then repeat. This is ONE SET of turns. P.S. Head to my Sourdough highlight in my Instagram Stories to see a video on how I perform a set of turns.
Once the set is complete, cover the bowl again with plastic wrap and return it to its warm place.
We will repeat these sets of turns six times every 30 minutes total (see the sample schedule in the recipe for an example on timing), then let the dough rest covered without any turns for another 1 hour 30 minutes. This means bulk fermentation in total takes approximately 4 hours 30 minutes.
At the end of bulk fermentation, your dough should be strong, grown in size anywhere from 20 to 50 percent and have a few gas bubbles sprinkled throughout. This is good news!
STEP FOUR: PRESHAPE
Once bulk fermentation is complete, we need to preshape the dough before actually shaping it (ha). The most important tip to know here is that we want to manipulate the dough as little as possible to keep those gas bubbles intact.
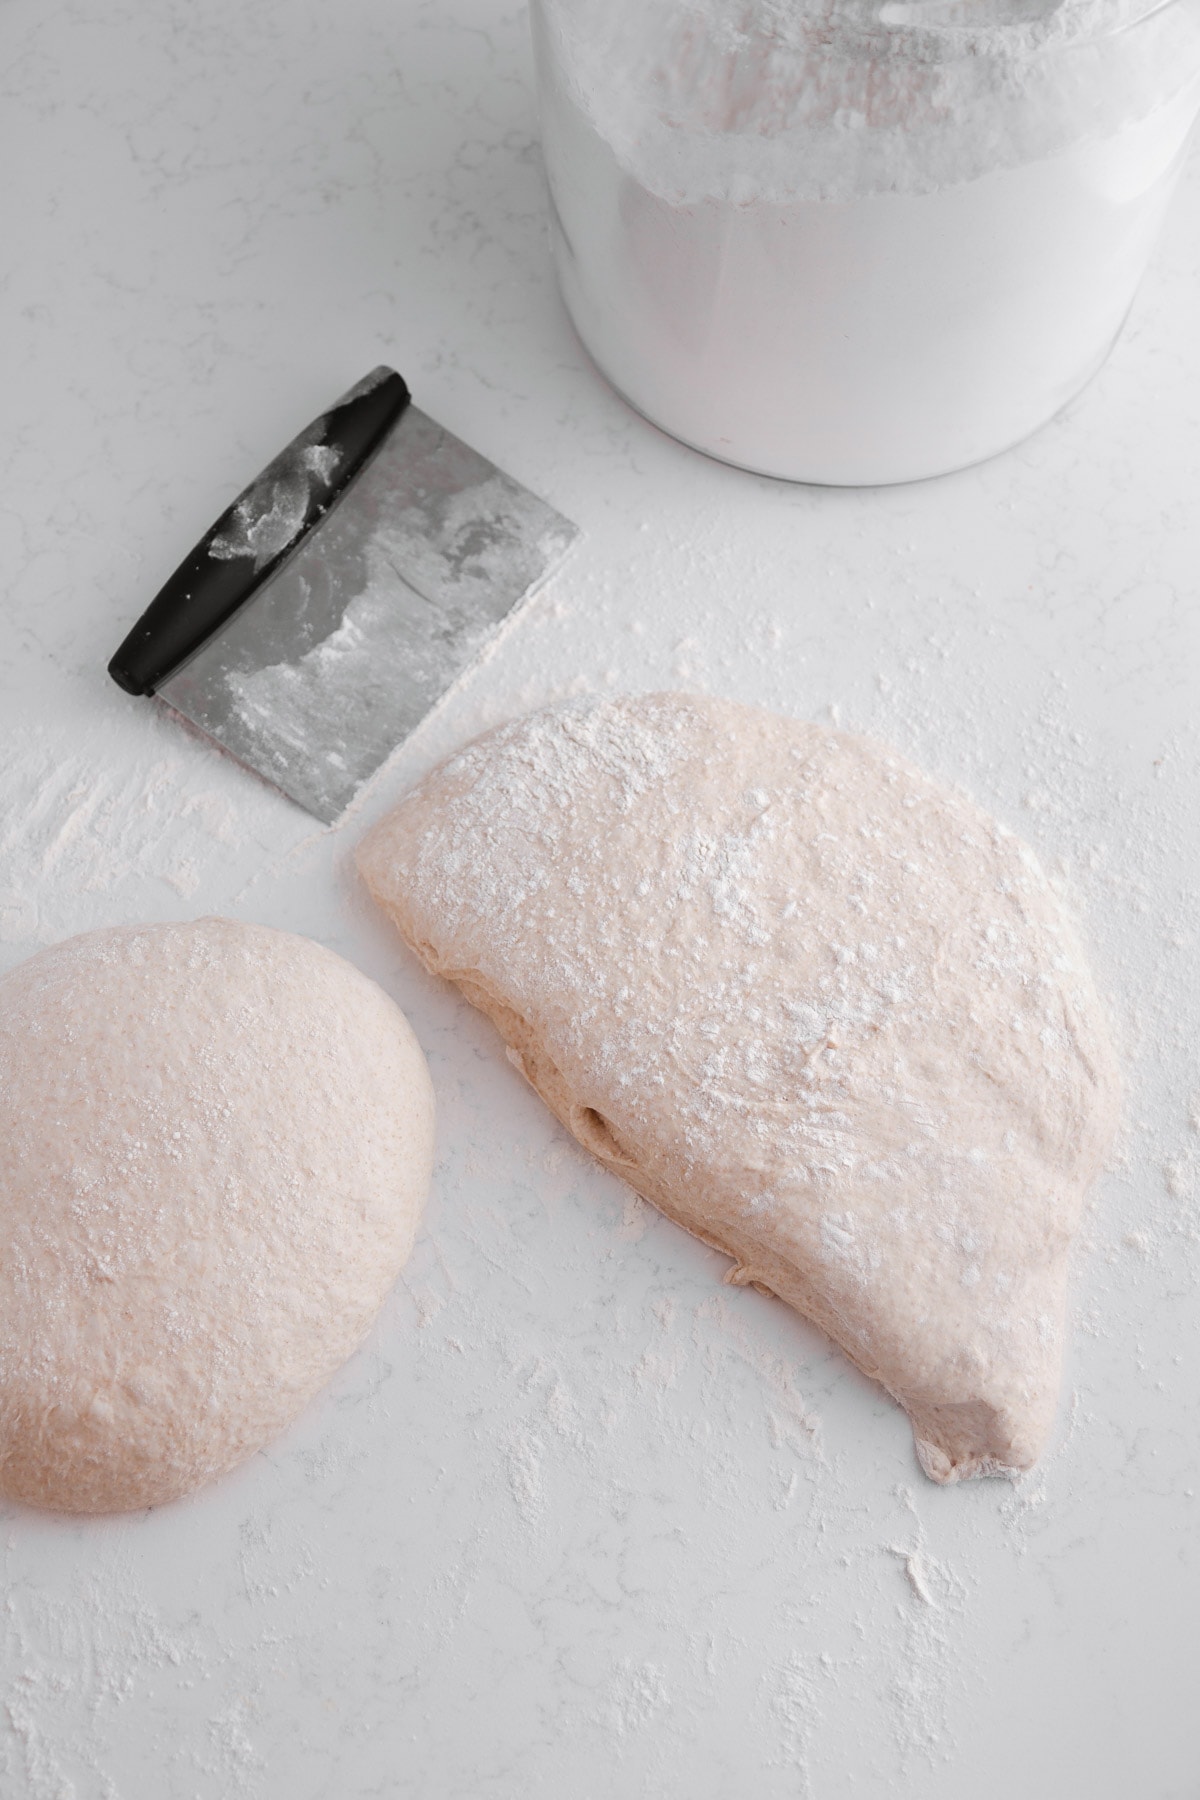
Using a spatula to help coax it out, gently remove the dough from its bowl onto a well-floured surface. Use a bench scraper or sharp knife coated in flour to divide the dough in two equal size pieces. Cover your hands with flour and, as gently but as quickly as possible, rotate one piece of dough with your hands while leaving it on or close to the surface, shaping into a tight round. I usually cup my hands and gently pull the dough under itself as I turn it to create a round shape with a tight surface. Repeat this process with the second piece of dough.
Cover each piece of dough with a bowl and let them rest on the counter untouched for 30 minutes.
STEP FIVE: SHAPE AND OVERNIGHT PROOF
While the dough is in its preshape phase, let’s prep the bowls/baskets for the overnight proof.
I like to spray the banneton basket or linen for lining the bowl(s) with a little bit of water (basically, just get them lightly damp), then sprinkle them evenly with a light coating of white rice flour. White rice flour is the best option for the bowls because it gives you the best chance of making sure the dough doesn’t stick to the lining. Once that step is done, I set them off to the side until we are ready to shape.
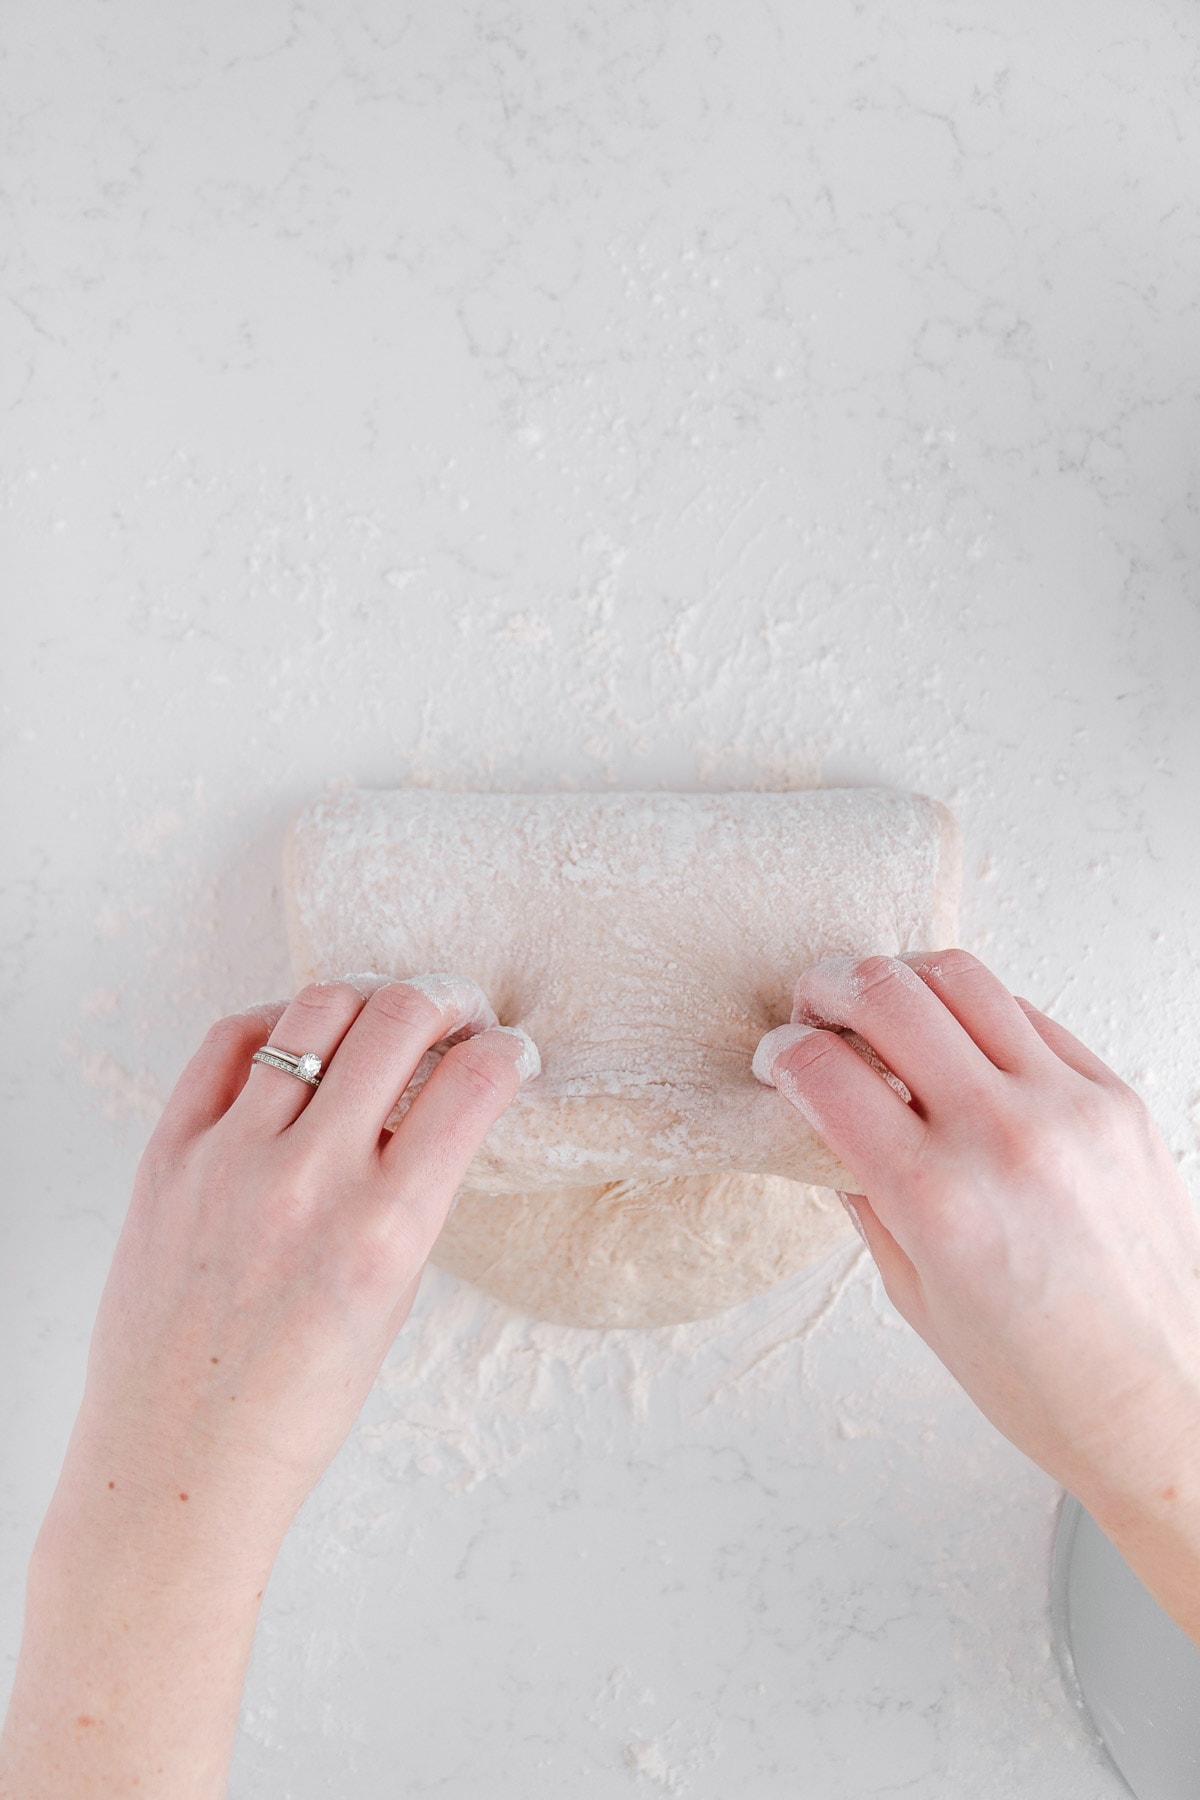
About 30 minutes after preshaping, uncover one piece of dough. Gently turn it over and place it on the surface. Using both hands, lift up the top half and fold it over about 3/4 of the way over itself.
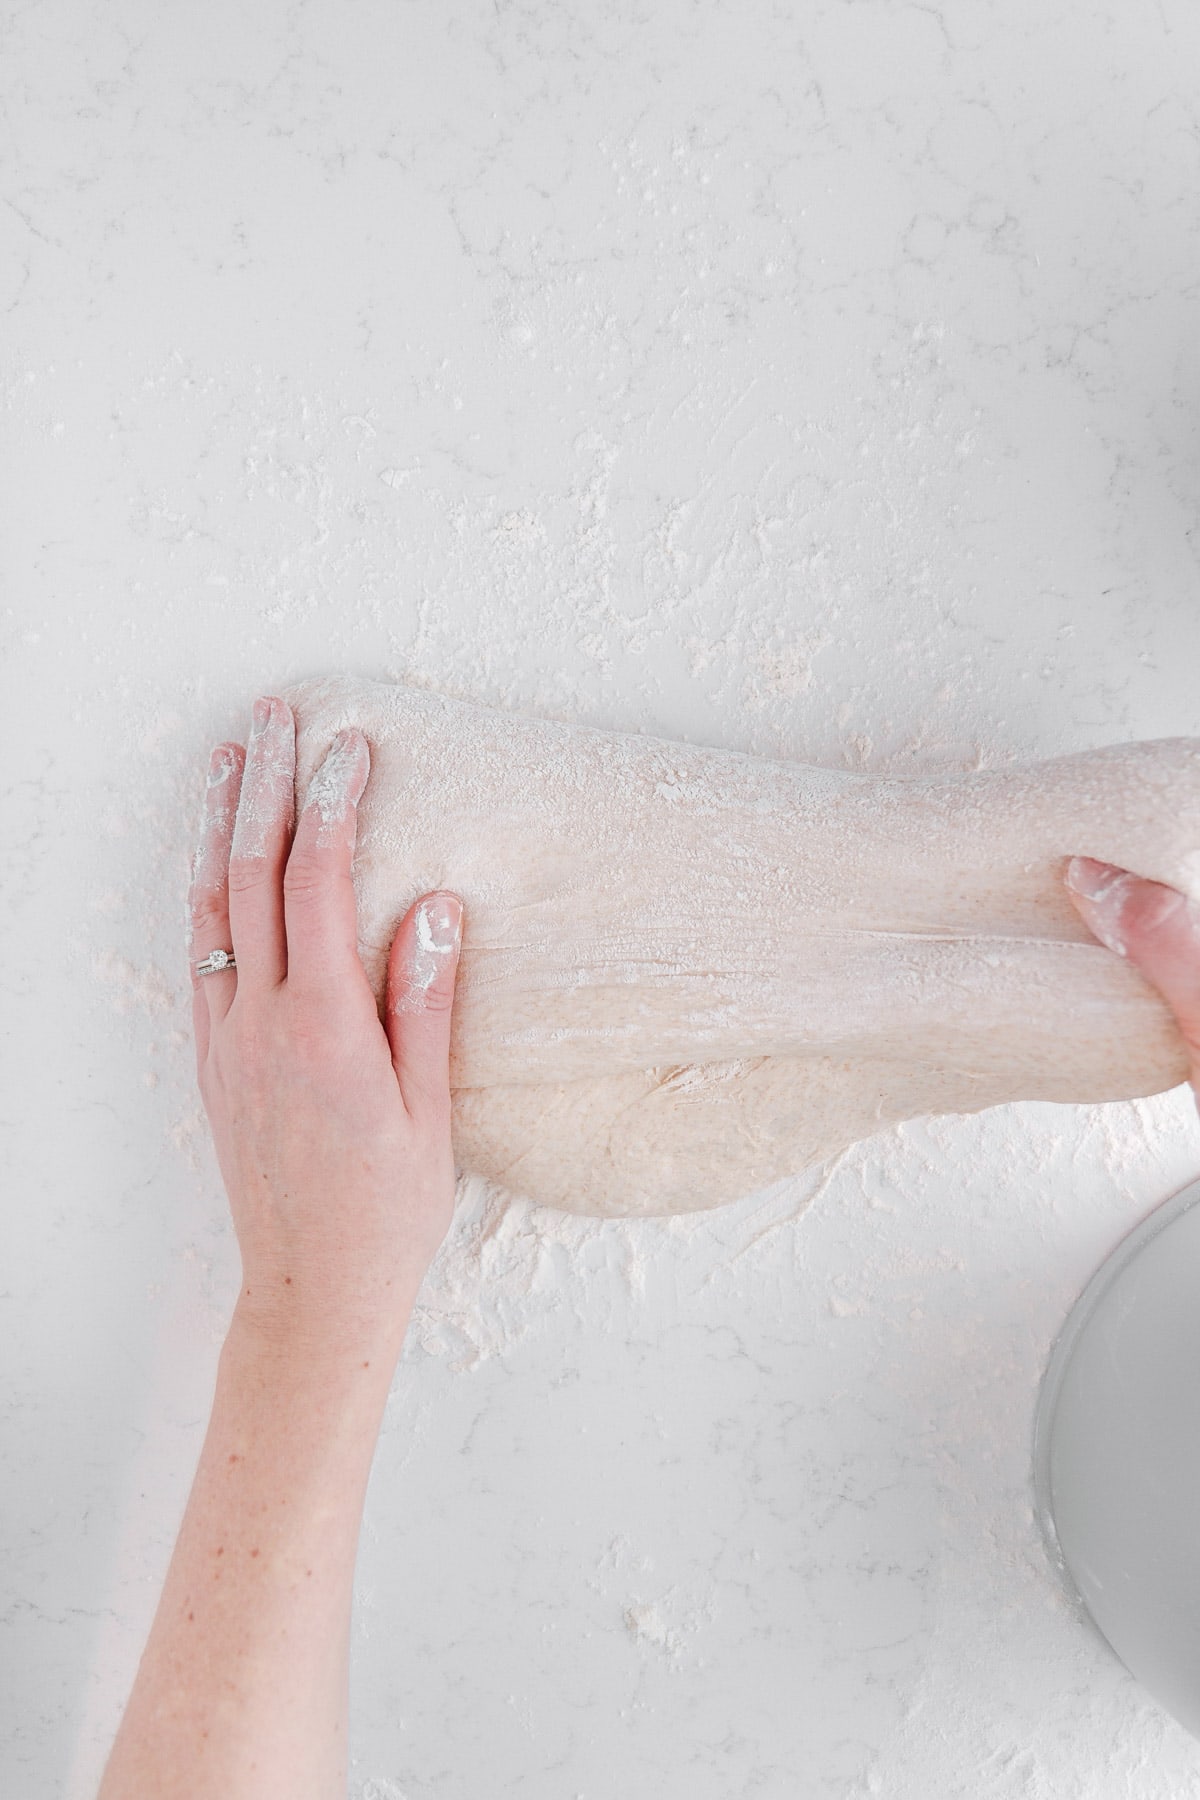
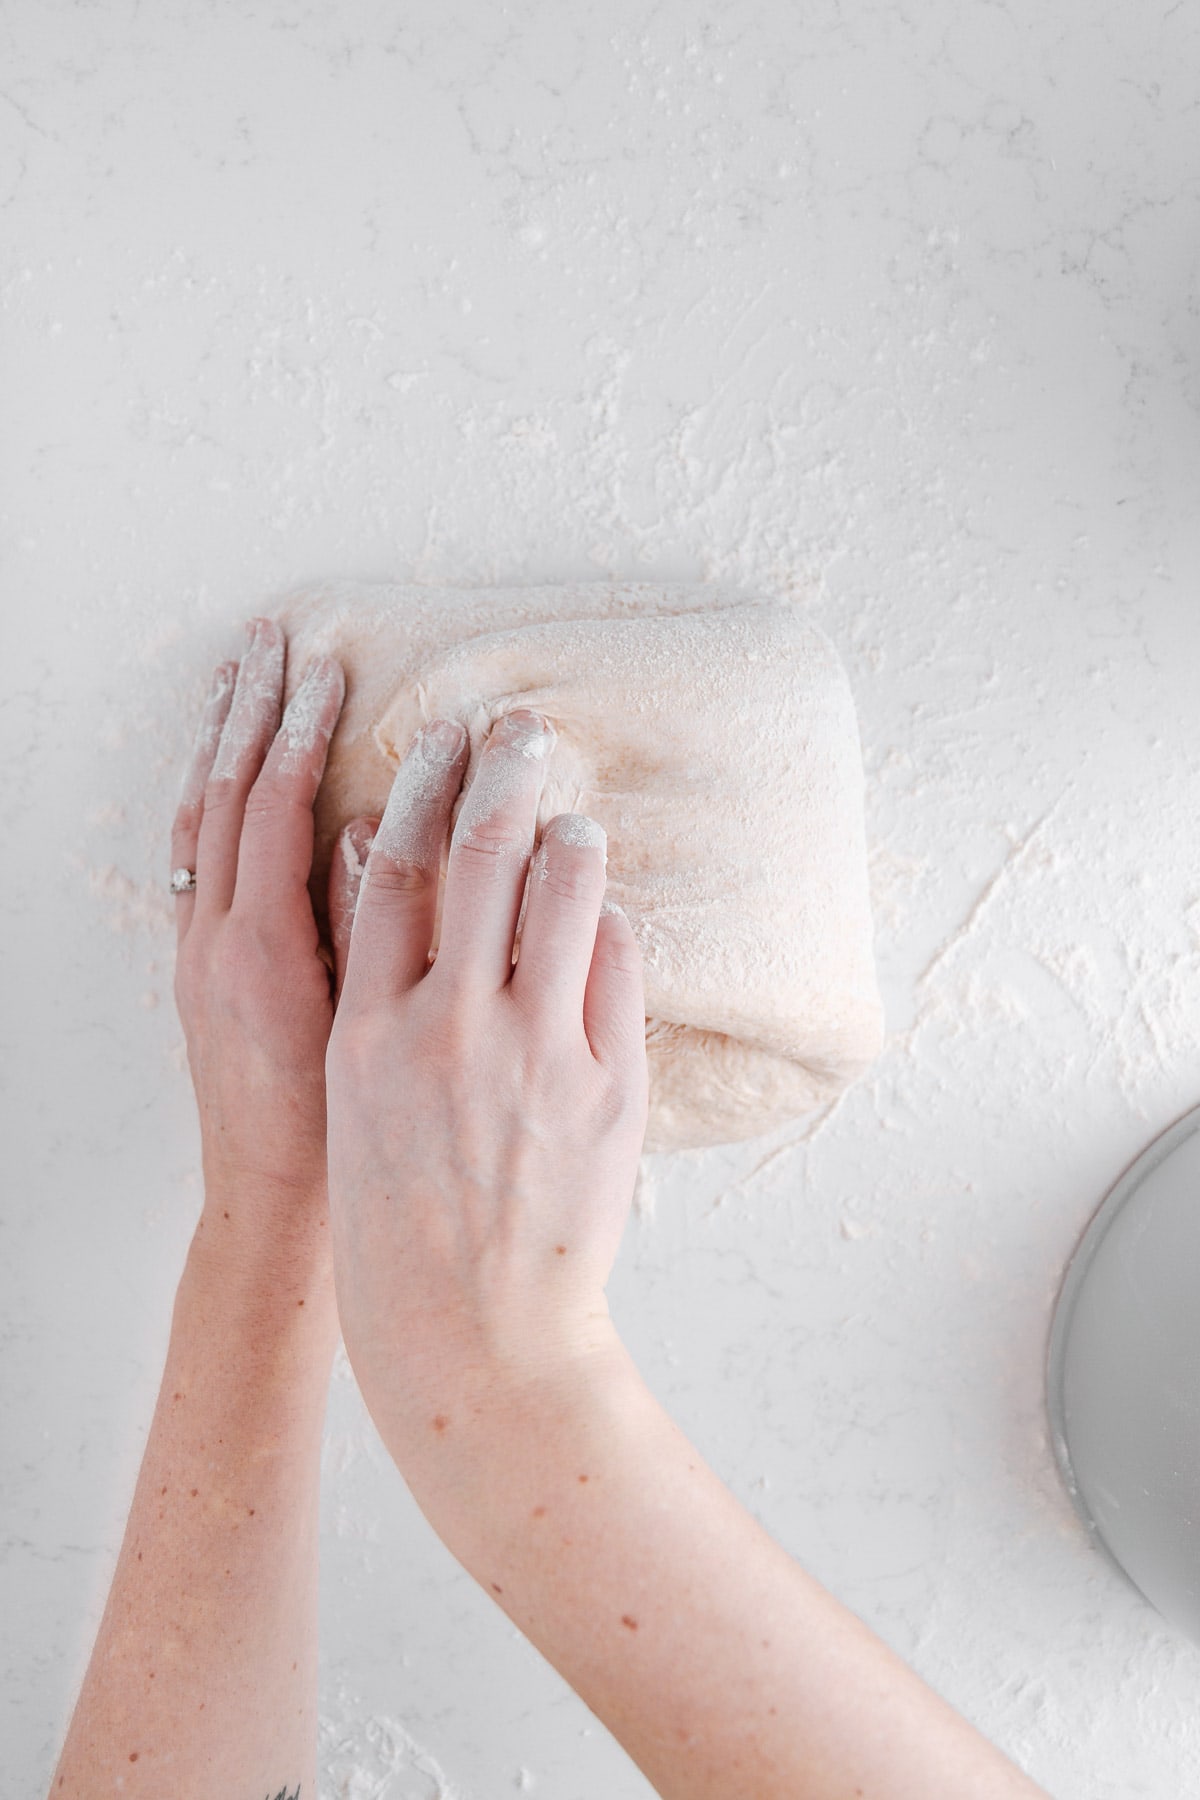
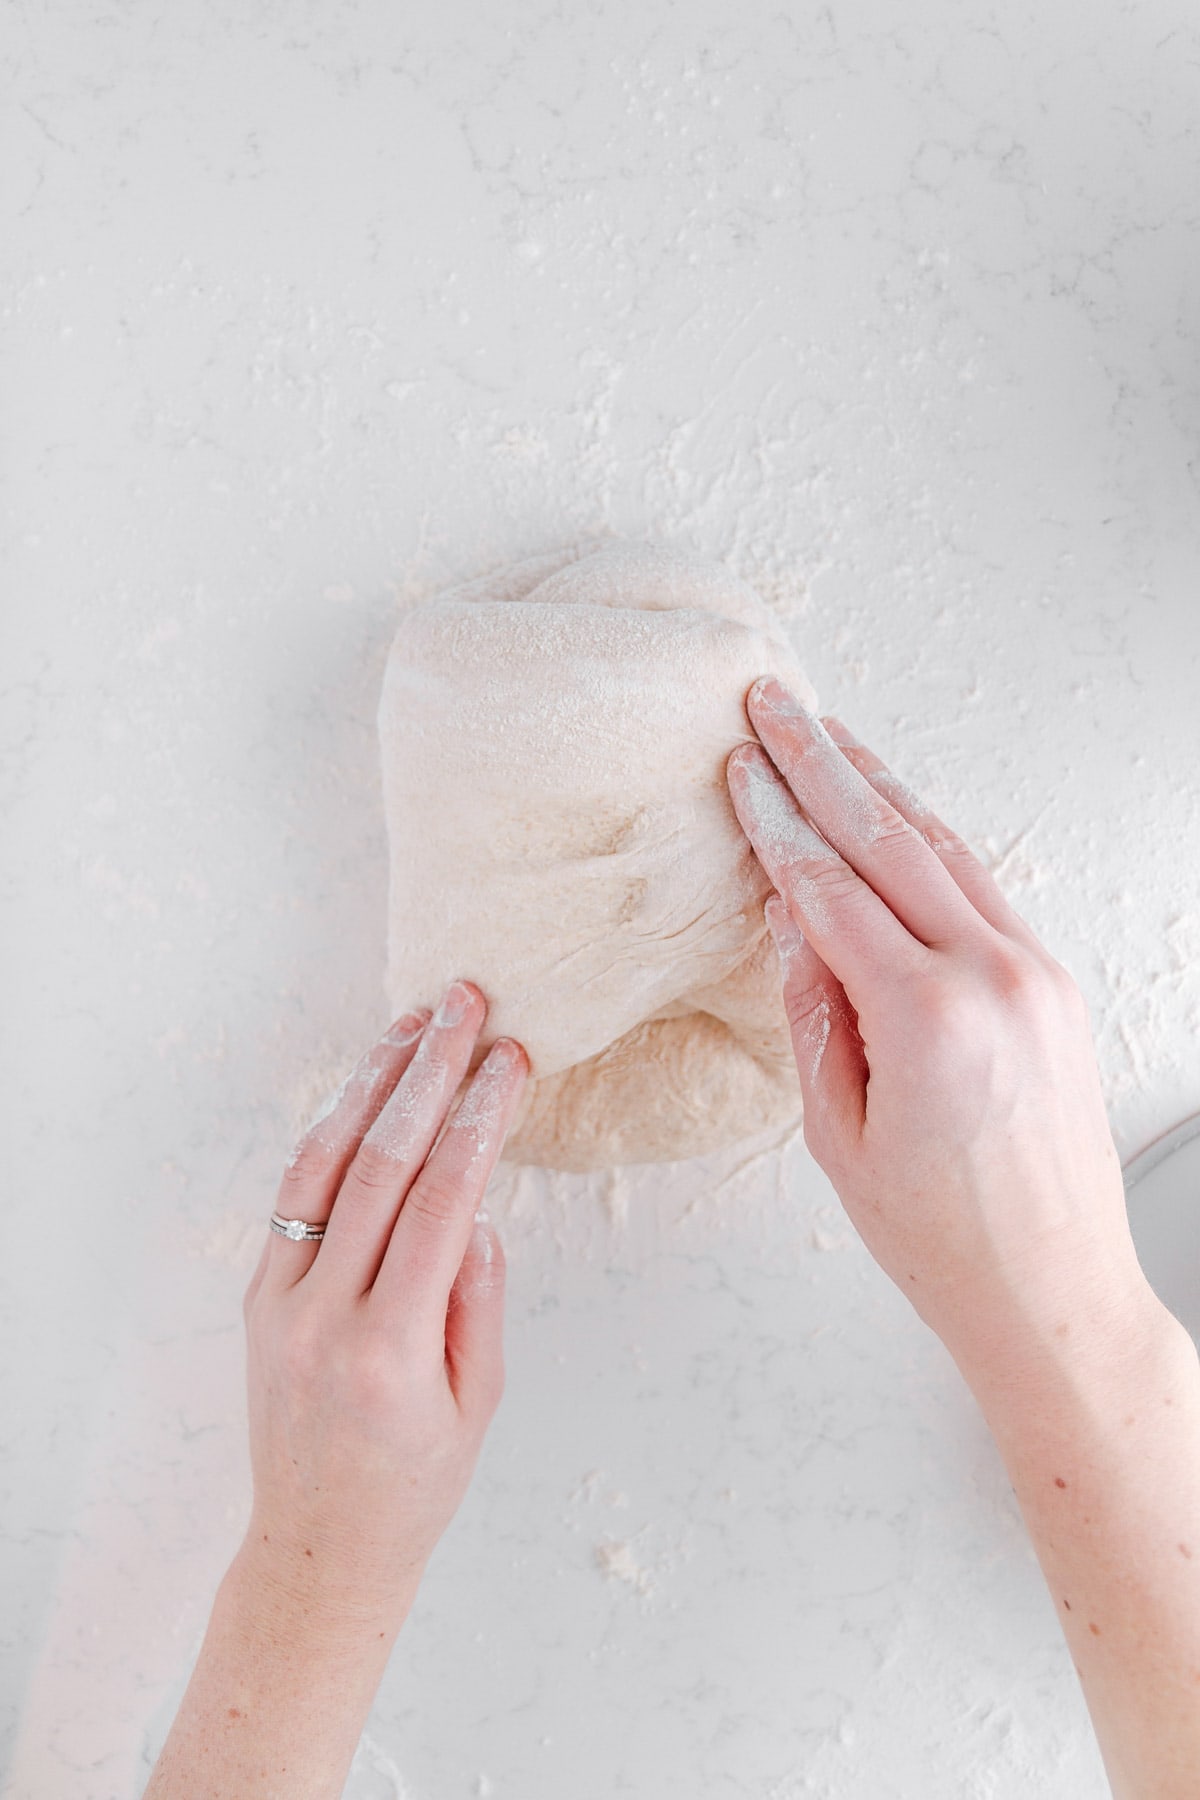
Grab the right side of the dough; stretch it out to the right and then fold it over the dough. Grab the left side of the dough; stretch it out to the left and then fold it over the dough.
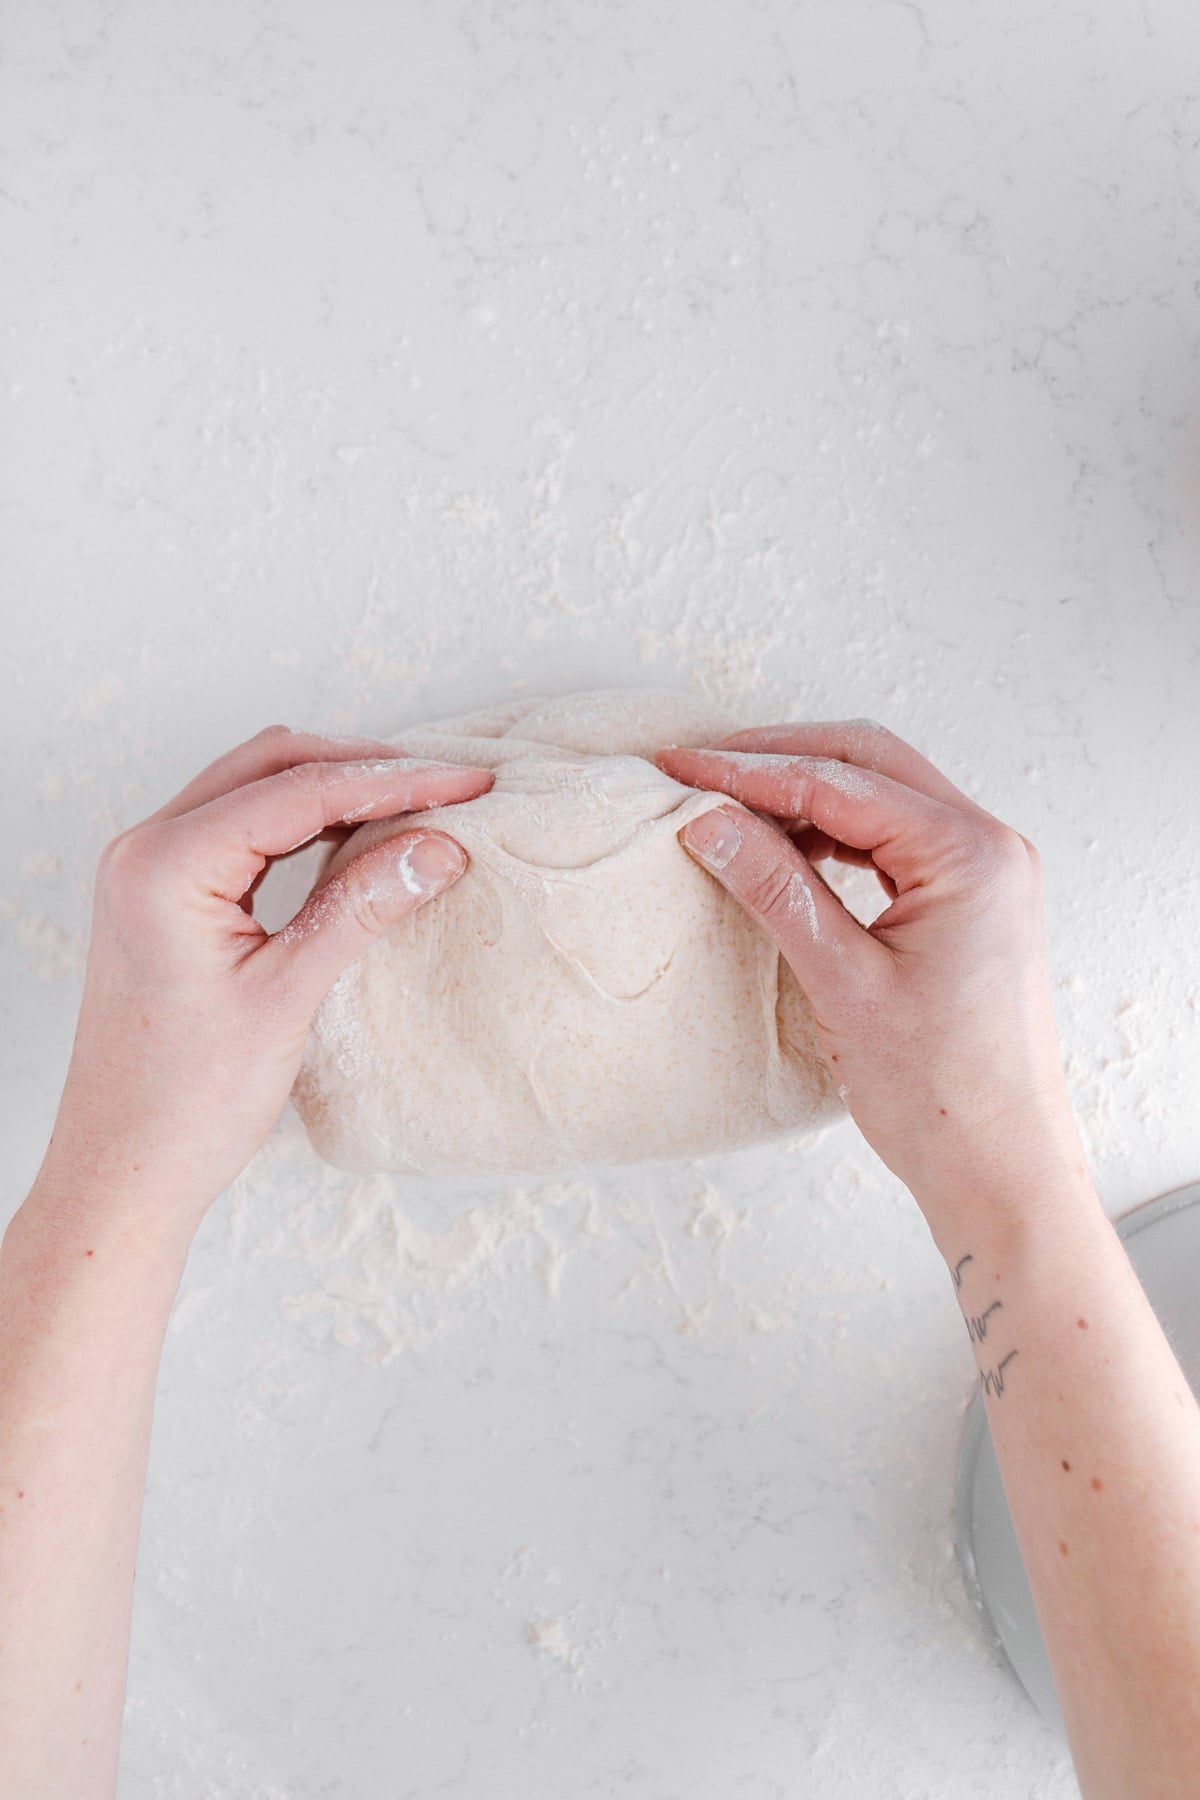
Take the bottom half of the dough, lift it up and fold it completely over the dough to form a “letter.” Turn the dough over so the seam is on the bottom, then gently rotate the dough in your hands a few times to form a tight round, aka a boule. Repeat with the second piece of dough.
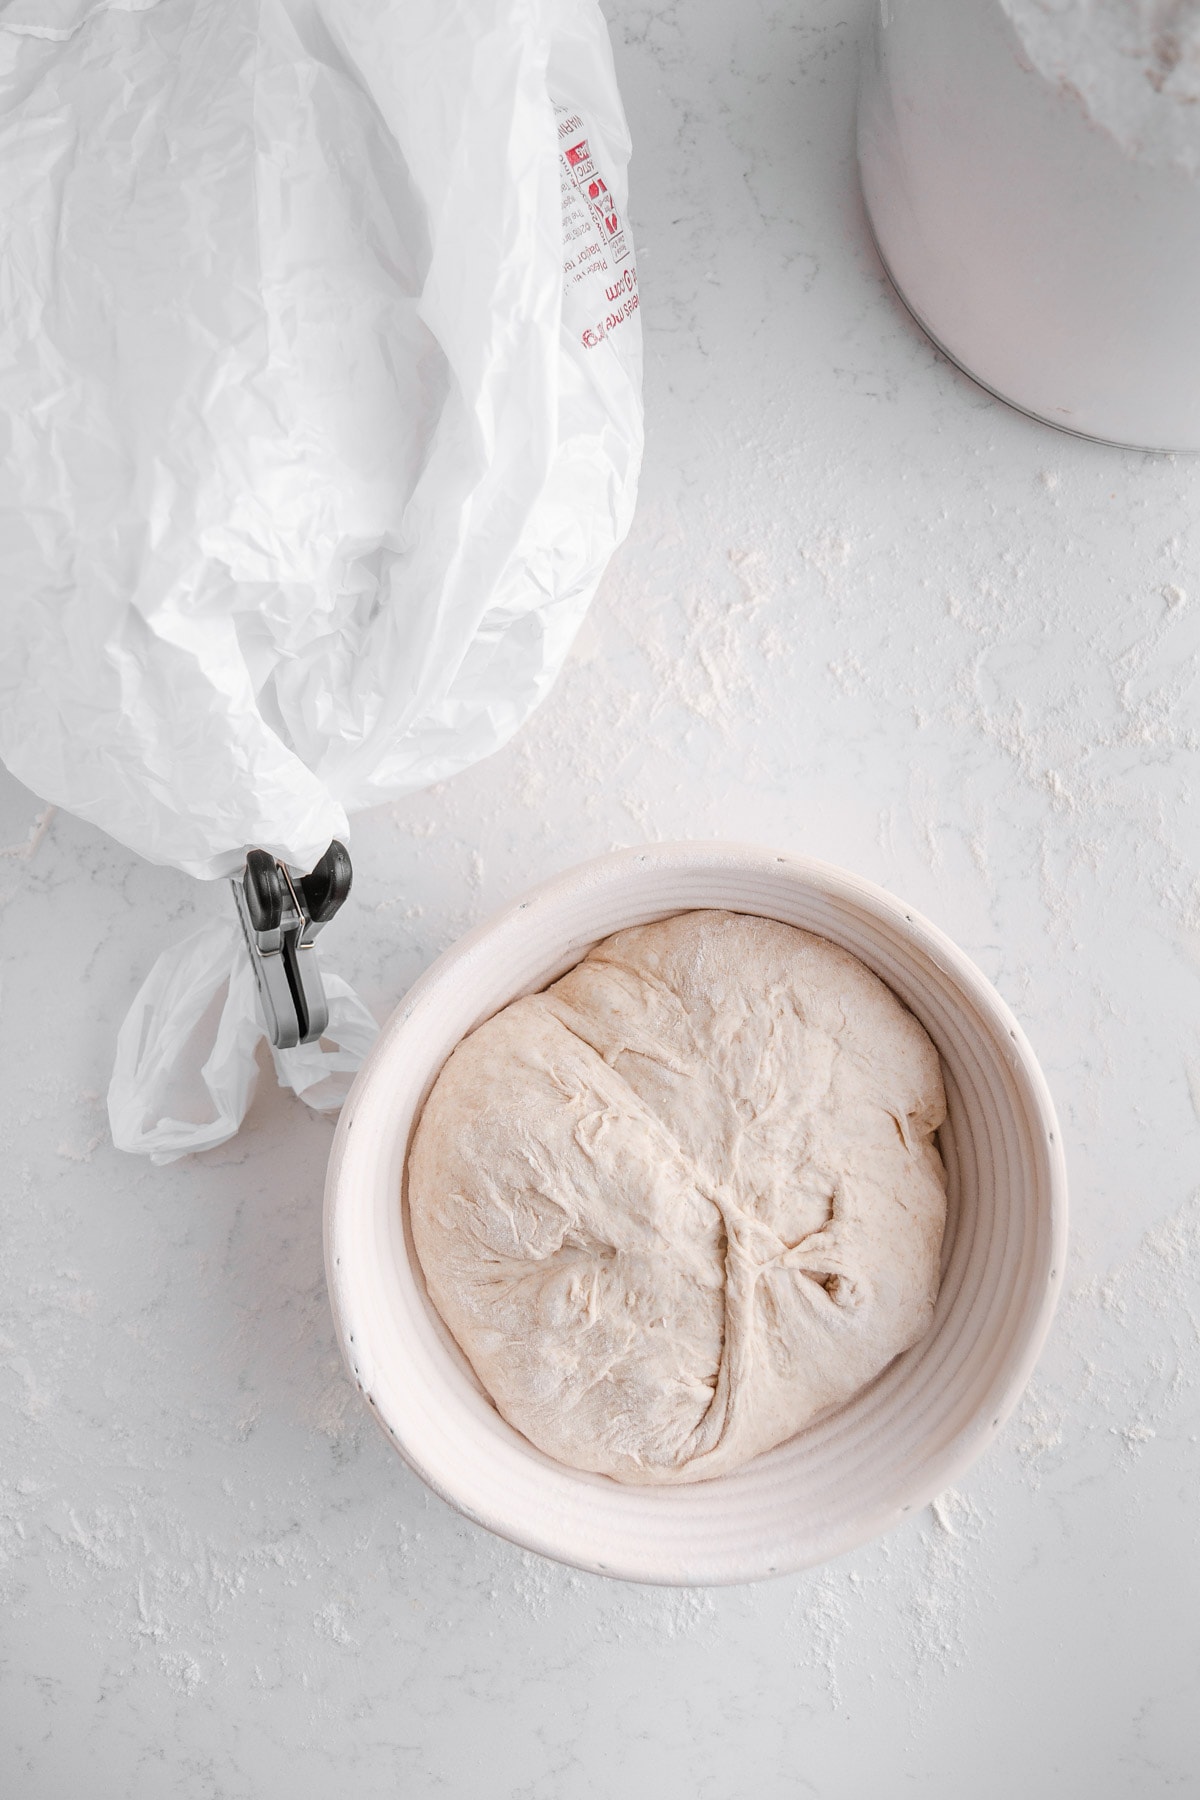
Gently transfer each piece of dough, seam side-UP, to a prepared basket/bowl. Sometimes, if I feel the dough is really slack, I’ll gently pinch the edges of the dough into the center once it is in its basket to help it maintain its shape. Cover each bowl with a plastic bag, then seal with a clip, rubber band, etc. to avoid as much refrigerator air flow as possible.
Let the dough sit in the bags at room temperature for about 20 minutes, then transfer to the fridge for an overnight proof, approximately 15-16 hours.
STEP SIX: PREHEAT AND PREP
The next morning, place an oven rack on the bottom third of your oven (if you’ve got a starter stored in there, move it for the time being!). Place the deeper side of your combo cooker or bread pan facing down and the shallow side facing up next to each other on the rack (if you’re using a Dutch oven, place the cover facing down and the pot part facing up next to each other on the rack). Preheat the oven to 510 degrees F for one hour.
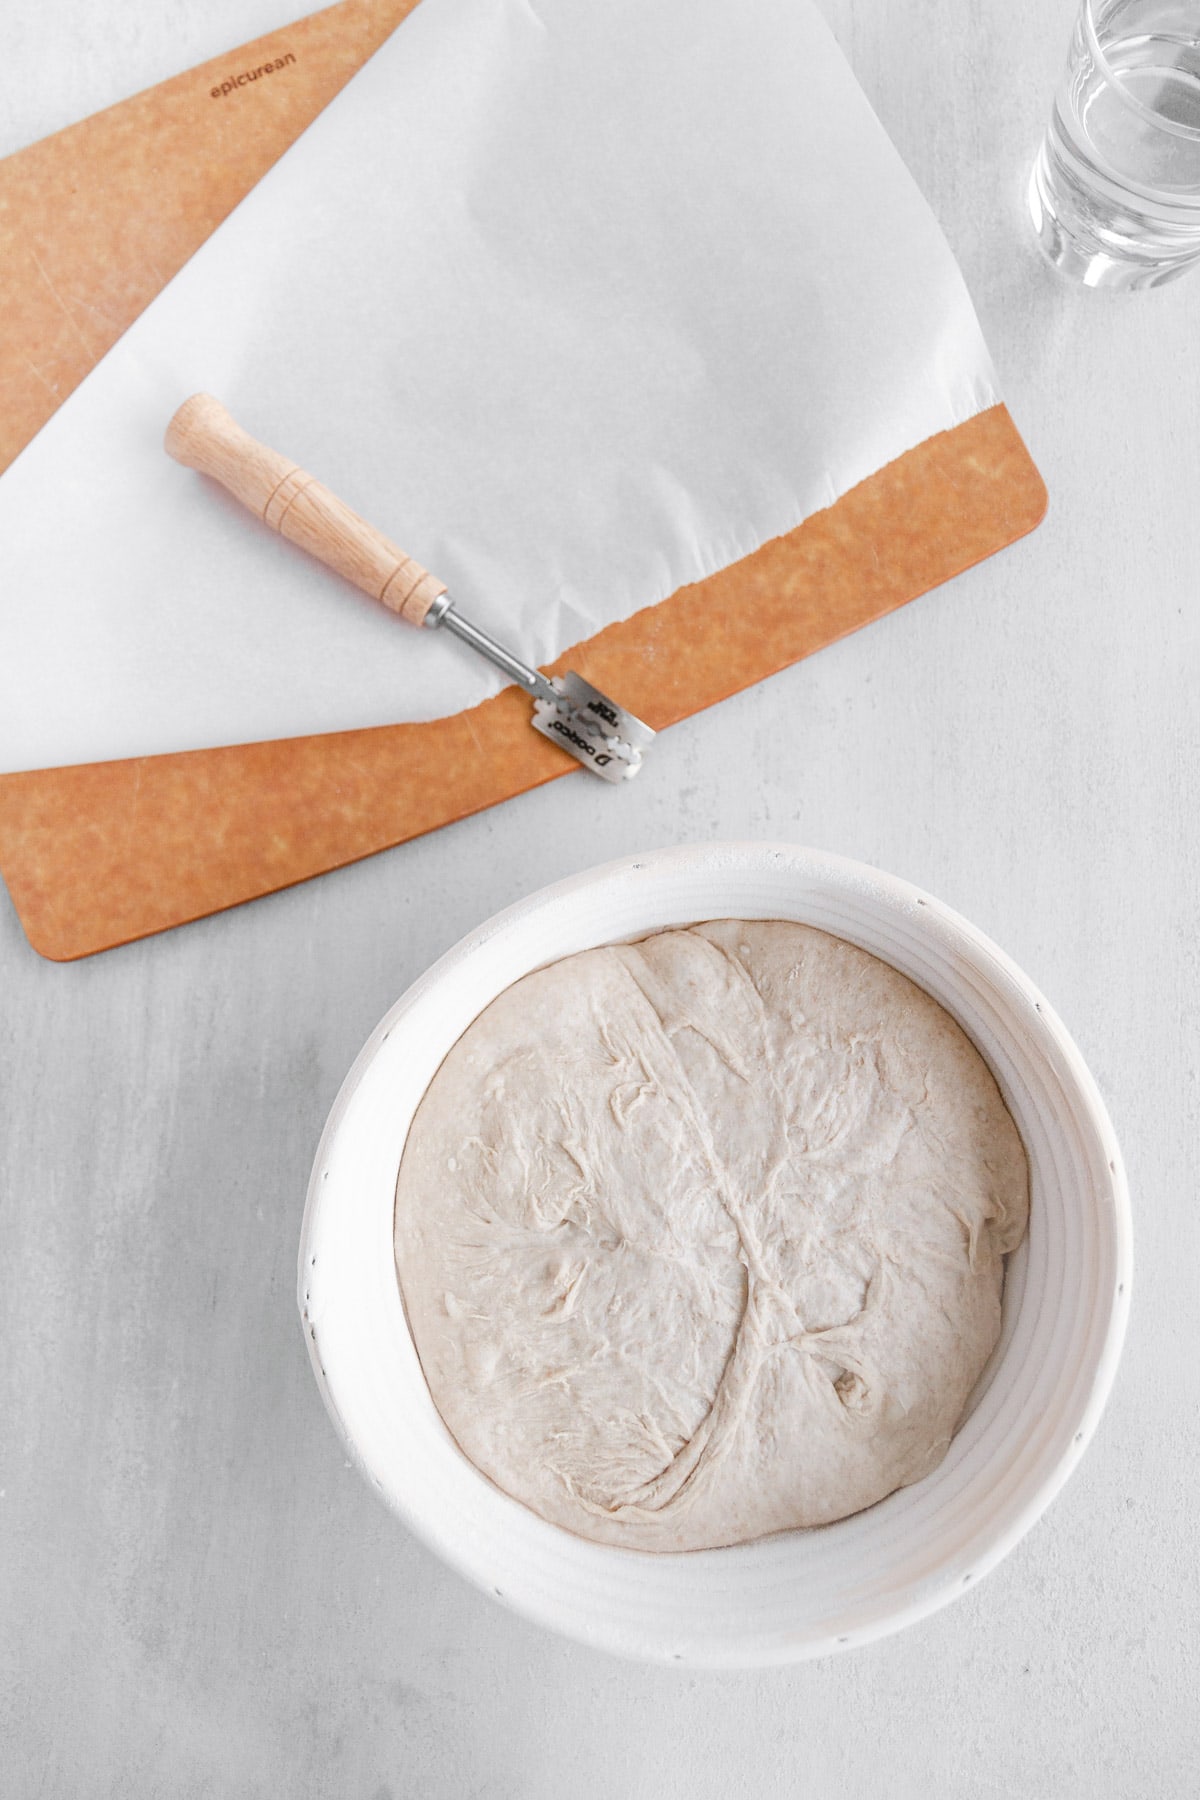
When the oven is fully preheated, remove one piece of dough from the fridge. Place a sheet of parchment paper on top of the basket. Top the parchment with a cutting board. Gently but quickly invert the basket with the cutting board so the dough lands on the parchment paper on the cutting board. Remove the basket.
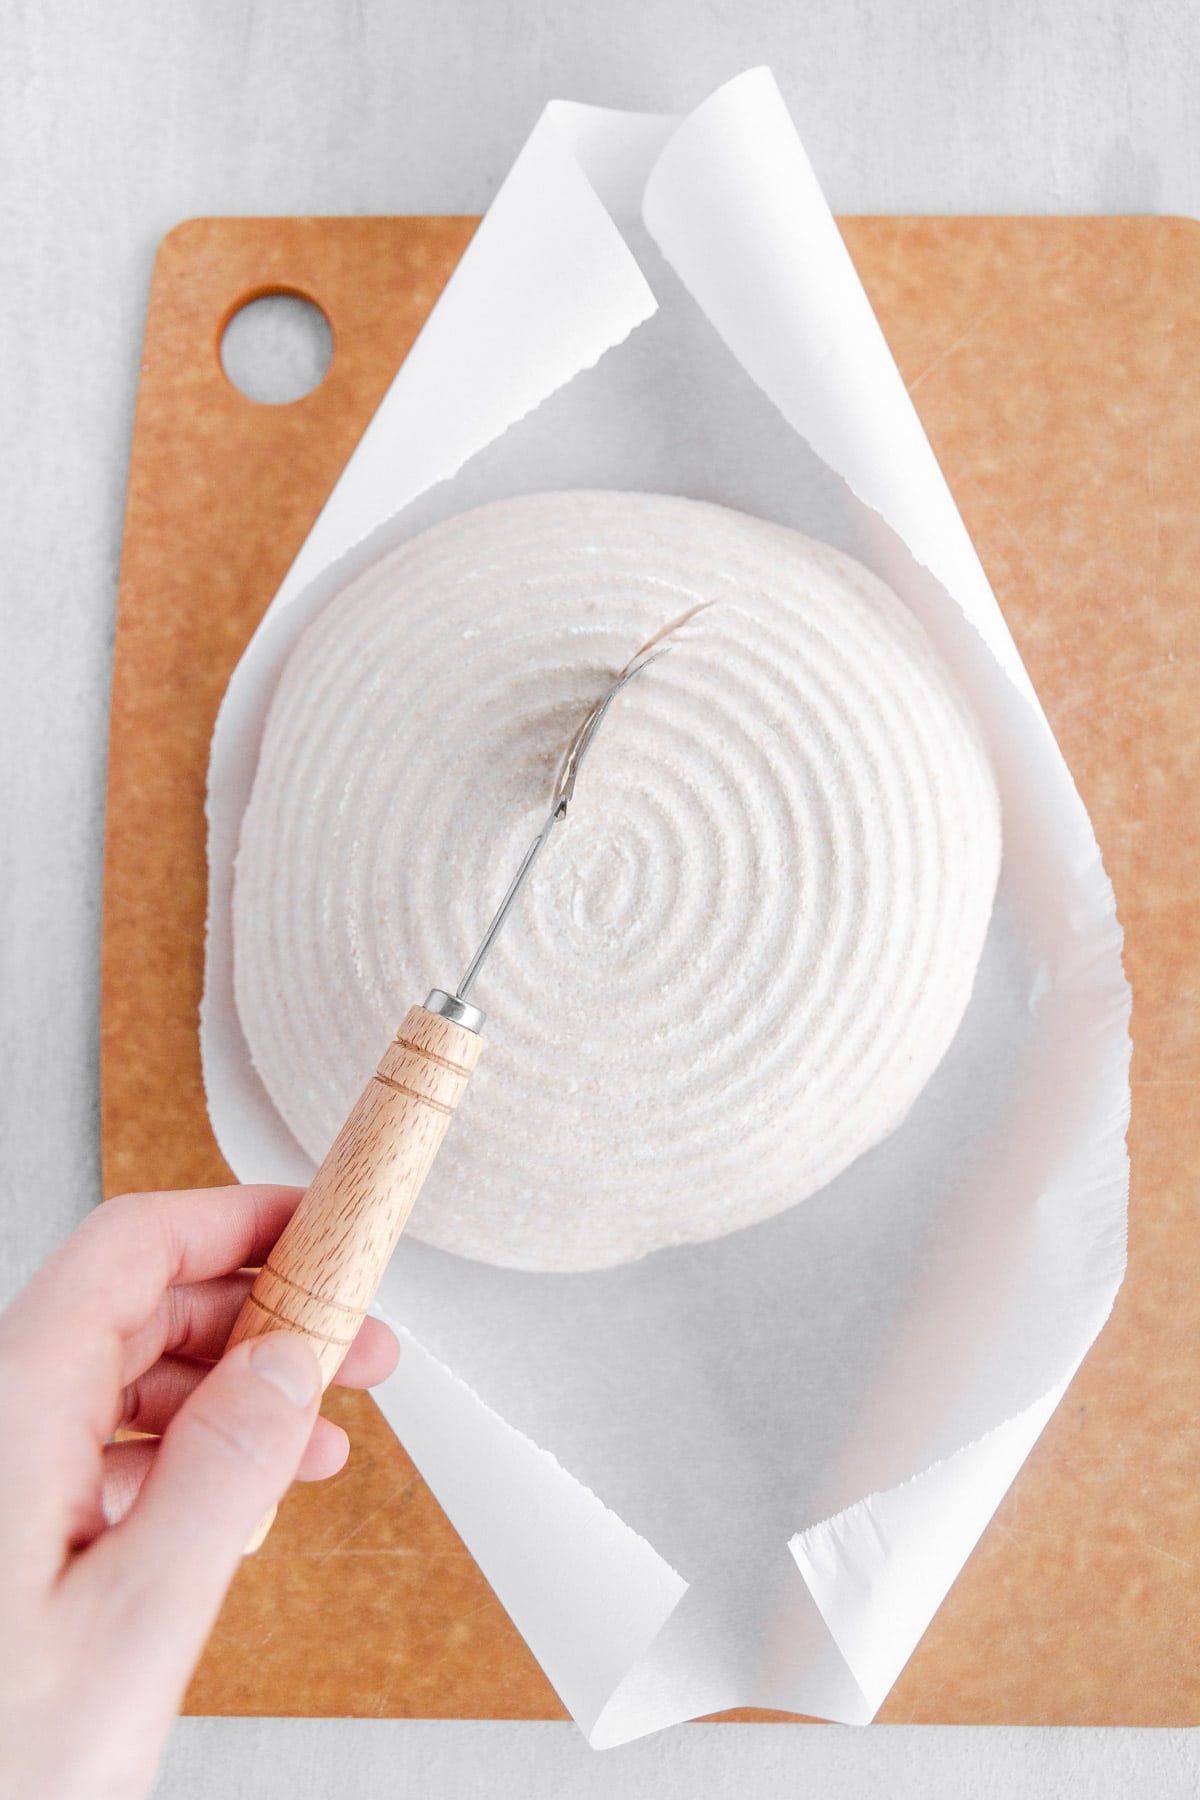
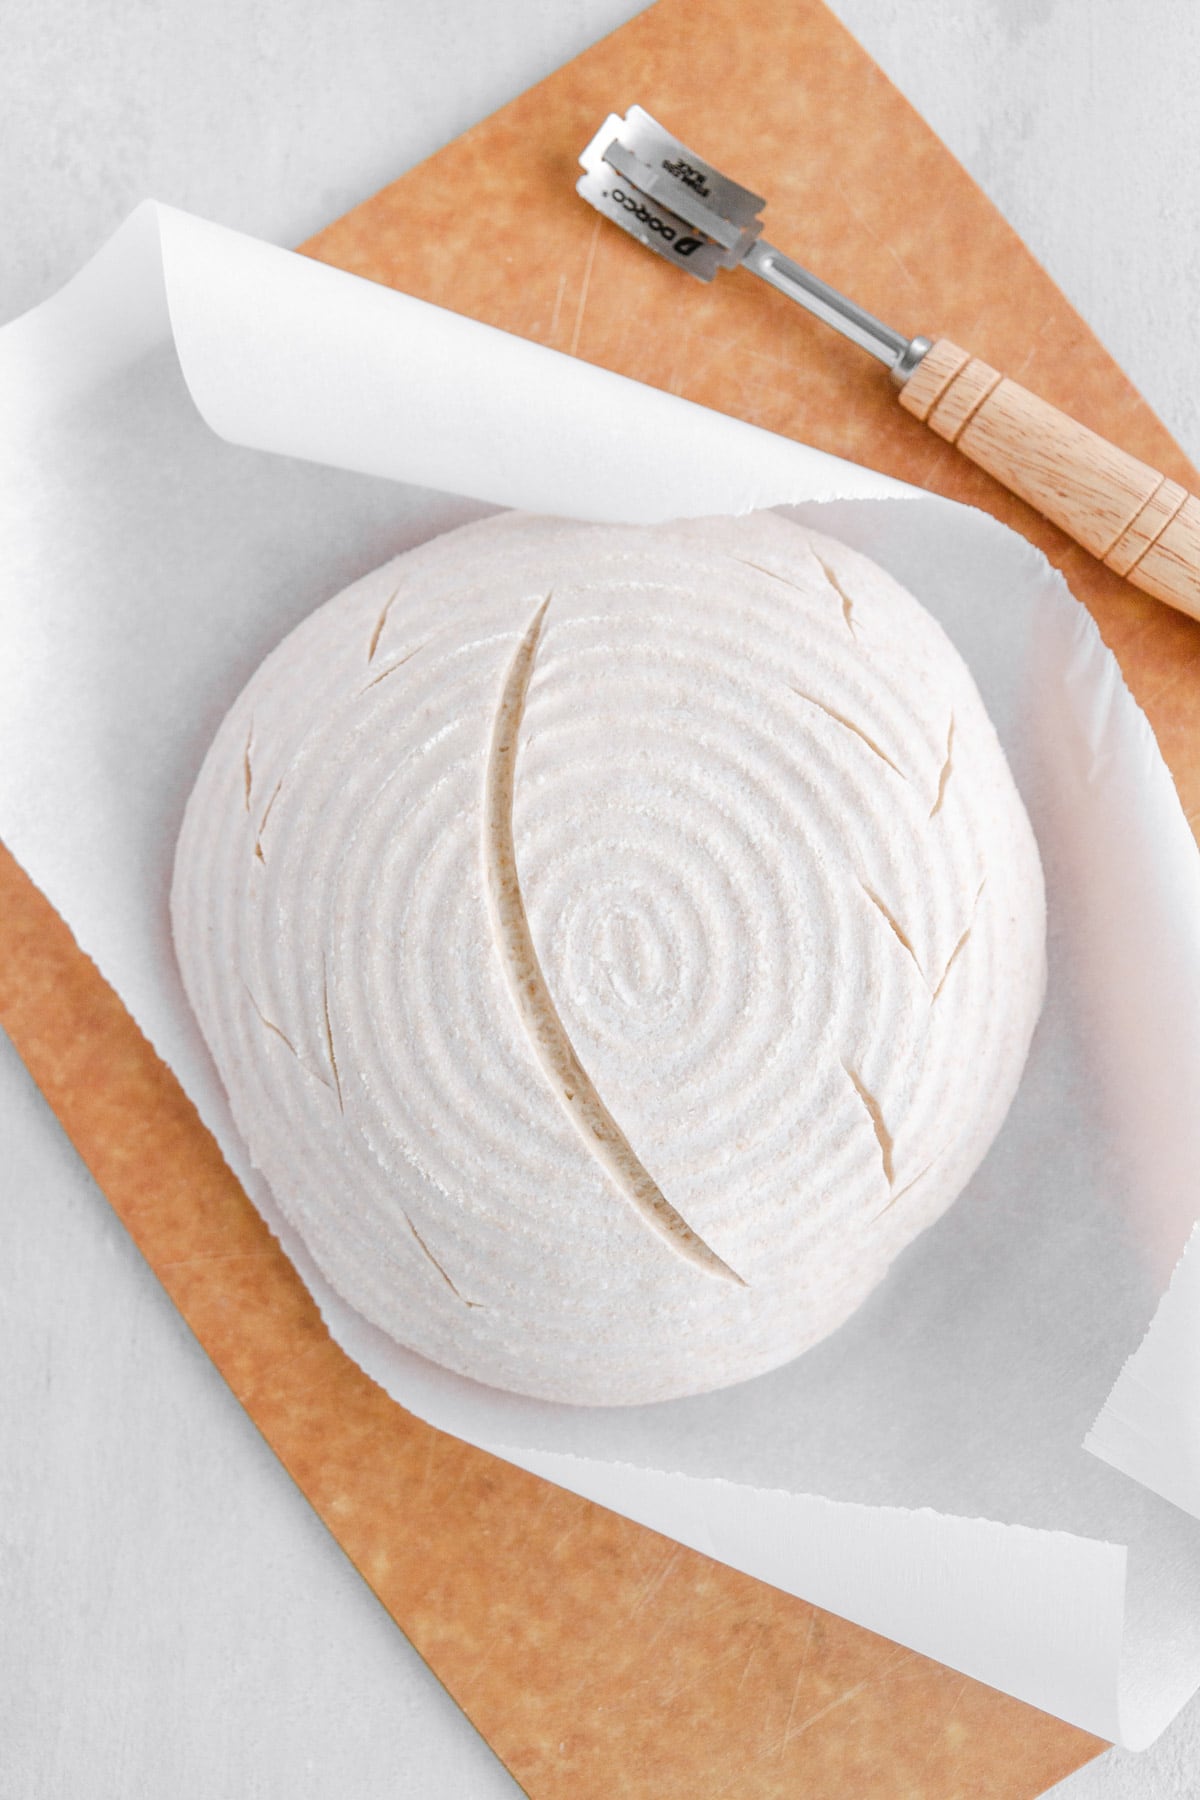
Use a bread lame to score the top of the loaf. You want to score straight into the loaf about a quarter-inch deep, and do enough scoring to allow for steam to escape from the dough and for the oven spring to occur (basically, you don’t want the dough to tear unattractively in the oven as it expands). Feel free to get creative here, or keep it simple! A box cut is always a good beginner choice.
Here’s a tip I learned from Laura of A Beautiful Plate: to avoid the parchment paper from crinkling inside the combo cooker/Dutch oven, thereby sometimes giving the bread a weird shape, cut the paper around the dough leaving two “handles” that can poke out of the sides of the cooker in the oven. This helps to transfer the dough to and from the cooker.
STEP SEVEN: BAKE
Using oven mitts, carefully slide the dough on the parchment paper into the shallow side of the combo cooker or bread pan (or the pot of the Dutch oven). Cover with the deep side of the combo cooker/bread pan/lid of the Dutch oven, and place in the oven. Reduce the oven temperature to 500 degrees F.
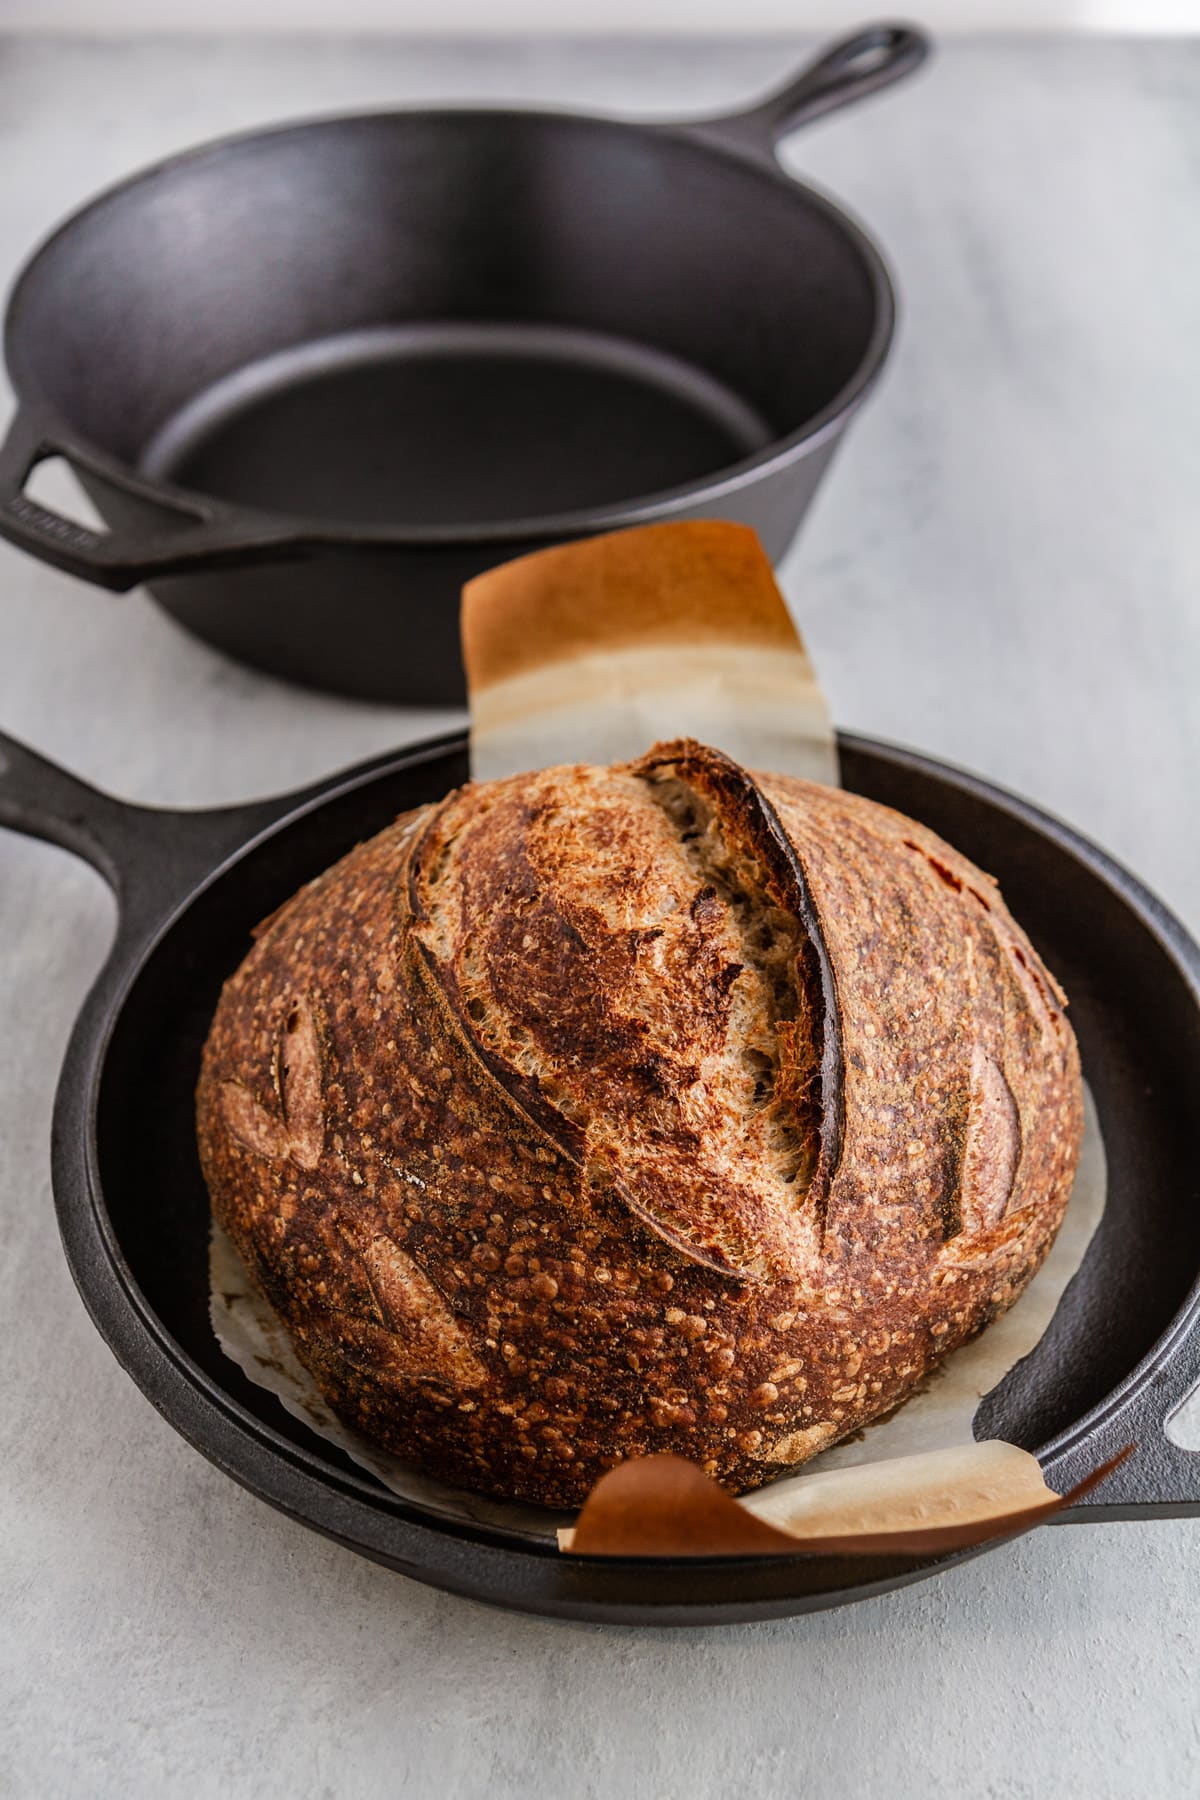
Bake at 500 degrees F covered for 20 minutes, then reduce the temperature to 450 degrees F and continue to bake, covered, for 10 minutes. Uncover the dough (place the top of the cooker/bread pan/Dutch oven next to the dough in the oven to keep it hot) and continue to bake another 25-30 minutes until the bread is a deep, dark golden brown and baked through. An instant thermometer inserted in the center of the loaf should read around 210 degrees F when it’s fully baked.
Use the parchment paper to transfer the bread to a cooling rack to cool completely. Repeat the scoring/baking process with the second piece of dough.
Here’s an important tip: I know this is tough to do, but let the bread cool completely before slicing into it! If it’s even the least bit warm, a knife cutting into the bread can make it squish together and “gum up,” which is just sad for everyone. Be patient and you’ll be rewarded!
STEP EIGHT: EAT.
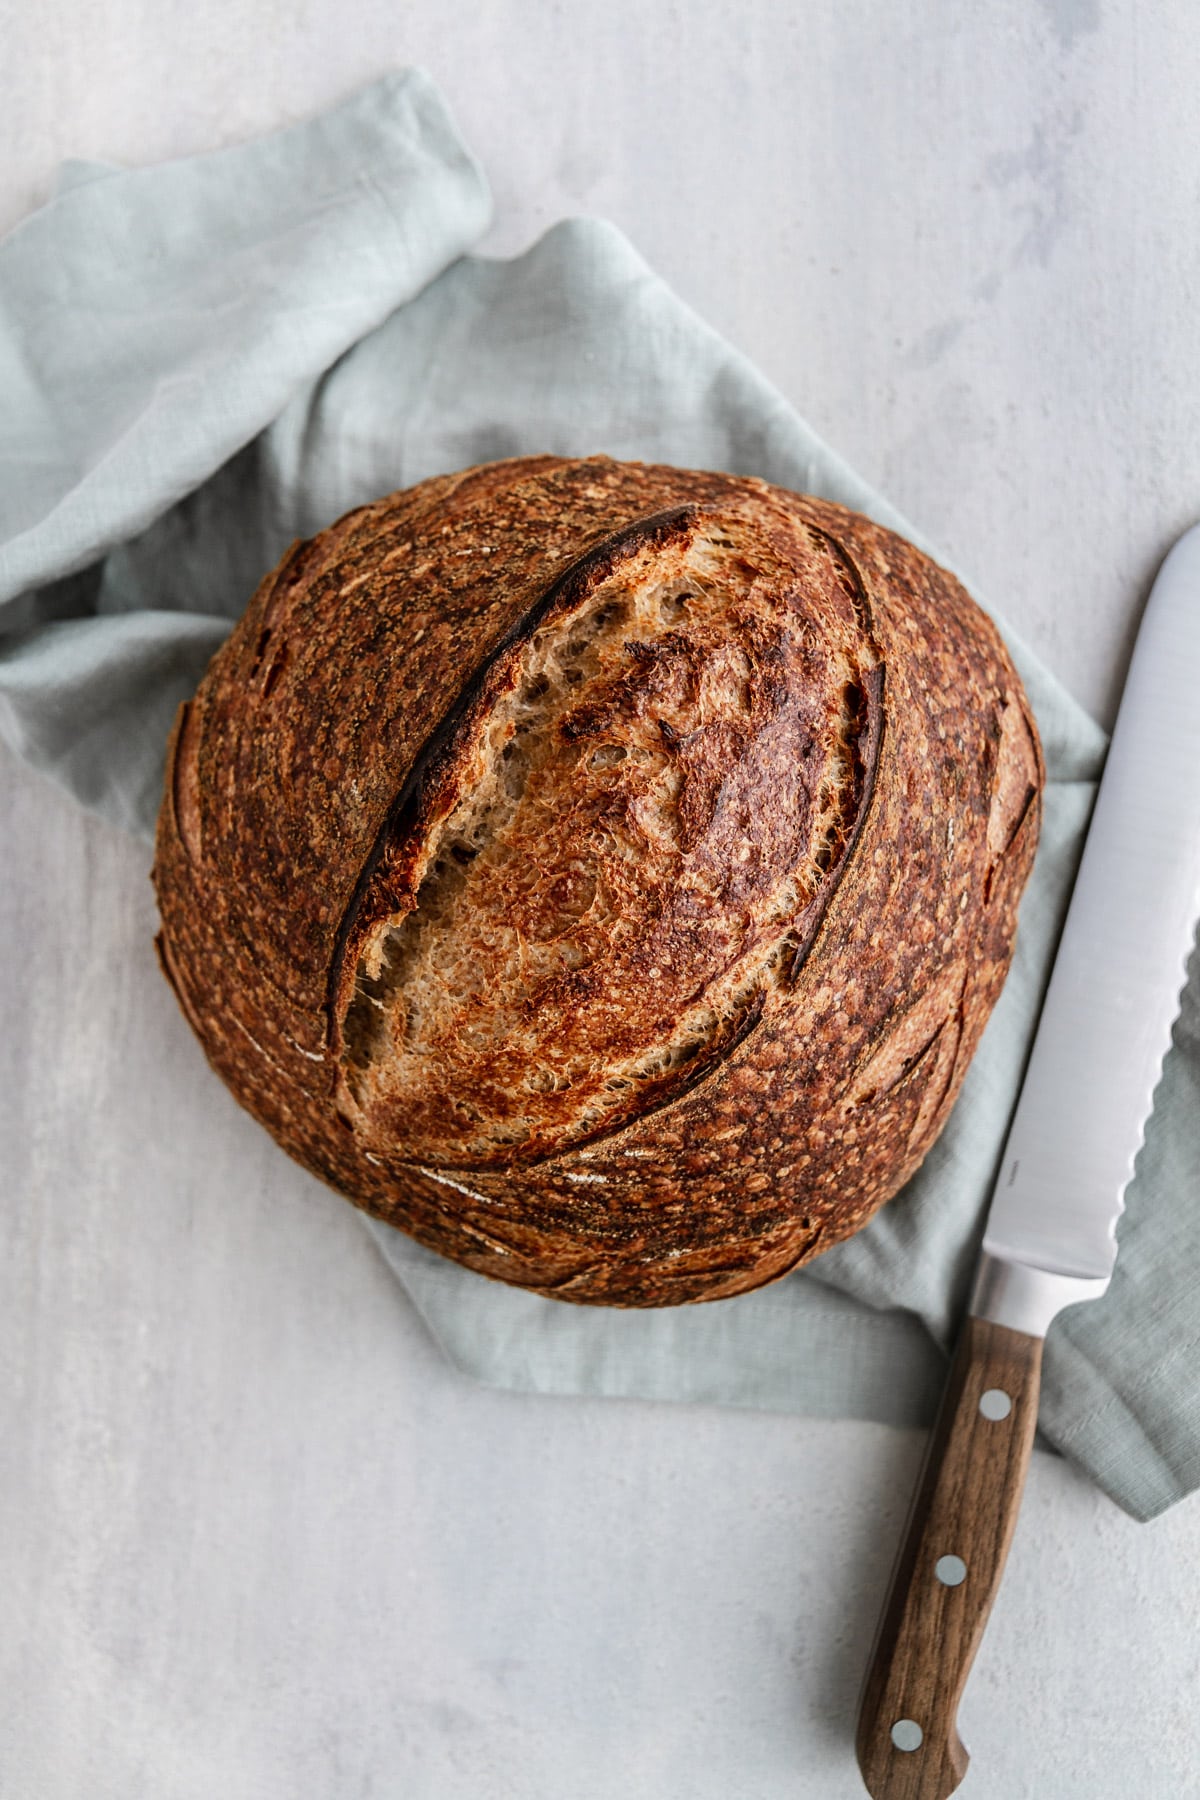
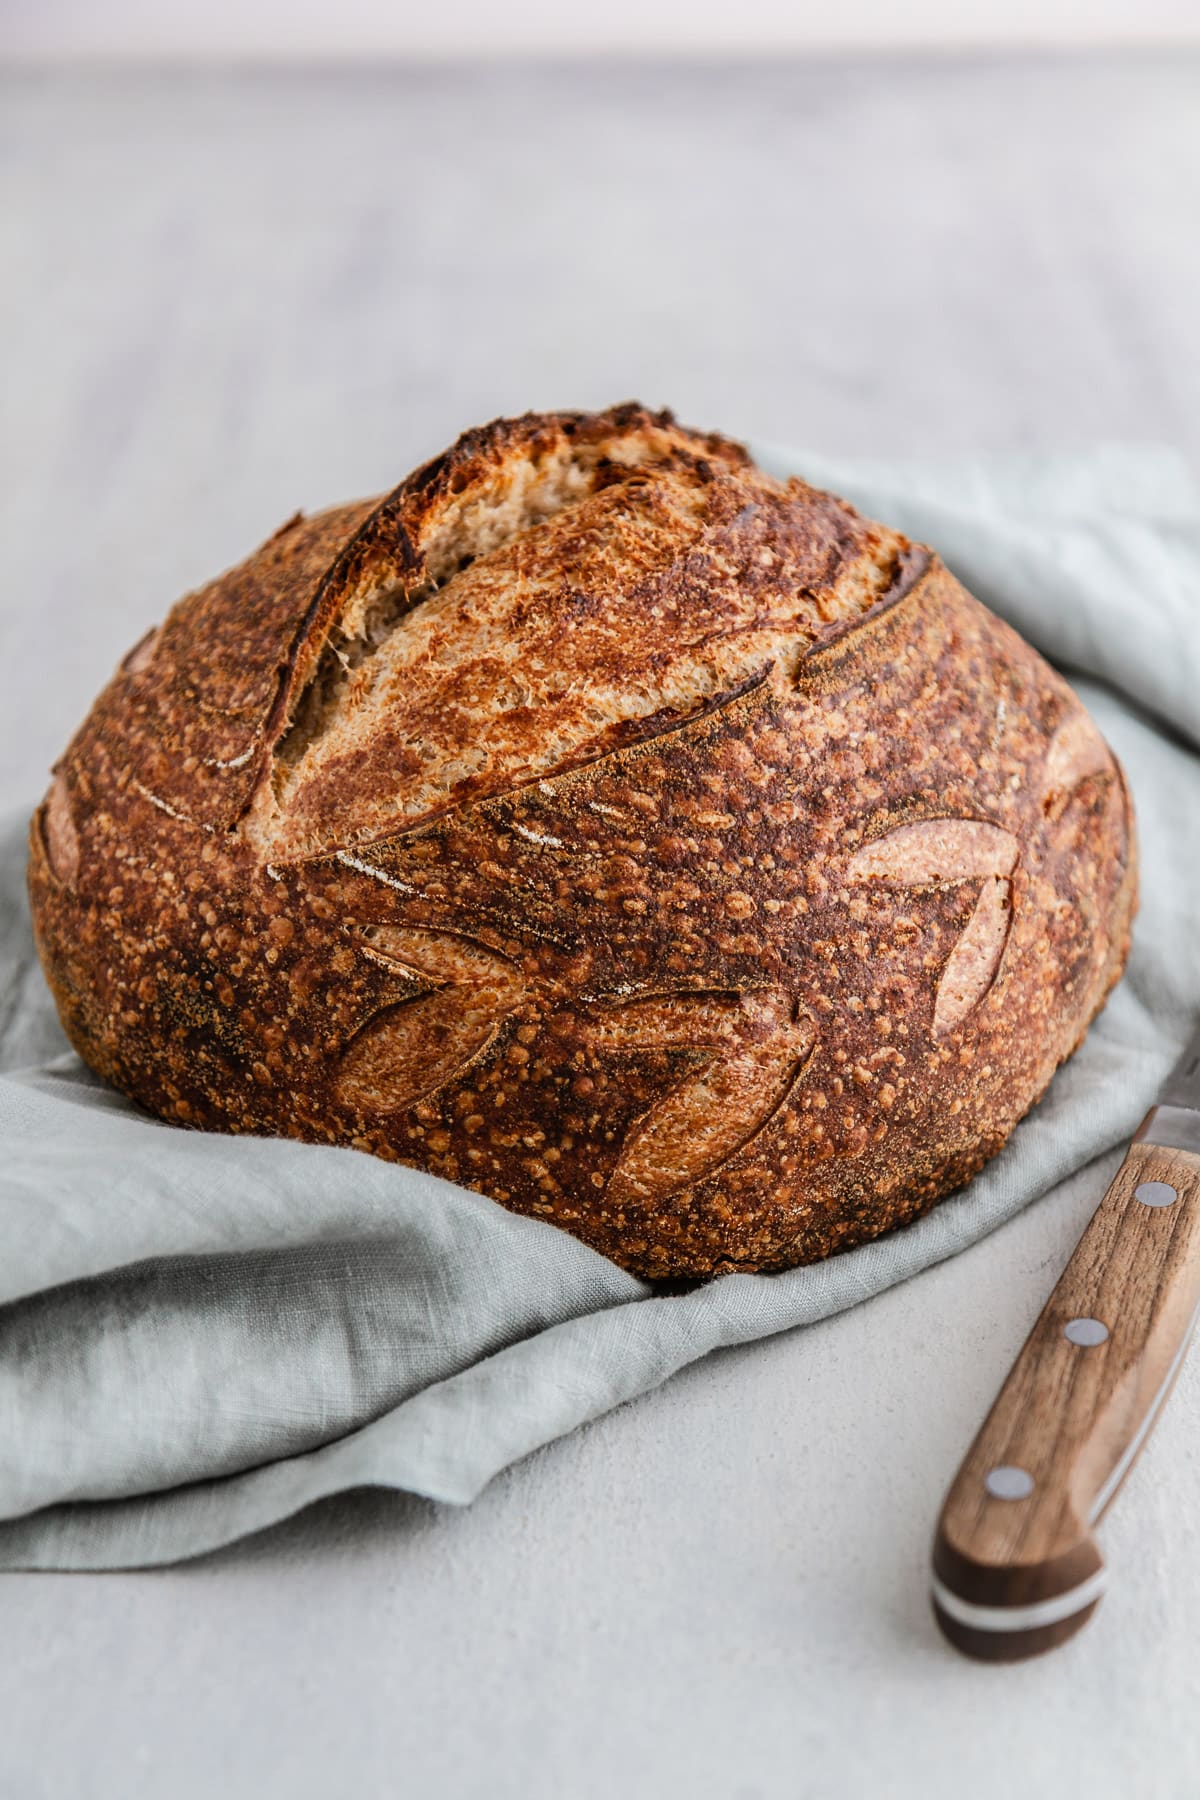
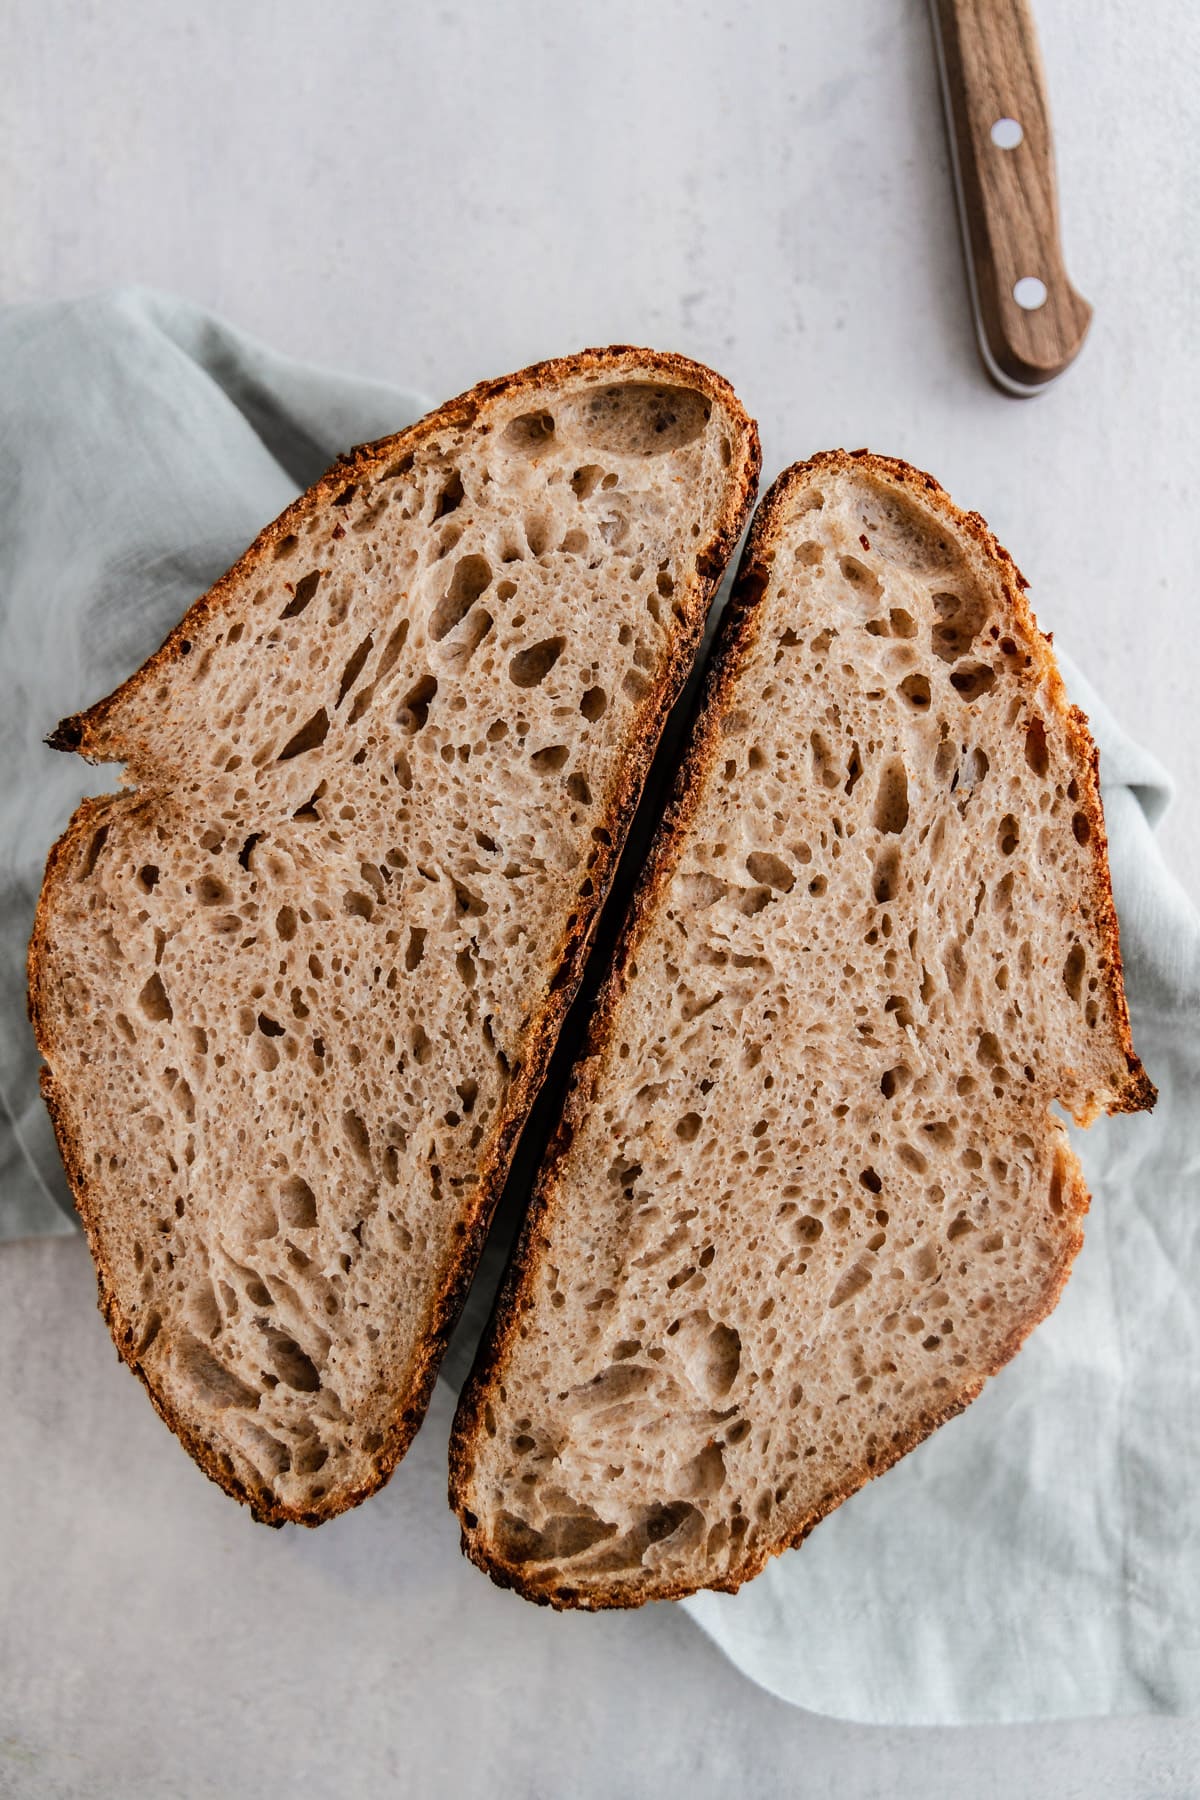
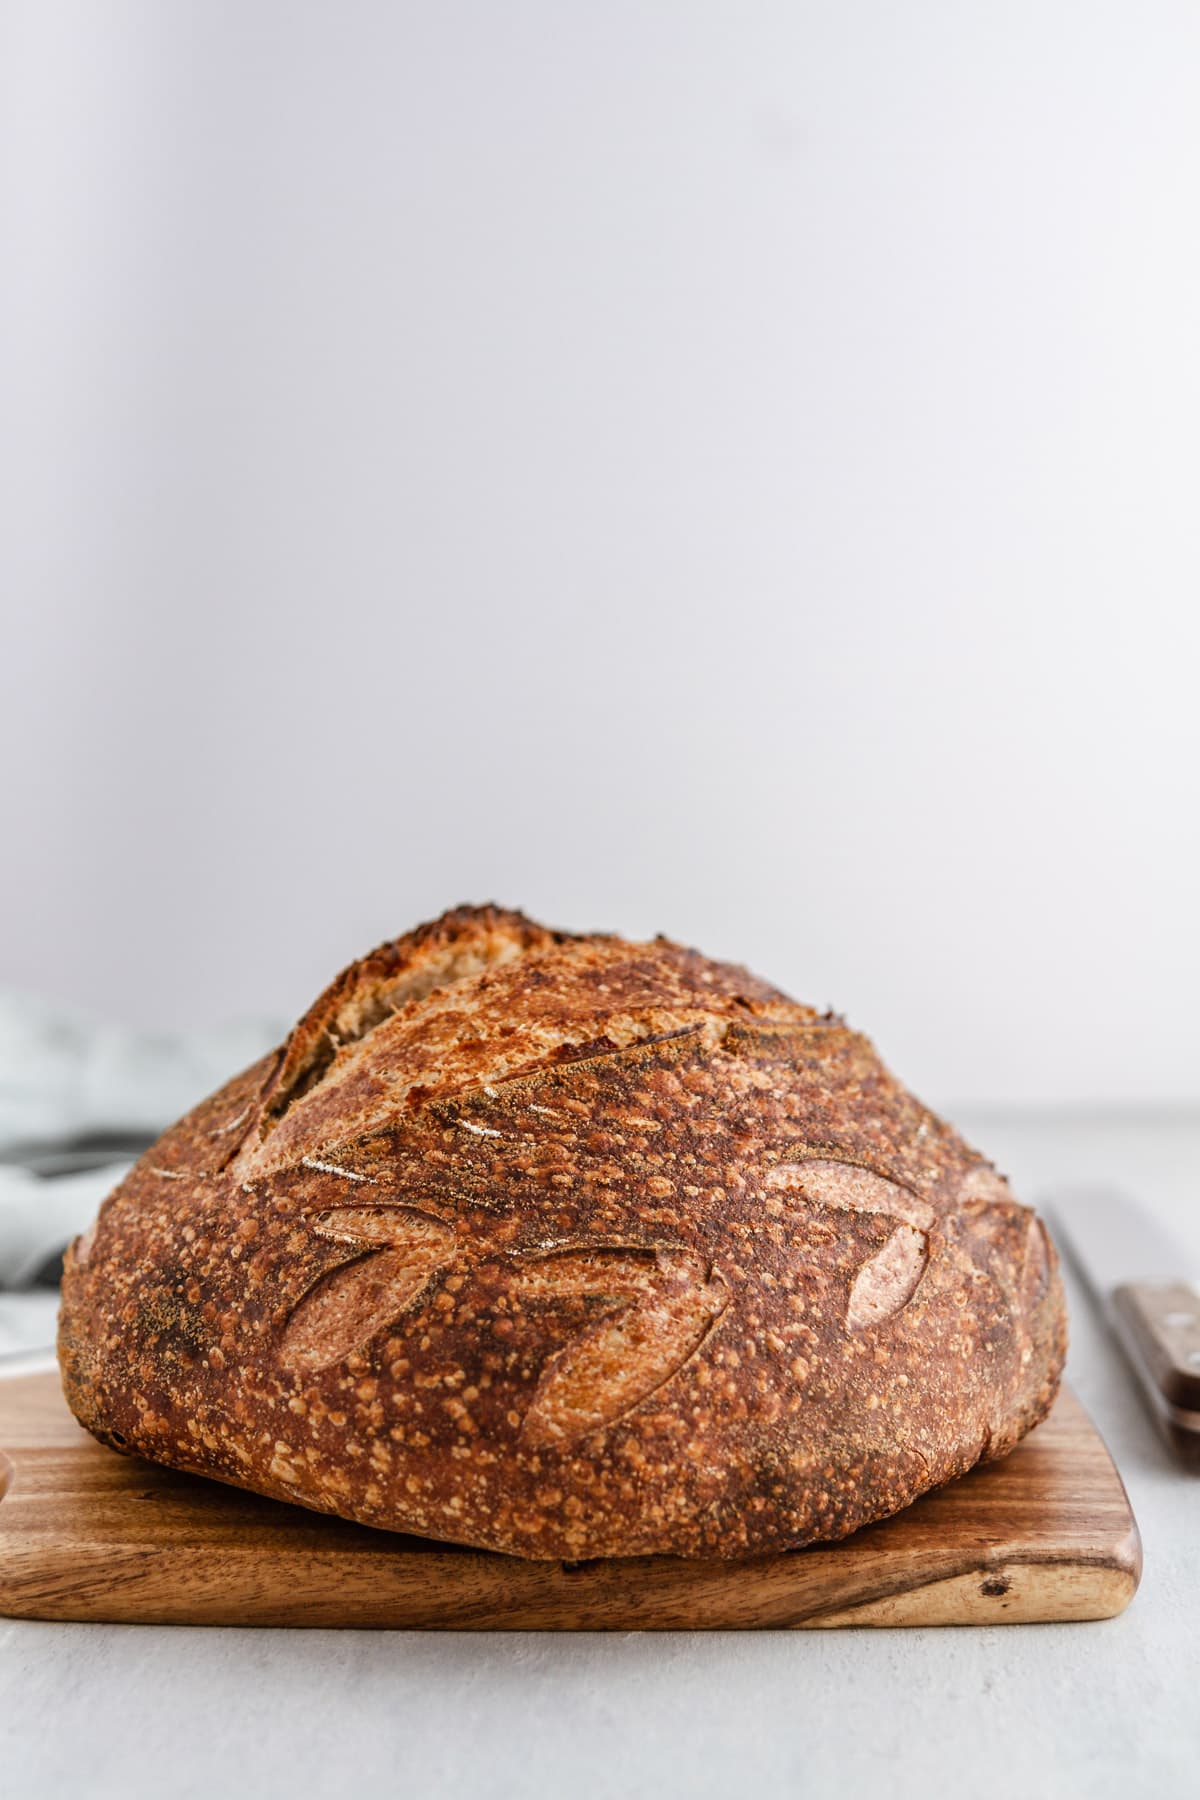
The finished bread, when baked correctly, should have a decent height, a caramelized dark brown exterior, a slightly open crumb, a fluffy but stable interior and a delicate, crisp crust. It should taste like unicorn sprinkles rained down from heaven – or just really, really good.
And guess what? YOU BAKED THAT. You are a wizard.
CONCLUSION
Below is my printable recipe that includes a sample baking schedule for my favorite sourdough bread. This is just a guide – feel free to adjust to fit your schedule, but keep the division of time the same.
Friends, if you’ve made it this far, you are fully committed and I am so happy about that. As always, please ask questions in the comments below, e-mail me or send me a message on Instagram or Facebook. I am here for you! Hint: check out this Banana Bread too!
Remember, this is a long journey that takes practice, so be patient and have fun.
WANT MORE KNOW-HOW ON SOURDOUGH? Head to my next post, Sourdough Baking Tips and Resources.
Print
My Favorite Sourdough Bread
- Prep Time: 36 hours
- Cook Time: 2 hours
- Total Time: 38 hours
- Yield: 2 loaves 1x
- Category: Bread
- Method: Bake
Description
My favorite sourdough bread recipe, step by step! This is how I bake delicious sourdough bread with great results, every time.
Ingredients
For the levain:
- 50g mature starter
- 200g whole wheat flour
- 200g distilled water
For the dough mix:
- 250g levain
- 800g distilled water, divided
- 800g bread flour
- 200g whole wheat flour
- 20g fine sea salt
For the preshape:
- Bread flour or all-purpose flour, for shaping
For the shape:
- White rice flour, for dusting the baskets/linen-lined bowls
Instructions
- At 9:15 p.m. PREPARE LEVAIN: Place a clean starter jar on a kitchen scale. Tare the weight so it reads “0”, then to the jar add 50g mature starter, 200g whole wheat flour and 200g distilled water at room temperature. Stir the mixture vigorously until no dry bits of flour remain, then cover the jar loosely with a lid. Store in a warm place (such as the oven with the light on) for approximately 10-12 hours.
- At 8:30 a.m. (next day) PREPARE AUTOLYSE: The next morning, place a medium to large mixing bowl on a kitchen scale. Tare the weight so it reads “0”, then to the bowl add 250g levain and 750g distilled water at room temperature. Stir the mixture until the levain is completely dissolved. Add 800g bread flour and 200g whole wheat flour. Mix with your hands until mixture is completely incorporated. Cover bowl with plastic wrap and place in a warm place (such as the oven with the light on) for 50 minutes.
- At 9:20 a.m. FINISH THE DOUGH MIX: To the mixing bowl add 20g fine sea salt and remaining 50g distilled water (at temperature calculated as described in post to achieve final dough temperature of 78 degrees F). Mix with your hands until mixture is completely incorporated. Cover bowl with plastic wrap and place in a warm place (such as the oven with the light on) for 30 minutes.
- At 10 a.m. BULK FERMENTATION: After 30 minutes have elapsed, perform the first set of turns (see post for full description on how to perform a set of turns). Cover the bowl and return it to its warm place.
- At 10:30 a.m. Perform second set of turns. Cover and return to warm place.
- At 11 a.m. Perform third set of turns. Cover and return to warm place.
- At 11:30 a.m. Perform fourth set of turns. Cover and return to warm place.
- At 12 p.m. Perform fifth set of turns. Cover and return to warm place.
- At 12:30 p.m. Perform sixth and final set of turns. Cover and return to warm place to finish bulk fermentation, untouched.
- At 2:00 p.m. PRESHAPE: Gently transfer dough to a well-floured surface. Using a well-floured bench scraper or knife, divide dough into two equal pieces. Use floured hands to gently but quickly shape each piece of dough into a tight round (see post for full description on preshape). Cover dough with bowls and let rest on counter for 30 minutes.
- At 2:30 p.m. SHAPE AND PROOF: Lightly dampen and dust two banneton baskets or linen-lined bowls with white rice flour. Remove bowls from dough. Shape dough into boule (see post for full description on how to shape into a boule). Carefully transfer dough to one prepared basket. Repeat with second dough.
- Cover each basket with a plastic bag; use a clip to seal bag. Let dough rest in bags at room temperature 20 minutes, then transfer to refrigerator for an overnight proof.
- At 7:30 a.m. (next day) PREHEAT: Place an oven rack on bottom third of oven. Place deep side of combo cooker facing down on one side of oven rack; place shallow side of combo cooker facing up on other side. Preheat oven to 510 degrees F for 1 hour.
- Just before baking, remove one dough from refrigerator and plastic bag. Place a sheet of parchment paper and a cutting board on top of basket. Carefully invert basket with cutting board so dough lands on parchment paper. Remove basket. Use a bread lame to score top of dough.
- At 8:30 a.m. BAKE: Using oven mitts, carefully slide dough on parchment paper to shallow side of combo cooker. Place deep side of combo cooker on top to seal. Reduce oven temperature to 500 degrees F. Bake covered 20 minutes. Reduce oven temperature to 450 degrees F. Bake covered another 10 minutes. Using oven mitts, remove top of combo cooker and return to oven rack in oven to keep hot. Bake bread uncovered another 25-30 minutes until a deep golden brown (an instant thermometer should read an internal temperature of approximately 210 degrees F). Transfer bread to a cooling rack to cool completely, about 1 hour 30 minutes. Repeat with second loaf.

Hi Stephanie,
Thanks for posting this method and recipe. I just tried it for my second ever loaf of sourdough. The results were really good and I will be trying this again soon.
Cheers
I’ve been making sourdough using only white floor for a few months now and recently tried using 80% white and 20% wheat flours. My whole family loves the all white version but nobody likes the one with whole grain wheat flour mixed in. It makes the bread taste like dirt. What is the point of adding wheat flour given that it ruins the flavor? Have you tried using all white bread flour and found that to be lacking something? I’m just curious why that choice was made for this recipe
Chris, I’ve always enjoyed the ratio of bread flour to wheat flour in this recipe and for my starter. Not only does it lend a depth of flavor that I and my family prefer, but it helps with the structure and crumb of the bread. I encourage you to try a recipe with all white flour if that’s your preference!
Hi, at step 10, when we remove the dough on the counter, do we turn us upside down or lift it as it is and place it? I’m slightly confused here!
Awaiting your reply! Thank you!
Stephanie, what happened to “Homemade Sourdough Bread, Step by Step”? I tried it a week or two ago and, while it had its issues, I wanted to try it again with what I learned. I found it intriguingly different from other sourdough recipes (like “Favorite Sourdough Bread Recipe” which looks overwhelming)!
Hi Dave, I did not trust my previous testing with that recipe so it has since been redirected to my updated recipe, which has been heavily tested. I will email you the previous recipe if you’d still like to work with it!
Here I am…back again, making this recipe. I have made this recipe so much. It’s so yummy and it walks you through everything. Sourdough can seem so overwhelming so it’s amazing to find a recipe with instructions like this. They can be hard to find. I’ve tried other loaves that take less time and always come back to this one. You can beat the flavor, texture, and instructions. I grew up on San Francisco authentic sourdough and I’m so happy I can make it at home. The entire process of making these loaves is so therapeutic and fun for me. Thank you!
Laura, Thank you so, so much for your kind and thoughtful comment! I’m glad the instructions are as helpful for you as they are for me. 🙂 Happy baking!
Even during a pandemic lock down, this recipe has way too many steps, folds, timing, and temperature checks. Maybe the written instructions are making it seem like more work than it actually should be. The reward at the end is not worth 3 days of babysitting dough.
M. Darling, Sounds like maybe sourdough isn’t the right fit for you! Maybe give no-knead Dutch oven bread a try!
Love this recipe! I can’t seem to find the best way to adjust the schedule and still have great results. I want to start autolyse in the afternoon, but when I mix levain in the morning, it doesn’t rise fast enough! What do you think about making the levain the night before, then sticking in the fridge in the morning until I’m ready to start the autolyse? Or other suggestions?
Kayla, I would not recommend storing the levain in the fridge, as that will retard the starter too much for baking shortly after. It really depends on the timing you’re going for, but you can use the levain anywhere from about 8 hours after mixing to about 15-16 hours max (that’s as far as I’d push it). So depending on your schedule, you can make it right before bed or early in the morning. I hope that helps!
That does help! Thanks!!
Made this recipe twice. Both times over baked when doing the final 25 minute range. The first baking time is much hotter than the many sourdough bread recipes I use. I’ve noticed the crust is much darker than I’m accustomed to when I take remove the lid. The bread temp is on spot but the result is blackish on the bottom. I can’t share bread like this.
Had anyone done a different combination of temps and baking time to achieve a nice crust that isn’t blackish on the bottom? Next I’ll try a baking sheet on the shelf below to absorb some heat.
Katniss, I’m sorry to hear you’re not getting the results you want! Every oven can vary in temperature, so my suggestion is to bake your bread at 450 degrees F the entire time (but keep the covered/uncovered directions as-is). Everyone has a different preference on crust so this might be a better outcome for you. I hope that helps!
This recipe turned out AMAZING! I’ve been working with sourdough for about 6 weeks now, after getting my hands on some Amish Friendship Bread starter. Using that starter was working ok, but most of the recipes are sweet by default.
I used some of that mature starter and switched immediately over to “day 8” of your method and got IMMEDIATE results; a starter that doubled in roughly 5 hours. I used the *new* starter for this recipe today and it is to DIE for — croissant-like crust with a SUPER FLUFFY interior and fantastic flavour! I could hardly wait for it to cool before slicing into the gorgeous loaf!
Looking forward to trying some of your other recipes! ? THANK YOU!
Hey, your bread looks great. I would like to make this, but my starter is at 100 percent hydration, equal parts flour and water. How many days of feeding it at 80 percent hydration should I feed my starter until it is ready to make this bread? Also it looks like your starter uses some sort of whole wheat flour, can I use my starter that is just made with AP flour?
Jasmine, This recipe can use starter with just about any flour, so your all-AP flour starter is just fine! My starter is also 100 percent hydration (equal parts flour + water) and I use it for this recipe all the time without any changes. The 80% hydration for the starter is only for when you want to store it in the fridge for a week or two. I hope that helps!
I’ve been baking sourdough for about 2 months with mixed results. The highest hydration I’ve attempted is 77%
I’m surprised at your temperatures and baking times. (higher and longer). Is this due to the higher hydration level?
Cas, The baking temperatures and times here are approximate, but in general, yes — the higher the hydration, the higher the initial temperature should be so that the bread can rise quickly, rather than flatten as it bakes. The timing will yield a very dark-crusted loaf, which is my personal preference — but some choose to remove the loaf from the oven right when the crust is golden brown. This is up to you! That’s what’s so great about sourdough — there is a lot of room to play.
Hi – I used the recipe as Instructed, however my loaf didn’t turn out. It won’t hold its shape – it just turns into a big pancake mess, despite following the instructions. Obviously I’m bummed, any advice would certainly be appreciated!
Paige, This could be due to a whole host of reasons, which is why sourdough is a lifelong learning process! I can understand your frustration, however, as I’ve had that happen before, too. A lot of times, a flat loaf is the result of temperature fluctuation during bulk fermentation, improper shaping, low-quality flour, under- or over-proofing, etc. It’s really hard to say what is your specific issue, but my best advice is to just keep practicing!
O h my. I am a newbie and I thought I would try your recipe. It was very wet before bulk fermentation and I was worried. But lo and behold. a fabulous 2 loaves. they are beautiful land delicious. Also I refrigerated after the 5 fold and turns. Alexandra cooks gives permission to use the refrigerator at almost any step. Thank you.
Hi. Just now making this recipe. I am wondering though… is there a mistake on the levain amounts? It says 50g starter 200g water and 200g flour. But later you say to add 250g levain. That would leave 200g levain left over.
Sunny, No mistake! This ensures you have enough levain to make the recipe, in case your levain doesn’t rise too much. As you continue to bake sourdough, you can adjust that amount as needed. For me, I’d rather have too much than not enough. 🙂
Do you think this recipe be baked in bread tins and if so, what size tins?
Nadine, I do not have experience with baking sourdough in bread tins, so unfortunately I can’t give you much direction there!