Ever get a snack attack but want something more than the typical fare? These homemade goldfish crackers will fit the bill. Exceedingly flaky, flavorful and heckin’ cheesy, once you give this elevated version of the snack favorite a try, you might not want to ever by the bag from the store again. You’ve been warned!
Welcome to The Snack Series!
Hello and happy 2023! My, what a year 2022 has been. I am not one for resolutions, but I can’t help but reflect on the past year around this time and all that has happened/all that has been learned/all that is worth celebrating and all that worth letting go of. I hope that you can look back on 2022 with some level of fondness, and if not, that 2023 is your redeeming year. I feel like it’s gonna be a good one.
That said, I’m kicking off the new year with a fun new series on the blog called The Snack Series! Every week this month (January), I’ll share a new recipe for a homemade version of a classic snack. I was inspired to do this series by the Snack Vs. Chef show on Netflix, which I watched with my family all last month. We had so much fun watching it together and it made me want to make all the snacks! So, here we are.
All the snacks in this series will be considered an “elevated” version of the original, so don’t expect complete dupes. Instead, this is what you’d want the food to be if you were eating it at, say, a restaurant or a bakery. We’re going for gourmet, while still keeping it fun and unfussy, per us.
Homemade Goldfish Crackers Recipe
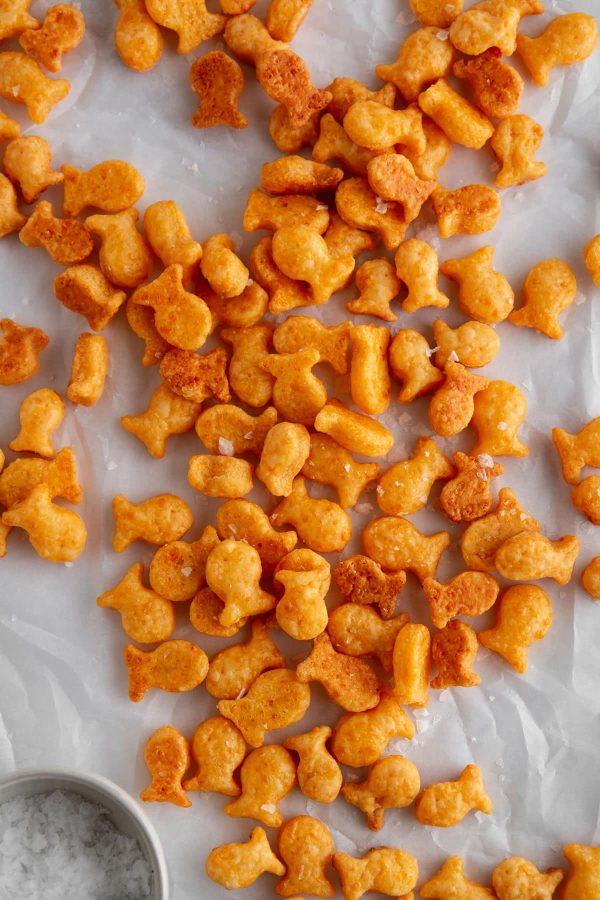
I’m kicking off The Snack Series today with homemade goldfish crackers, aka the fancy cousin to the bag-at-the-store version. These goldfish are incredibly delicious — so delicious, in fact, that we scarfed up a whole 14 dozen of them in one day. That’s gotta be some kind of record. Here’s what you can expect from this recipe:
- Flaky, buttery crackers made from scratch
- Ultra-cheesy flavor in every bite
- A fancy-yet-unfussy version of your favorite savory snack
- A new addition to lunch boxes, snack packs, cheese boards, etc.
Ingredients for Homemade Goldfish Crackers
The ingredient list for these lil’ fishes that are so delicious is really simple and straightforward, as we want just a few flavors to really shine. Here’s what you’ll need:
- Sharp cheddar cheese (HIGHLY recommend buying a block and shredding it yourself; see my Notes in the recipe below)
- Unsalted butter, cold, cut into cubes
- All-purpose flour
- Salt, garlic powder and onion powder, for flavor
- Cold water, to bind the ingredients
- Flaky sea salt, to finish (optional, but I love the added salty crunch it provides!)
How to Make Homemade Goldfish Crackers
If you’ve never made homemade crackers before, it will blow your mind how easy it is to do. You’re basically making a flaky pastry dough, cutting it into shapes and baking. As always, please scroll to the bottom of the post for the FULL recipe, but here’s the basic rundown:
- Step One: Pulse the dry ingredients. In the bowl of a food processor, pulse together cheese, butter, flour, salt, garlic powder and onion powder.
- Step Two: Form the dough. Pulse in cold water just until a dough comes together, then wrap the dough in plastic wrap and chill in the fridge.
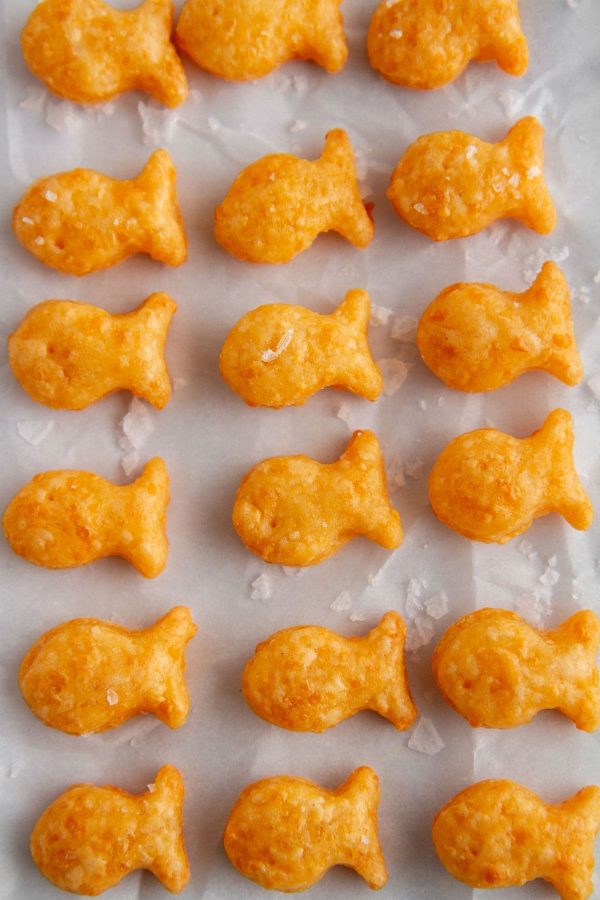
- Step Three: Shape and bake. Roll out the chilled dough on a lightly floured surface. Use a goldfish cookie cutter or other small cookie cutter to cut out shapes from the dough. Place the crackers on a parchment paper-lined baking sheet and bake until puffed and golden.
Can I Make These Ahead of Time?
Yes! You can make the dough and refrigerate it up to 24 hours before you plan to bake it. I have a hunch you can also freeze the dough (and let it thaw in the fridge overnight before using), but I have not tested this, so I can’t say with 100% confidence that it works. If you try it, let me know the results!
Can I Use a Different Kind of Cheese?
Yes, you can. I would recommend using another kind of semi-hard cheese, such as white cheddar, mild cheddar, Gouda or Havarti, or a combination of cheeses.
More Snack Recipes!
- 5 Ingredient Cheese Straws
- Homemade Fruit and Nut Crisps
- Apple Peanut Butter Granola Bars
- Slow Cooker Mexican Grilled Corn Dip
- Moroccan Spiced Nuts
Homemade Goldfish Crackers

Ingredients
- 8 ounces sharp cheddar cheese, shredded*
- ¼ cup unsalted butter, 4 tablespoons cold butter, cut into ½-inch cubes
- 1 cup all-purpose flour
- ¾ teaspoon salt
- ¼ teaspoon garlic powder
- ¼ teaspoon onion powder
- 2 tablespoons cold water
- flaky sea salt, for topping (optional)
Instructions
- Preheat your oven to 350°F. Line a baking sheet with parchment paper; set aside.
- In the bowl of a food processor, pulse together cheese, butter, flour, salt, garlic powder and onion powder until mixture resembles coarse sand. Drizzle in water while pulsing the food processor just until a dough comes together.
- Remove dough from food processor; press and roll into a disk shape, then cover tightly with plastic wrap. Chill dough for at least 20 minutes (up to 1 day).
- On a lightly floured surface, roll out dough to 1/4-inch thickness. Using a goldfish cracker cookie cutter or other small cookie cutter, cut dough into shapes. Poke each cracker once with a toothpick to form the “eye” and also keep crackers from puffing too much in the oven. Reroll scraps once, if needed, to make more crackers.
- Place crackers at least 1/2-inch apart on prepared baking sheet (you may need to bake in batches). Sprinkle with flaky sea salt, if desired. Bake for 11 to 13 minutes or until crackers are puffed and golden. Cool completely on baking sheet.
- Store fully cooled leftover crackers in an airtight container at room temperature for up to 1 week.
Notes
- *I highly recommend using a block of cheese and shredding it yourself rather than using the pre-shredded variety, which has extra anti-caking agents mixed in (thereby making your crackers a little gummy).
Nutrition
Nutrition information is automatically calculated, so should only be used as an approximation.
 Like this recipe? Rate & comment below!

These were delicious! My son is obsessed. I cooked some in the oven and some in the air fryer and I thought the ones in the air fryer turned out even better. I cooked them at 330 for 5 minutes and then let them sit in the air fryer for a while.
Hi Eve! Thank you so much for coming back and sharing your experience, it means a lot! Sounds wonderful, keep it up! ~gvd team
These are sooo yummy!! I’ve tried a few different recipes for goldfish and these are the best!
Thank you so much, Reagan! I really appreciate you taking the time to come back and comment and rate! It made my day
I really want to try these but I don’t have a food processor (honestly. I know it’s weird). Can i use a blender? I do have one of those mini-chopper things but it’s small so I’d have to do it in increments – I could never fit 2 cups of flour in it.
Hi Patti! You can definitely make these without a food processor. I think it would probably be better to use your mini-chopper than the blender, just because you can cut through thicker things with it. Just go through in small batches, and then combine each batch in a large bowl. Once everything is in the bowl, you can use a pastry cutter or your fingers to blend the mixture. Then finish it by hand! Enjoy! ~gvd team
These taste great, are easy to make, and are a wonderful alternative to the grocery store brands filled with chemicals. Thank you for sharing!
Hi Jordan! Thank you so much for taking the time to rate and comment! We’re so happy you agree that this homemade recipe is the way to go! ~gvd team
Looks good and I want to make these for my two year old. The only problem is I don’t own a food processor. Is there something else I can use instead?
Hi Joni! You can definitely make these for your little one without a food processor, it will just take a little more time. Prep your ingredients as said in the list (shred the cheese, cube the butter, etc). Combine your dry ingredients in a bowl. Then, using a pastry cutter or 2 knives cut the cold butter into the flour mixture until it looks like coarse sand. Drizzle in the cold water and use a fork or your hands until it just comes together. Then follow the rest of the recipe as written! Can’t wait for your 2 y.o. to have these, let me know how it goes! ~gvd team