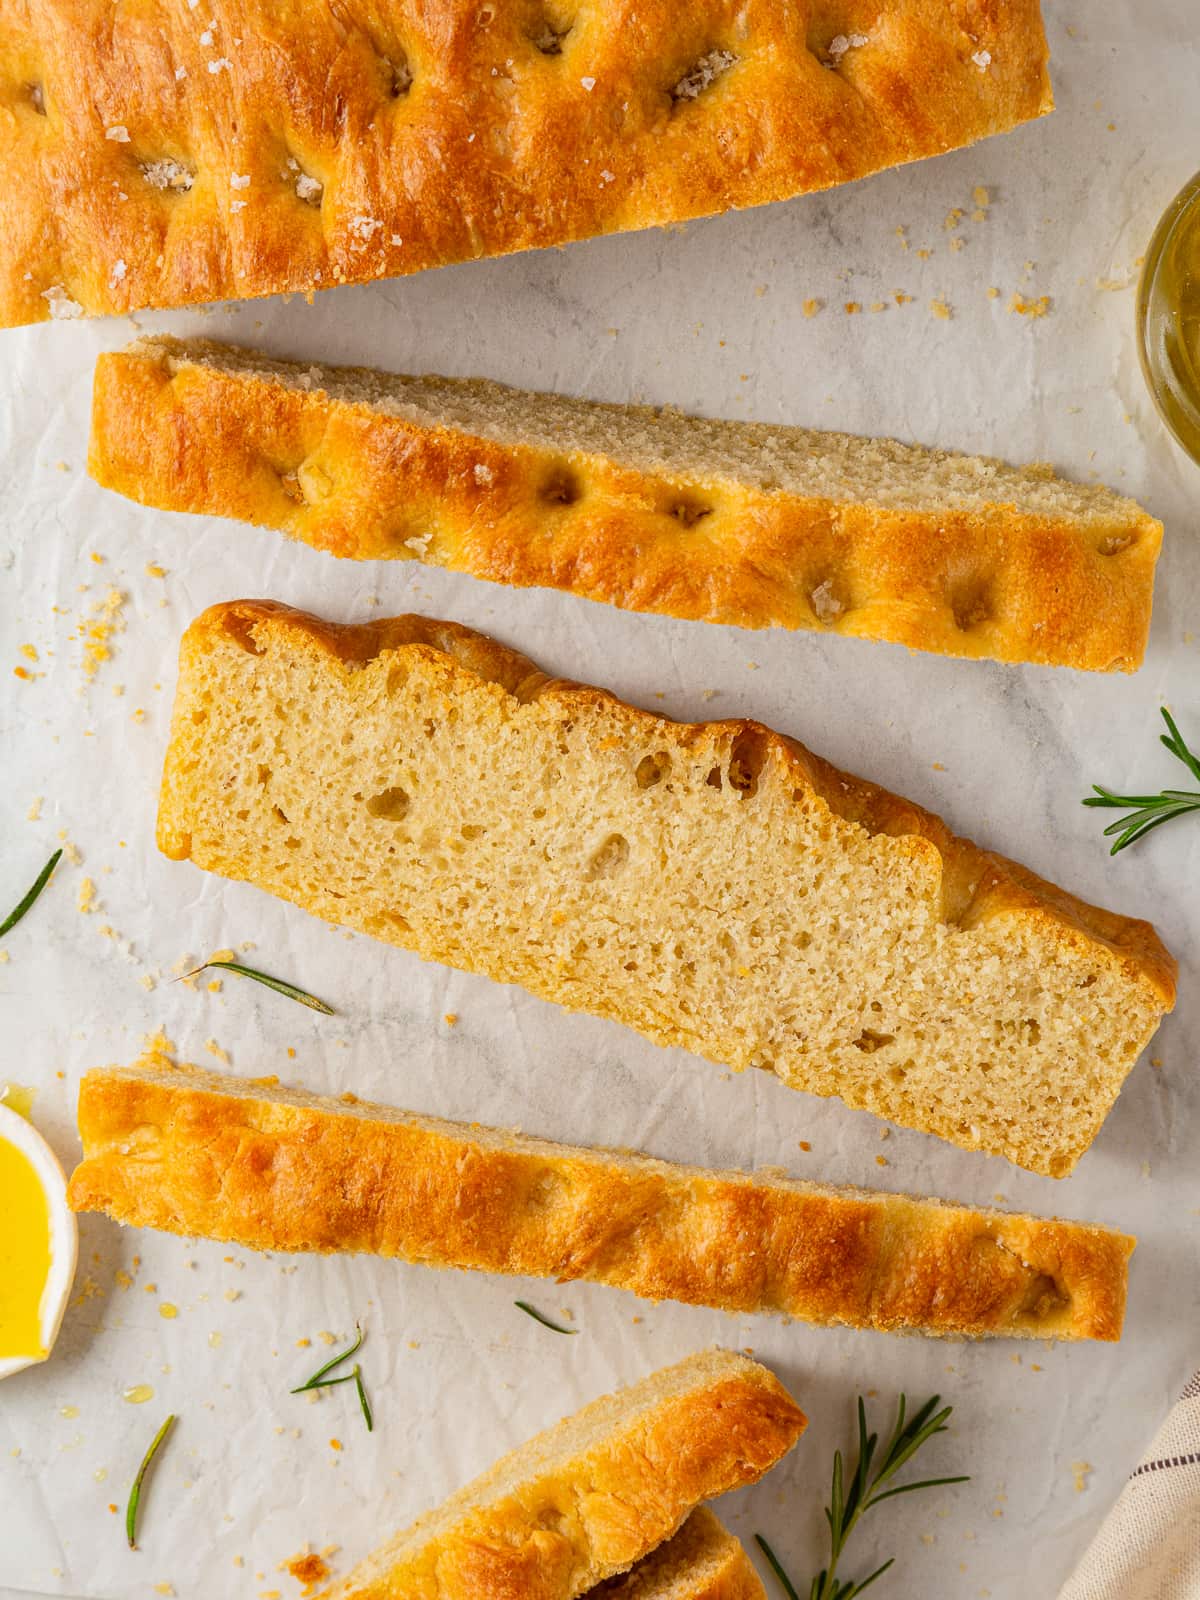
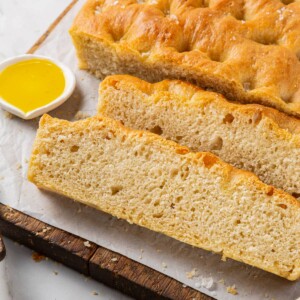
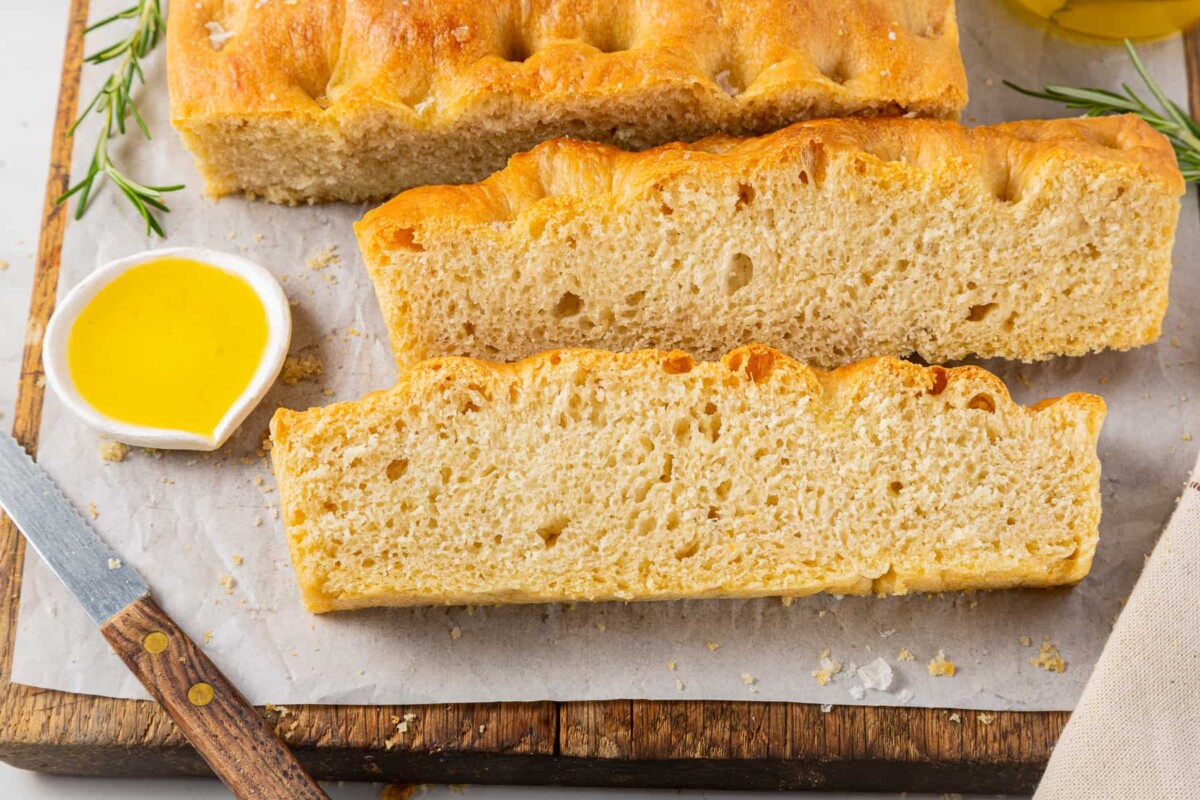
No-knead focaccia is soft, flavorful, and made with only 5 simple ingredients. You’ll have fresh-baked bread in under 3 hours that’s perfect for sandwiches, salads, or snacking!
A Quick Look At The Recipe
This is a brief summary of the recipe. Jump to the recipe to get the full details.
Prep Time
25 minutes
Cook Time
30 minutes
Proofing/Rest
2 hours
Total Time
2 hours 55 minutes
Servings
12 pieces
Difficulty
Easy
Calories *
294 kcal per serving
Technique
Stir together dough, proof twice, dimple, then bake until golden and crisp.
Flavor Profile
Soft, chewy focaccia with a crisp edge and deep olive oil flavor.
* Based on nutrition panel
The rest stretch rest method here stopped that thick hump from forming in the center which I have had happen in other focaccia recipes. My first bite had the salty crispy top and a faint peppery taste from the olive oil. All my apartment has to say is 10 out of 10! ⭐⭐⭐⭐⭐
Lauren
Why You Will Love This
- No equipment needed! As with a no-knead bread, no special equipment needed! Just your hands, minimal effort and some patience. You got this, and if you love easy breads, make sure to check out this no-knead grilled naan and my flatbread recipe next!
- Simple bread recipe perfect for beginners. I am a firm believer that everyone deserves fresh-baked bread. There aren’t many things better! This focaccia is a great introduction to the world of bread, or it’s perfect when you want bread and don’t want to dirty your mixer or knead for 20 minutes. It is also a fun way to involve your kids in bread making!
- Perfect crust with a pillowy inside. Nothing compares to the crisp and flavorful crust of homemade focaccia bread. The olive oil helps create a firm crust (no soggy bottoms here) and a pillowy soft inside that will make it very hard to step away from.
Table of Contents
Nothing beats the smell and flavor of freshly baked bread. This foolproof no-knead focaccia recipe is perfect for beginners and is ready to eat the same day! It’s a perfect addition to any lunch, dinner, or cheese board and a great beginner recipe.
Once you’ve made this easy focaccia recipe, be sure to try our whole wheat focaccia or sourdough focaccia recipe! For another fun bread recipe to start making at home, I suggest these sourdough discard bagels or my garlic breadsticks!
Ingredients & Substitutions
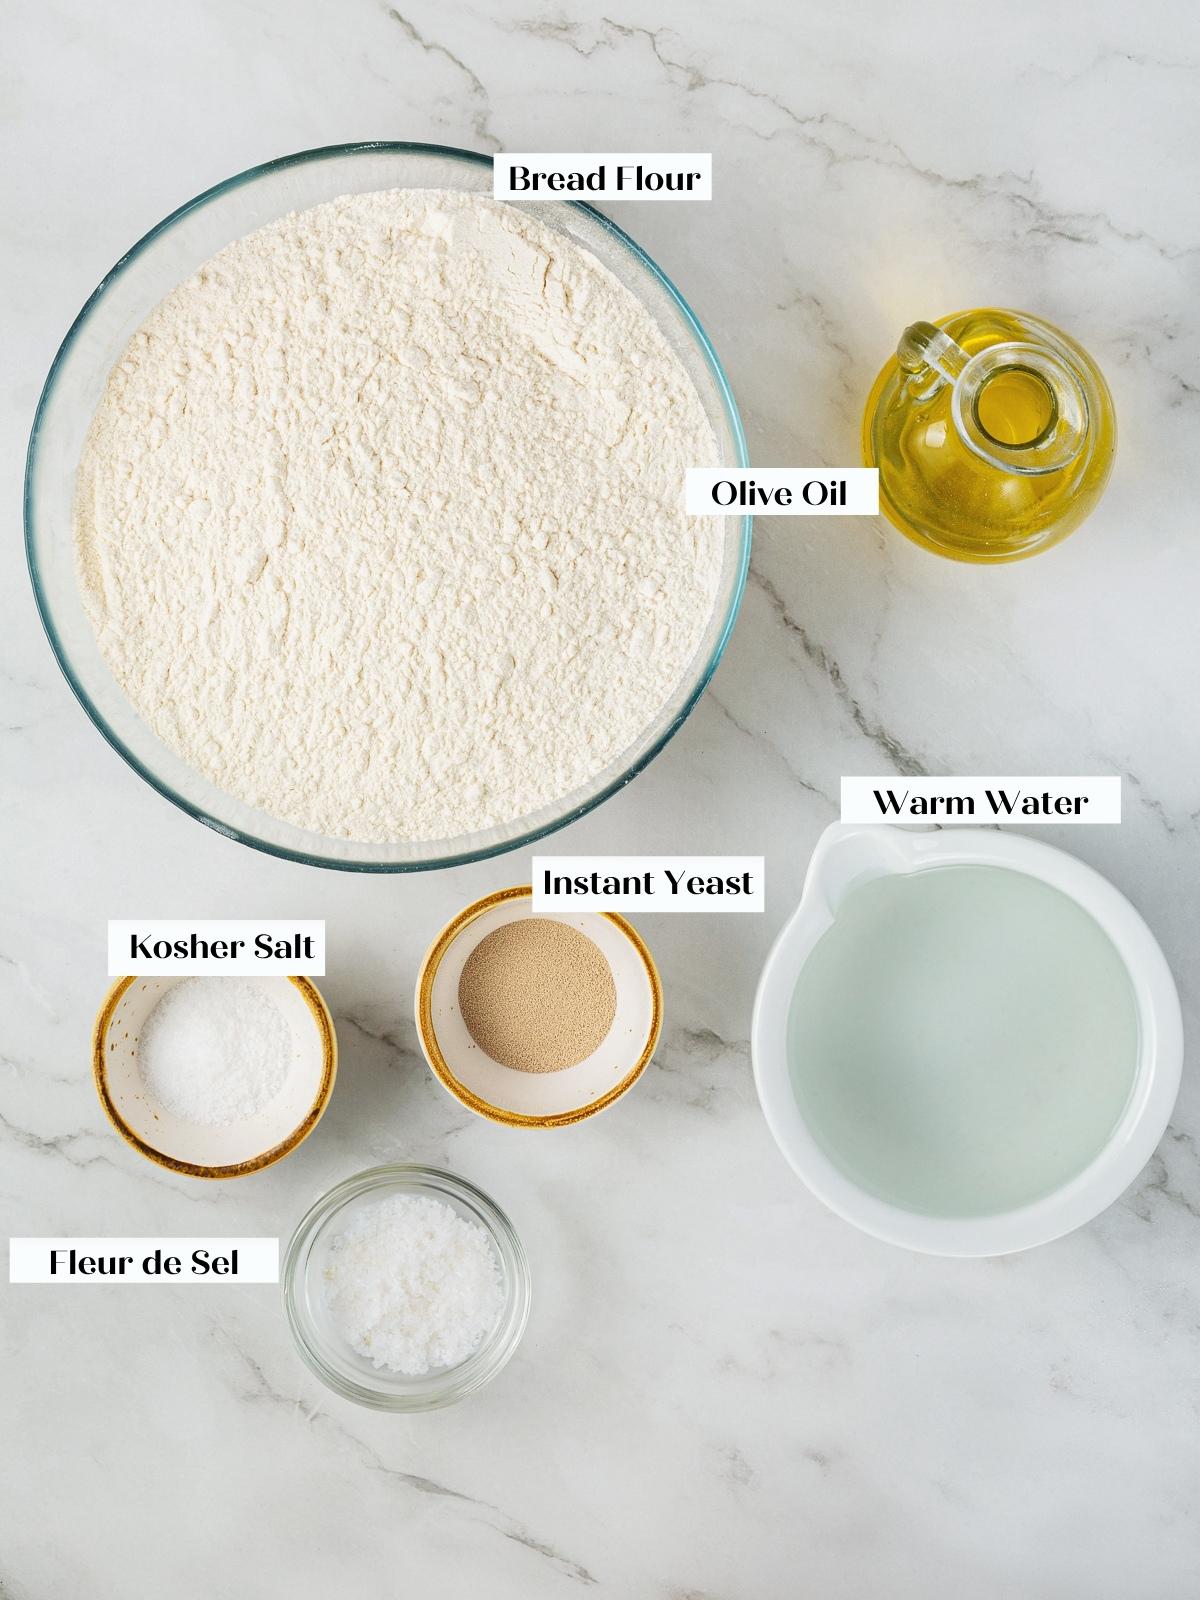
- Bread Flour: We need all the help we can get to develop gluten in a no-knead bread, such as this no-knead pizza dough. Bread flour has a higher protein content, which means more gluten. You can substitute all-purpose flour, just be sure to reduce it to 682 grams.
- Instant Yeast: Instant yeast is fast and ready to work! You can substitute double the weight in active dry yeast or fresh yeast if that’s what you have. Active dry yeast requires activation in warm liquid, so keep that in mind.
- Warm Water: You can use tap water, bottled water, or distilled water. I always use tap because nothing beats NYC water!
- Extra Virgin Olive Oil: Extra-virgin olive oil undergoes the least amount of processing among olive oils, thereby retaining some of its nutritional value and most of its flavor. It adds flavor and moisture to the bread while helping to create a crisp crust.
- Optional toppings: Top the focaccia dough with olive oil, flaky sea salt, fresh herbs or sun-dried tomatoes. You can use many different toppings for this bread.
See the recipe card for full information on ingredients and quantities.
Why No-Knead Recipes Work
Gluten is developed in three ways: hydration, agitation, and time. With bread, we normally use agitation (kneading) as the main way for developing gluten. When making sourdough, we tend to lean on time, leaving the bread for 8-18 hours or overnight, like with this no knead dutch oven bread, to develop that gluten network. However, with no-knead recipes, it actually depends on all three.
- Hydration: This recipe is a high-hydration dough and is also made with bread flour. Meaning that when the water and oil interact with the flour, the high protein content of the flour starts producing gluten.
- Agitation: From mixing the dough to folding and stretching it, we are agitating the gluten network to strengthen it.
- Time: Bulk proofing and the final proofing play a big role in allowing the gluten in this bread to develop. So make sure not to skimp on the proof.
Variations
- Have fun with your toppings. The world is your oyster when it comes to topping your focaccia! Add your favorite spice mixes, such as everything bagel seasoning or za’atar, as seen in my za’atar focaccia. Alternatively, you can go crazy with fresh rosemary like I do in my rosemary bread, or some confit garlic. Maybe even make it your own personal pizza with some cherry tomatoes, parmesan cheese, mushrooms or olives, yum!
- Infuse the olive oil. Gently heat the olive oil with fresh herbs like thyme or rosemary, let it infuse covered overnight, and allow it to cool. You can even try with red pepper flakes, garlic, or lemon. If lemon sounds enticing, be sure to check out this lemon focaccia!
- Mix in some flavor. Add some flavor directly to the dough! You can substitute some of the olive oil for tomato paste or pumpkin puree. You can also add the spices directly to the dough!
- Make it sweet! Yes! Let’s swap out the olive oil for some melted butter or coconut oil and top this bread with cinnamon and sugar! Then, of course, we will have to drizzle it with some cream cheese glaze using the one from these cinnamon scones or add fruit like my strawberry focaccia!
How to Make No-Knead Focaccia
Use these instructions to make the best focaccia bread every time! Further details and measurements can be found in the recipe card below.
Mix the dough:
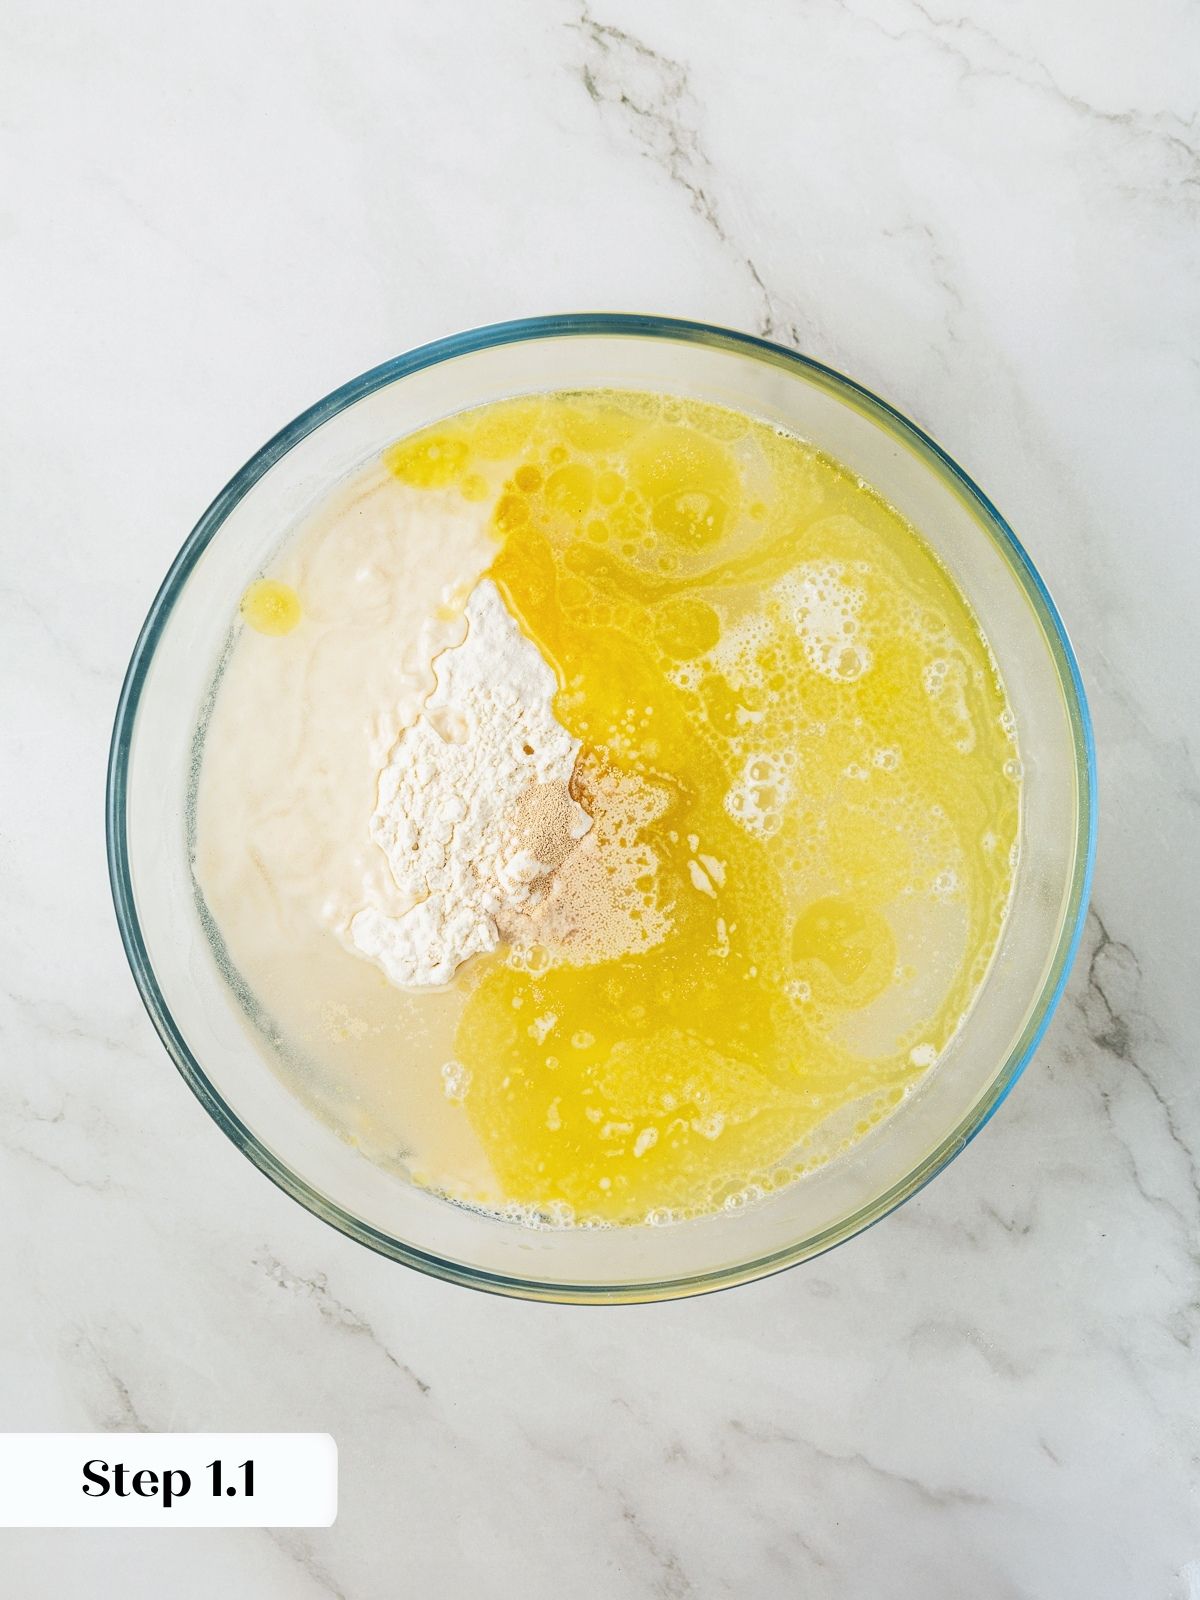
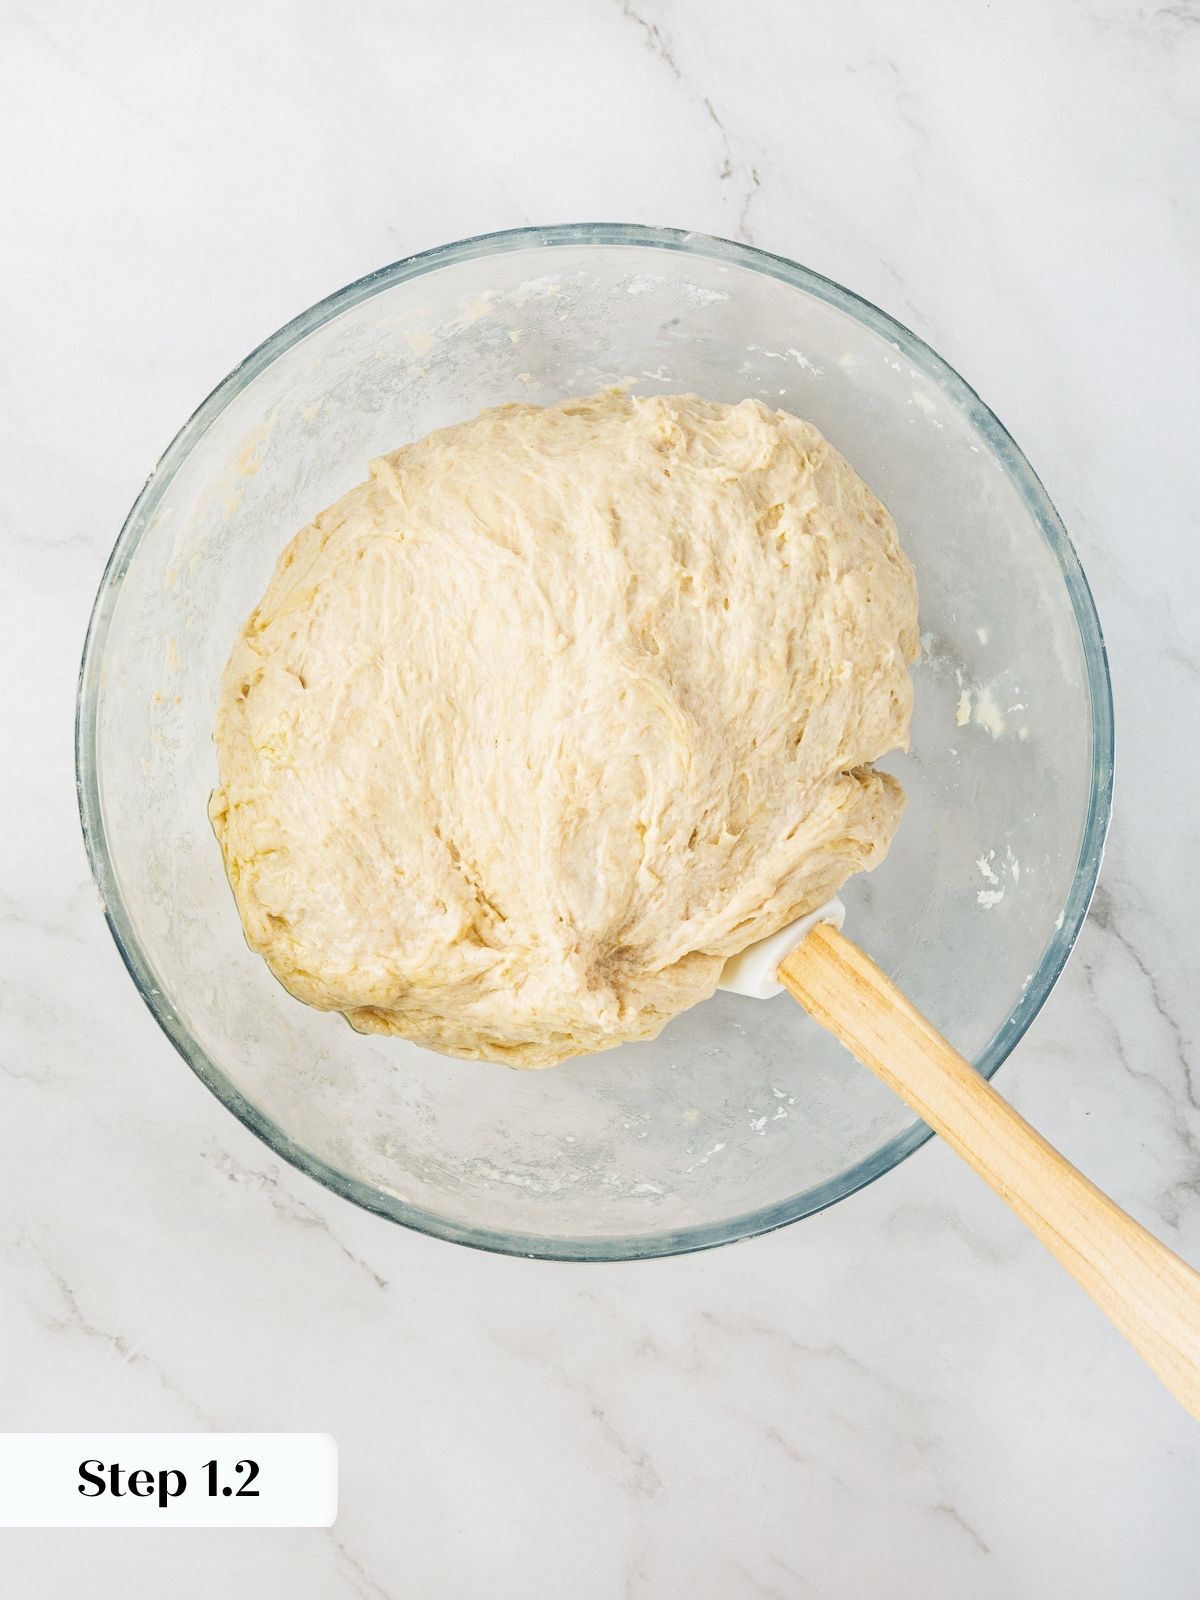
Step 1: Mix ingredients. In a large bowl, add the flour, yeast, salt, water, and olive oil (photo 1). Stir with a stiff silicone spatula or wooden spoon until a dough forms (photo 2). I use my hand to make it easier, squeezing and folding.
Proof and fold:
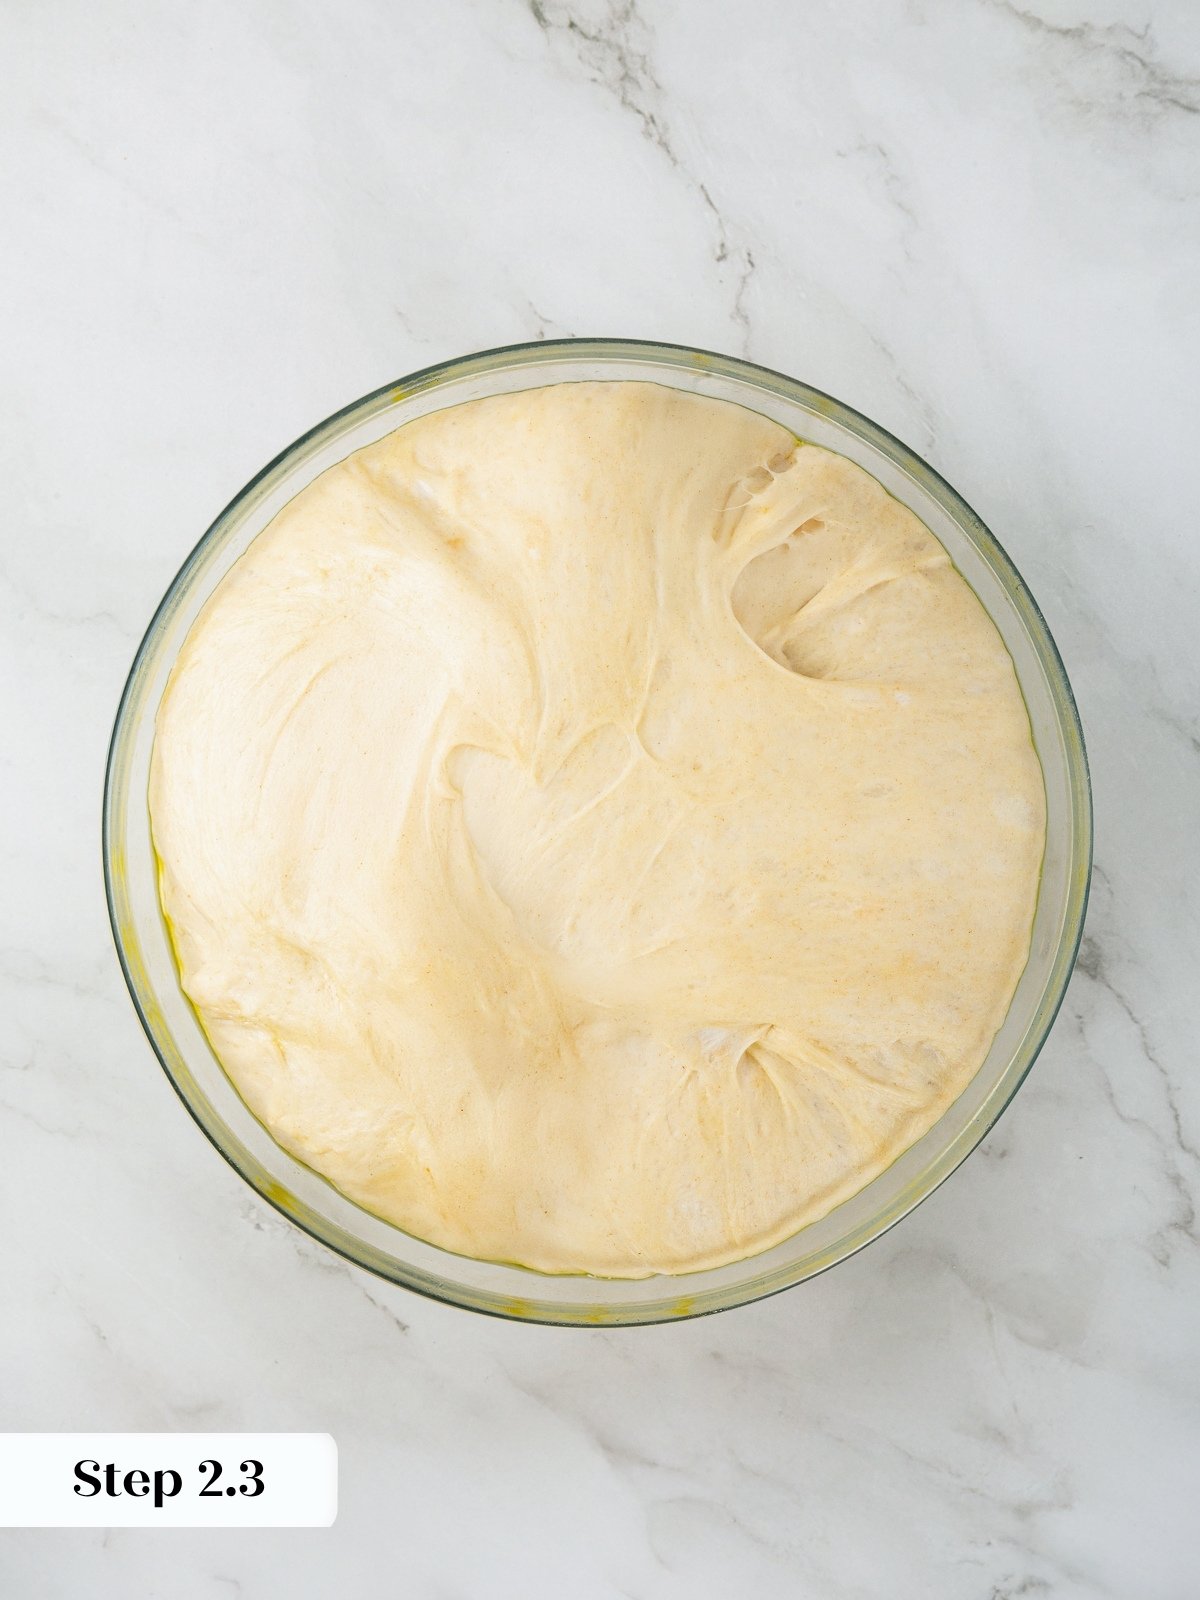
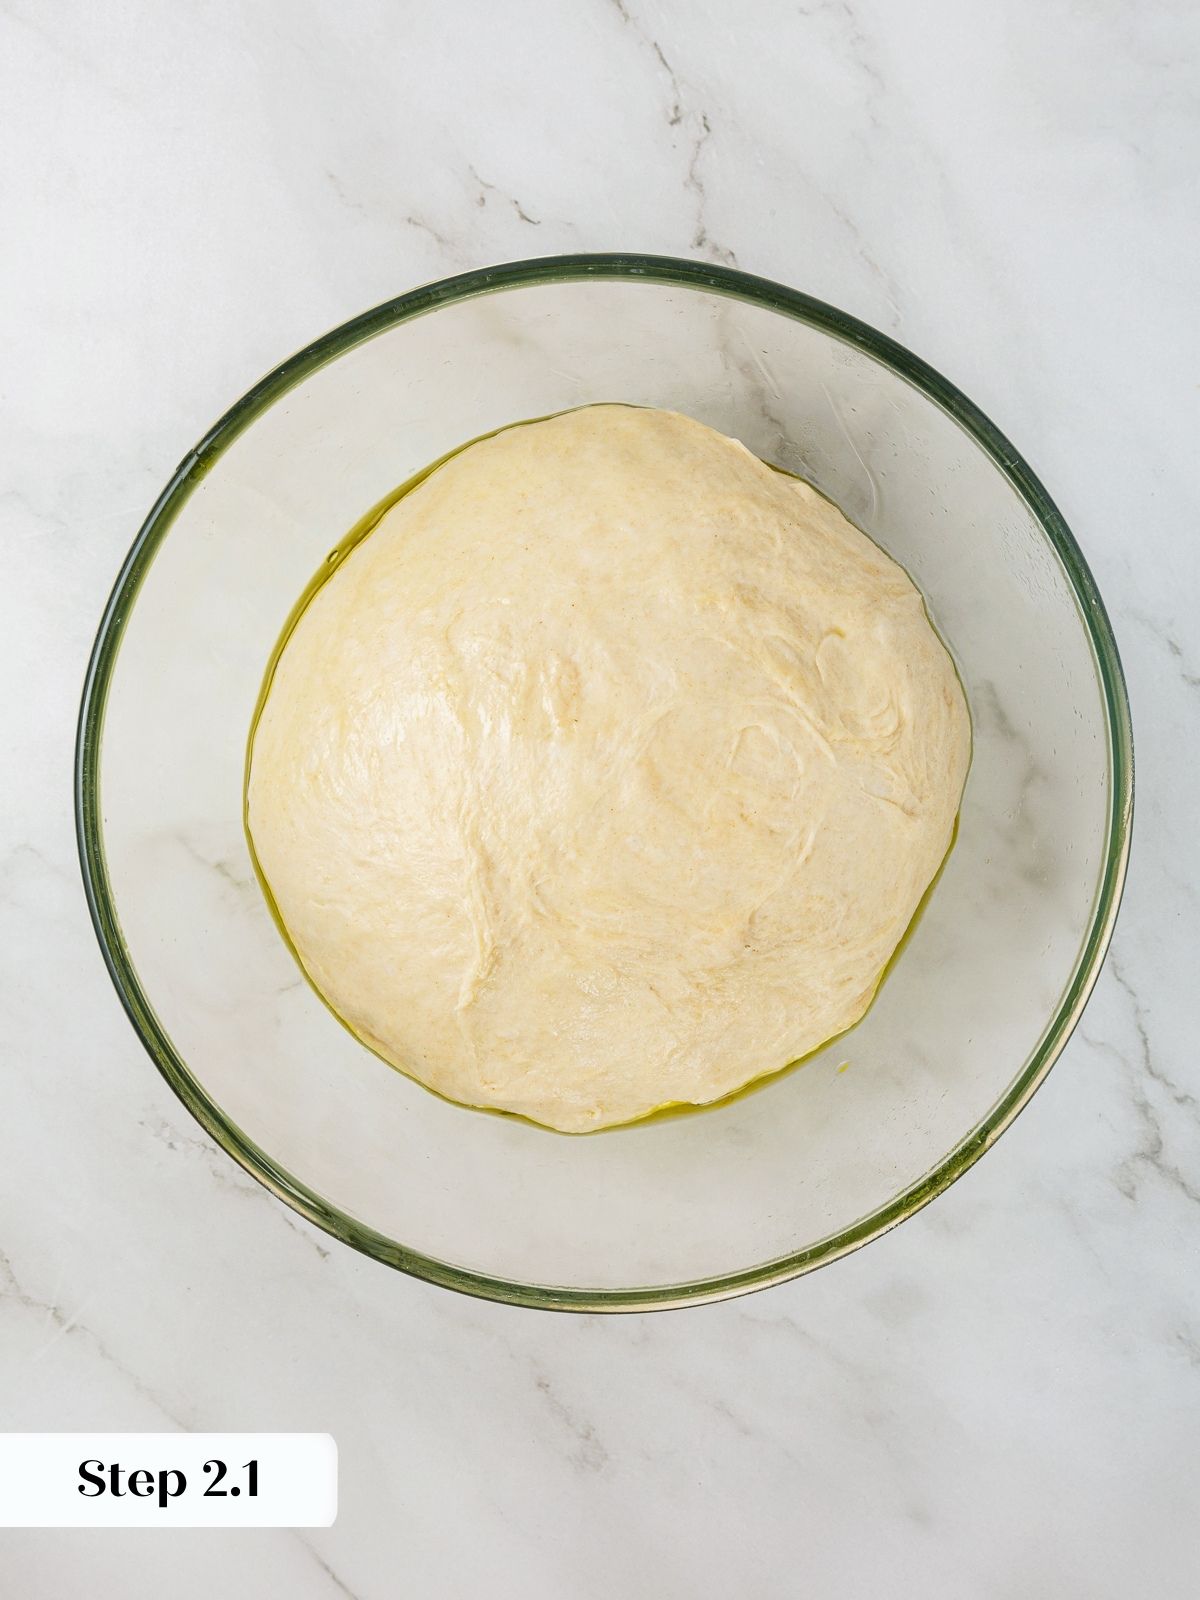
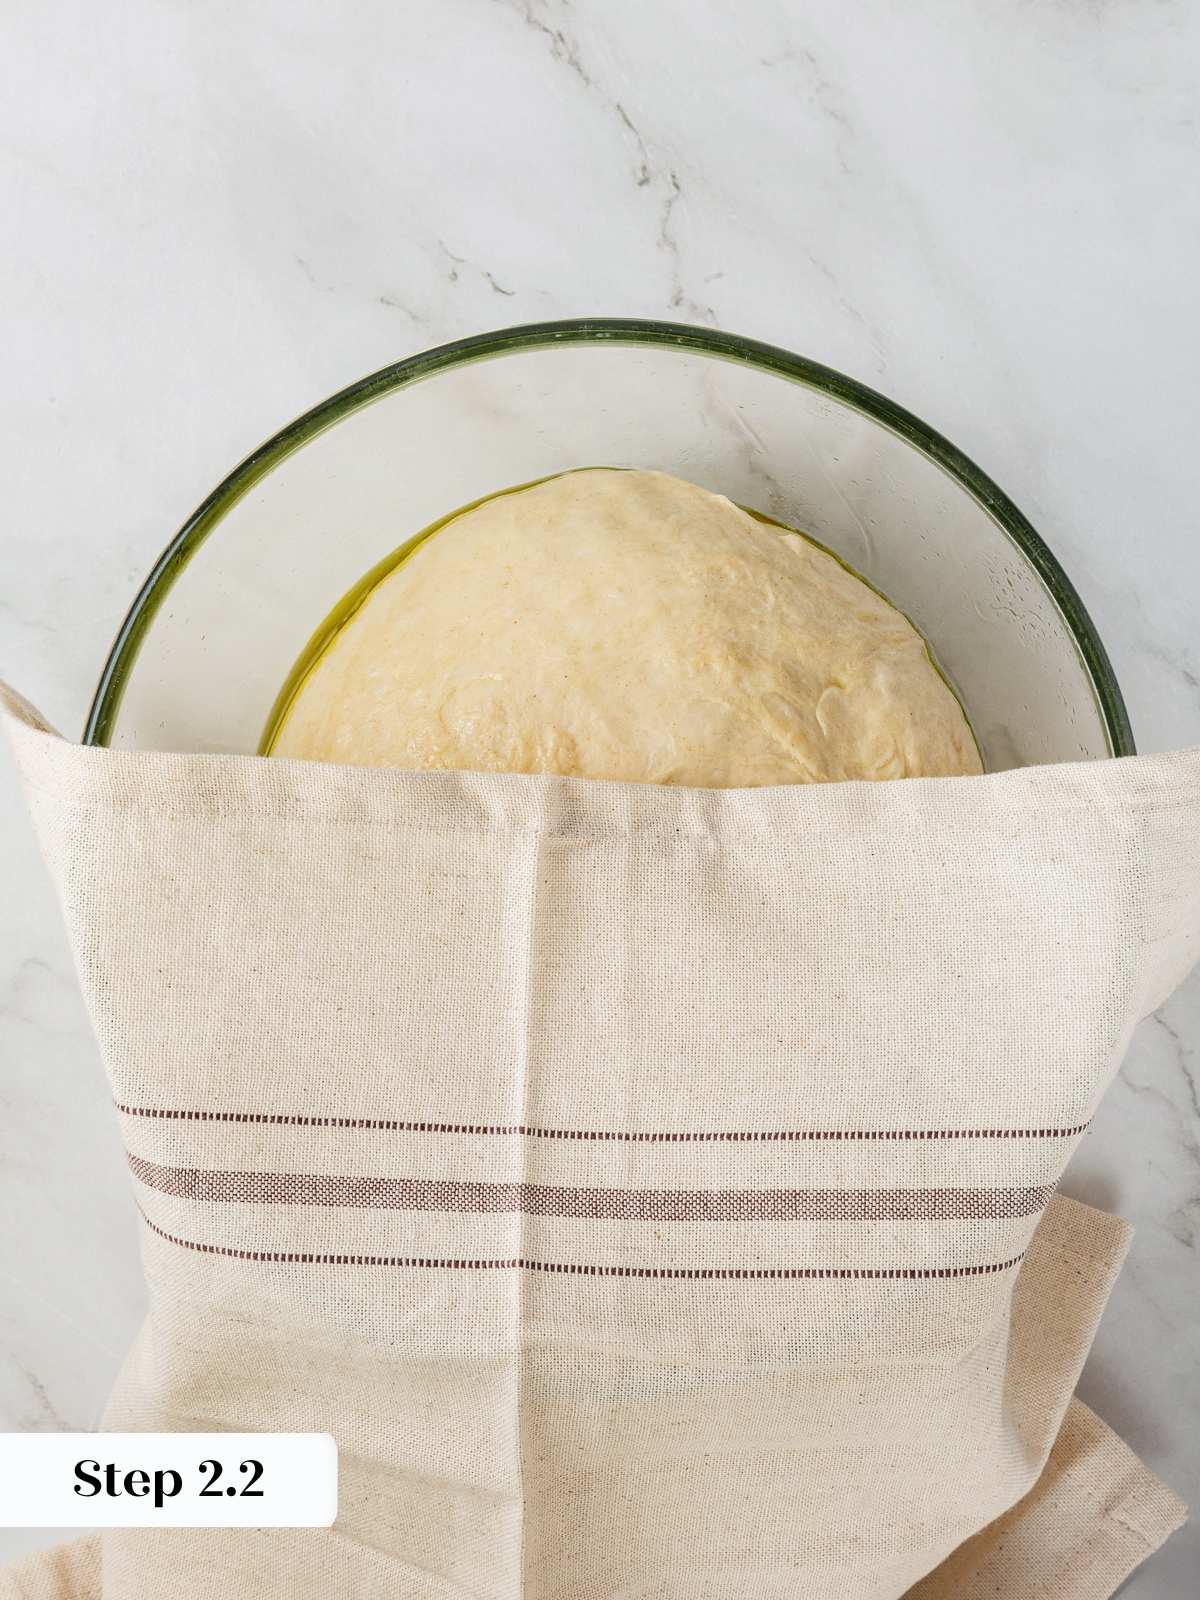
Step 2: First rise. Place the dough in a bowl lightly oiled with olive oil (photo 3). Cover with a kitchen towel (photo 4) or plastic wrap and bulk proof for 1-1 1/2 hours for the first rise or until the dough has doubled (photo 5).
Place the bowl in a warm place in your house. If you have the option, you can use the proof setting on your oven.
Step 3: Oil a rimmed baking sheet for thinner focaccia or a 9×13-inch baking pan with about 1 tablespoon olive oil.
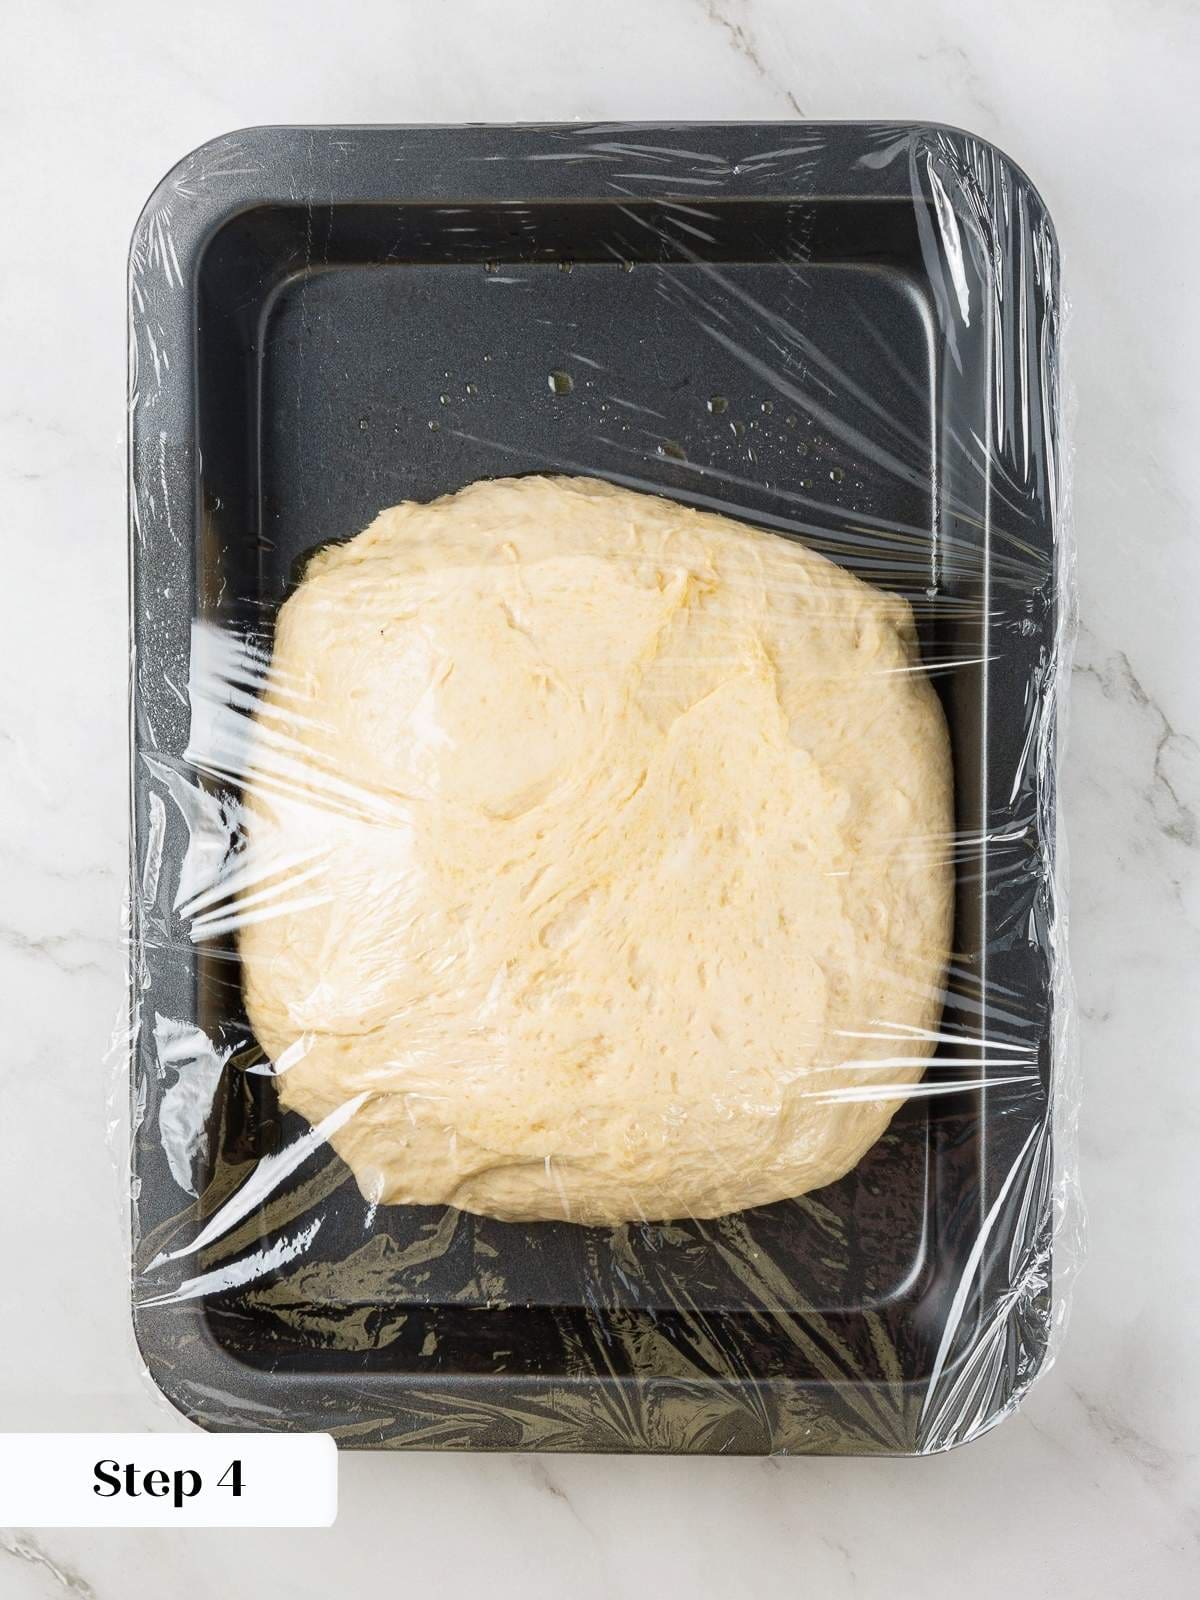
Step 4: Fold and transfer. Perform 1 set of stretch and folds, and then pick it up from the bowl and gently form it into a ball. Transfer dough into the center of the oiled baking pan. Use some of the oil from the pan to oil the top of the dough. Cover with plastic wrap and allow to rest for 15 minutes (photo 6).
One set of folds consists of stretching the dough from one end and folding it into the center. Turn the dough 180° and repeat. Then do a quarter turn and repeat the process on the remaining two sides.
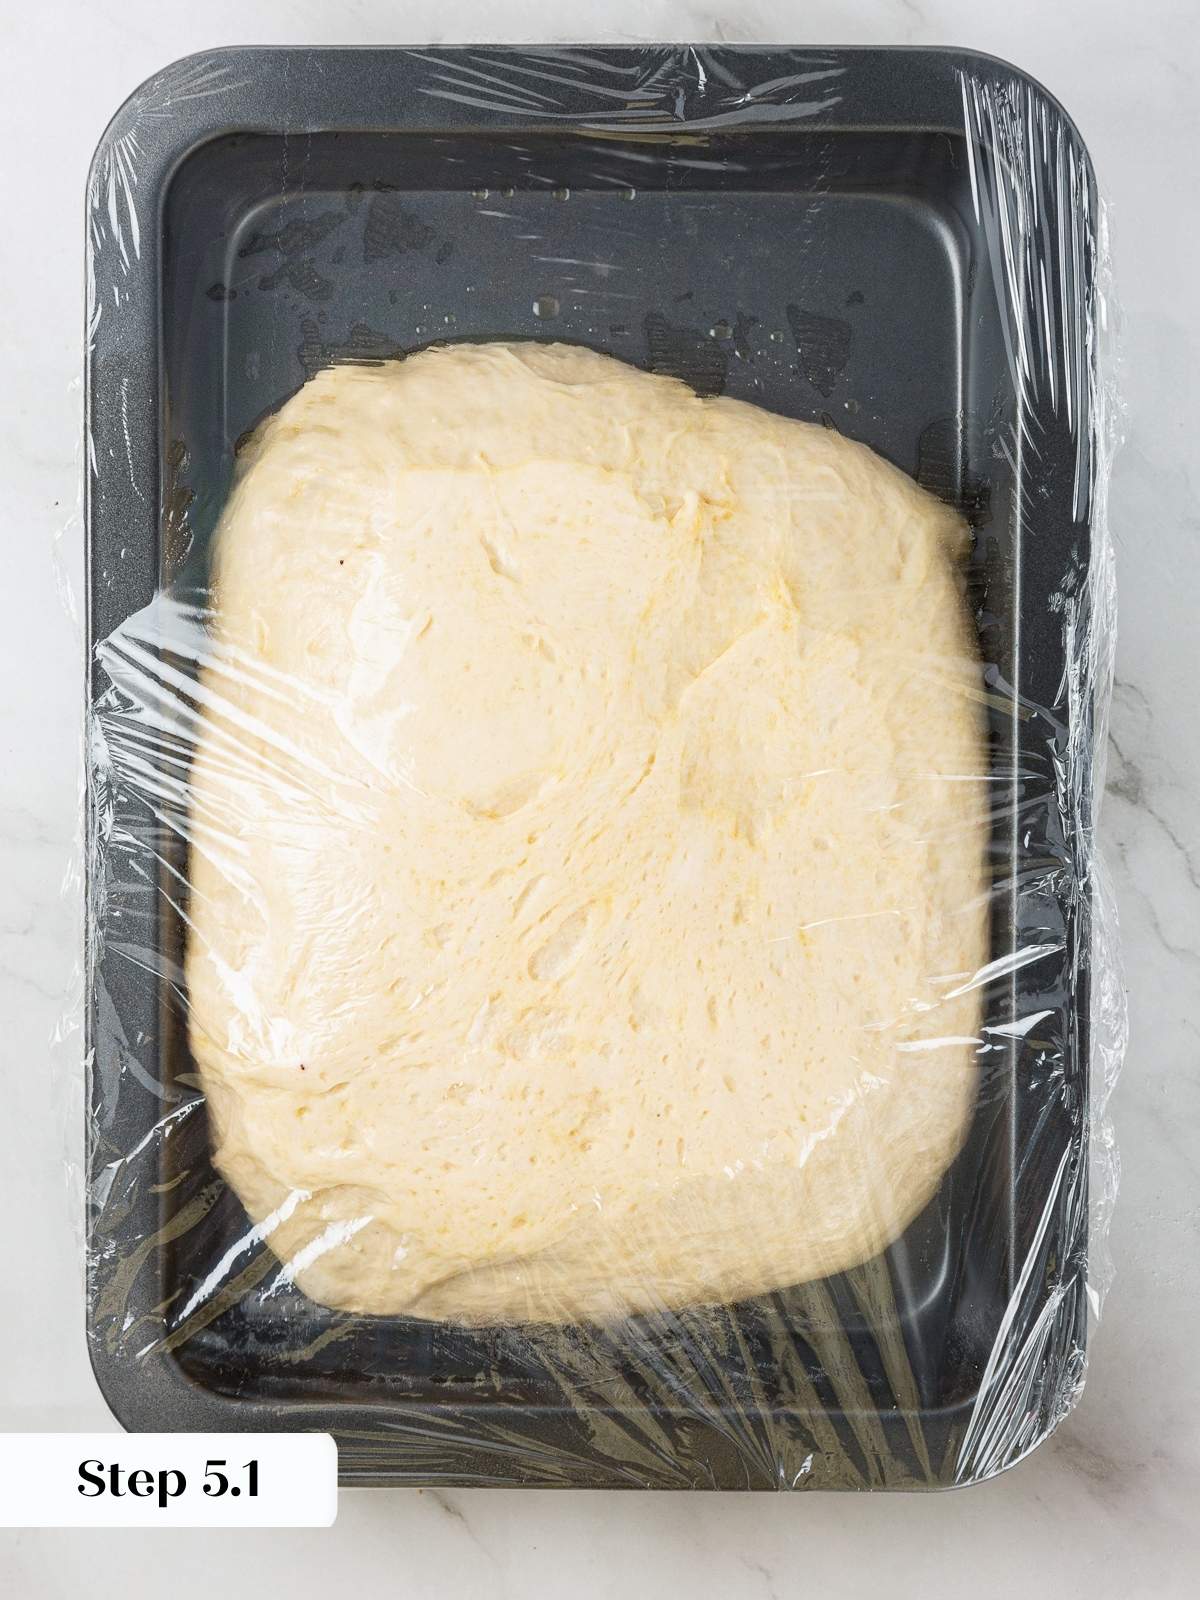
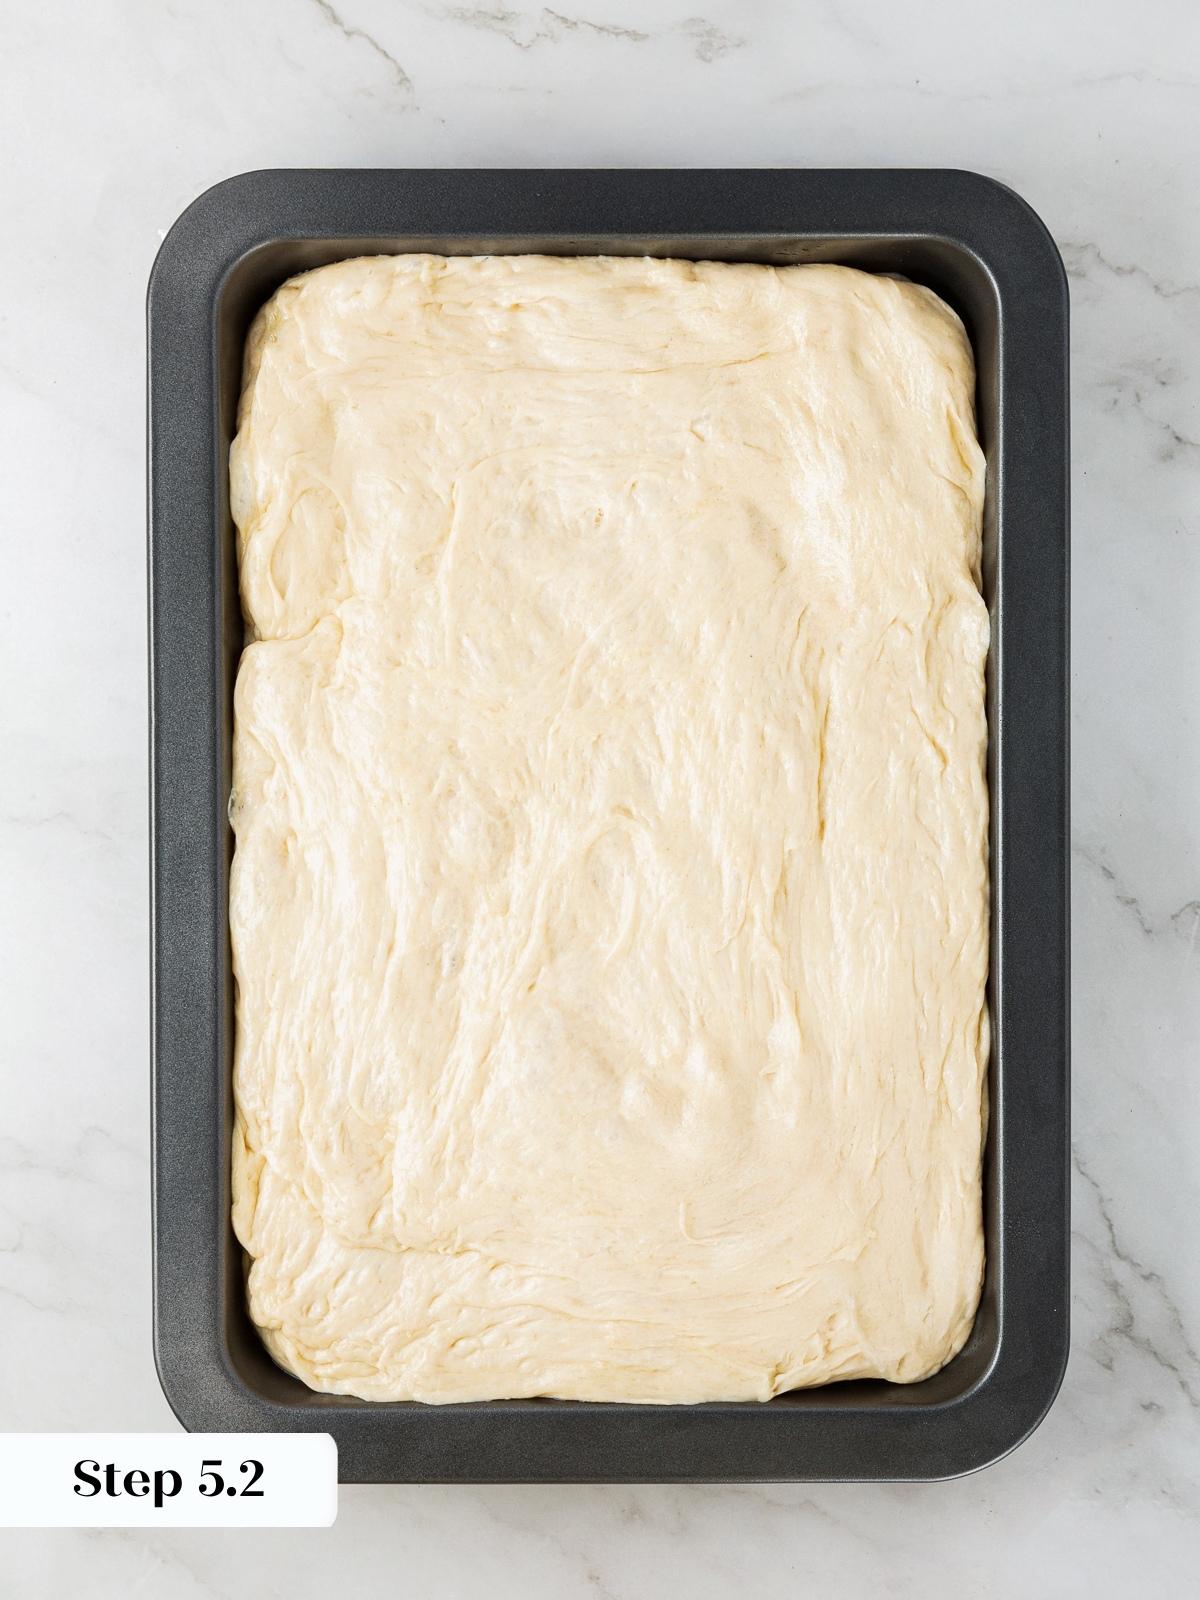
Step 5: Gently stretch the dough evenly (don’t let it stay fat in the center!) until it begins to spring back. Cover and let rest for 10 minutes (photo 7). Repeat this process until the dough is gently and evenly stretched to the edges of the pan (photo 8). For a 9×13-inch baking pan, this will only take 2 stretches, but for a larger baking sheet, you might need an additional rest and stretch.


Step 6: Final proof. Cover and allow to proof a second time for 45 minutes to 1 hour, or until it has doubled in size (photo 9). While the dough is final proofing, start preheating the oven to 400°F (without a fan).
Time to bake:
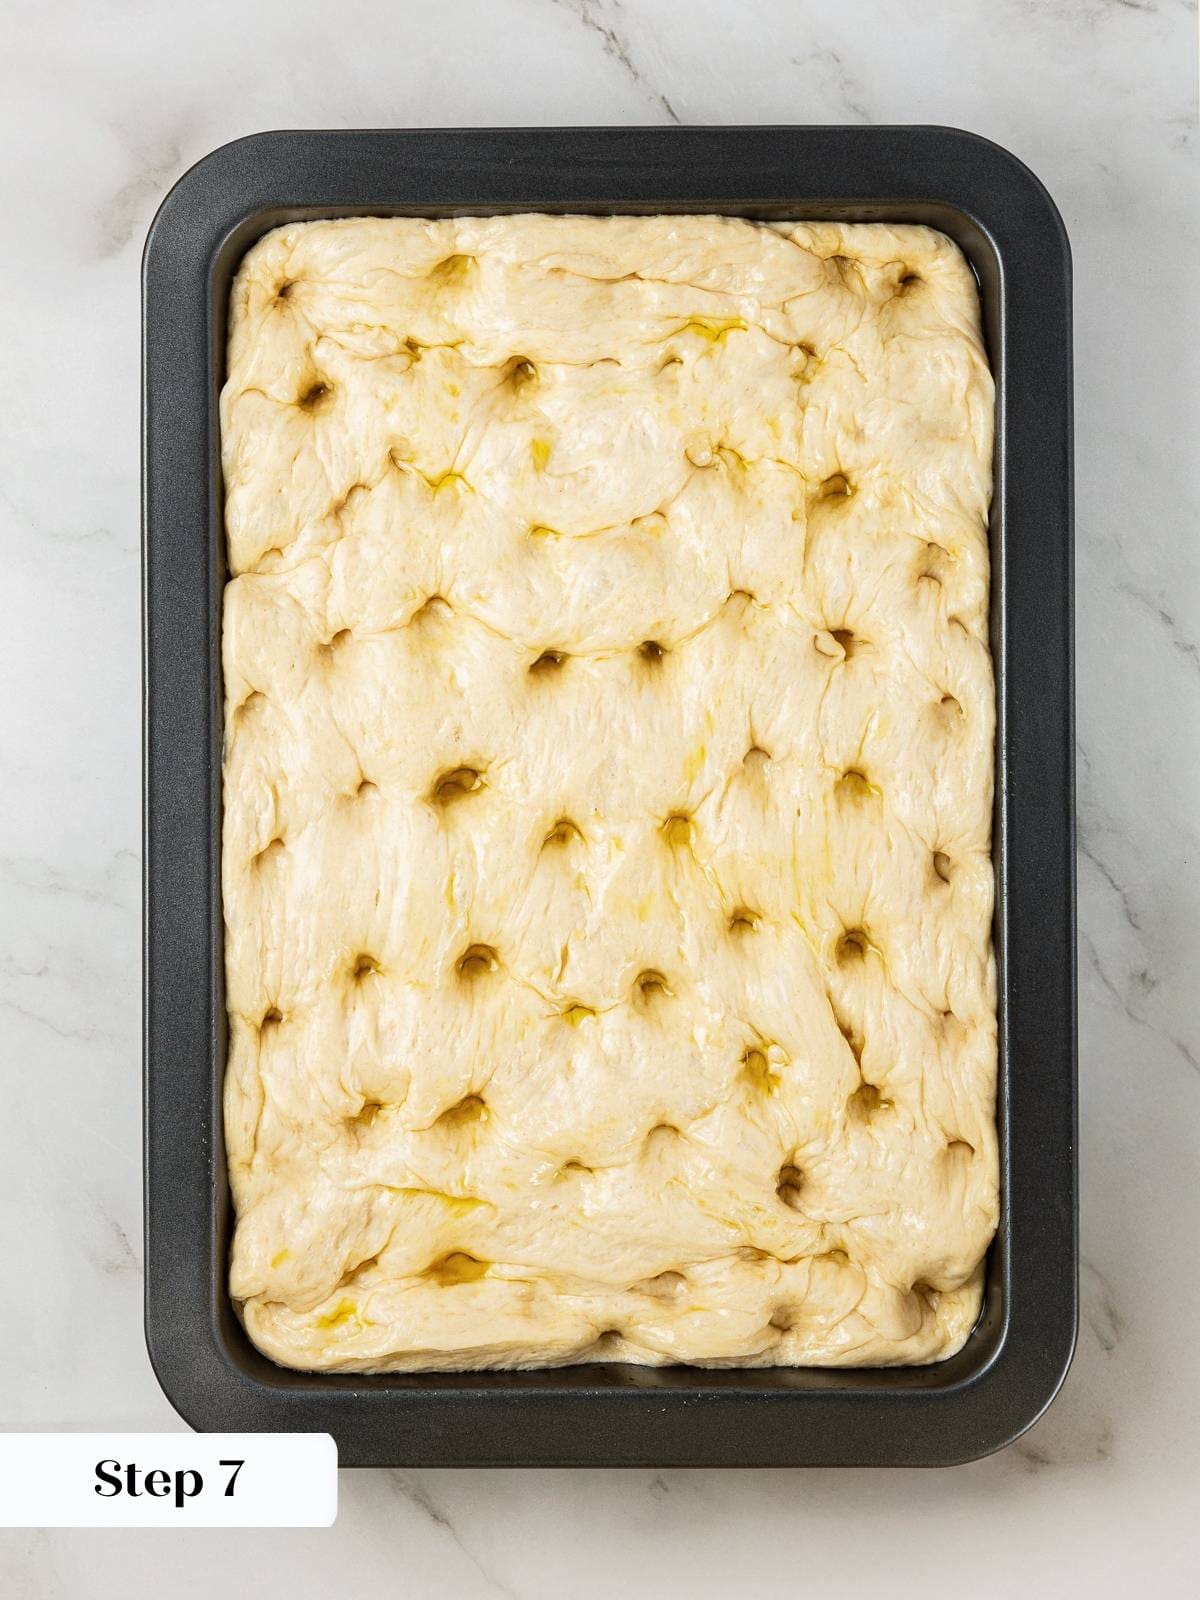
Step 7: Dimple and top. Uncover the dough, drizzle with olive oil, and press your fingertips into the dough, all the way to the bottom of the pan. Dimple the dough all over, popping any large air bubbles that appear (photo 10). Sprinkle the top with flaked sea salt and any additional toppings of your choice.
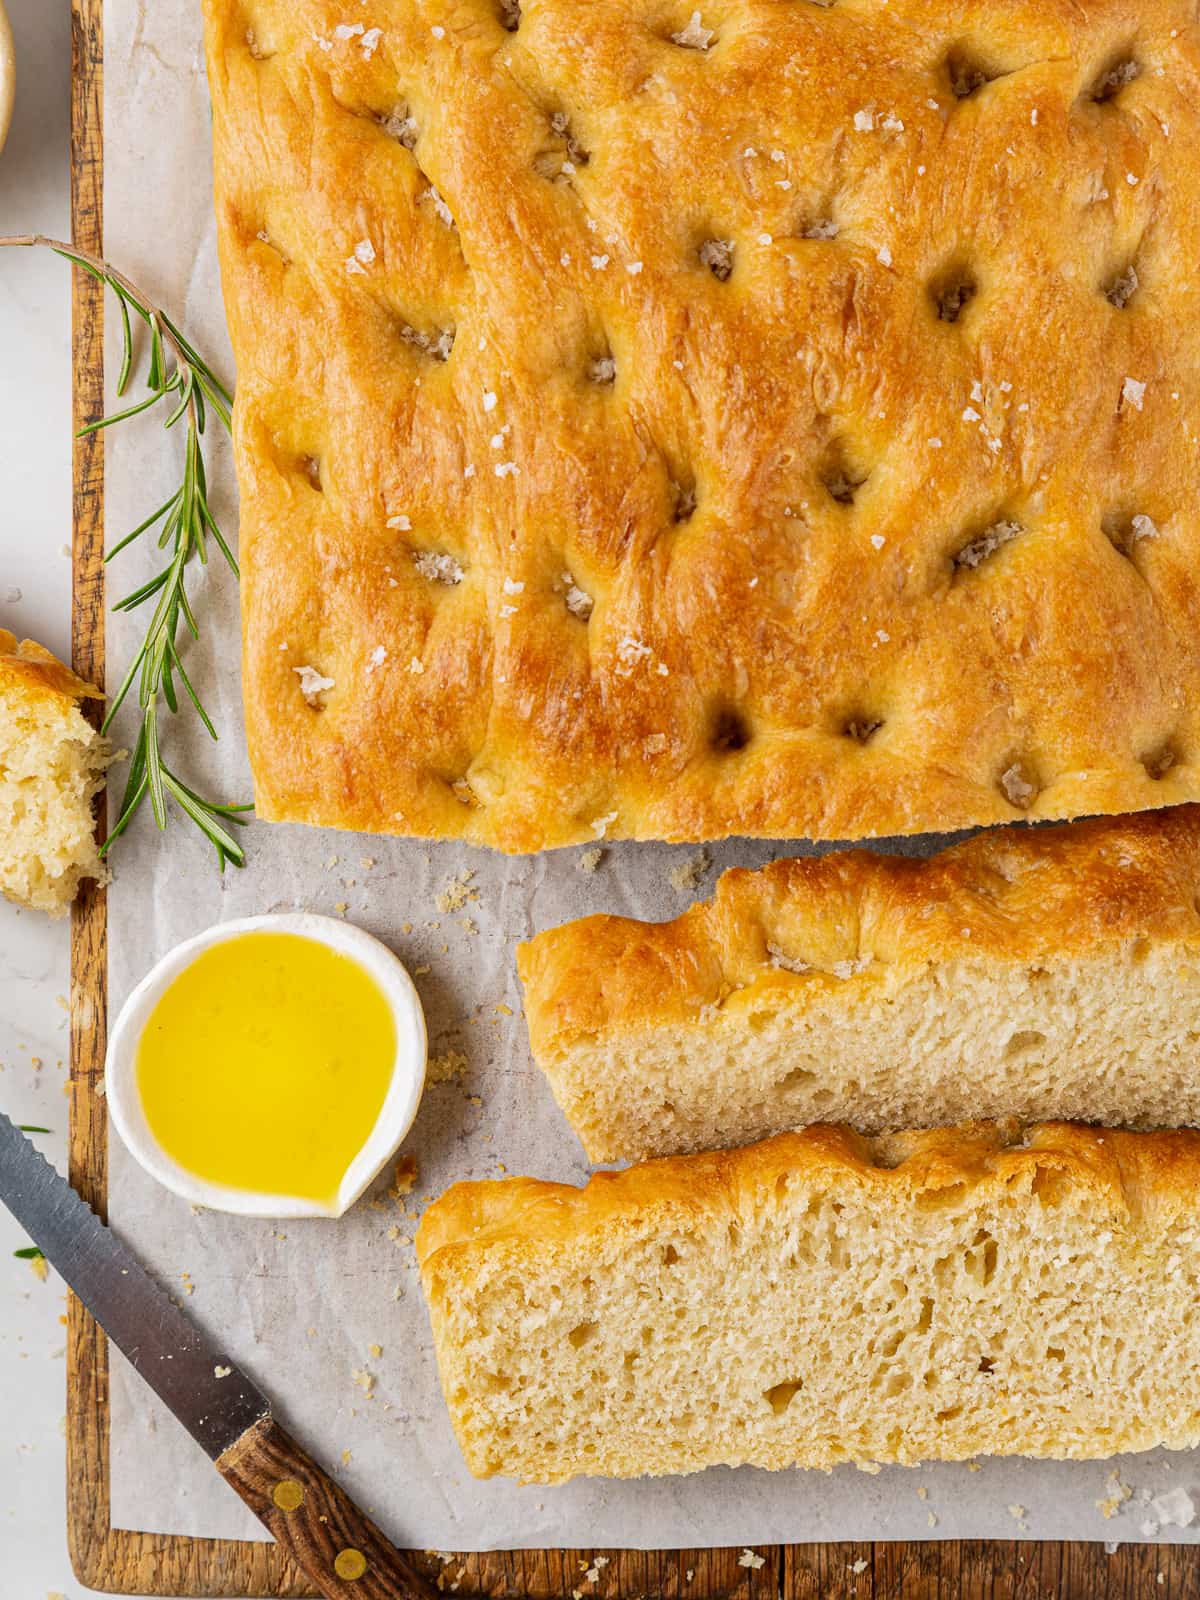
Step 8: Bake in the preheated oven for 25-35 minutes. I turned on the fan for the last 5 minutes to get a nice golden brown top (photo 11). A larger pan will require 10-12 minutes of baking, or until golden brown.
Step 9: Cool completely. Remove the bread from the pan onto a wire rack immediately and allow it to cool before slicing. This will keep the bottom and sides crispy rather than soggy. Allow the bread to cool before you slice into it (photo 12).
Recipe FAQs
Store focaccia in an airtight container at room temperature for up to 3 days. I do find it best on the day it is baked. The next day is the ideal time to use it as sandwich bread or make croutons that would be perfect with this stone fruit caprese panzanella salad! You can always rewarm the bread at 350°F directly on the oven rack. You can freeze baked focaccia, but I do not recommend storing the focaccia in the refrigerator because it will dry it out.
Use a metal pan when baking focaccia bread! Metal distributes the heat properly, giving you the best crisp crust on the sides and bottom of your bread. You can bake this in a glass or ceramic baking dish if that’s all you have.
You can serve focaccia as an appetizer with an oil and vinegar dip, hummus, this tzatziki recipe, or baba ganoush. You can also use thick focaccia to make an open faced caprese sandwich or this roast beef melt!

Recommended Easy Bread Recipes

Yeast Breads

No-Knead Breads

Yeast Breads

Yeast Breads
If you enjoyed this recipe, please leave a star rating and let me know how it goes in the comments below! I love hearing from you and your comments make my day!
No Knead Focaccia
Ingredients
- 5 ½ cups bread flour
- 2 cups warm water
- 2 ¼ teaspoons instant yeast, 1 packet
- ½ cup extra virgin olive oil, plus additional for shaping
- 1 tablespoon kosher salt
- olive oil, for shaping and topping
- fleur de sel, and other toppings, as desired
Instructions
Mix the dough:
- In a large bowl, add the flour, yeast, salt, water, and olive oil. Stir with a stiff silicone spatula or wooden spoon until a dough forms. I use my hand to make it easier, squeezing and folding.
Proof and fold:
- Place the dough in a bowl lightly oiled with olive oil. Cover with a kitchen towel or plastic wrap and bulk proof for 1-1 1/2 hours for the first rise or until the dough has doubled.
- Oil a rimmed baking sheet for thinner focaccia or a 9×13-inch baking pan with about 1 tablespoon olive oil.
- Perform 1 set of stretch and folds, and then pick it up from the bowl and gently form it into a ball. Transfer dough into the center of the oiled baking pan. Use some of the oil from the pan to oil the top of the dough. Cover with plastic wrap and allow to rest for 15 minutes.
- Gently stretch the dough evenly (don’t let it stay fat in the center!) until it begins to spring back. Cover and let rest for 10 minutes. Repeat this process until the dough is gently and evenly stretched to the edges of the pan. For a 9×13-inch baking pan, this will only take 2 stretches, but for a larger baking sheet, you might need an additional rest and stretch.
- Cover and allow to proof a second time for 45 minutes to 1 hour, or until it has doubled in size. While the dough is final proofing, start preheating the oven to 400°F (without a fan).
Time to bake:
- Uncover the dough, drizzle with olive oil, and press your fingertips into the dough, all the way to the bottom of the pan. Dimple the dough all over, popping any large air bubbles that appear. Sprinkle the top with flaked sea salt and any additional toppings of your choice.
- Bake in the preheated oven for 25-35 minutes. I turned on the fan for the last 5 minutes to get a nice golden brown top. A larger pan will require 10-12 minutes of baking, or until golden brown.
- Remove the bread from the pan onto a wire rack immediately and allow it to cool before slicing. This will keep the bottom and sides crispy rather than soggy. Allow the bread to cool before you slice into it.
Notes
Nutrition
Nutrition information is automatically calculated, so should only be used as an approximation.
 Like this recipe? Rate & comment below!
Before You Go
I hope you enjoyed this Italian flatbread bread recipe. Check out our other no-knead bread recipes like this no-knead sourdough bread or this no-knead ciabatta bread recipe!


Making Dutch Oven Bread tonight, but the Facacia is something that I have not made before. And the Ciabatta Recipe of yours looks so very, very intriguingly yummy! Dutch Oven Bread (no knead type) has been a life saver for me. What a game changer it is, having a successful Bread Recipe that’s also so very yummy ??????????
Hi Karen! Isn’t it amazing what a simple no-knead dough can do? Dutch oven bread really is a game changer, and if you love that, you’re going to have so much fun with the focaccia and ciabatta next. Definitely come back and tell me how it goes! ~gvd team
The rest stretch rest method here stopped that thick hump from forming in the center which I have had happen in other focaccia recipes. My first bite had the salty crispy top and a faint peppery taste from the olive oil. All my apartment has to say is 10 out of 10!