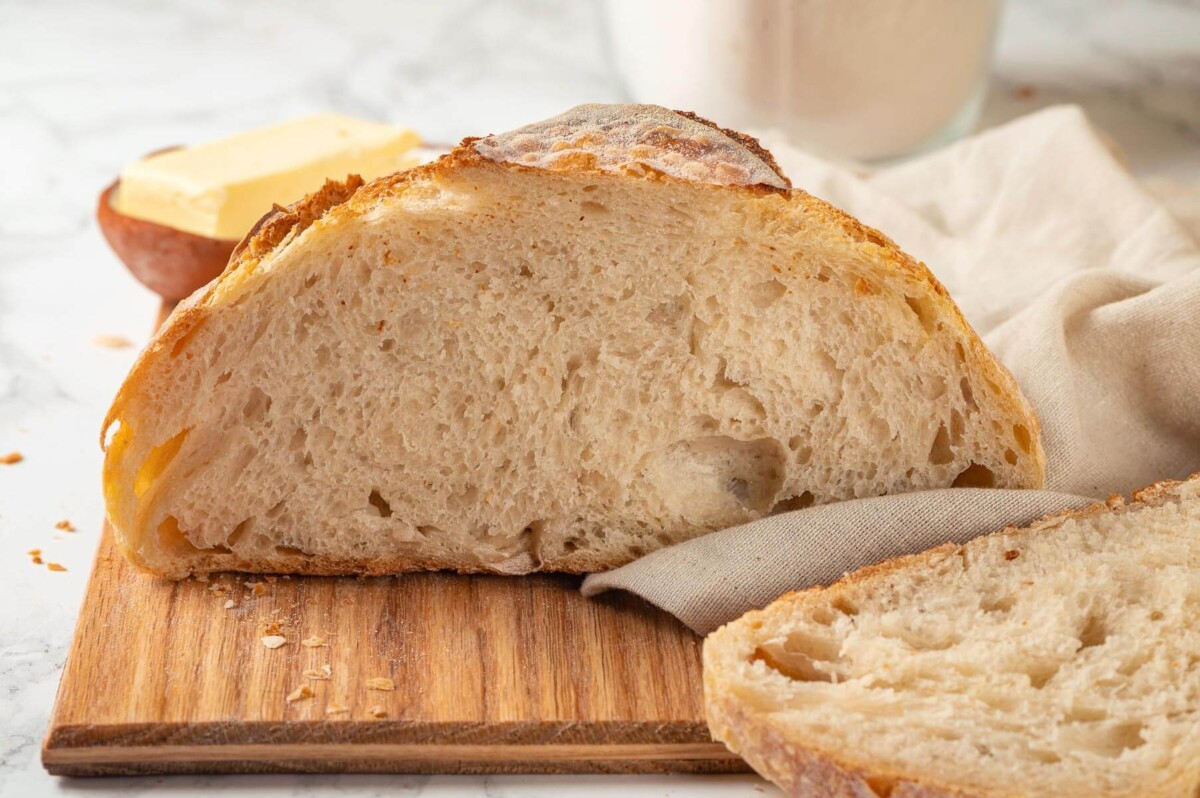
This same day sourdough bread recipe requires no kneading and only 1 set of folds. In 8 hours you’ll have a freshly baked loaf of sourdough bread ready for dinner! A pleasantly mild sourdough flavor, soft, chewy open crumb and crusty, crunchy crust!

This is my new favorite bread for dinner. It is everything you love about sourdough but in a fraction of the time with no commercial yeast. Delicious, mild sourdough flavor; soft, fairly open crumb; and a crispy crust. This is an excellent recipe for a beginner baker or anyone who wants sourdough bread now and not in 3 days but doesn’t want to use a stand mixer!
This same day sourdough bread started when I was perfecting my no-knead sourdough bread recipe. I was using a biga to strengthen that dough, so as I played around with the ratios, I was curious how fast I could make a loaf of no knead sourdough without adding commercial yeast.
Table of contents
Why This Same Day Sourdough Recipe Works
- I took a page from the Italians and started with a preferment called a biga. A biga is a type of pre-ferment that has 50-65% hydration rather than the 100%+ of a traditional levain like the one used in my sourdough bread recipe for beginners. This gives the bread a head start on creating a strong gluten network. The further dispersed the protein molecules are by water molecules, the more time and/or activity is required to build a strong network.
- I only recommend using bread flour. You know I am a huge proponent of using a flour with the least amount of gluten necessary to achieve a balance between soft, tender and creating a structure to trap the air from fermentation. In this case, we need to create that gluten structure as quickly as possible with as little kneading or folding as possible. The only way to do that is to start with more protein from the get-go!
- You need the salt. Salt not only flavors the bread but it also helps strengthen the bonds between the gluten proteins. Without the salt, this bread will not work. The dough will be sticky and will not shape without a considerable amount of additional flour. With perseverance you can still bake a loaf of bread but the flavor will be flat and it will take more work. I know because I forgot the salt in one of my tests! I didn’t realize it until after I tasted the baked bread. Palm to face!
- No endless sets of folds needed! In this recipe we let the sourdough starter and bread flour do almost all the work!
Professional Tips for Making Sourdough Bread in 8 Hours
- Measuring by weight (mass) is more precise than volume. You’ve heard it before but it is worth repeating especially because I did develop this recipe to have convenient volume conversions. Using an inexpensive kitchen scale is not only more accurate and consistent, but it is actually faster!
- If using the volume measurements, do measure correctly. Use a liquid measuring cup for the water and dry measuring cups for the flour. Fluff up the flour in the bag or container before scooping and leveling. Try your very best not to compact it or tap it.
- Feed your sourdough starter separately when mixing the biga. The entire preferment (biga) will go into the dough, which means there will be nothing left to feed without compromising the flavor, integrity or proofing speed of the dough!
- The limit does exist (that is a Mean Girls reference!). Making and baking bread is a science, and every set of conditions come with their own limitations. By making it a no knead recipe, with limited folds and limited proofing time, the sourdough flavor will be less pronounced than my no knead sourdough bread recipe, for example. It also limits the volume of the baked bread and size of the bubbles in the crumb.
Ingredients & Substitutions

- Water: I use tap water for this and all my sourdough bread recipes, but you can use filtered water if you prefer or if you know your water is hard. I also want to stress the importance of using warm water to mix the dough. Gluten develops faster in warm conditions in addition to giving the yeast a jump start. Starting with a warmer dough means faster gluten development and more rise in less time!
- Active Sourdough Starter: You will need a fed sourdough starter that consistently doubles within 12-14 hours depending on the heat of your room. If you do not have a starter, start here with my sourdough starter recipe, or if yours is simply uncooperative, start with my how to feed sourdough starter post, which covers all aspects of feeding, storing and troubleshooting.
- Bread Flour: I use bread flour throughout the entire recipe: the biga, the bread dough and shaping. Bread flour has more protein than all-purpose and will allow us to get a good sourdough loaf in a fraction of the time. I have not tried high-gluten flour, but I will and I’ll keep you posted!
- Kosher Salt: As I mentioned above, salt is critical to gluten development in addition to flavoring the dough. Salt strengthens the gluten bonds and the same recipe made without salt will take several hours longer or demand more folds. Also the resulting bread will not be as flavorful. My measurements are based on using this kosher salt.
- Rice Flour: I use rice flour to prepare the proofing basket as in other sourdough recipes, additionally, I use it to flour the bottom of my shaped and proofed loaf so it doesn’t stick to the parchment. You could also use cornmeal.
See the recipe card for full information on ingredients and quantities.
Possible Variations
There are limits to what can reasonably be added to or changed about this recipe due to the limited proofing time and dough development. I will let you know what is and is not possible based on my professional training and experience.
- Adding fruits & nuts: The final dough will be strong enough to support the weight of dried fruits and nuts like in this cinnamon raisin sourdough bread or this cherry sourdough with pecans. Add raisins, dried cherries, dried cranberries or blueberries along with your favorite nuts when you initially mix the dough. If you decide later, you can fold them in but that kind of defeats the purpose of the no-knead, 1 fold.
- Adding spices, herbs or garlic: There are several additions that will impede fermentation. That does not mean to say the dough will not ferment, because it will, but it will take longer. If you add cinnamon, rosemary and/or garlic, this bread will still rise just as this no-knead rosemary garlic bread does, but it will not be fully proofed within 8 hours.
- A caution against tomatoes! A little something I learned the hard way professionally; tomatoes especially in higher concentrations, inhibit fermentation. I do not advise adding tomato paste to this recipe without adding active dry or instant yeast like in tomato basil bread. Consider adding chopped sun-dried tomatoes instead like in this sun dried tomato bread.
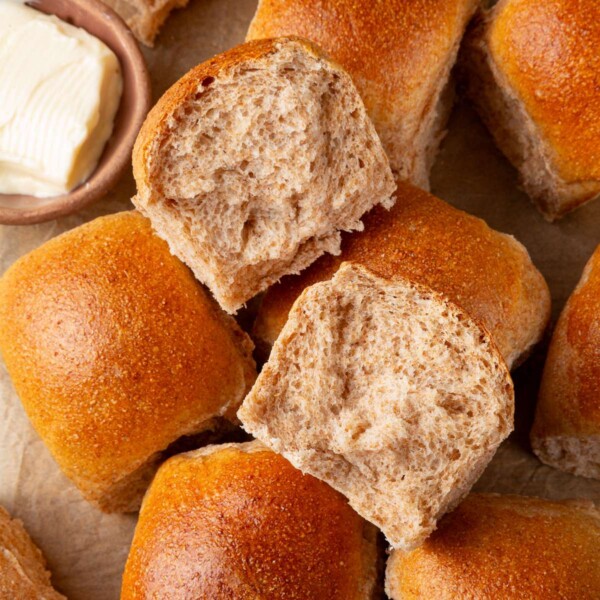
- You can use whole wheat flour but it might take longer and I would recommend another 2 sets of stretch and fold. Even though the protein content of whole wheat flour is higher than that of bread flour, the bran and germ affect the gluten structure. They can actually cut the protein strands which weakens the structure and causes a more dense crumb like in my whole wheat sourdough bread recipe.
How to Make this Same Day Sourdough Bread Recipe
Use these instructions to make a crusty loaf of no-knead sourdough bread in 8 hours! Further details and measurements can be found in the recipe card below.
The Night Before Mixing Dough:
Step 1: Approximately 10-12 hours before you would like to mix your bread dough, place a clean jar or container on a kitchen scale and press the “tare” button so the weight reads “0.” To the jar add the 100g water, 40g active starter, and 150g bread flour. Stir well until no dry spots remain. You might want to try flipping the dough over in the jar because sometimes water gets stuck at the bottom. Let sit at room temperature for 10-12 hours. The mixture will more than double in volume.
This entire amount will go into your sourdough bread dough, so be sure to feed your sourdough starter separately!
Mix the Dough:
Step 2: In a medium or large mixing bowl, add the whole biga (everything you mixed last night) and warm water (100-105°F). Incorporate the starter and water as best you can with your hands, trying to break up as many lumps as possible. You won’t be able to get it completely incorporated and that is fine.
You can simply combine all the ingredients in the bowl and mix but you will end up with unincorporated pieces of the starter that will never fully mix into the dough. The stiff levain and “no knead” aspect of this recipe makes this step necessary for proper incorporation.


Step 3: Add bread flour and kosher salt to the starter mixture and continue mixing with your hands. The dough is thick but sticky at this point so using your fingers like a whisk will be easier than any other tool.
Step 4: Lightly oil a separate medium mixing bowl and scrape the dough from the large bowl into the clean, oiled bowl using a bowl scraper or stiff silicone spatula. Remove as much dough from your hands as possible, using the bowl scraper to help, cover the bowl with plastic wrap and set in a warm spot to proof until the only fold.
You can bulk ferment the dough in the same bowl in which it was mixed. I found throughout testing that transferring the dough to a clean, oiled bowl resulted in a less sticky and more easily folded and shaped dough.


Step 5: Approximately 3 hours later, perform one set of stretch and folds using lightly oiled hands. Start on one side of the dough, slide your fingers under, stretch the dough up and over itself. Rotate 90° and repeat the stretch and fold. Rotate and fold until you have gone all the way around the dough. Don’t worry too much about the status of the gluten development right now. You can use oiled hands to help. Cover it back up and let the dough rest in a warm spot.
Shaping the Loaf:
Step 6: Approximately 2 hours later, remove the plastic wrap, toss some bread flour on top of the dough because this is the stickiest part. Lightly dust the countertop with bread flour, scrape the dough from the bowl using your bowl scraper, and dump out onto the floured countertop. Using generously floured hands, fold each of the four corners into the center and flip seam-side down onto the surface.
I rotate it between each fold so that I am always folding towards my body. You get a tighter fold this way.


Step 7: Using both hands, dipped in flour, pull the dough round towards you, rotate 90° and repeat until the top of the dough is pulled tight and the round boule sits tall on the counter. Towards the end of this process the dough might start sticking to your hands. Simply dip in flour and continue. You can use a bench scraper to assist but I found that, as long as I worked quickly, floured hands were best. This is the pre-shape.
Step 8: Cover the dough boule with the overturned proofing bowl and let bench rest for 15 minutes.
Step 9: Flip the dough back over and repeat the folding and shaping process again from above one last time. This is the final shaping.


Step 10: Flip the dough upside down (seam side up) into a bread proof basket (banneton basket) dusted generously with rice flour, dust the dough in the basket lightly with rice flour, cover with plastic wrap and place back in the warm place.
Baking the sourdough:
Step 11: Approximately 2-2 ½ hours later, preheat the oven to 450°F conventional or 425°F convection (with fan) with the Dutch oven inside (including the top). [See Recipe Notes or FAQ section for instructions on how to bake without a Dutch Oven.]
Step 12: Once your oven has preheated, cut a piece of parchment slightly larger than the bottom of your Dutch oven. Remove the plastic wrap from the top of the basket and gently loosen the edges of the dough from the basket using floured fingers. Turn the dough out of the basket onto a piece of parchment paper.
Step 13: Score the top with a razor blade. I recommend a square on the top, with overlapping edges, which will allow the bread to rise up as well as out.
Since we proofed this bread at room temperature, it will be more difficult to score and it is not the time to attempt decorative patterns.


Step 14: Working efficiently but carefully, remove the Dutch oven from the hot oven. Close the oven door and remove the Dutch oven lid. Using the edges of the parchment paper, pick up the bread dough and place in the Dutch oven with care not to touch the sides! Replace the top and place back in the oven. Bake in a preheated oven for 20 minutes.
Step 15: After 20 minutes remove the top of the Dutch oven and close the oven door. Lower the oven temperature to 425°F conventional or 400°F convection (with fan). Continue baking until the exterior of the bread is a golden brown, approximately an additional 20 minutes.
Step 16: Remove the bread from the Dutch oven and cool on a wire cooling rack for as long as you can. You can either dump it out, carefully remove it with your hands, or use large tongs.
This makes a delightfully crusty loaf, which is best cut with a serrated knife. Due to the timing of dinner, I cut it warm and it did what all bread does, which is gums up. For the optimal crumb, let it cool at least an hour before slicing.


Sample Bread Bakers Schedule
The night before
8:30 PM: Mix the biga according to the recipe. Feed your starter separately!
The next day
8:30 AM: Mix the dough, cover and set in a warm spot.
11:30 AM: Fold the dough in the bowl. Cover and place back in the warm spot.
1:30 PM Pre-shape the loaf into a boule (round) and cover with the overturned mixing bowl. Let it bench rest for 15 minutes.
1:45PM Flip the dough back over and repeat the folds and shaping for the final shape. Turn upside down (seam side up) into a bread proof basket (banneton) dusted with rice flour, dust the top of the dough with rice flour, cover and place back in the warm spot.
4:00 PM Preheat the oven to 450°F conventional or 425°F convection (with fan) with the Dutch oven inside (including the top).
4:30 PM [Whenever the oven has preheated] Flip the dough out of the basket onto a piece of parchment paper. Score the top with a razor blade or bread lame.
4:30 PM Carefully remove the Dutch oven from the hot oven. Close the oven door and remove the top of the Dutch oven. Using the edges of the parchment paper, pick up the bread dough and place in the Dutch oven with care not to touch the sides! Replace the top and place back in the oven. Bake in a preheated oven for 20 minutes.
4:50 PM Remove the top of the Dutch oven and close the oven door. Lower the oven temperature to 425°F conventional or 400°F convection (with fan). Continue baking until the exterior of the bread is a golden brown, approximately an additional 20 minutes.
5:10 PM Remove the bread from the Dutch oven and cool completely on a wire cooling rack. You can either dump it out, carefully remove it with your hands, or use large tongs.
You can slice it any time even when warm. I did every day I tested it (and every time since then!). A toddler waits for nothing, not even sourdough.

Frequently Asked Questions
To maintain the crunchy crust, store sourdough bread at room temperature, cut side down on a cutting board. It will gradually lose moisture but it will store well at room temperature for up to a week. You can also store in a plastic baggie or airtight container at room temperature but the crust will soften almost immediately. You can also store well wrapped in the freezer for up to 3 months.
If you haven’t sliced the loaf yet, but would like to rewarm it for serving, preheat an oven to 400° F. Place the loaf directly onto the oven rack and bake until heated through. It will take about 15-20 minutes. You can also toast a slice at a time. Reheating a partially sliced loaf will dry it out on one side.
The best oven-spring, most open crumb and crusty crust will occur if baked in a Dutch oven or Challenger bread pan, but you can also preheat a baking sheet on the center rack and a large roasting pan on the bottom of the oven. When ready to bake, place the parchment paper with the scored loaf directly on the hot baking sheet and pour at least 2 quarts of hot water into the baking pan on the bottom. Close the door as quickly as possible. Release the steam after 30 minutes by opening the door.
This bread makes excellent sandwiches; toast for breakfast with butter and jam or this avocado coconut toast; French toast; and exceptional grilled cheese.
You will not have any discard during the final dough mixing process because you use all the biga; however, you will have discard the night before when you mix the biga and feed your starter separately. Use or save the discard for sourdough blueberry muffins, sourdough pancakes, or sourdough cinnamon rolls!
If you enjoyed this recipe, please leave a star rating and let me know how it goes in the comments below! I love hearing from you and your comments make my day!
Same Day Sourdough Bread

Ingredients
For the Biga
- 100 g water
- 40 g active sourdough starter
- 150 g bread flour
For the Loaf
- 290 g biga, (all of it)
- 226 g warm water, (approximately 105 degrees, 8 oz)
- 298 g bread flour
- 1 ½ teaspoons kosher salt
Instructions
The Night Before Mixing Dough:
- 10-12 hours before you mix your dough, place a clean jar or container on a kitchen scale and press “tare” so the weight reads “0.” To the jar add 100g water, 40g active starter, and 150g bread flour. Stir until no dry spots remain. Flip the dough in the jar because water gets stuck at the bottom. Let sit at room temperature 10-12 hours. The mixture will more than double.
Mix the Dough:
- In a medium or large bowl, add the whole biga (everything you mixed last night) and warm water (100-105°F). Incorporate the starter and water with your hands, breaking up as many lumps as possible. You won’t get it completely incorporated and that is fine.
- Add bread flour and kosher salt to the starter mixture and mix with your hands. The dough is thick but sticky, so using your fingers like a whisk is easier.
- Lightly oil a separate medium bowl and scrape the dough from the large bowl into the oiled bowl using a bowl scraper or silicone spatula. Remove as much dough from your hands as possible, cover the bowl with plastic wrap and set in a warm spot to proof until the only fold.
- About 3 hours later, perform one set of stretch and folds using lightly oiled hands. Start on one side of the dough, slide your fingers under, stretch up and over. Rotate 90° and repeat. Rotate and fold until you’ve gone all the way around. Don’t worry about gluten development now. You can use oiled hands to help. Cover and let rest in a warm spot.
Shaping the Loaf:
- About 2 hours later, remove the plastic wrap, toss some bread flour on top of the dough because this is the stickiest part. Lightly dust the countertop, scrape the dough from the bowl using your scraper, and dump onto the floured surface. Using floured hands, fold each of the four corners into the center and flip seam-side down.
- Using both hands, dipped in flour, pull the dough round towards you, rotate 90° and repeat until the top is tight and the boule sits tall. Toward the end the dough might start sticking. Simply dip in flour and continue. You can use a bench scraper, but I found that as long as I worked quickly, floured hands were best. This is the pre-shape.
- Cover the boule with the overturned bowl and bench rest 15 minutes.
- Flip the dough and repeat the folding and shaping. This is the final shaping.
- Flip the dough upside down (seam side up) into a proof basket (banneton) dusted with rice flour, dust the dough lightly with rice flour, cover with plastic wrap and place in the warm place.
Baking the Sourdough:
- About 2–2½ hours later, preheat the oven to 450°F conventional or 425°F convection (with fan) with the Dutch oven inside (including the top). [See Recipe Notes or FAQ for baking without a Dutch oven.]
- Once your oven is preheated, cut parchment slightly larger than the bottom of your Dutch oven. Remove the plastic wrap and gently loosen the edges using floured fingers. Turn the dough onto parchment.
- Score the top with a razor blade. I recommend a square with overlapping edges, which allows the bread to rise up and out.
- Working carefully, remove the Dutch oven from the oven. Close the door and remove the lid. Using the parchment edges, pick up the dough and place in the Dutch oven, not touching the sides. Replace the top and place back in the oven. Bake for 20 minutes.
- After 20 minutes remove the lid and close the door. Lower the oven temperature to 425°F conventional or 400°F convection. Continue baking until golden brown, about 20 minutes more.
- Remove the bread from the Dutch oven and cool on a wire rack. You can dump it out, carefully remove with your hands, or use tongs.
Notes
Nutrition
Nutrition information is automatically calculated, so should only be used as an approximation.
 Like this recipe? Rate & comment below!
Before You Go
I hope you enjoyed this easy sourdough recipe. Check out our other delicious sourdough recipes from easy sourdough focaccia to fluffy sourdough waffles to my favorite sourdough bread bowl!


I love a sourdough recipe that doesn’t require kneading. And bonus points for being same-day! I used this bread to make the best BTL I’ve had in a while. Also, it’s great for avocado toast in the morning!