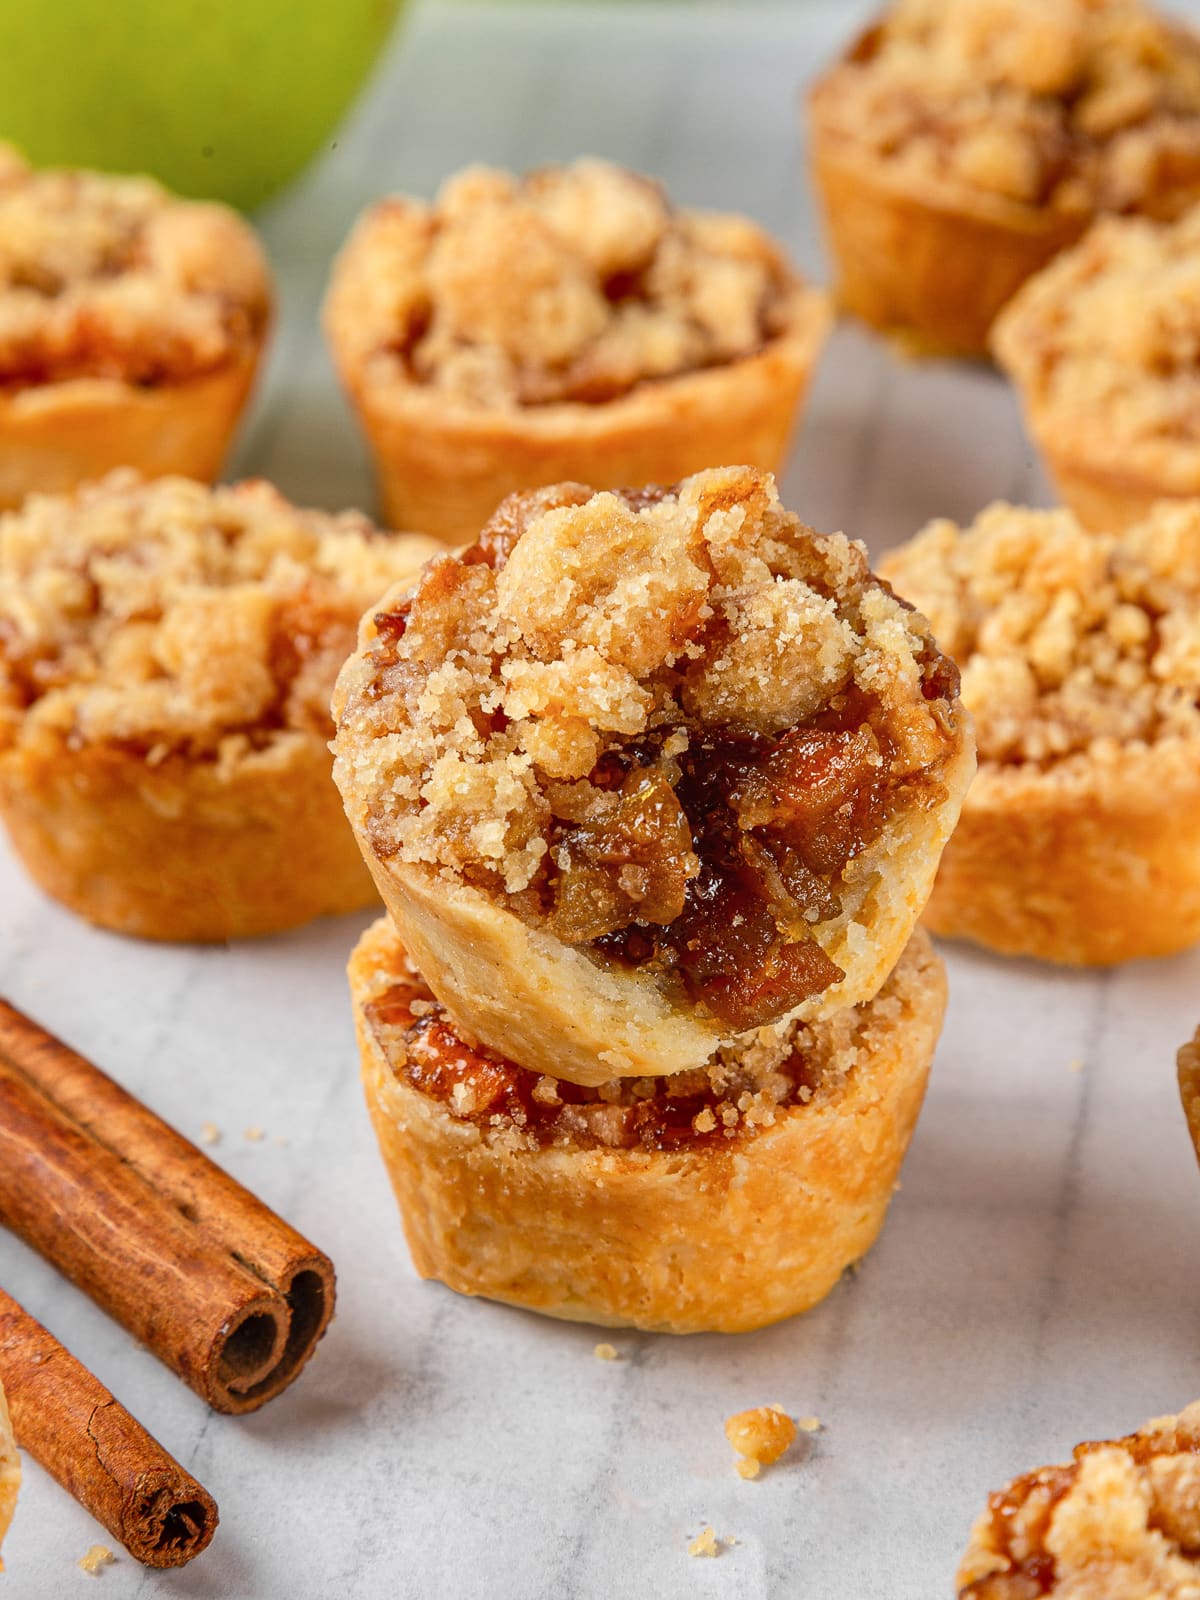
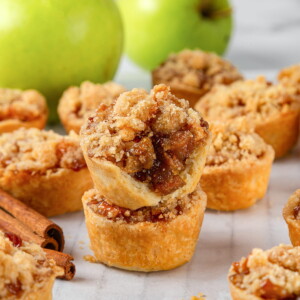
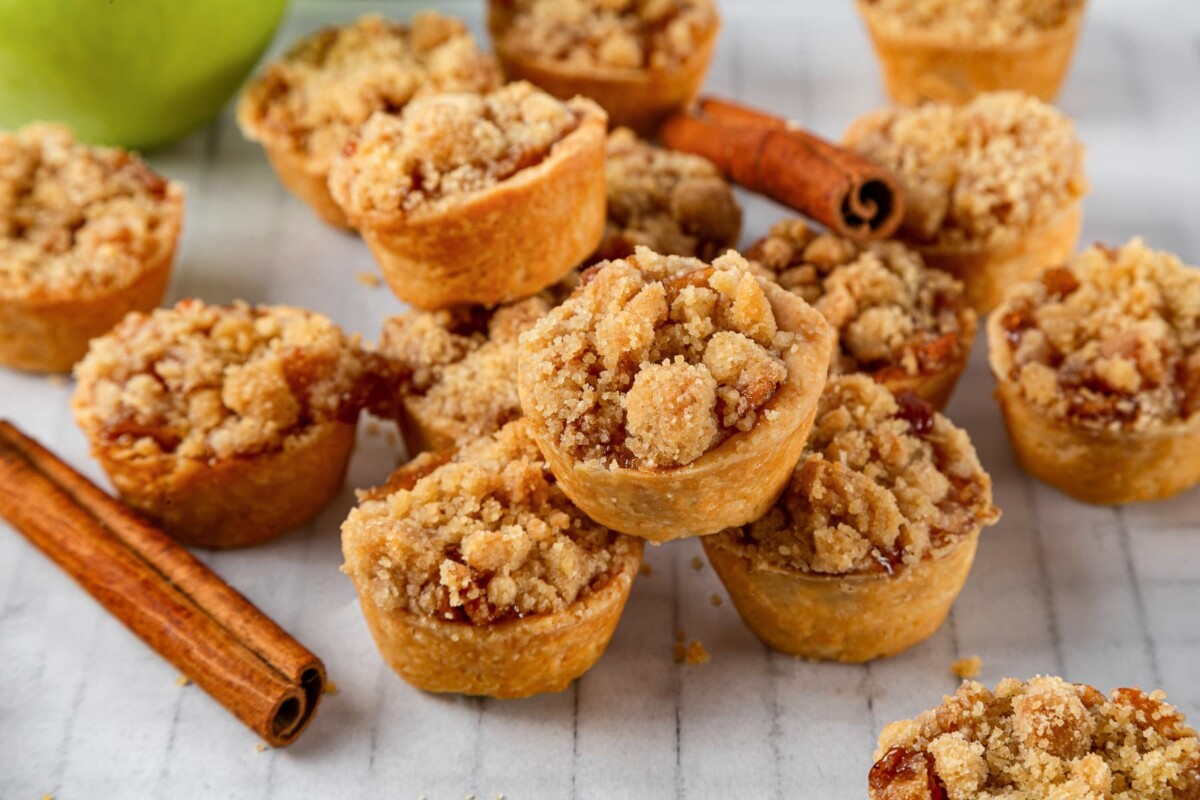
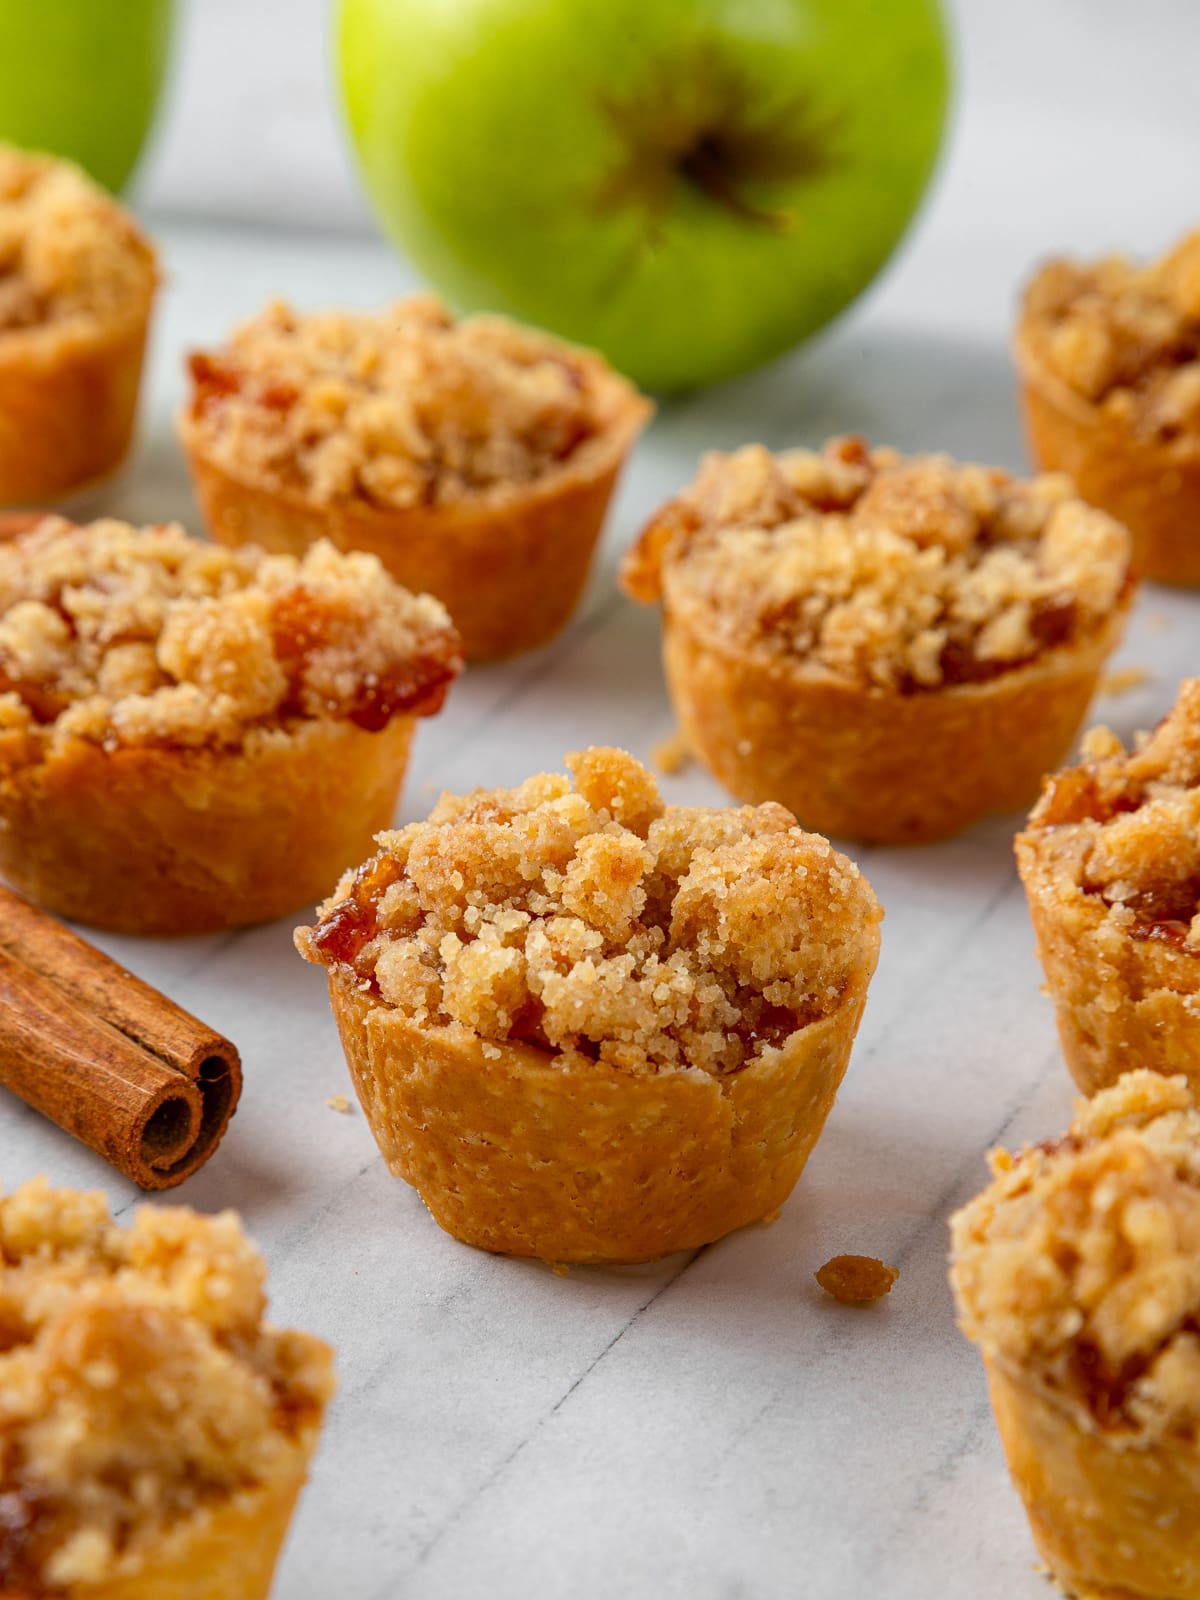
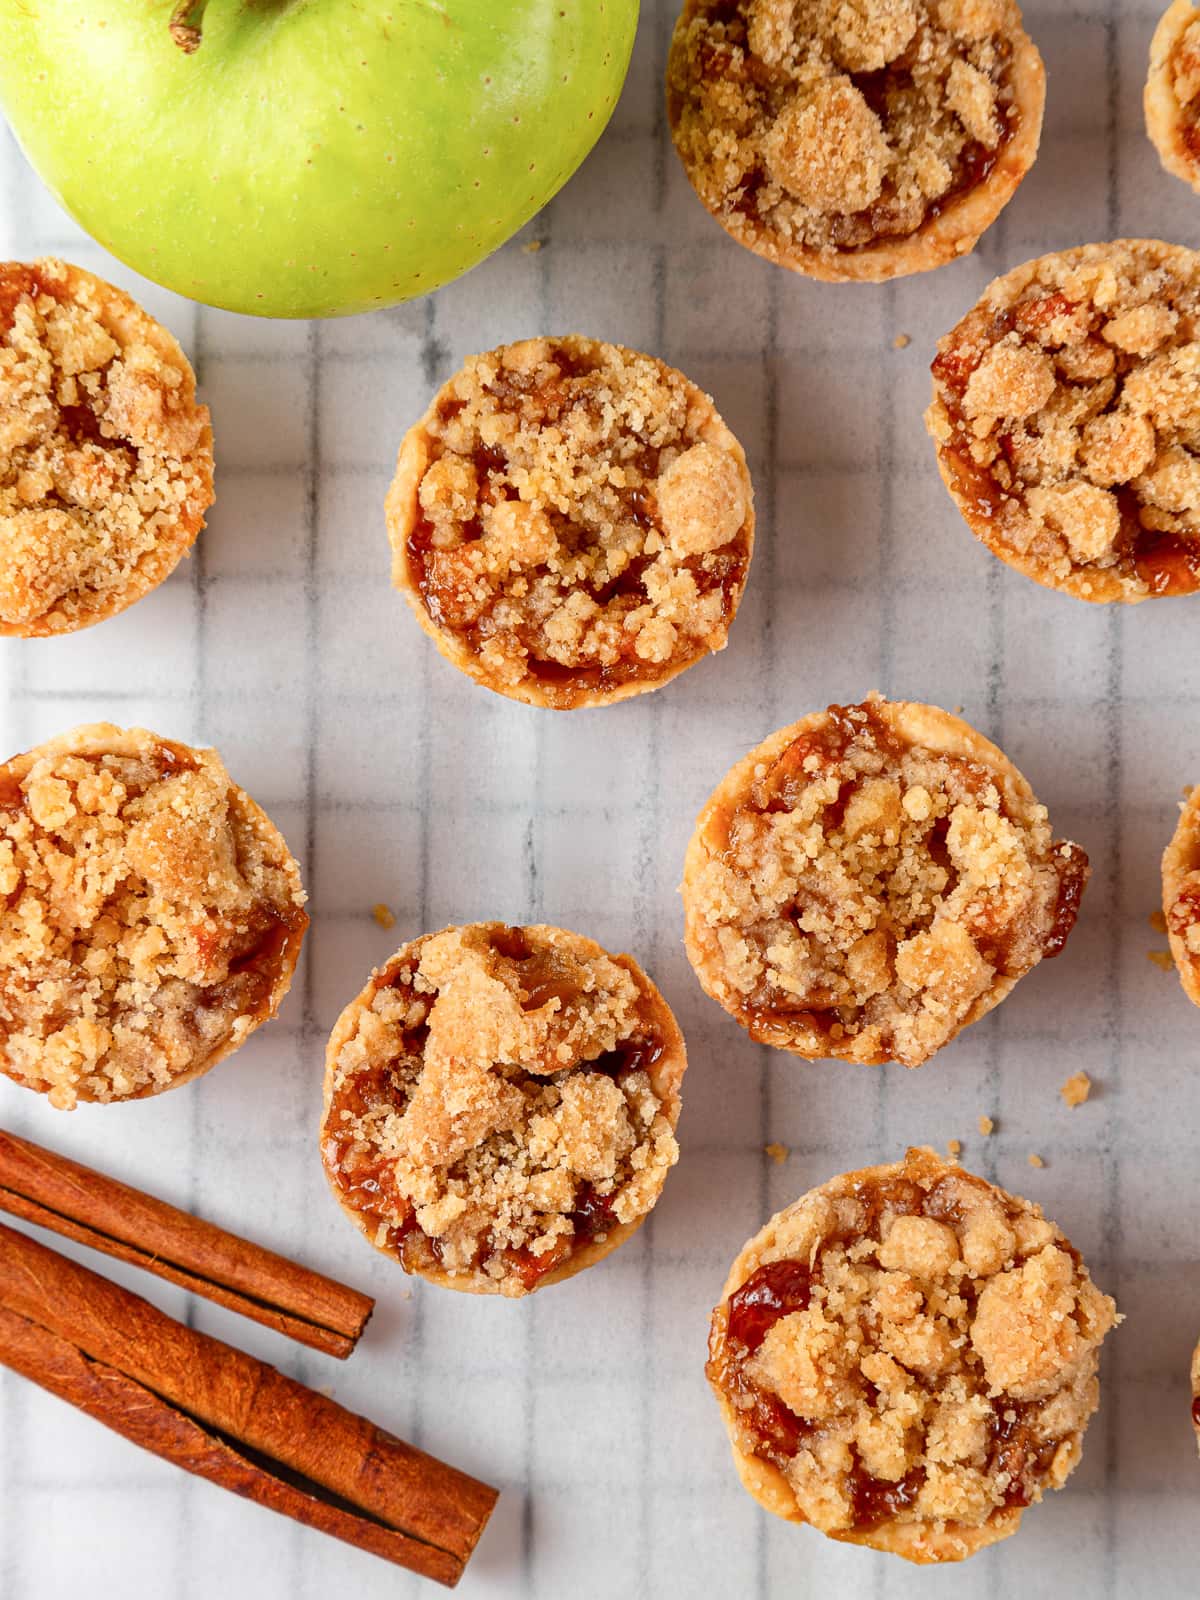
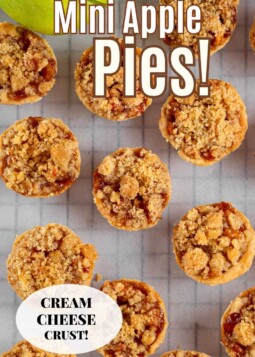
These mini apple pies have a tender cream cheese crust, cinnamon spiced apple filling, and are topped with an easy brown sugar crumble! The no-fuss dough requires no chilling, no resting, and no rolling!
A Quick Look At The Recipe
This is a brief summary of the recipe. Jump to the recipe to get the full details.
Prep Time
20 minutes
Cook Time
30 minutes
Total Time
50 minutes
Servings
24 mini pies
Difficulty
Easy
Calories *
126 kcal per serving
Technique
Press-in crust, add apple filling, top with crumble, bake in muffin tin.
Flavor Profile
Warmly spiced, with a tangy cream cheese crust and brown sugar crumble.
* Based on nutrition panel
These are so fun, the streusel on top is always one of the best parts! A dessert with streusel is the best in my book. The apple filling is easy to make and so is the tart dough. Easy fun mini dessert! ⭐⭐⭐⭐⭐
Mara
Why You Will Love These
- Super easy cream cheese shell. The crust is simply pressed into the muffin tins but bakes up flaky and tender! Cream cheese does not behave the same as butter when baked and it creates a soft, tender crust.
- Perfectly balanced dessert! Granny Smith apples and cream cheese add a slight tang and tartness to the filling and dough. It pairs perfectly with the sweetness from the brown sugar added to the crumble topping and filling.
- Cute and delicious, perfect for the holidays. These are everything you love about a classic apple pie recipe in mini form! They are incredibly easy to transport to holiday gatherings or to ship to friends and family.
Table of Contents
A simple homemade apple pie filling paired with a tangy and flaky cream cheese crust topped with a brown sugar streusel. These mini apple pies require no slicing and the crust requires no chilling! They are delicious little poppable pies that are perfect for bake sales, potlucks, or the ideal addition to any Thanksgiving or Christmas gathering.
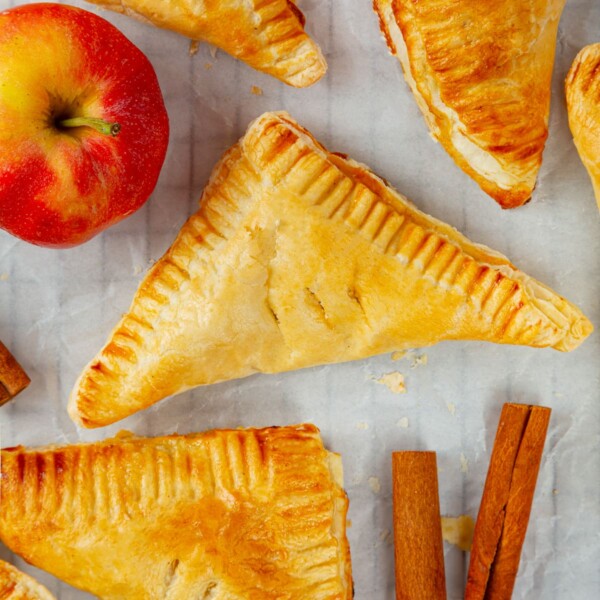
For other fun alternatives to the standard pie, try these apple hand pies, apple tart, or this apple dump cake! If you fell in love with making mini desserts, try these mini cream cheese apple crisp or these mini banana cream cookie pies!
Ingredients & Substitutions
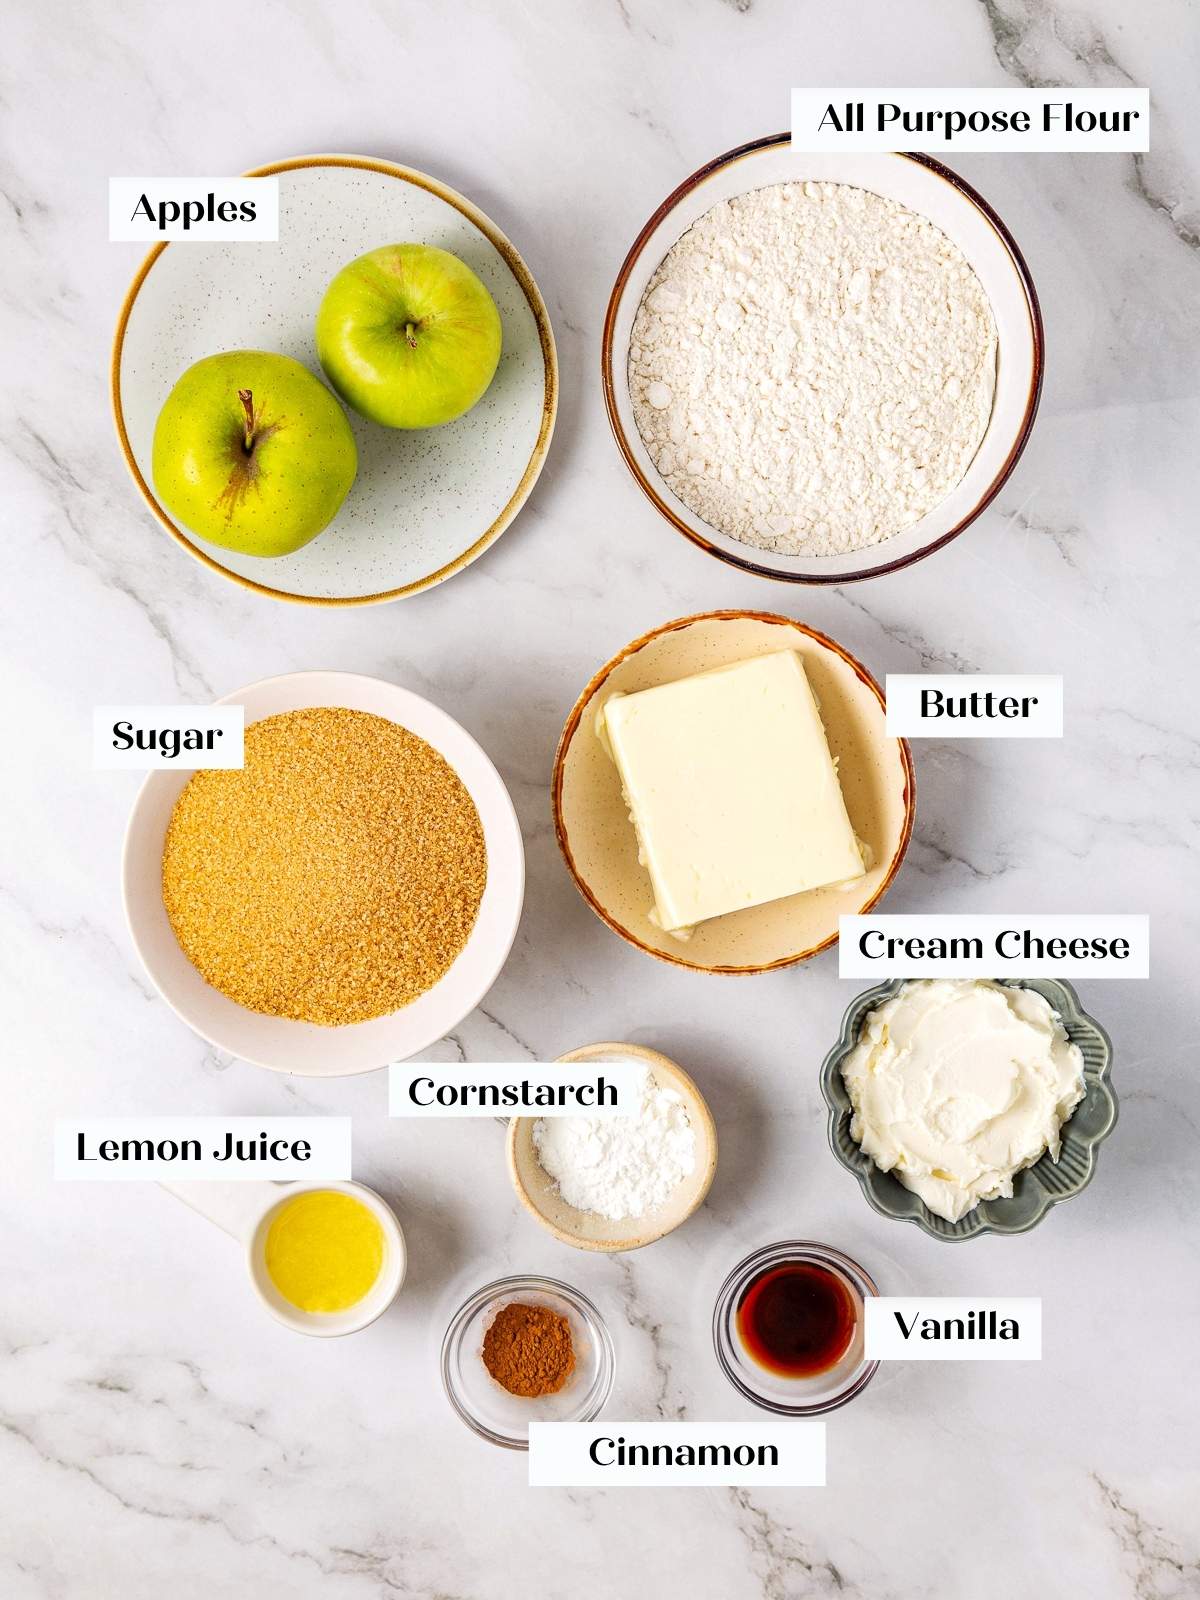
- Salted Butter: If you don’t have salted butter, you can use unsalted butter and add a pinch of kosher salt.
- Cream Cheese: I use original Philadelphia Cream Cheese for all my baked goods. Working the cream cheese into the dough adds fat and a hint of tang, as well as complementary flavor, to the apple filling and brown sugar crumble topping.
- Granny Smith Apples: Granny Smith apples lend themselves well to these mini apple pies! They hold their shape when baked, and the tartness complements the cream cheese crust. If you plan to use different apples such as Braeburn or Honeycrisp apples, I suggest reducing the sugar for the filling.
- Cinnamon: Ground cinnamon is always a staple in apple desserts! But feel free to add different spices like ginger or nutmeg or use my apple pie spice!
- Cornstarch: Cornstarch is the thickening agent for the apple filling. You can substitute tapioca starch if you have that on hand.
- Light Brown Sugar: Light brown sugar adds a slight molasses flavor to the filling and crumble. You can substitute dark brown sugar or maple sugar.
See the recipe card for full information on ingredients and quantities.
Variations for Mini Apple Pies
- Use a different crust or pie dough. You can use my easy pie crust recipe or pâte sucrée . You can also use store-bought pie crust if you prefer. But the cream cheese dough provides a flaky crust without all the fuss.
- Change the filling. Try making these mini pies using the filling from blackberry pie, cherry pie, or even strawberry rhubarb pie!
- Add additional flavors. Layer in some dark chocolate or caramel, like I did with this caramel apple pie, for a decadent mini apple pie. They would also be delicious with chopped walnuts, pecans, or hazelnuts.
- Make a double crust! With rolled pie dough cut two circles per mini pie using a cookie cutter. Press the first circle into the muffin tin and fill with the filling and then lay the top crust on and seal the edges like you would with my easy apple pie and chill. Then, brush the top of the pie using a pastry brush, with heavy cream or egg wash. Then top with sugar and bake! You can also make a lattice top following my instructions on how to lattice pie crust!
Professional Tips
- Don’t chill the tart dough! Don’t be tempted to chill the tart shells before filling and baking. They will puff excessively and will push the filling out. I made thousands of pecan tassies, which use the same dough, so this crust and I are intimately acquainted.
- Properly filled apple pies will just twist out of the pan. It is easier to remove them when cooled to room temperature because the crust is more stable and less likely to crumble. If they are overfilled or the crust is too thin, you can run a paring knife around the edges to loosen it. Twist out or use a small offset spatula to pry them out!
- Don’t overdo it with the crumble. Too much crumble topping can cause the pies to stick to the muffin pan. If the crumble bakes into the pan, use an offset to loosen it from the pan before removing the pies.
How to Make Mini Apple Pies
Use these instructions to make the perfect mini apple pies every time! Further details and measurements can be found in the recipe card below.
Step 1: Preheat the oven to 350°F (no fan).
Prepare the apple pie filling:
Step 2: Peel, core, and chop the apples. You want the apples to be small, about 1-cm squares.
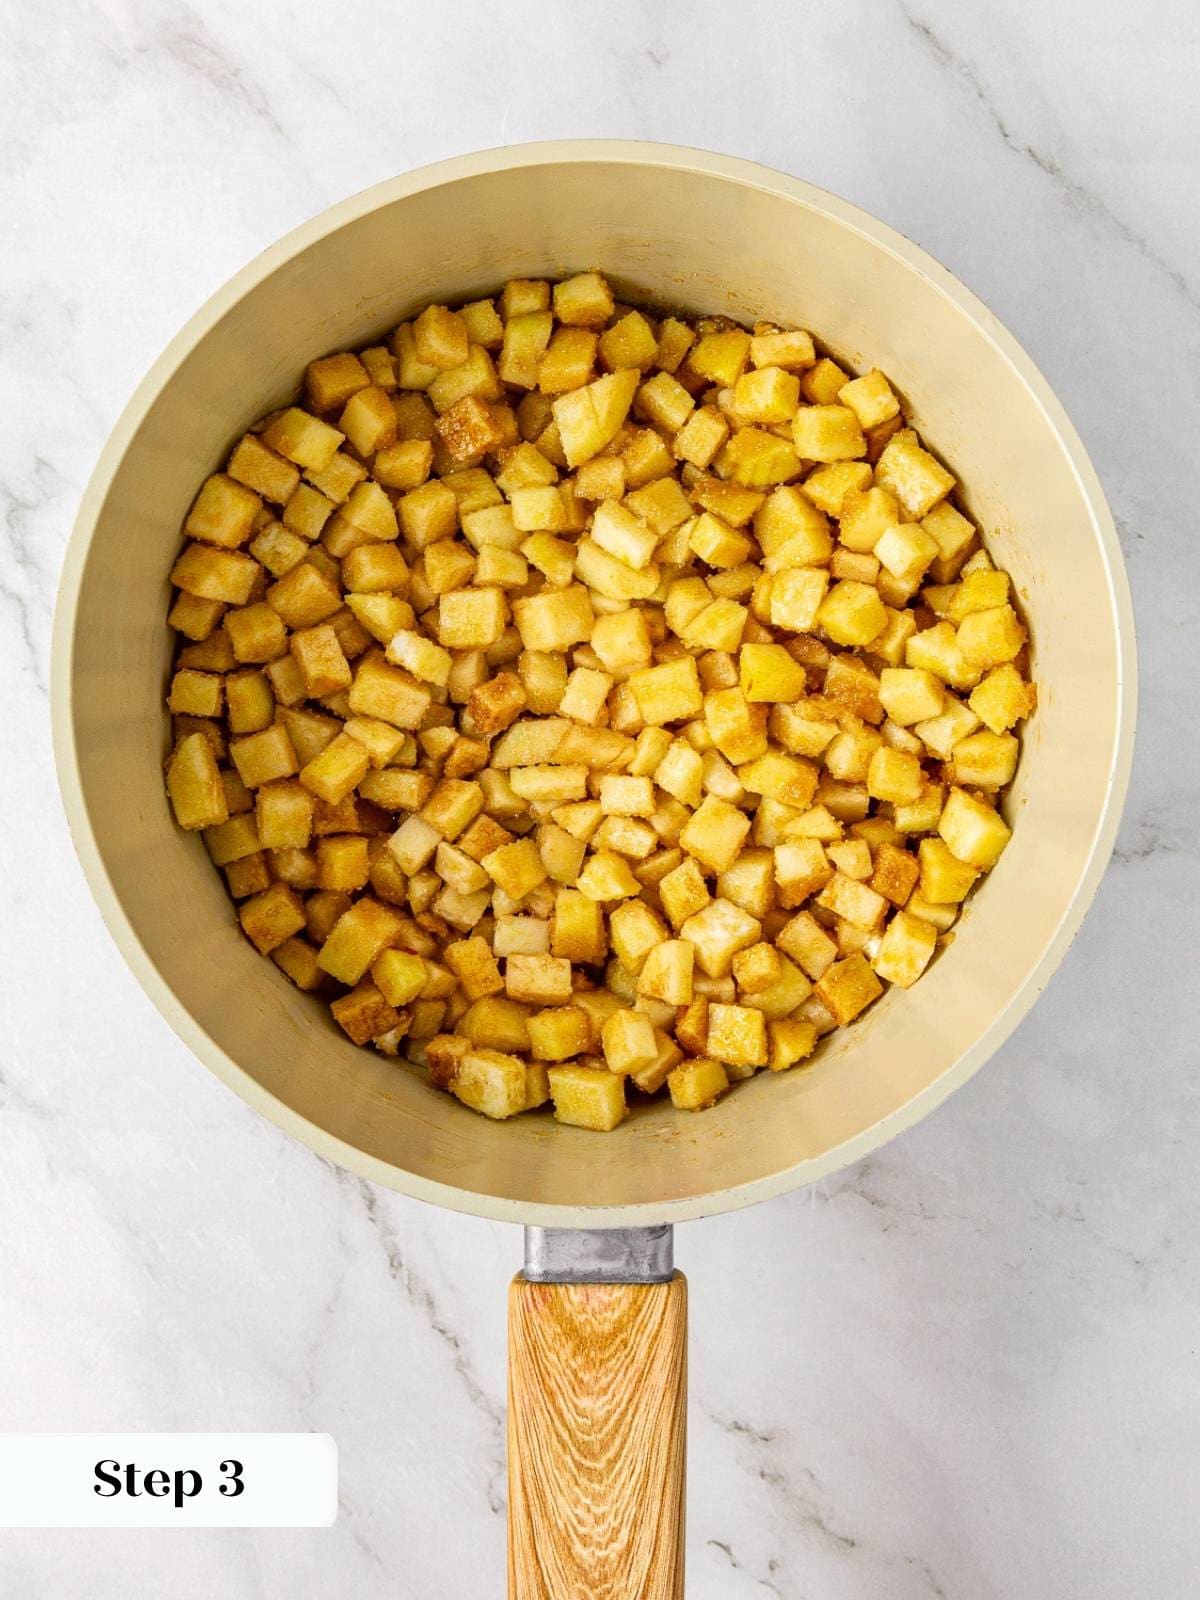
Step 3: Combine the apples, sugar, lemon juice, and cinnamon in a medium saucepan. Stir to coat evenly. Taste and adjust sugar, lemon juice, or spice as necessary (photo 1).
Step 4: Add cornstarch to the apple mixture and stir to coat evenly. Starting on low heat, gently cook the apples until they begin to release their juices. Once the apples are cooking in their own sauce, increase the heat to medium and bring to a boil.
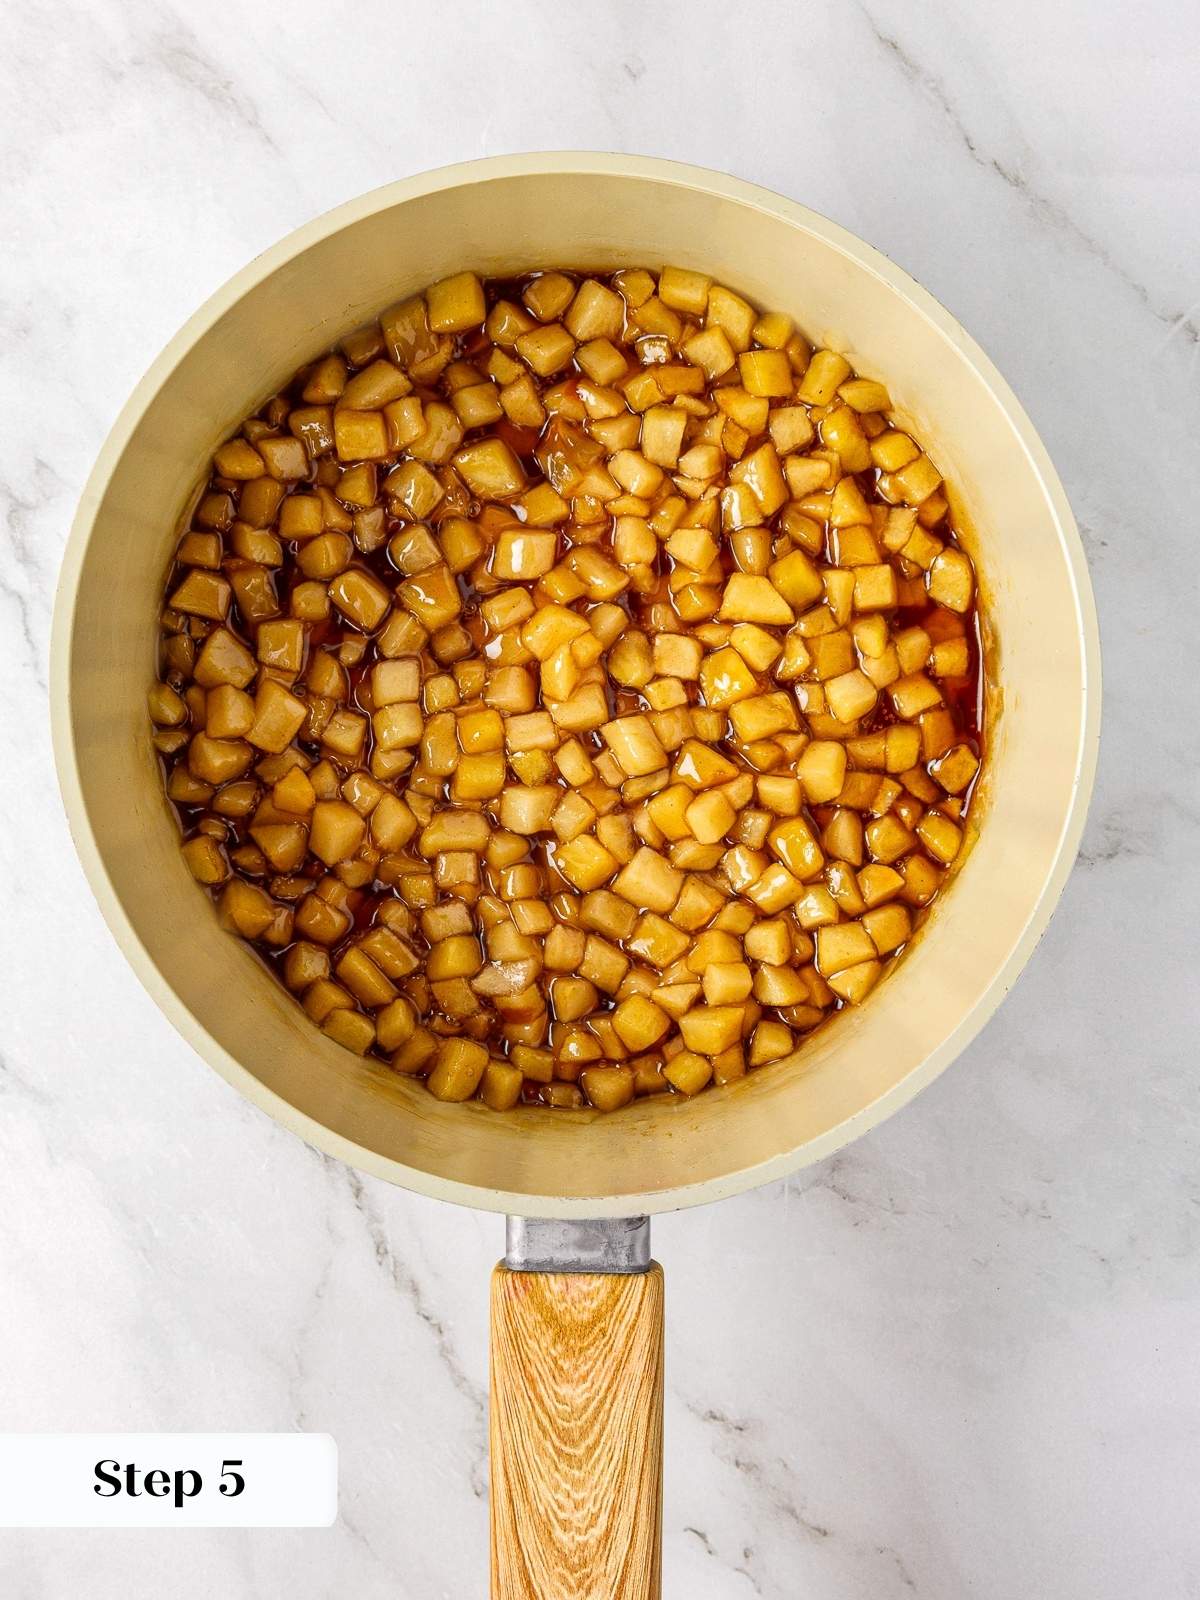
Step 5: Continue to cook over medium-low or medium heat, stirring frequently, until the apples have softened slightly and the sauce has thickened (photo 2).
Step 6: Cool the filling. Pour the mixture onto a large plate or rimmed baking sheet and refrigerate until it is cool. This increased surface area will cool the apples more quickly.
To make the crust:

Step 7: Mix flour, butter, and cream cheese. Add the flour to a medium-sized bowl. Cut the butter into small cubes and add it to the flour, along with the cream cheese (photo 3).
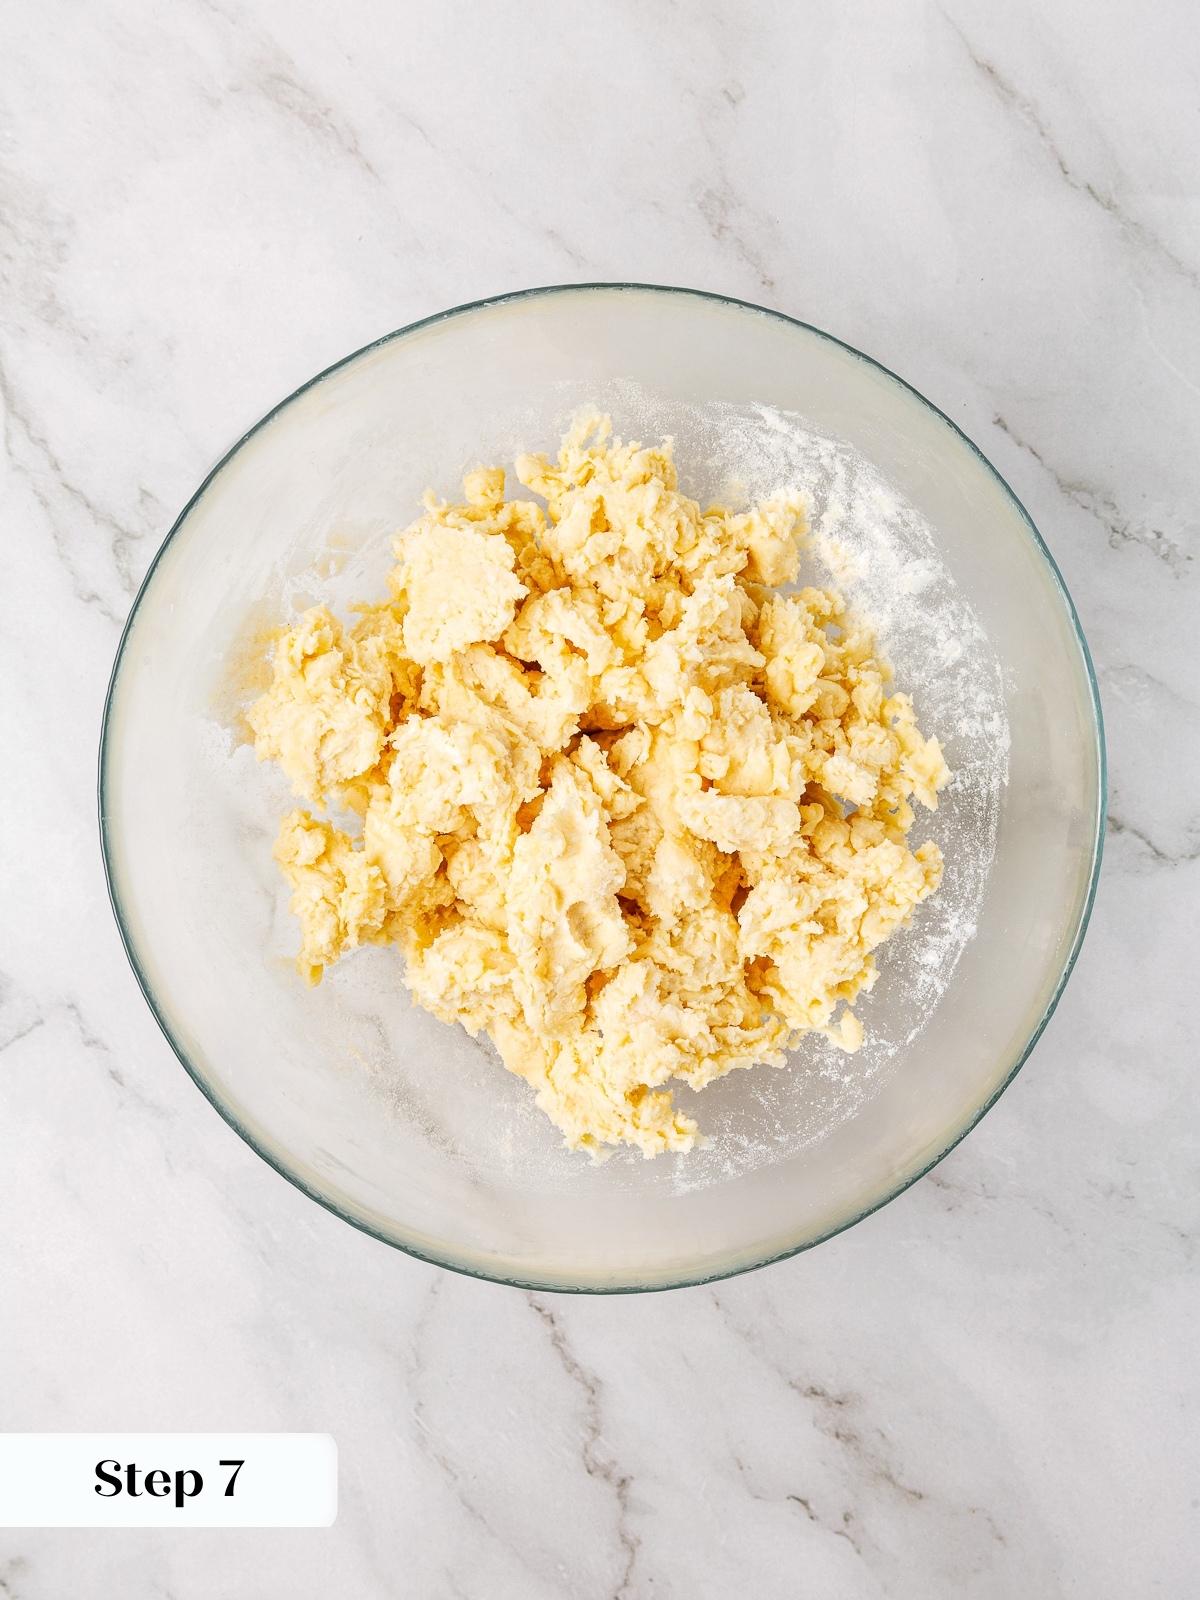
Step 8: Blend dough. Cut the butter and cheese into the flour with a pastry blender or by squeezing it in your hand. Continue until the dough holds together.
Since we aren’t adding any additional liquid, you’ll want to continue blending well past the stage at which you would usually stop with a pie crust. You will have a cohesive dough.
Step 9: Gather the crust into a ball and divide it into 24 little pieces (photo 4).
I make a fat log out of the dough, divide the log into half, divide each half roughly into quarters with a bench scraper or knife, then divide each quarter into 3 pieces. The dough is pliable enough that if you come up with several pieces that are way smaller and way larger than the others, which you probably will, you can pinch some off the larger and add it to the smaller pieces. Works every time.
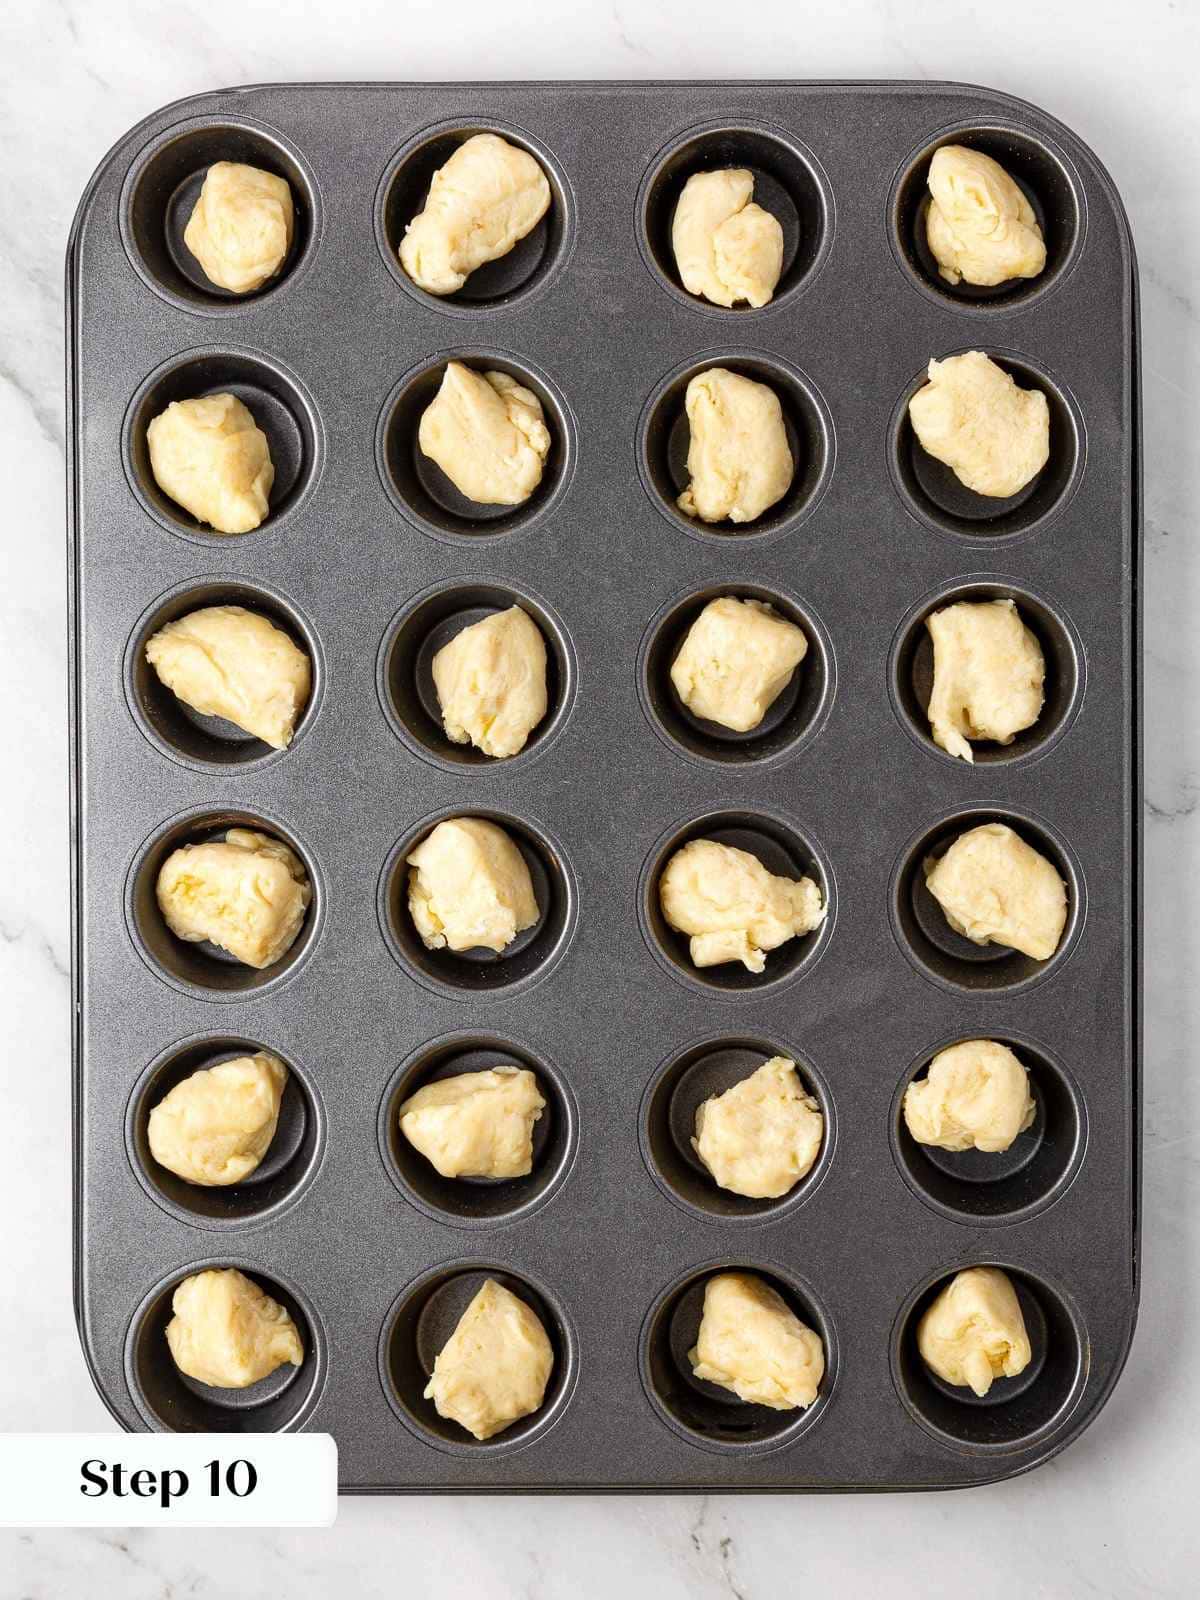
Step 10: As I divide each portion of the dough, I drop the dough into a cavity in the muffin tin. This not only cleans up the workspace, but also allows you to easily see if one is much larger or smaller than the others (photo 5).
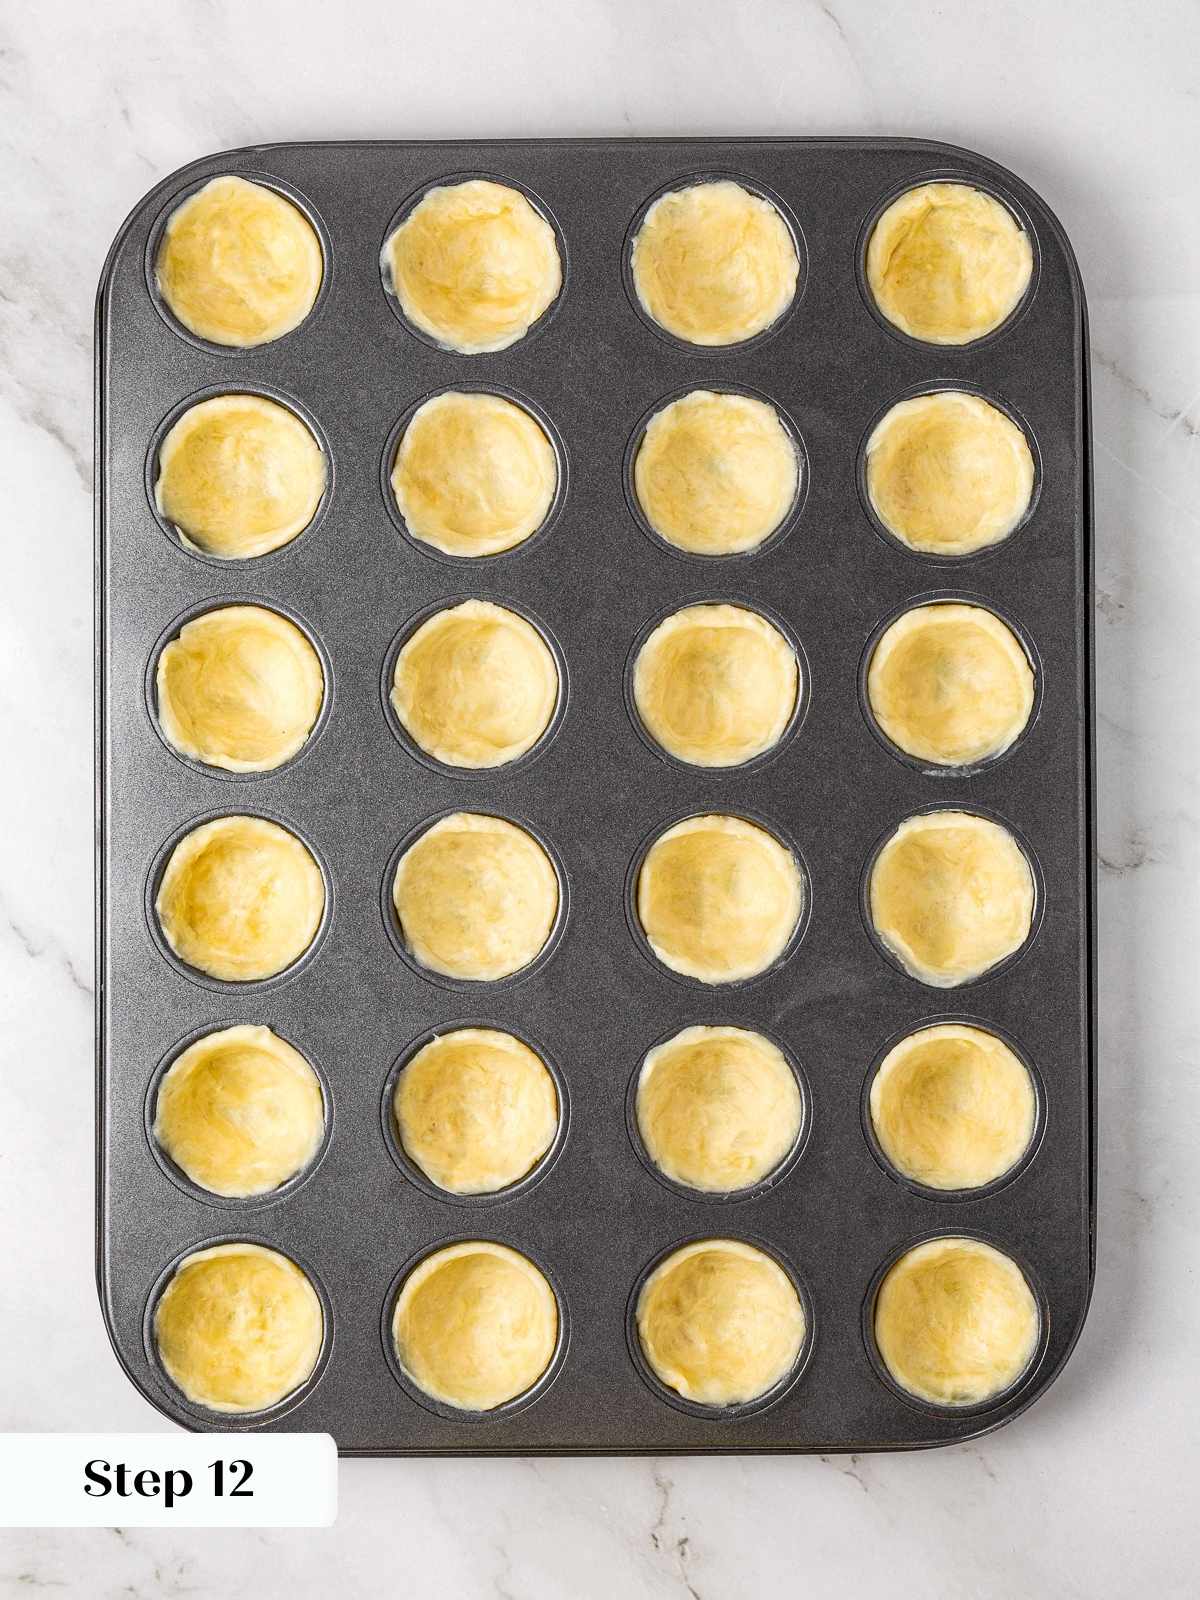
Step 11: Press each piece into one cup of a miniature muffin tin with your forefinger to create a little crust.
Step 12: Shape crust up the sides. I press an indentation into the center of the dough into the bottom of the pan, then gently press it against the sides, rotating the tin as I go, to cover the sides and bottom. The most important part of this crust is not making it too thin on the bottom or sides. I like to ensure the crust reaches all the way to the top of the tin, which provides the most space for filling (photo 6).
Make the Crumble:
Step 13: Combine the flour, brown sugar, vanilla extract, and melted butter in a small bowl, and stir with a fork until all the ingredients are equally moistened. They should hold together and then break into crumbles when squeezed in your hand.
If it is still too dry, you can add melted butter 1 teaspoon at a time, but be careful not to make it too moist, as this can cause it to become greasy and spread too much.
Assemble and Bake the Pies:
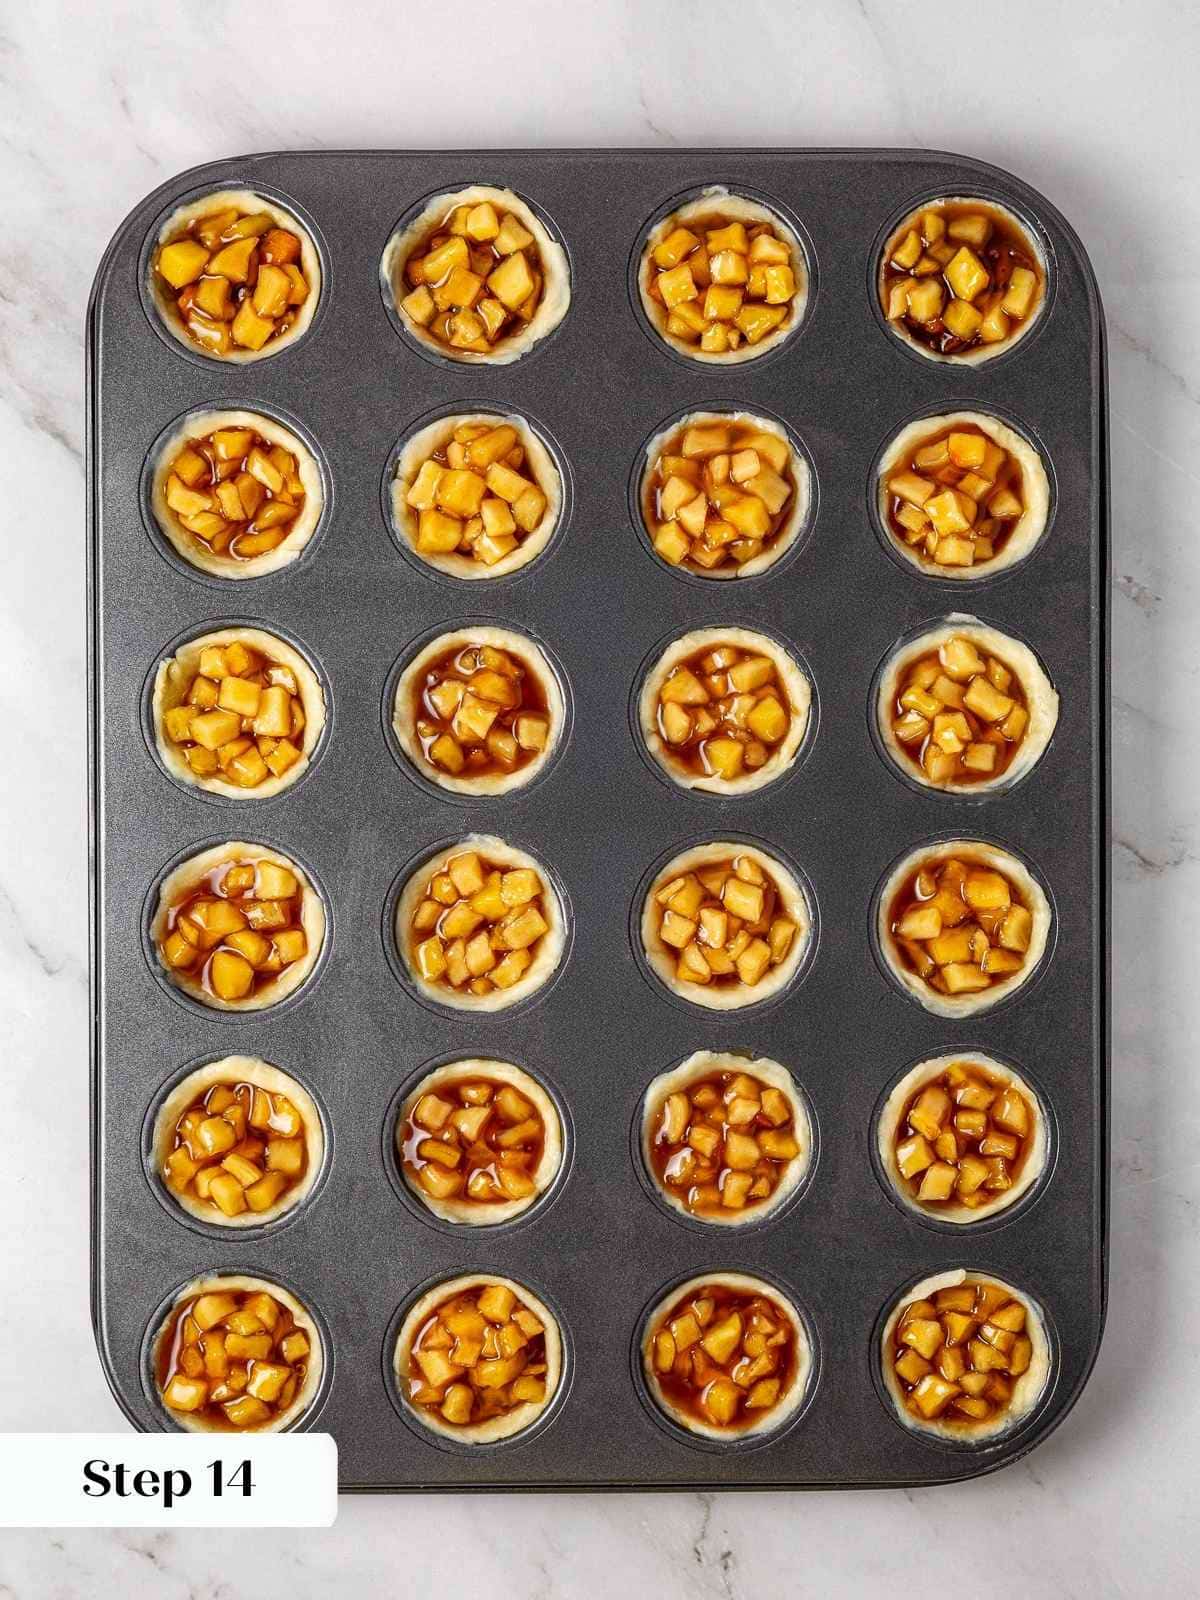
Step 14: Fill shells. Use a spoon to portion about a tablespoon of the apple filling into each (unbaked) pastry shell. The filling should come to the top. Be careful not to overfill or add too much sauce, as either will cause the filling to bubble out and adhere the crust to the pan (photo 7).
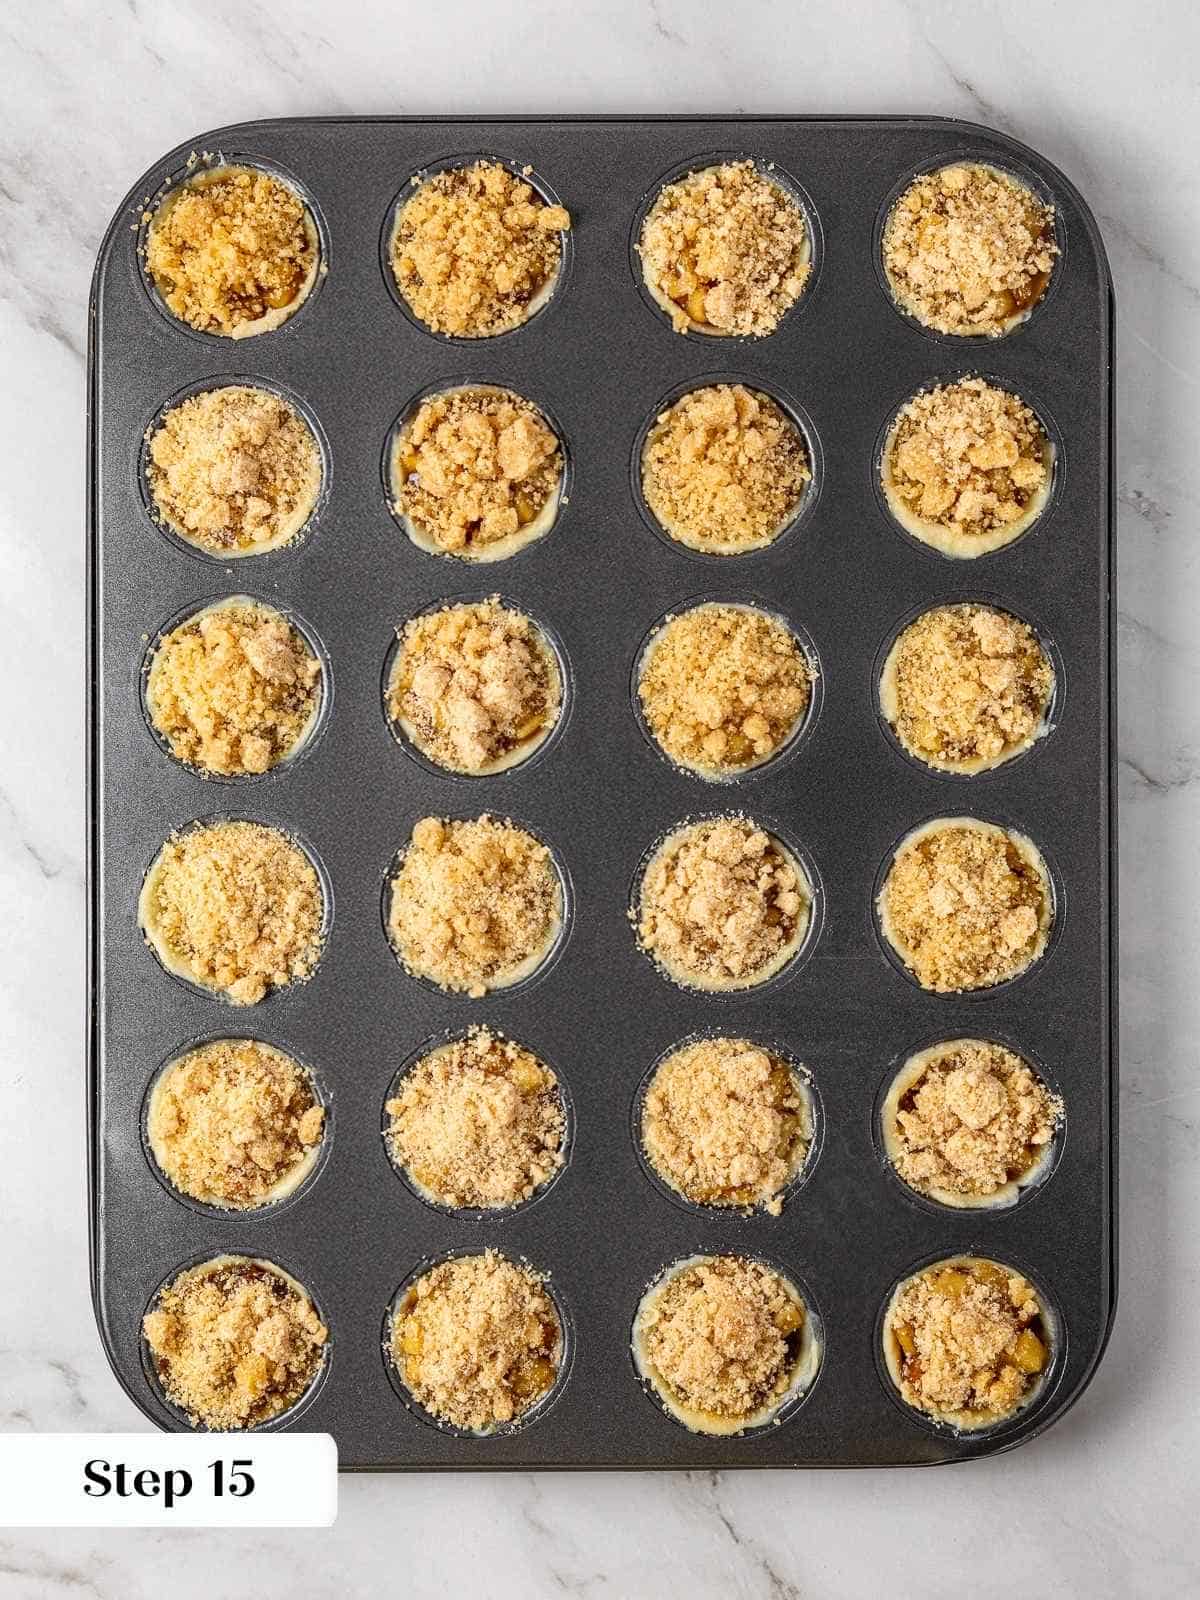
Step 15: Sprinkle and press some crumble topping onto each mini pie (photo 8).
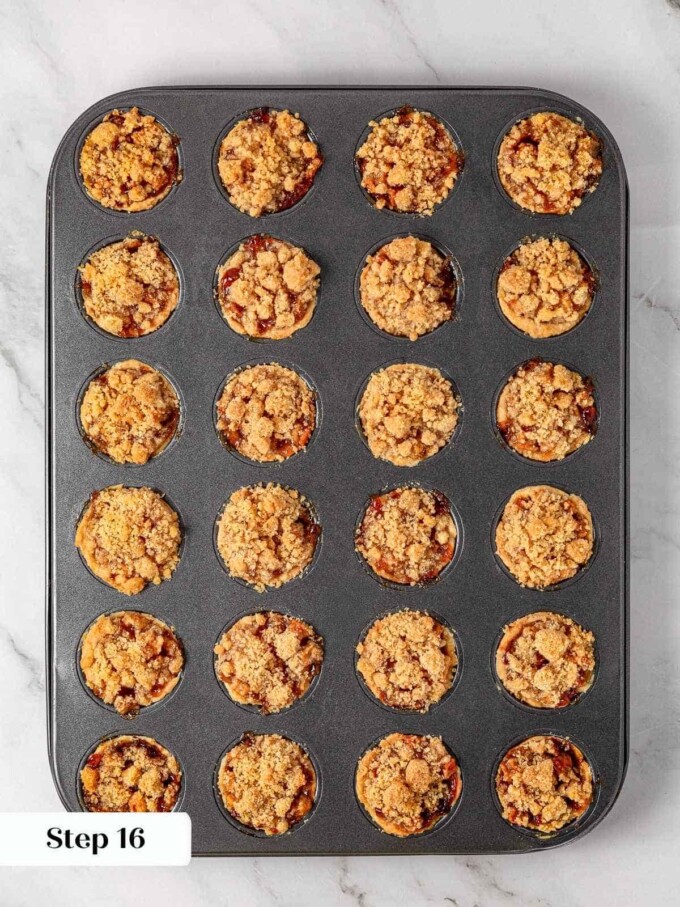
Step 16: Bake in a preheated oven for 30-35 minutes on the middle rack, until the filling is bubbling around the edges and the crumble and pie crusts become a nice golden brown color (photo 9).
Step 17: Let the mini apple pies cool completely in the tins before removing them.
Step 18: Loosen and remove. I’ve found that loosening any crumble or filling that has stuck to the pan and then spinning the pie in the tin to release the edges, and then gently pressing down on one side, is a quick and easy way to remove them without breaking the pie shells. You can use a small offset spatula to assist in unsticking any filling or crumble that is baked over, and also to lift the mini apple pies out of the tin (photo 10).
Recipe FAQs
Store the mini pies in an airtight container layered between parchment paper or wax paper. They store well at room temperature, in the refrigerator, or in the freezer for longer-term storage. They will keep 1 week at room temperature, 2 weeks in the fridge, or frozen for 3 months
You can use a different variety of apple, such as Jonagold, pink lady, Gala, or Fuji. But tart apples like Granny Smith lend themselves perfectly to this recipe. If you use a different type of apple, I recommend reducing the sugar.
Yes, you can make these with apple pie filling. I would not use store-bought as it can be too sweet, but if you would like to use my apple pie filling recipe, be sure to chop the apples small and consider reducing the sugar.
This recipe does not lend itself to being made in a large pie format. You can make these like the apple pie bar, where you layer the crust and filling, then add more crust on top, and slice into squares once baked.
Yes, just be careful not to over process the dough. It can become tough. Do it by pulsing until the dough comes together.
Serve these mini pies at room temperature or warmed with a small scoop of vanilla ice cream, crème anglaise, or salted caramel sauce!
Recommended Apple Recipes

Breakfast & Brunch

Fall

Pies & Tarts

Pies & Tarts
If you enjoyed this recipe, please leave a star rating and let me know how it goes in the comments below! I love hearing from you and your comments make my day!
Mini Apple Pies
Ingredients
For the crust:
- ½ cup salted butter
- 3 ounces brick-style cream cheese
- 1 cup all-purpose flour
For the apple pie filling:
- 2 ½ cups Granny Smith apples, peeled and diced into small pieces, ~2 apples
- ½ cup light brown sugar, not packed (113g)
- 2 tablespoons fresh lemon juice, 26g
- ¼ teaspoon cinnamon
- 2 teaspoons cornstarch
For the crumble:
- 2 tablespoons unsalted butter, melted
- ¼ teaspoon vanilla extract
- ½ cup light brown sugar, packed
- ½ cup all-purpose flour
Instructions
- Preheat the oven to 350°F (no fan).
Prepare the apple pie filling:
- Peel, core, and chop the apples. You want the apples to be small, about 1cm squares.
- Combine the apples, sugar, lemon juice, and cinnamon in a medium saucepan. Stir to coat evenly. Taste and adjust sugar, lemon juice, or spice as necessary.
- Add cornstarch to the apple mixture and stir to coat evenly. Starting on low heat, gently cook the apples until they begin to release their juices. Once the apples are cooking in their own sauce, increase the heat to medium and bring to a boil.
- Continue to cook over medium-low or medium heat, stirring frequently, until the apples have softened slightly and the sauce has thickened.
- Pour the mixture onto a large plate or rimmed baking sheet and refrigerate until it is cool. This increased surface area will cool the apples more quickly.
To make the crust:
- Add the flour to a medium-sized bowl. Cut the butter into small cubes and add it to the flour, along with the cream cheese.
- Cut the butter and cheese into the flour with a pastry blender or by squeezing it in your hand. Continue until the dough holds together.
- Gather the crust into a ball and divide it into 24 little pieces.
- As I divide each portion of the dough, I drop the dough into a cavity in the muffin tin. This not only cleans up the workspace, but also allows you to easily see if one is much larger or smaller than the others.
- Press each piece into one cup of a miniature muffin tin with your forefinger to create a little crust.
- I press an indentation into the center of the dough into the bottom of the pan, then gently press it against the sides, rotating the tin as I go, to cover the sides and bottom. The most important part of this crust is not making it too thin on the bottom or sides. I like to ensure the crust reaches all the way to the top of the tin, which provides the most space for filling.
Make the Crumble:
- Combine the flour, brown sugar, vanilla extract, and melted butter in a small bowl, and stir with a fork until all the ingredients are equally moistened. They should hold together and then break into crumbles when squeezed in your hand.
Assemble and Bake the Pies:
- Use a spoon to portion about a tablespoon of the apple filling into each (unbaked) pastry shell. The filling should come to the top. Be careful not to overfill or add too much sauce, as either will cause the filling to bubble out and adhere the crust to the pan.
- Sprinkle and press some crumble topping onto each mini pie.
- Bake in a preheated oven for 30-35 minutes on the middle rack, until the filling is bubbling around the edges and the crumble and pie crusts become a nice golden brown color.
- Let the mini apple pies cool completely in the tins before removing them.
- I’ve found that loosening any crumble or filling that has stuck to the pan and then spinning the pie in the tin to release the edges, and then gently pressing down on one side, is a quick and easy way to remove them without breaking the pie shells. You can use a small offset spatula to assist in unsticking any filling or crumble that is baked over, and also to lift the mini apple pies out of the tin.
Notes
Nutrition
Nutrition information is automatically calculated, so should only be used as an approximation.
 Like this recipe? Rate & comment below!
Before You Go
I hope you enjoyed this bite-sized dessert recipe. Check out our other delicious pie and tart recipes like this sweet potato pie or this cranberry gingersnap tart!


These are so fun, the streusel on top is always one of the best parts! A dessert with streusel is the best in my book. The apple filling is easy to make and so is the tart dough. Easy fun mini dessert!