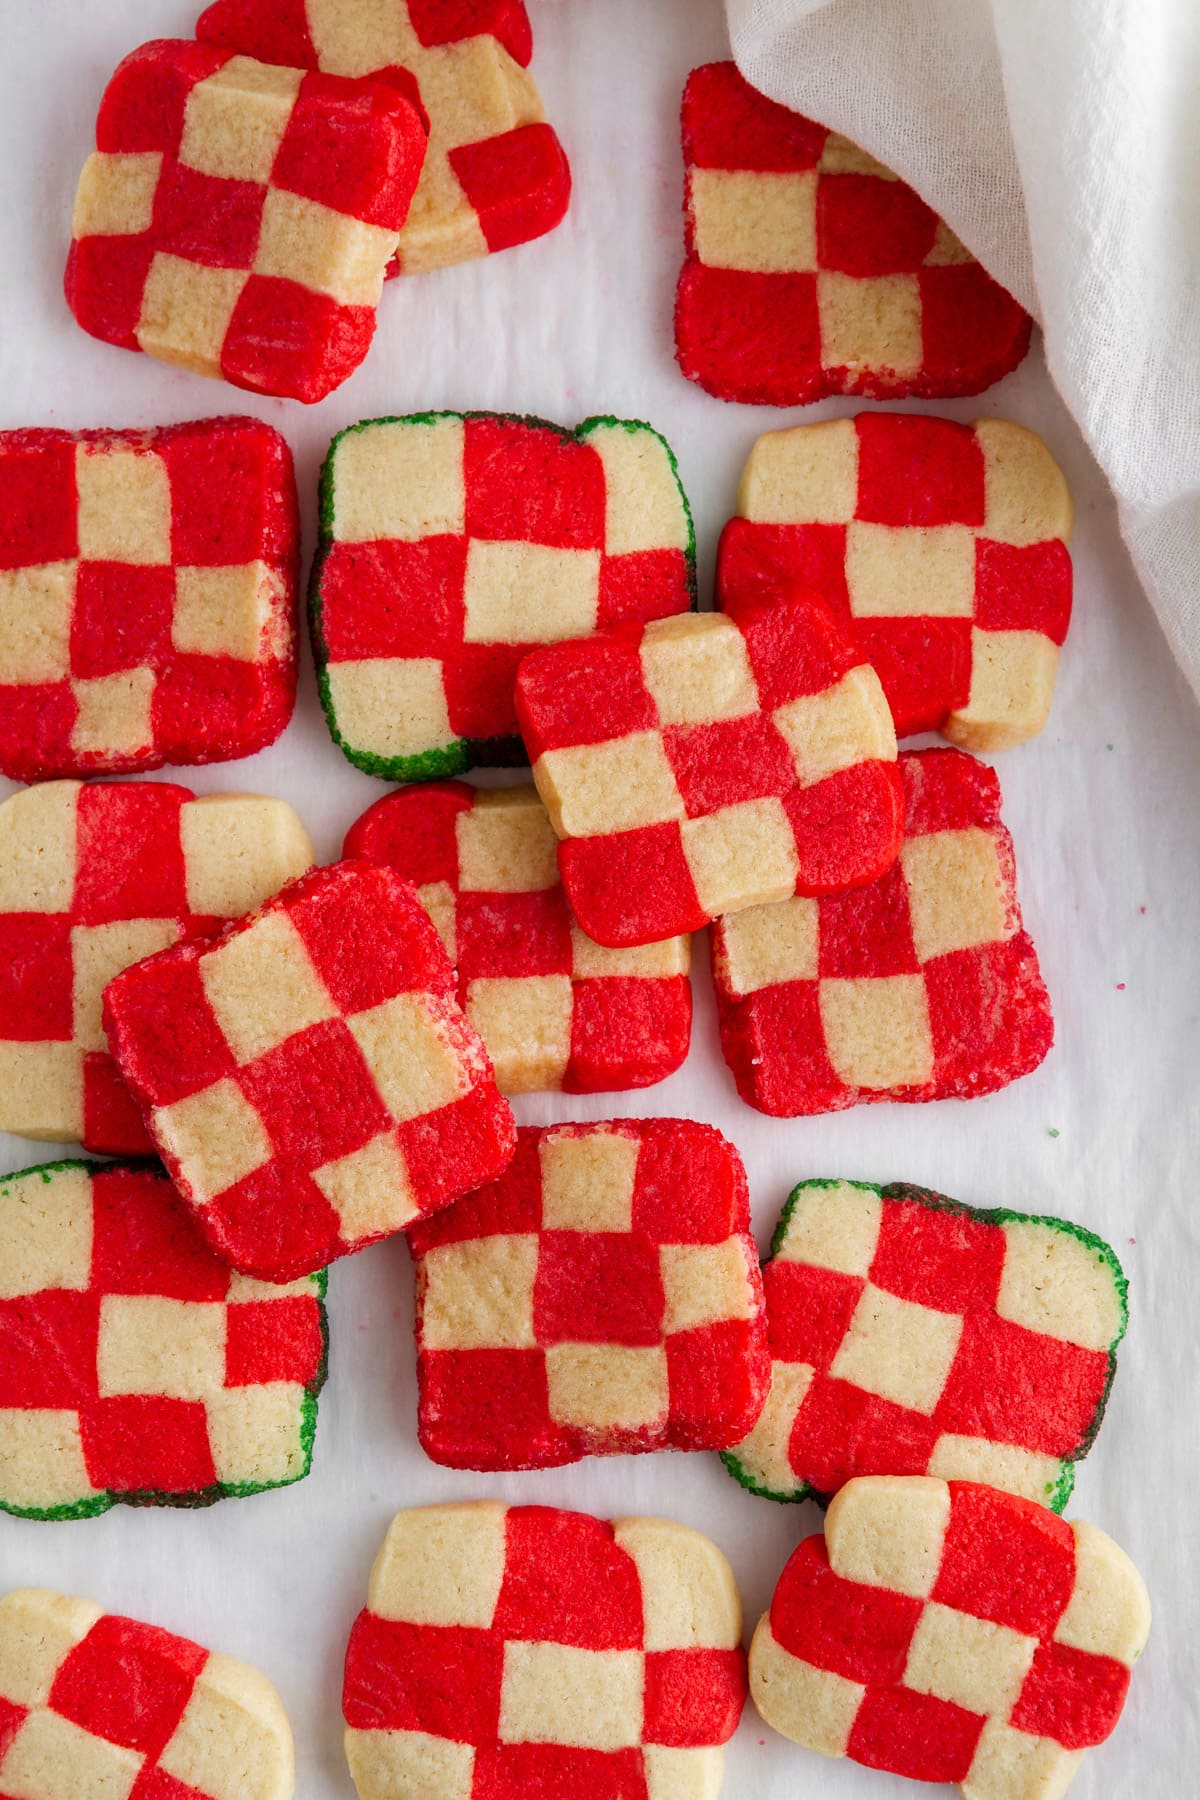
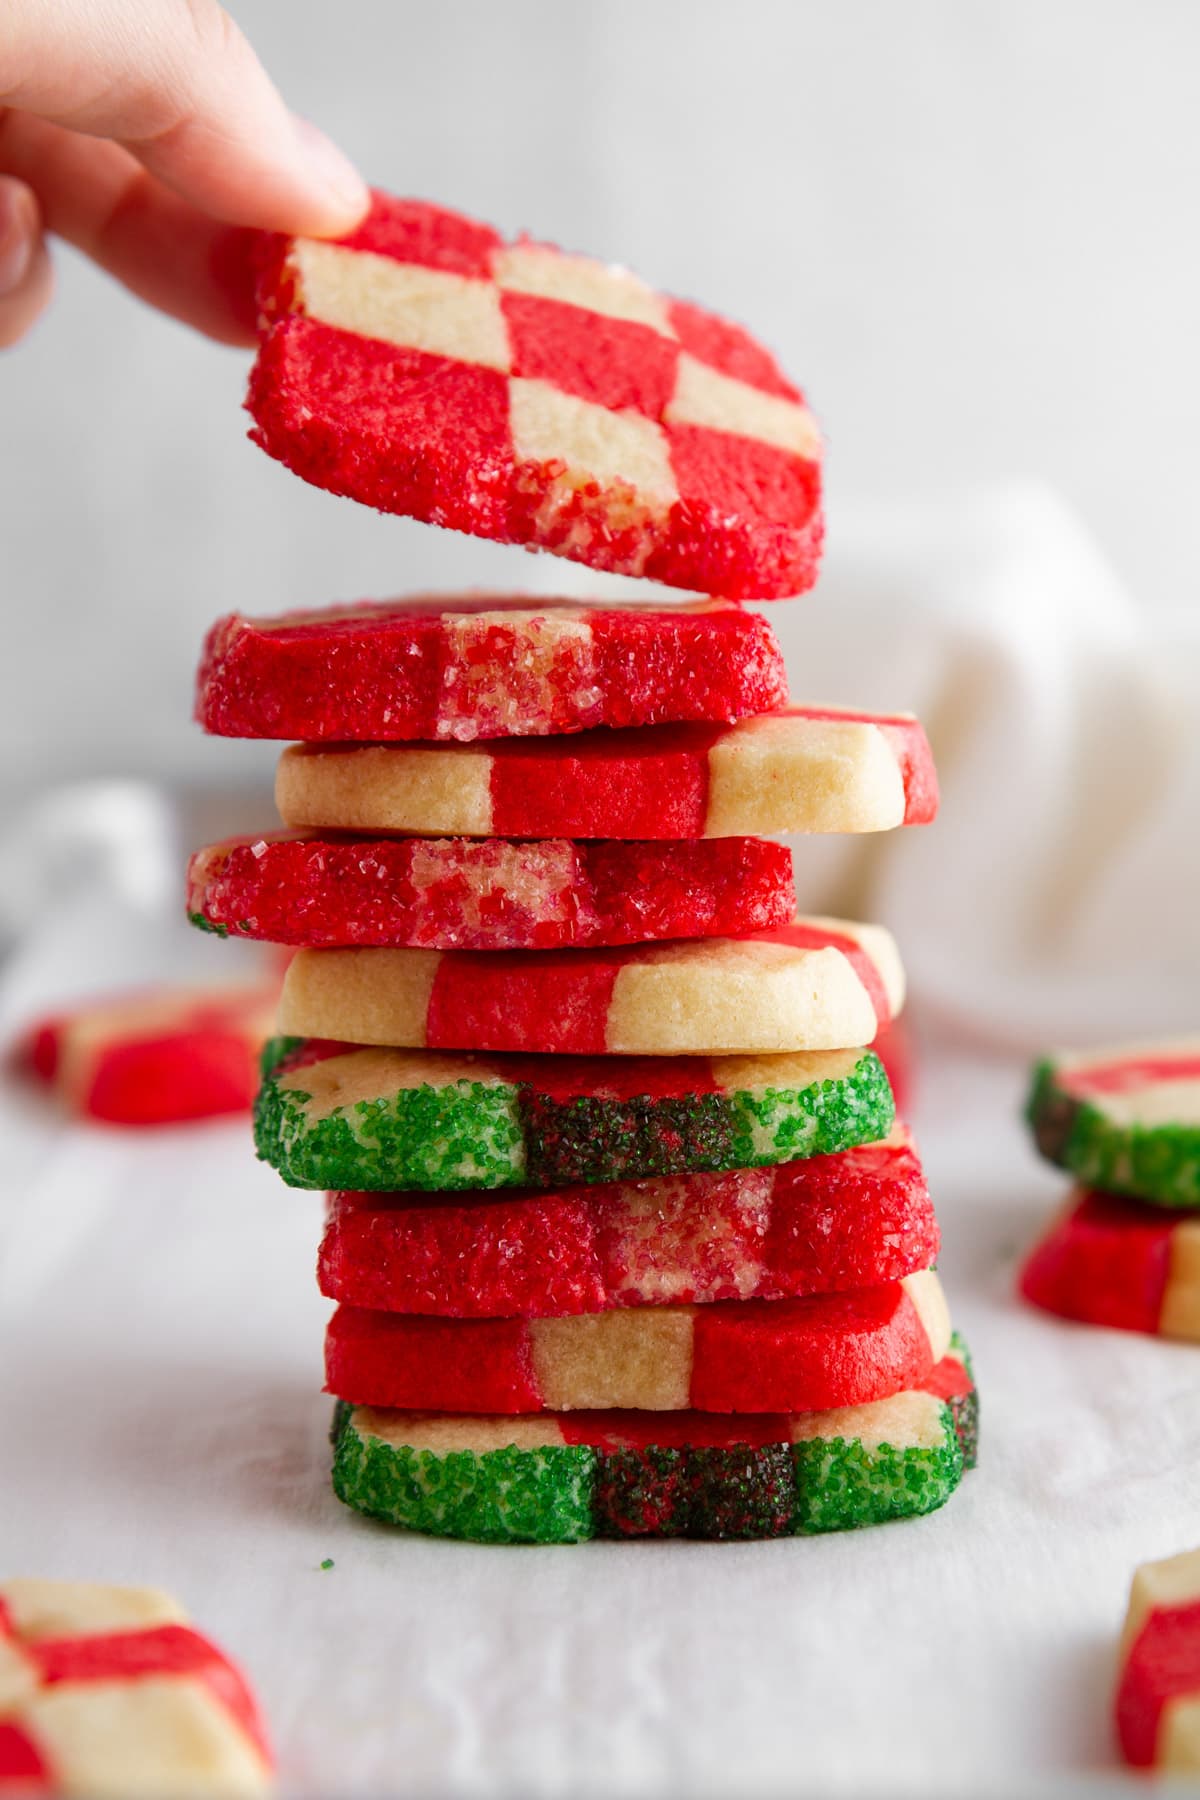
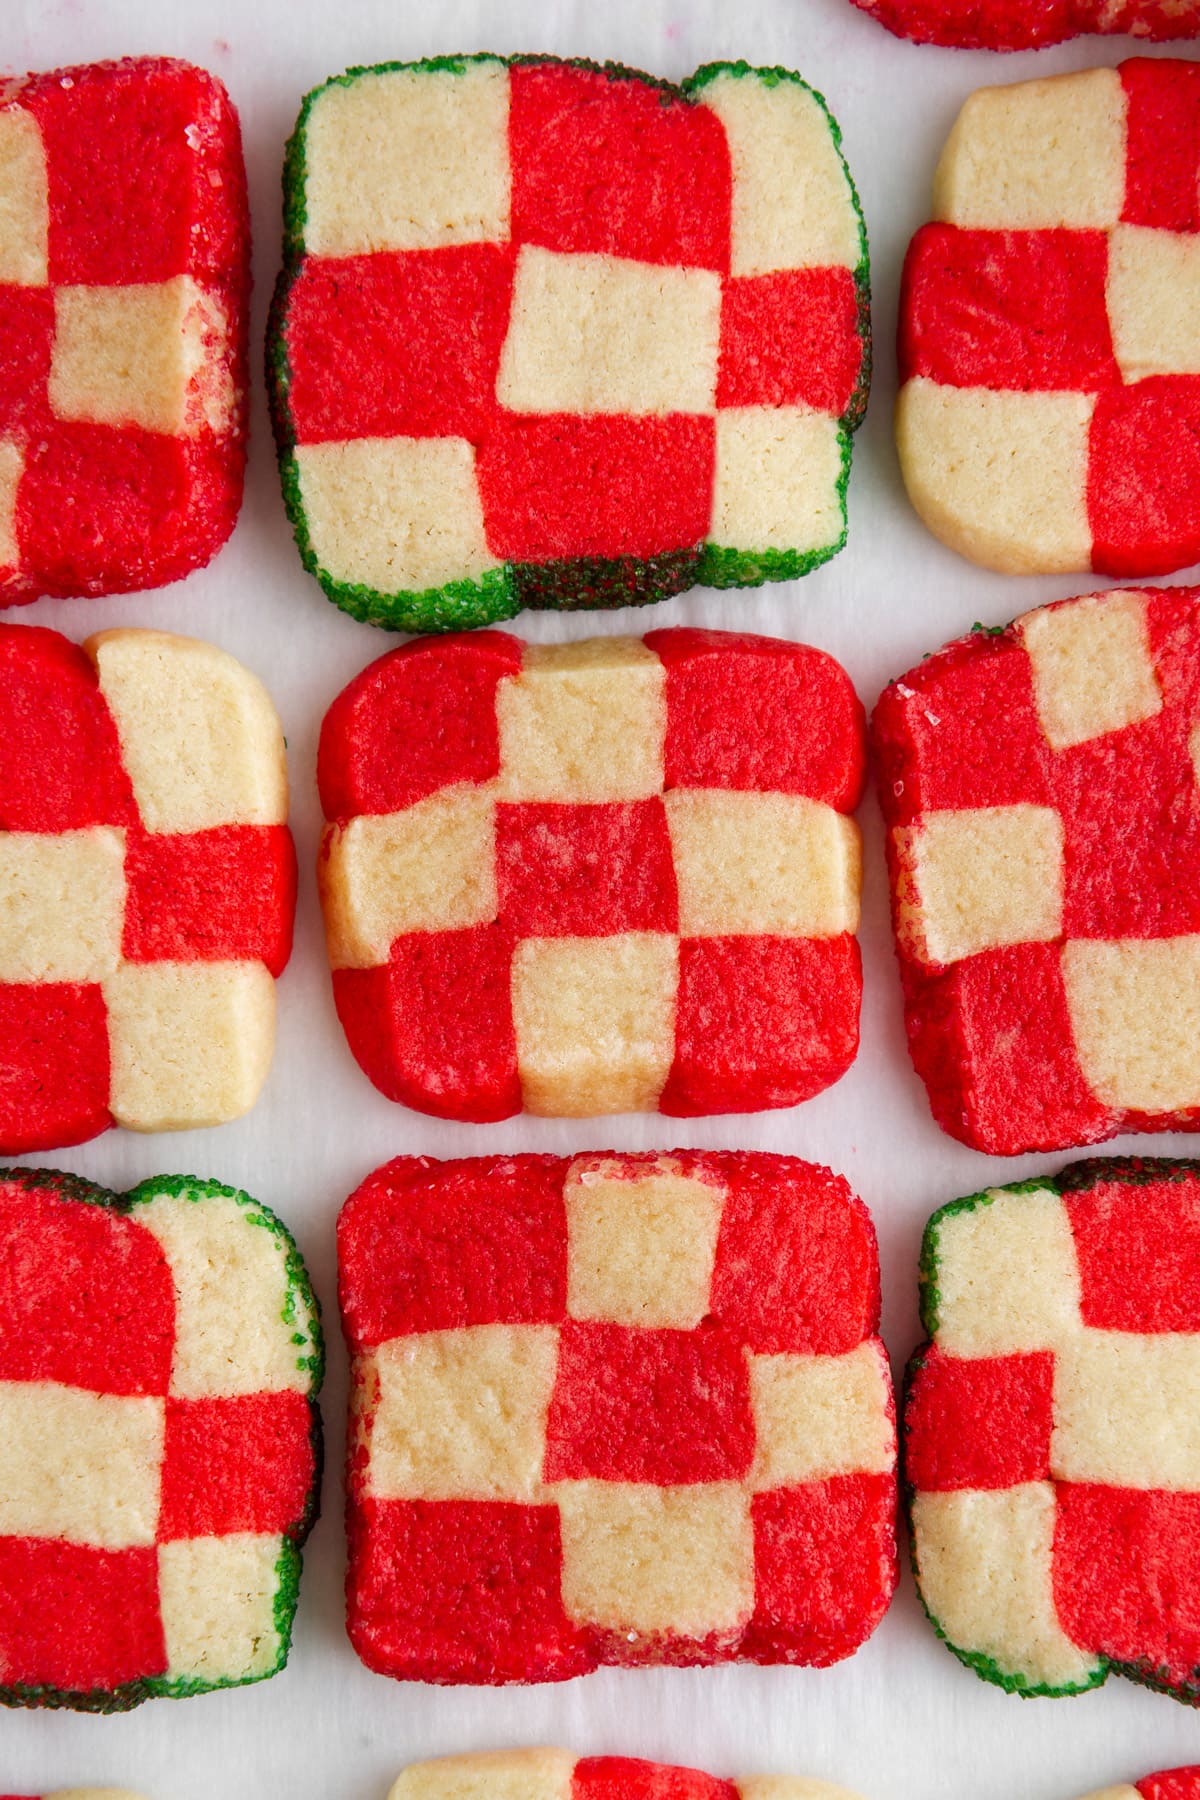
These peppermint checkerboard cookies are delightfully sweet, minty and fun to make and eat! Stack and layer two different colored doughs to form simple checkerboard shapes, roll in colored sugars, bake and enjoy. You can easily make the dough ahead of time, too!
Peppermint Checkerboard Cookies Recipe
If you’ve been following along on Instagram, Facebook or email, you know that we’ve been celebrating 12 Days of Cookies! Today, I’m sharing my fourth and final new holiday cookie recipe, which happens to be my favorite one of the bunch, if I’m being honest. These pepperminty checkerboard-patterned cookies are soft, sweet, and just like my candy cane cookies they are and really fun to make and eat. Here is what you can expect from this recipe:
- A soft, easy-to-work-with sugar cookie dough
- A sweet sugar cookie flavor with a hint of mint
- A simple method to stack and layer doughs to make fun checkerboard patterns
- A recipe that you can prep ahead
- The perfect cookie to round out your cookie boxes or exchanges this year

Ingredients
The dough for these cookies is super straightforward — just a simple sugar cookie dough with the addition of peppermint extract that you’ll split in half to dye one part red. It’s really that easy! Here is what you’ll need:
- All-purpose flour
- Baking powder
- Salt (I prefer to use kosher salt in baking recipes!)
- Unsalted butter
- Granulated sugar
- Large egg + egg yolk (the bonus egg yolk adds more super-soft texture to the dough once baked)
- Vanilla extract
- Peppermint extract
- Red food coloring (liquid or gel works!)
How to Make Peppermint Checkerboard Cookies
Though these cookies might look complicated, they’re actually very easy to assemble. You’ll basically just make the dough, let it chill, then shape and bake. Here is the general rundown (as always, please scroll to the bottom of the post for the FULL recipe + directions):
- Step One: Make the dough. Whisk together the dry ingredients, beat the butter and sugar together, beat in egg, egg yolk and extracts, and add the dry ingredients to form a dough.
- Step Two: Color one half of the dough. Divide the dough in half, then color one half of the dough red.
- Step Three: Chill the dough. Shape each dough half separately into two long, rectangular blocks. Cover tightly with plastic wrap and chill.
- Step Four: Shape the cookies. Cut each chilled block into 9 strips of dough. Stack strips in alternating colors to form two new blocks in a checkerboard pattern. Cover and chill again until firm.
- Step Five: Slice and bake. Roll chilled blocks in colored sugars, if desired. Slice each block into cookies and place on parchment paper-lined baking sheets. Bake for 12 to 14 minutes or until set in the centers.
Can I Make Peppermint Cookies Ahead?
Yes! You can chill the dough for up to 3 days ahead of time before shaping. For longer-term storage, I recommend baking the cookies and freezing them in an airtight container for up to 3 months.
Can I Make Peppermint Checkerboard Cookies Without Peppermint?
Yes, totally! If you’re not a fan of the peppermint flavor, you can just leave it out. The cookies will then taste like a yummy vanilla sugar cookie. Make these Easy Snickerdoodle Cookies for another Christmas classic!
More Christmas Cookie Recipes!
- stained glass window cookies
- hot toddy molasses cookies
- chocolate-nutella linzer cookies
- cheesecake-stuffed red velvet crinkle cookies
- chai-spiced crescent cookies
Recommended Peppermint Cookie Recipes

Cookie Recipes

Christmas Recipes

Christmas Recipes

Cookie Recipes
If you enjoyed this recipe, please leave a star rating and let me know how it goes in the comments below! I love hearing from you and your comments make my day!
Peppermint Checkerboard Cookies

Ingredients
- 2 ½ cups all-purpose flour
- 1 teaspoon baking powder
- ½ teaspoon salt
- 1 cup unsalted butter, softened
- 1 cup granulated sugar
- 1 large egg
- 1 egg yolk
- 1 ½ teaspoons vanilla extract
- 1 teaspoon peppermint extract
- 1 teaspoon red food coloring
- colored sanding sugars, for rolling (optional)
Instructions
- In a large bowl, whisk together flour, baking powder and salt. In the bowl of a stand mixer with the paddle attachment or in a large bowl using an electric hand mixer, beat butter and granulated sugar on medium speed until light and fluffy, about 2 minutes. Beat in egg, egg yolk, vanilla extract and peppermint extract until just combined. Gradually stir in flour mixture just until a dough forms.
- Remove half of the dough and transfer to empty flour mixture bowl. Add red food coloring to stand mixer or large bowl with remaining dough; stir on low speed just until food coloring is fully incorporated, about 1 minute.
- Shape each half of dough into a rectangular block about 8x2x2 inches. Wrap each block tightly in plastic wrap. Refrigerate at least 1 hour or up to 3 days.
- On a cutting board, slice each block lengthwise into 3 equal-sized strips. Slice each strip lengthwise into thirds to make 9 total long, thin strips of dough (about 1/3-inch thick) per block.
- Line up a strip of red dough, white dough and a second strip of red dough on cutting board; press strips together to seal edges. Top with 3 more strips of dough in alternating colors; press to seal. Repeat with a third and final layer. Trim off and discard any rounded edges. Repeat with remaining 9 strips of dough, beginning and ending with white dough, so you end up with two blocks of checkerboarded dough.
- Tightly wrap blocks in plastic wrap and refrigerate for at least 1 hour or up to 1 day.
- Preheat oven to 350°F. Line two baking sheets with parchment paper and arrange two oven racks in upper and lower thirds of oven.
- If desired, roll ends of dough blocks in colored sugars. Use a sharp knife to slice each block of dough into 1/4-inch slices (you should end up with about 32 cookies total); arrange on prepared baking sheets spaced at least 1 inch apart. Bake, rotating baking sheets halfway through baking, until cookies are set in centers, about 12 to 14 minutes. Let cookies cool on baking sheets for 5 minutes, then transfer to a cooling rack to cool completely.
- Store leftover cookies in an airtight container for up to 1 week.
Notes
- Recipe adapted from Real Simple.
Nutrition
Nutrition information is automatically calculated, so should only be used as an approximation.
 Like this recipe? Rate & comment below!


I made these yesterday and your instructions were very clear! These came out so cute! Thank you for the recipe!
Oh hooray, Kerry! THanks for coming back to comment and rate! Your comments make my day. ~lindsey
Not sure if I am posting in the correct blog entry. But I am trying for giveaway..apron and cookbook. The email I received keeps bringing me here????My fav. Cookie are the checkered ones so cute.!
You can just reply to the email I sent ya, but I’ll add this as an entry! 🙂