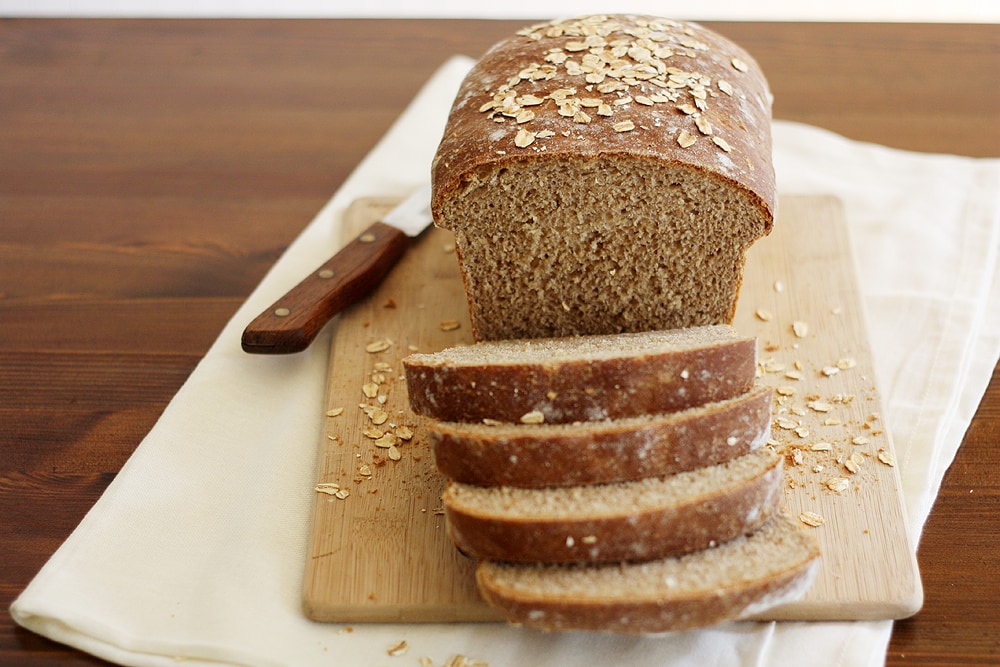
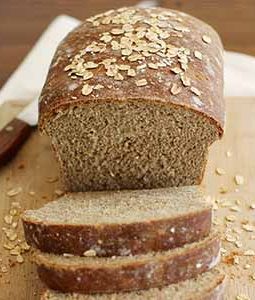
whole wheat honey oatmeal bread
Sometimes I like to be fancy.
Sometimes I like to wear high heels because it makes me feel fancy (this happens approximately once a year, though, maybe twice if a wedding is involved). Sometimes I buy and then eat expensive cheese because it feels like something fancy people do. Sometimes I get dressed and wear makeup and put on jewelry at home even when I know I’m not going out that day, for the fanciness of it (again, this happens approximately once a year, maybe twice).
And sometimes I make my own sandwich bread because it’s fancy without the fuss — and there’s food involved. My favorite kind of fancy.
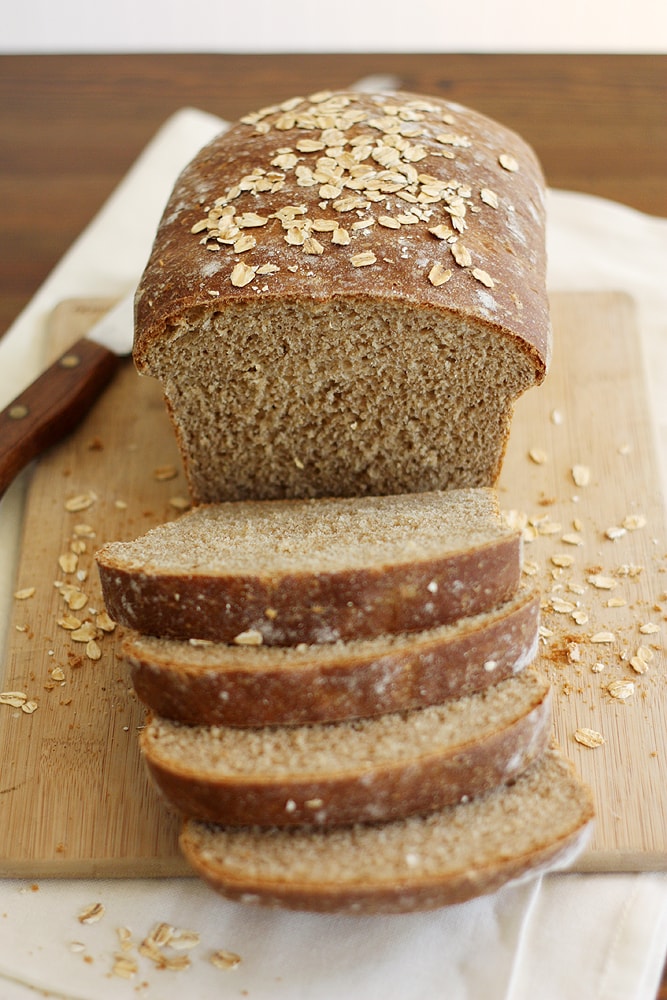
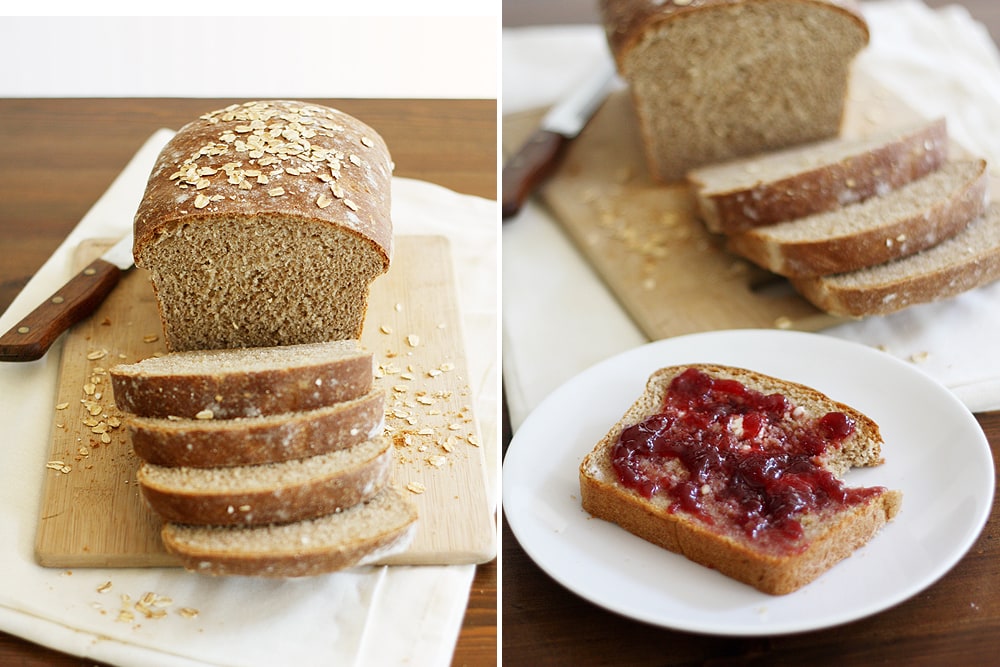
If you’re an oatmeal bread lover or a whole wheat bread lover or a bread lover in general (which is probably why you’re here in the first place, hi hello), you’re going to love this bread. It’s a classic sandwich loaf through and through — light and fluffy, but dense enough to rock a grilled cheese or a PB & J or a deli sandwich or jammy toast. The flavor is mild but it doesn’t taste like air, either — it’s subtly sweet with an earthy undertone, thanks to that whole wheat action. And the oatmeal is da best addition — gives it just a hint of texture and a flavor boost. I mean, really, this sandwich bread is fancy.
It’s also, as I said, fuss-free: As in, I made it first thing in the morning and by lunchtime, I had warm, fresh-baked bread ready for the munching. And while it requires a teensy bit o’ patience (as all good breads do), it’s worth every minute of the wait. Must I remind you of the end result, a warm, fresh-baked bread ready for the munching? I thought not.
And oh, check it: I thought this bread would be the perfect segue for my next video! If you’re a baker, you probably know that not all flours are created equal. So what the heck is the difference between bread flour, all-purpose flour and whole wheat flour (the main players in my kitchen) anyway? Since all three can play a role in this bread, this video helps you sort it out:
Yeah, (fancy) toast! Serve these Oatmeal Chocolate Chip Cookies for dessert!
Whole Wheat Honey Oatmeal Bread
- Prep Time: 2 hours
- Cook Time: 40 mins
- Total Time: 2 hours 40 mins
- Yield: 1 loaf 1x
- Category: Bread
- Method: Bake
- Cuisine: American
Ingredients
- 1 cup water
- 1 cup milk
- 2 1/4 teaspoons (1 packet) active dry yeast
- 2 tablespoons honey
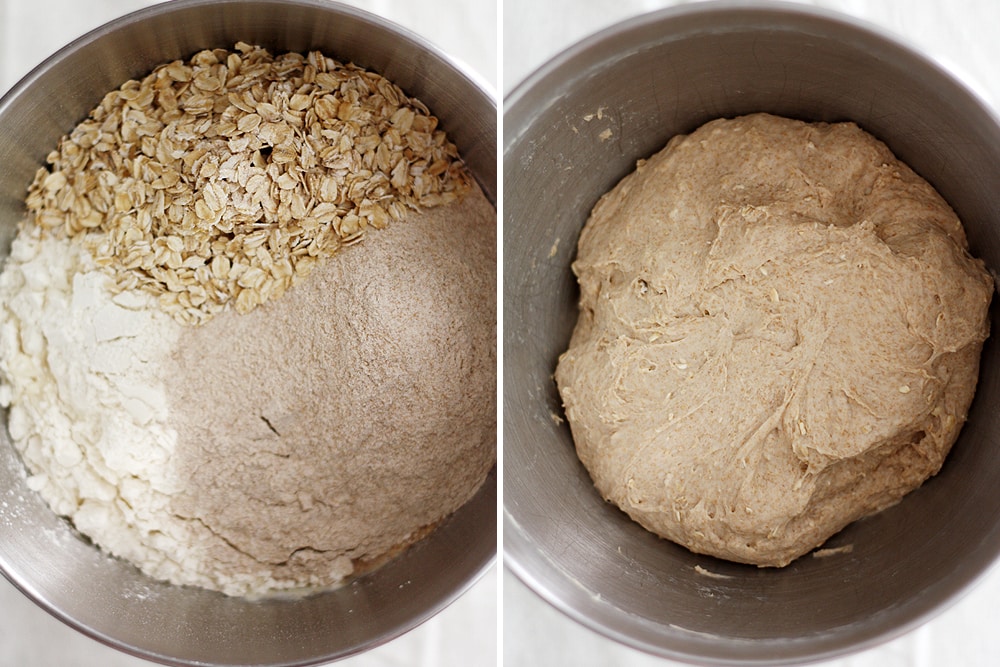
- 2 1/2 cups whole wheat flour
- 2 cups bread or all-purpose flour
- 1 cup rolled oats, plus more for topping loaf
- 4 tablespoons (1/2 stick) unsalted butter, melted and cooled slightly
- 1 tablespoon salt
Instructions
- Pour water and milk into a microwave-safe bowl; heat 30 to 45 seconds until warm (about 115 degrees F). Pour into the bowl of a stand mixer.
- Add yeast and honey. Let sit 10 minutes until yeast is foamy.
- Stir in flours, oats, butter and salt. Using a dough hook, knead on medium speed 6 minutes until dough is smooth, elastic and only slightly sticky (alternatively, knead by hand 10 to 15 minutes on a lightly floured surface until smooth, elastic and only slightly sticky). Keep dough in bowl and cover with a tea towel. Let rise 1 hour until doubled.
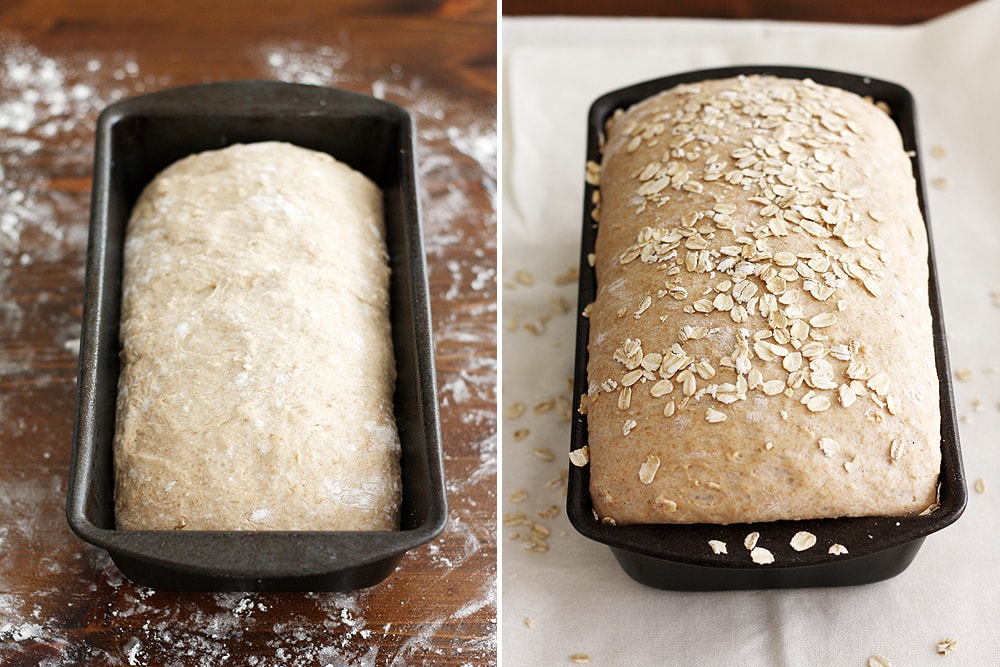
- When dough is doubled, punch down and transfer to a lightly floured surface. Press into an 8-by-8-inch square, then tuck in sides slightly and roll up into a log. Transfer to a lightly greased 9-by-5-inch loaf pan, seam-side down. Cover with a tea towel and let rise 30 to 40 minutes until dough reaches the edges of the pan (but not doubled).
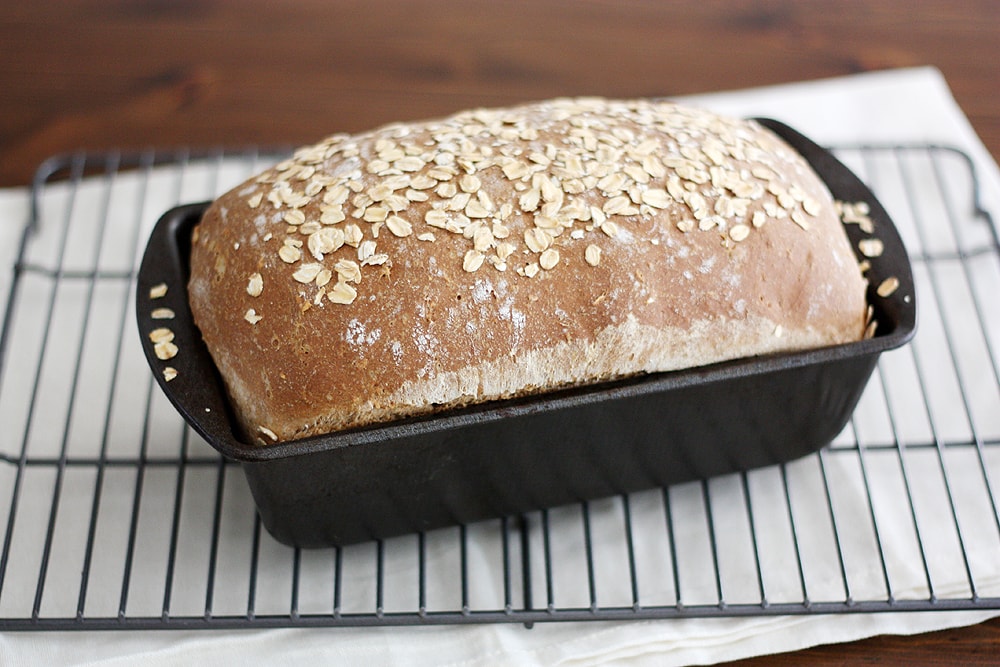
- Heat oven to 400 degrees F (375 degrees F if loaf pan is dark or nonstick). Sprinkle oats on top of risen loaf. Bake 40 to 50 minutes, rotating halfway through baking, until loaf is deep brown on top and sounds hollow when tapped on the bottom. Remove from loaf pan and transfer to a cooling rack to cool completely.
It’s funny you say that because I have a hunk of expensive Gouda in the fridge and all I can think about is getting home and eating Gouda and apple slices. Some of this bread would be the icing on the cake!
Melissa — Oh, thank you so much! This would be perfect with that soup — just let me know when dinnertime is, mmk? 😉
Laura — Been there, done that. 😉 And thanks about the tat! I kinda like it. 🙂
Caroline — Thank you, dear!
Stefanie — Carb lovers and fancy gals unite! 🙂
Abbie — Wish I could pass you a slice right through the screen! Thanks!
Natalie — You sure know how to make my day. 🙂
Megan — Oh man, if I had Gouda in the fridge right now I’d be thinking the SAME THING. 🙂
I adore your bread. It’s like bakery quality. I would definitely buy your bread 🙂
Bread is my most favorite thing to bake! This loaf looks fabulous, I’ll definitely be giving the recipe a try. Who needs children when you can make a bread baby of your very own? Plus bread smells better than babies do.
Nic — Oh thank you, dear, you are too kind! 🙂
Stephanie — Ooo, I hope you love it! And ha — bread babies definitely smell better than real ones, that’s for sure 😉
Such a great looking loaf of bread!
Nosy nosers over here kept rewinding the video (wait…do people even SAY rewinding anymore or was that a VHS thing?) to try and get a sneak peek of your tat. Priorities.
Gimme dat bread.
Homemade bread – my absolute favorite homemade treat – ever!