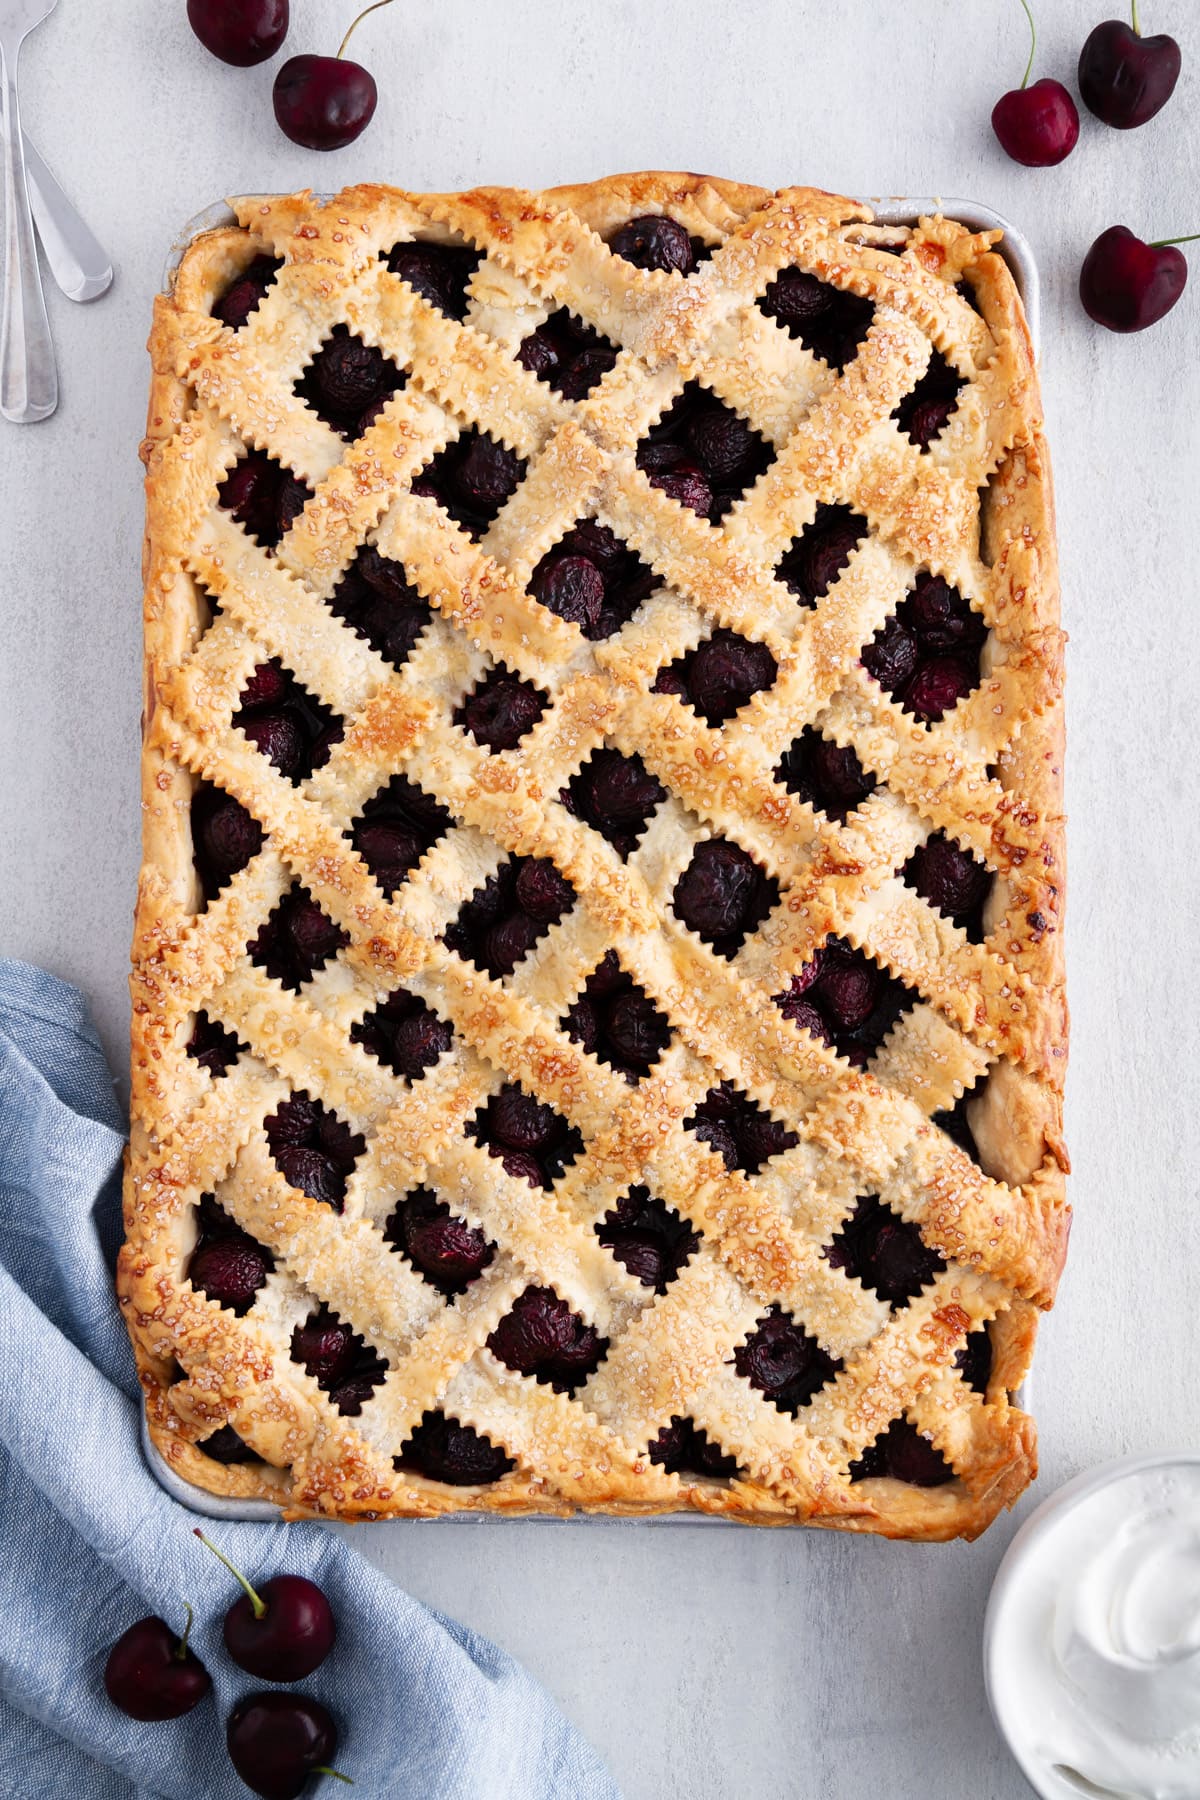
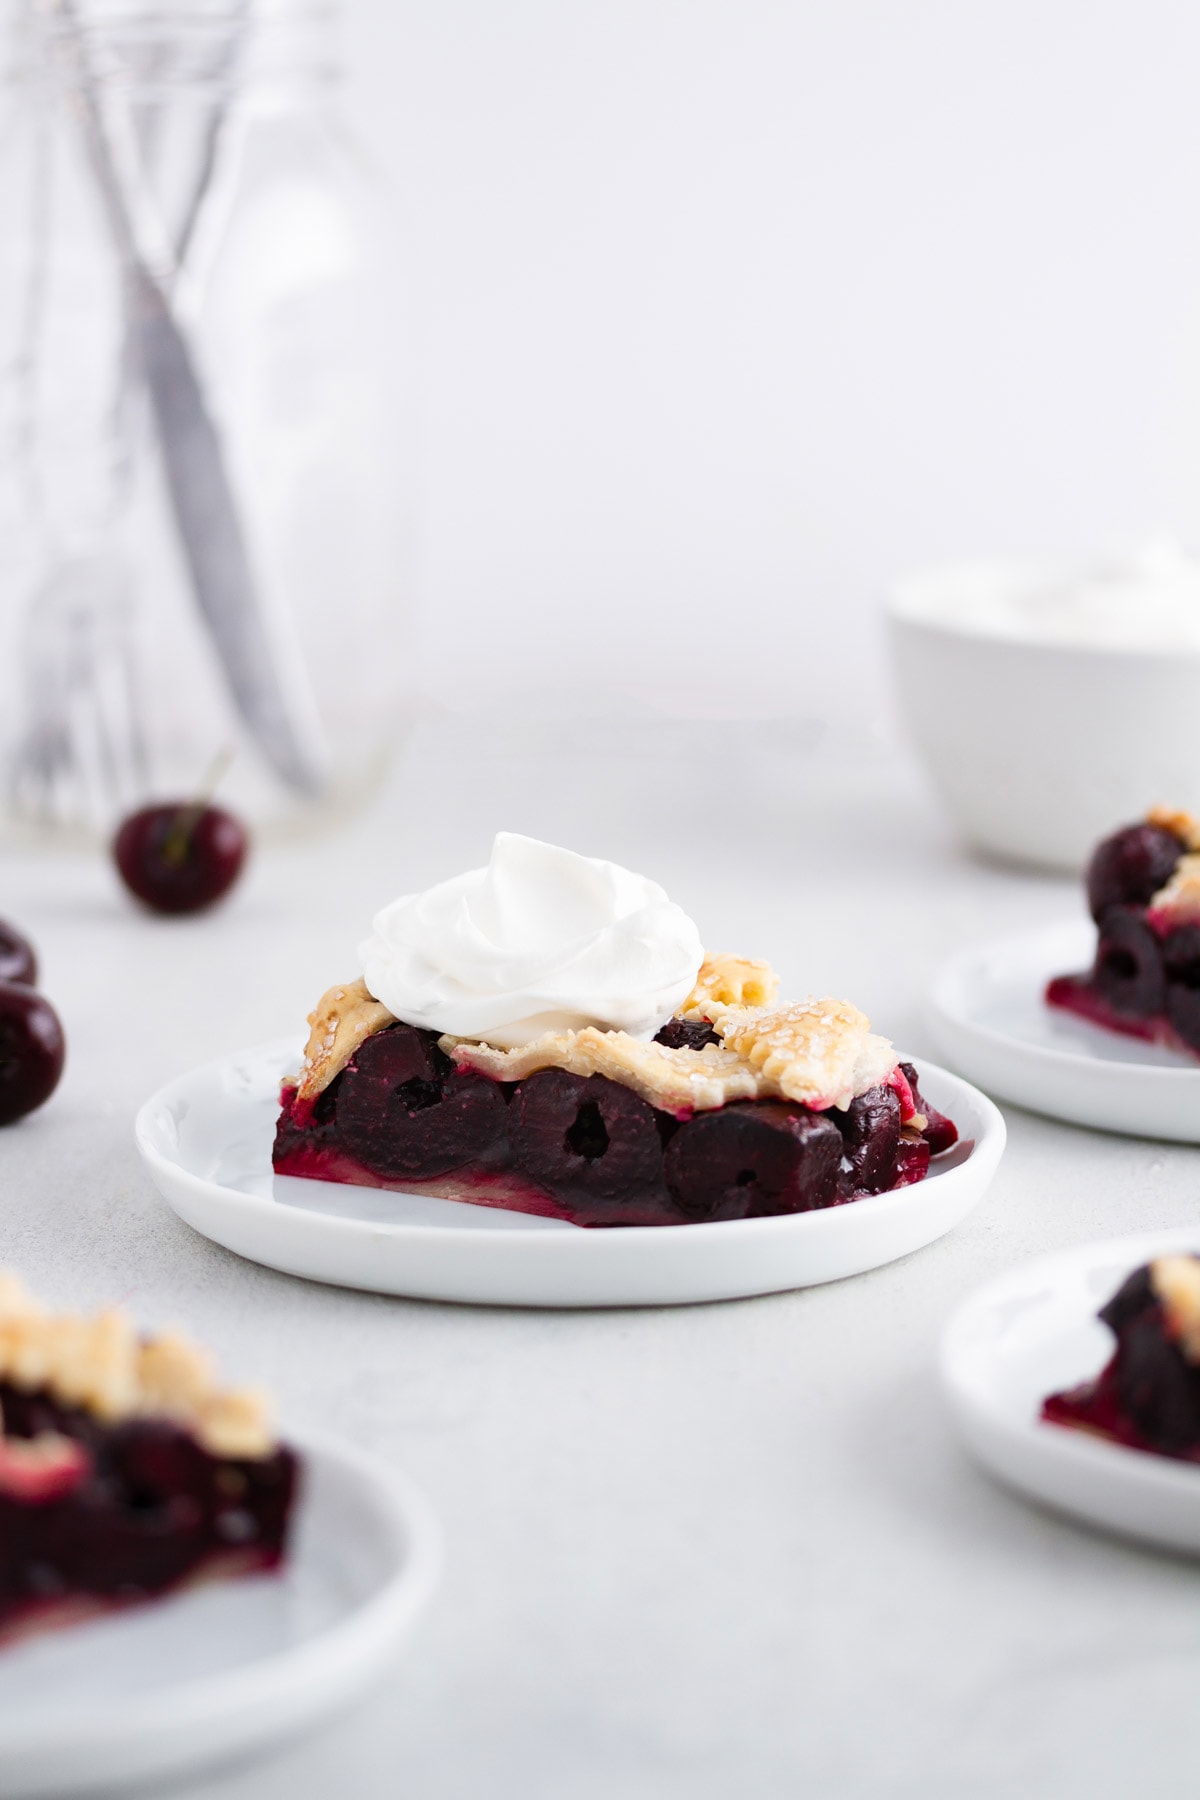
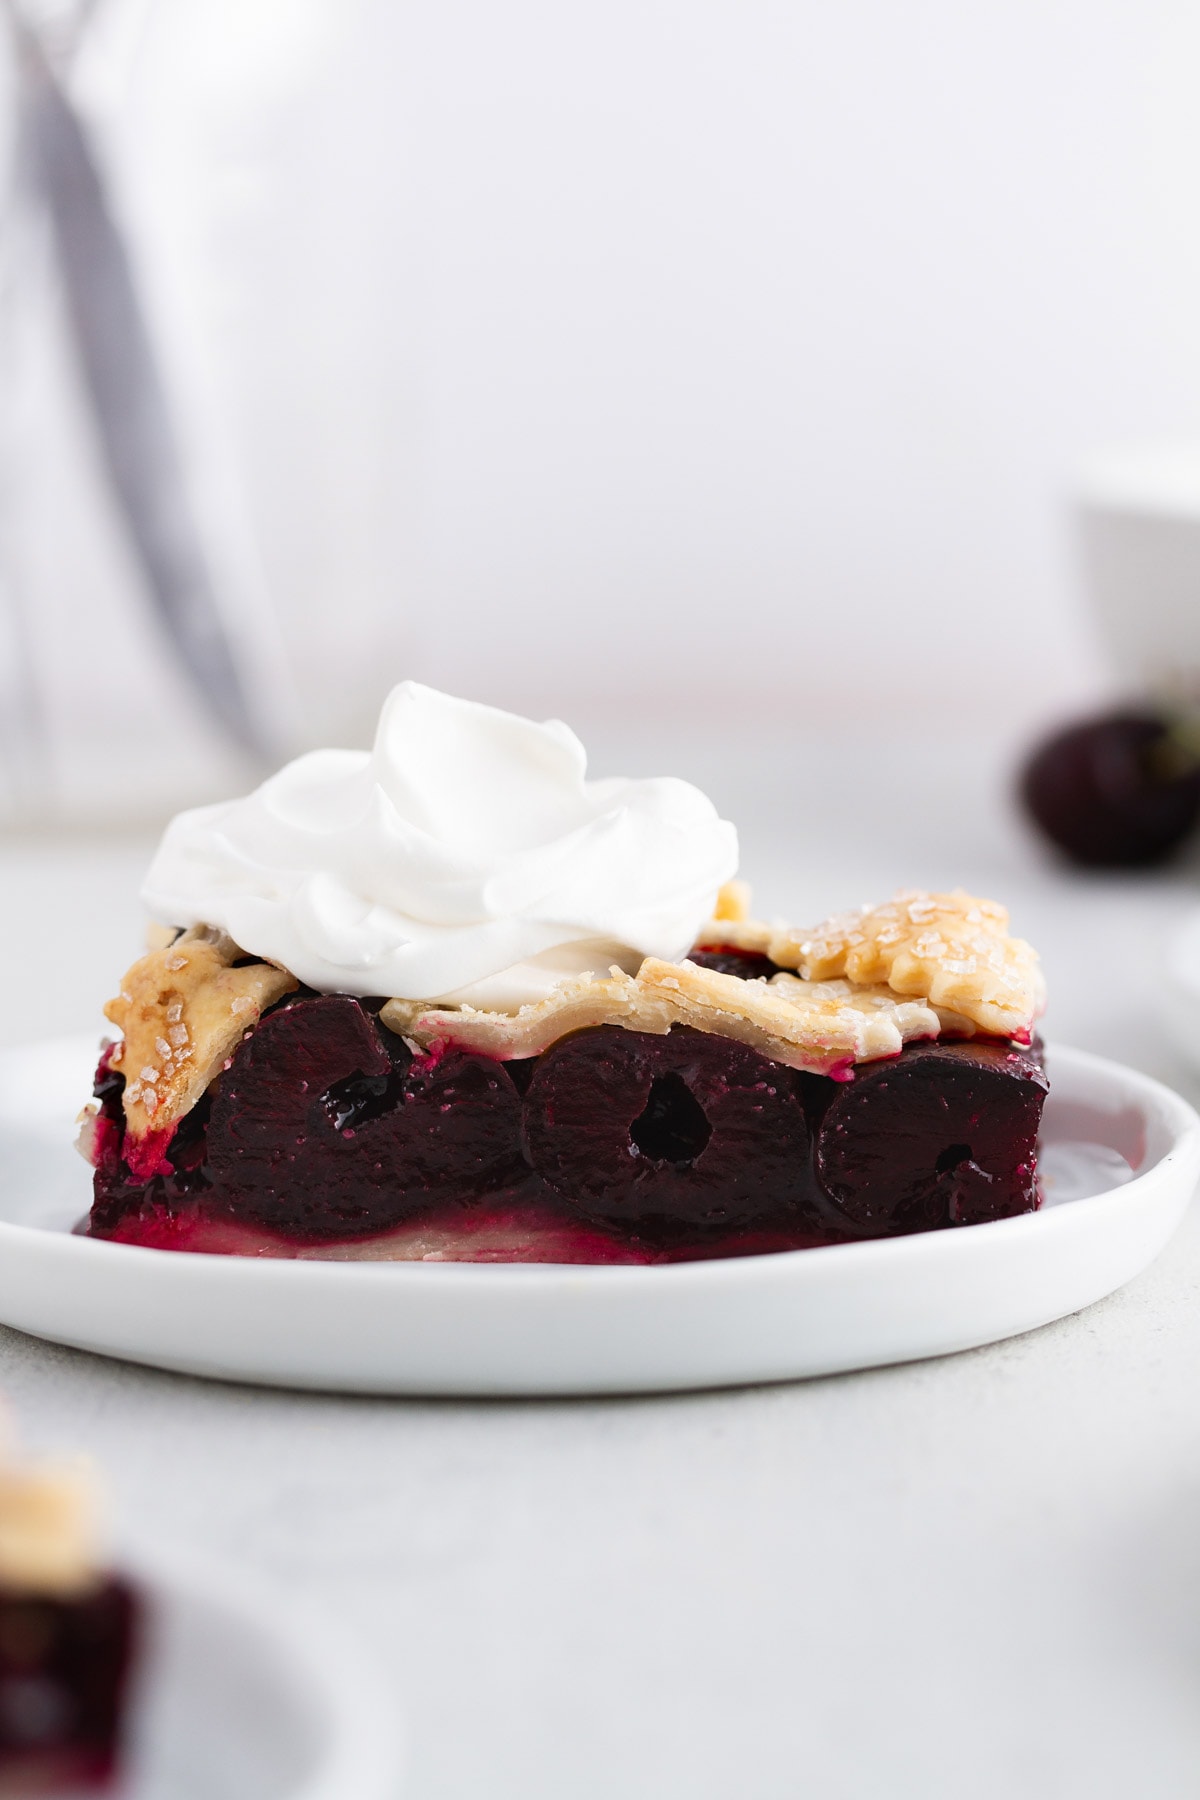
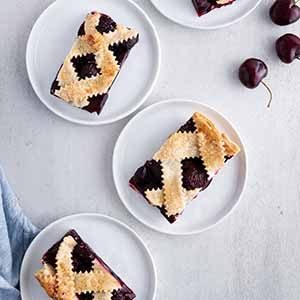
These easy cherry pie bars have a sweet-tart fresh cherry filling, buttery lattice pie crust and sparkling sugar topping. Add a dollop of whipped cream or vanilla ice cream for an irresistible dessert! Make them for July 4th, Christmas, Thanksgiving, or a Summer BBQ! They are easy, sliceable and perfect for sharing!


A Quick Look At The Recipe
This is a brief summary of the recipe. Jump to the recipe to get the full details.
Prep Time
30 minutes
Cook Time
55 minutes
Total Time
1 hour 25 minutes
Servings
20 bars
Difficulty
Moderate
Calories *
236 kcal per serving
Technique
Roll pie dough, line pan, mix filling add to pan, lattice top and bake.
Flavor Profile
Crisp buttery pie crust with a sweet-tart cherry filling.
* Based on nutrition panel
I made this yesterday and it worked beautifully! I made it with frozen cherries and made sure to drain them while they thawed, and then put them into the pie with a slotted spoon to eliminate any extra juice (of which there was a lot!). But it got rave reviews and worked wonderfully. So a few extra steps to ensure not too much liquid, but frozen cherries worked too! Thank you!⭐⭐⭐⭐⭐
Melissa
Cherry Pie Bars
Can we talk about how it’s JULY ALREADY. You’ve probably already thought this yourself or heard others discussing it, but I have to say it’s insane. Here in Minnesota, summer has only really just started peeking its sunshine-y head out from the clouds, so we are just now beginning to complain about how our legs are sticking to our shorts and how our frizzy hair can no longer be tamed and how our farmer’s tans are getting more farmer’s tan-like and before we know it, it will be winter and we’ll have even more to complain about. That’s just how we do.
But I’m getting way ahead of myself, because today we’re not here to talk about the weather. Instead, we’re here to talk about something much more exciting and that is Cherry Pie Bars, aka, your new favorite way to eat pie. This is a fun and easy twist on the classic American dessert that is guaranteed to be the fan favorite at all your Fourth of July gatherings and beyond.
Testing This Cherry Pie Bars Recipe
I’ll admit it: It took me three tries to get these bars right. The first go, I tried to blind bake the bottom pie crust to see if it was a) necessary and b) effective. The short answer is no, it is neither. So, I pressed on. During the second round, I was worried that adding too many cherries or too much sugar would make for a runny filling, which isn’t a huge deal when you’re making a regular pie but in wanting to make cherry pie bars, I wanted a filling that could hold up to its name and form. Unfortunately, I went too far in the opposite direction and there were gaps in the bars where no cherry filling existed and the filling was dry and not sweet enough. But I didn’t give up.
On the third try, I bumped up the amount of filling (and sugar) and baked everything together (without a blind bake) and by Jove, it WORKED. And here we are.
If you love these bars, you will also adore this Homemade Cherry Pie and my apple pie bars!
How to Make Cherry Pie Bars
To conclude my saga, here’s how to make cherry pie bars:
1. Roll out two pie crusts (try my easy pie crust recipe for a foolproof homemade option) to a large rectangle, then place said rectangle into a jelly roll pan — aka, a 15x10x1-inch pan, which I found to be the best size for the number of servings I wanted the recipe to yield.
2. Top with a filling of fresh sweet cherries, sugar (to break down and sweeten the filling), cornstarch (to stabilize), lemon juice and zest (for acid and brightness) and vanilla (for flavor).
3. Prepare a lattice crust (which I explain how to make in the recipe below, but for visual cues, I suggest following Chef Lindsey’s tutorial on how to lattice pie crust, which shows you how to do it for a round pie but it’s the same gist for a rectangular pie/pie bars).
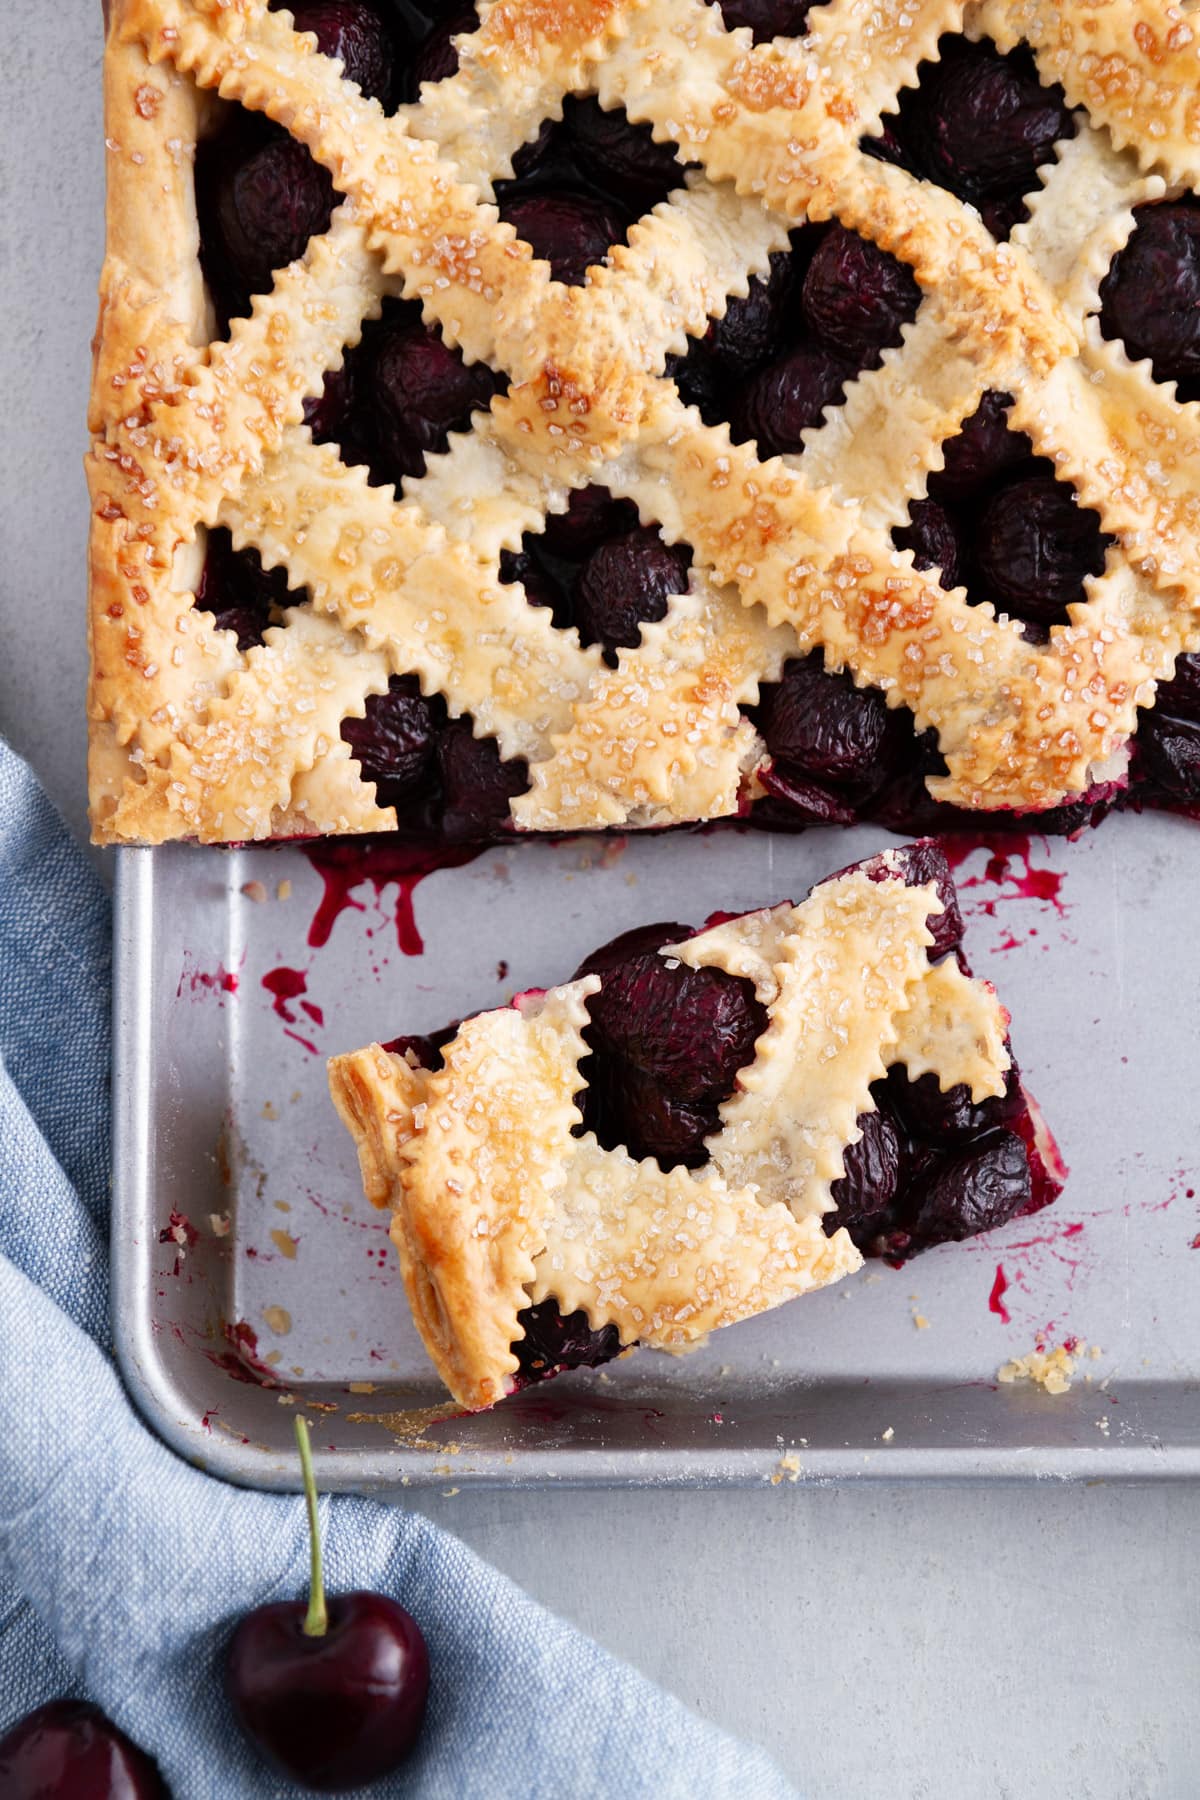
4. Top with egg wash and sparkling sugar, and bake. Once it’s done, let it cool completely before slicing — this ensures you get those nice, clean cuts.
Tips for the Best Cherry Pie Bars
These pie bars are a true showstopper and they make for the perfect summer dessert, but there are a few tips I need to share with you for full baking achievement:
1. You don’t need to use homemade pie crust here. In fact, because you’ll be spending some time pitting cherries, my advice is to skip the homemade pie crust and use one from the store. Baker’s blasphemy, you say! I say look, it’s summer, and we don’t want to spend half of our sunny days making a pie crust if we don’t need to. That being said, I know there are some die-hard homemade pie crust fans out there and for you, I recommend preparing a double batch of my go-to all-butter pie crust, the recipe for which you can find in my post for Deep-Dish Cinnamon Swirl Pumpkin Pie.
2. I really love the way a lattice top looks when the strips are cut with a pastry wheel, but don’t fret if you don’t have one or don’t want to buy one. A pizza cutter or a sharp knife does the trick, as well.
3. If you can find fresh sweet cherries at the grocery store, I highly recommend using them for this recipe! And while yes, pitting 3 1/2 pounds of cherries is kind of a pain, it is worth it (and even less of a pain if you have a cherry pitter). If you can’t find fresh cherries or don’t have a cherry pitter, you certainly can use frozen (thawed) cherries in this recipe — though I can’t speak to their success in relation to fresh cherries in this recipe, as I’ve only tested it with fresh cherries.
4. You might be looking at this pie and thinking to yourself, “This is basically a cherry slab pie,” and hey, you’re right! It basically is. So feel free to serve it as such with more square-like pieces, if that’s your jam. Just always remember the fresh whipped topping — it’s optional, but by optional I really mean DO IT.
I hope you love these bars as much as I do — they were well worth the efforts to get them here to share with you today. And on that note, I’m going to reward myself for all my hard work with another slice or three.
You May Also Like
- Oreo Ice Cream Cake
- Donut Cake
- Chocolate Pound Cake
- Funfetti Cupcakes with Cream Cheese Frosting
- Strawberry Shortcake Cupcakes
Cherry Pie Bars
Ingredients
- 4 pie crusts, 14.1 oz each, or 2x homemade pie crust
- 3 ½ pounds fresh sweet cherries, pitted
- ½ cup granulated sugar
- ¼ cup cornstarch
- 1 ½ teaspoons lemon zest
- 2 tablespoons fresh lemon juice
- 1 ½ teaspoons vanilla
Egg wash & topping:
- 1 egg
- 2 tablespoons milk
- sparkling sugar, for topping
- whipped cream , or whipped topping, thawed
Instructions
- Heat oven to 425°F. On a lightly floured surface, stack two pie crusts on top of each other. Using a rolling pin, roll out crusts into one large rectangle, approximately 13×18 inches. Transfer to a 15x10x1-inch jelly roll sheet pan; press into bottom and sides.
- Meanwhile, add cherries to a large bowl. In a separate small bowl, whisk sugar and cornstarch until combined. Add to cherries along with lemon zest, lemon juice and vanilla. Stir to combine.
- On a lightly floured surface, stack and roll remaining two pie crusts to a 13×18-inch rectangle. Using a pastry wheel, pizza cutter or sharp knife, cut dough lengthwise into 3/4-inch strips.
- Arrange half of strips diagonally on top of pie approximately 1 inch apart. Fold back every other strip to a little past center. Place another long strip of dough perpendicular to other strips on top of pie, meeting right at the end of the folded strips in the center of the pie. Fold over the strips on top of the perpendicular strip; then, fold back alternating strips of dough in the same fashion as before.
- Lay another dough strip perpendicular as before, then fold strips back over. Repeat this process across top of pie until entire top of pie is covered in a lattice design (you may have a few pieces of pie crust left over).
- Gently press edges of crust together to seal. Use scissors or a knife to trim pie crust edges.
- In a small bowl, whisk egg and milk to make an egg wash. Gently brush egg wash over pie dough. Sprinkle with sparkling sugar.
- Bake pie 50-60 minutes, rotating halfway through and covering pie crust edges with foil if getting too brown, until filling is broken down and starting to bubble and pie crust is golden. Cool completely on a cooling rack before slicing, about 1 hour.
- Use a sharp serrated knife to slice pie into bars. Serve with whipped cream, if desired.
Notes
- Store bars covered at room temperature up to 3 days.
- If using frozen cherries, let cherries thaw to room temperature before using.
Nutrition
Nutrition information is automatically calculated, so should only be used as an approximation.
 Like this recipe? Rate & comment below!


This cherry pie bar is perfect for all occasions. I made it for dinner and everyone loved it. I served it with vanilla ice cream, warmed. I love that the filling holds it shape once cut.
If I don’t want to do the lattice crust on top, would I just repeat the bottom crust directions for the top crust? Thank you!
Janet, I would cut a few slits in the top crust and then bake as directed.
I made this yesterday and it worked beautifully! I made it with frozen cherries and made sure to drain them while they thawed, and then put them into the pie with a slotted spoon to eliminate any extra juice (of which there was a lot!). But it got rave reviews and worked wonderfully. So a few extra steps to ensure not too much liquid, but frozen cherries worked too! Thank you!
Melissa, that’s so great to hear. Thank you so much and so glad you enjoyed! 🙂