ciabatta bread
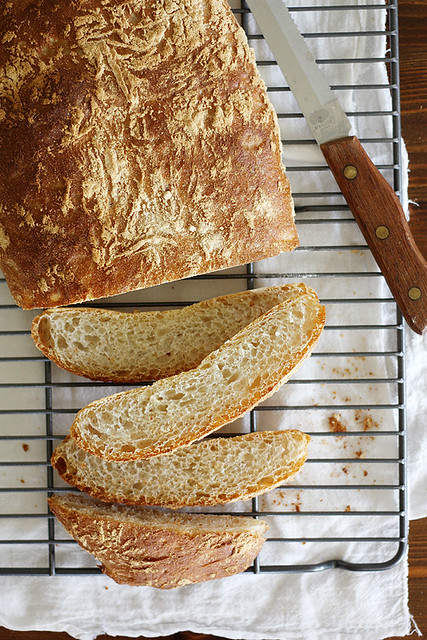
I’m going back to my roots and it tastes delicious.
I realize that I haven’t baked a legit bread in what seems like forever (said like Squints in “Sandlot,” ALWAYS). And considering that this blog is foundationally about bread, I felt I was doing you all a disservice. So, here we are.
I’ve had ciabatta on the docket for what feels like a bazillion years, but I just never got around to it. I couldn’t even tell you why — especially after taking one bite of it and realizing this may be one of the best breads I’ve ever baked. Of course, that led to me kicking myself for not making it sooner, but I suppose it was because I was too busy dunking my face in prosecco-poached peaches and queso fundido — which, I feel, is a pretty good excuse.
That said, I’m so glad I finally hopped on the ciabatta bandwagon. There is so much yum going on in this loaf, I can’t even deal. And by yum, I mean a mega-crusty crust and chewy interior studded with air pockets. And by deal, I mean restrain myself from eating almost the whole thing in a day. And by almost, I mean I would have eaten the whole thing if my husband wasn’t around to help me devour it. What can I say? I’ve always been a girl who loves her bread.
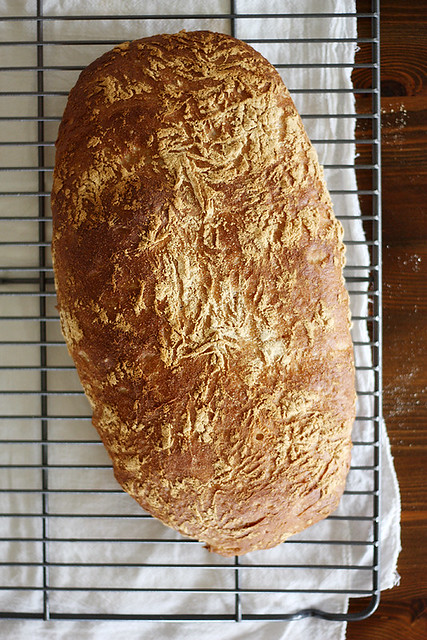
Of course, this loaf didn’t come without its own set of challenges adventures. I set off the smoke detector in our apartment — twice — from all the steam coming out of the oven. I nearly burned myself pulling the cast-iron skillet from the immensely hot oven post-baking. There was flour everywhere, and the plastic wrap I lovingly laid atop the rising loaf nearly stuck to the entire thing and ruined it. I confess it’s not always sunshine and roses in this kitchen of mine. But the end result was worth the chaos, as it most often is when it comes to homemade bread.
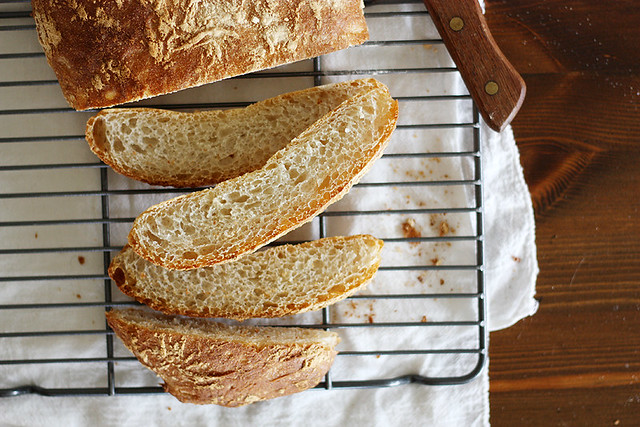
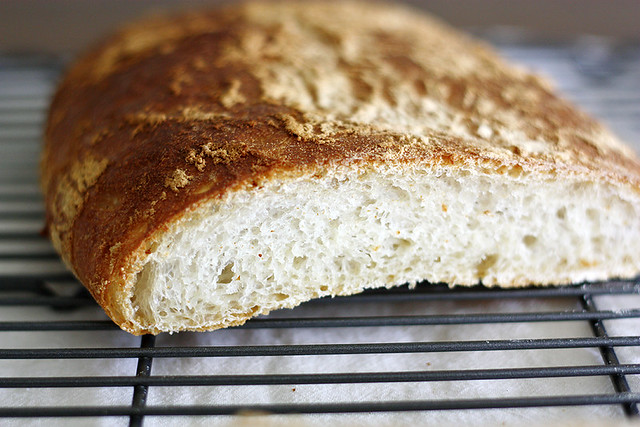
Ciabatta
Adapted oh-so-slightly from The Bread Bible
Yields: 1 loaf
Ingredients:
For the biga (dough starter) —
1/2 cup plus 1 1/2 teaspoons unbleached all-purpose flour
1/16 teaspoon instant yeast (OR 1/12 teaspoon active dry yeast)
1/4 cup room temperature water
For the dough —
1 cup unbleached all-purpose flour
1/4 teaspoon instant yeast (or one domed 1/4 teaspoon active dry yeast)
1/2 teaspoon salt
1/2 cup water
Biga (from above)
Directions:
Make the biga: In a small bowl, using a wooden spoon, stir together the ingredients until a smooth, cohesive dough forms, about 3 minutes. Cover tightly with lightly oiled plastic wrap and let rise in a warm, draft-free place until tripled in size and bubbly, about 6-8 hours (you can leave it sitting out for up to 12 hours). Stir it down, then cover it and place it in the refrigerator for up to 3 days.
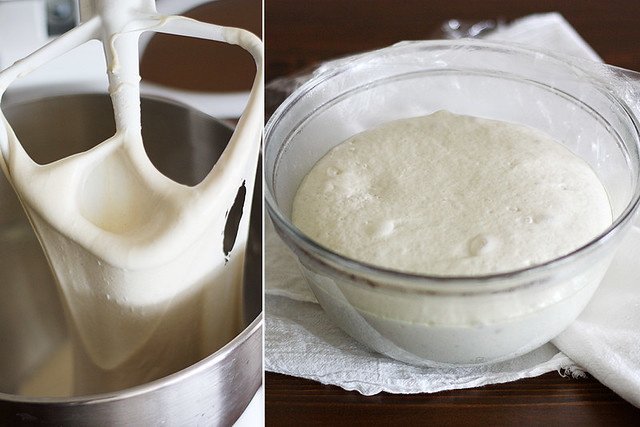
Remove the biga from the refrigerator about 1 hour before you mix together the dough. In the bowl of a stand mixer, whisk together flour and yeast. Whisk in the salt. Add water and biga. Using paddle attachment, mix everything together on low speed (#2 on the stand mixer) just until the flour is moistened; then, increase speed to medium-high (#6 on the stand mixer) and beat 3 minutes until dough pulls away from the sides of the bowl. Decrease speed to medium (#4 on the stand mixer) and beat another 2 minutes. The dough should be fairly wet but hold together in one long strand when you pull it with the paddle attachment).
Using an oiled spatula, transfer the dough to a large, lightly oiled bowl. Cover with lightly oiled plastic wrap and let rise in a warm, draft-free place until tripled, about 1 1/2 to 2 hours.
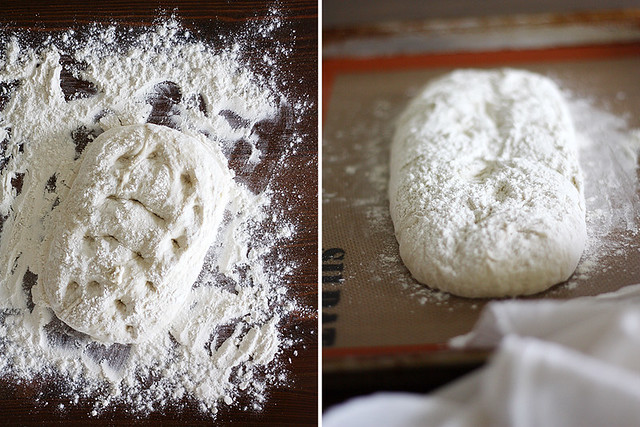
When dough is risen, generously sprinkle a countertop with flour. Using an oiled spatula, transfer the dough to the floured surface; sprinkle top with flour. Use your palms to pat the sides of the dough inward to push it together slightly. Using four of your fingertips, make deep dimples in the top of the dough about 1 inch apart. Push the sides together again slightly.
Carefully transfer and invert the dough onto a parchment paper or Silpat-lined baking sheet. Use your palms again to shape the dough so that it is approximately 4 1/2 inches wide, 10 to 11 inches long and 1 inch tall. Sprinkle top with more flour, then cover lightly with plastic wrap or a tea towel and let rise in a warm, draft-free place until about 1 1/2 inches tall, about 1 1/2 to 2 hours.
About 30 minutes before baking, prep oven: Place an oven rack on the lowest level and another one just above it. Place a cast-iron skillet on the lower rack and a baking sheet on the upper rack. Heat oven to 475 degrees F.
When dough is risen, remove plastic wrap or tea towel and gently place the baking sheet on top of the sheet in the oven. Pour 1/2 cup ice cubes into the cast-iron skillet and close the door quickly. Bake loaf at 475 degrees F for 5 minutes, then decrease oven temperature to 450 degrees F and bake another 20 minutes, or until loaf is a deep golden brown. When loaf is done, turn off oven and prop door open slightly, leaving the loaf in the oven for 5 more minutes.
Remove the loaf from the oven and transfer to a cooling rack to cool completely before slicing.
Disclosure: This post contains one affiliate link.

Ciabatta bread is on of my very favorites! This looks like you nailed it! I cant wait to try it!
You’re such a pro – this bread looks perfect! It definitly has a mega crust which is just the way I like it!
Baking bread like a boss… That looks uh-mazing!!
Ciabatta is my go to bread to BUY…it scares me a little to bake, but your instructions here are perfect! I need to try this!
Yay! a bread post! I miss your breads, they are always so perfect. Wonderful crumb by the way.
Tieghan — Oh thank you, dear! It’s one of my faves, too!
Julia — Oh yes, mega crust indeed! 🙂 Thanks love!
Erika — Ha! Well thank you, lady! 🙂
Katrina — You totally need to give the homemade version a go at least once… it’s so worth it! You can do it 🙂
Belinda — Aw thank you 🙂 And yes, the crust was MAJOR — definitely my favorite part.
Ciabatta bread is one of my faves! I need to try this out.
I have always wanted to make ciabatta because it’s my FAVORITE, but haven’t tried yet. Yours looks perfect! You have me inspired! Once school is out for the summer, this is happening!
Perfection! You would have to restrain me from eating the whole thing!
Gorg! I adore Ciabatta bread. And fo’ reals, teach me your baking ways!!! #blackyeastthumb
This loaf looks as if its worth all the kitchen disasters in the world!