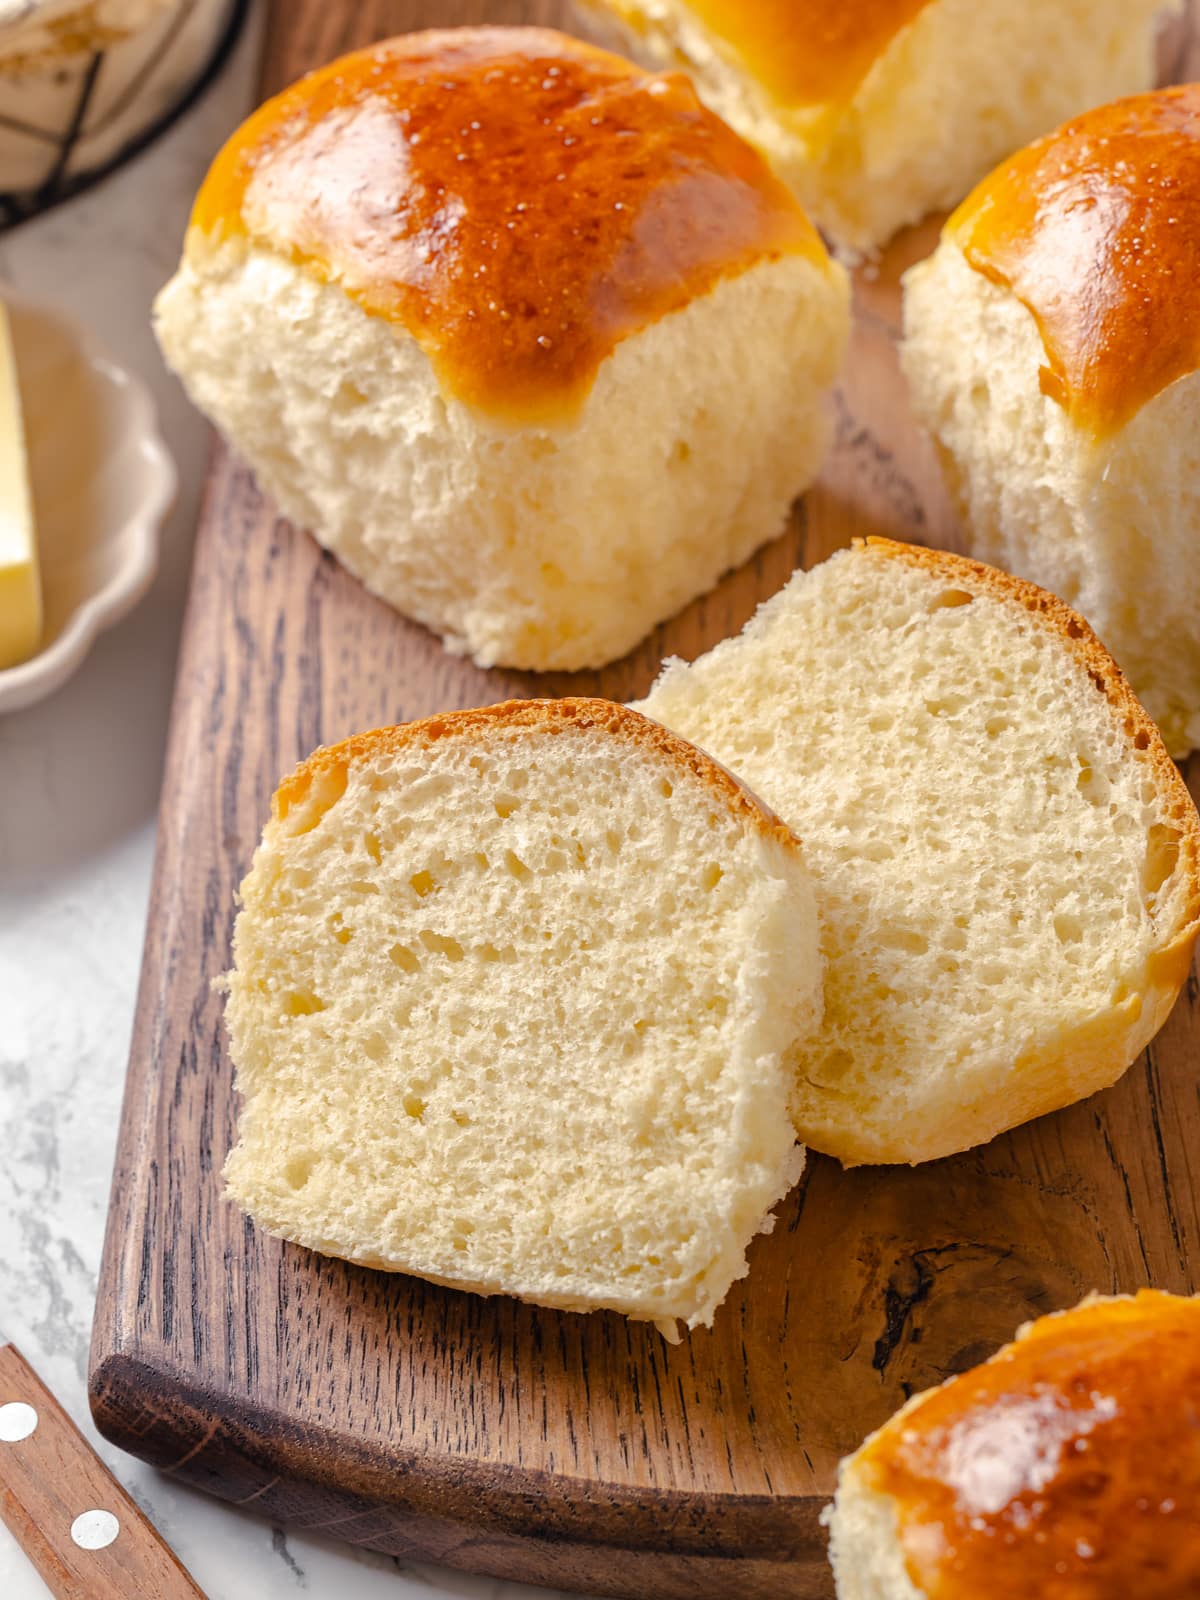
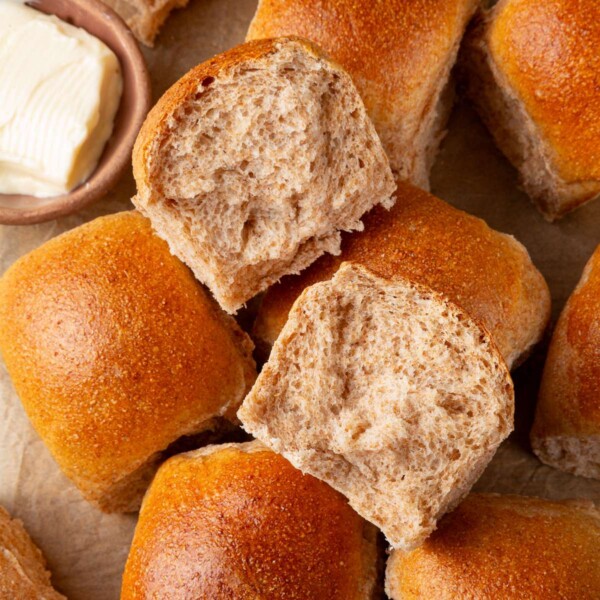
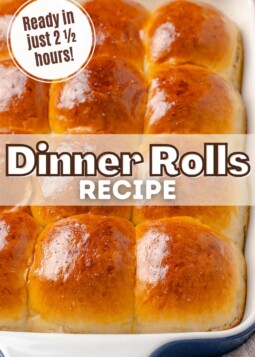
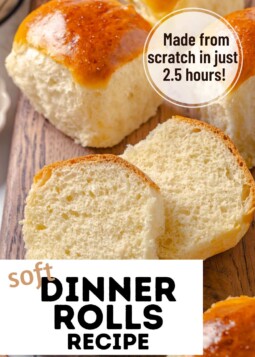
Soft, pillowy dinner rolls recipe that are tender enough to pull apart with your fingers! Perfect for holiday meals, weeknight dinners, or whenever you need fluffy homemade rolls in just 2 ½ hours!

A Quick Look At The Recipe
This is a brief summary of the recipe. Jump to the recipe to get the full details.
Prep Time
30 minutes
Proof
2 hours
Total Time
2 hours 30 minutes
Servings
12 rolls
Difficulty
Intermediate, with enriched dough handling and two proofing stages.
Calories *
232 kcal per serving
Technique
Mix and knead an enriched yeast dough, proof twice, shape into rolls, and bake until golden and fluffy.
Flavor Profile
Soft, fluffy dinner rolls with a lightly sweet, buttery crumb and golden egg-washed tops.
* Based on nutrition panel
I made these because I offered to bring bread to a Sunday dinner and didn’t want to show up with something forgettable. Letting the dough fully proof the second time made them actually fluffy instead of dense. They were still warm when we ate, and people pulled them apart straight from the pan — really grateful for this recipe. ⭐⭐⭐⭐⭐
Lauren
Why You Will Love This Recipe
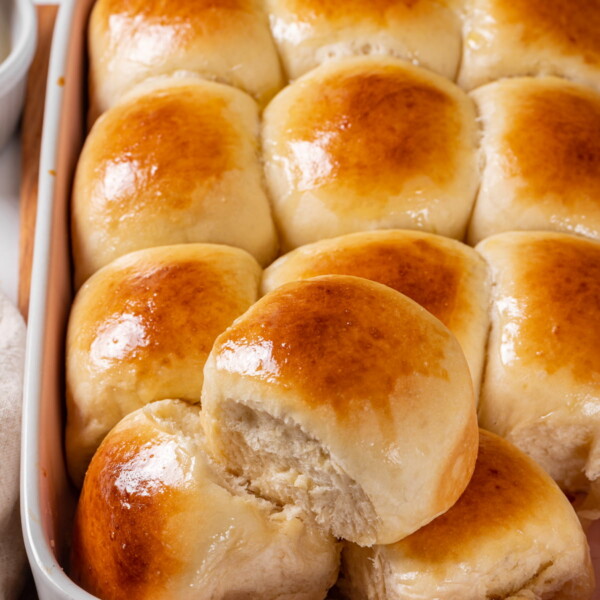
- Tender, fluffy texture that almost melts in your mouth. The combination of ingredients and all-purpose flour creates dinner rolls with an impossibly soft crumb. They practically pull themselves apart!
- Ready in just 2 ½ hours from start to finish. Unlike some yeast bread recipes that require all-day commitment, these dinner rolls come together quickly enough for a weeknight dinner but taste special enough for your holiday table.
- The dough is incredibly easy to work with. This is a forgiving recipe that’s perfect for beginner bakers! The dough is soft and supple without being sticky, making shaping a breeze. If you’ve mastered no knead dutch oven bread, you’re ready for these rolls.
- Created by a professional pastry chef for foolproof results. Every aspect of this recipe has been carefully calibrated — from the flour ratio to the proof times — to ensure bakery-quality rolls every single time.
Table of Contents
There’s something magical about fresh homemade dinner rolls especially when they can be made from scratch in a few hours! I developed this easy recipe from my beloved sourdough dinner rolls recipe! These classic yeast rolls have a tender, almost cloud-like texture that makes them irresistible.
Whether you’re serving them alongside slow cooker Italian meatballs, using them to soak up every last bit of sauce from sheet pan shakshuka, or building a bread-forward spread with snacks like my soft pretzel recipe or pretzel sticks recipe, these rolls are the perfect companion.
Ingredients & Substitutions
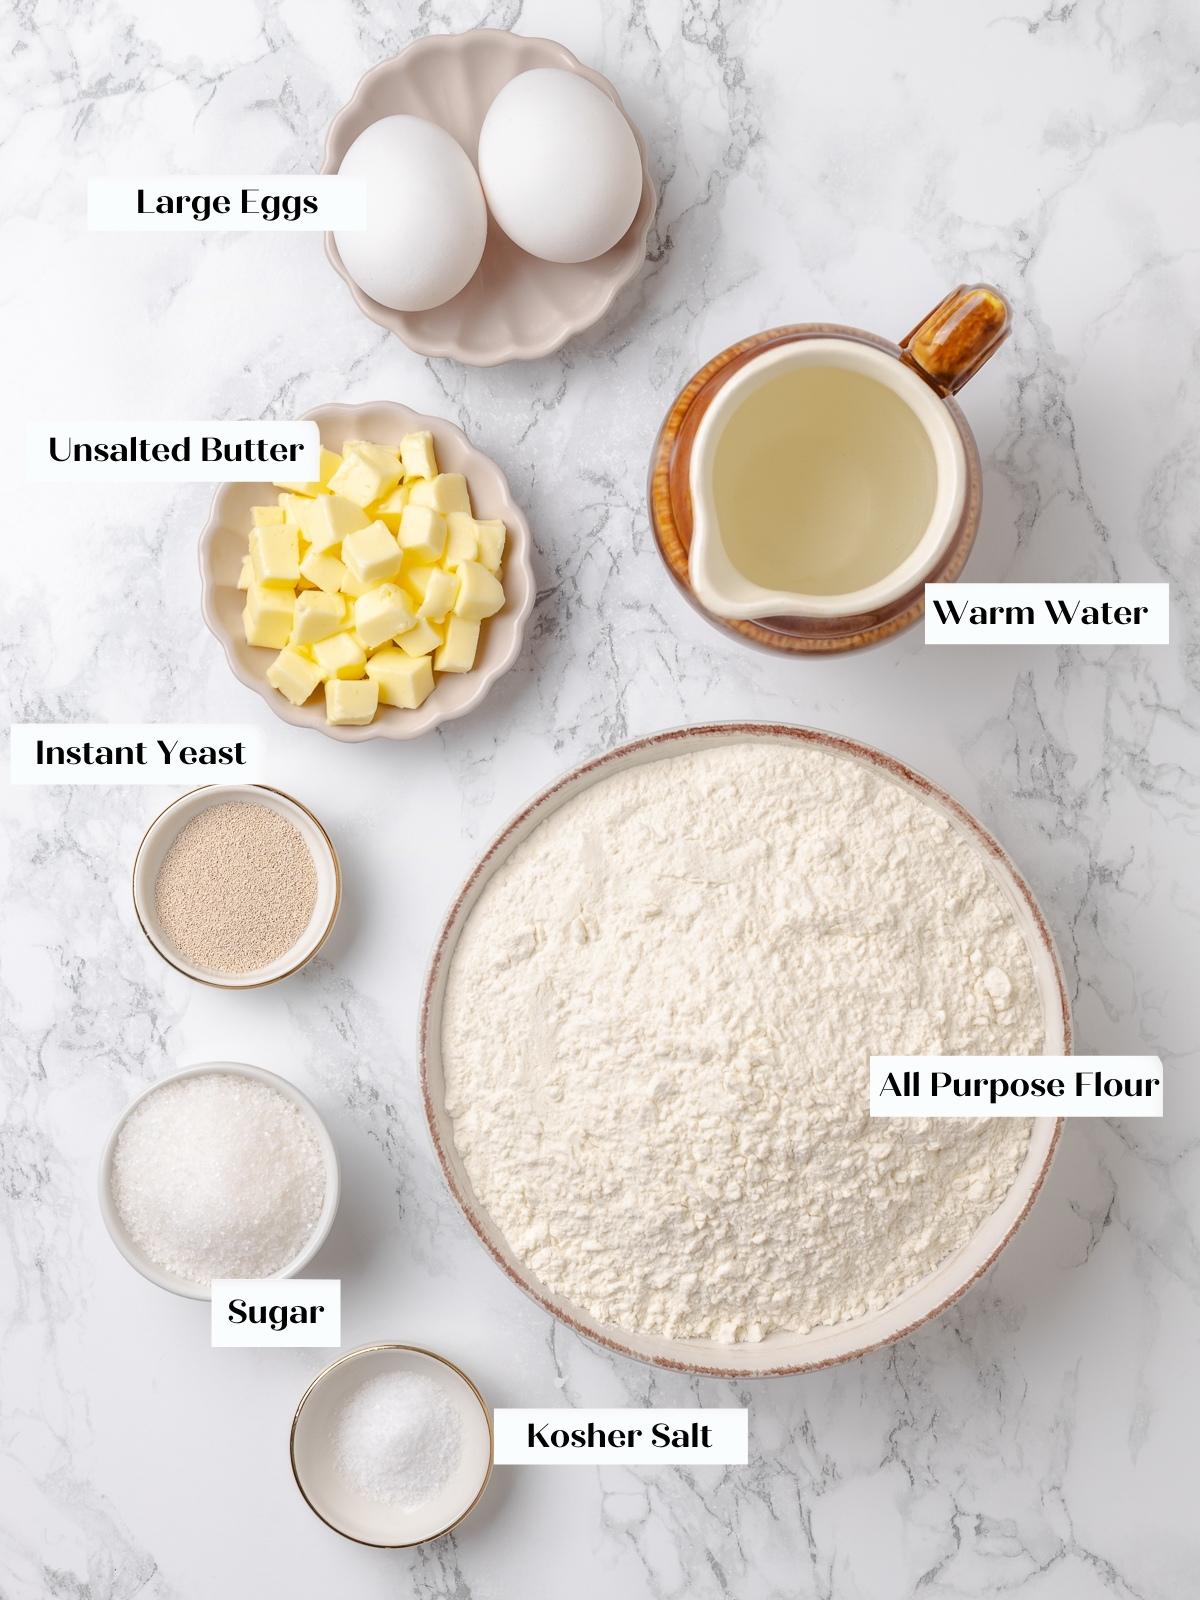
- All-Purpose Flour: The foundation of these rolls! All-purpose flour gives you the perfect balance of structure and tenderness. You could substitute bread flour for a slightly chewier roll, but I prefer the softer texture that all-purpose provides. If you’re looking for a whole grain option, try my oatmeal bread instead.
- Instant Yeast: This is my go-to for reliable, quick rise. Instant yeast can be mixed directly into the flour without blooming first. If you only have active dry yeast, you can use the same amount but mix it into the warm water with a pinch of sugar first, like I do in my rosemary bread.
- Warm Water: The water should be around 100-110°F, warm to the touch. Water that’s too hot will kill the yeast, while water that’s too cool will slow down the rise significantly. You can also use warm milk or buttermilk if desired or make this buttermilk bread into dinner rolls!
- Granulated Sugar: Just enough to feed the yeast and add a subtle sweetness that balances the butter. You could substitute honey for a richer flavor.
- Kosher Salt: Salt strengthens the gluten network and enhances flavor. Don’t skip it! If using table salt, use about ¾ teaspoon instead.
- Unsalted Butter: The butter is what makes these rolls so tender and rich. Make sure to use unsalted so you can control the salt level in the dough. Room temperature butter will incorporate more easily, though cold butter works fine, and is typically what I use.
- Eggs: One egg goes into the dough for richness and structure, while a second egg creates that beautiful glossy finish when brushed on top before baking.
See the recipe card for full information on ingredients and quantities.
Variations
- Make them herb rolls: Add 2 tablespoons of chopped fresh herbs like rosemary, thyme, or chives to the dough. You could even add herbs and garlic like my rosemary garlic bread or go all in like my cheesy garlic pull apart bread!
- Transform them into slider buns or larger rolls: These rolls are the perfect size for sliders! Shape them slightly flatter and use them for mini bacon turkey bravo sandwiches or pulled pork sliders. They are also the perfect size for my son’s lunchbox! You can also divide this dough into 9 like my milk bread recipe and bake it in a square baking dish for extra tall, fluffy rolls.
- Add cheese: Fold in ½ cup of shredded parmesan or cheddar cheese after the gluten has developed for cheesy dinner rolls that pair beautifully with soup—similar to the flavor profile in my cheddar biscuits recipe. Top them with a little extra cheese like my no knead cheese bread!
- Make them whole wheat: You can substitute up to half of the all-purpose flour with whole wheat flour in the recipe as written. My whole wheat dinner rolls uses 100% whole wheat like in my whole wheat bread. If you are a sourdough lover then you can’t miss these whole wheat sourdough rolls!
Professional Tips for Perfect Dinner Rolls
- The dough should be sticky but soft and easy to work with. When mixing, resist the urge to add more flour. The dough will look a bit shaggy at first but will come together beautifully as the mixer kneads it. If you’re mixing by hand like with peasant bread, expect to knead for 8-10 minutes.
- Shape the rolls quickly to prevent sticking. The key to smooth, round rolls is speed! Work with unfloured hands and use a pushing-pulling motion to create surface tension. Don’t overthink it — a few practice rolls and you’ll find your rhythm.
- Let the rolls rise until they’re tripled in size and feel light and airy. This is crucial! Underproofed rolls will be dense, while properly proofed rolls will have that signature fluffy texture. They should feel almost balloon-like when you gently press them with your finger.
- Brush with egg wash just before baking for that bakery-shine finish. Be gentle when applying the egg wash and don’t let it pool around the edges of the pan, as this can prevent the sides from browning properly.
How to Make this Dinner Rolls Recipe
Use these instructions to make the most tender, fluffy dinner rolls! Further details and measurements can be found in the recipe card below.
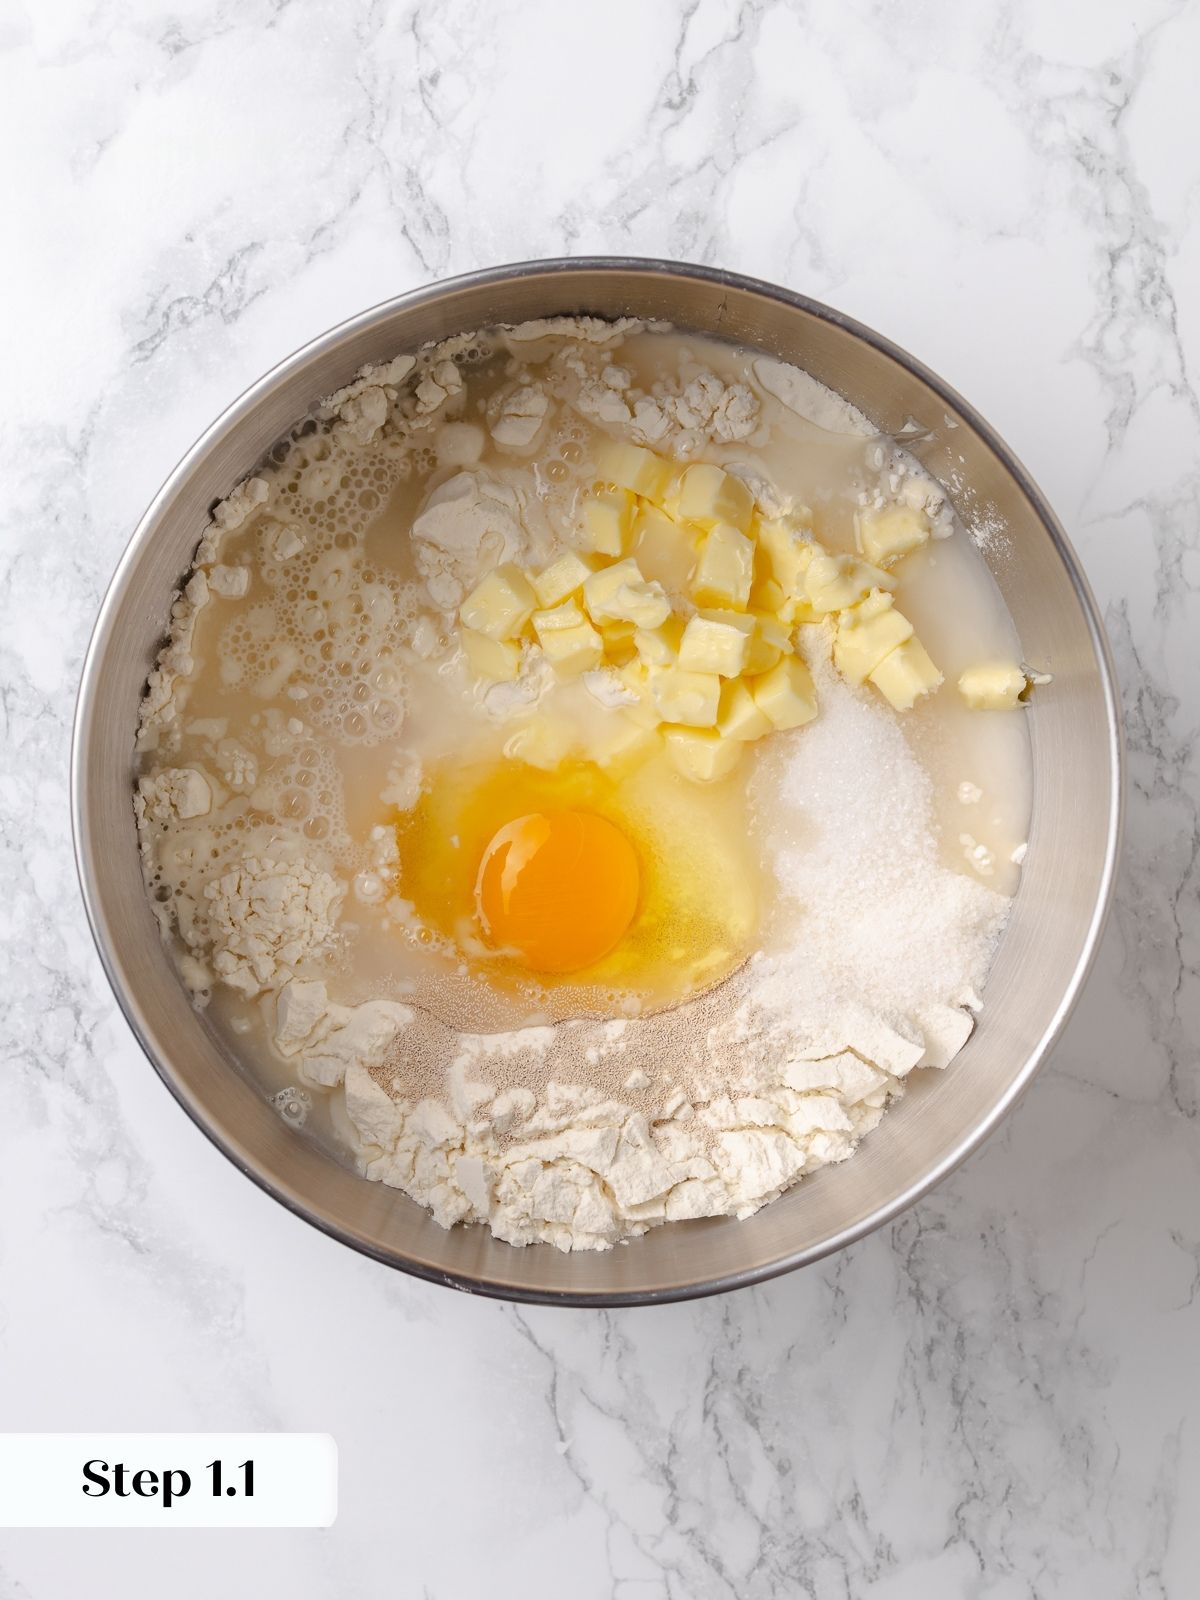

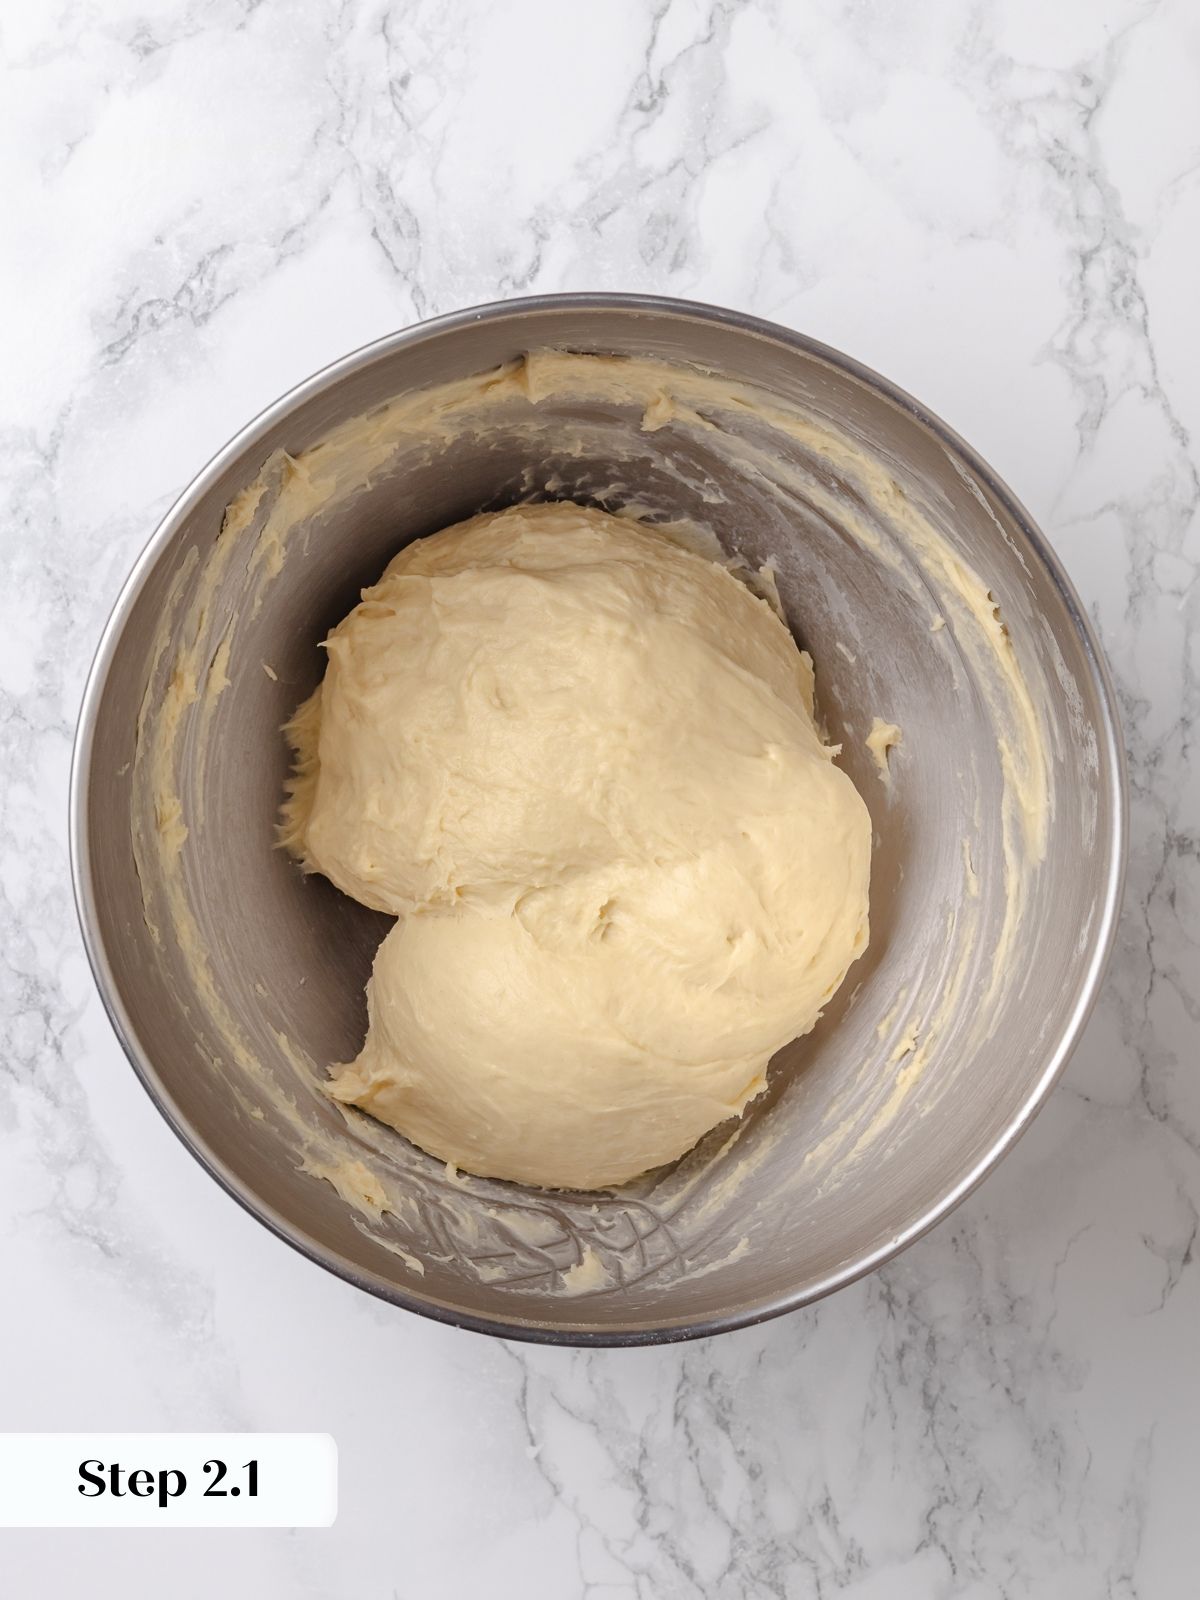
Step 1: Mix the dough. In the bowl of a stand mixer fitted with the dough hook attachment, combine flour, instant yeast, warm water, sugar, salt, cubed butter, and one egg. I like to add the flour first so all the other ingredients don’t get stuck to the bottom of the bowl (photos 1 & 2).
When I am doing the straight dough mixing method, adding everything at once, I like to put flour in the bowl first because I find it incorporates faster and easier without having yeast or other unincorporated ingredients on the bottom of the bowl.
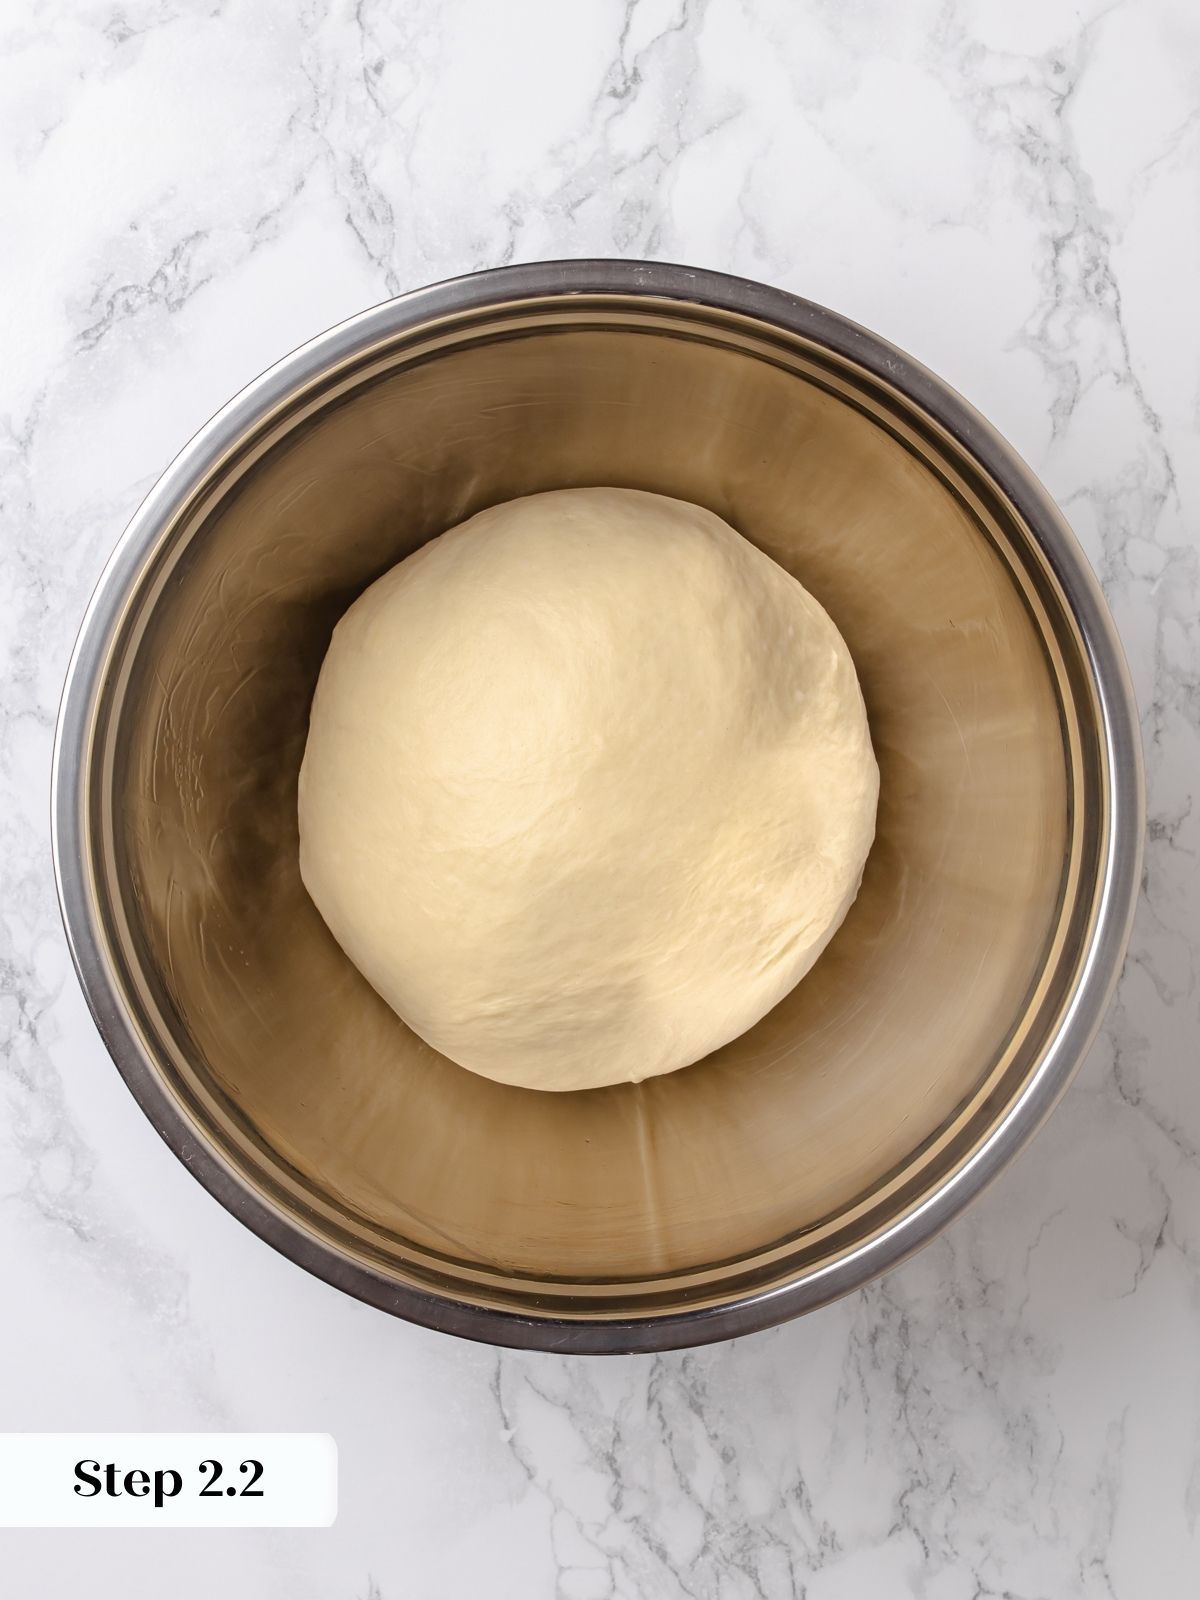
Step 2: Knead until smooth. Mix on low speed until everything is incorporated with just a few butter pieces remaining. Increase to medium speed and knead for 5-6 minutes until the dough pulls a smooth windowpane like challah bread. This enriched dough is sticky but wonderfully soft to work with (photos 3 & 4).
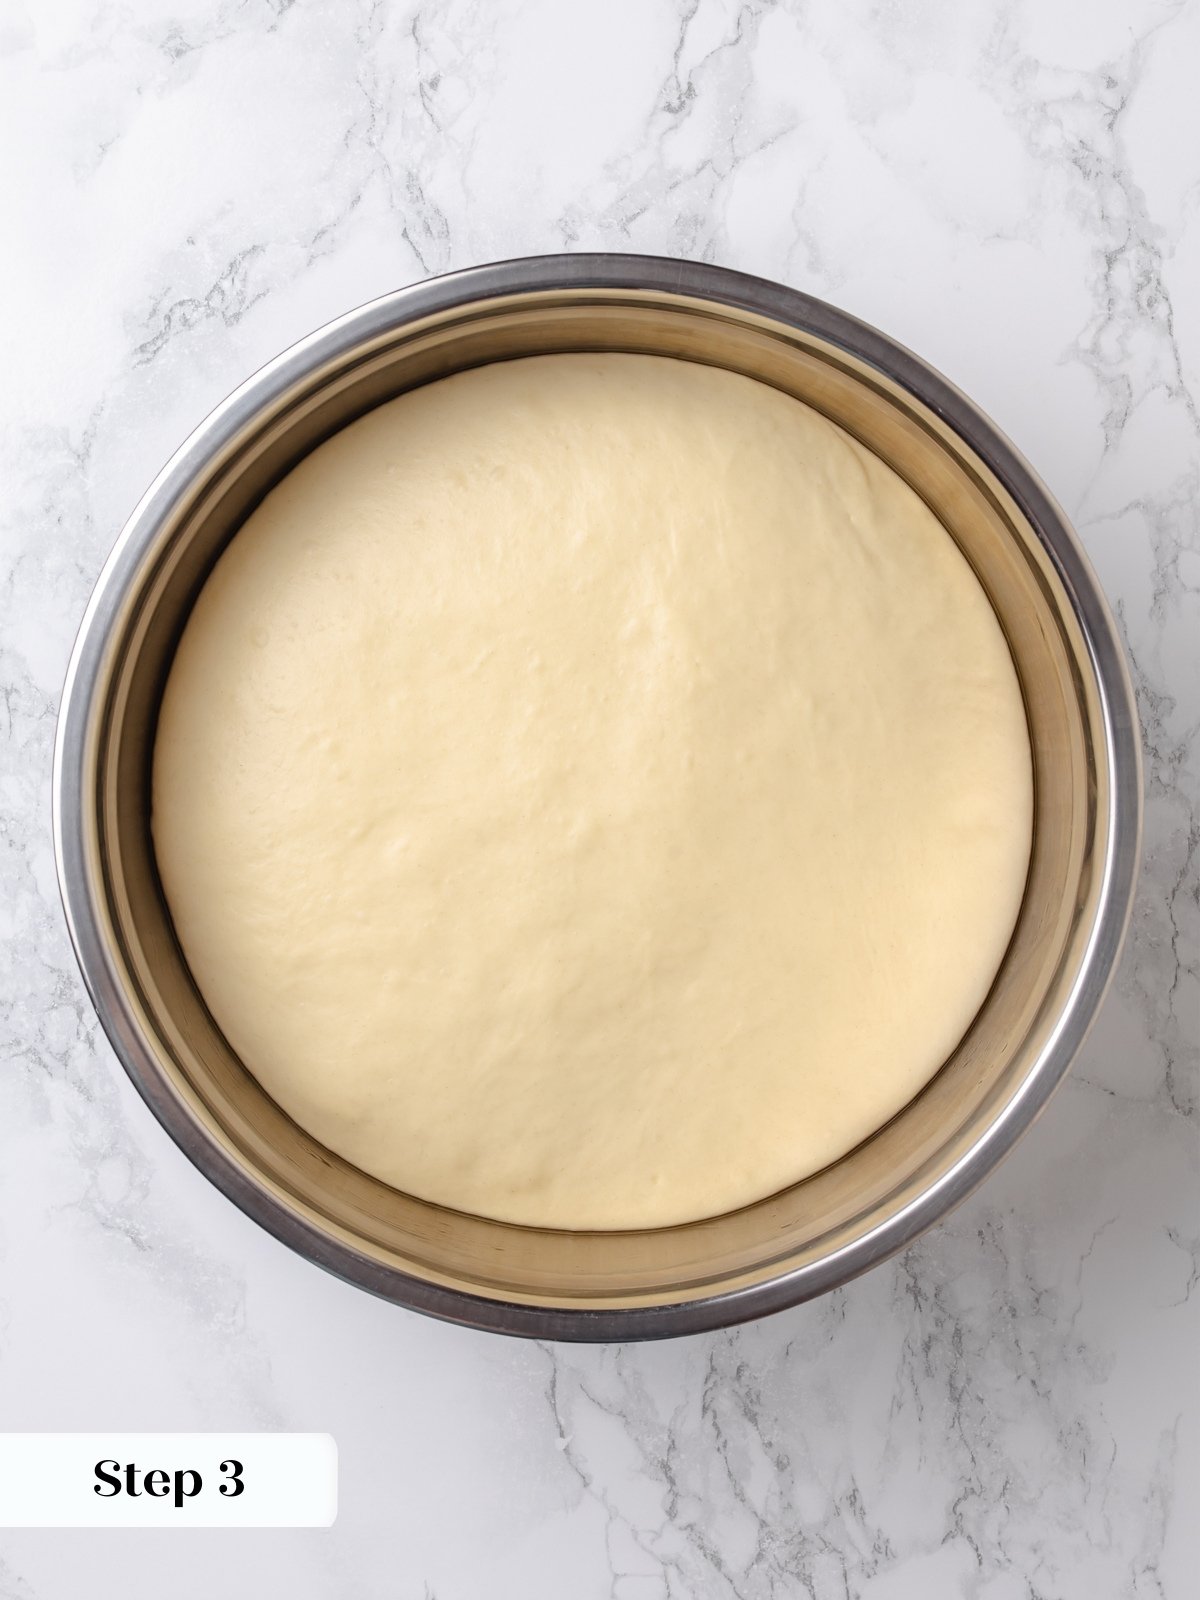

Step 3: First proof. Scrape the dough ball into a large bowl that’s been sprayed with non-stick cooking spray or lightly coated with neutral oil. Cover and let it rise in a warm spot for 45 minutes to 1 hour, until it’s visibly doubled in size and feels airy when touched (photo 5).
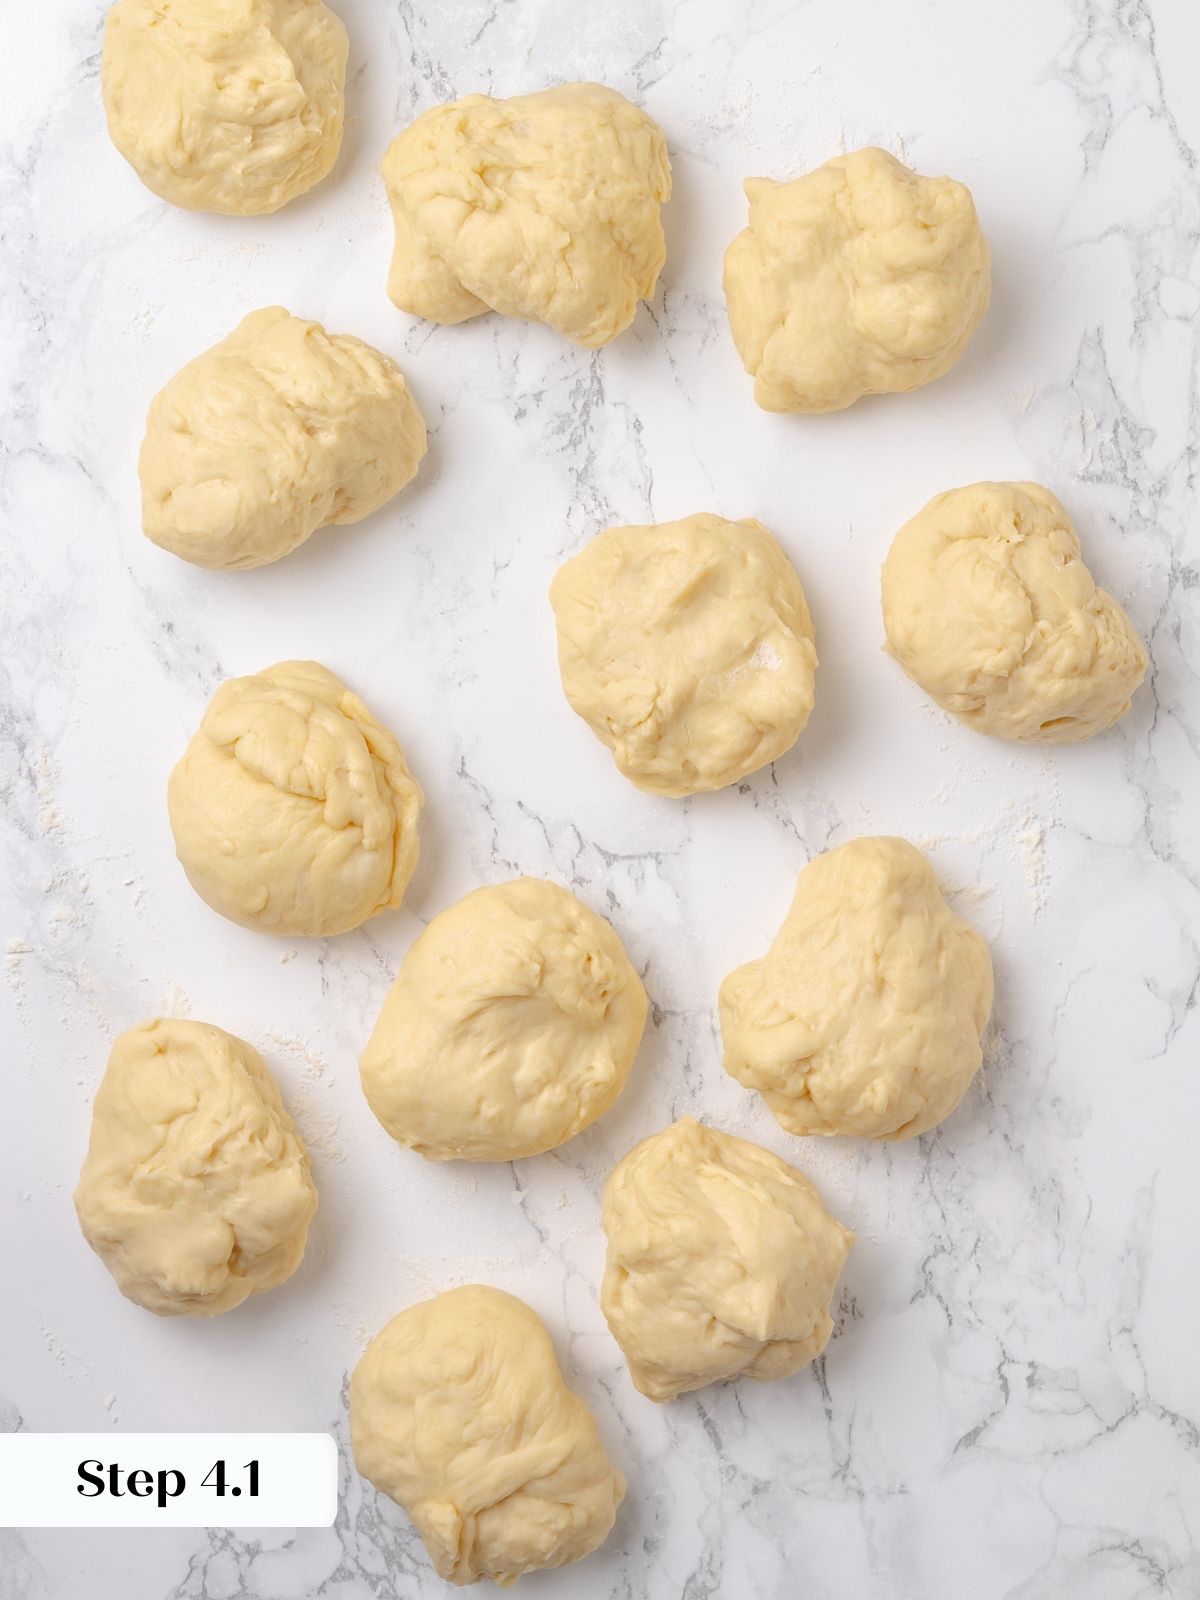
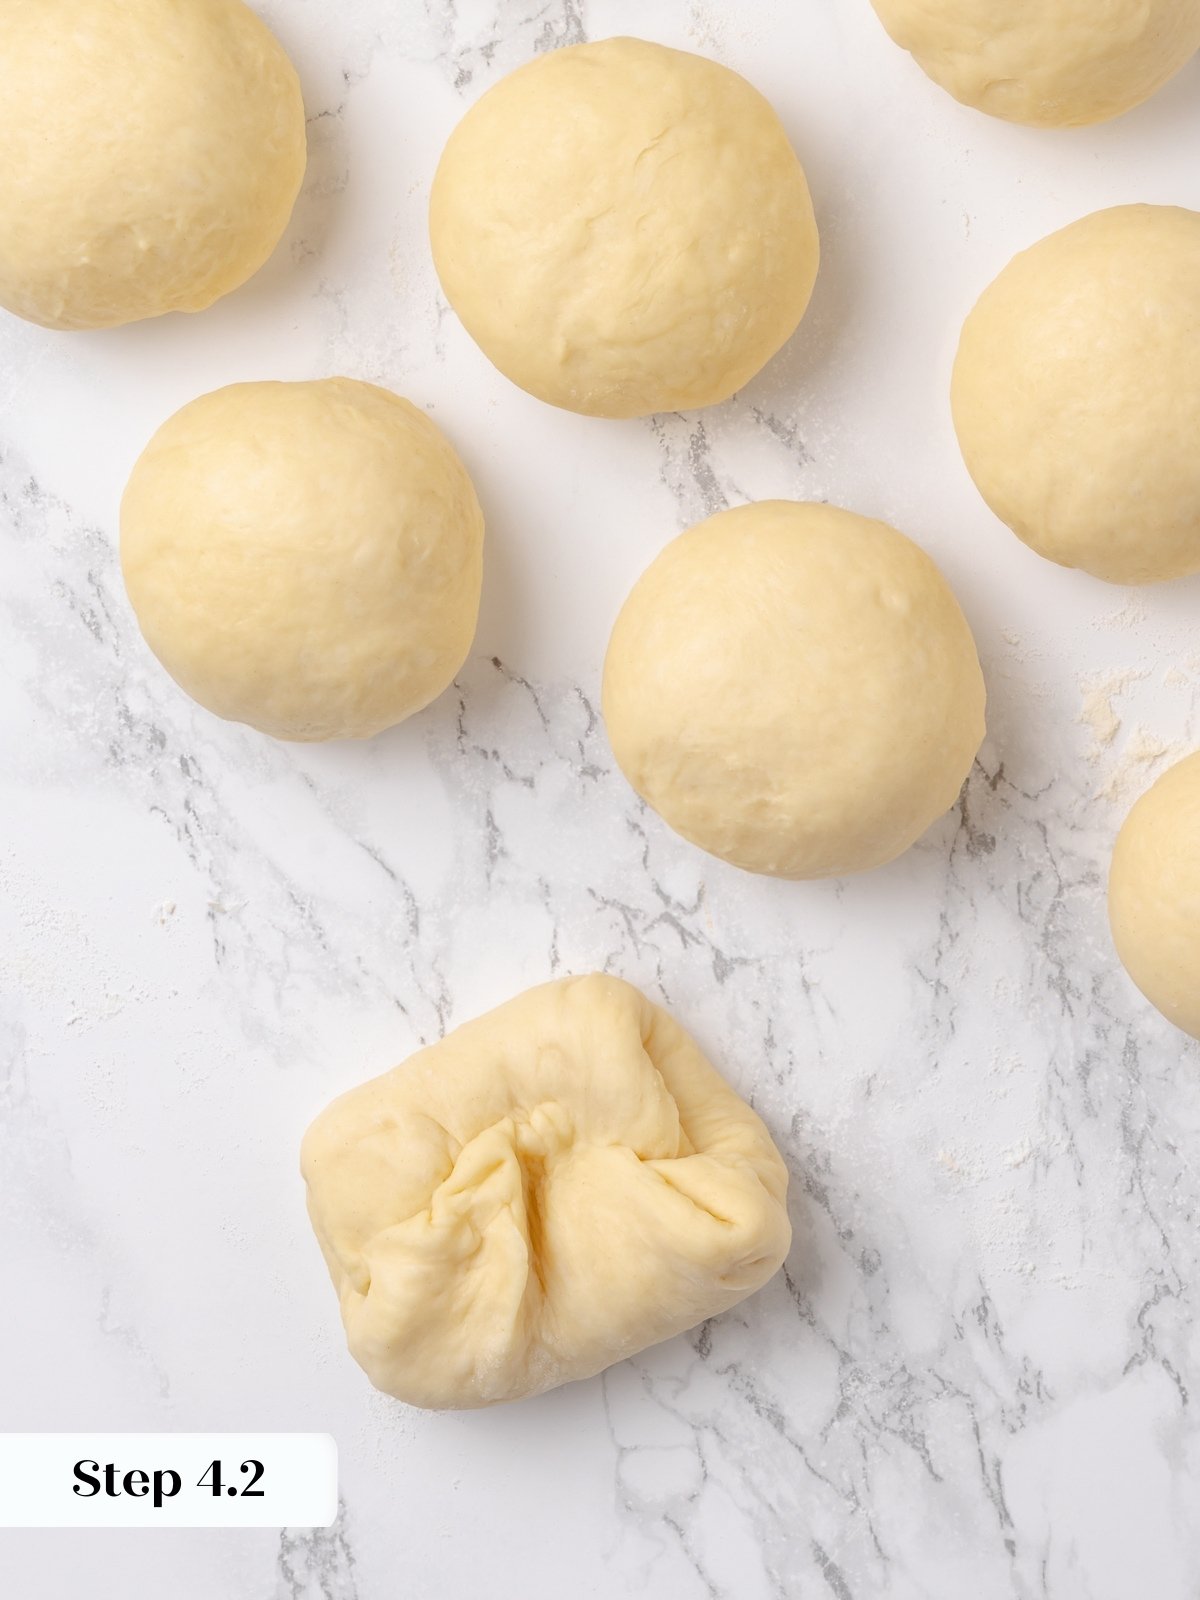
Step 4: Divide and shape. Grease a 9×13-inch baking dish with cooking spray or softened butter. Turn the dough out onto a lightly floured surface and divide it into 12 equal pieces (about 80g each). To shape each roll, fold all the edges into the center, flip it seam-side down, then use a push-pull motion with your thumb and fingers to create a smooth ball. Work quickly so the dough doesn’t stick too much to your hands or counter (photos 6-8).
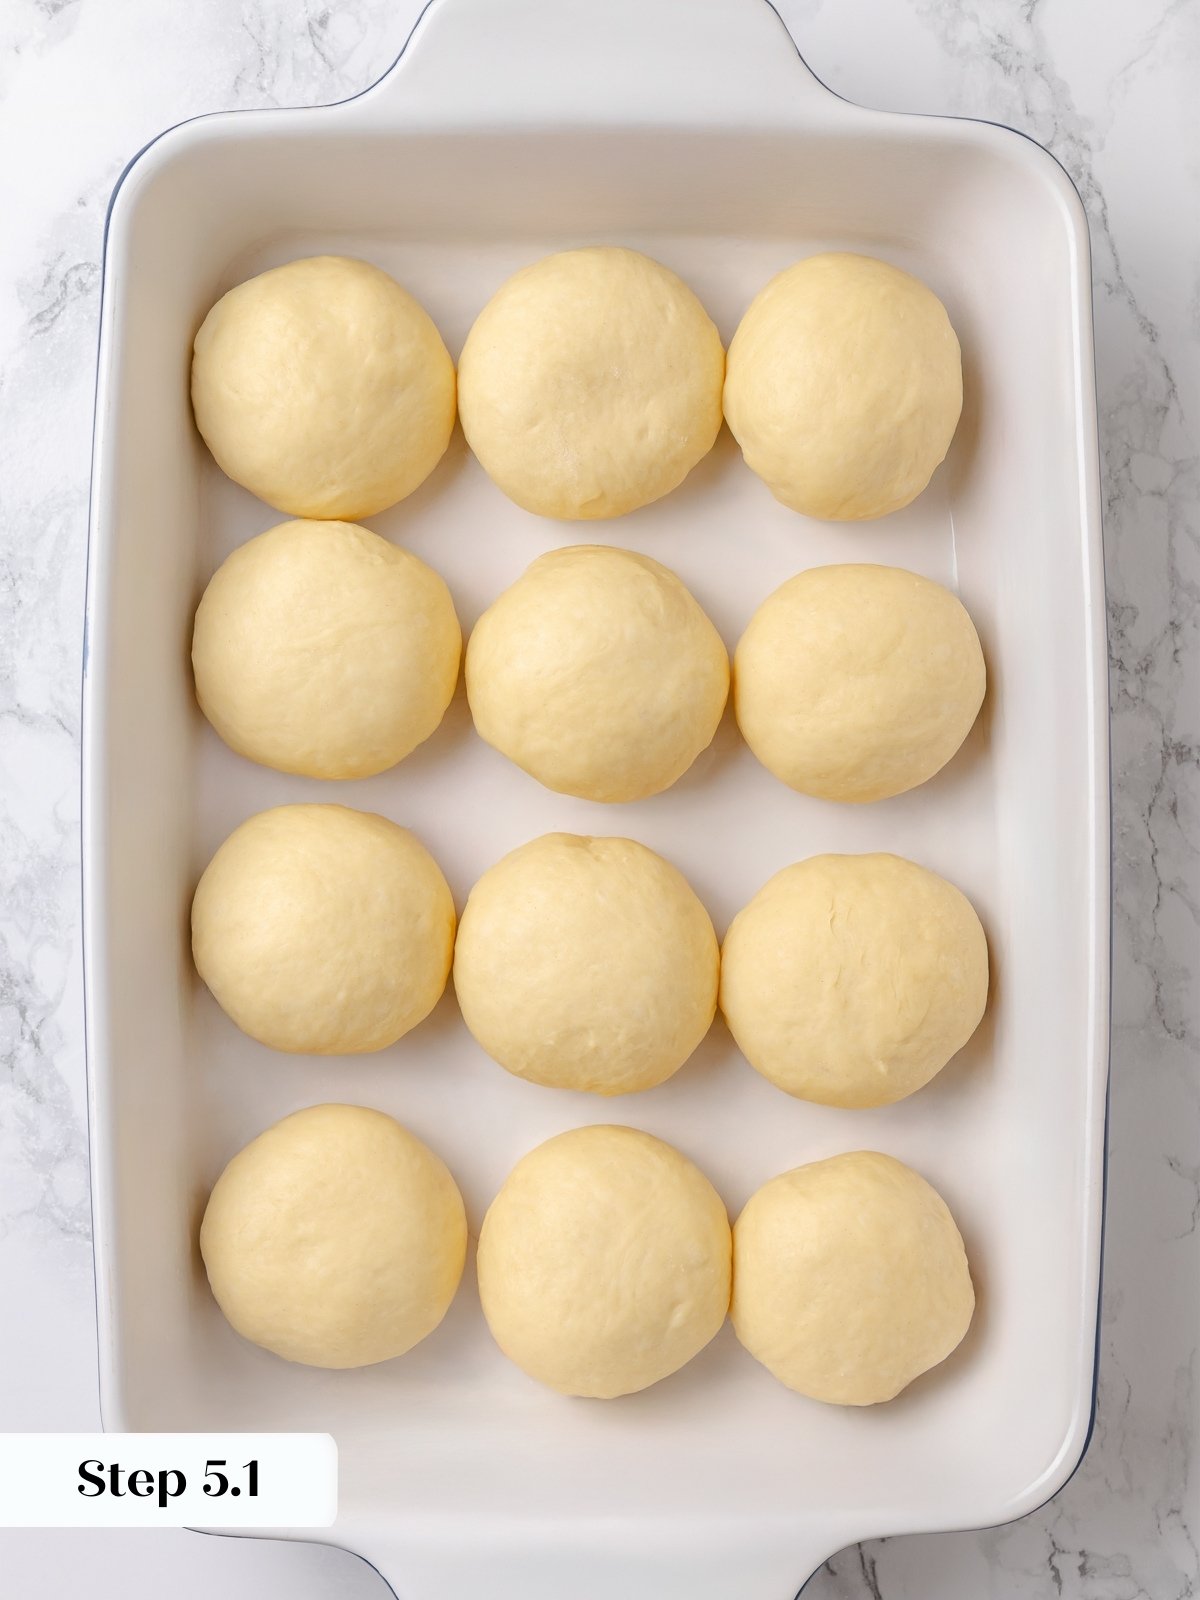
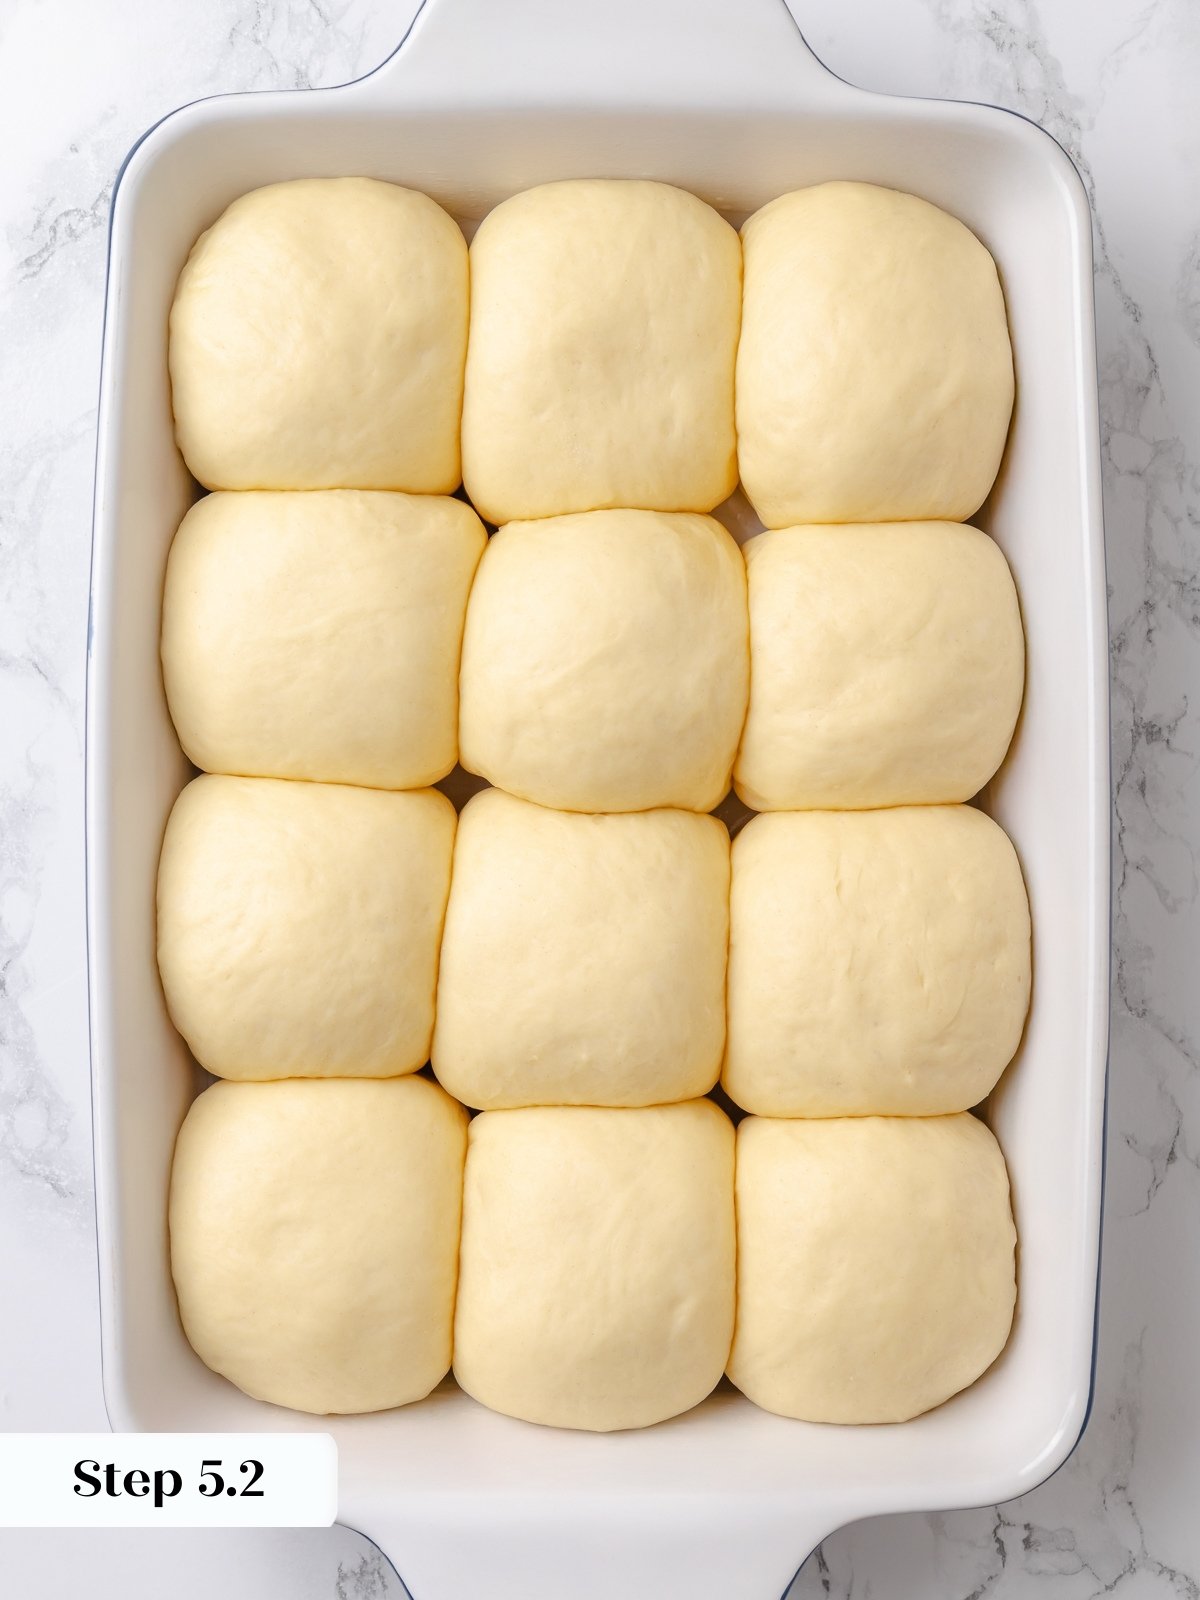
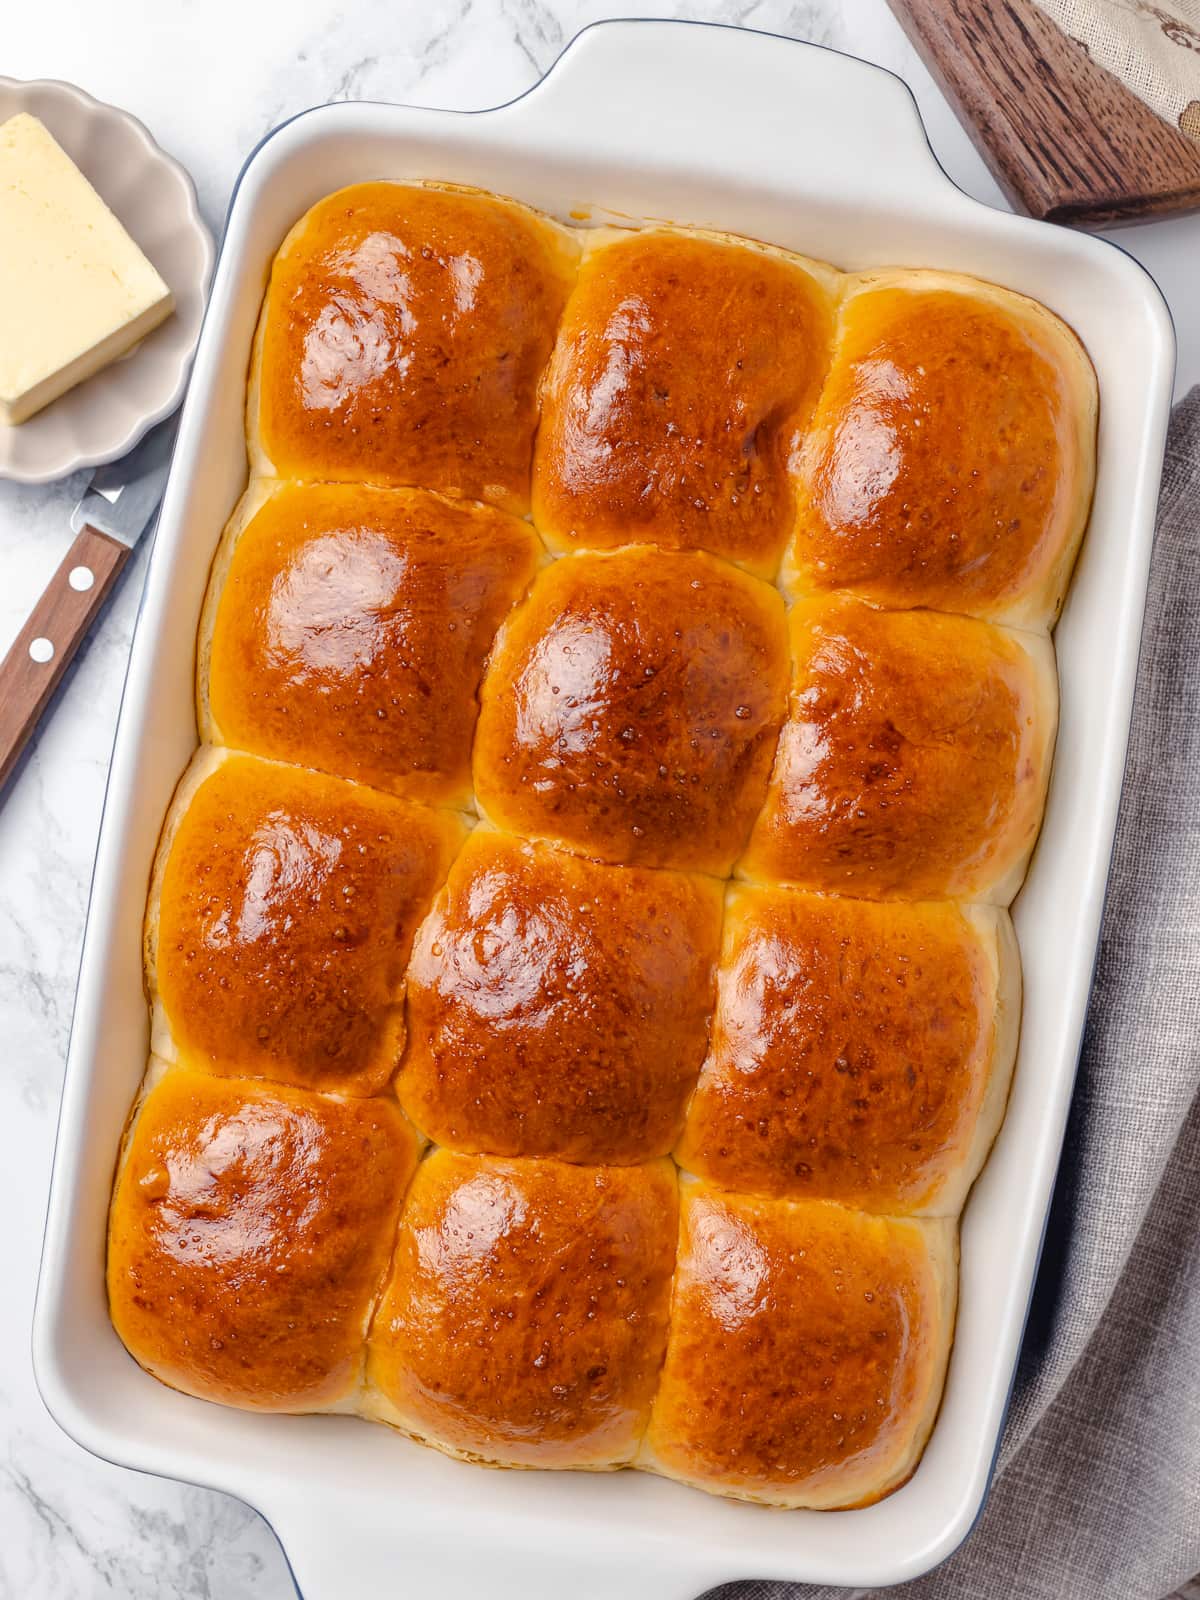
Step 5: Final proof (second rise). Arrange the shaped rolls in your prepared baking dish. Cover with plastic wrap and proof in a warm spot for about 1 hour. The rolls should triple in size and feel light and airy when gently touched. While they’re proofing, preheat your oven to 350°F conventional (no fan) (photos 9 & 10).
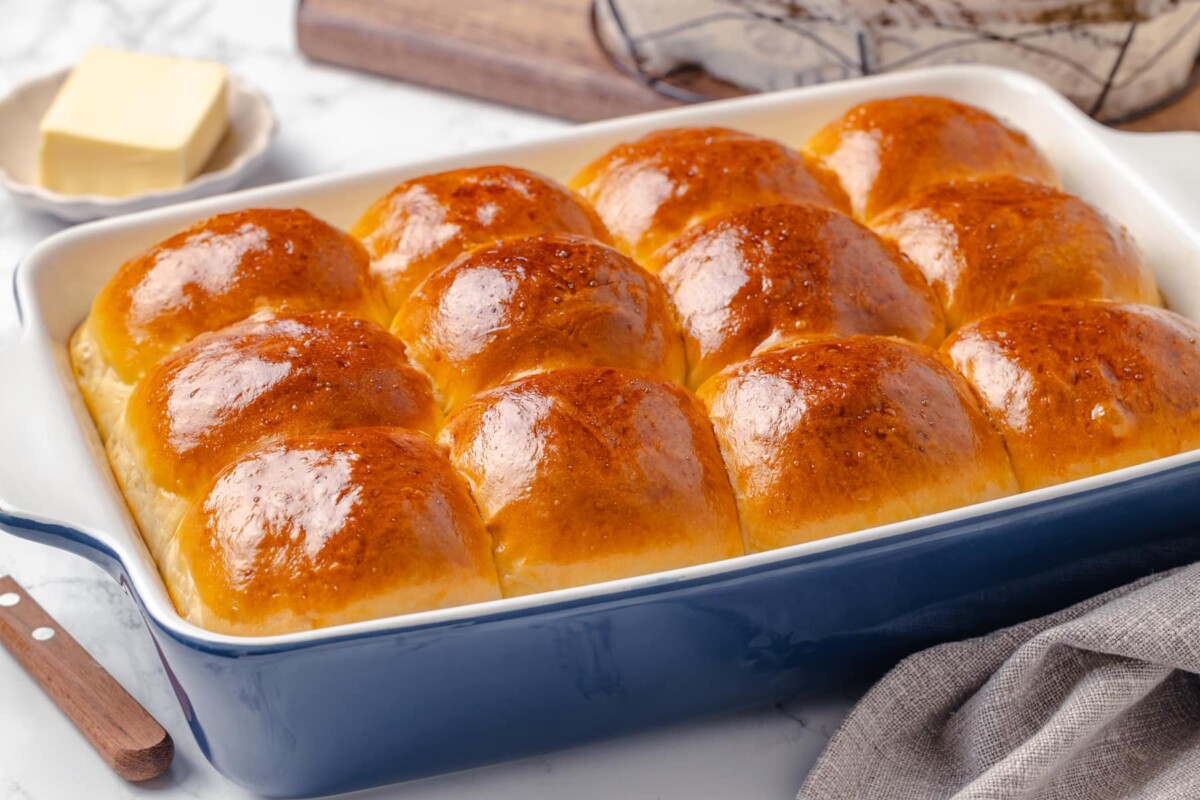
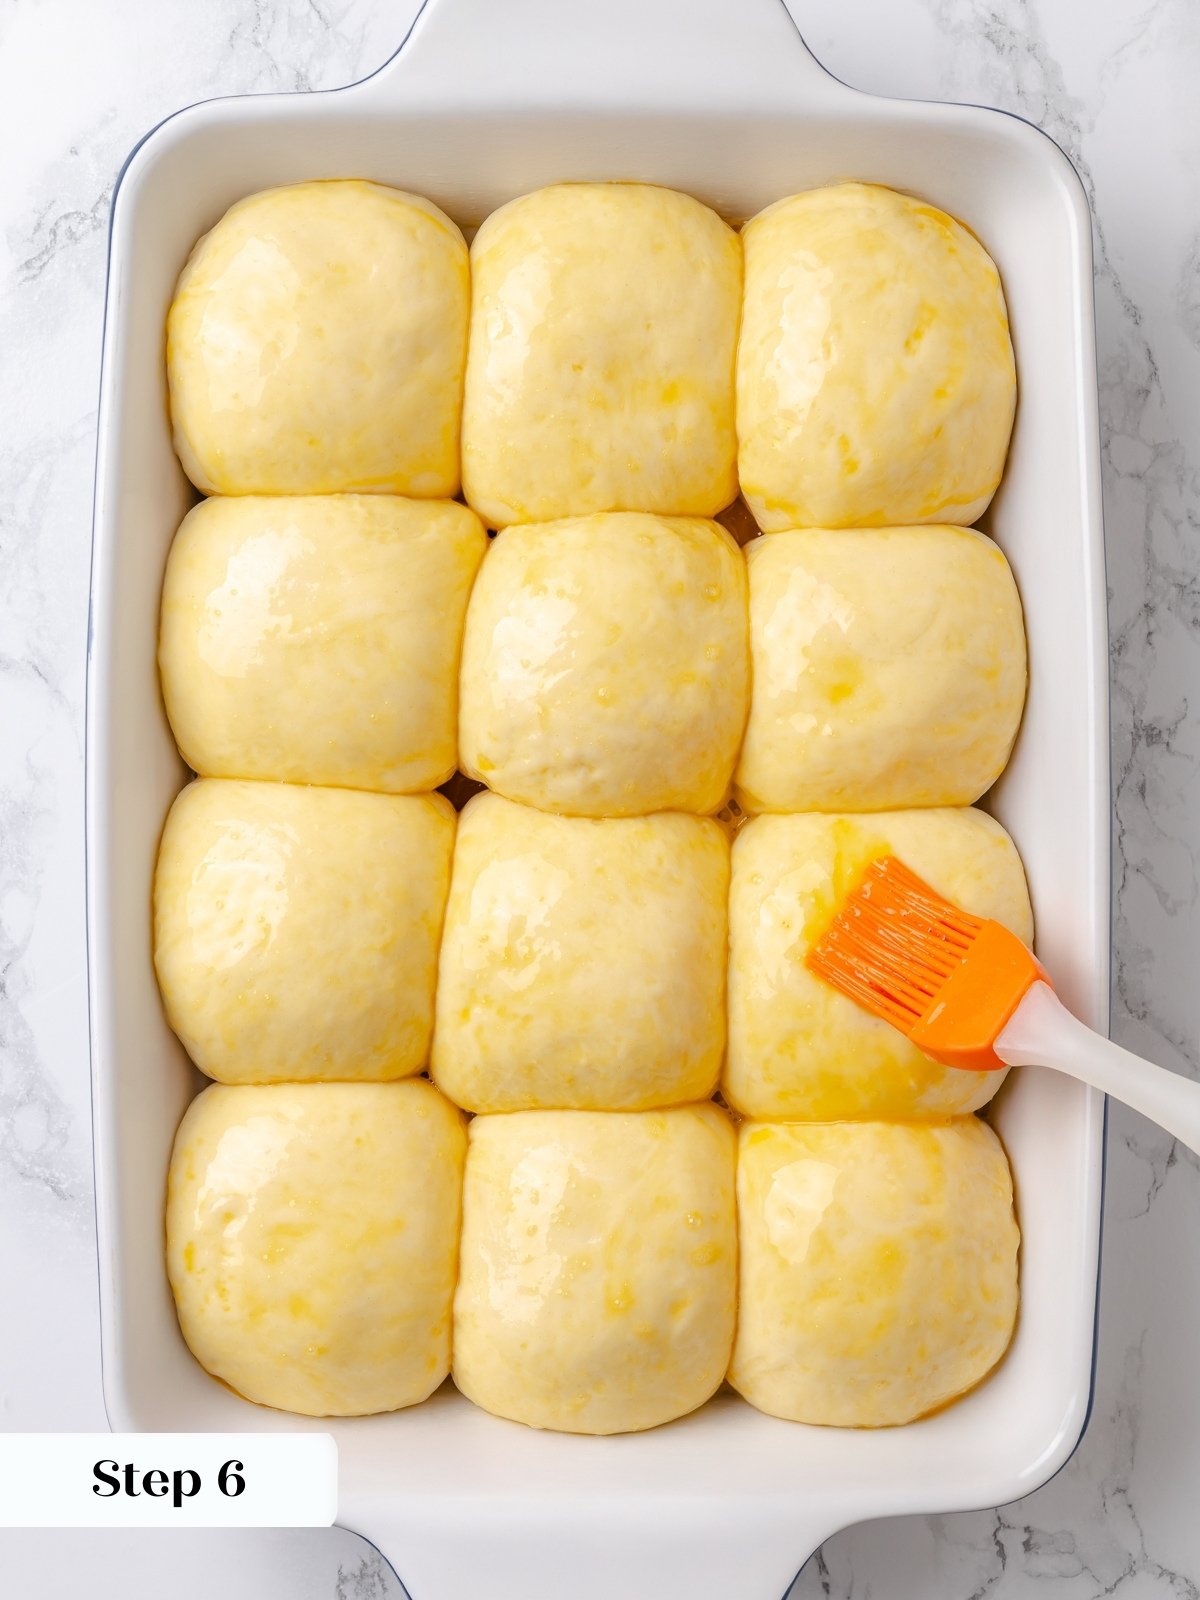
Step 6: Egg wash and bake. Gently brush the tops of the risen rolls with beaten egg, being careful not to let it run down the sides or pool in the pan. Bake for 25-28 minutes until golden brown. You can also check with an instant-read thermometer — this enriched dough should register 185°F (photo 11).
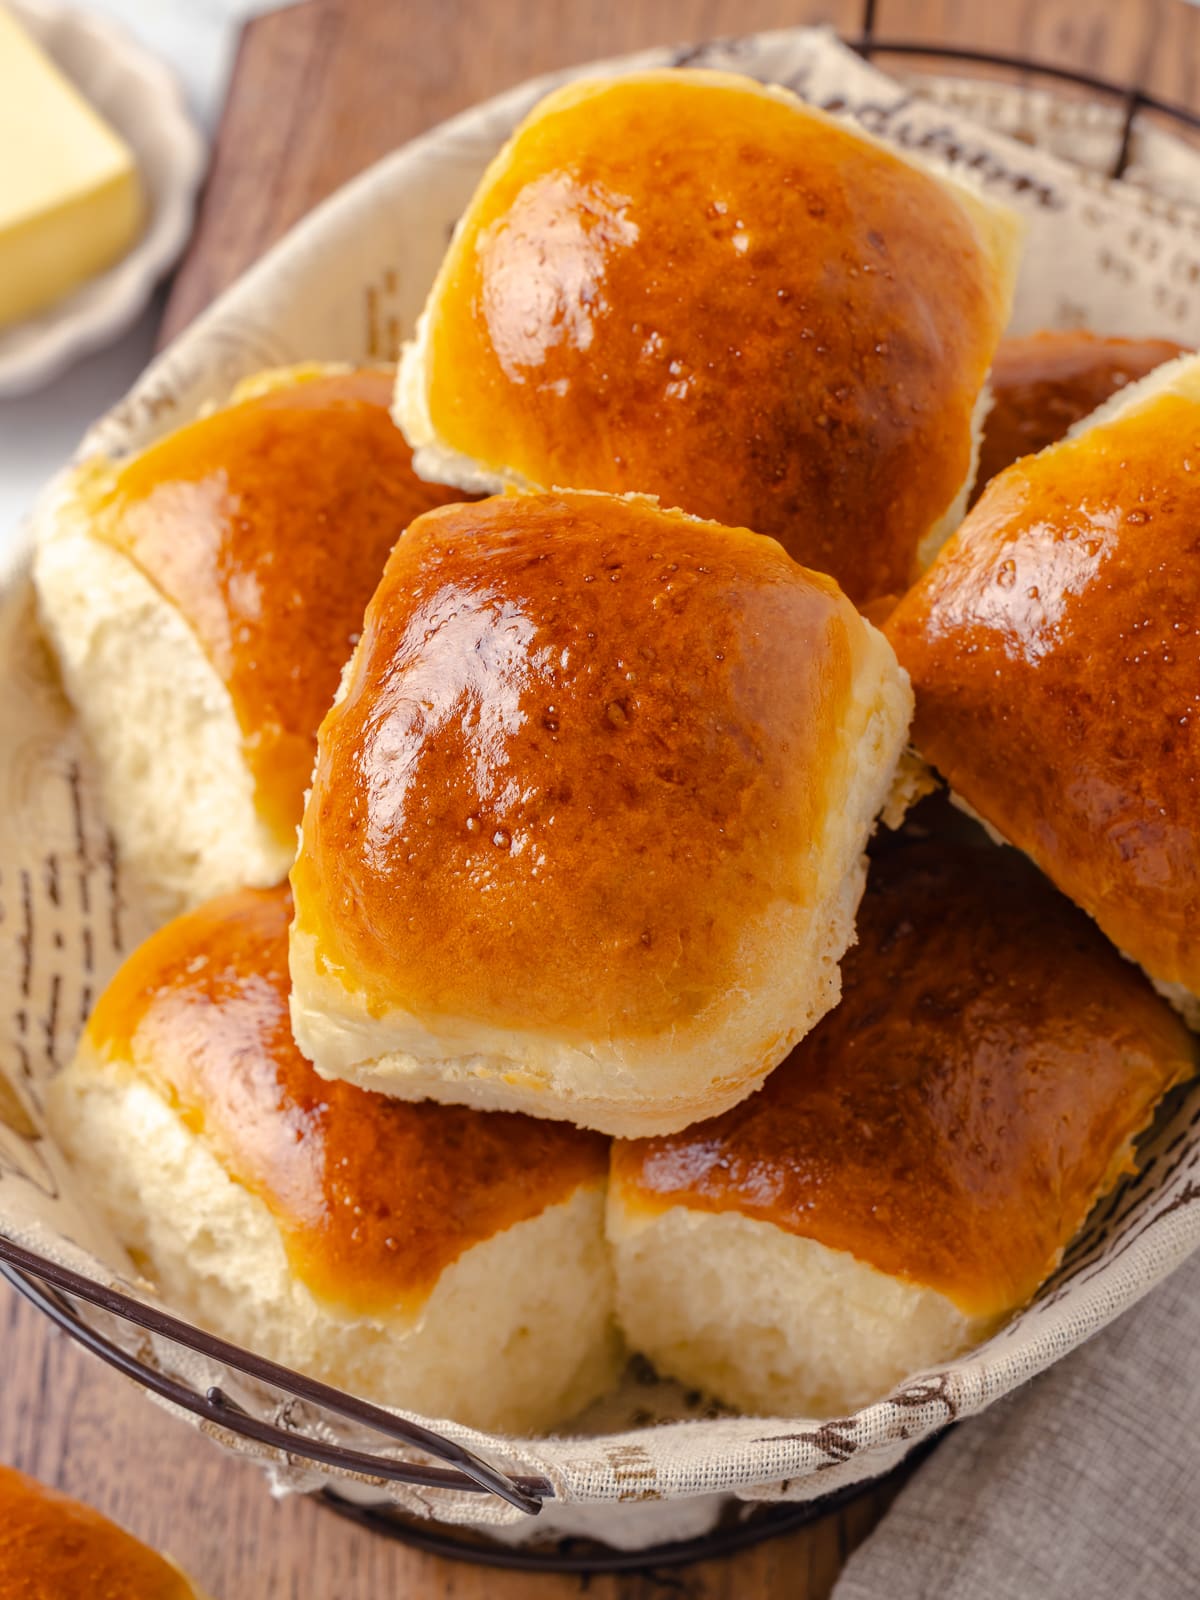
Step 7: Serve. Let the rolls cool slightly in the pan, then serve warm or at room temperature (photo 12).
Brush with melted butter if desired for extra richness!
Recipe FAQs
Store completely cooled dinner rolls in an airtight container or zip-top baggie at room temperature for up to 3 days. For longer storage, wrap them well and freeze for up to 3 months. To reheat, wrap in foil and warm in a 300°F oven for 10-15 minutes, or microwave individual rolls for 15-20 seconds.
Absolutely! You can shape the rolls and do the final proof overnight in the refrigerator. In the morning, remove them from the fridge and let them come to room temperature (about 1 hour) before brushing with egg wash and baking. This is the same technique I use for homemade bagels.
Yes! After shaping, place the rolls on a baking sheet and freeze until solid. Transfer to a freezer bag and freeze for up to 3 months. When ready to bake, place frozen rolls in a greased pan, cover, and let thaw and rise at room temperature (3-4 hours) before baking as directed.
For best results, wrap rolls in foil and warm in a 300°F oven for 10-15 minutes. You can also wrap them in a damp paper towel and microwave for 15-20 seconds. If reheating from frozen, increase the oven time to 20-25 minutes.
Yes! Combine all ingredients in a large bowl and mix with a wooden spoon until a shaggy dough forms. Turn out onto a clean surface and knead by hand for 8-10 minutes until smooth and elastic. The same technique works for multigrain bread as well.
Recommended Yeast Bread Recipes
Sourdough

Rolls & Biscuits

Yeast Breads

Yeast Breads
Dinner Rolls
Ingredients
- 4 ⅓ cups all-purpose flour
- 2 ¼ teaspoons instant yeast
- 1 ¼ cup warm water, 100-110°F
- ¼ cup granulated sugar
- 1 ½ teaspoons kosher salt
- ¼ cup unsalted butter, cubed
- 1 large egg, for the dough
- 1 large egg, beaten, for egg wash
Instructions
- In the bowl of a stand mixer fitted with the dough hook attachment, combine flour, instant yeast, warm water, sugar, salt, cubed butter, and one egg. Mix on low speed until all ingredients are incorporated with only a few pieces of butter remaining. Room temperature butter will incorporate faster, but it isn’t necessary.
- Increase mixer to medium speed and knead for 5-6 minutes, or until the dough pulls a smooth windowpane. The dough is sticky but soft and easy to work with. You can use oiled or lightly floured hands if needed.
- Scrape dough into a large bowl sprayed with non-stick cooking spray or lightly coated with neutral oil. Cover and proof in a warm spot for 45 minutes to an hour, or until visibly doubled and airy to the touch.
- Spray a 9×13-inch baking dish with non-stick cooking spray or grease with softened butter.
- Turn the dough out onto a lightly floured work surface and divide into 12 pieces (approximately 80g each).
- Shape each piece into a roll by folding each edge into the center, flipping seam-side down, and rolling quickly between your thumb and other fingers. Use a push-pull motion to create surface tension and form a smooth ball. The key is to work quickly so the dough doesn’t stick excessively to your hands or counter. Allowing it to stick slightly to the counter will actually help create tension. Flour your hands as needed.
- Place shaped rolls in the baking dish and repeat with remaining dough. Cover with plastic wrap and proof in a warm spot for 1 hour, until tripled in size and light and airy when gently touched. Meanwhile, preheat the oven to 350°F conventional (no fan).
- Before baking, gently brush the tops with beaten egg (egg wash). Be gentle and don’t let it run down the sides of the dish or pool, as this will prevent proper browning.
- Bake rolls in preheated oven for 25-28 minutes until golden brown. You can also test with an instant-read thermometer — this enriched dough should read 185°F.
- Serve slightly warm or at room temperature. Brush with melted butter if desired.
Notes
Presentation: Brush with melted butter immediately after removing from the oven for extra richness and shine.
Flavor Tips: For herb rolls, add 2 tablespoons of chopped fresh rosemary, thyme, or chives to the dough.
Technique: The windowpane test is the best way to check if your dough is properly kneaded. Take a small piece of dough and gently stretch it — it should form a thin, translucent membrane without tearing.
Variations: Add ½ cup shredded cheese after kneading for cheesy dinner rolls, or brush with garlic butter before the final proof for garlic rolls.
Storage: Store in an airtight container at room temperature for up to 3 days. Freeze well-wrapped rolls for up to 3 months.
Nutrition
Nutrition information is automatically calculated, so should only be used as an approximation.
 Like this recipe? Rate & comment below!
Before You Go
I hope you enjoyed this tender dinner rolls recipe. Check out our other delicious yeast bread recipes including Italian bread and sandwich bread!


Thank you – can you confirm how much flour is required? It currently says 4 ? cups. 🙂
Hi Jacquelyn! That was a formatting glitch, thanks for flagging it! The correct amount is 4 1/3 cups all-purpose flour, happy baking!! ~gvd team
I made these because I offered to bring bread to a Sunday dinner and didn’t want to show up with something forgettable. Letting the dough fully proof the second time made them actually fluffy instead of dense. They were still warm when we ate, and people pulled them apart straight from the pan — really grateful for this recipe.