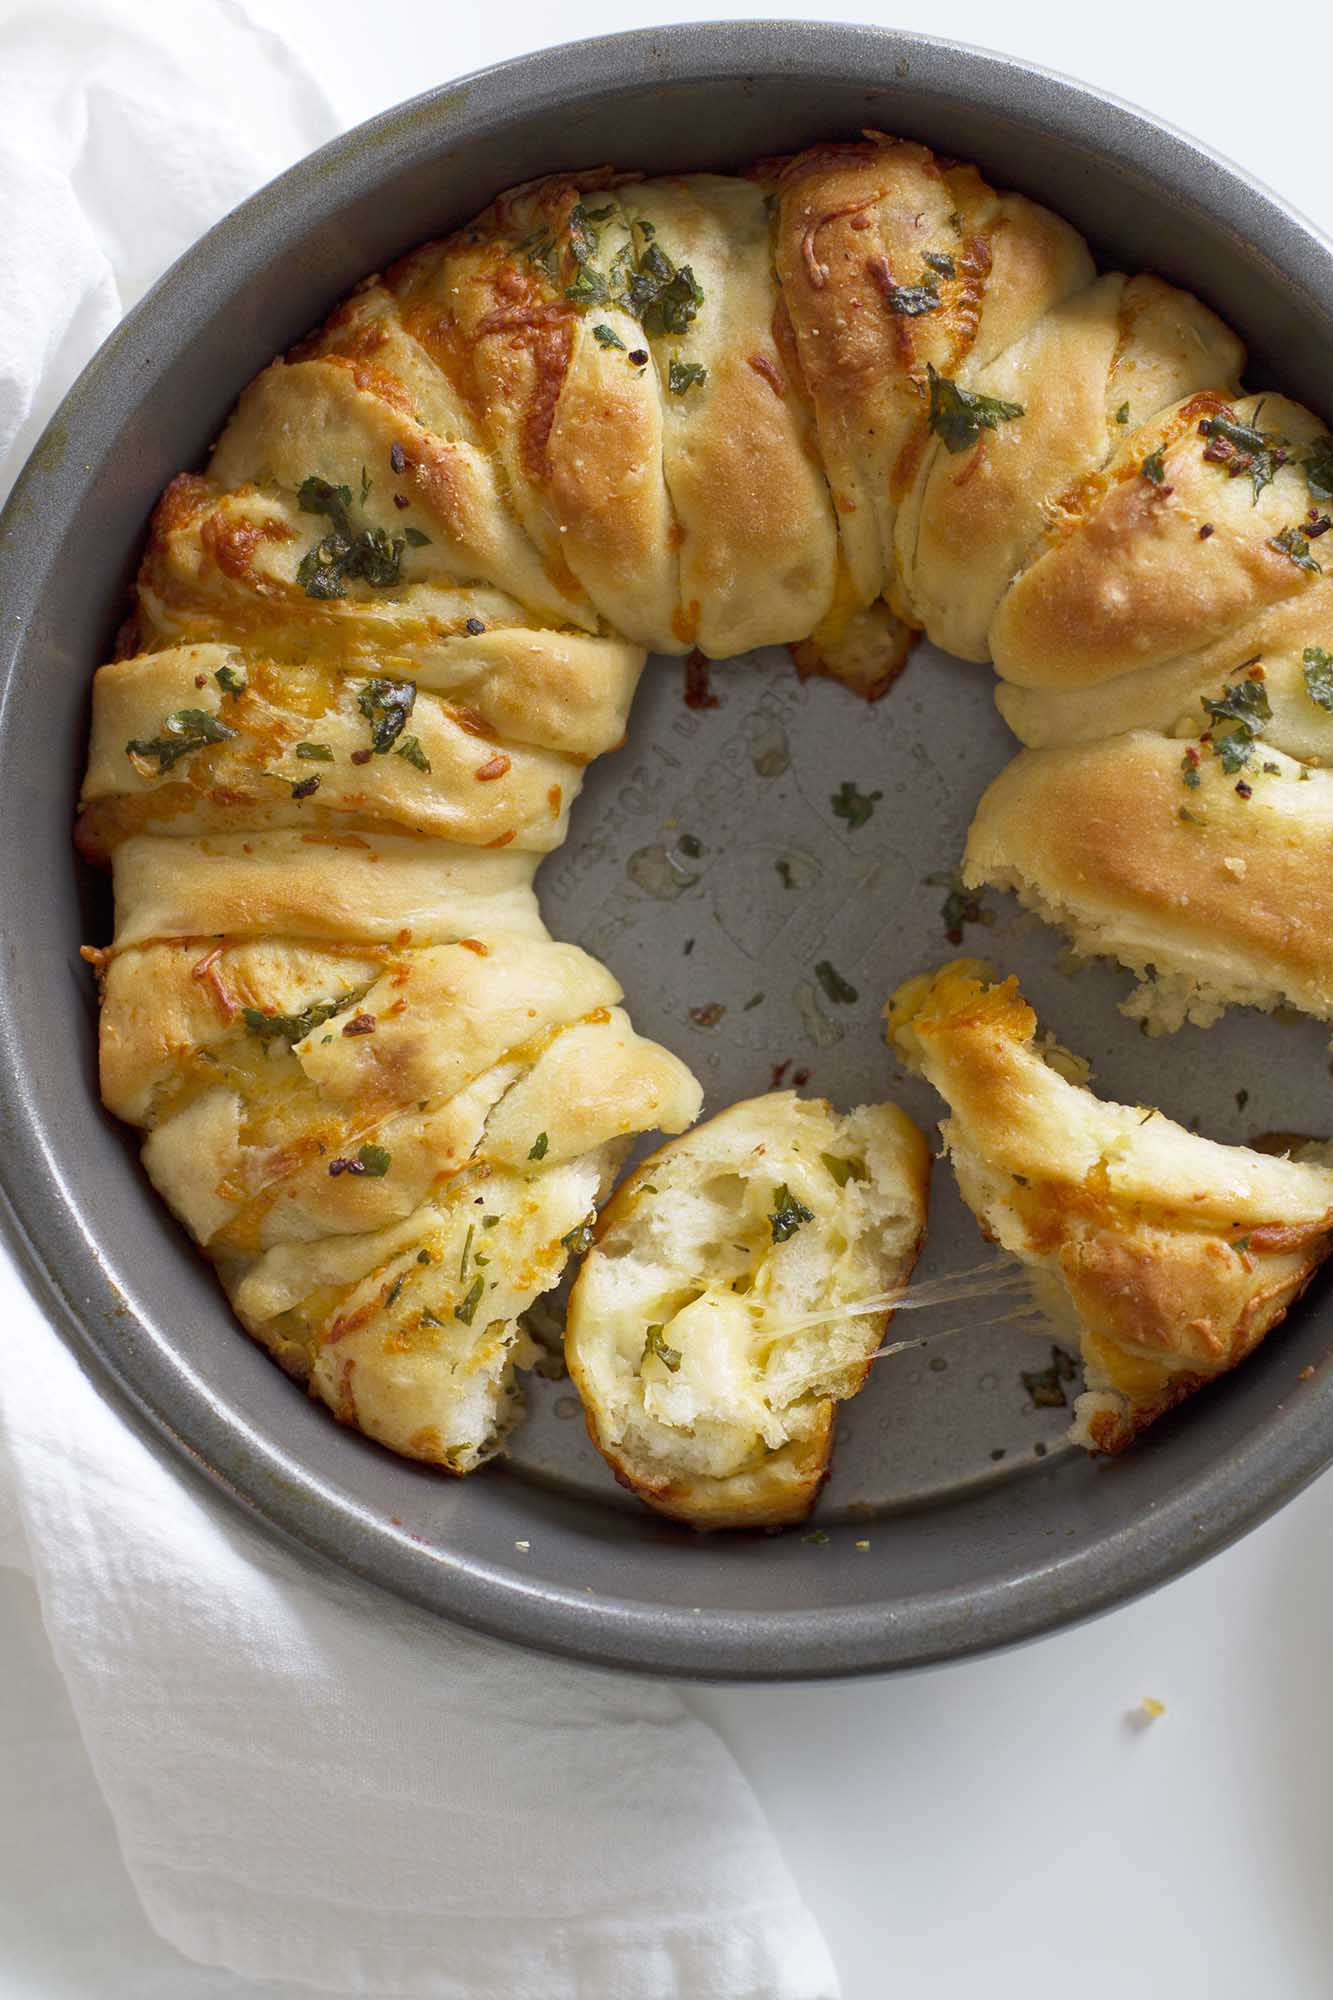
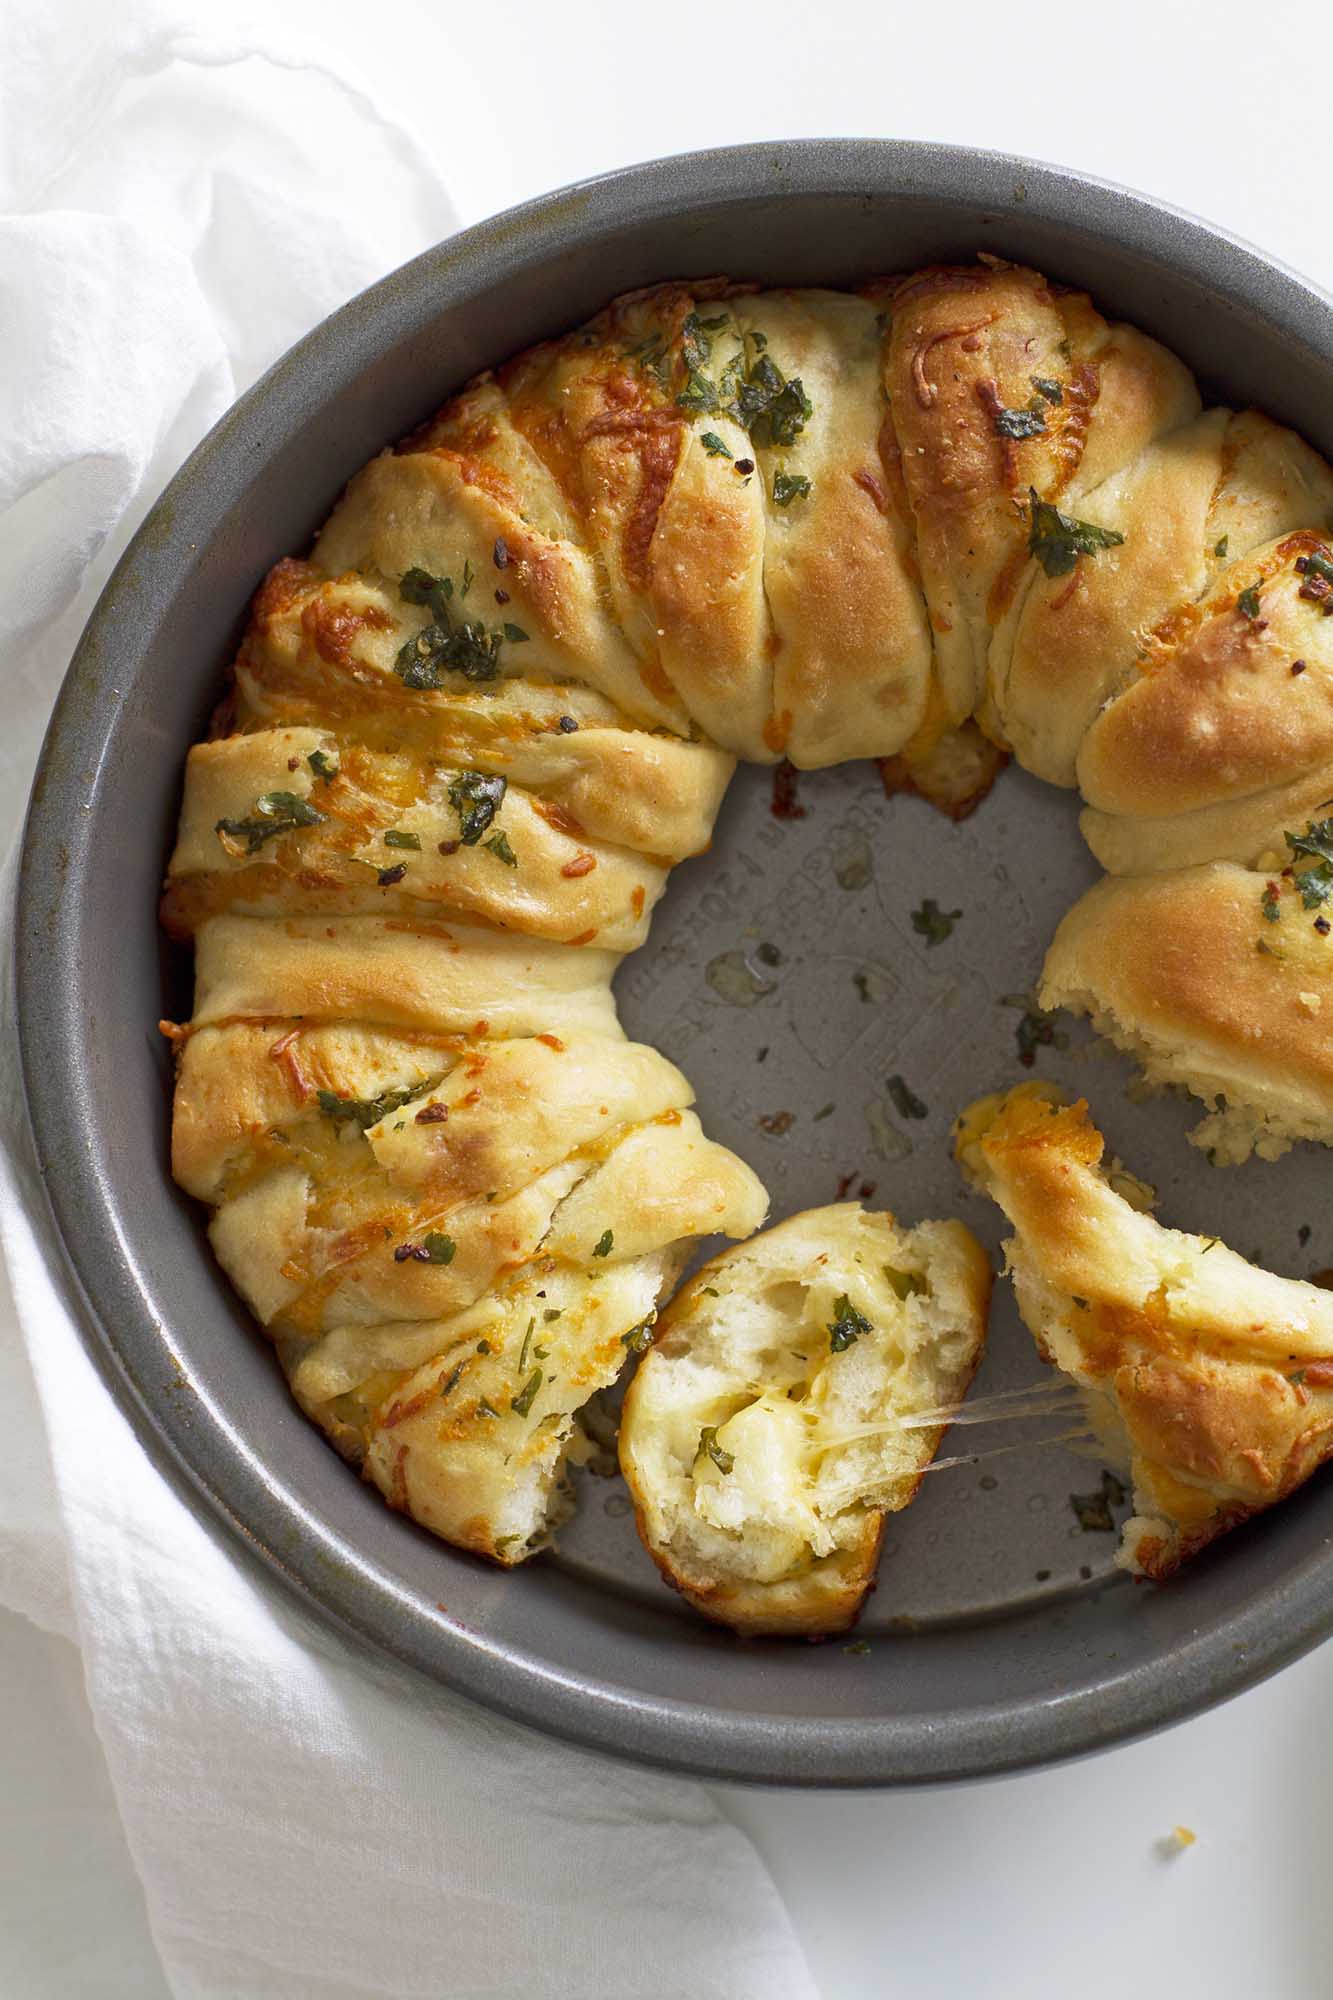
Cheesy Garlic Pull Apart Bread is buttery, golden, and loaded with melted cheese pockets. Just 30 minutes prep, simple shaping, and big garlic flavor in every pull!

A Quick Look At The Recipe
This is a brief summary of the recipe. Jump to the recipe to get the full details.
Prep Time
30 minutes
Cook Time
20 minutes
Proof Time
1 hour 20 minutes
Total Time
2 hours 10 minutes
Servings
12 pieces
Difficulty
Straightforward steps with simple shaping; approachable pull-apart bread for beginner bakers.
Calories *
231 kcal per serving
Technique
Activate yeast, mix dough, proof, roll into rectangles, fill with garlic butter and cheese, shape and bake.
Flavor Profile
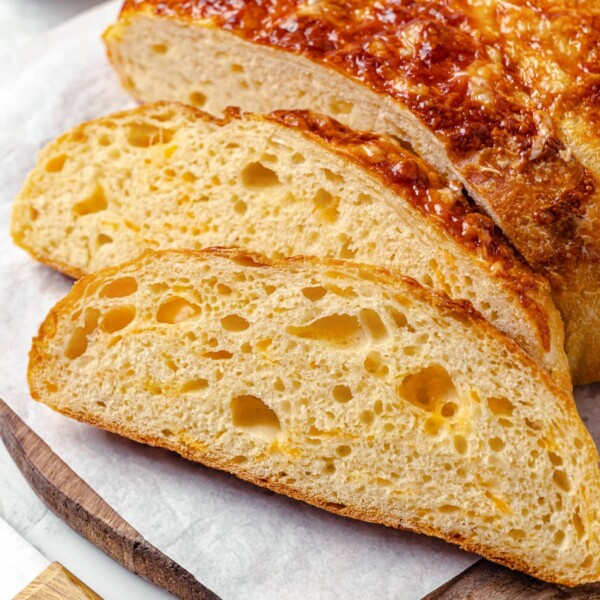
Pillowy soft, buttery pull-apart bread with rich garlic and herb notes, slightly tangy and sharp from parmesan cheese, melty cheesy pockets, and a lightly golden, slightly crisp crust
* Based on nutrition panel
Big hit with my family. Served it with homemade creamy tomato soup and perfect for dipping!⭐⭐⭐⭐⭐
Jeannie
Why You’ll Love This
- The perfect texture: We use a straightforward yeast dough that rises into soft, elastic strands.
- Flavor in every layer: Rolling garlic-herb butter and two types of cheese inside the dough spirals ensures savory richness in every single bite.
- Crowd-pleasing presentation: There is something undeniably fun about a tear-apart loaf. It shares the same communal vibe as a tray of Hot Cross Buns because it invites everyone to dig in.
Table of Contents
This recipe brings together everything you love about classic rosemary garlic bread, tender, layered dough, crisp golden edges, and rich buttery flavor, but adds a molten cheese factor that makes it truly unforgettable. It rises into soft strands that bake into perfect pull apart garlic bread portions.
If you love sticky, peel-away layers check out this cinnamon roll pull apart bread for dessert!
Ingredients & Substitutions
- Active dry yeast: Provides reliable leavening. Check the yeast is bubbly and active to ensure a good rise.
- Warm water: Aim for 110°F-115°F. Water that is too hot will kill the yeast, while water that is too cold will slow down the activation process.
- Unsalted butter: Softened butter blends smoothly with the garlic and herbs for easy spreading.
- Fresh parsley: Gives the butter mixture brightness, color and subtle freshness.
- Garlic: Freshly minced garlic cloves provide the most aromatic flavor.
- Cheddar cheese: Finely shredded so it melts evenly into the layers. Any good melting cheese like Monterey Jack or Mozzarella cheese can be swapped in.
- Parmesan cheese: Adds sharp, salty depth. A perfect pair with garlic.
Professional Tips for Cheesy Garlic Bread
- Watch the dough, not the clock: Rising times can vary wildly depending on the humidity and temperature of your kitchen. The dough is ready when it has truly doubled in size and looks puffy, whether that takes 45 minutes or over an hour.
- Keep the seam connected: When slicing the log into rolls (Step 11), be careful not to cut all the way through. Leaving the bottom ¼-inch intact ensures the ring holds its beautiful shape and doesn’t fall apart when transferred to the pan.
- Finely grate your cheese. This ensures even melting and prevents heavy pockets of cheese that can weigh down the rolls.
- Rest before serving. Rest 5–10 minutes before serving for cleaner pulls.
How to Make Cheesy Garlic Pull Apart Bread
Make the Dough
Step 1: Mix together the granulated sugar, active dry yeast, and warm water in a small bowl. Let it stand for 5-10 minutes, until the surface becomes foamy.
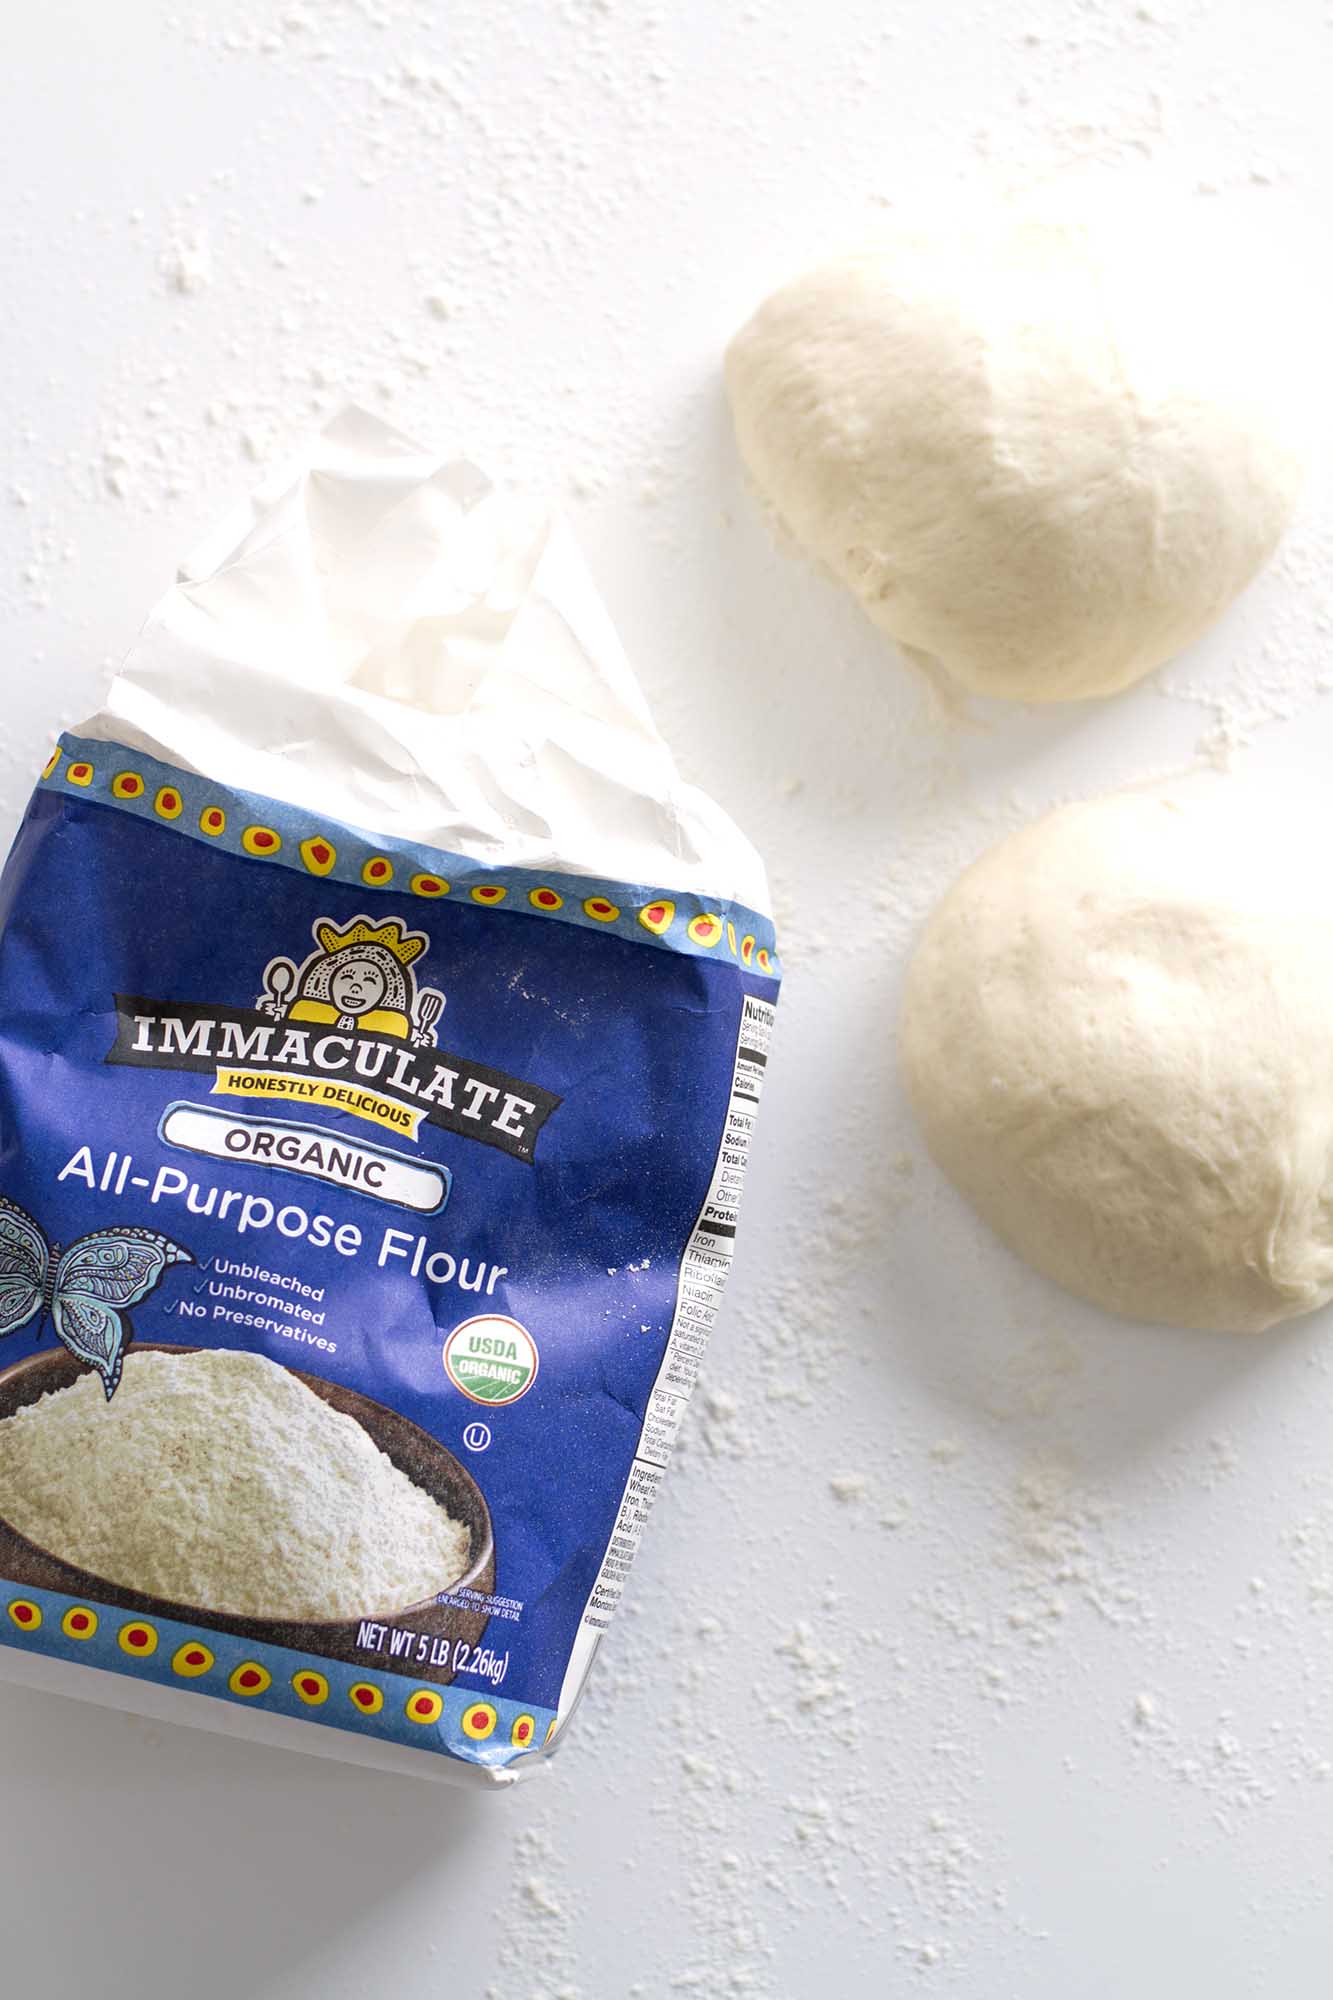
Step 2: Combine the all-purpose flour and salt in the stand mixer bowl fitted with the dough hook attachment. Mix briefly to distribute the salt evenly throughout the flour.
Step 3: Pour the yeast mixture and olive oil into the center of the flour mixture. Mix on low speed until the ingredients come together into a rough, shaggy dough.
Step 4: Knead until smooth and elastic. Increase to medium speed and knead for 5-7 minutes, adding extra flour 1 tablespoon at a time only if the dough feels overly sticky.
A properly developed dough should stretch without tearing when gently pulled. You’re looking for a smooth, soft, elastic dough that cleans the sides of the bowl and feels tacky but not sticky.
First Rise
Step 5: Let the dough rise until doubled. Lightly grease a medium bowl with cooking spray or a thin layer of oil. Transfer the dough to the bowl, cover with plastic wrap, and let it rise in a warm spot for 1 hour, or until doubled in size.
Fill and Shape the Rings
Step 6: Stir together the softened butter, chopped parsley, minced garlic, and a pinch of salt in a bowl until evenly combined.
Step 7: Divide and rest the dough. Punch down the risen dough and divide it into 2 equal pieces. Place the pieces on a lightly floured surface, cover with a towel, and let them rest for 5 minutes to relax the gluten.
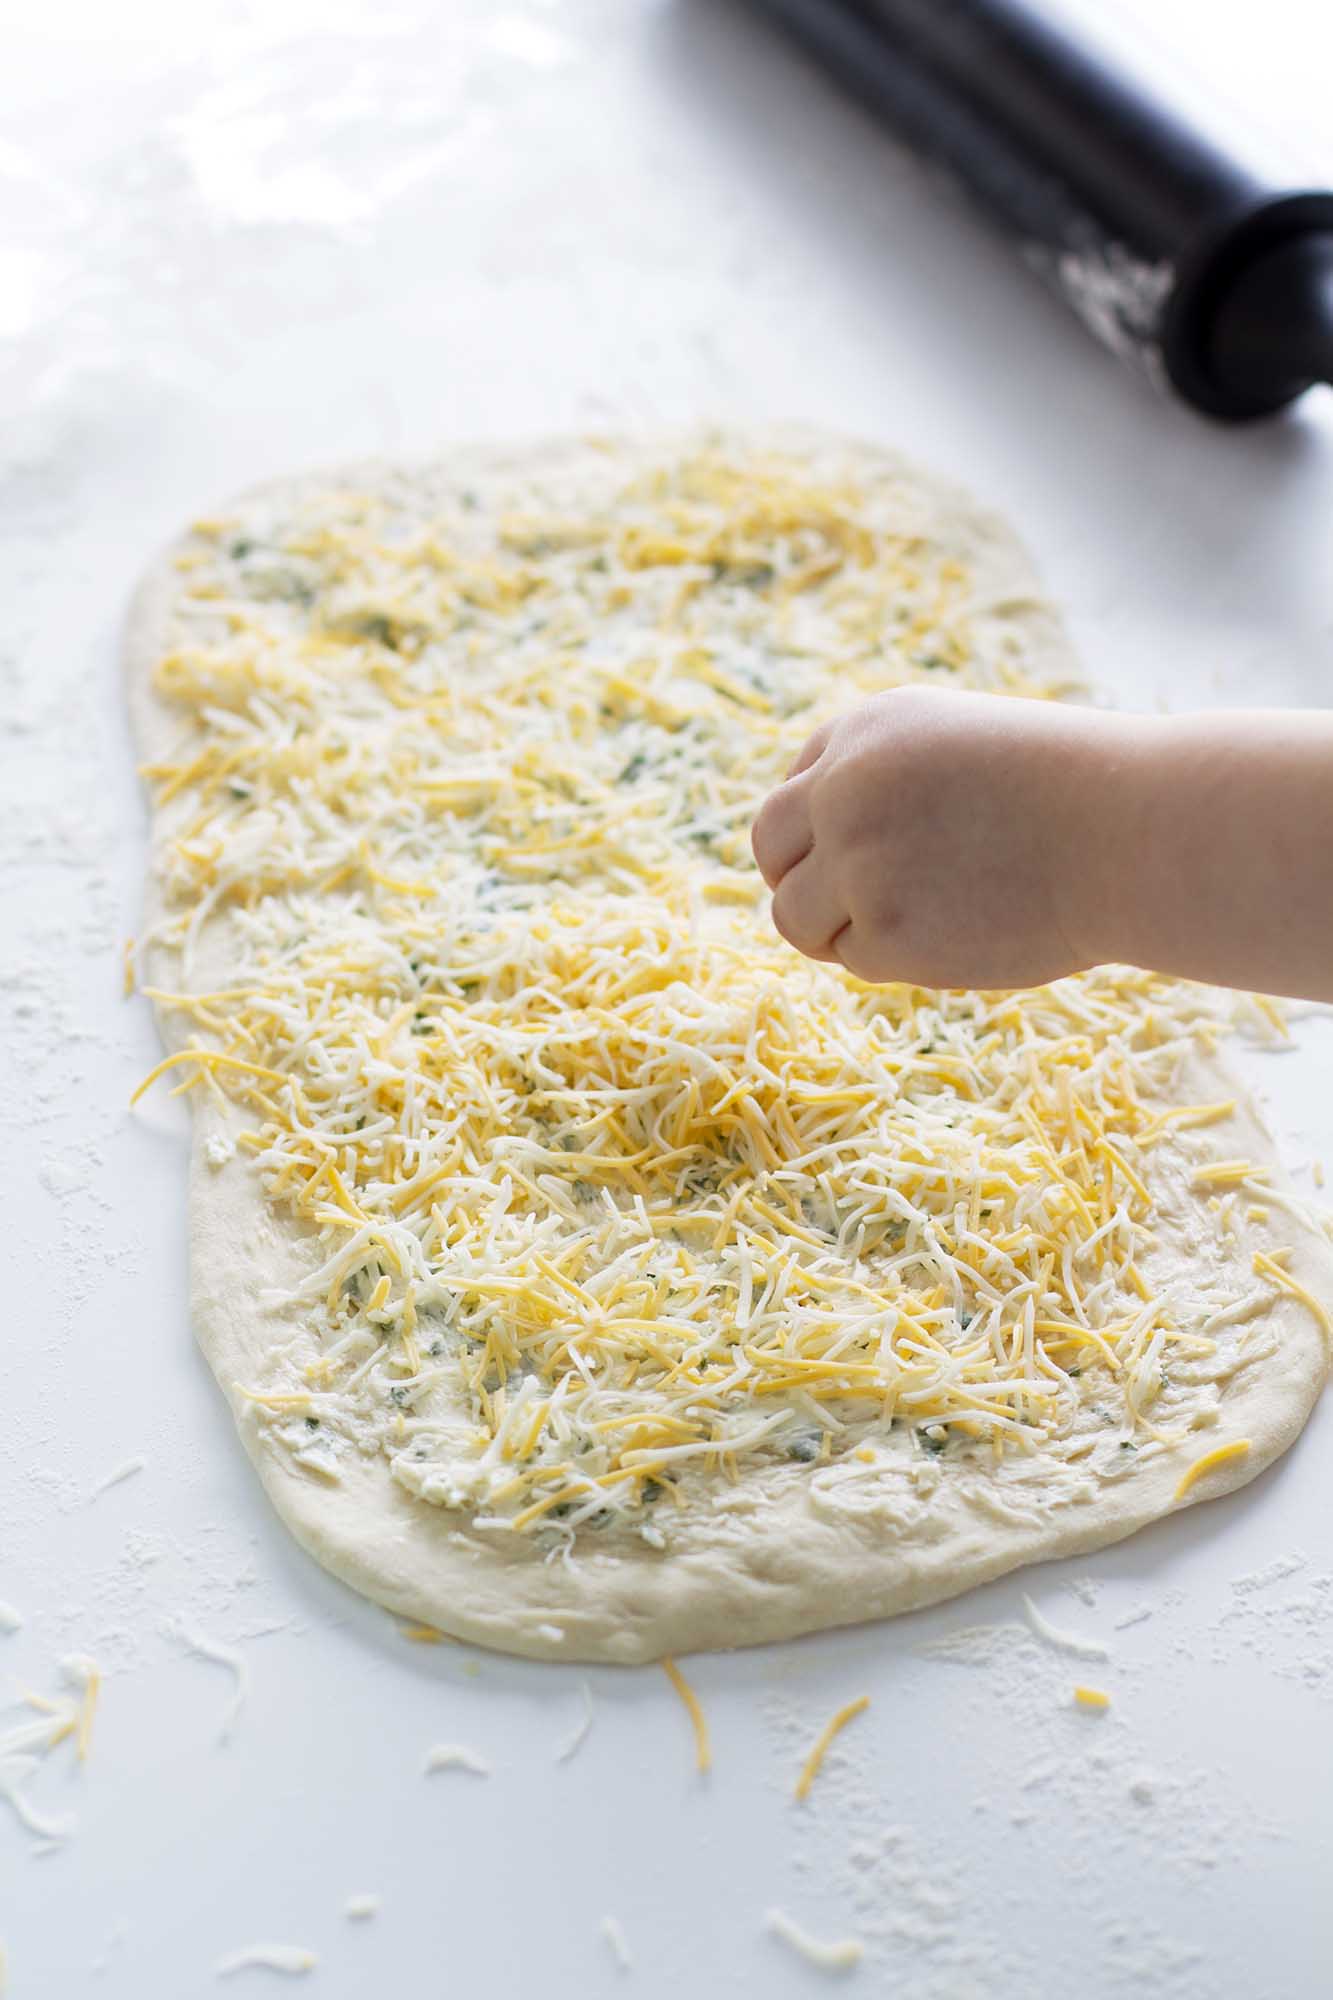
Step 8: Roll out the dough. Working with one piece at a time, roll the dough into a 14 × 8-inch rectangle.
Step 9: Spread with garlic butter and sprinkle cheese. Spread 2 tablespoons of the garlic-herb butter evenly over the surface. Sprinkle with ½ cup cheddar cheese, 2 tablespoons of Parmesan, and a light pinch of black pepper.
Step 10: Roll and seal. Starting from the long edge, roll the dough tightly into a 14-inch log. Pinch the seam firmly to seal so the filling stays inside during baking.
Step 11: Slice into connected rolls. Place the log seam-side-down. Using a sharp knife, slice the dough into 1-inch sections, cutting almost all the way through but keeping the bottom edge intact. Grease two 8-inch round cake pans with cooking spray.
Second Rise
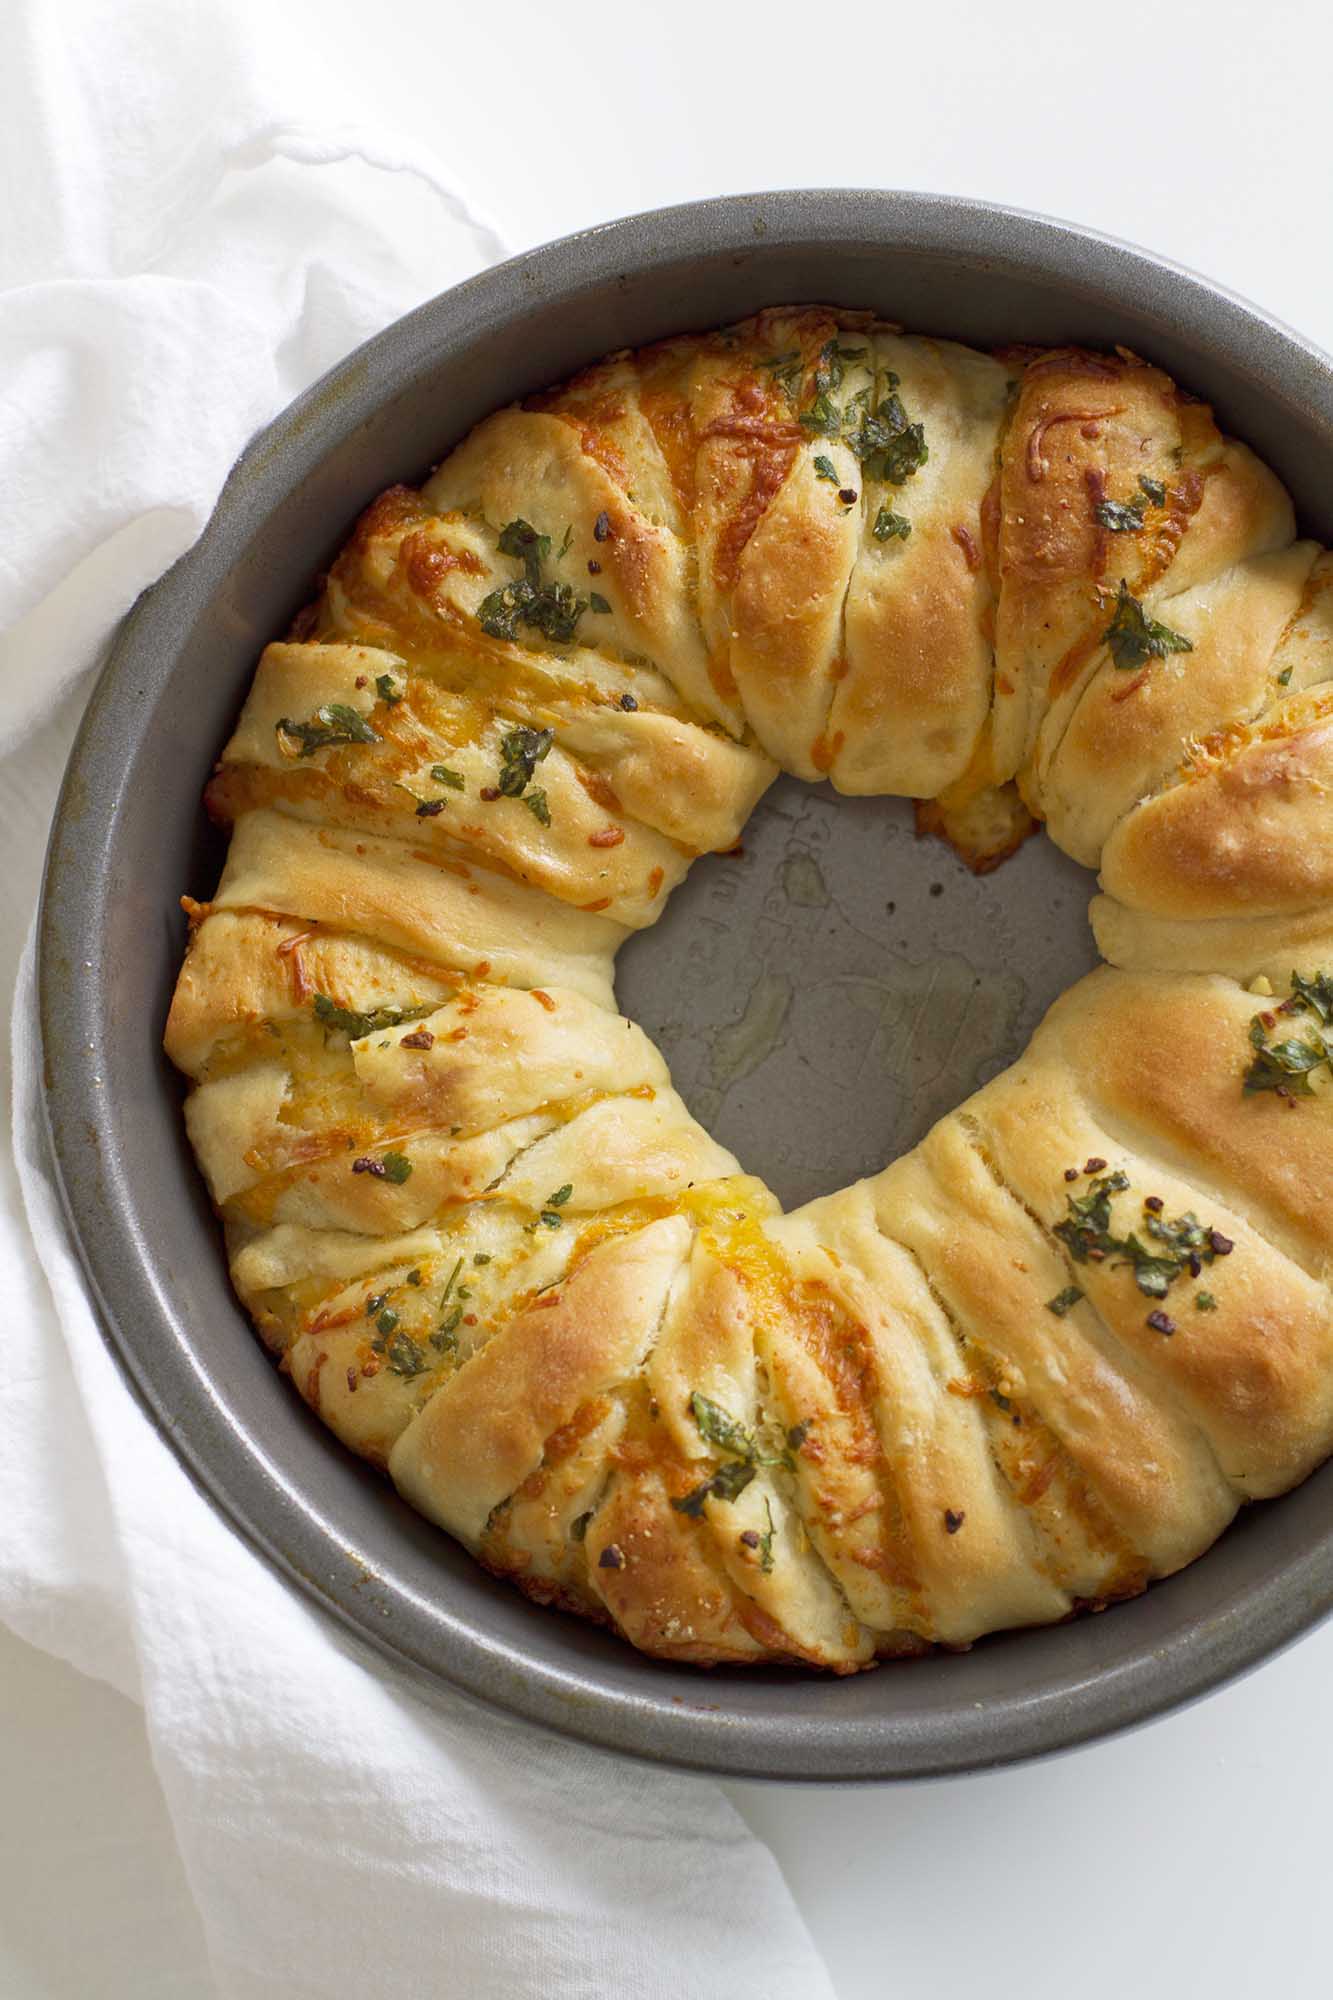
Step 12: Arrange in pans and shape into rings. Lift the sliced log gently and place it in a greased 8-inch round cake pan, arranging it into a ring with the cut sides facing up. Repeat with the second piece of dough in the second pan.
Step 13: Spread the remaining garlic-herb butter over the tops of both rings.
Step 14: Let the rings puff slightly. Cover the pans and let the dough rest for 15-20 minutes, just until slightly puffy.
Step 15: Preheat the oven to 400°F (200°C) while the dough rests.
Bake the Bread
Step 16: Bake the rings for 20-25 minutes, until the tops are a deep golden brown and the cheese is melted throughout.
Finish and Serve
Step 17: Allow the bread to cool slightly in the pans for 5–10 minutes. This sets the structure and helps the cheese thicken slightly so the pieces pull apart cleanly.
Step 18: Serve straight from the pan or transfer to a platter. Enjoy the bread warm, pulling apart the layers piece by piece.
Recipe FAQs
Pull apart garlic bread is made for sharing, set the warm ring in the center of the table and let everyone tear off cheesy, garlicky bread pieces as they go. It’s perfect with cozy soups such as my chicken vegetable soup, carrot ginger coconut soup, or alongside hearty stews. It can also be served alongside a party dip or side dish, just like these pretzel rods.
We recommend a block of sharp Cheddar or Monterey Jack for meltability, paired with Parmesan for salty depth. Crucially, grate your own cheese. Pre-shredded bags contain anti-caking agents that prevent the cheese from melting into those gooey, stretchy strands we want.
To bring the soft texture back, wrap the leftover bread (or individual pieces) in foil and warm them in a 350°F oven for 10–15 minutes. Avoid the microwave, as it will make the yeast dough tough and rubbery.
Yes. Let it cool completely after baking. Wrap the ring tightly in plastic wrap, then in a layer of foil. Freeze for up to 2 months. When a craving hits, unwrap and reheat the frozen bread in a 350°F oven until warm and melty.
Recommended Cheese Bread Recipes

Yeast Breads
Yeast Breads

Yeast Breads

Yeast Breads
If you enjoyed this recipe, please leave a star rating and let me know how it goes in the comments below! I love hearing from you and your comments make my day!
Cheesy Garlic Pull Apart Bread

Ingredients
- 2 tablespoons granulated sugar
- 2 ¼ teaspoons active dry yeast
- 1 cup warm water, about 110 to 115°F
- 2 ½ cups all-purpose flour, plus more as needed
- 1 teaspoon salt
- 1 tablespoon olive oil
- ½ cup unsalted butter, softened
- 3 tablespoons fresh parsley, chopped
- 2 teaspoons minced garlic
- Pinch salt
- 1 cup cheddar cheese, finely shredded, divided
- ¼ cup Parmesan cheese, grated, divided
- Ground black pepper to taste
Instructions
- In a small bowl, combine the sugar and yeast. Pour the warm water over the mixture and let it stand for 5 to 10 minutes, until the surface is foamy and the yeast smells fragrant.
- Meanwhile, in a large bowl or the bowl of a stand mixer, attach the dough hook and combine the flour and salt.
- Add the yeast mixture and oil to the center of the dry ingredients. Mix with a wooden spoon or on low speed just until the dough begins to come together.
- Transfer the dough to a well-floured surface and knead 10 to 15 minutes, adding flour 1 tablespoon at a time as needed, until the dough is smooth, soft, elastic, and only slightly tacky; or knead in the stand mixer on medium speed 5 to 7 minutes, adjusting with small additions of flour until the dough reaches the same smooth, supple texture.
- Place the dough in a lightly greased bowl, cover with plastic wrap, and let rise in a warm spot for about 1 hour, or until doubled in size.
- In a small bowl, combine the softened butter, parsley, garlic, and a pinch of salt. Set aside.
- Gently punch down to deflate the dough. Divide it into 2 equal portions, place them on a lightly floured surface, and cover with a clean kitchen towel. Let rest for 5 minutes to relax the gluten.
- Working with one portion at a time, roll the dough into a 14×8-inch rectangle.
- Spread 2 tablespoons of the garlic-butter mixture evenly over the surface. Sprinkle ½ cup Cheddar cheese, 2 tablespoons of Parmesan, and a light dusting of black pepper.
- Starting from a long edge, roll the dough into a tight 14-inch log and pinch the seam to seal.
- Place the log seam-side down. Using a sharp knife, slice the log into 1-inch sections, cutting almost all the way through but keeping the rolls connected at the base. Grease two 8-inch round cake pans with cooking spray.
- Carefully lift the log and transfer it to one of the prepared pans, arranging it into a ring with the cut sides facing upward. Repeat with the remaining dough so each pan holds one ring.
- Spread or brush the remaining garlic-butter mixture over the tops of the rolls.
- Cover the pans and let the dough rest 15 to 20 minutes while the oven finishes heating.
- Meanwhile, heat the oven to 400°F. Bake for 20 to 25 minutes, until the tops are deeply golden and the cheese is bubbling at the edges.
- Let cool briefly before serving.
Notes
Nutrition
Nutrition information is automatically calculated, so should only be used as an approximation.
 Like this recipe? Rate & comment below!
Before You Go
I hope you enjoyed this cheesy garlic pull apart bread. Follow it up with my kugelhopf recipe, potato bread, or no knead cheese bread and you will be a yeasted dough champion!


I brought this to a dinner party, and it was a huge hit. Everyone wanted the recipe! The garlic-herb butter layered inside, combined with the melty cheddar and Parmesan truly magnificent! The tip about grating your own cheese made a huge difference in how evenly it melted. Thank you!
Can u use pre-made dough?
Hi Diana! Yes, you can! If using store-bought pizza or bread dough, let it sit at room temp 20–30 minutes so it’s relaxed and easy to roll. Then start at Step 8 (roll to 14×8 inches, fill, slice, and shape) and bake as written. Happy baking! ~gvd team
Should I make any changes for baking this at an altitude above 5000ft?
Hi Casey! We haven’t tried this one at other altitudes yet, but my best guess is that at 5,000+ ft, this bread usually just needs a little less rise time, because yeast works faster at altitude. I’d follow the recipe, but use the rise cues as your guide. If it’s rising too fast, you can also reduce the yeast slightly (try 2 teaspoons instead of 2 ¼) or do the final rest in a slightly cooler spot. Baking time/temp should stay the same. Report back with your findings, please, and happy baking! ~gvd team
This look fabulous! Does it prep well for baking later? I’d like to prep it in the morning and then bake it when I get home for dinner. Would that change any part of the recipe? Or do you have any recommendations for it to be a success?
Hi Janelle! Yes, it preps beautifully for later. You can fully assemble the rings in the morning, cover them, and refrigerate up to 8 hours. When you get home, let them sit out to puff again (about 30–45 minutes), then bake as written. The only real change is giving the chilled dough a little extra rise time. Perfect for a fresh-baked dinner side without the evening prep. ~gvd team
Big hit with my family. Served it with homemade creamy tomato soup and perfect for dipping!
Hi Jeannie! That sounds like the coziest combo — creamy tomato soup and this bread is **chef’s kiss** for dipping. So happy it was a hit with your family! Thanks for taking a moment to share. ~gvd team
Hi! Thanks for sharing this recipe. Is it possible to substitute AP flour with bread flour for this recipe? If so, would you recommend any modifications to the recipe? Thanks so much & happy holidays!
Hi Jackie! Yes, you can use bread flour, it will just make the bread a bit chewier. AP keeps the pull-apart texture softer! If you do opt to use bread flour, you might need to add 1-2 extra teaspoons of water. Happy holidays to you as well, and happy baking! ~gvd team
Thanks for the tip! I ended up sticking with AP flour. This turned out so wonderful and was a hit at Thanksgiving! Thanks so much!!
So happy to hear it was a Thanksgiving hit! Thanks for coming back to share. ~gvd team
I made this bread for a casual football Sunday and it did not last until halftime! Not only are the instructions easy to follow, but the dish is also incredibly flavorful.
I was looking for a bread to go with chicken Alfredo.
I’ve been baking bread for 50 years, this is one of the best ones I’ve found.
I make it for friends last week, it was such a hit I was asked to make it for a friend’s birthday party.
Although this time I’ll have to make double recipe.
Lol, last week 4 people were absent, only 2 pieces were left. EXCELLENT!
Hi Teresa! That’s quite the endorsement! This would be so good with chicken alfredo, I might do just that this week! Thanks for taking the time to tell us how popular they were, and from someone who has been baking bread so long. Means a lot! ~gvd team
Made this and it was perfect! Really tasty pull apart bread. Followed the recipe exactly and was super easy to make.
Thank you so much for taking the time to come back and comment and rate, Jayme! It made my day!
I have been making these wreaths for Christmas ever year for a while now. Sorry for taking so long to thank you for your beautiful recipe.
So wonderful to hear, Melana! Thank you for stopping back by and taking the time to comment and rate us 5 stars!