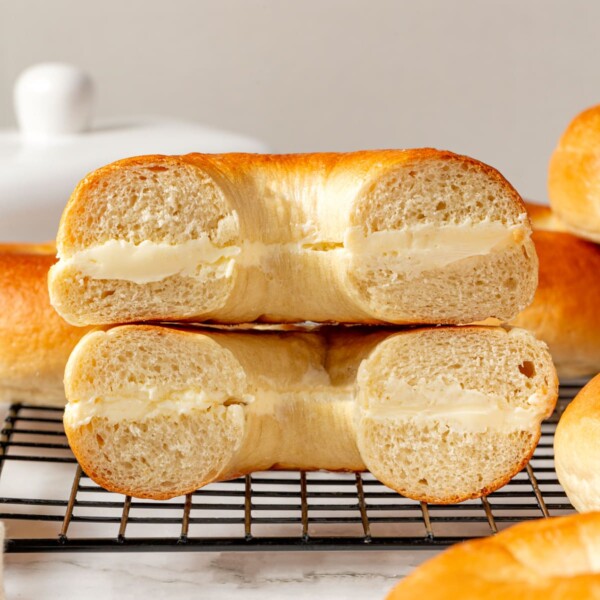
This easy sandwich bread recipe is soft and tender with a hint of sweetness! You can have flavorful, freshly baked bread in under 3 hours with only 5 ingredients!

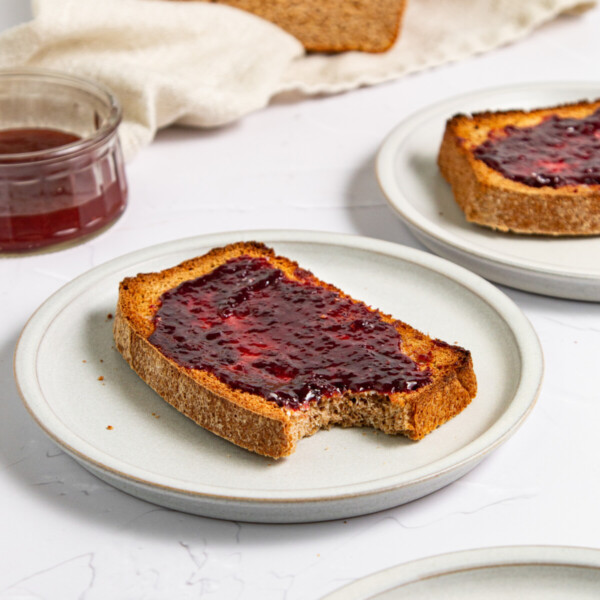
This is the best sandwich bread recipe! You can have fresh bread in under 3 hours that is way better than store-bought. This bread slices perfectly into thin slices for sandwiches or thicker for French toast, avocado coconut toast, or dipping into soups.
Since my son turned 2, I’ve been on quite a sandwich bread baking streak! I’ve tested some of the fan-favorites, like this multigrain bread, whole wheat bread, and brioche bread; and updated and improved a few older favorites, like this oatmeal bread recipe and easy peasant bread.
![]()
Why This is the Best
- Soft and fluffy but sturdy. No soggy bread here–and you’ll love how easily this homemade bread stacks for everything from bacon turkey bravos to French toast!
- Just 5 everyday ingredients! A little bit of butter lends a slightly buttery taste and super soft crust!
- Recipe created by a professional pastry chef! I adapted my professional recipe to be even easier for home cooks, so you can bake homemade white bread with confidence.
- Beginner-friendly and forgiving! The dough is easy to mix, soft, and easy to shape. Like this no knead Dutch oven bread and oatmeal bread recipe, this sandwich bread is the perfect recipe to start with!

Ingredients & Substitutions

- Whole Milk: Adds to the richness, texture and shelf-life for this and in my milk bread recipe. Feel free to substitute with your preferred alternative milk or warm water, like I do in my French bread recipe!
- Instant Yeast: I use instant rapid-rise yeast to make this sandwich bread in under 3 hours, but you can use active dry yeast and follow the recipe as written. I break down the differences between the yeasts in my how to bake with yeast post! Check it out!
- Granulated Sugar: There is just a hint of sweetness from the granulated sugar. Alternatively, use honey or omit it completely.
- All-Purpose Flour: All-purpose flour will give you the softest, most tender bread. It has the right amount of protein to develop a strong gluten network for support. If you opt to use bread flour, it will be chewier.
- Kosher Salt: Salt strengthens and tenderizes the gluten, so it helps with structure, texture and flavor!
- Unsalted Butter: Just 3 tablespoons of butter adds the right amount of tenderness, a little buttery flavor and keeps homemade sandwich bread soft. It is possible to substitute vegetable oil or olive oil.
See the recipe card for full information on ingredients and quantities.
Variations
- Make it whole wheat. You can substitute up to half of the all-purpose flour in this recipe for whole wheat flour; however, if you are looking for a 100% whole wheat sandwich bread, I recommend making my whole wheat bread or whole wheat sourdough bread instead!
- Make it a sourdough sandwich bread! I loved this homemade white sandwich bread so much that I couldn’t wait to transform it into a sourdough sandwich bread! I’ve been testing and perfecting it with active starter and sourdough discard! That recipe will be coming to you in Summer 2025! If you are a sourdough novice, I recommend starting with my sourdough starter recipe then brush up on how to feed sourdough starter and then get baking with all our sourdough recipes!
- Make the top shiny. You could brush to top of the loaf with egg wash right before baking to achieve a shiny top or to adhere flaked sea salt or seeds like brioche buns.
- Make a cinnamon swirl. Check out my cinnamon swirl bread for a nostalgic cinnamon variation!
Professional Tips
- Bloom the instant yeast as you would active dry yeast. This gives them a head start and will cut the proof time in half. You could also skip this step and combine all the ingredients, except butter, in the mixer starting with Step 2.
- Add butter after the gluten develops. Adding the butter too early will slow down the mixing. Using room temperature butter helps, but isn’t required.
- Using flour for shaping will make this bread more difficult to shape and less flavorful. Even a light dusting of bench flour is unnecessary! That is how lovely this dough is! There is no need to add flour which will just make the dough drier and less flavorful.
How to Make Sandwich Bread
Use these instructions to make soft, fluffy white bread from scratch! Further details and measurements can be found in the recipe card below.


Step 1: Bloom the yeast for a faster rise. In a small bowl combine warm milk, the instant yeast and a sprinkle of the sugar for the recipe. It isn’t important how much sugar, I just sprinkled about a teaspoon and put the rest in my mixer bowl! Whisk or stir together with a fork, then let sit while you measure the remaining ingredients but no longer than 10 minutes (photo 1).
Step 2: Mix the dough until fully hydrated. In the bowl of a stand mixer fitted with the dough hook attachment or a large mixing bowl with a wooden spoon if mixing by hand, combine all-purpose flour, salt, remaining sugar and the milk-yeast mixture (photo 2). Mix on low speed until the dough is hydrated and all the ingredients have incorporated. It will only take a minute or two.
Step 3: Knead until the dough passes the windowpane test. Increase the mixer to medium speed for 6-8 minutes, or until a soft, strong, elastic dough forms. Use the window-pane test to assess the dough. It should pull a smooth, thin window similar to a brioche loaf dough.
Step 4: Add the butter after gluten has developed. Add the pieces of butter to the mixer bowl and reduce the speed to low. Mix on low speed until all the butter has worked into the dough. Room temperature butter will incorporate faster, but it isn’t essential (photo 4).
Note: If you are mixing and kneading this sandwich dough by hand, I do recommend using room temperature or softened butter. Cold butter will take longer.
Step 5: Let the dough rise until doubled. Turn the dough out into a lightly oiled medium bowl for the first rising. Cover with plastic wrap and let the dough rise at room temperature 45-60 minutes. The dough should have doubled (photo 5).


Step 6: Preshape into a tight round. Preshape the dough into a round (boule) by flipping it over and folding each of the four sides towards the center (photo 6.1). Flip back over (seam-side-down) and gently shape it into a round by pulling it towards you with both hands. Rotate a quarter turn and repeat until you have a round dough ball that sits up on your work surface (photo 6.2).
Note: I do not use any bench flour when working with this dough. I lightly oil my hands from the proof bowl and this dough does not stick. If you add more flour at this point not only will the dough be difficult to shape but the resulting bread will be dry.
Step 7: Let the dough rest to relax gluten. Cover the dough with your plastic wrap or the overturned bowl and allow to bench rest 15-20 minutes. This is longer than most bench rests because it needs that time to relax. You can rush it but the surface of the loaf will be rough and will crack.
Step 8: Shape the dough into a loaf. Flip the dough back over and take the side furthest from you and fold it down to the center. Rotate the dough 180 degrees and repeat by folding the other side down towards the center (photo 8.1).
Perform 2 thumb folds: wrapping the dough around the thumb of the left hand and sealing the edge with the heel of the right hand. Start this motion towards the right side and gradually move left, rolling and sealing as you go. The first thumb fold will not fully close the dough log. Perform 1 more thumb fold to fully create a cylinder or log shape (photo 8.2).


Step 9: Final proof in the loaf pan. Place the log shaped dough seam side down in a 8-9 inch loaf pan sprayed with non-stick cooking spray (photo 9.1). Cover loosely with plastic wrap and allow to proof in a warm spot for 45-60 minutes or until the dough has risen above the edge of the loaf pan in most places (photo 9.2).
Step 10: Bake until golden and fully set. While the dough is final proofing (its second rise), preheat the oven to 375°F conventional (no fan). Bake in a preheated oven for 28-30 minutes until the crust is a golden brown or an instant read thermometer reaches 185°F (photo 10).
Step 11: Cool completely before slicing. Remove the loaf from the oven and turn out immediately onto a wire rack to cool completely before slicing.
Note: You can brush the warm crust with melted butter for added flavor if desired. The crust will soften naturally as it cools regardless of the additional butter!
Recipe FAQs
Cool sandwich bread completely on a wire rack at room temperature, then store in an airtight container or a plastic zip-top baggie at room temperature for up to a week! The freezer is best for longer storage.
Freeze the cooled loaf, well wrapped, for up to 2 months. Like oat flour banana bread, I like to freeze loaves already cut into individual slices for easy snacks or breakfasts!
Other than the most delicious toast and sandwiches, like this thai veggie sandwich or even an open faced caprese sandwich, you could serve thick slices alongside sheet pan shakshuka for breakfast or to soak up the last bit of sauce from these crockpot Swedish meatballs! This bread slices perfectly into thin slices for sandwiches or cut it thicker for French toast, avocado coconut toast, or dipping into soups.
The leftovers are the reason why I always double this recipe! It makes excellent sandwiches, peanut butter toast, French toast casserole, easy bread pudding, breadcrumbs, croutons, or this breakfast casserole with bread.

Recommended Yeast Bread Recipes

Yeast Breads

Yeast Breads
Yeast Breads

Yeast Breads
If you enjoyed this recipe, please leave a star rating and let me know how it goes in the comments below! I love hearing from you and your comments make my day!
Sandwich Bread

Ingredients
- 1 cup whole milk, warmed to 100°F-110°F
- 2 ½ teaspoons instant yeast, 1 packet
- 1 tablespoon granulated sugar
- 3 cups all-purpose flour
- 1 ½ teaspoons kosher salt, or half the amount of table salt
- 3 tablespoons unsalted butter, cut into small pieces
Instructions
- In a small bowl combine warm milk, the instant yeast and a sprinkle of the sugar for the recipe. It isn’t important how much sugar, I just sprinkled about a teaspoon and put the rest in my mixer bowl! Whisk or stir together with a fork, then let sit while you measure the remaining ingredients but no longer than 10 minutes.
- In the bowl of a stand mixer fitted with the dough hook attachment, combine all-purpose flour, salt, remaining sugar and the milk mixture. Mix on low speed until the dough is hydrated and all the ingredients have incorporated. It will only take a minute or two.
- Increase the mixer to medium speed for 6-8 minutes, or until a soft, strong, elastic dough forms. Use the window-pane test to assess the dough. It should pull a smooth, thin window similar to a brioche dough.
- Add the pieces of butter to the mixer bowl and reduce the speed to low. Mix on low speed until all the butter has worked into the dough. Room temperature butter will incorporate faster, but it isn’t essential.
- Turn the dough out into a lightly oiled medium bowl. Cover with plastic wrap and proof at room temperature 45-60 minutes. The dough should have doubled.
- Preshape the dough into a round (boule) by flipping it over and folding each of the four sides towards the center. Flip back over (seam-side-down) and gently shape it into a round by pulling it towards you with both hands. Rotate a quarter turn and repeat until you have a round dough ball that sits up on your work surface.
- Cover the dough with your plastic wrap or the overturned bowl and allow to bench rest 15-20 minutes. This is longer than most bench rests because it needs that time to relax.
- Flip the dough back over and take the side furthest from you and fold it down to the center. Rotate the dough 180 degrees and repeat by folding the other side down towards the center. Perform 2 thumb folds by wrapping the dough around the thumb of the left hand and sealing the edge with the heel of the right hand. Start this motion towards the right side and gradually move left, rolling and sealing as you go. The first thumb fold will not fully close the dough log. Perform 1 more thumb fold to fully create a cylinder or log shape.
- Place seam side down in a 8-9 inch loaf pan sprayed with non-stick cooking spray. Cover loosely with plastic wrap and allow to proof in a warm spot for 45-60 minutes or until the dough has risen above the edge of the loaf pan in most places.
- While the dough is final proofing, preheat the oven to 375°F conventional (no fan).
- Bake in a preheated oven for 28-30 minutes to an internal temperature of 185°F. Remove the loaf from the oven and turn out onto a wire rack to cool completely before slicing.
Notes
Nutrition
Nutrition information is automatically calculated, so should only be used as an approximation.
 Like this recipe? Rate & comment below!
Before You Go
I hope you enjoyed this homemade white bread recipe. Check out our other yeasted bread recipes or try your hand at sourdough with this sourdough bread recipe for beginners!


I have it rising on the oven now, but I needed to add a tbsp more of butter and 2 tbsp of water to get it to a good dough for bread consistency. I’ve been making bread for years and it was definitely too dry to work with. Maybe adding grams to the recipe instead of relying on measuring cups for flour would be the better option, but knowing how to tweak definitely helped and I’m looking forward to trying this variation!! It’s different than what I normally do! It smells really good so far and I love that it doesn’t have a ton of sugar and is a one loaf recipe!
HI Rose! I am so happy you had the knowledge and confidence to get the dough where it needed to be. nothing but experience can teach that! I create and test all my recipes using the metric mass measurements, so you are spot on in assuming it was most likely the flour measurement. Happy Baking! Lindsey
Made this today and wow—finally a sandwich bread that slices clean and actually holds up. I didn’t change a thing! The shaping instructions were especially helpful (I usually wing it and regret it). Already planning to make another loaf this weekend and try the egg wash trick.