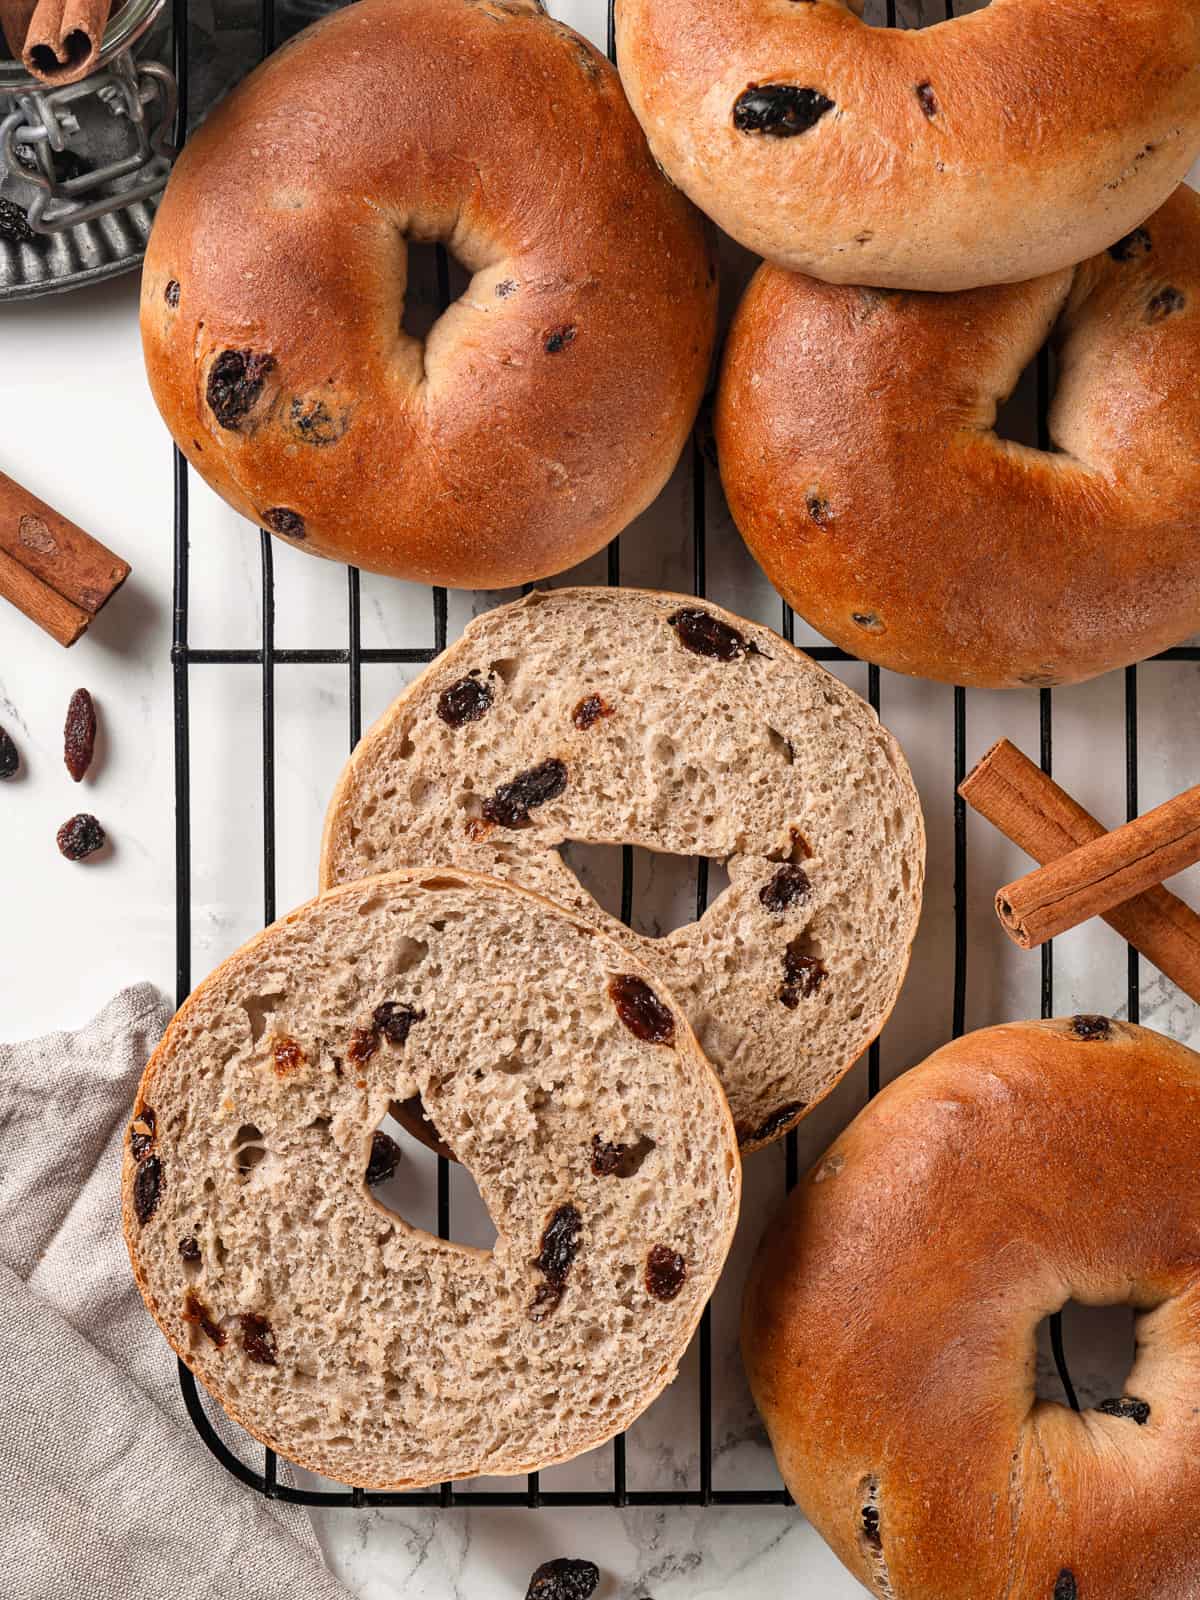
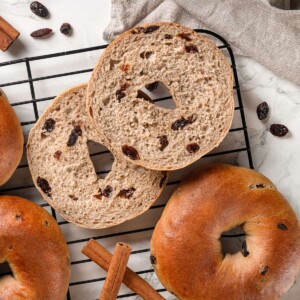
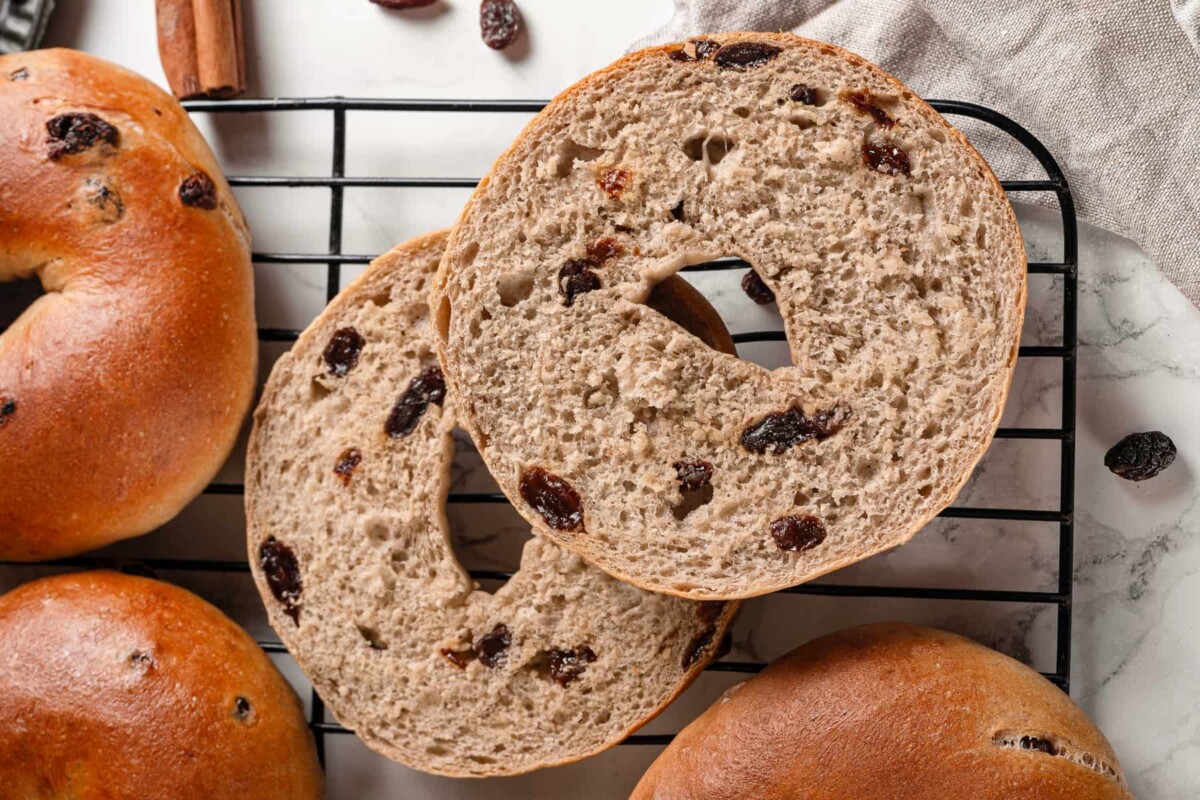
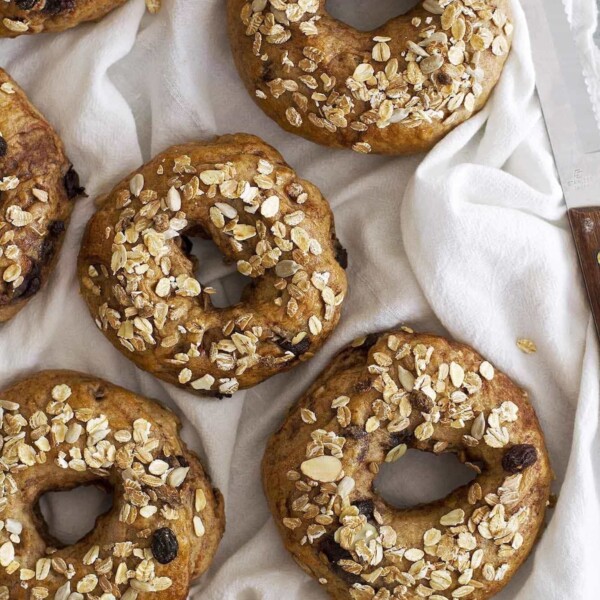
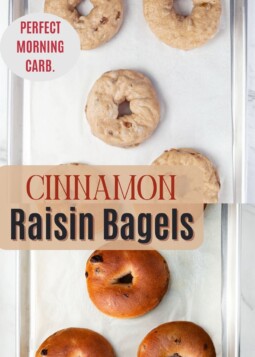
Soft, chewy homemade cinnamon raisin bagels! Delightfully spiced and lightly sweetened with brown sugar and plump raisins. This professional recipe guides you step-by-step and shows you that chewy bagels are easier than you think!
A Quick Look At The Recipe
This is a brief summary of the recipe. Jump to the recipe to get the full details.
Prep Time
25 minutes
Cook Time
20 minutes
Proof + Boil
1 hour 45 minutes
Total Time
2 hours 30 minutes
Servings
10 bagels
Difficulty
Moderate
Calories *
280 kcal per serving
Technique
Make dough, pre-shape, shape bagels, proof, boil, and bake!
Flavor Profile
Light cinnamon raisin bagels with a perfect bagel crust.
* Based on nutrition panel
Just pulled these out of the oven and already want another. Very delicious! I wanted mini bagels so after weighing them out to 120-123 grams each, I got 11. When at the rope stage, I rolled them out to 9″ then cut in half and rolled a little more to get mini bagels…⭐⭐⭐⭐⭐
Cathleen Richert
I would venture to say that, just like ice cream, everyone has a favorite, go-to bagel order. My husband and son go savory with their everything bagels and plain cream cheese but I will always get a cinnamon raisin bagel with cinnamon walnut cream cheese. Sometimes I will get a plain New York Style bagel on the side!
This is a simple and traditional bagel recipe that uses a lean dough and only a little bit of brown sugar as sweetener. There are no eggs in the recipe and the only deviation from my professional recipe is the omission of diastatic malt powder, because I wanted to create a homemade cinnamon raisin bagel recipe that is accessible to all!
Why This is the Best Recipe
- Developed by a professional pastry chef. The best recipe and all my pro tips for making chewy, hand-rolled bagels better than your local bagel shop!
- Chewy crust with a soft, slightly chewy interior! Lightly sweetened brown sugar dough spiced with cinnamon and packed full of sweet, plump raisins!
- You can just poke a hole in the center to shape bagels, but this recipe shows you the professional way to hand-roll bagels at home! This ensures a smooth surface that will maintain its shape when boiled and baked. There is no need to add an egg wash to fake it!
- This recipe can be made in under 2 ½ hours or proofed in the refrigerator overnight! I prefer the texture and convenience of an overnight proof, especially since you can mix and then shape immediately! It makes for an easy, tasty breakfast treat the next morning!
Table of Contents
Ingredients & Substitutions
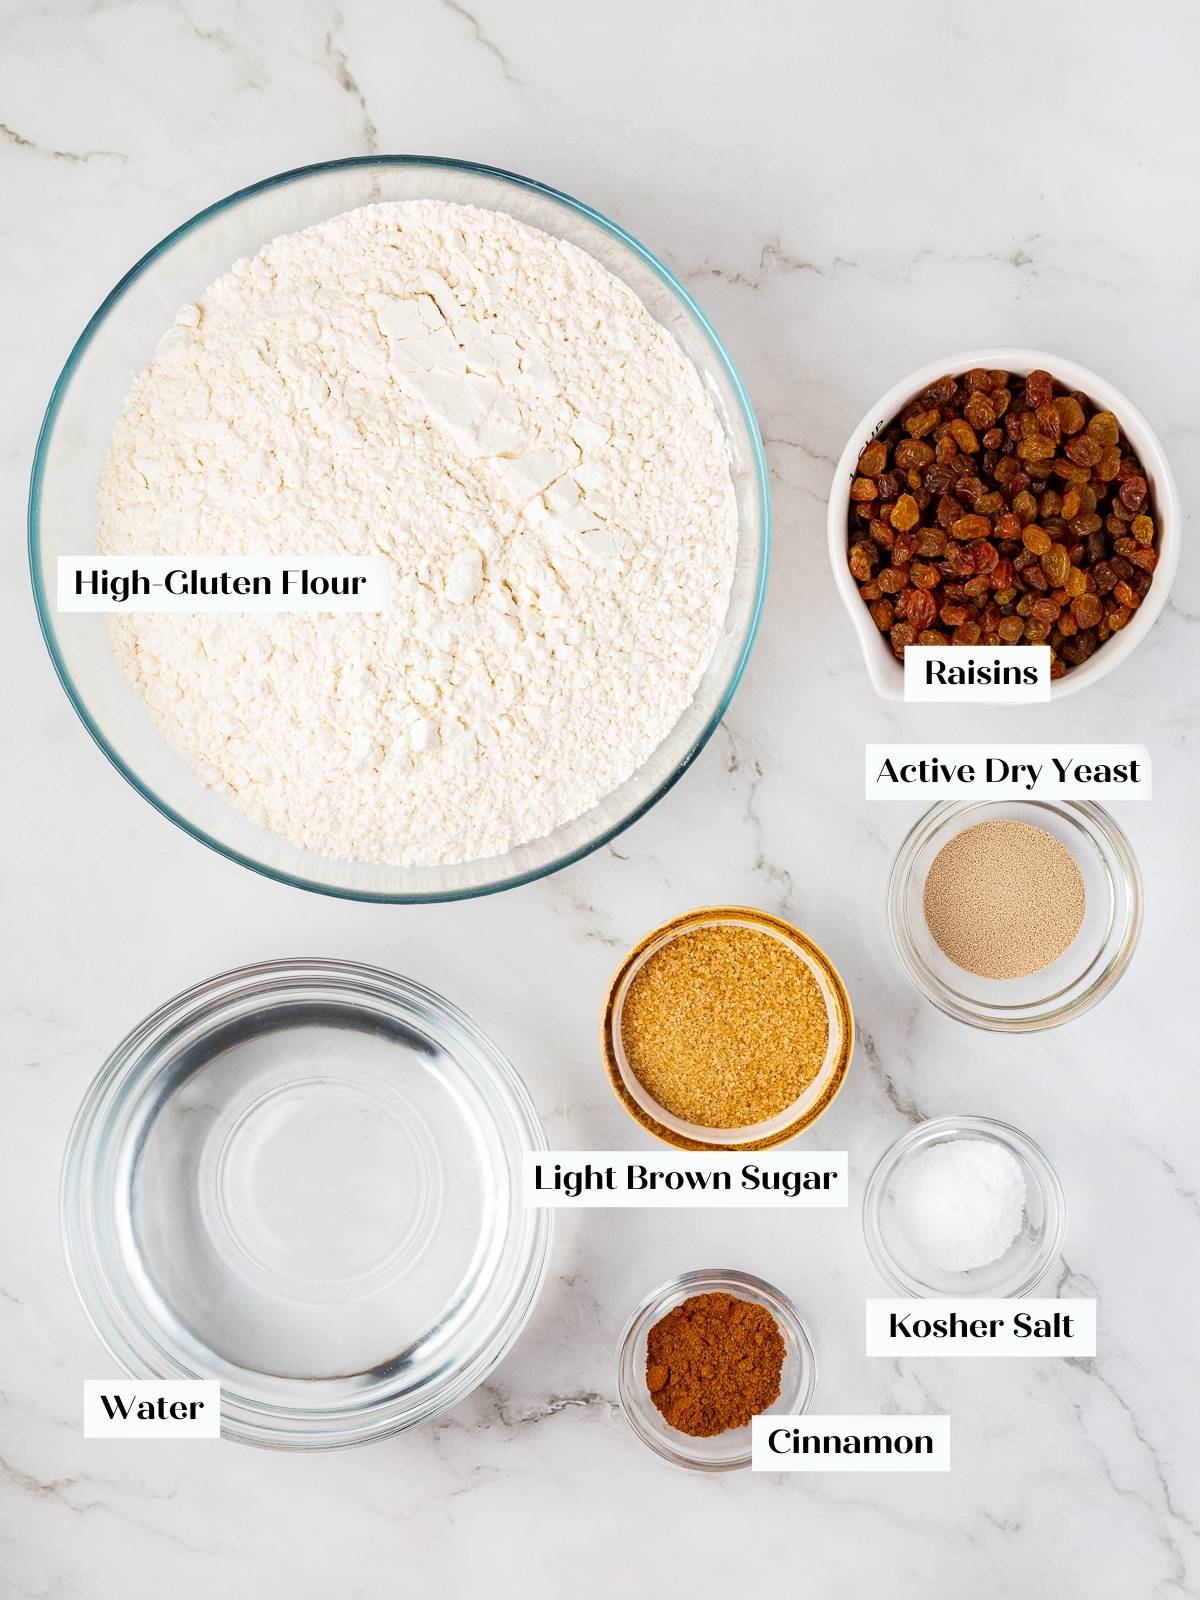
- High-Gluten Flour: I use King Arthur’s High-Gluten Flour both when I make bagels and when I test them. It is important to know that high-gluten flour, bread flour and all-purpose flour have different gram measurements per cup. I test all my recipes by mass, so if you would like to change the flour and you are using volume measurements, you will need to adjust the amount of flour accordingly. That would be approximately 5 2/3 cup bread flour or 4 ¾ cups + 1 tablespoon of all-purpose flour to yield 10 bagels.
- Ground Cinnamon: I add the ground cinnamon with the flour. If you would like an additional cinnamon swirl, like in my cinnamon swirl bread, then I recommend reducing the cinnamon to 1 teaspoon in the dough and adding 1- 1 ½ teaspoons cinnamon on low speed after the raisins have been incorporated. I’ve tried adding it with the raisins but they mix too long to retain the swirled effect.
- Kosher Salt: I recommend using kosher salt or half the amount of table salt or fine sea salt. It is integral to gluten development and the final chewy texture of the bagels.
- Raisins: There is no need to plump your raisins in warm water first if they are fresh and soft. My family and I eat enough dark raisins to always have soft, plump raisins on hand!
See the recipe card for full information on ingredients and quantities.
Variations
- Add a topping: I recommend leaving the everything bagel seasoning to the sourdough bagels or plain bagels, but no one is saying you couldn’t dip these in the cinnamon sugar topping from this Panera copycat French toast bagel recipe!
- Add a different or additional mix-in. Why not combine my bagel/cream cheese combo into one fantastic bagel by adding in walnuts with the raisins? Take inspiration from my cranberry bagels with walnuts or chocolate chip bagels with oats, and get creative!
- Adding sweeteners to the boiling water. Some swear by adding barley malt syrup or honey to the boiling water, but I do not find that it makes a significant difference in the flavor or texture of the finished bagels.
Pro Tips for Making Chewy Cinnamon Raisin Bagels
- There is no bulk proof, so make sure the dough is fully developed before adding cinnamon and raisins.
- Boiling bagels is a misnomer. It is best to drop bagels into simmering water to avoid cooking and killing the yeast and creating too thick a crust.
- I found that the boiling time was less important than dough development & proofing. You will read that the longer you boil the bagels, the chewier the crust; but I found that developing the dough enough, adequate proofing, boiling cold bagels, and fully baking the bagels made more of a difference than the actual time the bagels spent in the water.
How to Make Cinnamon Raisin Bagels
Use these instructions to make the chewy hand-rolled cinnamon raisin bagels! Further details and measurements can be found in the recipe card below.
Make and Mix the Dough
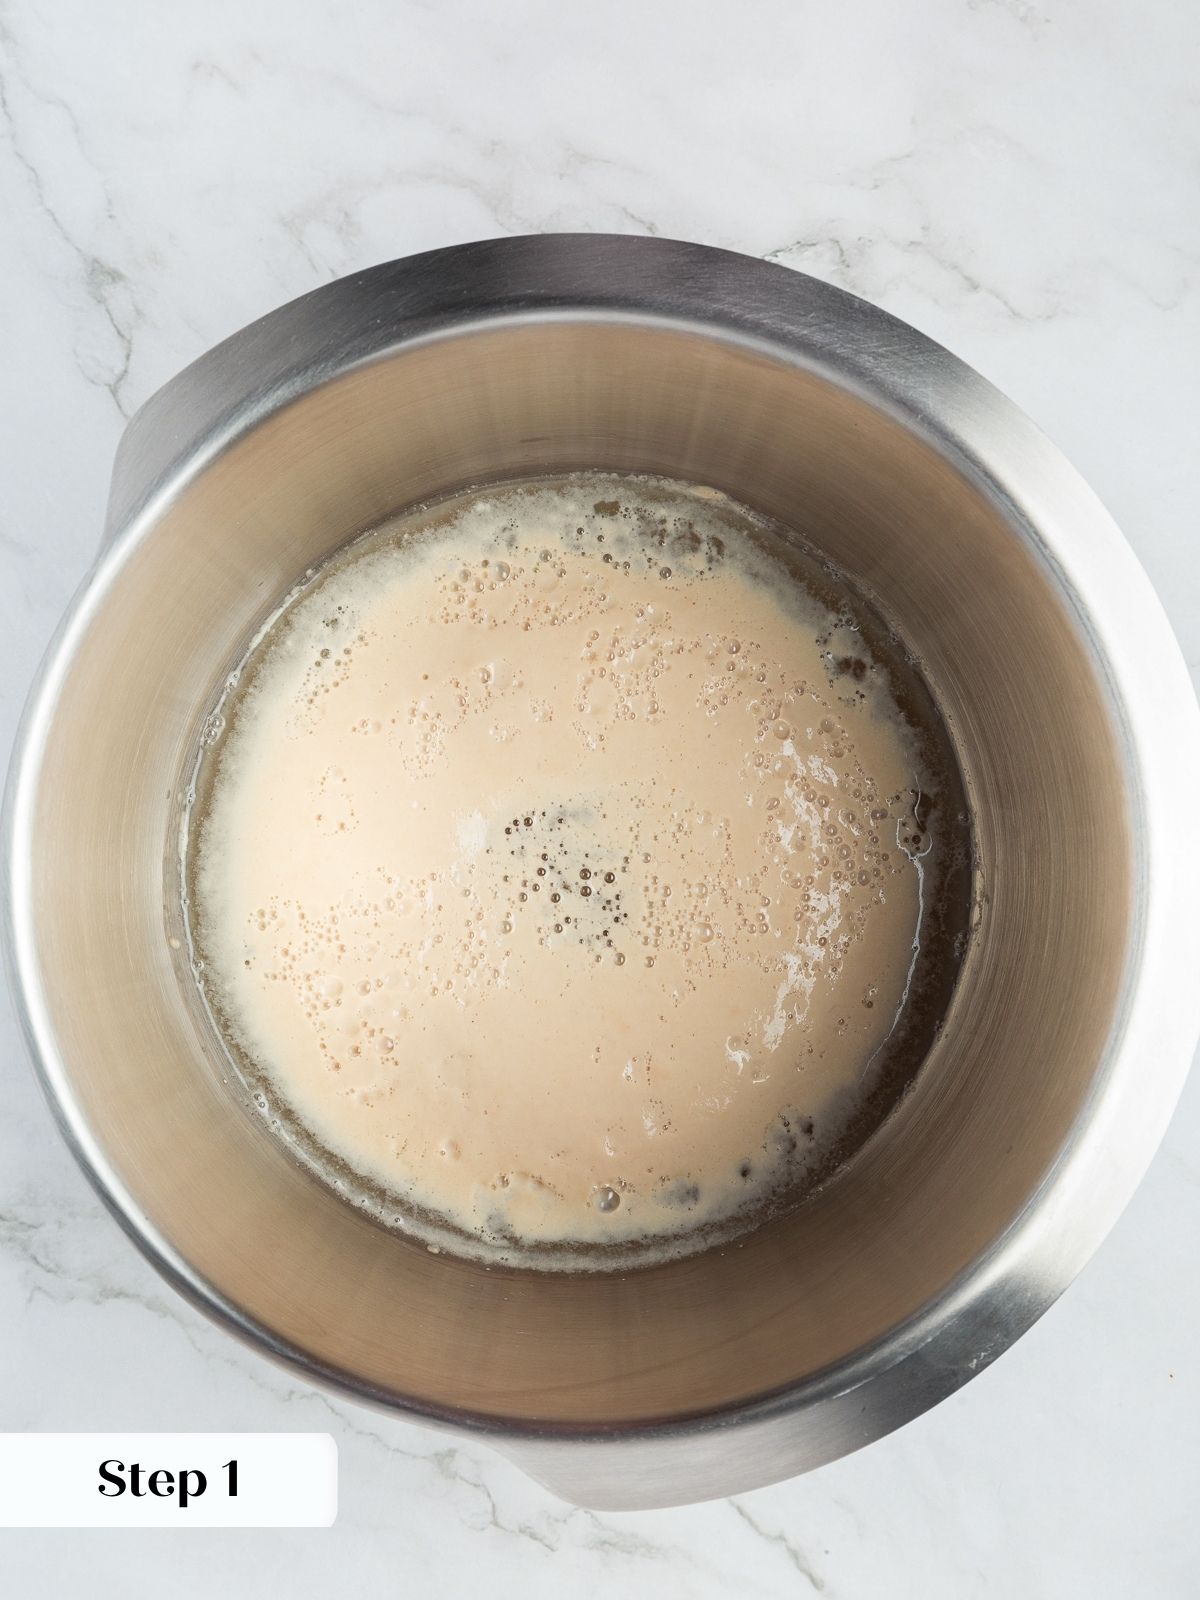
Step 1: Whisk yeast and water. In the bowl of a stand mixer, whisk together dry active yeast and water and optionally a bit of the brown sugar. Allow to sit for 10 minutes or until foamy (photo 1).
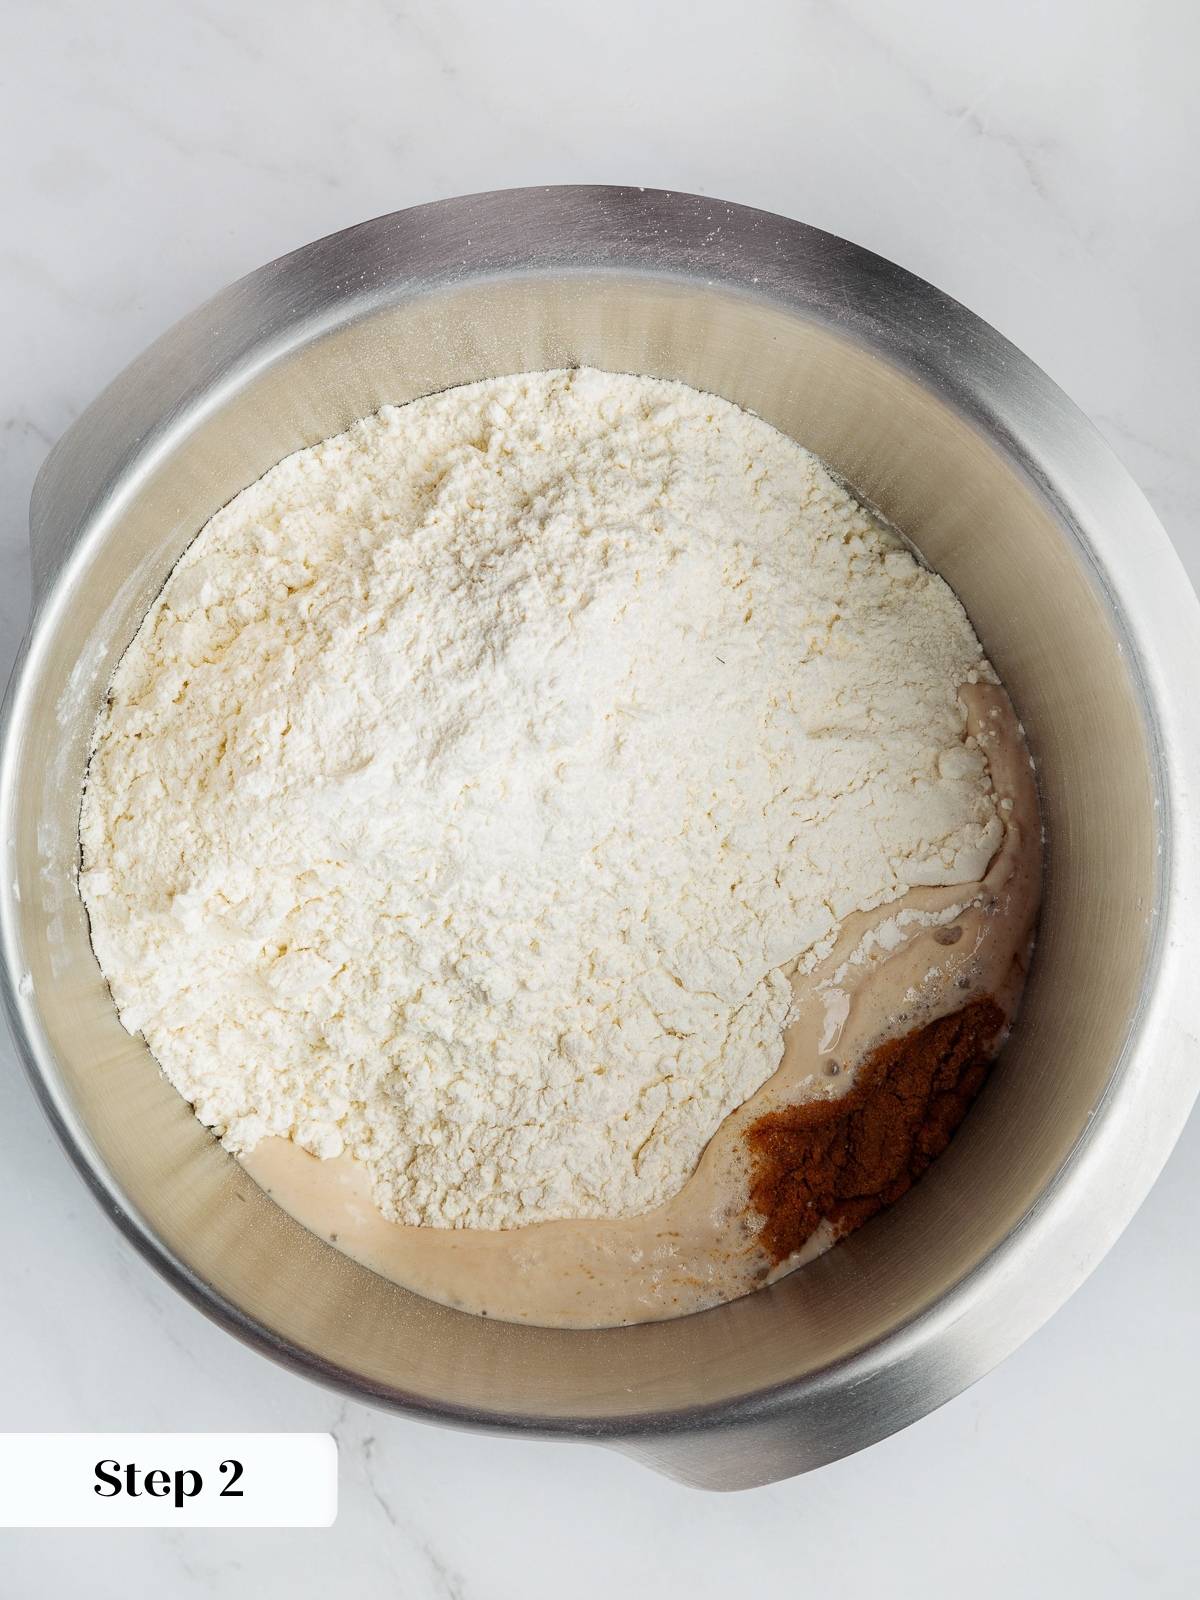
Step 2: Add remaining dry ingredients. To the stand mixer bowl add high-gluten flour, brown sugar, cinnamon, and kosher salt (photo 2). Use the dough hook attachment to combine all the ingredients on low speed.
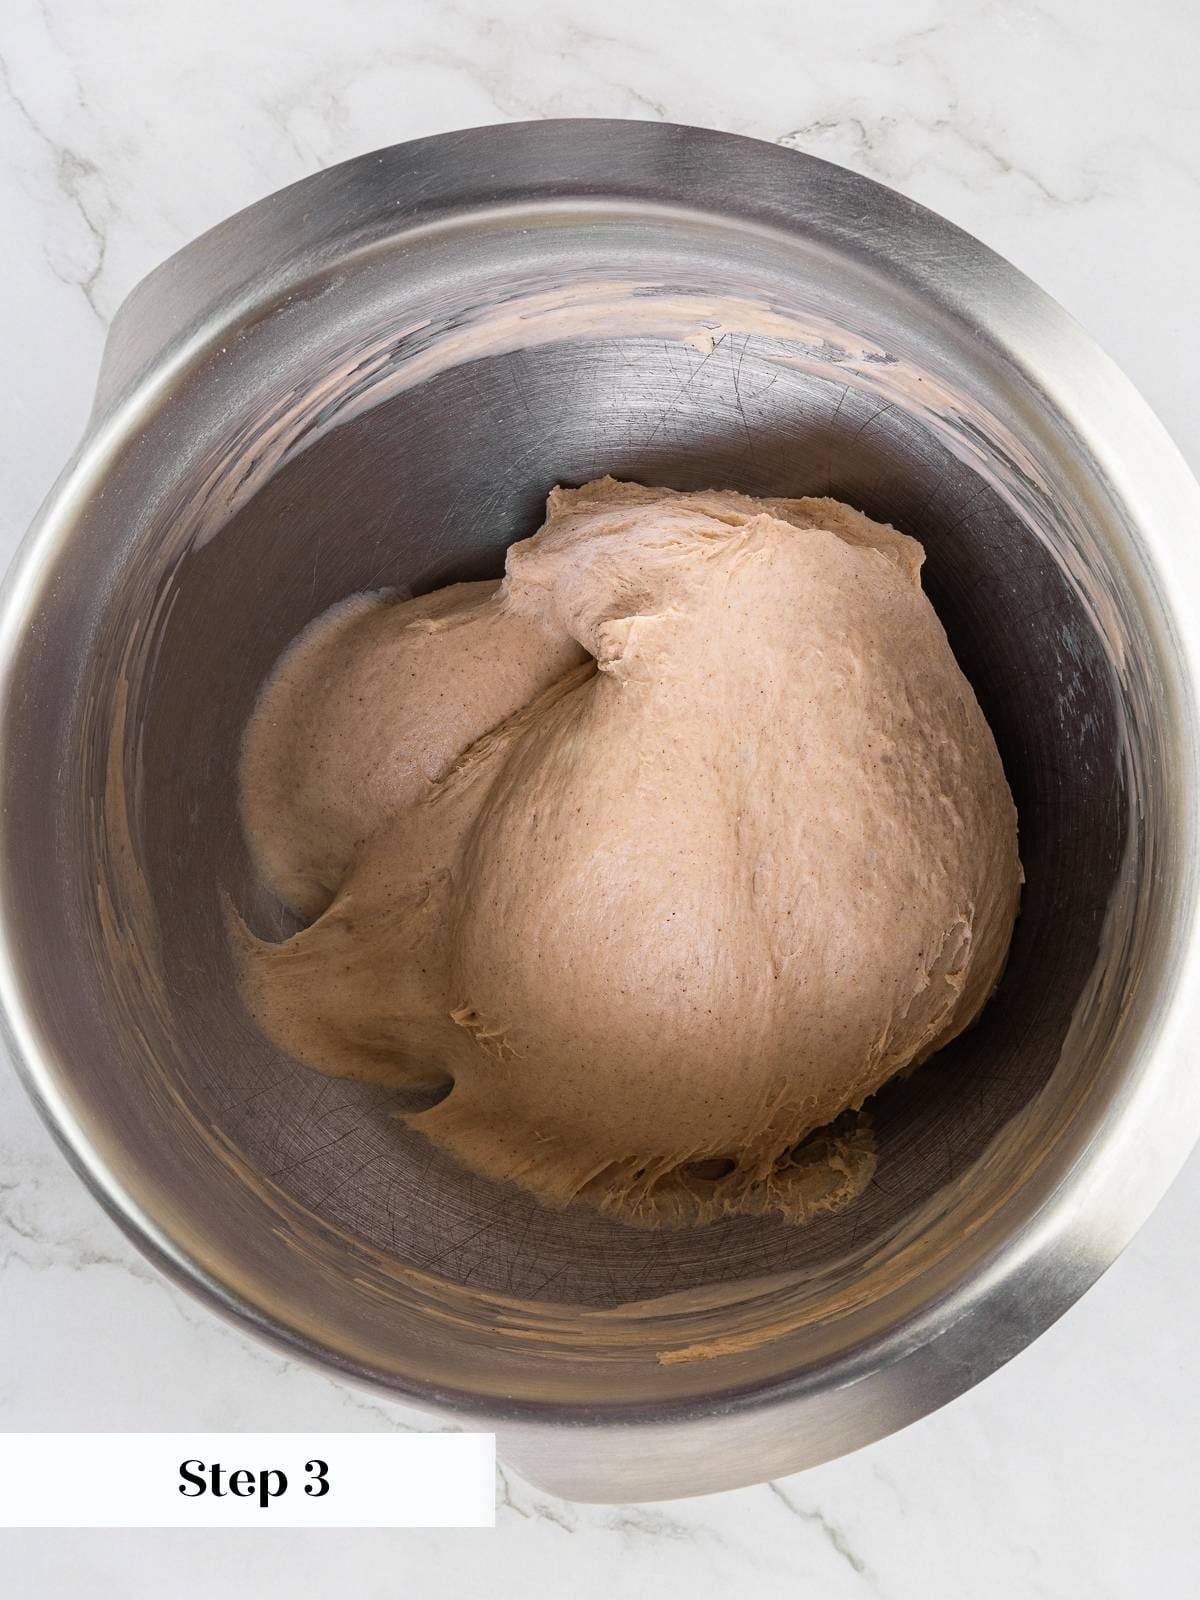
Step 3: Mix to windowpane stage. Mix on medium speed until a smooth dough forms. You should be able to pull a window pane. This is a stiffer dough because it only has 52% hydration, so it might seem developed when it is not. You are looking for a smooth dough (photo 3). The surface shouldn’t look like scar tissue, if it does, it isn’t mixed.
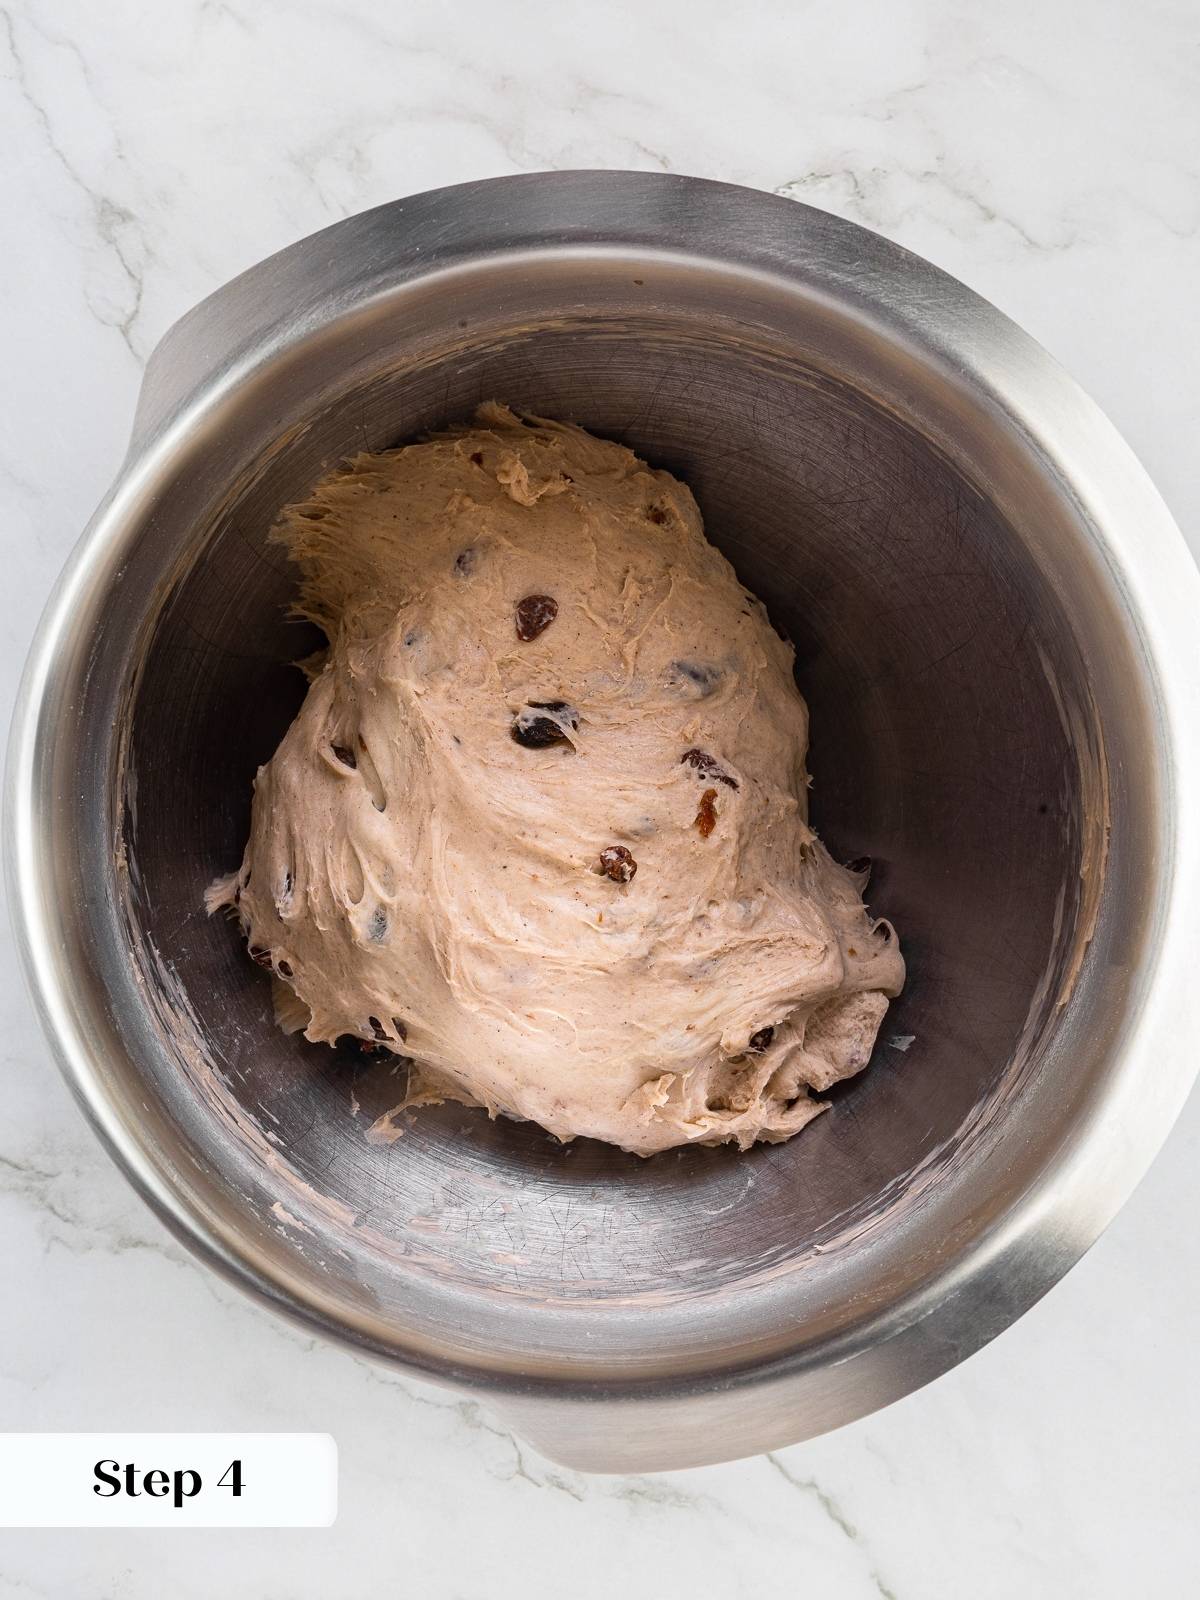
Step 4: Incorporate raisins until they are well distributed or you will have some bagels with a lot and some with hardly any (photo 4).
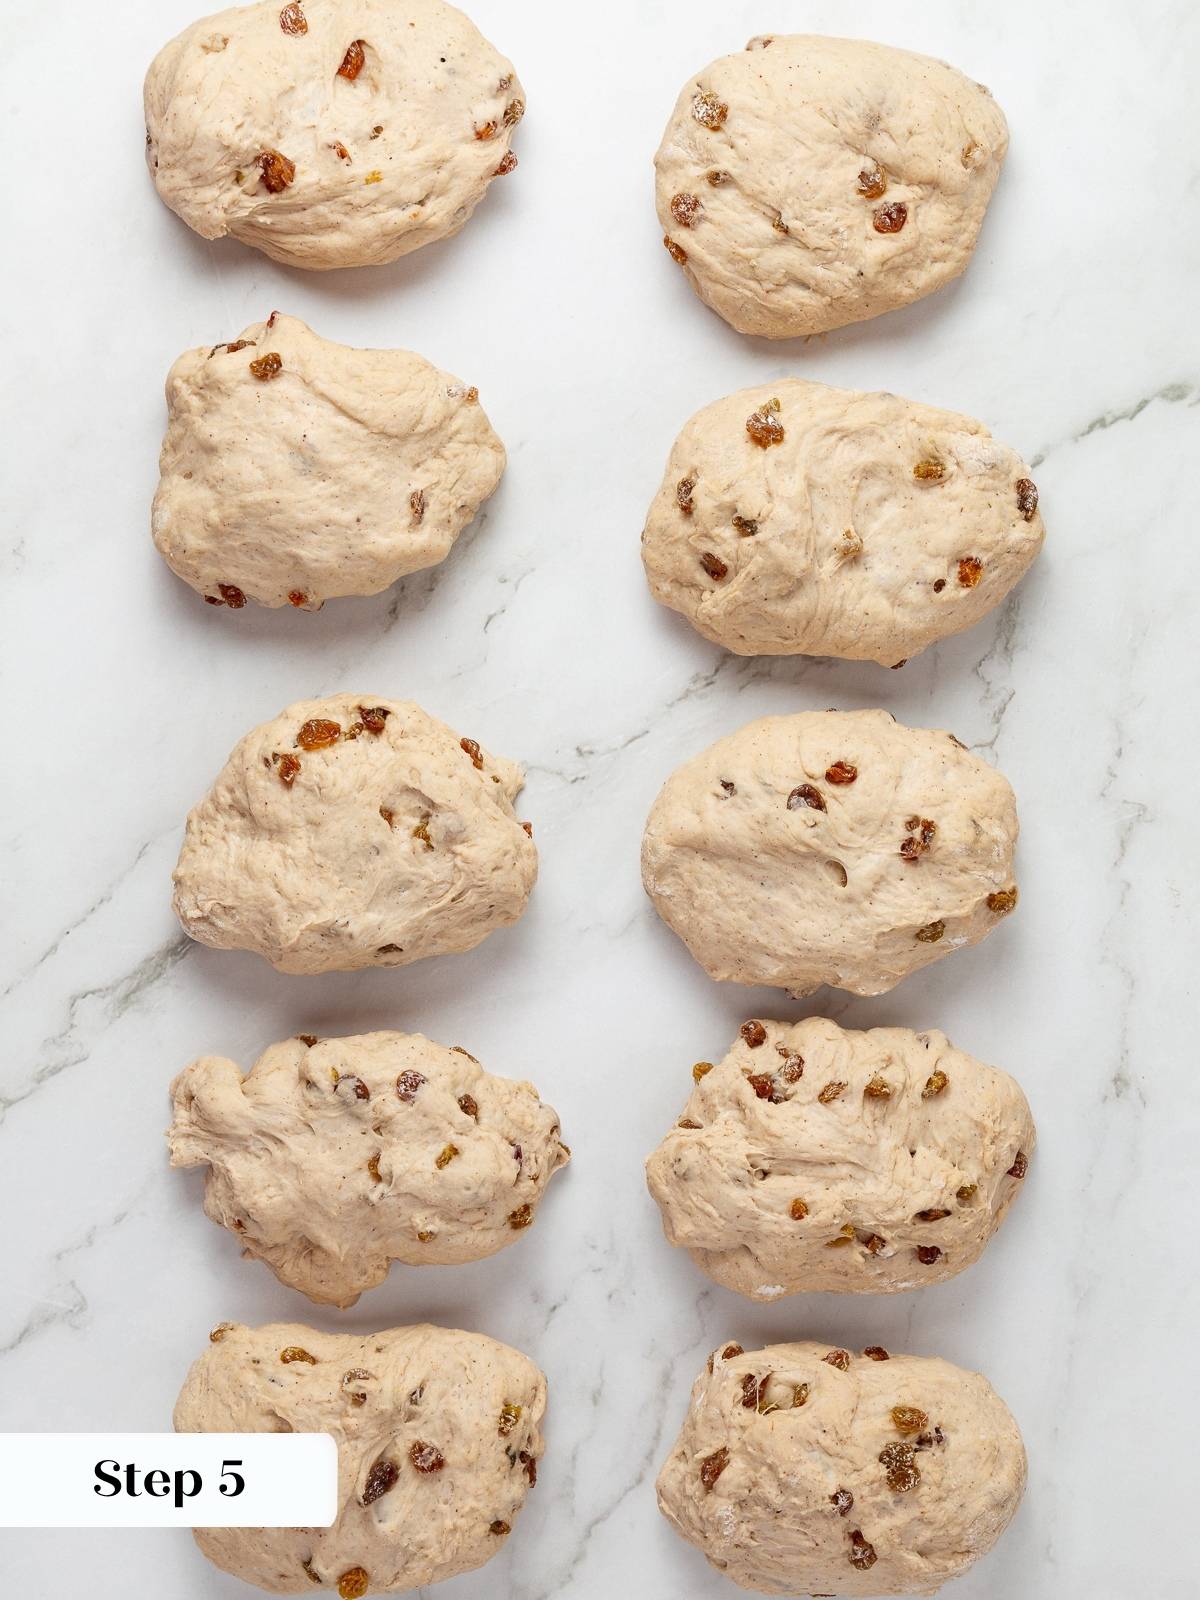

Step 5: Turn the dough out onto a smooth surface. Divide into 10 equal pieces, approximately 120g each (photo 5).
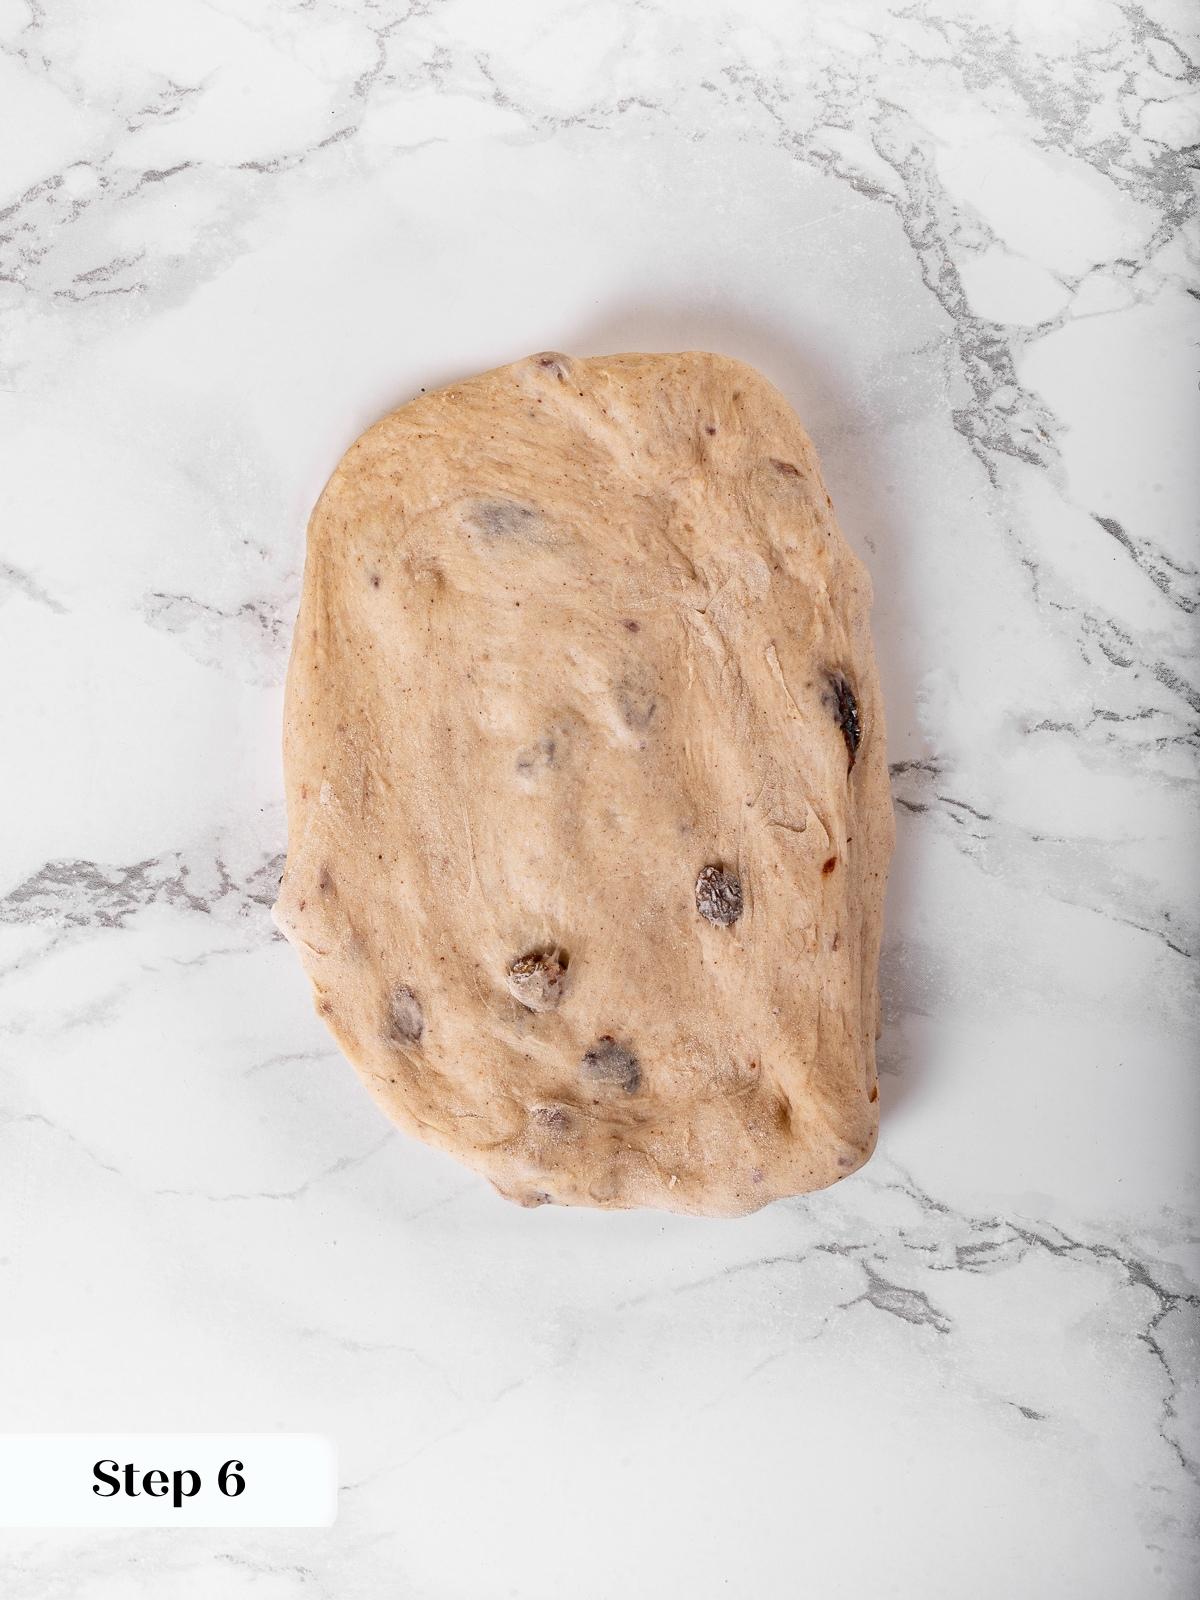
Step 6: Pre-shape. Working with one piece at a time, pre-shape the dough into a log shape. Do this by stretching the dough into a rectangle (photo 6). Fold the top 1/3 down to the center and then continue folding the folded dough over the final 1/3, sealing it against the counter with your fingers. Place it to the side and keep covered while you repeat with all remaining pieces.
If you weighed the dough to divide, you’ll probably have some small pieces. Place those pieces in the center of each rectangle before pre-shaping. That way they will be in the center of the dough and not stuck to the outside.
Shape the Bagels
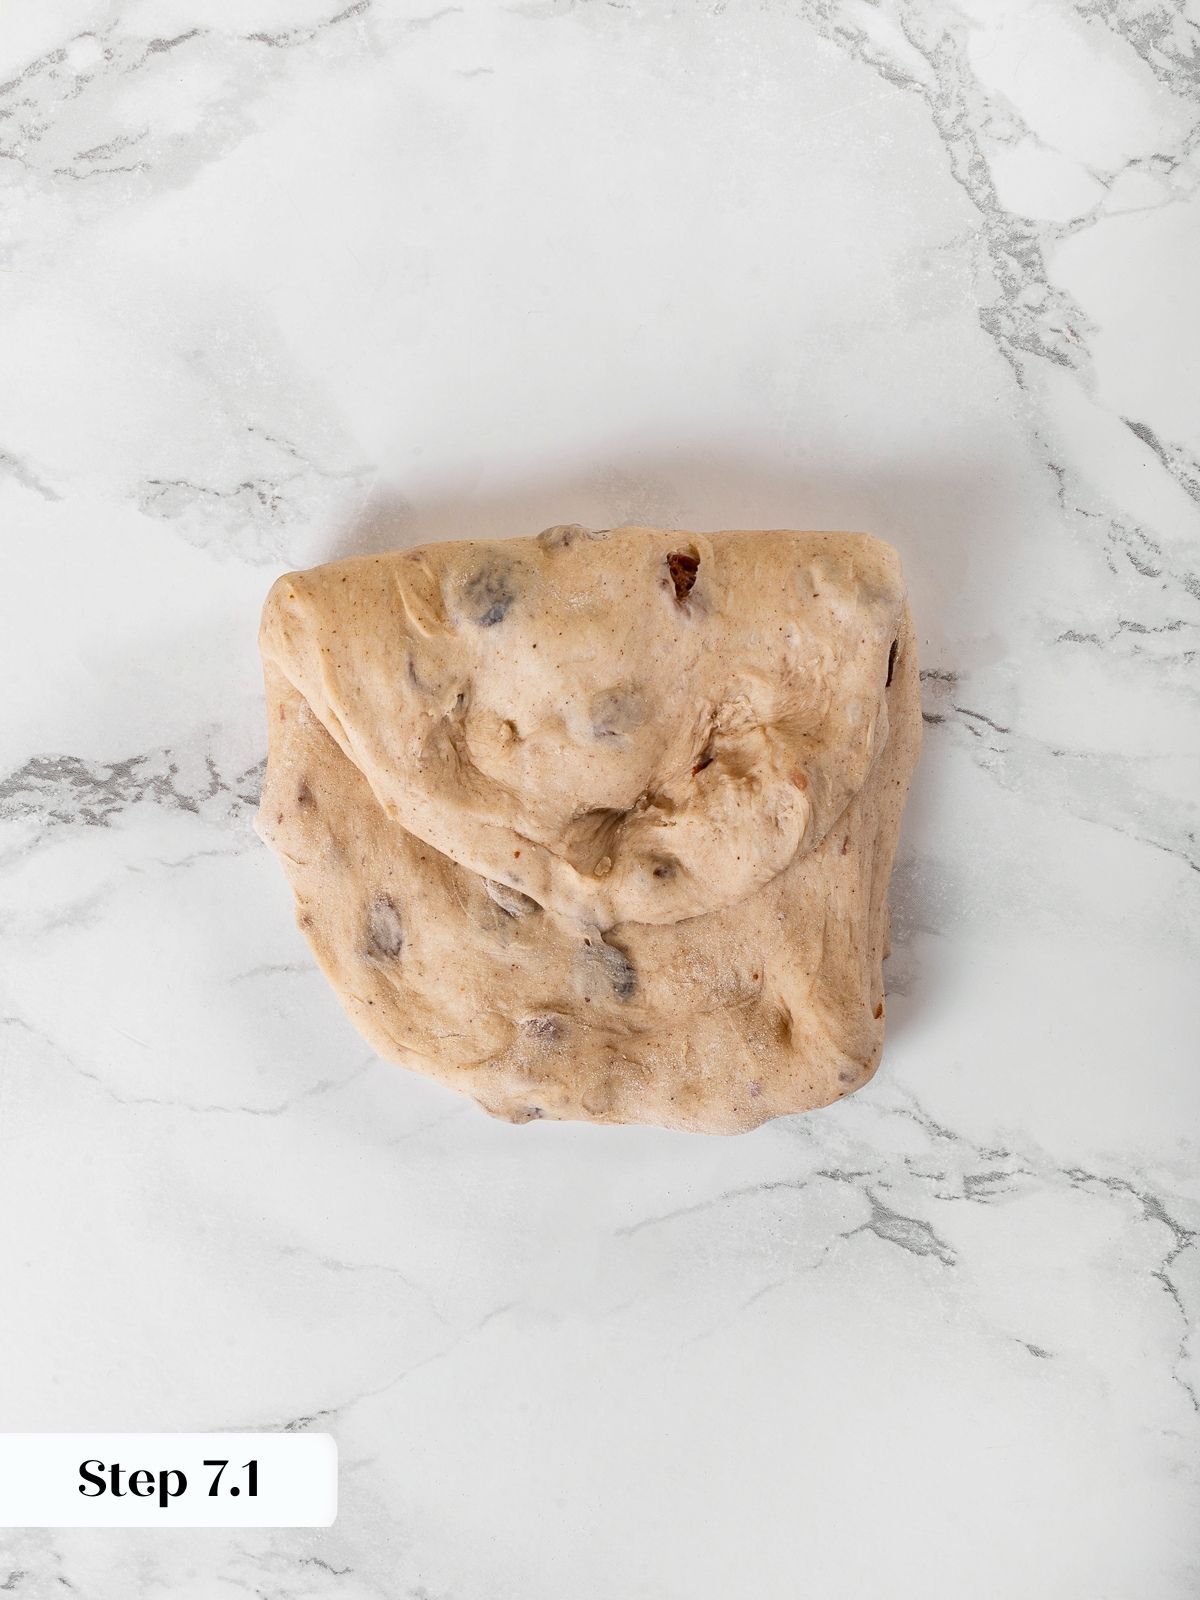
Step 7: Begin the envelope fold. Starting with the first piece of dough that you pre-shaped, gently work it into a square or rectangle. The size isn’t important. Place it down on the bench. Fold one straight side towards you into the center (photo 7). Press to seal. Rotate the dough 180 degrees or so the part you just folded is on the opposite side (close to your body).
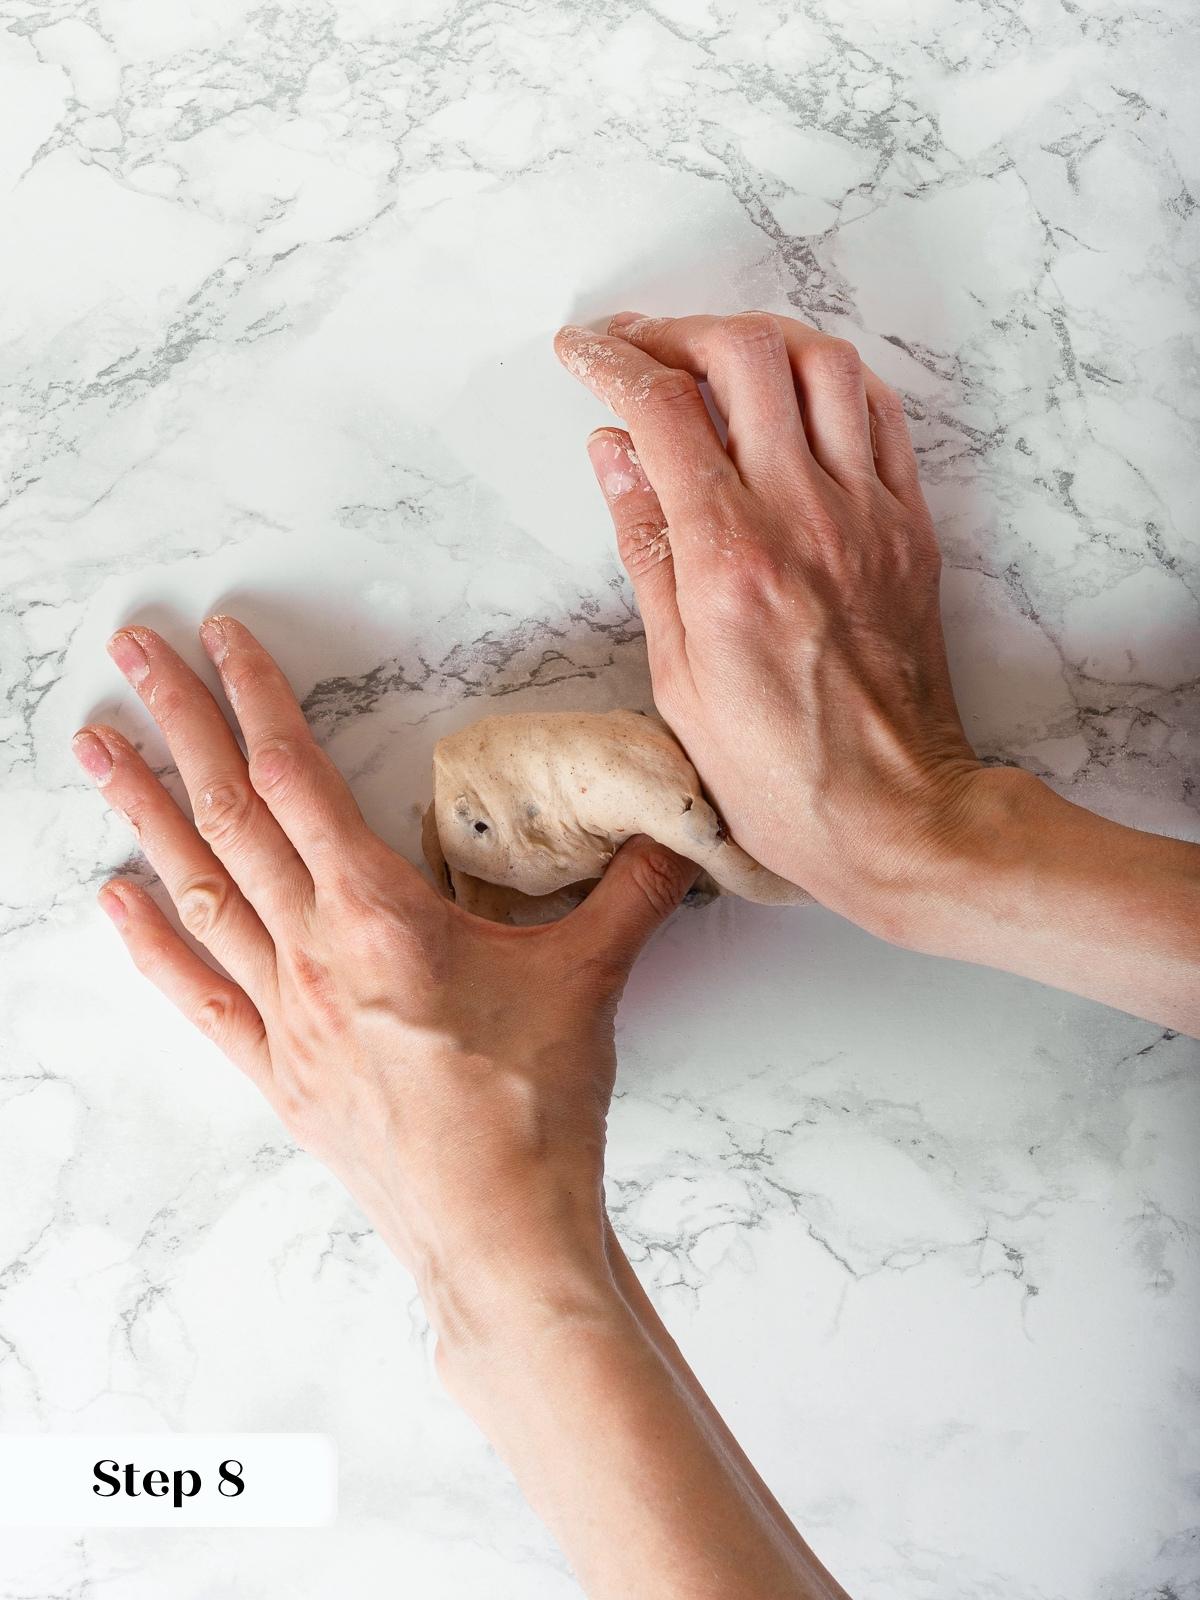
Step 8: Finish shaping the log. Fold the other side of the dough towards you overlapping with the first fold (photo 8). Press to seal. You just folded it like you would a letter (that’s why it’s called an “envelope fold.”) Place your left thumb on the seam that you just made. Your hand will make an “L” shape (photo 9). Using your left hand, fold the dough in towards your body around your left thumb and then seal it with the heel of your right hand. Repeat this down the length of the rectangle. You are making a log shape.
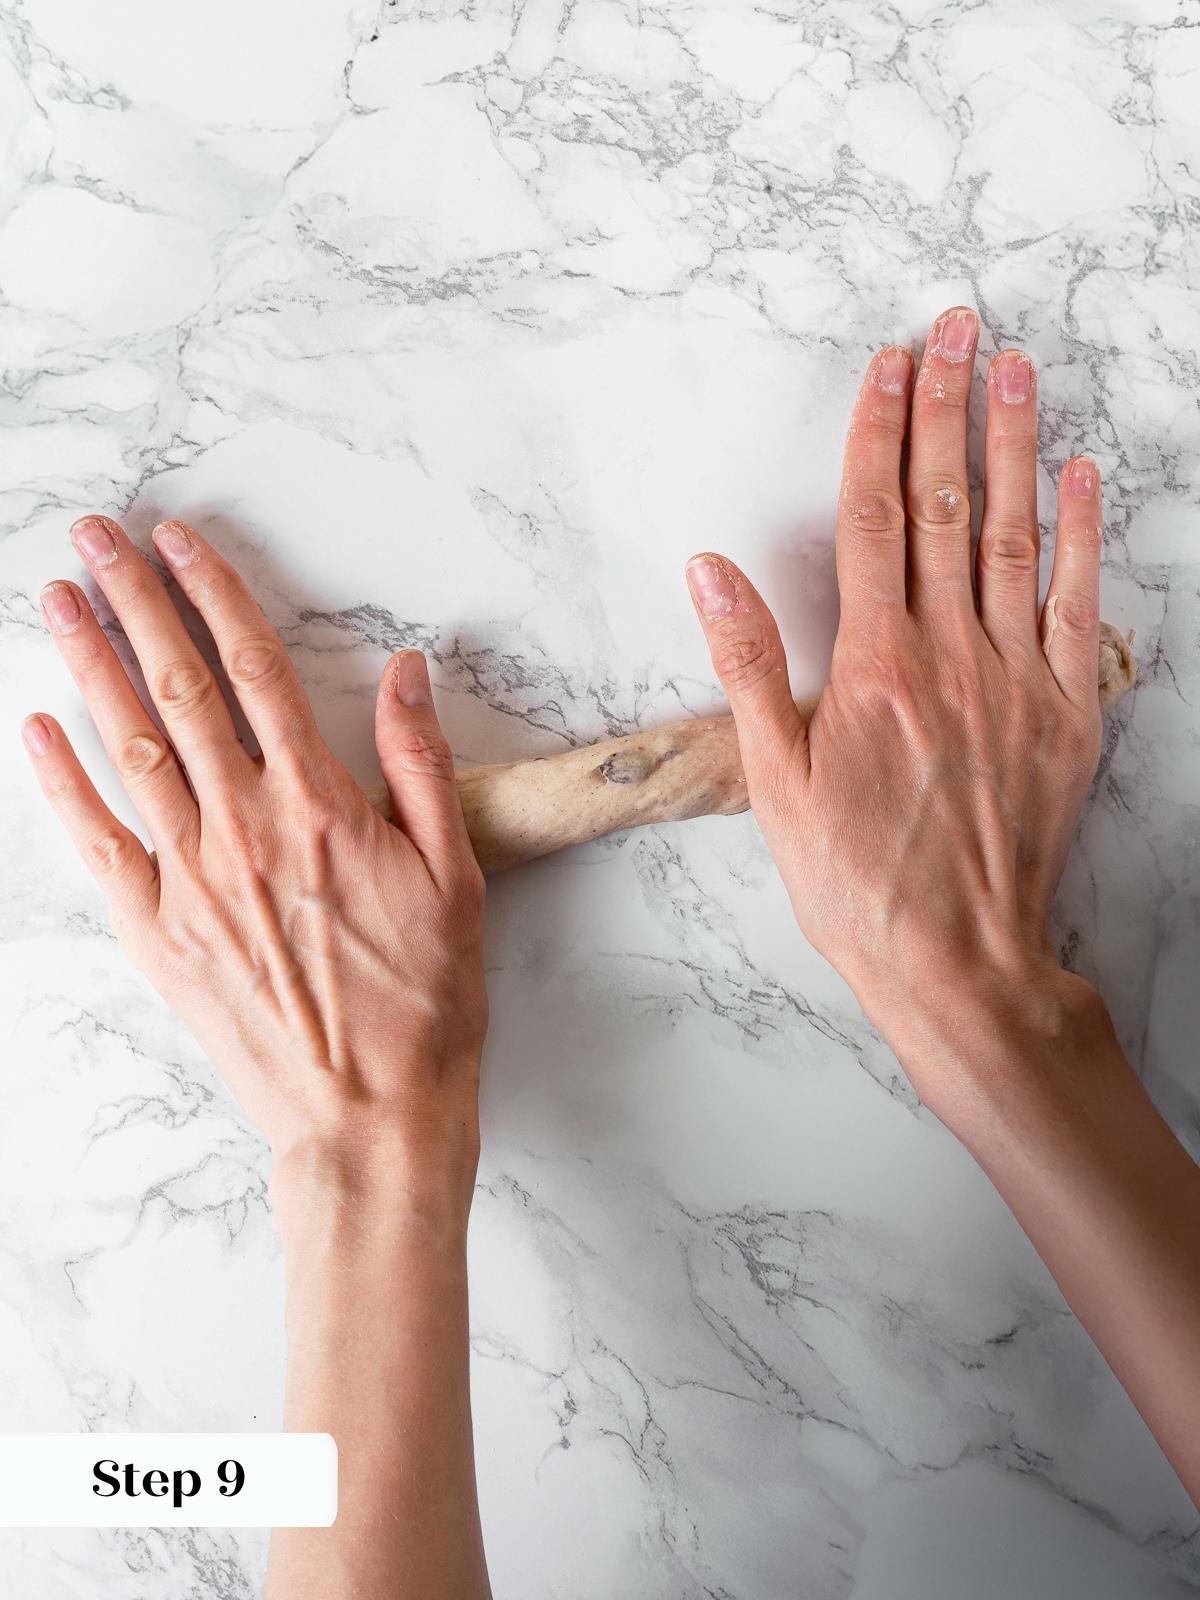
Step 9: Roll into rope. Repeat once more to make a tight log shape. Now roll that log out using both hands like a snake or rope (photo 10). Start with both hands in the center and gently roll it back and forth while moving your hands apart. This will lengthen the rope. Get it to around 8 inches.
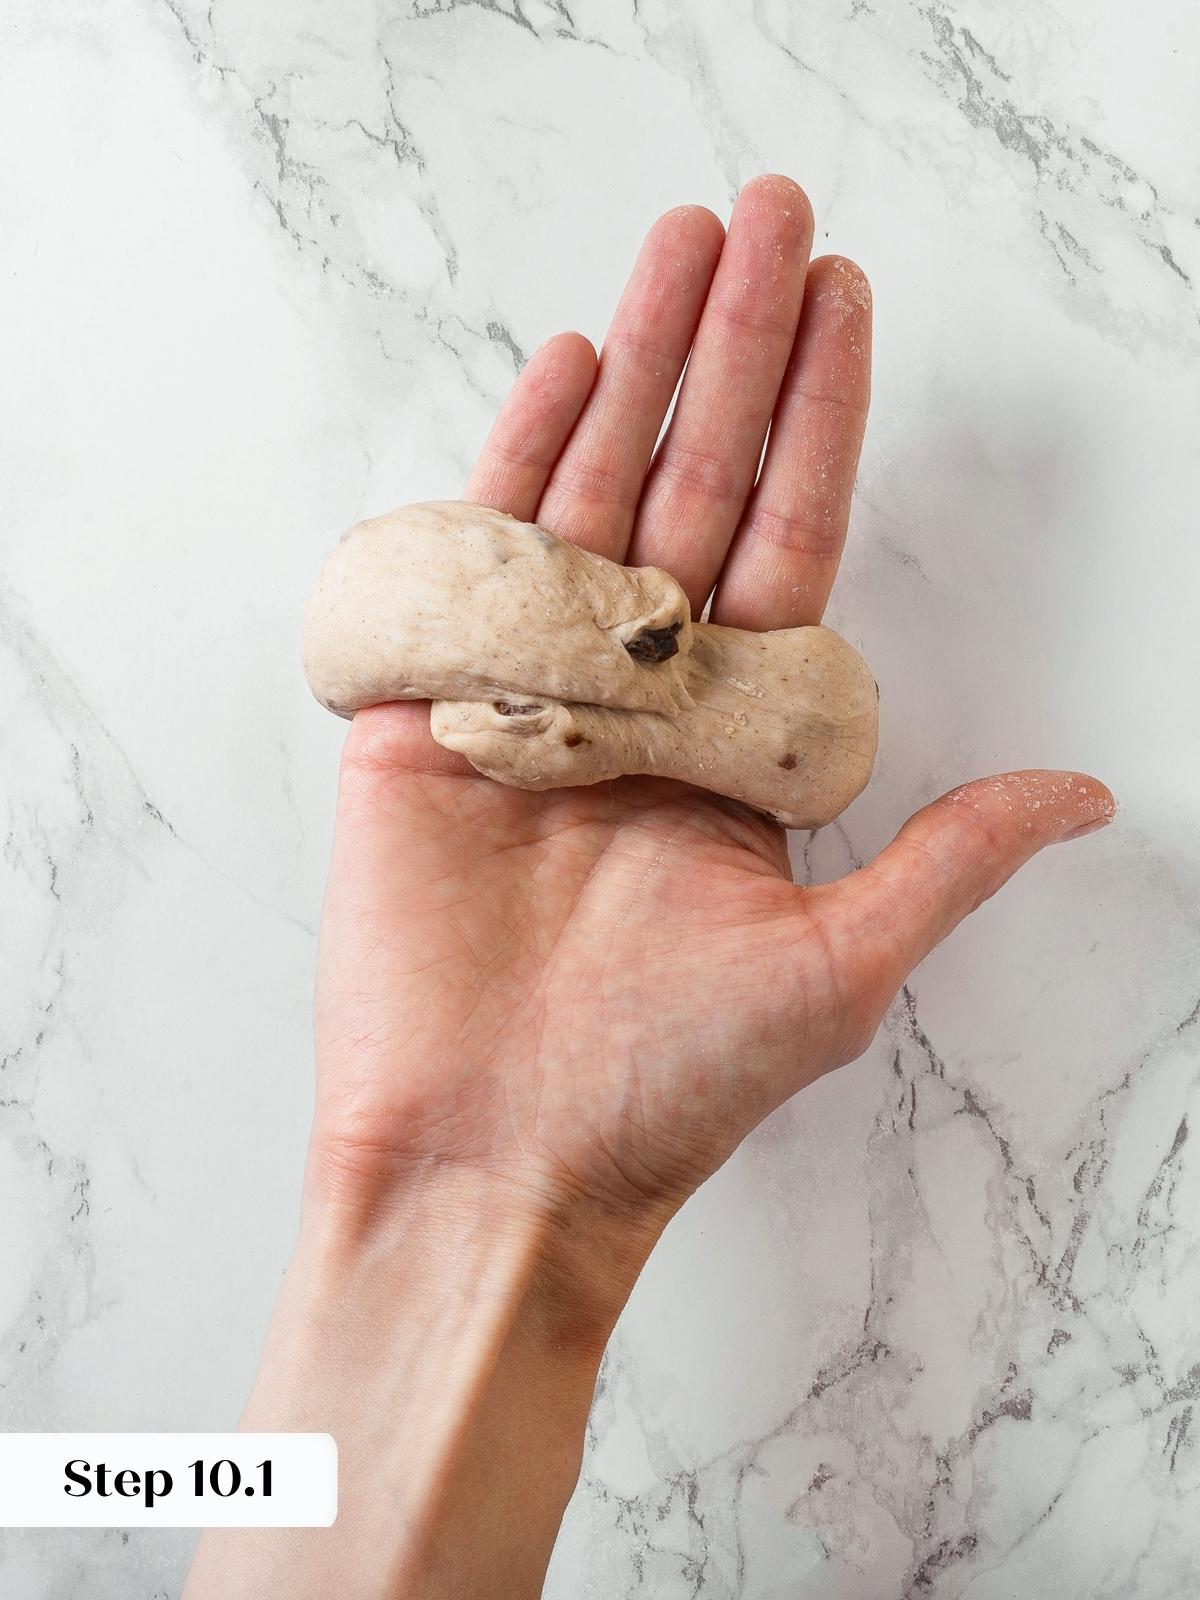
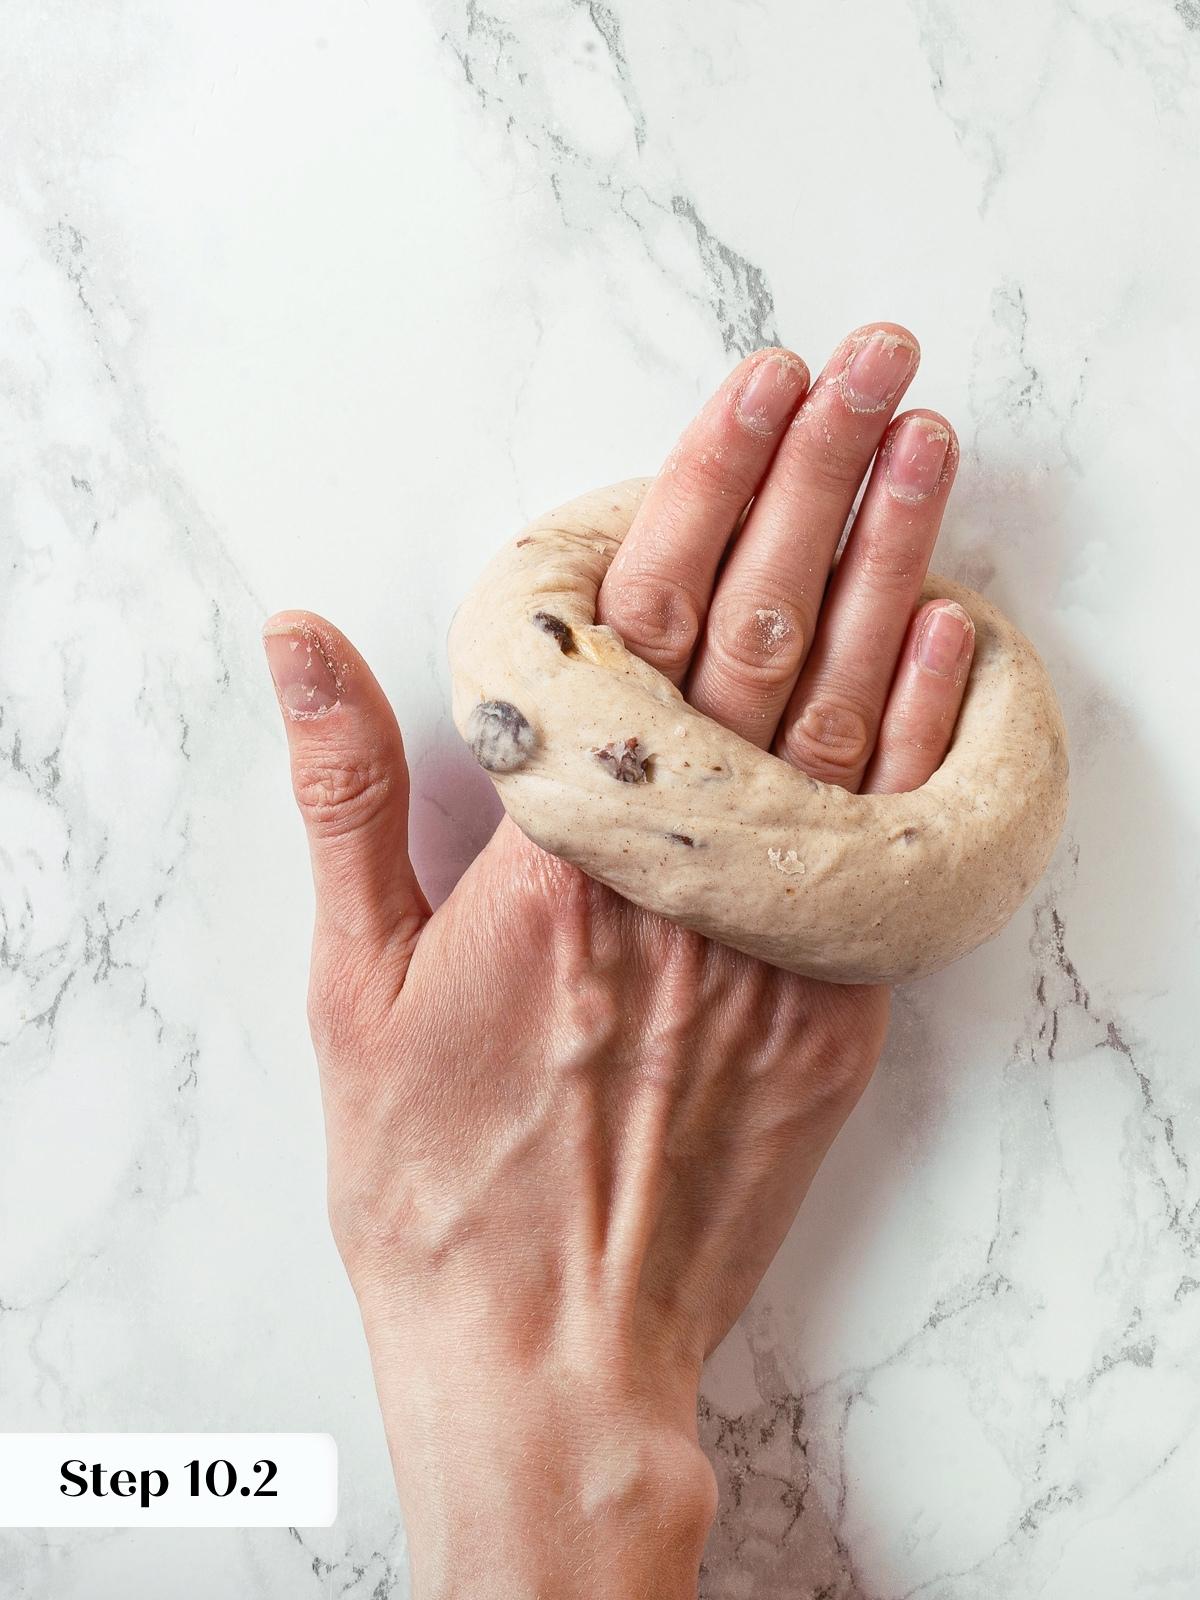
Step 10: Seal the ends. Take the rope and wrap it around your hand (photo 11), overlapping the ends by about 1 ½ – 2 inches. Flip your palm flat with the overlapped portion underneath it (photo 12). Roll the overlap gently underneath your palm to seal them together. The goal isn’t further lengthening, rather just to seal the ends together. This is the traditional way to shape bagels, not by poking a hole in the center.
This dough is slightly wetter than the everything bagels and the sourdough bagel dough but it is still easy to work with. I still didn’t use bench flour but you could lightly flour your hands if you find it sticking. I did need to work quickly and I rolled the ends together faster and fewer times than the other 2 bagels. Since the dough is stickier, the ends adhered to each other easier.
Proof, Boil, and Bake
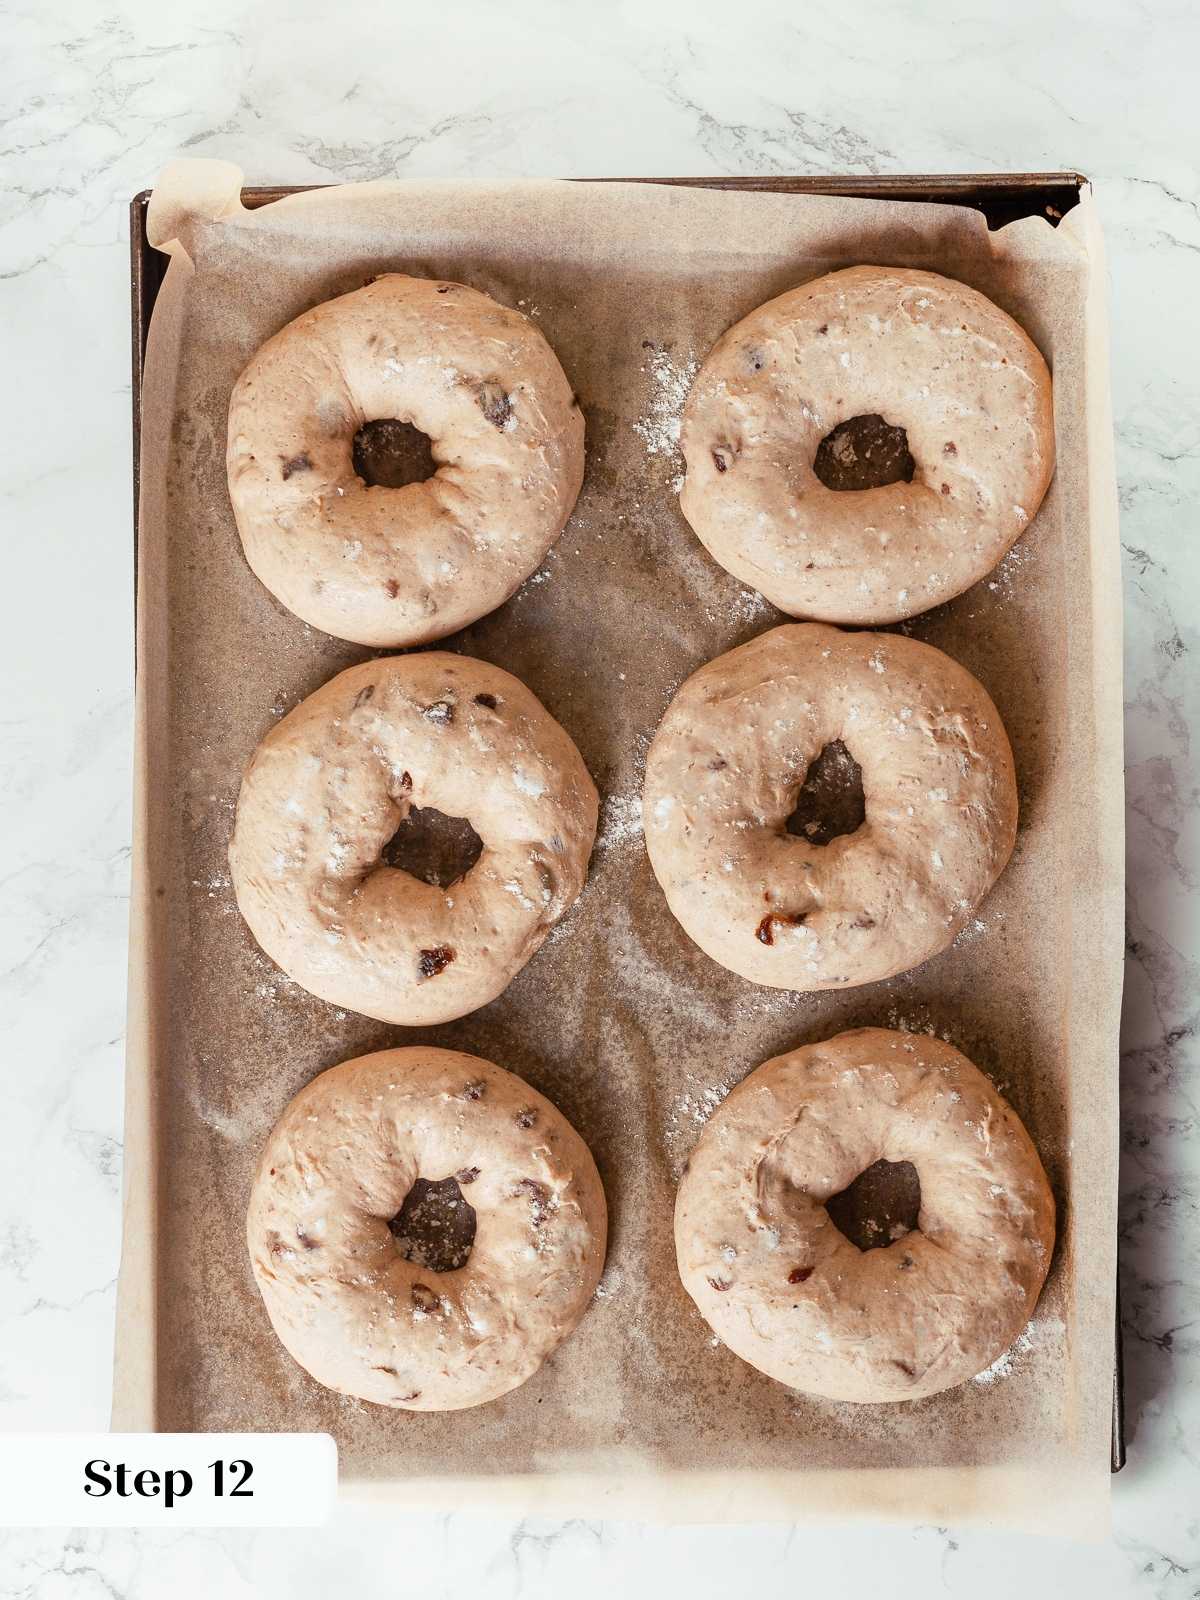
Step 11: Place shaped bagel on parchment or silicone mat lined baking sheet. Repeat with all 8 pieces of dough. Cover loosely with plastic wrap so the surface doesn’t dry out.
Step 12: Proof and/or chill. If baking the same day, allow to proof for 45-60 minutes at room temperature then refrigerate at least 60 minutes until they feel light and airy (photo 13). It is a little tricky when the dough is cold but you can still feel the difference.
If you are baking the next day, immediately refrigerate the shaped bagels for up to 24 hours.
Step 13: Preheat the oven to 450°F (no fan). Set up your boiling station. Place a wire rack inside a rimmed baking sheet, gather a spider (like for frying) or large slotted spoon, and bring about 4 inches of water in a large pot to a boil. Reduce the heat to a simmer and then begin boiling bagels.
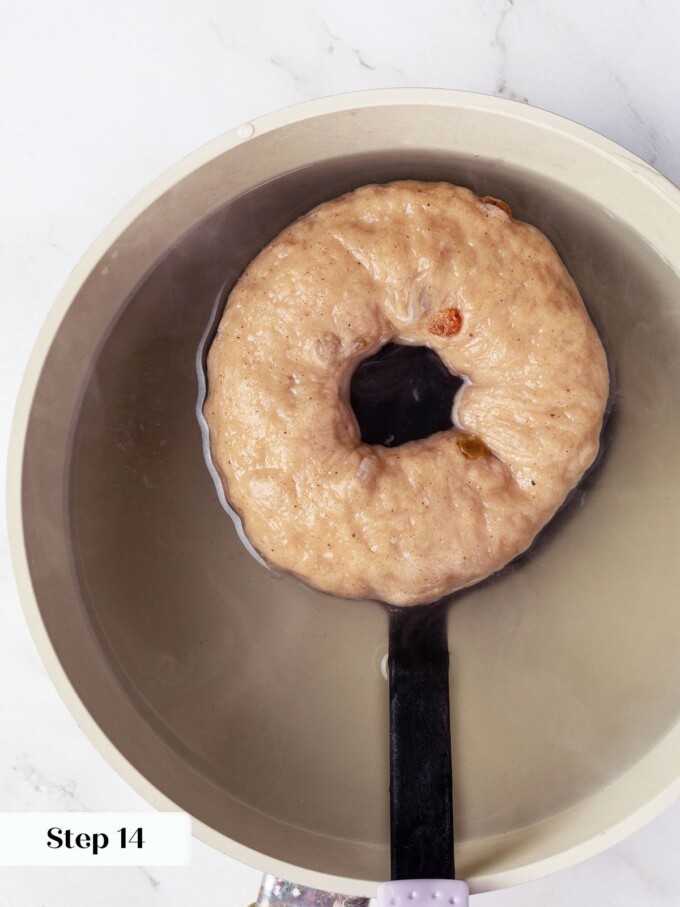
They call it boiling bagels, but the water isn’t actually boiling. You don’t want to cook them too hot or too long in the water or the yeast will die. If that happens they will not continue to rise in the oven. Cooking them in the water keeps the surface soft, to allow for maximum expansion in the oven while also cooking the outside of the bagel giving it that chewy exterior. I do turn the temperature back up after 2 batches of bagels because the cold bagels lower the temperature of the water and heating it back up to ensure that all bagels get that nice exterior chew and expansion.
Step 14: Simmer bagels. Take the cold bagels from the refrigerator and cook them 1-3 at a time (depending on your comfort, for 25-35 seconds in the simmering water (photo 14). I like to place each one in the water gently, top side down, then flip after about 15 seconds. Remove to the wire rack.
You can test if they have proofed enough by placing one in the water. It should float immediately, if not, they aren’t ready to bake (or they proofed too long, but probably the former).
Step 15: Repeat with all bagels.
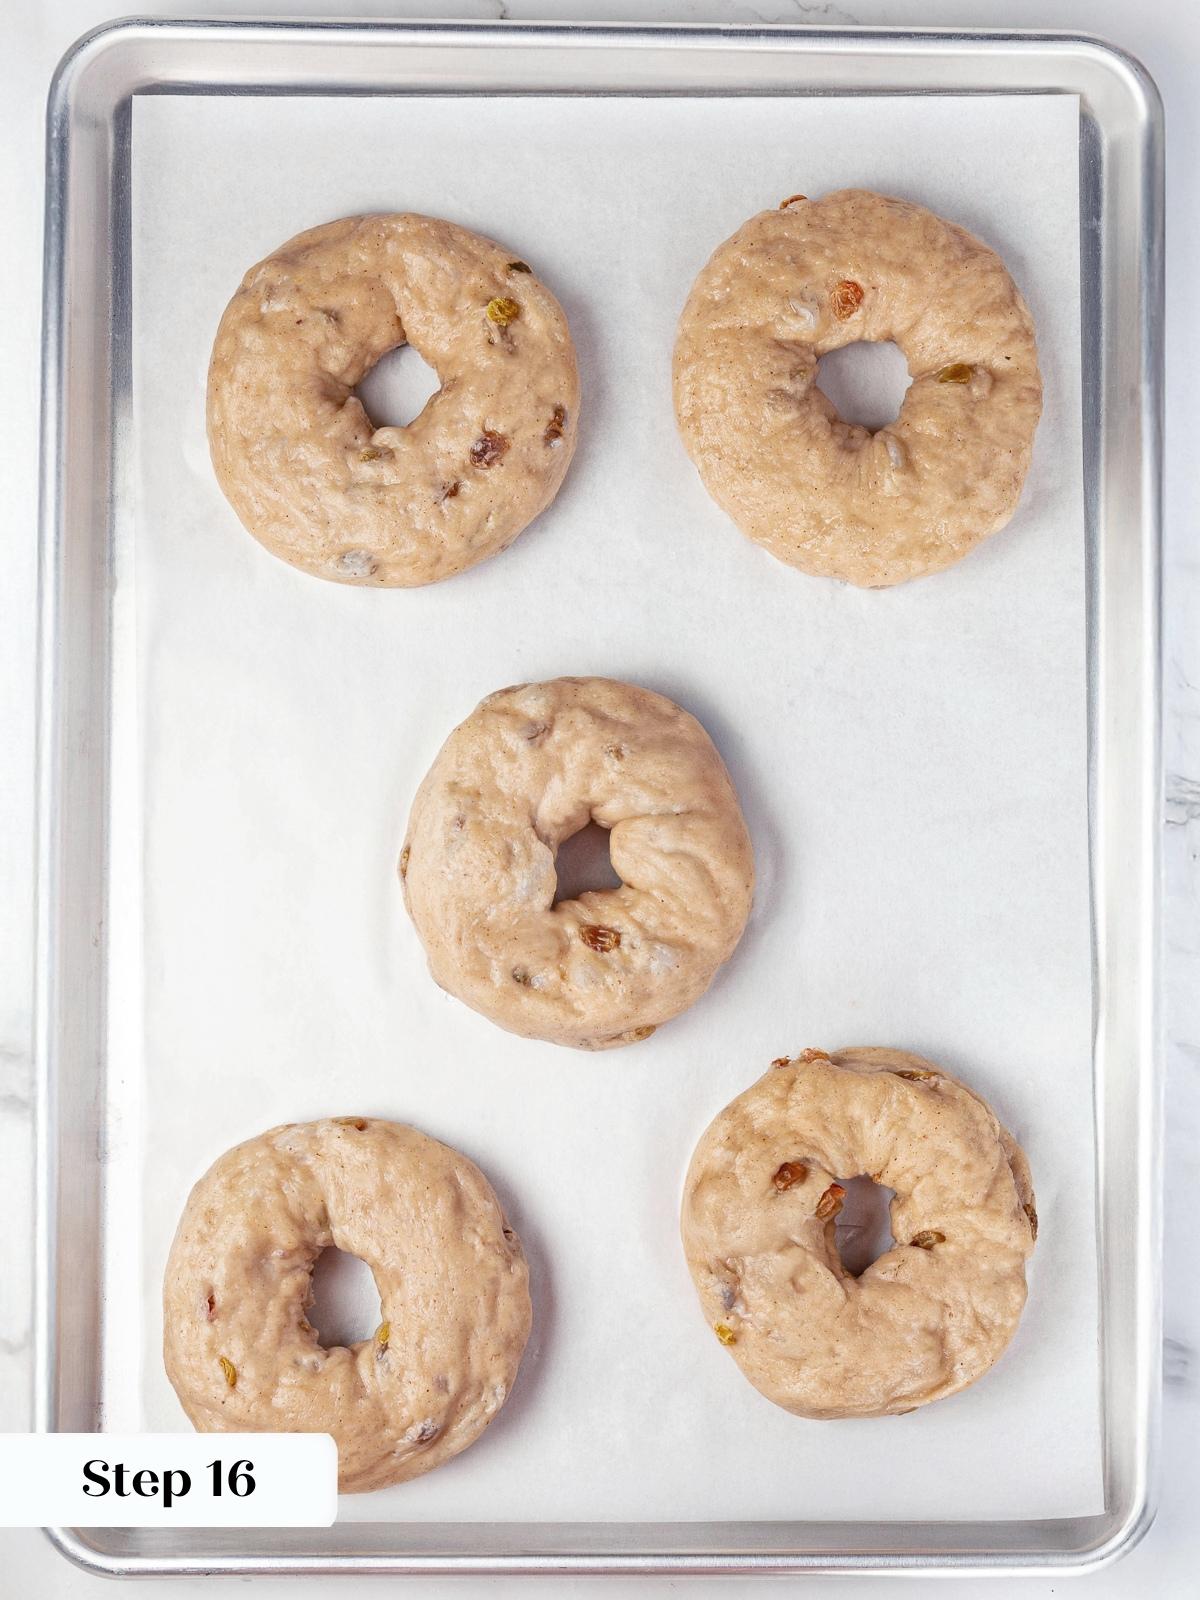
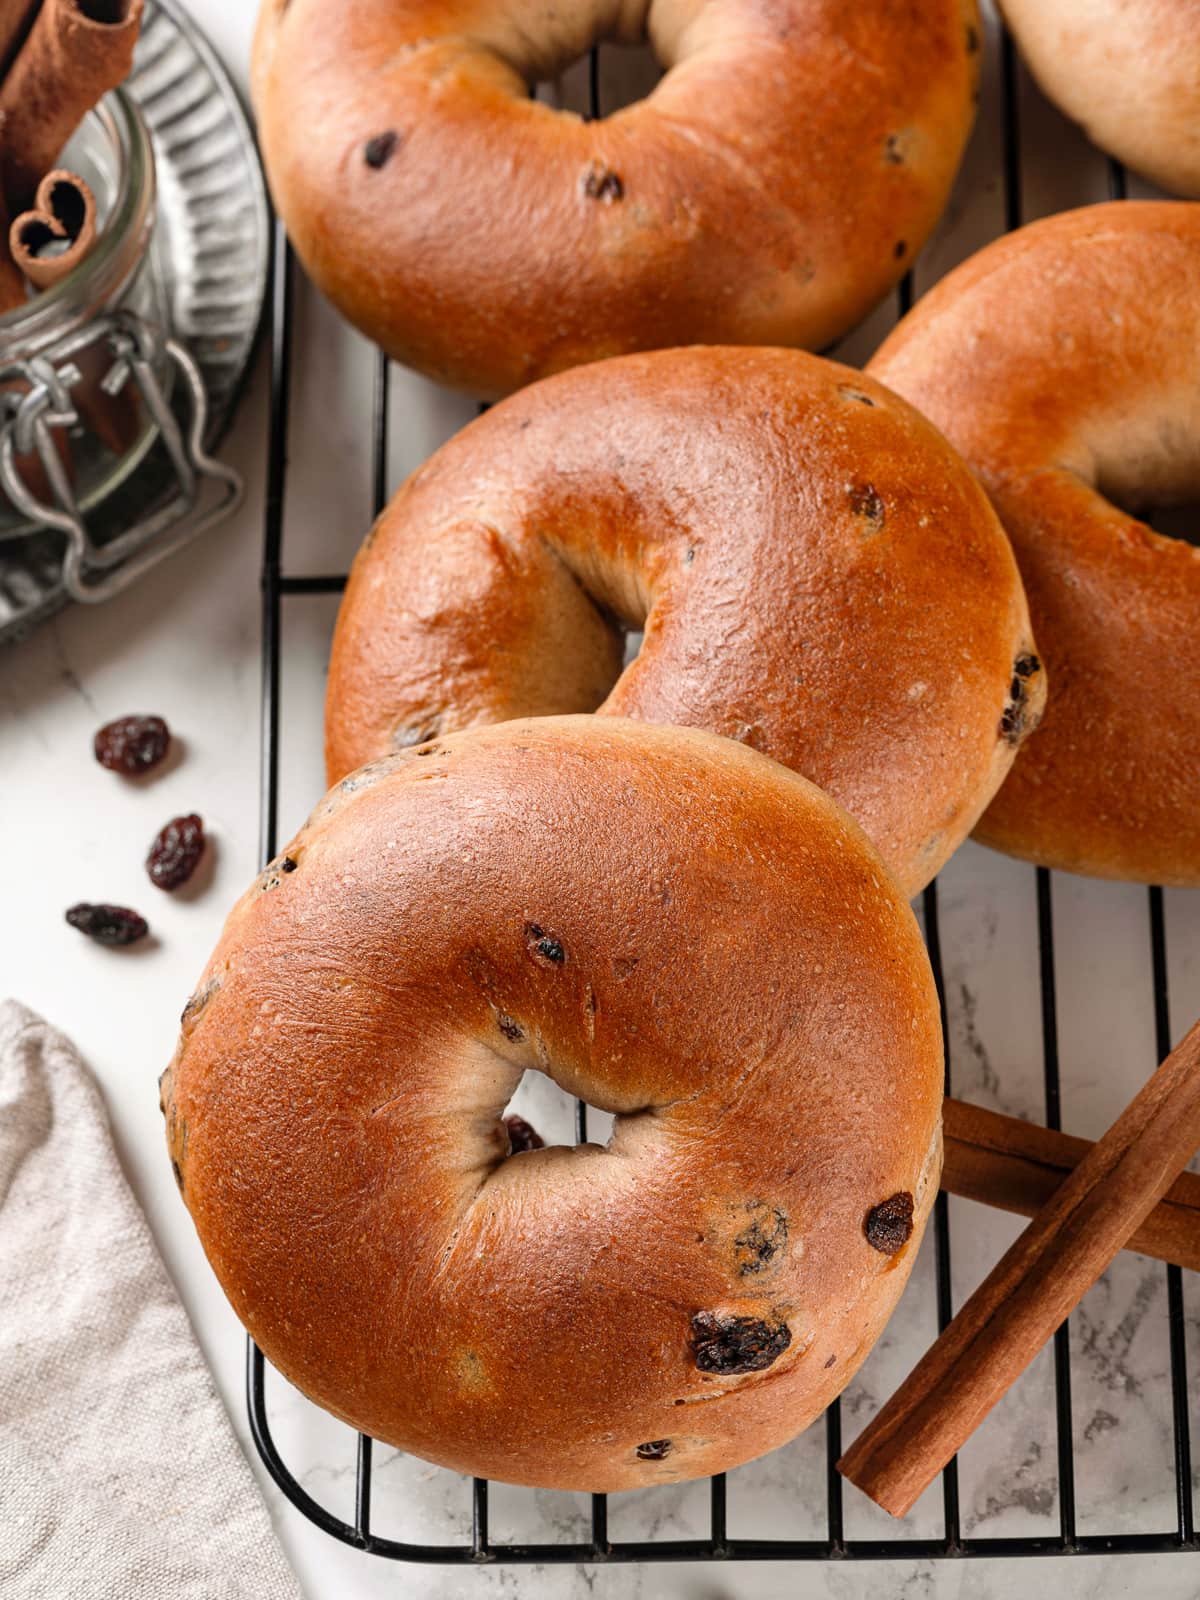
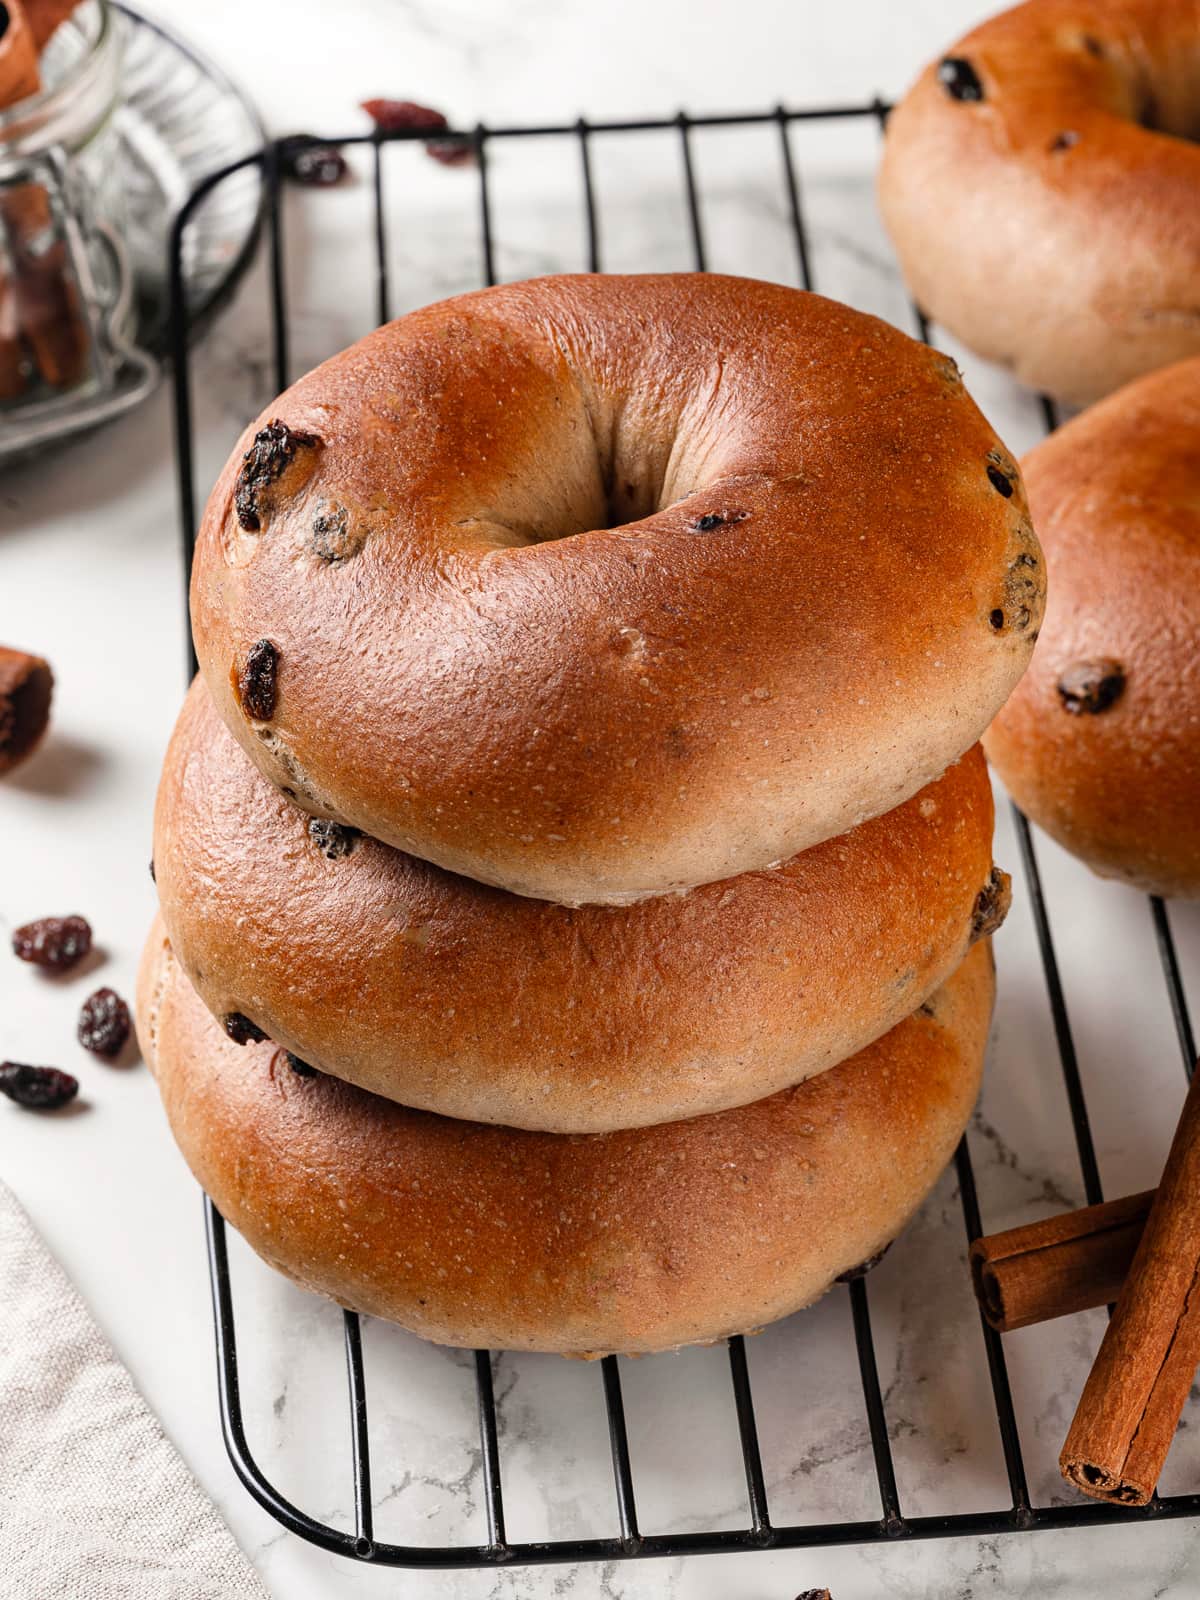
Step 16: Bake in preheated oven for 18-25 minutes until they are a nice golden brown (photos 15 & 16). Rotate the racks top to bottom and front to back after 10 minutes. Cool before slicing, if you can wait that long! My son and husband waited for no such thing. They ate the first bagel right out of the oven and burned their mouths on the raisins…I warned them.
Frequently Asked Questions
Allow cinnamon raisin bagels to cool to room temperature before storing. No matter the timeline, I prefer to store bagels that will not be consumed within a day in an airtight container or zip top baggie in the freezer. You can also store them for up to a week at room temperature, though they will gradually dry out.
Reheat room temperature bagels in a toaster oven, preheated oven or microwave until hot through. I prefer to thaw bagels either at room temperature or in the microwave. To heat further, they are best warmed in a toaster oven.
This recipe was developed in a professional kitchen by a pastry chef who is trained in professional bread baking, so you can absolutely make a larger batch of this recipe. I would recommend using the metric conversions by toggling to “Metric” under the Ingredients heading in the recipe card.
Yes, you can absolutely make miniature cinnamon raisin bagels with this recipe. They will not need as long to proof or bake, so watch for visual cues of airiness or doneness rather than relying on the recipe instructions.
Unlike their best friends, sourdough discard bagels or Montréal style bagels, cinnamon raisin bagels are not best used for sandwiches. I enjoy them plain or with a thick New York Schmear of cream cheese. Butter or peanut butter are also delicious and you could always play up the sweet by toasting the halves with butter and sprinkling with cinnamon sugar.
Recommended Yeasted Bread Recipes

Breakfast & Brunch

Yeast Breads
Bagels

Bagels
If you enjoyed this recipe, please leave a star rating and let me know how it goes in the comments below! I love hearing from you and your comments make my day!
Cinnamon Raisin Bagels
Ingredients
For the bagel dough:
- 2 cups water, warm (approximately 100°F)
- 2 ¼ teaspoons dry active yeast, 1 package
- 5 cups high-gluten flour, King Arthur
- 3 tablespoons light brown sugar
- 2 teaspoons ground cinnamon
- 2 teaspoons kosher salt
- 1 cup raisins
Instructions
Make and Mix the Dough
- In the bowl of a stand mixer, whisk together dry active yeast and water and optionally a bit of the brown sugar. Allow to sit for 10 minutes or until foamy.
- To the stand mixer bowl add high-gluten flour, brown sugar, cinnamon, and kosher salt. Use the dough hook attachment to combine all the ingredients on low speed.
- Mix on medium speed until a smooth dough forms. You should be able to pull a window pane. This is a stiffer dough because it only has 52% hydration, so it might seem developed when it is not. You are looking for a smooth dough. The surface shouldn’t look like scar tissue, if it does, it isn’t mixed.
- Incorporate raisins until they are well distributed or you will have some bagels with a lot and some with hardly any.
- Turn the dough out onto a smooth surface. Divide into 10 equal pieces, approximately 120g each.
- Working with one piece at a time, pre-shape the dough into a log shape. Do this by stretching the dough into a rectangle. Fold the top 1/3 down to the center and then continue folding the folded dough over the final 1/3, sealing it against the counter with your fingers. Place it to the side and keep covered while you repeat with all remaining pieces.
Shape the Bagels
- Starting with the first piece of dough that you pre-shaped, gently work it into a square or rectangle. The size isn’t important. Place it down on the bench. Fold one straight side towards you into the center. Press to seal. Rotate the dough 180 degrees or so the part you just folded is on the opposite side (close to your body).
- Fold the other side of the dough towards you overlapping with the first fold. Press to seal. You just folded it like you would a letter (that’s why it’s called an “envelope fold.”) Place your left thumb on the seam that you just made. Your hand will make an “L” shape. Using your left hand, fold the dough in towards your body around your left thumb and then seal it with the heel of your right hand. Repeat this down the length of the rectangle. You are making a log shape.
- Repeat once more to make a tight log shape. ?Now roll that log out using both hands like a snake or rope. Start with both hands in the center and gently roll it back and forth while moving your hands apart. This will lengthen the rope. Get it to around 8 inches.
- Take the rope and wrap it around your hand, overlapping the ends by about 1 ½ – 2 inches. Flip your palm flat with the overlapped portion underneath it. Roll the overlap gently underneath your palm to seal them together. The goal isn’t further lengthening, rather just to seal the ends together. This is the traditional way to shape bagels, not by poking a hole in the center.
Proof, Boil, and Bake
- Place shaped bagel on parchment or silicone mat lined baking sheet. Repeat with all 8 pieces of dough. Cover loosely with plastic wrap so the surface doesn’t dry out.
- If baking the same day, allow to proof for 45-60 minutes at room temperature then refrigerate at least 60 minutes until they feel light and airy. It is a little tricky when the dough is cold but you can still feel the difference.
- If you are baking the next day, immediately refrigerate the shaped bagels for up to 24 hours.
- Preheat the oven to 450°F (no fan). Set up your boiling station. Place a wire rack inside a rimmed baking sheet, gather a spider (like for frying) or large slotted spoon, and bring about 4 inches of water in a large pot to a boil. Reduce the heat to a simmer and then begin boiling bagels.
- Take the cold bagels from the refrigerator and cook them 1-3 at a time (depending on your comfort, for 25-35 seconds in the simmering water. I like to place each one in the water gently, top side down, then flip after about 15 seconds. Remove to the wire rack.
- Repeat with all bagels.
- Bake in preheated oven for 18-25 minutes until they are a nice golden brown. Rotate the racks top to bottom and front to back after 10 minutes. Cool before slicing, if you can wait that long!
Notes
Nutrition
Nutrition information is automatically calculated, so should only be used as an approximation.
 Like this recipe? Rate & comment below!
Before You Go
I hope you enjoyed these easy homemade bagels. Check out our other delicious breakfast & brunch recipes, like this overnight French toast casserole!


This recipe isnt making sense. You have roughly 475g of water and 600 of flour. Thats why more hydrated than 52%…
Hi Chad! Great catch! I double checked Chef Lindsey’s notes on this to be sure, and the ingredient weights are correct: 400g water to 600g flour (~67% hydration). The line “52% hydration” looks like a leftover note from an earlier draft, everything else in the post lines up! That said, it still behaves like a stiff dough, which is typical for bagels. Appreciate you pointing it out! ~gvd team
Can these be made without a stand mixer?
Hi Bryndis! Yes, you can make them by hand. Knead firmly on the counter until smooth and elastic. It’s a stiff dough, so expect a workout — that’s what gives the chew. Enjoy! ~gvd team
Just pulled these out of the oven and already want another. Very delicious! I wanted mini bagels so after weighing them out to 120-123 grams each, I got 11. When at the rope stage, I rolled them out to 9″ then cut in half and rolled a little more to get mini bagels. Baked for 12 minutes. The things I had issues with was my bagels sticking to the parchment paper after rise and sticking to wire rack after baking. I will just spray with avocado oil both times, next time. Thanks so much!
Hi Cathleen! I’m so happy you loved them, and mini bagels sound absolutely perfect! Thank you for sharing your adjustments; that’s such a great way to scale them down. For the sticking, your plan is spot on, silicone mats or a bit of oil help prevent that, especially with sweet doughs. Love that you’re already planning a next batch! ~gvd team
Definitely was a learning experience, but all your tips and tricks really made my bagels possible! They are soo good, I never thought I could have NYC-style bagels at home. I want to make blueberry next!
I made these cinnamon raisin bagels this weekend! Shaping them into ropes was definitely a challenge, but it paid off. They came out golden and chewy with just the right amount of cinnamon and raisin in literally every bite. I’ve been snacking on them between rehearsals this week with some maple butter my friend made for me!