Soft, chewy homemade everything bagels! This professional recipe guides you step-by-step and shows you that chewy bagels are easier than you think!

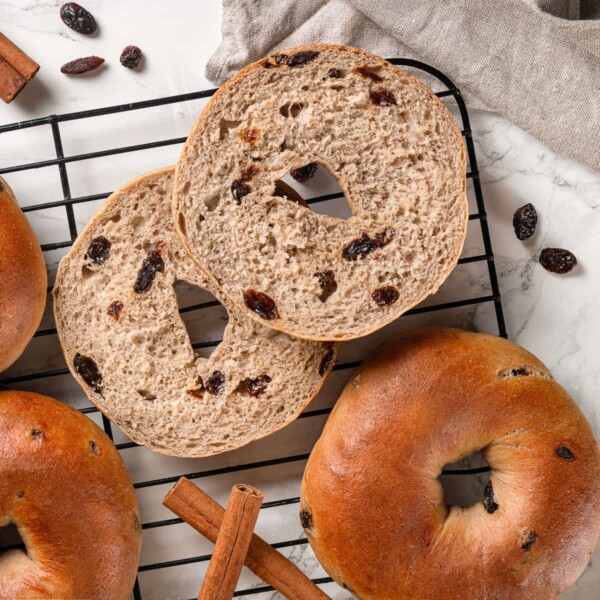
I have no shortage of bagel recipes on Girl Versus Dough mostly because I adore bagels but also because nothing beats a homemade bagel. For a hint of sweetness try these Montreal bagels, cinnamon raisin bagels, or, my favorite, pumpernickel bagels! I also love these chocolate chip muesli bagels spread with a cinnamon walnut cream cheese.
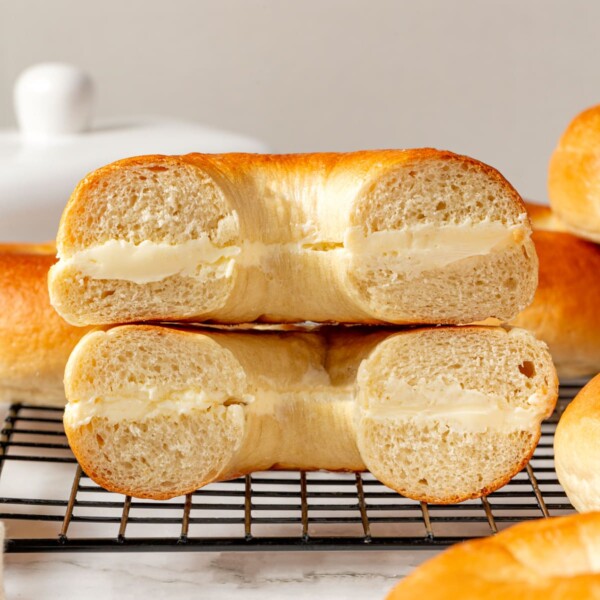
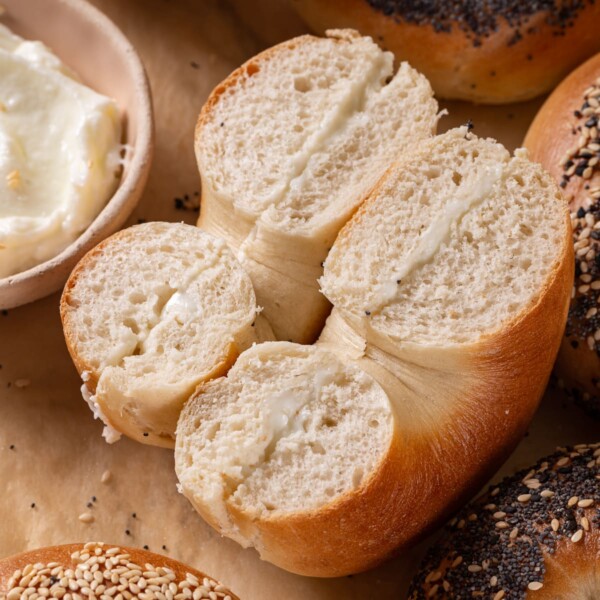
It felt only natural I bring you everything bagels next! They are made with my perfect homemade everything bagel seasoning and have just the right chewy and dense texture you are craving! They are chewier than New York deli-style bagels or these French toast bagels, which are just a little softer and fluffier (these have eggs and/or bread flour).
Table of contents
Why this Everything Bagel Recipe is the Best.
- Chewy, soft, perfectly dense texture. The combination of the low hydration, high-gluten flour, intense mixing and boiling, give these bagels the perfect chew!
- Easier than you think! Everything is mixed together in one bowl until the dough is smooth. The low-hydration dough is easy to work with and not sticky. Plus there is no bulk proof. Simply mix, divide, shape and proof!
- Perfect flavor in the bagels and the seasoning. I include the right amount of salt and malt powder for flavor and texture in the dough, and my perfect homemade everything bagel seasoning recipe has the right balance of flavors.

Professional Tips for Making Everything Bagels
- Finishing proofing the bagels in the refrigerator is essential. Immediately placing the shaped bagels in the refrigerator for 24 hours will yield the best results, but if you want to bake the same day you made them, finish proofing them in the refrigerator for at least 60 minutes. This will allow you to boil them without over proofing.
- It is called “boiling bagels” but you don’t actual want to boil them. Use simmering but not boiling water. If you cook them too hot or too long in the water the yeast will die and they will not continue to rise in the oven.
- Use the leftovers to make bagel chips! Simply slice, brush with butter, sprinkle with a little salt and maybe some extra everything bagel seasoning, and bake in a 300°F oven until no longer soft.
Ingredients & Substitutions

- Everything Bagel Seasoning: I use my own homemade everything bagel seasoning recipe to top these bagels as well as make my everything bagel quiche! You could also use store-bought such as Trader Joe’s everything but the bagel seasoning. Just be aware that many have salt, so be less liberal.
- Warm Water
- Dry Active Yeast: Active dry yeast has a consistent rise that is slow enough to achieve the perfect texture. Rushing bread does have consequences both on flavor and on texture, but you could use half the quantity of instant yeast or double the quantity of fresh yeast if you have it. The recipe was developed using fresh yeast.
- High-gluten flour: Like we talk about below when we dive deeper into achieving the perfect texture, high-gluten flour is essential for that characteristic chew in these and my sourdough discard bagels. You can use bread flour as a passible substitute. I wouldn’t recommend using all-purpose flour unless you will be satisfied with a more soft, fluffy bread texture rather than chewy and a little dense.
- Granulated Sugar: Sugar adds sweetness, enhances the caramelization and gives the yeast an easy energy source to get started with fermentation. Win-win-win. You can also use brown sugar.
- Diastatic Malt Powder Diastatic malt Powder separates this professional recipe from many other recipes on the internet. Diastatic malt powder has live enzymes in it that break down the complex carbohydrates into simple sugars that are readily accessible to yeast. Malt is also a type of sugar itself. This adds to the flavor but also aids in the fermentation process. You can use powdered or barley malt syrup in the same amount. You can also omit it and the everything bagels will still be delicious.
- Kosher Salt: Kosher salt is less salty per teaspoon than table salt or sea salt. It improves the flavor and makes the texture a bit more tender.
See the recipe card for full information on ingredients and quantities.
How to get the perfect chewy bagel texture?
- Use high-gluten flour not just bread flour. While bread flour will make a lovely bagel with a soft, yet chewy interior, it will be less chewy and will not have that perfect chewy crust. The extra gluten from the high-gluten flour is just enough to give that characteristic bagel texture inside and out.
- A low hydration dough creates a tough, chewy texture. Hydration is calculated using baker’s math where all the ingredients are given as a percentage of flour by weight. This bagel recipe has a 52.5% hydration in comparison to the 83% in my favorite sourdough bread recipe, for example.
- The gluten is fully developed in the mixer. This is called the “intensive mix” because the dough is kneaded until the gluten structure is fully set and will pull a smooth window. This is in comparison to other bread recipes that rely on either time like my no knead dutch oven bread, or on a series of folds like this whole wheat sourdough recipe and this cinnamon raisin sourdough.
How to Make Homemade Everything Bagels
Use these instructions to make chewy everything bagels at home! Further details and measurements can be found in the recipe card below.
Step 1: In the bowl of a stand mixer, whisk together dry active yeast and water. Allow to sit for 10 minutes or until foamy.
Step 2: To the stand mixer bowl add high-gluten flour, granulated sugar, malt powder, and kosher salt. Use the paddle attachment to combine all the ingredients on low speed. Switch to the dough hook attachment.


Step 3: Mix on medium speed until a smooth dough forms. You should be able to pull a window pane. This is a stiffer dough because it only has 52% hydration, so it might seem developed when it is not. You are looking for a smooth dough. The surface shouldn’t look like scar tissue, if it does, it isn’t mixed.
There is no bulk fermentation, so it is important that the dough is properly developed. This is called the “intensive mix,” and works best with low-hydration doughs like this one.
Step 4: Turn the dough out onto a smooth, un-floured surface. Divide into 8 equal pieces, 125g each.


How to shape bagels properly
Yes, you can roll each into a ball and then poke a hole in the center. It works, but it isn’t the proper technique. Follow along if you are one of those people who like to be in the know.
Step 5: Working with one piece at a time, pre-shape the dough into a log shape. Gently work the piece of dough into a square or rectangle. The size isn’t important. Place it down on the bench. Fold one straight side towards you into the center. Press to seal. Rotate the dough 180 degrees or so the part you just folded is on the opposite side (close to your body). Fold the other side of the dough towards you overlapping with the first fold. Press to seal. You just folded it like you would a letter (that’s why it’s called an “envelope fold.”) Step 6: Place your left thumb on the seam that you just made. Your hand will make an “L” shape. Using your left hand, fold the dough in towards your body around your left thumb and then seal it with the heal of your right hand. Repeat this down the length of the rectangle. You are making a log shape. Repeat once more to make a tight log shape. You can also simple fold the top of the rectangle down repeatedly until a tight log forms like you see in the photo below.
Step 7: Now roll that log out using both hands like a snake or rope. Start with both hands in the center and gently roll it back and forth while moving your hands apart. This will lengthen the rope. Get it to between 8-10 inches. If it shrinks back on you, just cover and move on to the next piece. Let the gluten relax. Be more gently with the next one. Gently but firm in your movements. Confidence takes time.


Step 8: Take the rope and wrap it around your hand, overlapping the ends by about 3 inches. Flip your palm flat with the overlapped portion underneath it. Roll the overlap gently underneath your palm to seal them together. The goal isn’t further lengthening, rather just to seal the ends together.
Step 9: Place shaped bagel on parchment or silicone mat lined baking sheet pan. Repeat with all 8 pieces of dough. Cover loosely with plastic wrap so the surface doesn’t dry out.


Step 10: Proofing Bagels
- Same Day Baking: If baking the same day, allow to proof for 45-60 minutes at room temperature then refrigerate at least 60 minutes until they feel light and airy. It is a little tricky when the dough is cold but you can still feel the difference.
- Next Day Baking: If you are baking the next day, immediately refrigerate the shaped bagels for up to 24 hours.
Step 11: Preheat the oven to 470°F (no fan). Set up your boiling station. Place a wire rack inside a rimmed baking sheet, gather a spider (like for frying) or large slotted spoon, and bring about 4 inches of water in a large pot to a simmer. Place your everything bagel seasoning blend in a large bowl near the wire rack, and line a baking sheet with parchment paper. You are now ready!
Step 12: Take the cold bagels from the refrigerator and cook them 1-3 at a time (depending on your comfort, for 5-10 seconds in the simmering water. I like to place each one in the water gently, top side down, then flip after about 5 seconds. Remove to the wire rack.
You can test if they have proofed enough by placing one in the water. It should float immediately, if not, and they sink, they aren’t ready to bake (or they proofed too long, but probably the former).
Step 13: Allow the first set of bagels to drip for 5-10 seconds (really just the amount of time it takes to get all 3 out of the water). Then flip the first one top-side-down into the seasoning of choice. The residual water will stick the toppings to the bagel. Place right-side-up onto parchment lined baking sheet.
If the bagels are too wet, they will stick to the paper. You can lightly spray it if you want.
Step 14: Repeat with all bagels.
Step 15: Bake in preheated oven for 15-20 minutes until they are a nice golden brown. If the garlic begins to burn before the bagels are cooked, reduce the oven temperature to 400°F.


Step 16: Cool before slicing, if you can wait that long! My professional opinion is eat one hot from the oven while you patiently let the others cool. You earned it! ?
Frequently Asked Questions
Store baked bagels in an airtight container at room temperature for up to 3 days. As any connoisseur of bagels knows, they are best the day they are made as close to fresh from the oven as possible! You can also cool to room temperature and freeze baked bagels for up to a month.
This is a point of contention amongst New Yorkers but I feel the best way to reheat is to slice and toast them, though I always eat fresh bagels without reheating. Toasting or warming covered in a warm oven will allow for an additional 2-3 days of enjoyment! Try building a breakfast sandwich or turkey bacon bravo on a bagel!
Boiling bagels is a misnomer because the water is simmering rather than boiling. Briefly cooking bagels in simmering water cooks the exterior of the bagel and creates that leathery chewy skin on the outside. It also keeps the outside moist, like steam, which allows the bagels to continue to grow and rise in the oven.

If you enjoyed this recipe, please leave a star rating and let me know how it goes in the comments below! I love hearing from you and your comments make my day!
Everything Bagels

Ingredients
For the bagel dough:
- 1 ½ cups water, warm (approximately 100°F)
- 2 ¼ teaspoons dry active yeast, 1 package
- 5 cups high-gluten flour, King Arthur
- 2 tablespoons granulated sugar
- 2 tablespoons diastatic malt powder
- 1 tablespoon kosher salt
For the everything spice mix:
- 2 tablespoons white sesame seeds
- 2 tablespoons black sesame seeds
- 3 tablespoons dried minced onions
- 2 tablespoons dried minced garlic
- 2 tablespoons poppy seeds
Instructions
- In the bowl of a stand mixer, whisk together dry active yeast and water. Allow to sit for 10 minutes or until foamy.
- To the stand mixer bowl add high-gluten flour, granulated sugar, malt powder, and kosher salt. Use the paddle attachment to combine all the ingredients on low speed. Switch to the dough hook.
- Mix on medium speed until a smooth dough forms. You should be able to pull a window pane. This is a stiffer dough because it only has 52% hydration, so it might seem developed when it is not. You are looking for a smooth dough. The surface shouldn’t look like scar tissue, if it does, it isn’t mixed. There is no bulk fermentation, so it is important that it is properly developed.
- Turn the dough out onto a smooth surface. Divide into 8 equal pieces, 125g each.
- Working with one piece at a time, pre-shape the dough into a log shape. Gently work the piece of dough into a square or rectangle. The size isn’t important. Place it down on the bench. Fold one straight side towards you into the center. Press to seal. Rotate the dough 180 degrees or so the part you just folded is on the opposite side (close to your body). Fold the other side of the dough towards you overlapping with the first fold. Press to seal. You just folded it like you would a letter (that’s why it’s called an “envelope fold.”) Place your left thumb on the seam that you just made. Your hand will make an “L” shape. Using your left hand, fold the dough in towards your body around your left thumb and then seal it with the heal of your right hand. Repeat this down the length of the rectangle. You are making a log shape. Repeat once more to make a tight log shape.Now roll that log out using both hands like a snake or rope. Start with both hands in the center and gently roll it back and forth while moving your hands apart. This will lengthen the rope. Get it to between 8-10 inches.
- Take the rope and wrap it around your hand, overlapping the ends by about 3 inches. Flip your palm flat with the overlapped portion underneath it. Roll the overlap gently underneath your palm to seal them together. The goal isn’t further lengthening, rather just to seal the ends together. This is the traditional way to shape bagels, not by poking a hole in the center. You can, of course, shape into a round and poke a hole.
- Place shaped bagel on parchment or silicone mat lined baking sheet. Repeat with all 8 pieces of dough. Cover loosely with plastic wrap so the surface doesn’t dry out.
- If baking the same day, allow to proof for 45-60 minutes at room temperature then refrigerate at least 60 minutes until they feel light and airy. It is a little tricky when the dough is cold but you can still feel the difference.
- If you are baking the next day, immediately refrigerate the shaped bagels for up to 24 hours.
- Preheat the oven to 470°F (no fan). Set up your boiling station. Place a wire rack inside a rimmed baking sheet, gather a spider (like for frying) or large slotted spoon, and bring about 4 inches of water in a large pot to a simmer. Place your everything bagel mix (or whisk together all the ingredients listed above, in a large bowl near the wire rack, and line a baking sheet with parchment paper. You are now ready!
- Take the cold bagels from the refrigerator and cook them 1-3 at a time (depending on your comfort, for 5-10 seconds in the simmering water. I like to place each one in the water gently, top side down, then flip after about 5 seconds. Remove to the wire rack.
- NOTE: They call it boiling bagels, but the water isn’t actually boiling. You don’t want to cook them too hot or too long in the water or the yeast will die. If that happens they will not continue to rise in the oven. Cooking them in the water keeps the surface soft, to allow for maximum expansion in the oven while also cooking the outside of the bagel giving it that chewy exterior.
- ALSO NOTE: You can test if they have proofed enough by placing one in the water. It should float immediately, if not, they aren’t ready to bake (or they proofed too long, but probably the former).
- Allow the first set of bagels to drip for 5-10 seconds (really just the amount of time it takes to get all 3 out of the water). Then flip the first one top-side-down into the seasoning of choice. The residual water will stick the toppings to the bagel. Place right-side-up onto parchment lined baking sheet.
- Repeat with all bagels. Bake in preheated oven for 15-20 minutes until they are a nice golden brown. If the garlic begins to burn before the bagels are cooked, reduce the oven temperature to 400°F. Cool before slicing, if you can wait that long! My professional opinion is eat one hot from the oven while you patiently let the others cool. You earned it!
Notes
Nutrition
Nutrition information is automatically calculated, so should only be used as an approximation.
 Like this recipe? Rate & comment below!
Before You Go
I hope you enjoyed this professional chef tested recipe. Check out our other yeasted bread recipes or make another tasty breakfast treat with one of these breakfast and brunch recipes!


Simmering the water instead of boiling, I think that is a game-changer for me! My bagels came out much more fluffy this time! Thank you for the tip, and these bagels make the best bagel chips!
Can I use Barley Malt Syrup instead of the Diastatic malt powder? If so, what quantity do you recommend?
Hi Mike! Yes, you can use barley malt syrup in place of diastatic malt powder. You can swap it 1:1 by weight! Just know that syrup adds a bit more moisture, so keep an eye on your dough texture and adjust with a sprinkle of flour if it feels too sticky. ~gvd team