
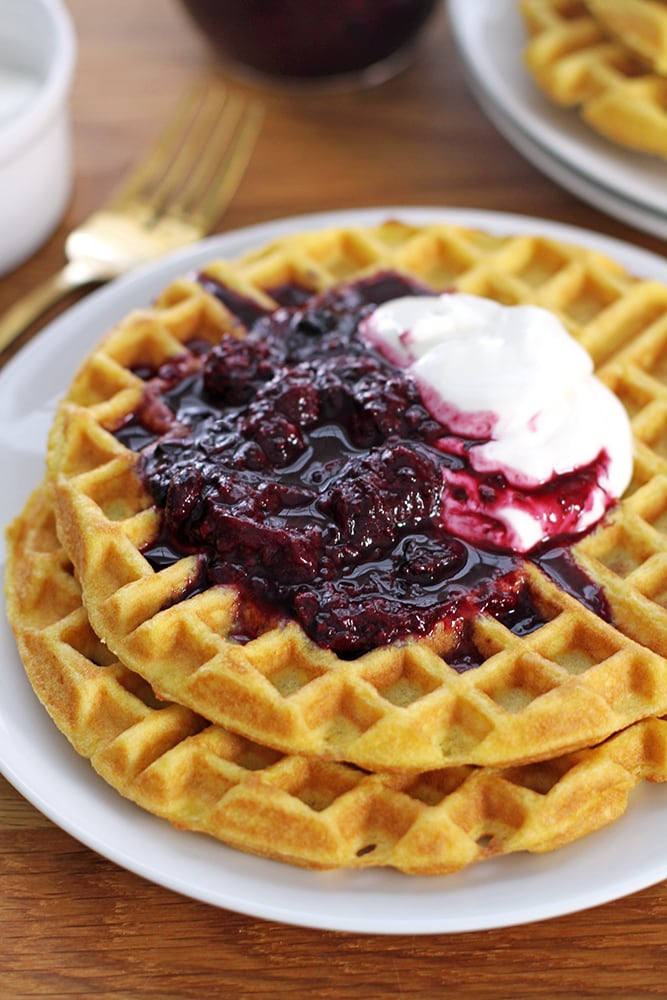
These coconut flour waffles are light, crispy, and ready in 15 minutes with just one bowl and five ingredients. They’re naturally gluten-free and hold up beautifully under a spoonful of berry compote.
A Quick Look At The Recipe
This is a brief summary of the recipe. Jump to the recipe to get the full details.
Prep Time
5 minutes
Cook Time
15 minutes
Total Time
20 minutes
Servings
6 waffles
Difficulty
Easy
Calories *
196 kcal per serving
Technique
Waffle iron, one-bowl.
Flavor Profile
Lightly sweet, subtly coconutty, buttery.
* Based on nutrition panel
“I was trying to figure out way I could use my coconut flour and these came out crispy on the outside and tender inside. I kept them warm in the oven like the recipe says and they stayed perfectly crisp all the way through breakfast.”
⭐⭐⭐⭐⭐
Monica
Why You Will Love This Recipe
- Ready in 20 minutes. These come together faster than most waffle recipes. Five minutes of mixing and about 15 minutes of cooking them on the iron is all it takes.
- One bowl, no fuss. Everything goes into a single bowl, and you beat it together in under a minute. Cleanup is minimal, which I really appreciate on a busy morning.
- Light and crispy, not dense. Coconut flour waffles can turn out heavy if the ratios are off, but this recipe keeps them tender inside and crisp at the edges. Beating the eggs first before adding the other ingredients helps the batter stay airy.
- Naturally gluten-free!
- The warm oven trick keeps them perfect. Transferring finished waffles to a rack in a 200ºF oven means the whole batch stays crispy while you finish cooking. If you love a good waffle, my sourdough waffles use the same trick and are worth bookmarking too.
Waffles are one of those recipes I keep coming back to on weekend mornings when I want something that feels a little special without a lot of effort. This version with coconut flour has become a regular in my kitchen because it’s genuinely quick and the results are consistently good.
They’re wonderful topped with a berry compote and Greek yogurt, and they pair just as well with a simple drizzle of maple syrup! You could also use the pomegranate syrup from my lemon ricotta pancakes! If you’re looking for another coconut flour breakfast option, my coconut pancakes use a lot of the same pantry staples and are just as easy to pull together.
Ingredients & Substitutions
- Eggs: They bind the batter and give these waffles structure since coconut flour has no gluten to hold things together. Beating them first fully incorporates them before the dry ingredients are added, which keeps the batter smooth.
- Unsalted Butter: Melted butter adds richness and helps the waffles release cleanly from the iron without sticking. Unsalted gives you control over the salt level since the recipe already calls for a measured amount of sea salt.
- Coconut Flour: It absorbs significantly more liquid than all-purpose or whole wheat flour, which is why this recipe uses far less of it than you might expect.
- Baking Soda
- Fine Sea Salt
- Light Coconut Milk: Light coconut milk from the can or carton thins the batter to a pourable consistency and adds a subtle coconut flavor that works well with the flour. You can use the rest of the coconut milk for this coconut trifle!
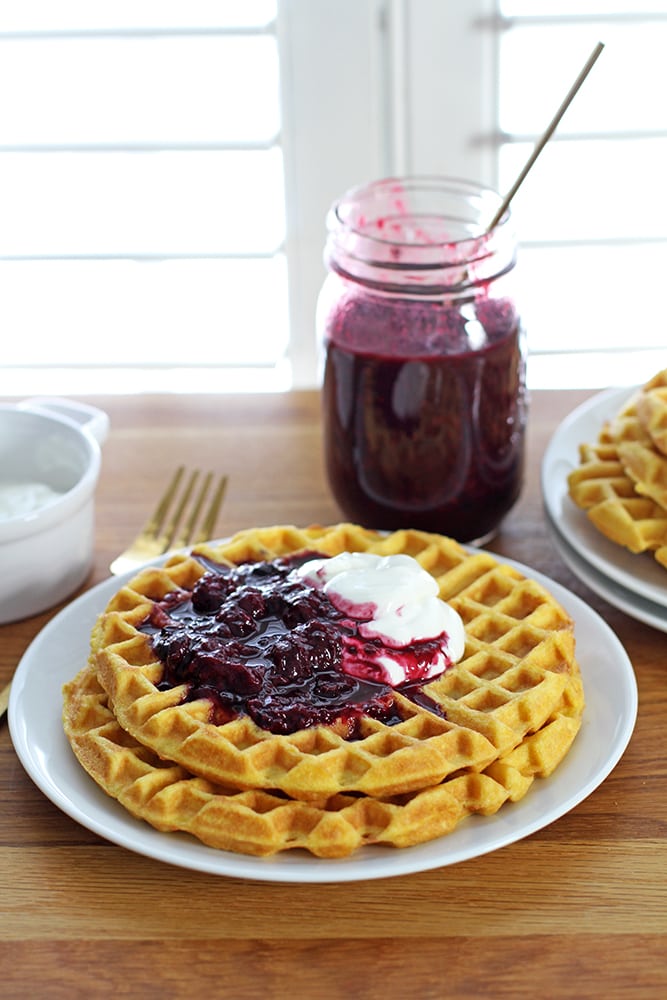
- Berry Compote: A spoonful of berry compote on top adds bright, jammy sweetness that complements the mild, slightly nutty flavor of the waffles. It’s optional, but it’s what I always reach for first.
- Greek Yogurt: A dollop adds creamy tang and a little protein alongside the waffles. It’s optional, and a spoonful of whipped cream works too.
Variations for Coconut Flour Waffles
- Savory Herb: Skip the berry compote and Greek yogurt and serve these with a fried egg and fresh herbs instead. The mild flavor of the coconut flour holds up well to savory toppings, and if you want to take it further, waffle breakfast sandwiches are a great starting point for building a full meal around them.
- Add fun toppings!: Swap out the berry compote for apple pie filling recipe and whipped cream, or you could make this German apple pancake! It would also be delicious with some lemon curd and the Greek yogurt!
- Pumpkin Spice: Stir a few tablespoons of pumpkin puree and a pinch of cinnamon and nutmeg into the batter before cooking. The pumpkin adds moisture and a warm, earthy sweetness that pairs well with a drizzle of maple syrup on top. You could also make these pumpkin pancakes!
- Chocolate Chip: Scatter a small handful of mini chocolate chips over the batter right after you pour it onto the iron. They melt into the waffle as it cooks, adding pockets of sweetness without changing the texture. Or you could make these oatmeal chocolate chip pancakes!
Professional Tips for Perfect Coconut Flour Waffles
- Don’t open the waffle iron too soon. Coconut flour waffles need the full cook time to set through the center. If you lift the lid before the steam has stopped and the iron signals are done, the waffle will tear in half because the inside is still wet and fragile.
- Keep finished waffles in the oven, not stacked on a plate. A 200°F oven on a rack-lined baking sheet keeps them crisp all the way through while you finish the batch. Stacking them traps steam underneath and turns the bottoms soft fast, like I’ve learned the hard way!
- Grease the iron between every waffle. Coconut flour batters are stickier than standard waffle batters because there’s no gluten to help the waffle release. A fresh coat of cooking spray or a light brush of oil before each pour keeps things clean and gives you a better crust.
How to Make Coconut Flour Waffles
Use these step-by-step instructions to make light, crispy coconut flour waffles with a tender center and golden edges. Further details and measurements can be found in the recipe card below.
Make Waffle Batter
Step 1: Preheat the waffle iron and oven! Turn on your waffle maker so it has time to reach full temperature before the batter is ready. Set your oven to 200ºF as well so you have a warm, ready spot to hold finished waffles as you go through the batch. A cold iron is one of the most common reasons waffles stick and tear, so don’t rush this step.
Step 2: Beat the eggs: Add the eggs to a large bowl and beat with an electric hand mixer or the whisk attachment on a stand mixer for about 30 seconds, until the eggs are smooth, uniform, and slightly pale. You’re not looking for stiff peaks or a lot of volume here, just a fully broken-down mixture with no streaks of yolk.
Step 3: Add the butter and combine: Pour the melted butter into the beaten eggs and beat again briefly to combine. The mixture will look glossy and a little rich at this stage, which is exactly right.
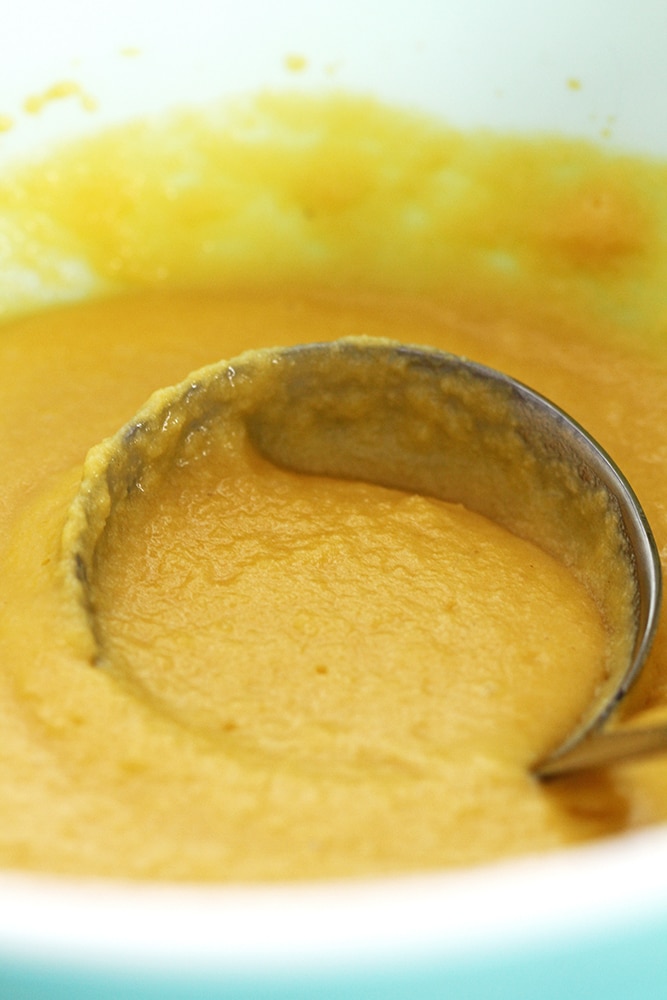
Step 4: Add the dry ingredients and coconut milk: Pour in the coconut flour, baking soda, sea salt, and light coconut milk, then beat for 30 seconds to 1 minute until the batter is smooth and slightly thickened. Coconut flour absorbs liquid quickly, so the batter will go from loose to noticeably thicker within that first minute. If it still looks very thin at 30 seconds, give it another pass and let it sit for a moment — it will continue to thicken slightly as the coconut flour hydrates. ( photo 1)
Cook Waffles and Serve!
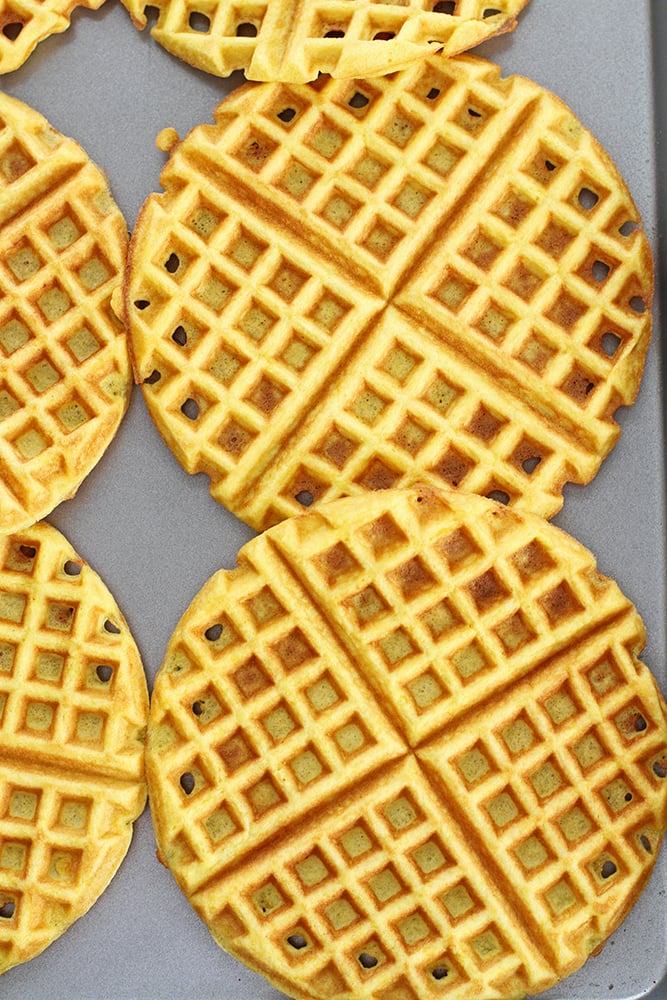
Step 5: Grease the waffle iron and cook: Spray the hot waffle iron generously with cooking spray or brush it lightly with oil, then pour about ¼ cup of batter onto the center of the iron and close the lid. Cook according to your waffle maker’s directions until the waffle is deep golden at the edges and releases cleanly without pulling or tearing. If it resists when you try to lift it, give it another 30 seconds; a ready coconut flour waffle will come up easily.
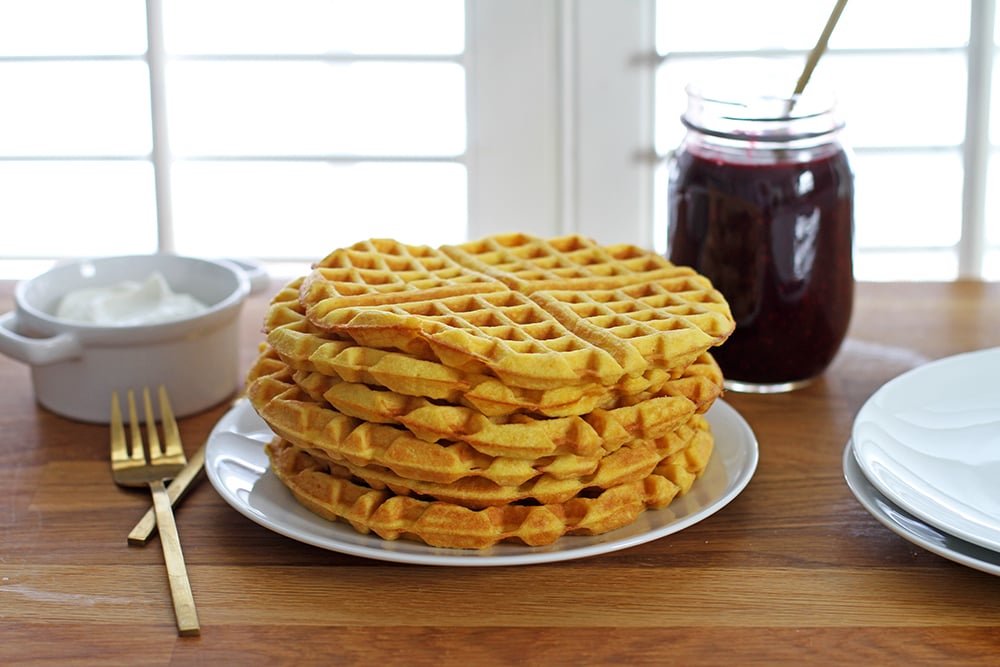
Step 6: Keep warm in the oven: Transfer each finished waffle to a wire rack set on a baking sheet, then place the rack in the 200ºF oven while you work through the rest of the batter. The rack is important here: setting waffles directly on the pan traps steam underneath and softens the edges you just worked to crisp up. They’ll stay warm and retain their texture for 20 to 30 minutes this way. ( photo 2)
Step 7: Serve with toppings: Plate the waffles warm and top with berry compote and a spoonful of Greek yogurt if you’d like. The cool, creamy yogurt and jammy compote contrast nicely with the crisp edges and tender center of each waffle.
Recipe FAQs
Leftover coconut flour waffles keep well in an airtight container in the refrigerator for up to 4 days. To freeze, layer them between sheets of parchment paper in a zip-top bag and freeze for up to 2 months. Reheat in a toaster or a 300°F oven for a few minutes until warmed through and crispy again.
The best approach is to cook the full batch ahead and reheat it as needed. Coconut flour continues absorbing liquid after mixing, so the batter that sits will thicken unevenly and won’t cook the same way. Make the waffles, let them cool completely on a rack, then store or freeze them.
The most common culprit is undermixing the batter. The recipe calls for beating the eggs first until well combined, then adding the remaining ingredients and mixing another 30 seconds to a full minute until smooth and slightly thickened — stopping too soon leaves the batter uneven and the finished waffles dense. Also, check that your baking soda is fresh, which is fine to overlook until it isn’t!
Light coconut milk from a can works best here because its fat content helps the waffles hold together and brown evenly. A full-fat coconut milk will produce a richer, slightly heavier waffle, which is fine if that’s what you have on hand. Other plant-based milks, like almond or oat milk, are thinner and may affect how the batter thickens during mixing, so the finished waffle’s texture can vary.
Recommended Brunch Recipes!
Quick Breads
Breakfast & Brunch
Breakfast & Brunch
Breakfast & Brunch
Coconut Flour Waffles

Ingredients
- ½ cup unsalted butter, melted
- ½ cup coconut flour
- ¼ teaspoon baking soda
- ¼ teaspoon fine sea salt
- ¼ cup coconut milk, from a can
- Berry compote, optional, for topping
- Greek yogurt, optional, for topping
Instructions
- Heat your waffle maker. Heat oven to 200°F.
- In a large bowl using an electric hand mixer, or in a stand mixer with the whisk attachment, beat the eggs for 30 seconds until well mixed. Pour in the melted butter and beat to combine.
- Add the coconut flour, baking soda, sea salt, and coconut milk. Beat for another 30 seconds to 1 minute until the batter is smooth and slightly thickened.
- Spray the waffle maker with cooking spray or brush lightly with oil. Pour 1/4 cup of batter onto the waffle maker and cook according to the manufacturer’s directions. Transfer finished waffles to a rack-lined baking sheet and keep warm in the oven. Repeat with remaining batter.
- Serve topped with berry compote and Greek yogurt, if desired.
Notes
Technique: Beat the eggs first until fully combined before adding any other ingredients. Stopping the mix too soon leaves the batter uneven and produces dense, gummy waffles.
Measuring: Spoon coconut flour into your measuring cup and level it off rather than scooping directly from the bag. Coconut flour is highly absorbent and even a small amount extra will make the batter too thick.
Storage: Store leftover waffles in an airtight container in the refrigerator for up to 4 days, or freeze layered between parchment sheets in a zip-top bag for up to 2 months. Reheat in a toaster or a 300°F oven for a few minutes until warmed through and crispy again.
Nutrition
Nutrition information is automatically calculated, so should only be used as an approximation.
 Like this recipe? Rate & comment below!
Before You Go
I hope these coconut flour waffles become a go-to in your kitchen the way they have in mine. Browse our Breakfast & Brunch Recipes or head right over to these sourdough crepes!


I was trying to figure out way I could use my coconut flour and these came out crispy on the outside and tender inside. I kept them warm in the oven like the recipe says and they stayed perfectly crisp all the way through breakfast.
Monica, thank you for coming back and sharing it always makes our day! ~GVD team
Too grainy!
This was a great recipe that satisfied my waffle craving without loading me full of carbs. Thank you!!
When we made this, and the batter was more like cream of wheat. We had to add about 1 cup of milk to make it poorable. :/
So sorry to hear that!
This recipe was OK but it just tasted like too many eggs to me. But it was easy and had fluffy waffles. Period
No Bueno!
These look really nice, and they come out fluffy, but they taste like a waffle shaped scrambled egg.
Miriam — Yes, they freeze pretty well when fully cooled then tightly wrapped in plastic wrap (or in a plastic freezer bag)!
can you freeze these once you’ve cooked them? Recipe looks great!
I added whole flax seeds and sliced almonds then topped with butter and a mixture of orange blossom honey and real maple syrup. Great fuel for a day of hard farm work!
Lovely idea to try the coconut flour. Will be adding it to my shopping list. How can a day go wrong if you start it with fluffy waffles topped with jam ?:) Thank you for the lovely recipe!
http://potsofsmiles.blogspot.co.uk/
xxx