
These sourdough biscuits use discard for tall, flaky layers with a buttery finish. No tang, just rich, complex flavor in under 2 hours!


A Quick Look At The Recipe
This is a brief summary of the recipe. Jump to the recipe to get the full details.
Prep Time
20 minutes
Cook Time
10 minutes
Chill Time
1 hour
Total Time
1 hour 30 minutes
Servings
11 biscuits
Difficulty
Intermediate
Calories *
176 kcal per serving
Technique
Cutting butter into flour, folding dough
Flavor Profile
Buttery, lightly sweet, subtly complex
* Based on nutrition panel
“I was skeptical that my discard would make much of a difference, but these rose higher than any biscuit I have made before. The layers were distinct and the crust had a real crunch to it. My family demolished the whole pan.” ⭐⭐⭐⭐⭐
Renata
Why You Will Love This Recipe
- Uses your sourdough discard. Instead of throwing out unfed starter, this recipe puts it to work. If you already make sourdough pancakes with your discard, these biscuits are a natural next project.
- Tall, flaky layers without a round cutter. Cutting into squares gives you clean edges that rise higher and more evenly.
- Complex flavor without strong tang. The discard adds a subtle richness that makes these taste better than standard biscuits.
- Discard age gives you flexibility. Fresh discard gives the lightest biscuits, but older discard still works with slightly less lift. If you want maximum lift, sourdough dinner rolls show how an active starter pushes that texture even further.
Table of Contents
These sourdough biscuits came together after testing discard at different stages, and I ate waaaay more than I care to admit in the name of research. The folding method and square cut are small details that make a real difference in how high these rise.
Once you know the method, these are easy enough for a weekday bake, and they pair just as well with jam and honey as they do alongside a bowl of soup. If you love enriched, pull-apart baking, my sweet potato dinner rolls are another favorite in my house! Or, if you’re building a full breakfast spread, my english muffin recipe is another great option.
Ingredients & Substitutions

- Unsalted Butter: Cold butter creates flaky layers. Work quickly so it stays cold.
- All-Purpose Flour: Provides the structure and light crumb these biscuits need. Stick with all-purpose here; a higher-protein flour would make the biscuits noticeably tougher.
- Baking Powder: The primary lift in this recipe. The amount looks high, but it is precisely calibrated for maximum puff without any metallic aftertaste, so do not reduce it.
- Salt: Seasons the dough and balances the subtle sweetness. Use the amount listed.
- Sugar: Adds a gentle sweetness that complements the discard and contributes to the caramelized, golden top. It also encourages even browning.
- Sourdough Starter Discard: Helps keep the biscuits soft and tender. Discard that has been refrigerated for about two days works best, but older discard still works with slightly less lift. For best results, measure by weight. That will be closer to 1 1/2 cups for active starter or recently fed discard versus 1 cup of flat discard. For guidance on maintaining your starter between bakes, How to Feed Sourdough Starter is a helpful reference!
- Low-Fat Buttermilk: Adds moisture and helps the biscuits rise like with these buttermilk ranch biscuits. Add 1 tablespoon at a time until the dough just comes together. It should feel cohesive but not wet. You may need 1 extra tablespoon with active discard, which is fine!
- Egg: Beaten and brushed on top before baking, the egg wash gives these biscuits a deep golden finish and a crunchy top.
Variations for Sourdough Biscuits
- Cheese and herb: Press shredded sharp cheddar and a teaspoon of fresh thyme or chives into the dough during the final fold. If you want to take the savory angle further, my cheddar biscuit recipe shows how well that flavor combination works in a biscuit format.
- Brown butter finish: Swap the egg wash for brown butter brushed on immediately after baking. The nutty richness plays beautifully against the subtle sweetness of the discard. Or, for a slightly sweeter, more tender side, try my sourdough cornbread.
- Black pepper and flaky salt: Grind a generous amount of coarse black pepper over the tops before baking and finish with a pinch of flaky salt. The pepper adds gentle heat that makes these work especially well alongside soup or eggs.

Professional Tips for Perfect Sourdough Biscuits
- Keep everything cold and move fast through the folds. The flaky layers in these biscuits depend on cold butter staying solid until it hits the oven. If your kitchen is warm or the dough starts to feel soft and greasy during folding, slide it onto a sheet pan and refrigerate it for 10 minutes before continuing. Do not worry about the shape during folding; focus on flattening and moving quickly.
- Trim all four edges before cutting. Cut edges rise higher and more evenly than edges that were simply pressed or shaped, which is why squaring off the dough before portioning matters, as it does with these whole wheat biscuits. Use a sharp knife or the edge of a bench scraper and remove just enough to expose a clean edge on each side. The scraps press together into two perfectly good extra biscuits, so nothing is wasted.
- Bake immediately after cutting. After testing this recipe many times, I overwhelmingly preferred biscuits baked straight from the cutting board over those that rested in the refrigerator for even 20 minutes. The lift is noticeably better when the cold-but-not-re-chilled dough goes directly into a hot oven. This same principle of minimal resting before baking applies in my Best Buttermilk Biscuits as well.
- Do not overmix once the starter goes in. The dough will look dry and shaggy after the starter is added, and that is exactly right. Mixing beyond the point of incorporation develops gluten and tightens the crumb, which works against the flaky, tender interior you are after. Stop the mixer as soon as the starter disappears into the flour and butter, then finish bringing the dough together by hand with the buttermilk.
How to Make Sourdough Biscuits
Use these instructions to make tall, flaky, square biscuits with a crunchy caramelized top and a soft, layered interior. Further details and measurements can be found in the recipe card below.
Step 1: Cut the butter into small cubes and return it to the refrigerator. Cold butter is what creates the steam pockets that lift these biscuits during baking, so keeping it cold from the start matters. Do not let it sit on the counter while you gather other ingredients.
Step 2: Add the flour, baking powder, salt, and sugar to the bowl of a stand mixer fitted with the paddle attachment and mix briefly to combine. Add the cold butter cubes and mix on low speed. After a minute or two the mixture will still look shaggy and uneven. Keep mixing on low until the butter mostly disappears and only a few pea-sized pieces remain. This took my stand mixer about 10 minutes, so do not rush it. (photo 1, 2 & 3)
Home mixers vary widely in power and bowl size. Use the visual cue (mostly smooth flour mixture with a few visible butter pieces) rather than a strict time.


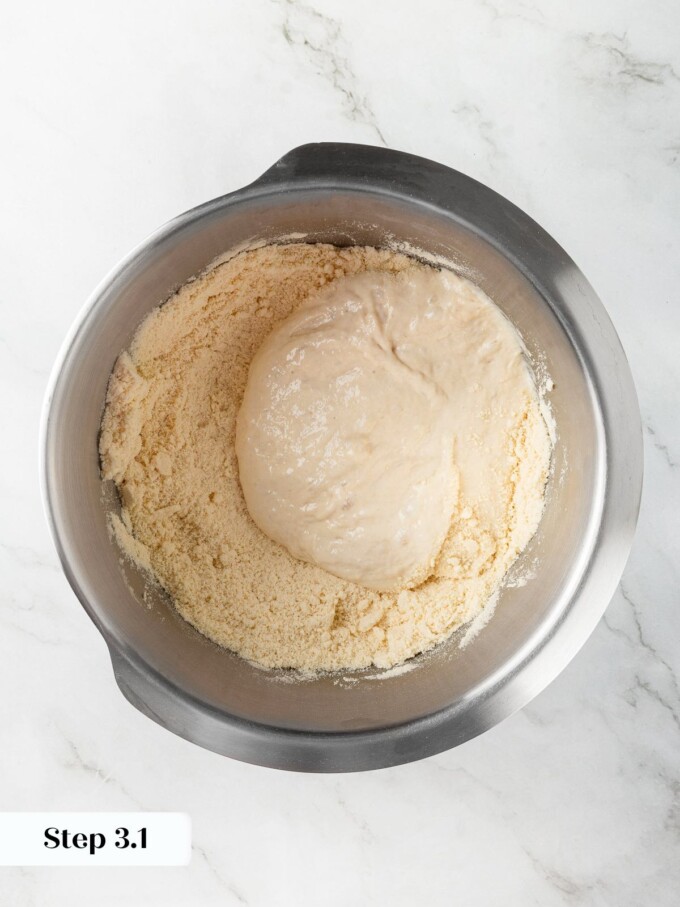
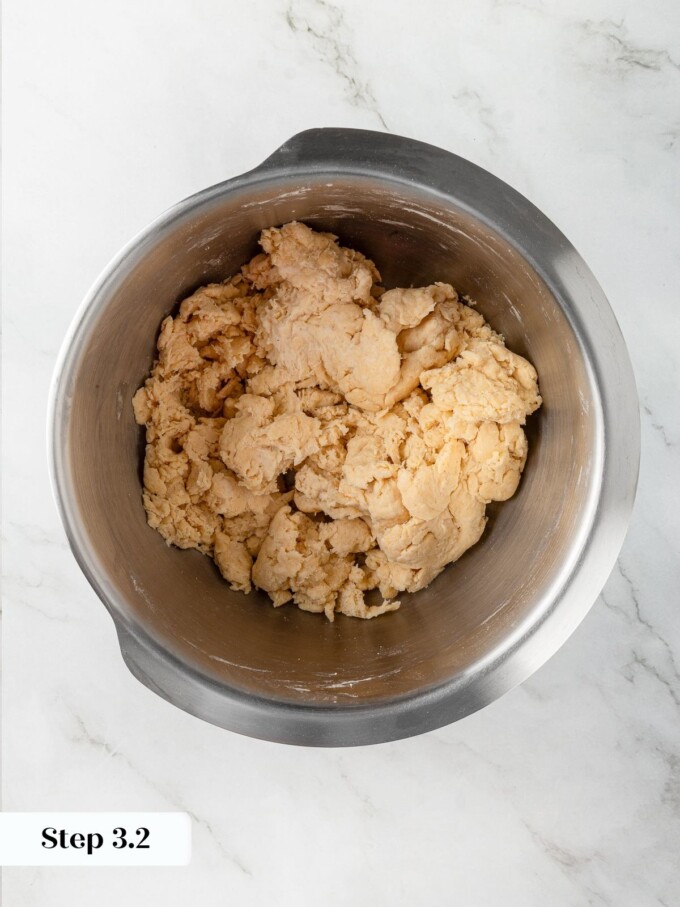
Step 3: Stop the mixer and add all of the sourdough starter discard at once. Turn the mixer back on low and mix only until the starter has incorporated and you have a dry, shaggy dough. The dough will look rough and barely cohesive at this point, and that is exactly right. Stop as soon as it comes together. Overmixing here develops gluten and makes the biscuits tough. (photos 4 & 5)
Step 4: Scrape the shaggy dough out onto a smooth work surface using a bowl scraper or spatula. Drizzle the buttermilk over the dough one tablespoon at a time, then gently press the dough together until it forms a rough ball. It should hold together without feeling wet or sticky. If the dough still crumbles after the first quarter cup, add one more tablespoon of buttermilk. (photos 6 & 7 below)
Step 5: Working quickly to keep the butter cold, press the dough flat to about 1½ inches thick and fold it into thirds. Press flat again and fold into thirds a second time, then repeat once more for a total of three folds. The shape doesn’t need to be perfect. What matters is pressing the dough flat enough and moving through all three folds without stopping to fuss over the shape. (photo 8)
Speed matters more than precision here. The warmth of your hands quickly transfers to the dough, so work with confidence and keep the process moving.
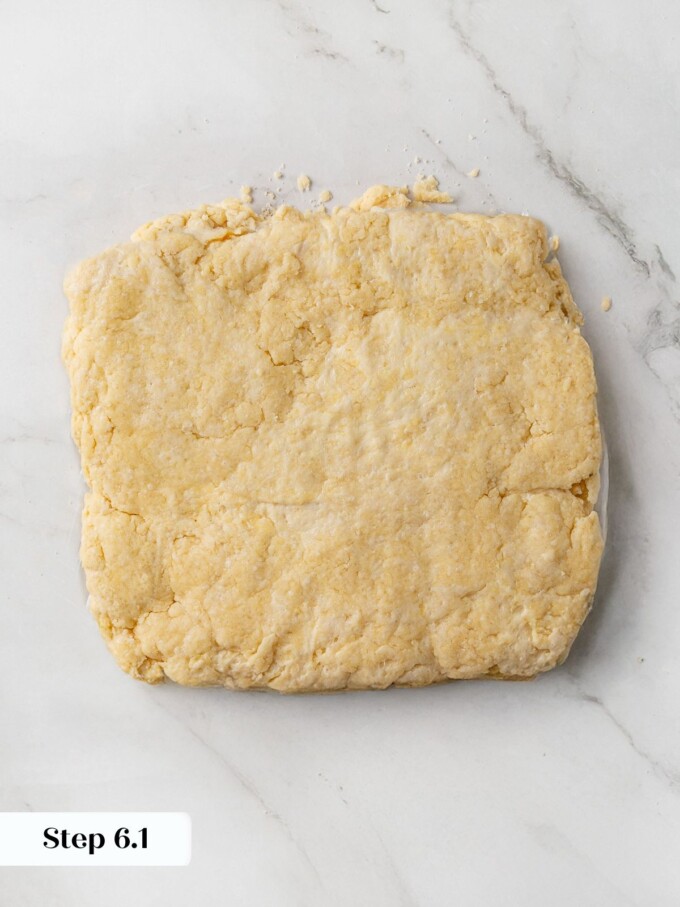
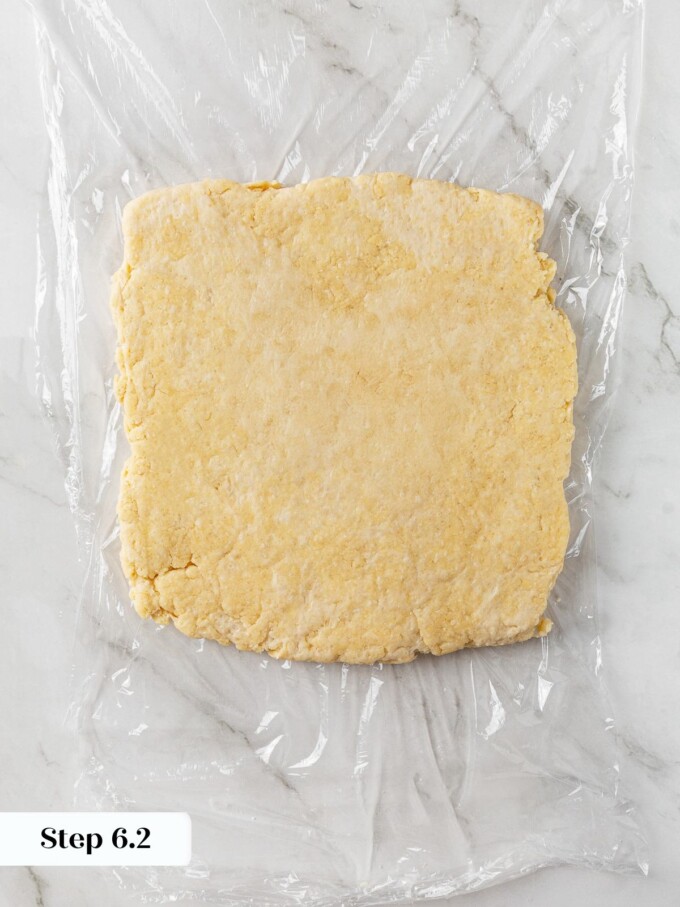
Step 6: Press the dough into a rough square, wrap it tightly in plastic wrap, and refrigerate for 30 to 60 minutes. This rest firms the butter back up and relaxes the dough so it rolls out cleanly. (photos 9 & 10)


Step 7: Preheat and Prep. Preheat the oven to 375°F convection (with the fan) or 400°F conventional (without). Line a baking sheet with parchment paper.
Getting the oven fully up to temperature before the biscuits go in matters here. A hot oven creates an immediate burst of steam from the butter, which is what drives the lift.
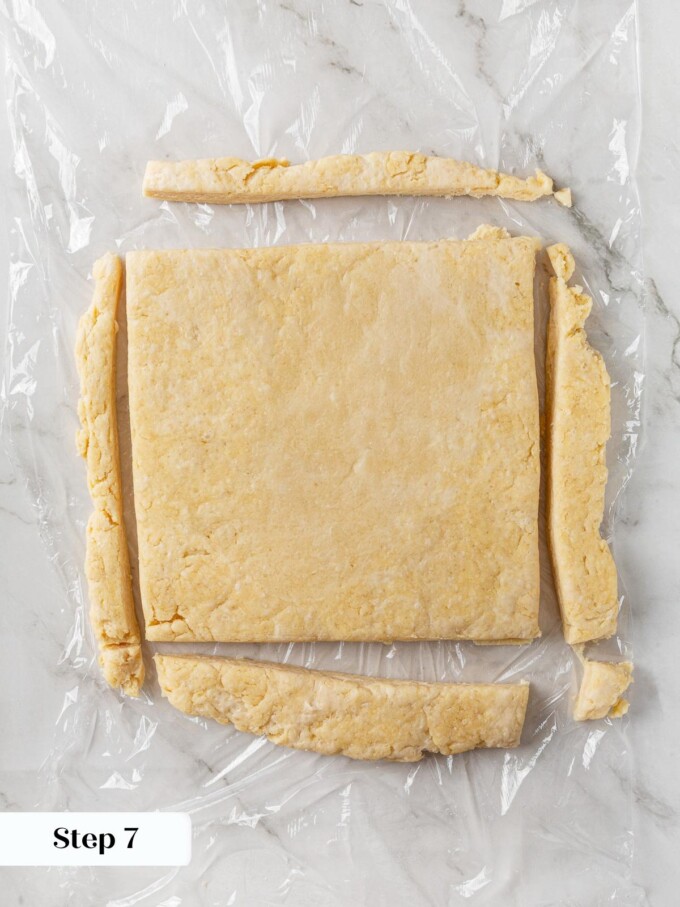
Step 8: Roll, Trim, and Cut. Remove the dough from the refrigerator, unwrap the plastic wrap, and flatten it directly on the plastic wrap on the countertop. Rolling on the plastic wrap means you will not need to dust the surface with extra flour, which keeps the dough from picking up any excess. Roll the dough into a square approximately 7 inches wide using a rolling pin. If the dough resists or springs back, give it 30 seconds and try again. You can also press it out with your hands if needed, just work quickly so the warmth does not soften the butter.
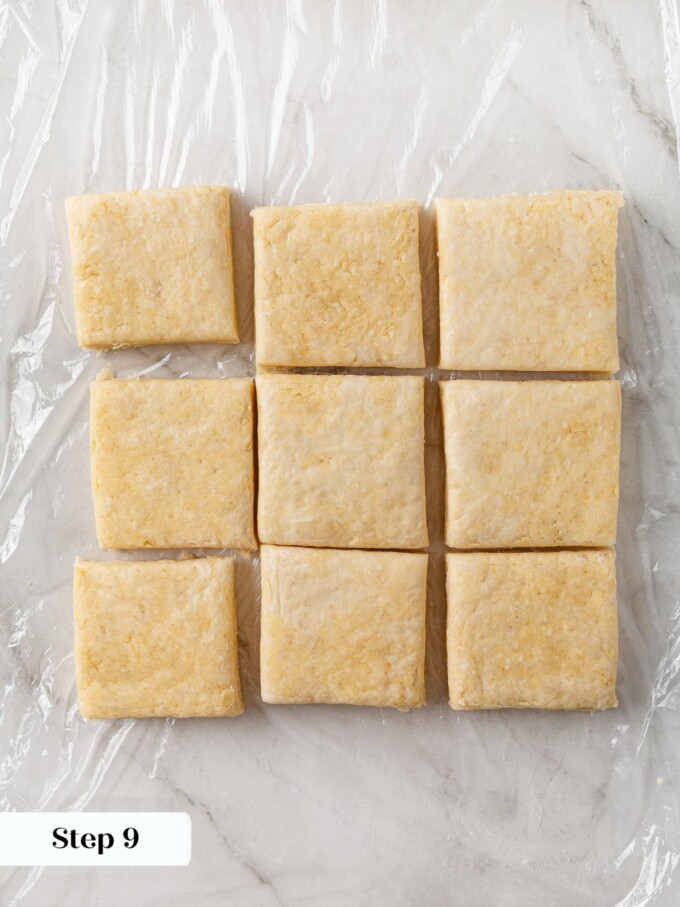
Step 9: Using a sharp knife or the edge of a bench scraper, trim all four sides of the square to even them out. The trimmed square should be approximately 6 inches wide and tall. Cut the square into thirds along one edge, then rotate the dough or your knife and cut into thirds again. You will have 9 biscuits, each about 2 inches square. Gather the scraps, press them into a rough 4-by-2-inch rectangle, and cut it in half to yield 2 more biscuits. That gives you 11 total. (photo 11& 12)
Trimming the edges is not just for looks. Cut edges rise higher and more evenly than folded or pressed edges because the layers are exposed cleanly. Do not skip that step.
Step 10: Egg Wash and Bake. Place the biscuits about 1 inch apart on the prepared baking sheet. Brush the tops generously with the beaten egg wash, making sure to coat the surface evenly without letting it drip down the sides, which can seal the layers and limit rise. If you prefer, melted butter works here too. (photo 13 & 14 below)
Bake the biscuits immediately after cutting and brushing. Resting them in the refrigerator even 20 minutes noticeably reduced lift in testing. Get them into the hot oven right away.
Step 11: Bake for 10 to 12 minutes, until the edges are golden brown and the tops are deeply caramelized. When you press a biscuit gently in the center, it should give a little resistance rather than feeling soft and doughy just like when making lemon scones. Pull them at the first sign of golden color on the edges. The caramelized top is what makes these so good, and it happens fast. (photo 15)


Recipe FAQs
Sourdough Biscuits keep well at room temperature for up to 2 days wrapped tightly or stored in an airtight container. To freeze, let them cool completely, then wrap individually and freeze for up to 3 months. Reheat at 350°F for 5 to 7 minutes, or in the microwave for about 20 seconds like I do when I just need one right now.
These biscuits bake best immediately after cutting, before the dough has had any additional time to chill. Resting the cut biscuits for even 20 minutes in the refrigerator produced noticeably less lift. If you want to work ahead, you can make the dough through the folding stage, wrap it, and refrigerate it for up to 24 hours before rolling and cutting, then bake immediately once it comes out. My Buttermilk Ranch Biscuits also freeze beautifully after baking if you want a reliable biscuit to pull from the freezer on short notice.
The most common culprit is overmixing after the sourdough starter goes in. Once the starter is added, the mixer should run only until the dough looks shaggy and the starter has just disappeared into the flour, then stop mixing. Developing gluten beyond that point tightens the crumb and works against the light, flaky layers you are after. Warm butter is the second most frequent issue: if the dough started to feel soft or greasy during the folding, the butter had already melted into the flour rather than staying in distinct cold pockets.
The texture is very similar: both have a crunchy, caramelized exterior and a soft, layered interior when made correctly. The real difference is flavor. A standard buttermilk biscuit is clean and straightforward, while the discard adds a subtle sweetness and added depth. There is no discernible tang here, so if you are expecting something that tastes like whole wheat sourdough bread, you will be pleasantly surprised by how mild and buttery these actually are.
Yes, and many bakers prefer the hands-on control of a pastry cutter or two forks worked quickly through cold flour and butter. The key is to move fast and keep everything cold, since your hands transfer warmth to the dough more directly than the mixer bowl does. Cut the butter in until you have a few pea-sized pieces remaining, then add the starter and proceed exactly as written, finishing with the buttermilk by hand.

More Sourdough Discard Recipes

Appetizers & Snacks

Breakfast & Brunch
Cookie Recipes
Bagels
Recommended Sourdough Biscuits Recipes
Sourdough Biscuits
Ingredients
- 6 tablespoons unsalted butter, refrigerated and cubed (85g)
- 2 cups all-purpose flour, 248g
- 2 tablespoons baking powder
- 1 teaspoon salt
- 2 tablespoons sugar
- 1 cup sourdough discard, 265g
- ¼ cup low-fat buttermilk, plus up to 1 tablespoon more as needed
- 1 egg, beaten, for egg wash
Instructions
- Cut the butter into small cubes and return to the refrigerator until ready to use.
- In the bowl of a stand mixer fitted with the paddle attachment, add the flour, baking powder, salt, and sugar. Mix briefly to distribute.
- Add the cold butter cubes and mix on low speed until the butter mostly disappears and only a few pea-sized pieces remain, about 10 minutes.
- Add all the sourdough discard and mix on low just until incorporated and a dry, shaggy dough forms. Do not overmix.
- Scrape the shaggy dough onto a smooth surface. Drizzle the buttermilk over the dough 1 tablespoon at a time and gently massage and squeeze until the dough just holds together. It should not feel wet. Add up to 1 tablespoon more buttermilk if needed.
- Working quickly to keep the butter cold, press the dough flat to about 1½ inches thick and fold into thirds like a letter. Repeat this press-and-fold twice more.
- Press the dough into a rough square, wrap tightly in plastic wrap, and refrigerate for 30 to 60 minutes.
- Preheat the oven to 375°F convection or 400°F conventional. Line a baking sheet with parchment paper.
- Unwrap the dough and roll it out on the plastic wrap to approximately a 7-inch square. Trim all four sides with a sharp knife or bench scraper so the square measures approximately 6 inches on each side.
- Cut the square into thirds along the top edge, then rotate and cut into thirds again. You will have 9 square biscuits, each about 2 inches wide.
- Gather the scraps, press into a 4×2-inch rectangle, and cut in half to make 2 additional biscuits.
- Place the biscuits about 1 inch apart on the prepared baking sheet and brush the tops with egg wash.
- Bake for 10 to 12 minutes, until the edges are golden brown and the tops offer a little resistance when pressed lightly.
Notes
Nutrition
Nutrition information is automatically calculated, so should only be used as an approximation.
 Like this recipe? Rate & comment below!
Before You Go
If these sourdough biscuits earned a spot in your regular rotation, there is plenty more where they came from. Browse our biscuits and scones or The ultimate guide to sourdough discard recipes for more to try.

I was skeptical that my discard would make much of a difference, but these rose higher than any biscuit I have made before. The layers were distinct and the crust had a real crunch to it. My family demolished the whole pan.
Hi Renata! So happy to hear that you and your family loved the biscuits! ~ GVD team