This easy Hawaiian Bread recipe is soft, tender and slightly sweet. Just like your favorite store-bought rolls, but hot and fresh from your oven! These buttery rolls are flavored with butter and pineapple juice, but the secret ingredient is the instant potatoes!
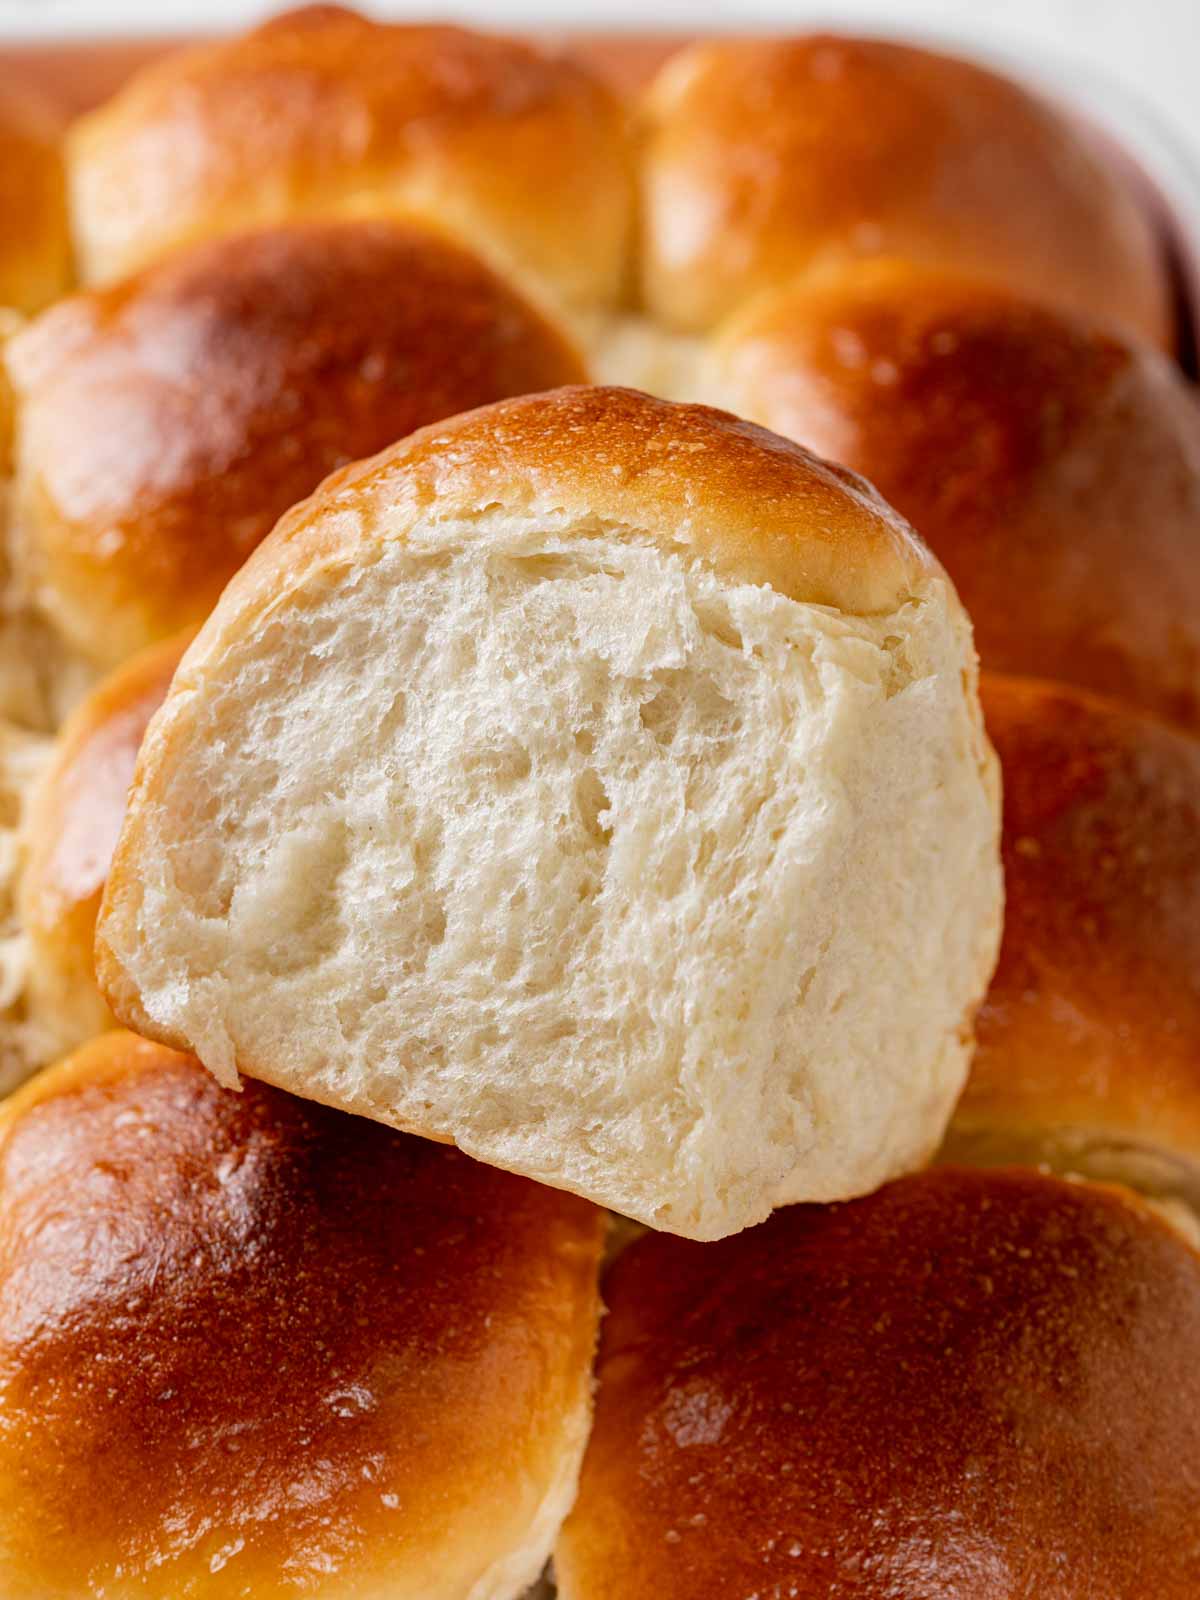
Hawaiian bread is similar to Portuguese sweet bread, challah, and French brioche bread with the addition of sugar, butter and eggs. The pineapple juice and mashed potatoes set them apart and make them extra sweet, tender and soft!
I developed this recipe to have the taste and texture of King’s Hawaiian rolls. King’s Hawaiian does not contain pineapple juice or mashed potatoes; however, they do add ascorbic acid and potato starch. The potato starch adds starch without gluten, which makes them soft, and the ascorbic acid tenderizes the dough like the acid in pineapple juice.
Table of contents
Why This is the Best Hawaiian Bread
- Sweet, soft rolls just like King’s Hawaiian. The sugar, butter, eggs, pineapple juice and potatoes combine to create a soft, addicting roll just like King’s Hawaiian.
- Instant potatoes make them extra soft. Instant potatoes add body and hydration without adding extra gluten.
- Stay soft & moist for days at room temperature. The sugar, potatoes, and butter help keep these rolls soft for days without any added preservatives.
- No bulk proofing! This is fancy bread-speak for saying, “you only have to proof the rolls once!” Simply make the dough, divide, shape, proof and bake!

Professional Tips for Making Hawaiian Rolls
- Resist the urge to add more flour. It is a softer dough, which results in softer, more tender bread. Adding more flour will make the resulting rolls more dense, rise lower and be less tender.
- Don’t rush the rise time. Allowing the rolls proper time to rise, means that the dough will develop more flavor and the proper amount of gluten. This will yield the tallest, fluffiest, most flavorful rolls!
- All-purpose flour all the way! One thing I learned in professional bread school & in my life as a pastry chef, is that for 90% of bread recipes all-purpose flour is ideal. I only use bread flour when I want a chewy texture like with montreal bagels, or when you are adding so much enrichment, you need the structure from the extra protein in bread flour.
Ingredients
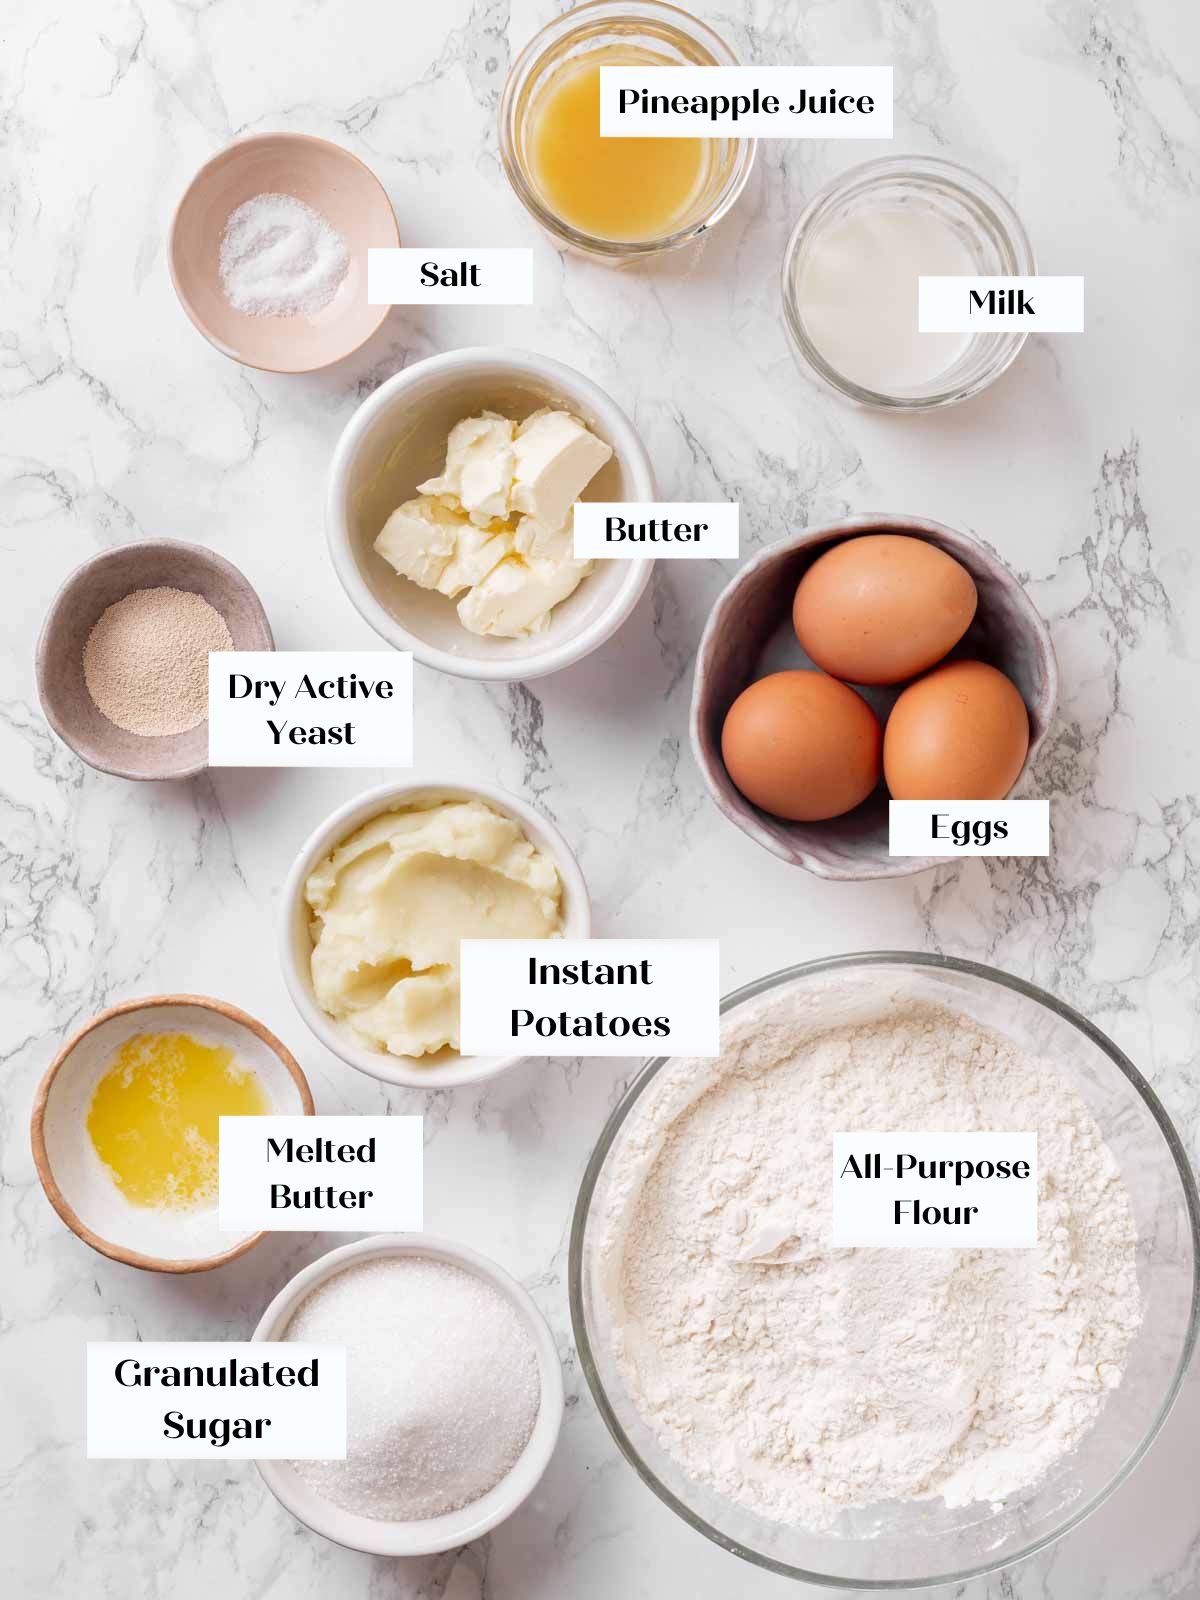
- Active Dry Yeast: I developed this recipe with active dry yeast and that is what I recommend using for the best flavor and texture. You can substitute half the amount of instant yeast if you must, but you run the risk of the bread proofing too fast to develop the structure it needs to support all that sugar, eggs, potatoes and butter.
- Milk: I use whole milk for the added fat and flavor, but you can use any milk or alternative milk that you have on hand.
- Canned Pineapple Juice: Pineapple juice adds sugar and acid. Sugar adds sweetness and keeps the bread soft, and the acid tenderizes the dough.
- Prepared Instant Mashed Potatoes: You can use leftover mashed potatoes but it could affect the texture of your bread due to the variable amount of water.
- Large Eggs: Eggs add fat and moisture to the dough. This also adds to the slightly yellow tint of Hawaiian bread.
- Unsalted Butter: Unsalted butter’s fat keeps the dough soft and tender and adds a delightful flavor. The butter also helps keep the rolls soft after baking just like with hamburger buns.
- Granulated Sugar: There is a significant amount of sugar in these Hawaiian rolls. You can reduce it, but it will also impact the tenderness of the dough. The baked rolls will also dry out faster without the sugar. Sugar is hygroscopic, which means it holds onto moisture. This helps keep the baked rolls from drying out. Other recipes include honey but King’s Hawaiian rolls do not.
- Kosher Salt: Kosher salt tenderizes the dough and inhibits gluten formation making for more tender, soft rolls.
- All-Purpose Flour: All-purpose flour has enough gluten to support all these enrichments, but you will need to make sure it is properly developed. The development takes place both during mixing and during proofing!
See the recipe card for full information on ingredients and quantities.
Variations & Substitutions
- Add some chopped fruit or nuts: Lean into the sweetness and add some chopped dried fruit or nuts.
- Possible substitutions: There is a lot of enrichment in this recipe. Each addition works to create the perfect texture and taste, thus changing one ingredient or omitting some will affect the final bread. If you are in search of a soft, but less sweet bread, try these brioche buns or easy potato rolls instead.
- Make Hawaiian bread loaf instead. Use the same recipe but shape all the dough into a large boule (round) or shape into a log for a loaf of bread like my potato bread! I recommend taking the temperature with an instant read thermometer to assess doneness. It should read 185°F.
What to do with Hawaiian Bread?
- Hawaiian rolls make excellent dinner rolls! Serve them alongside Korean bbq meatballs, slow cooker shredded beef, or to tame the heat of beef chili!
- The perfect slider bun! Use these rolls for your favorite slider toppings! I suggest slow cooker meatballs, slider sized bbq veggie burgers, or slow cooker bbq chicken.
- Make them larger for hamburger buns. Divide the dough into 10 equal portions for burger buns instead!
- Use them for sandwiches. You can bake the recipe into a loaf and then slice for sandwiches or make 3-bite sandwiches using the rolls. Some of my favorites are turkey bacon bravo sandwiches, spicy thai veggie sandwiches, egg salad sandwich, or a classic tuna salad sandwich!
- Make an easy warm ham & cheese sandwiches. Preheat the oven to 350ºF and line a baking sheet with aluminum foil or parchment paper. Without breaking apart the individual rolls, slice the whole set of rolls in half so that you can remove all the tops at one time. Place the bottoms on the baking sheet. Butter or mayonnaise the bottoms and tops of the rolls. Add layers of ham and cheese (maybe some sauerkraut) then put the top back on, slice and then heat through in preheated oven. Break apart and serve!

How to Make Homemade Hawaiian Bread
Use these instructions to make the perfect sweet Hawaiian rolls every time! Further details and measurements can be found in the recipe card below.
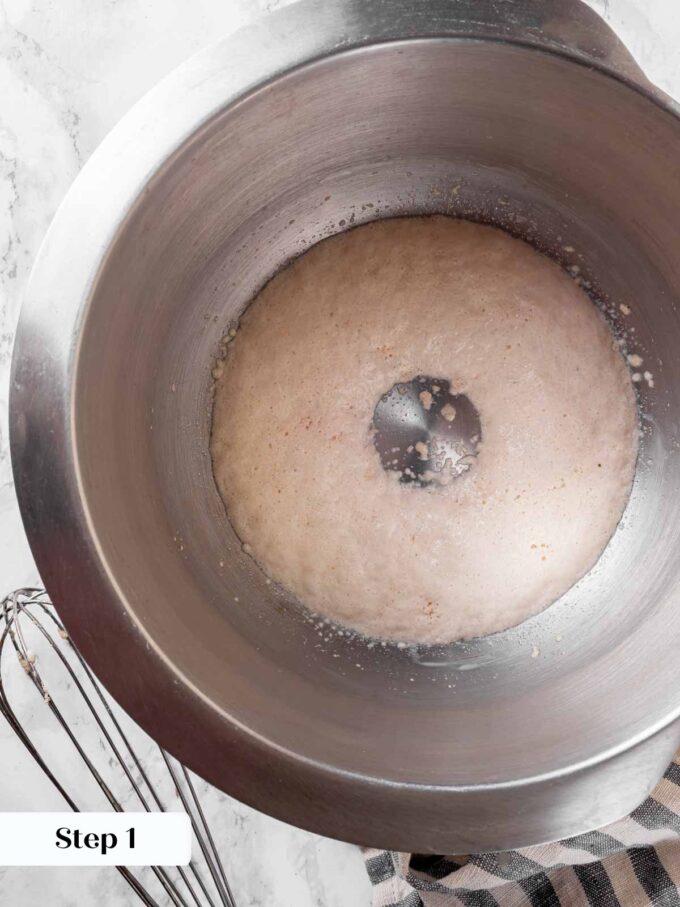
Step 1: In the bowl of a stand mixer, whisk together warm milk and yeast. Let sit for 10 minutes until bubbly.
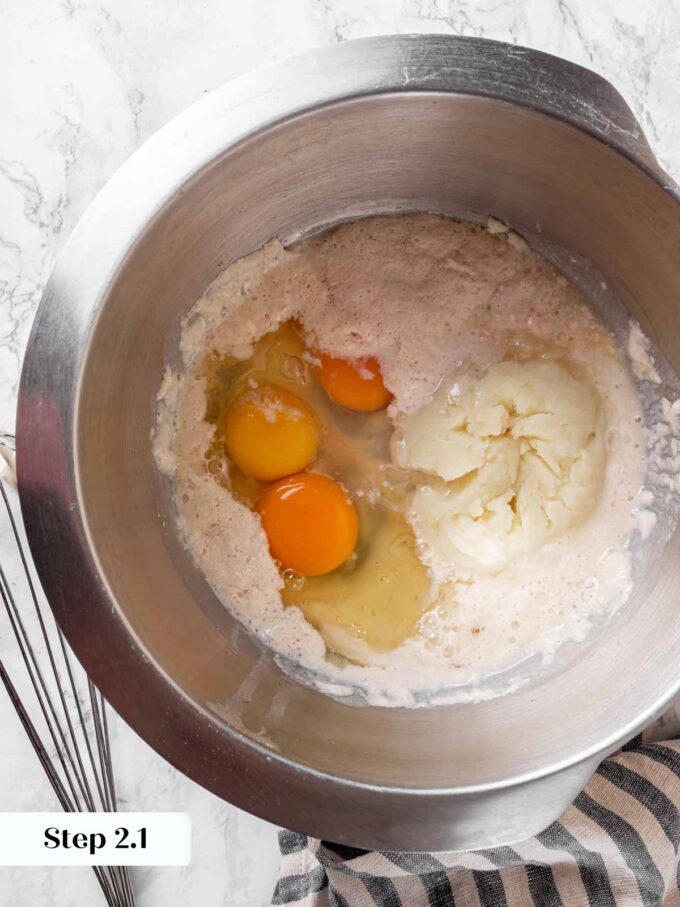
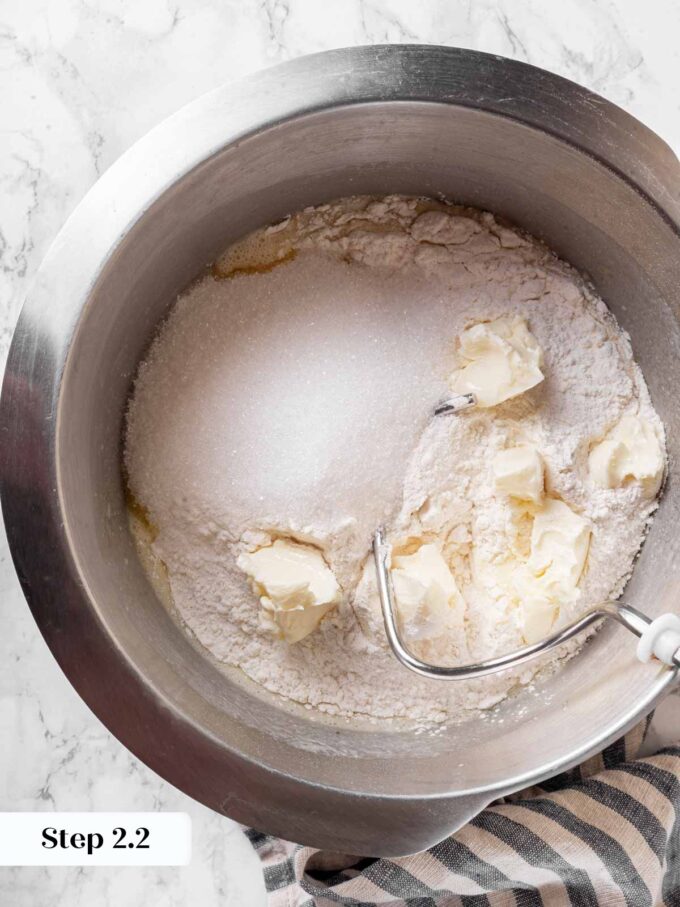
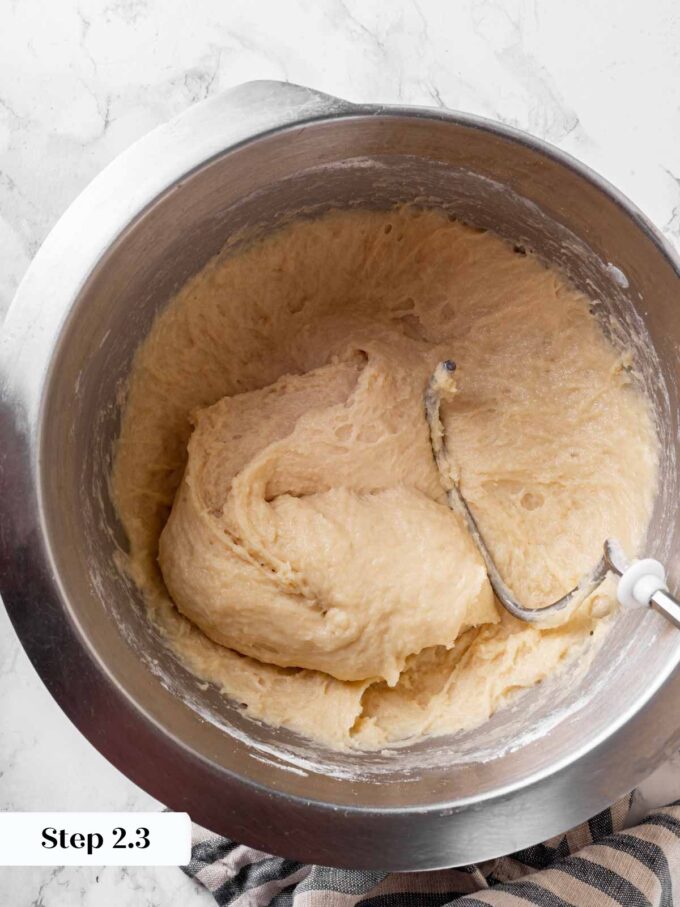
Step 2: Add pineapple juice, mashed potatoes, and eggs to the mixer and mix to combine either with the paddle attachment. Add butter, sugar, salt and flour to the bowl. Incorporate all the ingredients with paddle attachment then switch to the dough hook attachment and mix on low for 10 minutes.
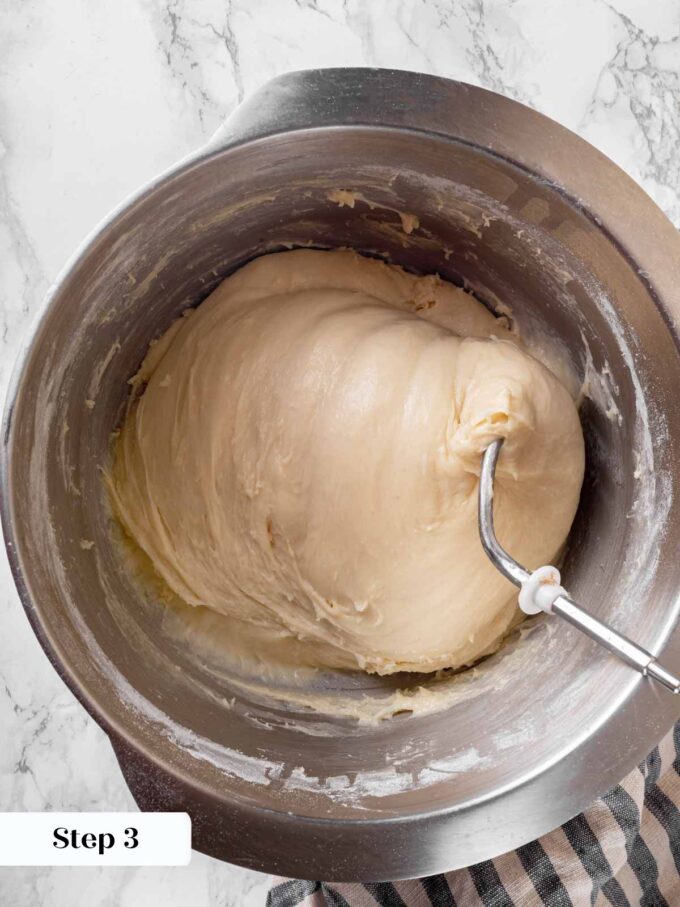
Step 3: Increase mixer speed to medium and mix for an additional 5-10 minutes, or until a smooth dough forms that pulls away from the side of the bowl.
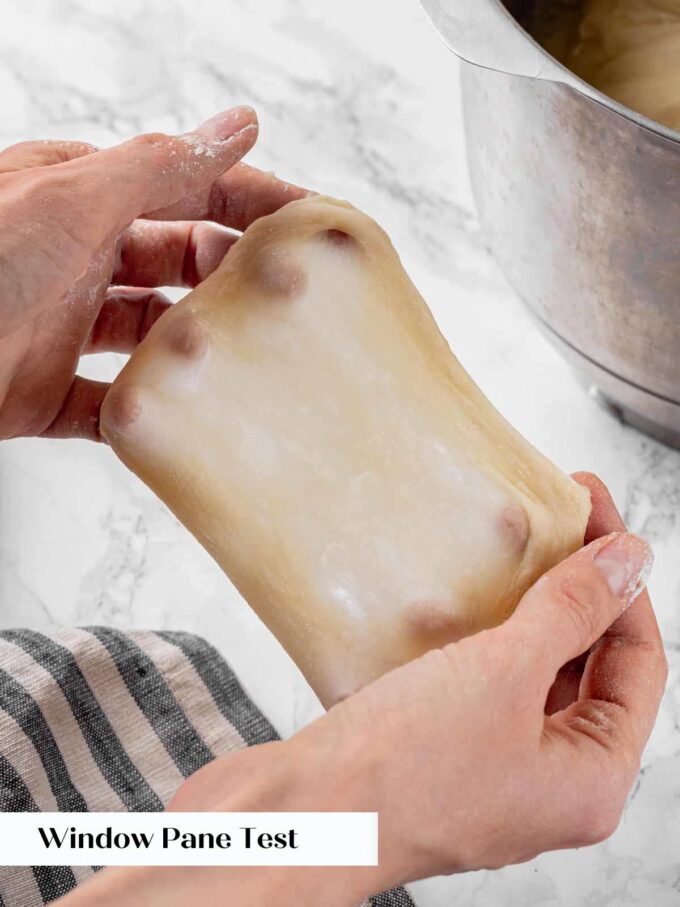
This is an enriched dough, so you should be able to pull a thin, smooth window in a piece of dough. To perform the window pane test (pictured above) grab a piece of dough no larger than a golf ball. Then working from opposite sides, wiggle and gently stretch the dough. Turn a quarter turn and repeat with the other sides. Turn and repeat until you have gradually pulled the center thin enough to see through.
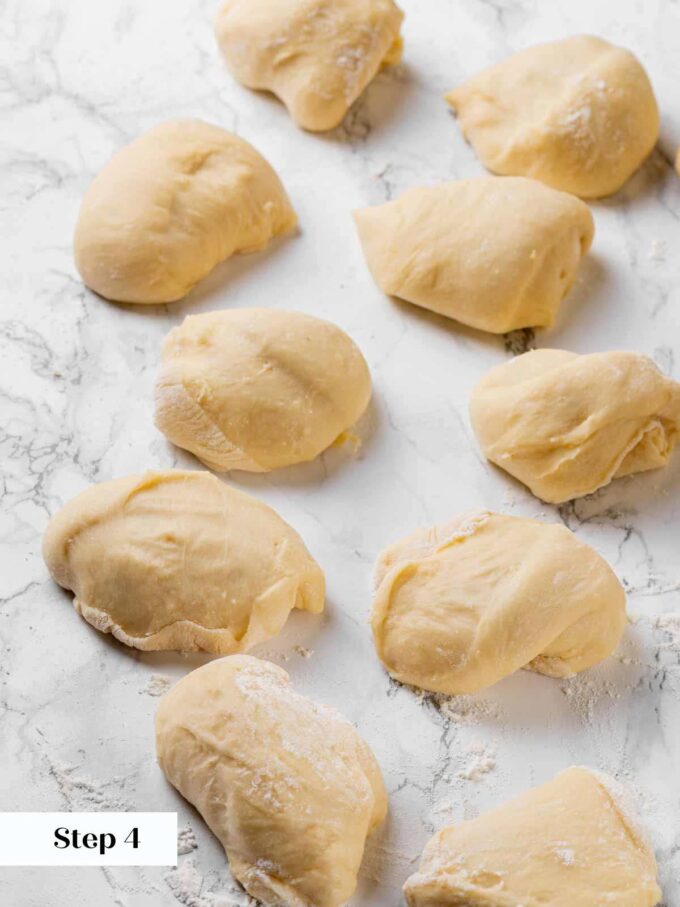
Step 4: Spray a 9×13 inch baking dish or pan with non-stick cooking spray or grease with softened butter. Lightly spray your countertop or use a light dusting of bench flour. Divide dough into 15 equal pieces. Each piece will be approximately 70g, if you want to divide it using a kitchen scale.
The dough will still be a little sticky and that is okay! A sticky dough will make a soft, supple roll. So feel confident in your dough!
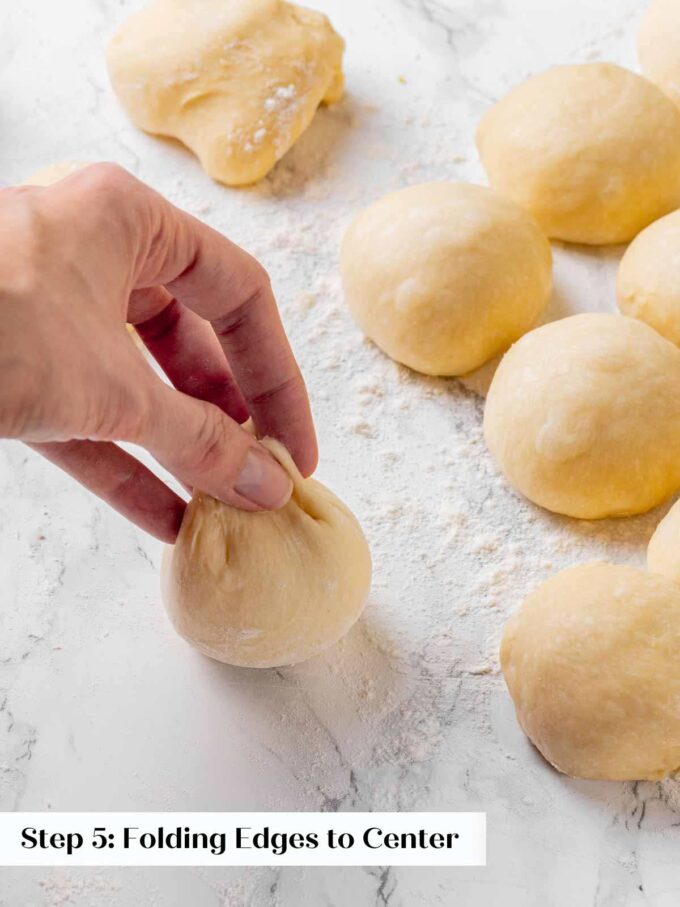
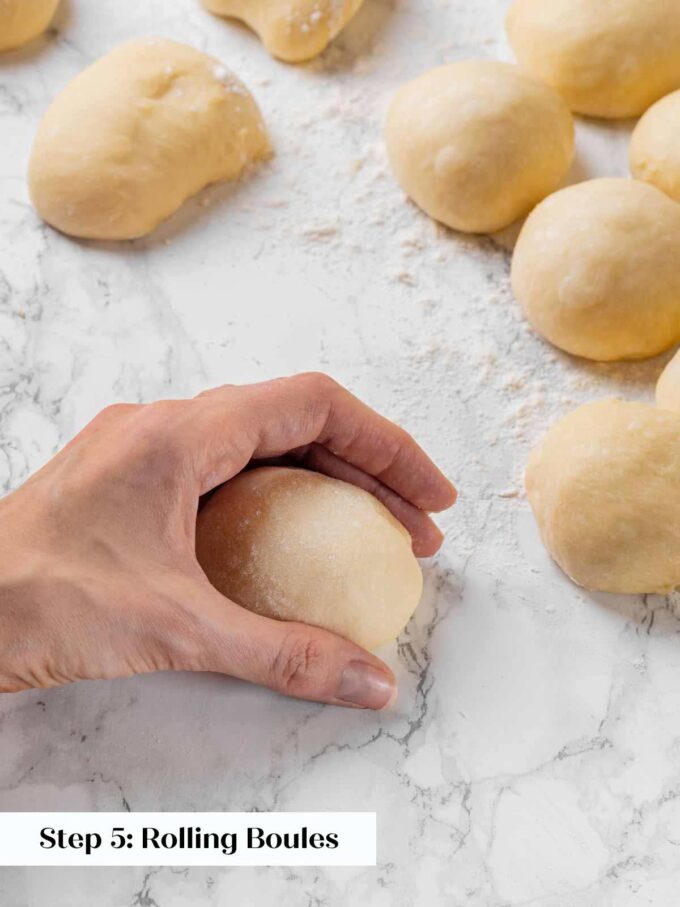
Step 5: Shape the rolls by folding each edge into the center, flipping the seam-side down on the counter top and then rolling quickly between your thumb and other fingers. The idea is to create a push/pull motion that gently tightens the roll into a ball. In order to do this, you can’t let the dough actually roll around in your hand. Push it away from you using your thumb and then pull it back in a sweeping motion, then repeat. The key is to do this quickly so it doesn’t stick to your hands or the counter excessively. Allowing it to stick a little to the counter will actually help you here. Place in prepared dish.
Step 6: Pre-heat the oven to 350ºF convection or 375 ºF conventional.
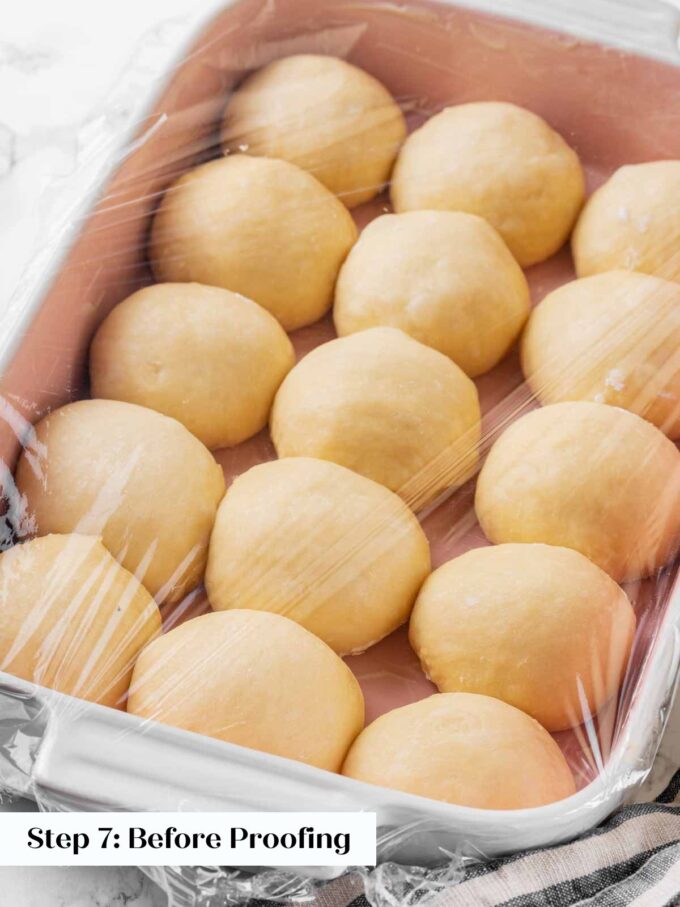
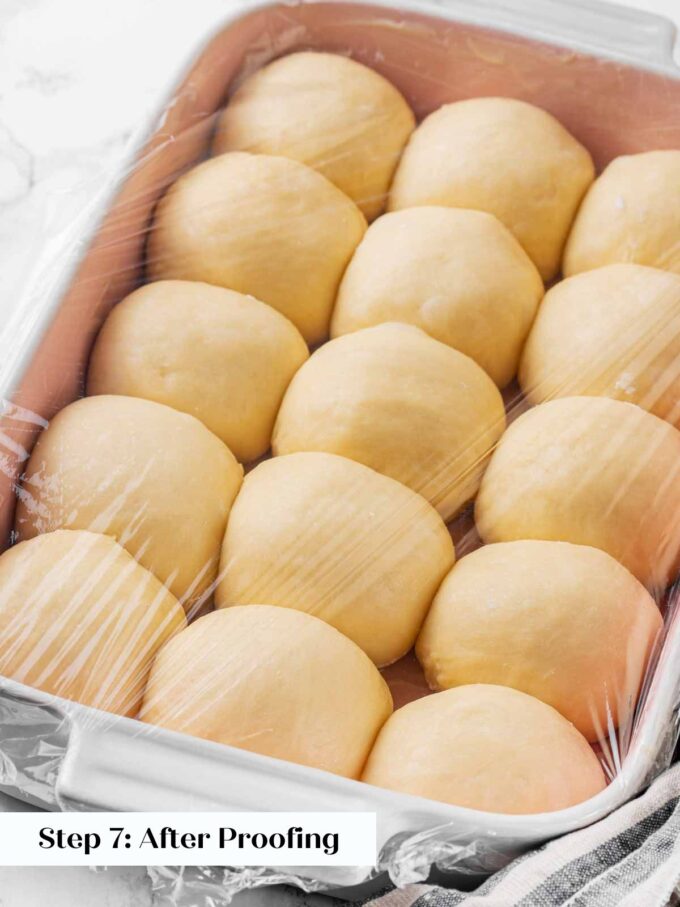
Step 7: Cover with plastic wrap and proof in a warm spot for 45 minutes to an hour until they are tripled in size and feel light and airy when gently touched with your finger.
Before baking you can brush the tops with a well-bean egg (egg wash). Be gentle and don’t let it run down the sides of the dish or pool. This will give the tops a shiny finish.
Step 8: Bake rolls in preheated oven for 20-30 minutes until they are a dark golden brown. You can also test with an instant read thermometer. This is an enriched dough so it should read 185 ºF.
The large range in baking time will depend on your oven and the baking dish you choose. A metal dish will cook much faster than the same sized ceramic dish, and these will bake closer to 20 minutes in a convection over verses an oven on the conventional (no fan) setting.
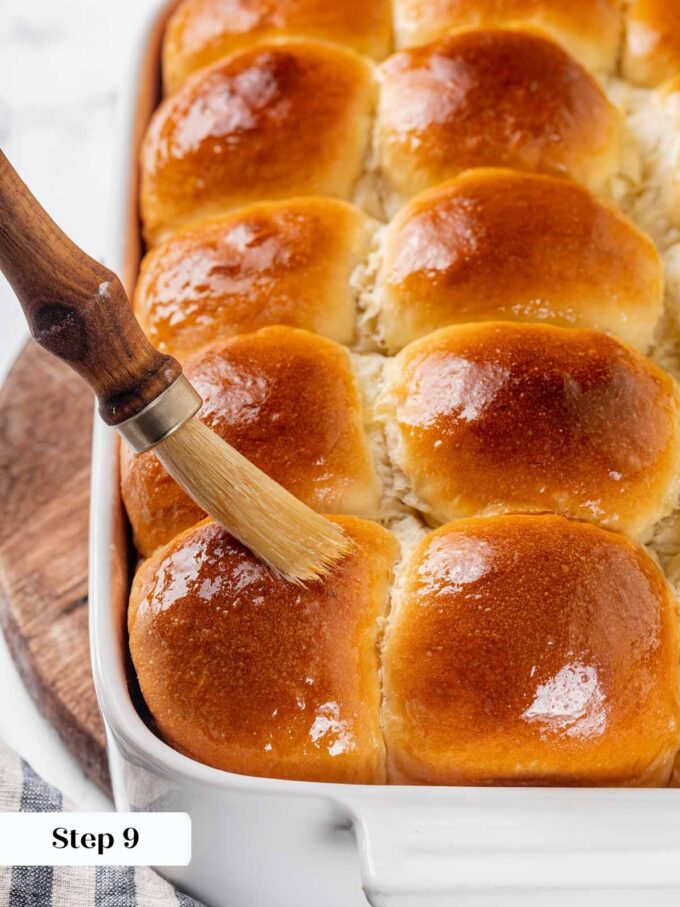
Step 9: Brush with melted butter and serve slightly warm or at room temperature.
Recipe FAQs
Store Hawaiian rolls in an airtight container at room temperature for up to 5 days, or frozen well-wrapped for up to 2 months. They will be their best for 2 days following baking.
Hawaiian bread is soft from the sugar, pineapple juice, eggs and butter that are added to the dough. The acidity of the pineapple juice also helps tenderize the dough.
I would not recommend baking the rolls from frozen. You can partially bake the rolls then cool, wrap and store in the freezer. Then finish baking the rolls according to the recipe instructions.
If the rolls rose beautifully but then collapse during baking, they were most likely over proofed. The surface of an over-proofed roll will no longer be smooth and the air pockets will be large. Over proofing bread begins to break down the gluten structure to the point where it cannot contain the air bubbles produced during the proofing process. The baked bread will have a slightly sour and very yeasty smell and taste.
Recommended Dinner Bread Recipes

Rolls & Biscuits

Yeast Breads

Yeast Breads

Yeast Breads
If you enjoyed this recipe, please leave a star rating and let me know how it goes in the comments below! I love hearing from you and your comments make my day!
Hawaiian Bread

Ingredients
- 2 ¼ teaspoons active dry yeast, 1 package
- ¼ cup milk, warm
- ¼ cup pineapple juice, room temperature
- ½ cup instant mashed potatoes, prepared and cooled
- 3 large eggs
- ¼ cup unsalted butter, cubed and softened
- ¾ cup granulated sugar
- 1 teaspoon kosher salt
- 4 ¼ cups all-purpose flour
- 2 tablespoons unsalted butter, melted for brushing
Instructions
- In the bowl of a stand mixer, whisk together warm milk (100ºF- 110ºF) and yeast. Let sit for 10 minutes until bubbly.
- Add pineapple juice, mashed potatoes, and eggs to the mixer and mix to combine either with a whisk or with the paddle attachment. Add butter, sugar, salt and flour to the bowl. Switch to the hook attachment and mix on low for 10 minutes
- Increase mixer speed to medium and mix for an additional 5-10 minutes, or until a smooth dough forms that pulls away from the side of the bowl.
- This is an enriched dough, so you should be able to pull a thin, smooth window in a piece of dough. To perform the window pane test grab a piece of dough no larger than a golf ball. Then working from opposite sides, wiggle and gently stretch the dough. Turn a quarter turn and repeat with the other sides. Turn and repeat until you have gradually pulled the center thin enough to see through.
- The dough will still be a little sticky and that is okay! A sticky dough will make a soft, supple roll. So feel confident in your dough!
- Divide dough into 15 equal pieces. Each piece will be approximately 70g, if you want to divide it using a kitchen scale.
- Spray a 9×13 inch baking dish with non-stick cooking spray or grease with softened butter (yum!). Lightly spray your countertop or use a light dusting of bench flour. I find shaping with flour more difficult here because it allows the rolls to slide, which makes it harder to get a nice tight roll.
- Shape the rolls by folding each edge into the center, flipping the seam-side down on the counter top and then rolling quickly between your thumb and other fingers. The idea is to create a push/pull motion that gently tightens the roll into a ball. In order to do this, you can’t let the dough actually roll around in your hand. Push it away from you using your thumb and then pull it back in a sweeping motion, then repeat. The key is to do this quickly so it doesn’t stick to your hands or the counter excessively. Allowing it to stick a little to the counter will actually help you here.
- Cover with plastic wrap and proof in a warm spot for 45 minutes to an hour until they are tripled in size and feel light and airy when gently touched with your finger. Meanwhile pre-heat the oven to 350ºF convection or 375 ºF conventional.
- Bake rolls in preheated oven for 20-30 minutes until they are a dark golden brown. You can also test with an instant read thermometer. This is an enriched dough so it should read 185ºF. The large range in baking time will depend on your oven and the baking dish you choose. A metal dish will cook much faster than the same sized ceramic dish, and these will bake closer to 20 minutes in a convection over verses an oven on the conventional (no fan) setting.
- Brush with melted butter and serve slightly warm or at room temperature.
Notes
Nutrition
Nutrition information is automatically calculated, so should only be used as an approximation.
 Like this recipe? Rate & comment below!
Before you go!
You might enjoy perusing our other yeasted bread recipes like our zaatar focaccia, or just start with our most popular bread recipe, this Dutch oven no knead bread!


Just tried this recipe and they were perfect in texture and taste. The only adjustment I made was to reduce the sugar slightly. This is definitely a keeper and they are delicious with my Christmas ham. Thanks for sharing this recipe.
Hi Evelyn! So happy to hear that, thank you for coming back to share! And I love that you paired them with Christmas ham, that’s exactly how I use them too. You’re right on the sugar adjustment, and sounds like you found the sweet spot that worked perfectly for you. Thanks again for baking along and Merry Christmas! ~gvd team
Made these for pulled pork sliders, and honestly they are the best tasting rolls I’ve ever made. And I’ve been making yeast rolls more than 50 years. I used one less egg and 1/4 cup less sugar but otherwise followed the recipe. Thank you for giving a gram weight for the rolls. I got 14, and split one with my husband, who said he could make his meal out of them. He said he could smell the pineapple juice but couldn’t taste it. All I know is this is a fantastic recipe!
Thanks so much for coming back to let us know, it makes us so happy to hear from you. Especially coming from someone with 50+ years of baking experience, I love that you and your husband enjoyed them so much. So glad the gram weights helped too, happy to hear it’s useful! Happy baking! ~gvd team
Wow, this information is awesome and deeply appreciated . Thank you so much !
So after entering your Williams Sonoma giveaway I’m just spending a happy Monday evening blog-stalking. And ohmygod – are we the same person? I’ve just read your Thanksgiving recipe round-up and I found so many things I had made myself (croissants, Russian black bread, cinnamon rolls, black pepper buttermilk biscuits, challah, blueberry-cherry cobbler [mine perhaps also had raspberries and nectarines, but practically identical!], and homemade sweet potato gnocchi [again a slight variation – sub sweet potato for butternut squash]).
Lady, this is crazy! Are we kindred food spirits? Are our palettes united? Maybe we just devour the same food blogs and ingredient trends, but that’s a far more practical explanation so let’s ignore it for now.
Anyway, Hawaiian sweet breads have been on my radar for a few months now and I’ve been itching to find the right occasion with the right audience to make them. Thanks for the recipe soulfoodmate, I’ve pinned it (punning as well as pinning, I’m on a roll).
Rebecca — That’s crazy that we’ve made so many of the same things! Great minds must just think/bake alike, I guess. 😉 Thanks for visiting (and for sharing a few hilarious puns, of course :))
This looks totally yummy and professional! I have been totally into bread making lately–I think this recipe should be on my list!
I adore breads with dips inside. They’re the best thing to come out of the 70’s and I always plonk myself next to them at family gatherings haha
I, too, am all for tradition even if we have to move it to your house because tradition starts with family and, yes, even the spinach dip is secondary. The bread looks wonderful but I hope you made two loaves because Matthew is already calling dibs on the first one. Yes, the whole loaf! And I had no idea it was made with potatoes. What makes it taste sweet.
Well I made only one, so Matthew is going to have to share 🙂 And what makes it tastes sweet is all the sugar that goes into it — but at least it’s real sugar, not the high fructose corn syrup they put in the storebought variety. And there is definitely something to be said with starting new traditions, too!