This easy chocolate cheesecake recipe is rich, creamy and chocolaty! A no-bake Oreo cookie crust and a decadent ganache topping make this a chocolate lovers paradise! Plus instructions for how to bake this cheesecake in an Instant Pot!
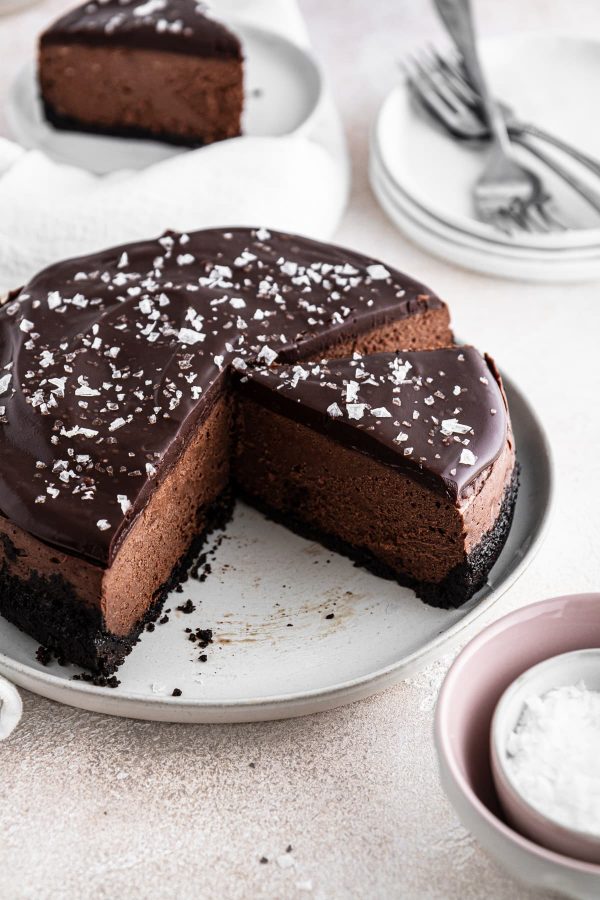
This chocolate cheese cake has a rich chocolate flavor from both melted chocolate and cocoa powder with a creamy, yet dense, texture between chocolate mousse and pots de crème. Enjoy this decadent chocolate dessert for Valentine’s Day or as a fun (and easier) alternative to my devil’s food cake recipe or moist chocolate cake for birthdays!
We are here to shake up all your pre-conceived cheesecake notions! Whether that is cooking it in an instant pot or make a cheesecake stuffed red velvet cookie. There is fun cheesecake recipe for you on GVD! Try these strawberry rhubarb cheesecake bars for Spring or no bake pumpkin cheesecake for Fall!
Table of contents
Why You Will Love this Chocolate Cheesecake Recipe
- Yields a 7-inch round cheesecake. This is a little smaller than the traditional size, but perfect for one familyor as a special date-night or Valentine’s Day dessert for 2!
- Rich dark chocolate flavor with a creamy texture.
- Easy, no-bake Oreo cookie crust.
- Detailed instructions for “baking” cheesecake in an instant pot! The interior of a pressure cooker is uniquely perfect for ensuring a crack-free cheesecake and it “bakes” in about half the time it takes to bake a cheesecake in the oven in a water bath.
Professional Tips for Making Chocolate Cheesecake
- Make sure all of your ingredients are at room temperature (or close to it) before combining them. This keeps the cream cheese from getting lumpy, the chocolate staying smooth and the cookie crust evenly moist and set.
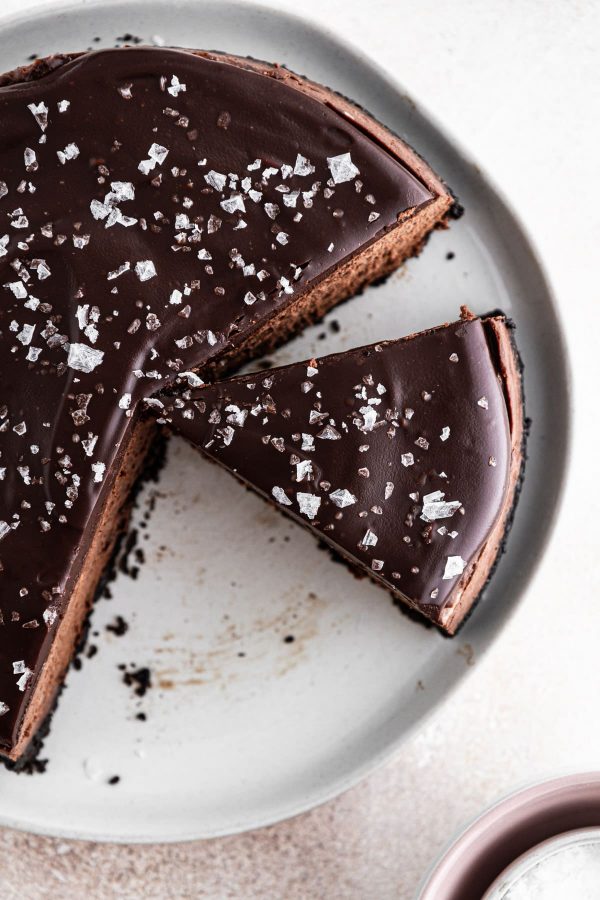
- Slice the fully chilled cheesecake with a hot sharp knife. Dip a large chef’s knife in a cup of hot water, let it sit for a few seconds, then dry off the blade with a kitchen towel. Do this between each cut and you will have restaurant quality slices!
- If using an Instant Pot use a 6- to 8-quart Instant Pot and a 7- to 7.5-inch springform pan for this recipe. I have not tested this exact recipe with other sizes so I cannot speak to their successes.
- Don’t stress too much. People put a lot of pressure on themselves to bake a perfect cheesecake with no cracks, but the good news is that we are covering this cheesecake with a rich chocolate ganache, so no one will know if it does!
Ingredients & Substitutions
- Oreo cookies
- Butter
- Salt
- Semi-sweet chocolate chips: You can also use any baking chocolate bars that you have on hand. The higher the cocoa (like bittersweet chocolate), the more intense the chocolate flavor and the less sweet!
- Cream cheese: I use full fat, brick-style cream cheese for cheesecakes. The low-fat will dull the flavor and also is more prone to breaking during the baking. I do not recommend using whipped cream cheese because it is not very stable.
- Brown sugar: You can use either light brown sugar or dark brown. Whichever you have on hand is best. You can also use granulated sugar.
- Cocoa powder: Either natural or Dutch-processed cocoa powder will work in this cheesecake like in these chocolate thumbprint cookies. I do appreciate the added richness from Dutch-processed due to the removal of the acidity and also the additional fat from cocoa butter.
- Heavy cream: I use full-fat heavy cream rather than light whipping cream in cheesecake recipes. It makes a more dense, richer textured cheesecake.
- Large Eggs
- Sea salt for topping: This is optional, but I highly recommended it for that sweet-salty combo. You can also use fleur de sel for a more delicate crunch.
See the recipe card for full information on ingredients and quantities.
Possible Variations
- Add a swirl: After pouring the cheesecake onto the crust, dollop and swirl in some fruit jam like cherry preserves or easy strawberry jam.
- Flavor enhancing additions: You could add 1-2 teaspoons vanilla extract, coffee extract or espresso powder to the filling to enhance the chocolate flavor. You could also add up to 1/3 cup sour cream to play up the tangy flavor of the cream cheese.
- Play around with toppings! If you’re not a fan of salt on your desserts, swap the sea salt for a scattering of mini chocolate chips, sprinkles, chocolate shavings, a drizzle of salted caramel sauce. You can also top the chilled cheesecake with whipped cream lightly sweetened with powdered sugar. Whip cream to stiff peaks and then mound or pipe on top of the fully chilled cheesecake. You could also make a flavored sour cream topping like I did in my mint chocolate cheesecake.
How to Make the Best Chocolate Cheesecake Recipe
Now that you’re fully prepped and ready to dive into this recipe, let’s get to it! Here is how to make this delectable chocolate cheesecake, layer by layer:
Prepare the crust:
Step 1: Spray bottom and sides of a 7- to 7.5-inch round springform pan with a removable base with cooking spray (or coat with butter). Line bottom of pan with parchment paper.
Step 2: In a medium bowl, stir together crushed cookies, 3 tablespoons melted butter and 1/8 teaspoon salt until well combined. Use fingers, a spatula or the flat bottom of a drinking glass to press crust evenly into bottom and slightly up sides of prepared pan. Transfer to freezer while you prepare the filling.
You can pulse Oreos in a food processor until fine or just buy Oreo cookie crumbs because it’s 2025.
Make the chocolate cheesecake filling:
Step 3: In a small, microwave-safe bowl, heat 1 cup semisweet chocolate chips on High 30 seconds; stir. Continue to microwave on High in 15- to 30-second intervals, stirring after each, until chocolate is melted and smooth. Set aside to cool.
Step 4: Preheat the oven to 325°F and line the outside of the chilled pan with aluminum foil.
Step 5: In a large bowl using an electric hand mixer or in the bowl of a stand mixer fitted with the paddle attachment, beat cream cheese on low speed until smooth. Beat in brown sugar and 1/4 teaspoon salt until well combined. Scrape down sides of bowl. Add cocoa powder and beat on low speed until smooth. Slowly beat in heavy cream on low speed until just combined. Add eggs, one at a time, beating on low speed until just combined. Scrape down sides of bowl again. Slowly beat in melted chocolate on low speed until well combined.
It is imperative that all the ingredients are room temperature for the best texture. If you forget, measure out all the ingredients into plastic or metal containers. Place uncovered on a baking sheet in the top rack of the oven. Place a large roasting pan in the bottom and pour in boiling water. Close the door and the steam will warm up the ingredients.
Step 6: Pour and spread filling over chilled crust in pan. Gently rap the pan against your counter a few times to remove any possible air bubbles.
Step 7: Bake in preheated oven for 1 hour or until the filling is set but still wobbly. The cake will puff slightly and will jiggle like Jello but not look loose in the center. You know how Jello moves in one cohesive unit? It should look like that.
Step 8: Carefully remove the springform pan from the water bath and place on a wire rack to cool completely. Remove the water bath carefully from the oven and pour out.
Step 9: Once cheesecake is completely cooled, cover pan with plastic wrap and transfer to the refrigerator to chill at least 4 hours, or up to 24 hours. Overnight is best.
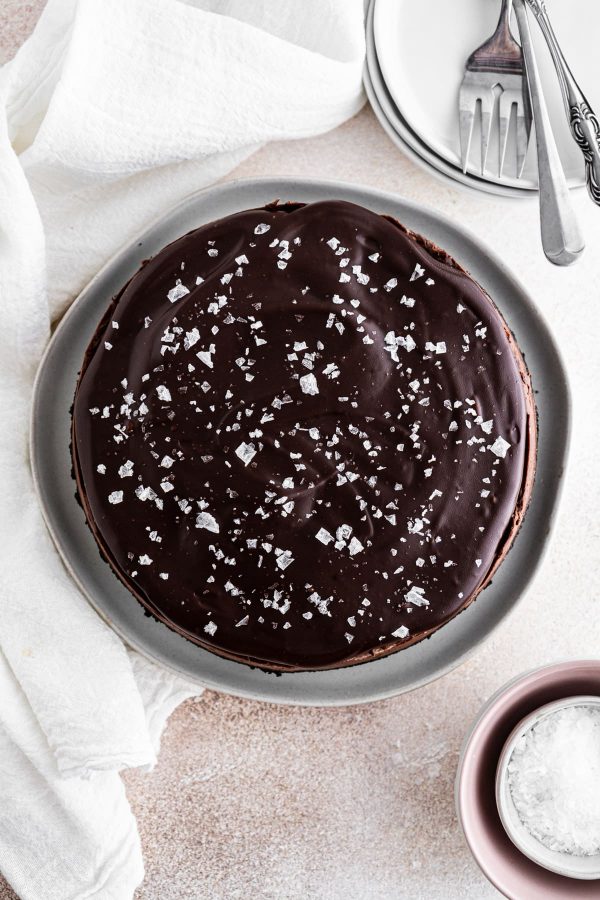
Step 10: Once the cheesecake has fully chilled, make the ganache topping: In a medium bowl, stir together 1/2 cup semisweet chocolate chips and 1/4 cup heavy cream. Microwave mixture on High for 30 seconds; stir, then continue to microwave on High in 15-second intervals, stirring after each, until mixture is smooth. Set aside to cool and thicken slightly.
Step 11: Run a paring knife around the edge of the cheesecake to gently loosen it from the sides of the pan and then remove side ring from springform pan. Spoon and spread ganache over top of cheesecake. Refrigerate at least 15 minutes to allow ganache to set on top of cheesecake. Just before serving, top with sea salt, if desired.
How to bake cheesecake in an instant pot
- Pour 1 cup water into a 6- or 8-quart Instant Pot/electric pressure cooker. Place Instant Pot trivet into pot. Gently place springform pan on top of trivet. Lock the lid and set the valve to SEALING. Set Instant Pot to pressure cook on HIGH pressure for 35 minutes. (It will take about 5-7 minutes to come up to pressure.)
- Once cook time is done, allow the pressure naturally release for 25 minutes; then, quick release any remaining pressure. Remove springform pan from Instant Pot; transfer to a wire rack to cool completely. (The cheesecake should be mostly set with a slight jiggle.)
- Blot the top of the cheesecake with a paper towel to remove any accumulated moisture.
Frequently Asked Questions
Once the cheesecake has chilled overnight (ideally) in the springform pan, remove the pan and then wrap well and store in the fridge for up to a week or in the freezer for up to 3 months.
Yes! As written it will make a thin cheesecake, so I recommend multiplying all the ingredients by 1.5 then proceeding with the recipe as written.
If you enjoyed this recipe, please leave a star rating and let me know how it goes in the comments below! I love hearing from you and your comments make my day!
Chocolate Cheesecake

Ingredients
For the crust:
- 18 Oreo cookies, finely crushed
- ⅛ teaspoon salt
- 3 tablespoons unsalted butter, melted
For the filling:
- 1 cup semisweet chocolate chips
- 1 lb cream cheese, room temperature
- ⅓ cup brown sugar
- ¼ teaspoon salt
- 3 tablespoons cocoa powder, preferably Dutch process
- ½ cup heavy cream, room temperature
- 2 eggs, room temperature
For the ganache topping:
- ½ cup semisweet chocolate chips
- ¼ cup heavy cream
- Flaky sea salt, for topping (optional)
Instructions
- Spray bottom and sides of a 7- to 7.5 inch springform pan with a removable base with cooking spray (or coat with butter). Line bottom of pan with parchment paper.
Make the crust:
- In a medium bowl, stir together crushed cookies, 3 tablespoons melted butter and 1/8 teaspoon salt until well combined. Use fingers, a spatula or the flat bottom of a drinking glass to press crust evenly into bottom and slightly up sides of prepared pan. Transfer to freezer while you prepare the filling.
- Preheat the oven to 325°F and line the outside of the chilled pan with aluminum foil.
Make the filling
- In a small, microwave-safe bowl, heat 1 cup semisweet chocolate chips on High 30 seconds; stir. Continue to microwave on High in 15- to 30-second intervals, stirring after each, until chocolate is melted and smooth. Set aside to cool.
- In a large bowl using an electric hand mixer or in the bowl of a stand mixer fitted with the paddle attachment, beat cream cheese on low speed until smooth. Beat in brown sugar and 1/4 teaspoon salt until well combined. Scrape down sides of bowl. Add cocoa powder and beat on low speed until smooth. Slowly beat in 1/2 cup heavy cream on low speed until just combined. Add eggs, one at a time, beating on low speed until just combined. Scrape down sides of bowl again. Slowly beat in melted chocolate on low speed until well combined.
- Pour and spread filling over chilled crust in pan. Gently rap the pan against your counter a few times to remove any possible air bubbles.
- Bake in preheated oven for 1 hour or until the filling is set but still wobbly. The cake will puff slightly and will jiggle like Jello but not look loose in the center. You know how Jello moves in one cohesive unit? It should look like that.
- Carefully remove the springform pan from the water bath and place on a wire rack to cool completely. Remove the water bath carefully from the oven and pour out.
- Once cheesecake is completely cooled, cover pan with plastic wrap and transfer to fridge to chill at least 4 hours, or up to 24 hours.
- Once the cheesecake has fully chilled, make the ganache topping: In a medium bowl, stir together 1/2 cup semisweet chocolate chips and 1/4 cup heavy cream. Microwave mixture on High for 30 seconds; stir, then continue to microwave on High in 15-second intervals, stirring after each, until mixture is smooth. Set aside to cool and thicken slightly.
- Run a paring knife or small offset spatula around the edge of the cheesecake and remove side ring from springform pan. Spoon and spread ganache over top of cheesecake. Refrigerate at least 15 minutes to allow ganache to set on top of cheesecake. Just before serving, top with sea salt, if desired.
- Store any leftover cheesecake covered lightly in plastic wrap and refrigerated for up to 4 days.
Notes
- Pour 1 cup water into a 6- or 8-quart Instant Pot/electric pressure cooker. Place Instant Pot trivet into pot. Gently place springform pan on top of trivet. Lock the lid and set the valve to SEALING. Set Instant Pot to pressure cook on HIGH pressure for 35 minutes. (It will take about 5-7 minutes to come up to pressure.)
- Once cook time is done, allow the pressure naturally release for 25 minutes; then, quick release any remaining pressure. Remove springform pan from Instant Pot; transfer to a cooling rack to cool completely. (The cheesecake should be mostly set with a slight jiggle.)
Nutrition
Nutrition information is automatically calculated, so should only be used as an approximation.
 Like this recipe? Rate & comment below!
Before You Go
I hope you enjoyed this delightful cheesecake recipe. Check out all our cake and cupcake recipes for more inspiration! If you are searching for more Valentine’s Day inspiration, peruse my list of easy Valentine’s Day Desserts!


A keeper recipe. Light texture. No Oreo cookies to make crust; used 3/4 c chocolate wafer crumbs, 1 tablespoon sugar and 3 tablespoons melted butter. Added 1 tablespoon cornstarch to batter as one reviewer noted cheesecake did not firm up. Delicious and my go to IP cheesecake recipe.
Hi Becky! So happy to hear it’s a keeper! Love the tweaks, and cornstarch can help firm things up, though the eggs and cocoa usually do the trick here. Thanks so much for sharing how you made it your own! ~gvd team
This has been my go to cheesecake! But did you change your original recipe from an Instant Pot process to regular bake? I appreciate the notes but please let me know if I’m losing my mind!
Hi P! Same recipe, just added the regular bake instructions. Instant pot is still in the post, I made it that way recently! I’m so happy to hear it’s your go-to, that’s wonderful, thank you for letting us know! ~gvd team
I’ve made this cheesecake twice. So far it is my favourite recipe!
Hi Jameema! I’m so happy to hear that! Thanks for coming back to rate and comment, always makes our day. ~gvd team
Very good
Hi Jasmina! I’m so glad you enjoyed, thanks for coming back to comment! ~gvd team
I made this cheesecake twice, once in the oven and once in the Instant Pot! I still find it crazy that I can make cheesecake in under an hour! What a world we live in. But the texture and flavor of this dessert is not for the faint of heart. As a true chocolate lover, it is rich and perfect.