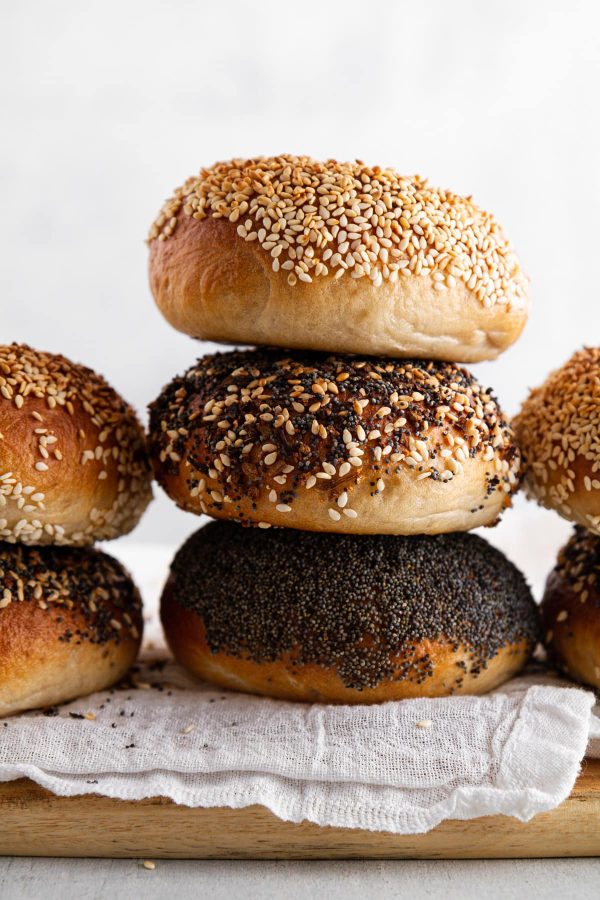
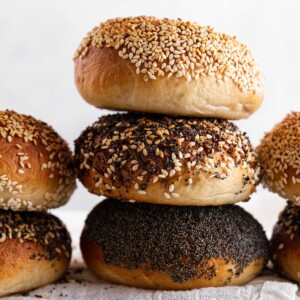
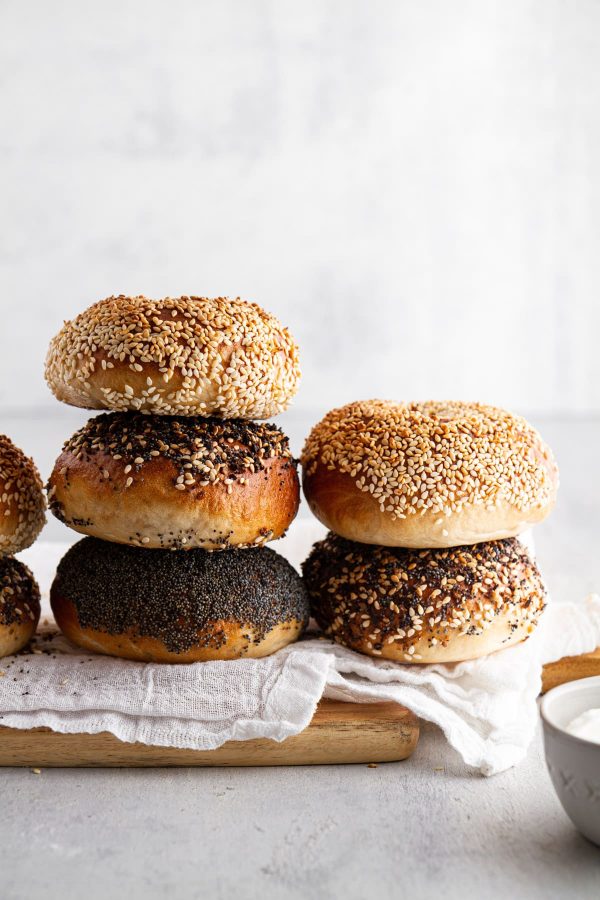
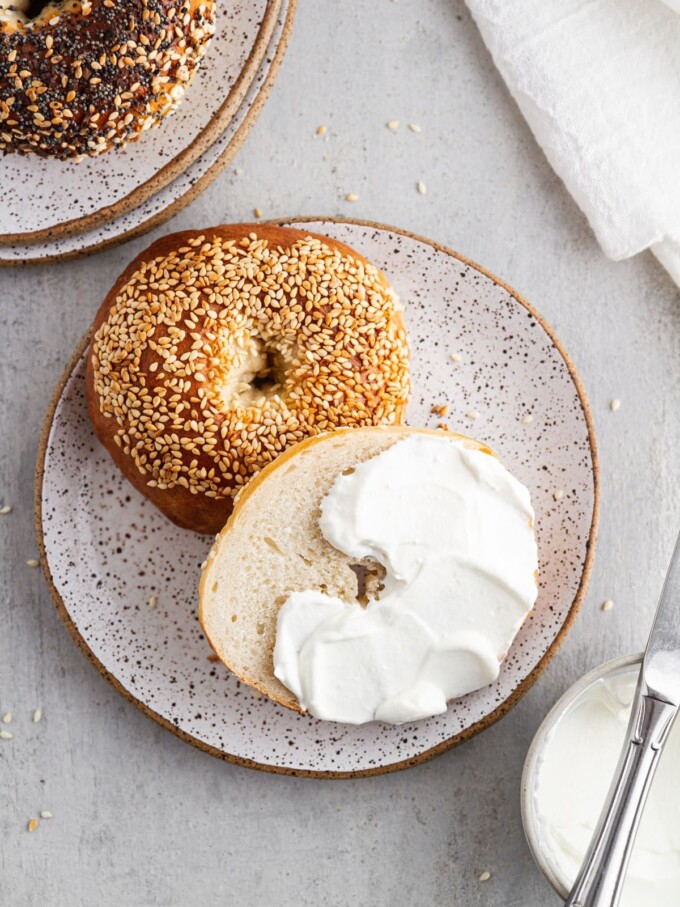
These Montreal-style bagels are soft, chewy and totally delicious. An easy bagel dough poached in honey water for a slight sweetness. Top with your favorite seasoning and enjoy a chewy homemade bagel in under 3 hours!
A Quick Look At The Recipe
This is a brief summary of the recipe. Jump to the recipe to get the full details.
Prep Time
40 minutes
Cook Time
25 minutes
Proof Time
1 hour 50 minutes
Total Time
2 hours 55 minutes
Servings
8 bagels
Difficulty
Moderate
Calories *
314 kcal per serving
Technique
Make the dough, pre-shape, shape the bagels, proof, boil, and bake.
Flavor Profile
Soft and chewy bagels poached in honey water.
* Based on nutrition panel
My very first attempt at making bagels and they were perfect! I don’t claim to be an expert nor am I from Montreal, but these have that authentic chewy texture instead of the bread-like texture in so many commercial bagels sold in supermarkets. Given the price of bagels at specialty shops in Vancouver, and how easy these are to make, I’ll DEFINITELY be making them again.⭐⭐⭐⭐⭐
Jill Anderson
This Montréal-style bagel recipe is inspired by traditional Montreal bagels rather than attempting to be an actual replication, since most home cooks don’t have access to a wood-fired oven! They retain that classic hint of sweetness with a delightful chew that sets them apart from New York style bagels.
I had the opportunity to try St. Viateur Bagels in Montréal, hot and fresh from the oven, on a trip with my husband and these bagels are some of the best you’ll ever make from scratch.
Table of Contents
What are Montreal-Style Bagels?
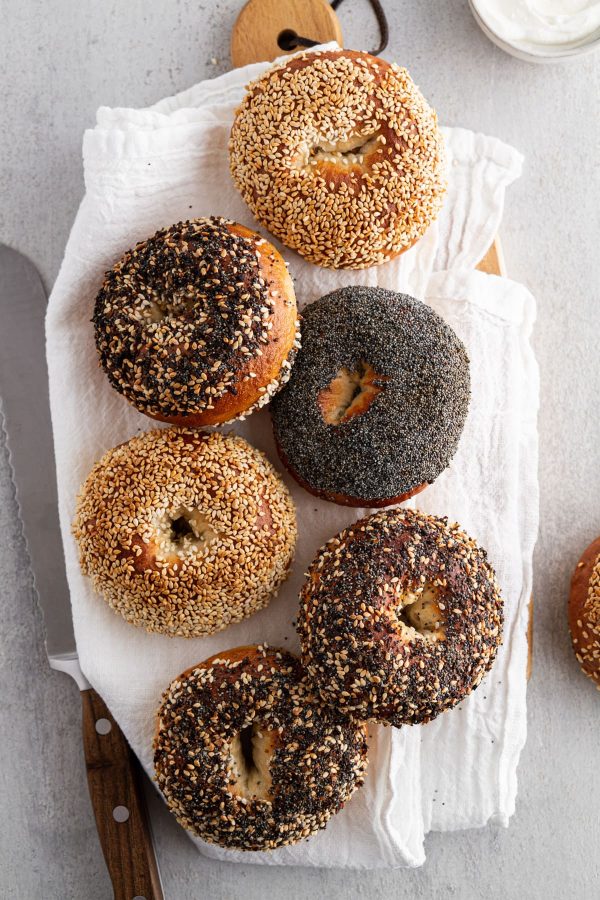
Montreal bagels, sometimes called Montreal-Style Bagels, are traditionally sweeter, thinner bagels with a bigger center hole that are baked in a wood-fired oven. They’re poached in a honey-sweetened water bath before baking and topped with sesame seeds or poppy seeds, though they can be topped with most traditional bagel toppings.
Why You Will Love this Recipe
- An easy & fast plain bagel recipe. This recipe is easy, lightly sweetened with maple syrup and can be made in under 3 hours!
- Only 5 ingredients! While bagels from St. Viateur and Fairmount bagel have egg or egg yolk in the dough, mine does not. This would make them even more dense.
- Chewy texture inspired by Montreal bagels. These bagels bake taller and fluffier than traditional Montreal bagels as a result of baking them in a standard oven rather than a wood-fired oven. Wood-fired ovens offer higher, more concentrated heat that cannot be replicated. At St. Viateur they moved the bagels through the oven on a conveyor belt.
- A versatile recipe for your favorite toppings. Traditional Montreal bagels are topped with sesame seeds or poppy seeds, but these bagels are also delightful with everything bagel seasoning (“all dressed” as they are called in Montréal!), a sprinkle of salt or even the cinnamon sugar from my copycat Panera French toast bagels!
Ingredients & Substitutions
- Pure Maple Syrup: Maple syrup is my own addition to Montréal style bagels. Just 2 teaspoons adds a little sweetness to the dough and a more complicated flavor. I recommend using Grade A pure maple syrup. You could also omit it or substitute honey.
- Active Dry Yeast: You can use either active dry yeast or instant yeast in this bagel recipe.
- Bread Flour: I do not recommend substituting the bread flour for all-purpose flour because it does not have enough gluten to create chewy bagels. They will be lighter and fluffier. You can also substitute an equal amount of the bread flour, by weight, for high-gluten flour as I do in my everything bagels and sourdough discard bagels!
- Salt: You can use sea salt or kosher salt, but salt is necessary for that chewy texture.
- Honey: The honey poaching water is what gives these bagels a slight sweetness. Swap the honey for ¼ cup barley malt syrup, if desired.
- Toppings: These bagels are delightful plain but the flavor is neutral enough to be a wonderful canvas for your favorite bagel seasonings.
See the recipe card for full information on ingredients and quantities.
Variations
- Bake in a wood-fired oven: My husband just splurged on a pizza oven for our backyard, so I can assure you that this recipe is also delightful when baked in a more traditional way. I recommend placing the bagels on a pizza screen for easy placement and rotation. Once I have perfected this, I’ll report back with more detailed instructions.
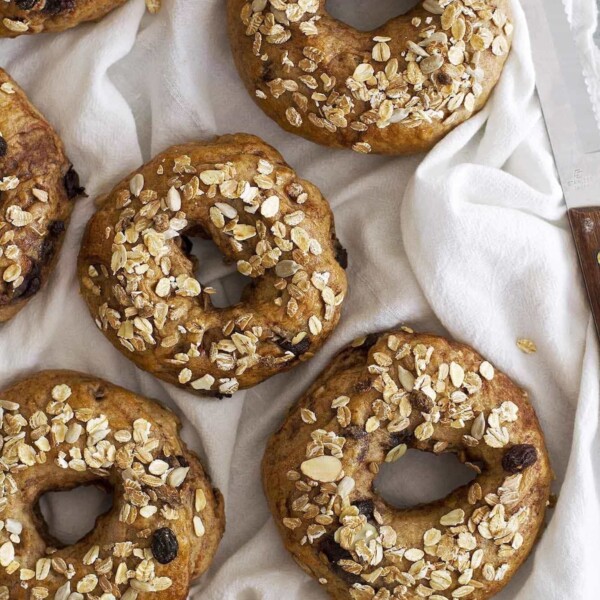
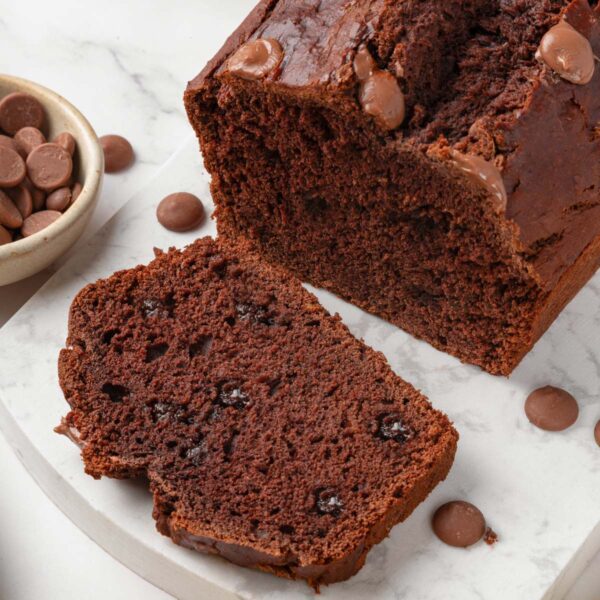
- Add a mix-in: Though not traditional, you could add dried fruits and nuts like these cranberry bagels and chewy cinnamon raisin bagels, or lean into the sweetness with chocolate chips like my chocolate chip bagels.
Professional Tips for Montréal Bagels
- Please use bread flour or high-gluten flour. For many recipes, bread flour and all-purpose flour can be interchangeable — but in this case the extra protein content yields a chewy, dense bagel.
- Don’t sweat it if you shape imperfect-looking bagels. I don’t know the science behind this, but even the ugliest bagels tend to bake up pretty in the oven, see my pumpernickel bagels as proof! If you do want to learn how to properly hand-roll a bagel like they do in Montreal, I have a step-by-step tutorial in my everything bagel recipe.
- Boiling bagels is a misnomer. Bringing the water to a boil then reducing to a simmer before adding the proofed bagels is sufficient. The warm water creates that chewy skin but isn’t so hot it kills the yeast throughout the bagel.
- Choose an oven temperature that works for you. Stephanie bakes her bagels at 475°F but I prefer to bake mine at 425°F. I enjoy them baked at 450°F but the crust is a little darker and thicker especially on the bottom. s
How to Make Montreal Style Bagels
Use these simple instructions to make chewy Montreal style bagels from scratch! Further details and measurements can be found in the recipe card below.
Step 1: In the bowl of a stand mixer with the dough hook attachment or in a large mixing bowl using a wooden spoon, stir together water, maple syrup, yeast, flour and salt until a firm dough forms. Continue to knead dough in a stand mixer on medium speed for 6-8 minutes, OR knead by hand on a clean surface for 8-10 minutes, until dough is soft, smooth, elastic and only slightly sticky. If necessary, you can knead in up to 1/4 cup more flour if the dough seems too sticky.
Step 2: Shape dough into a ball; transfer to a lightly oiled large bowl. Cover with plastic wrap and let rise in a warm place until doubled, about 1 ½ hours.
Step 3: Meanwhile, place a large sheet of parchment paper on an upside-down baking sheet. Place sesame/poppy/everything bagel seasoning into shallow bowls.
Step 4: Next, shape the bagels: Punch down risen dough to deflate. Divide dough into 8 equal-sized pieces. Roll each piece into a ball; poke a hole in the center of each ball and gently tug to form a rough bagel shape with a 2-inch circle in the center.
You can also reference the step-by-step photos for hand-rolling bagels like a professional in my everything bagel recipe post.
Step 5: Place bagels on parchment; cover loosely with plastic wrap and let rise until slightly puffy, about 20 minutes.
Step 6: In the meantime, heat the oven to 475°F and prepare the honey water bath. In a large saucepan, bring honey and roughly 3 quarts of water (enough to fill the pan by about 3 inches) to a boil. Reduce heat to a simmer.
Step 7: When the oven and bagels are ready, poach the bagels: Using a slotted spoon, transfer 2 to 3 bagels at a time to simmering water; cook on one side for about 1 minute, then flip and cook for another minute. Use a slotted spoon to transfer each bagel to one of the bowls with seeds; dip and turn the bagels to coat in the seeds, then return, seed side-up, to a parchment-lined baking sheet. Repeat with remaining bagels.
Step 8: Finally, bake the bagels: With bagels still placed on a parchment-lined upside-down baking sheet, carefully transfer to the oven. Bake bagels for 15 to 20 minutes, rotating the baking sheet halfway through baking, until bagels are a deep golden brown.
Step 9: Cool bagels completely on a cooling rack before slicing.
Recipe FAQs
Homemade bagels tend to keep best for up to 1 day at room temperature, stored in a paper bag. After that, I highly recommend freezing them in a freezer-safe resealable bag, and thawing, slicing and toasting them as needed. You can also slice them before freezing for easy toasting! They will retain freshness for up to 3 months frozen.
Montreal bagels are hand-rolled with slightly larger centers and baked in a wood-fired oven, which makes them more dense, chewier, and thinner than New York bagels baked in a conventional oven. The wood-fired oven also adds a smoky flavor. Traditionally they are poached in a water bath sweetened with honey.
Traditional toppings are sesame seeds or poppy seeds, but you can use any toppings you enjoy. They are even lovely plain.
Most Montrealers eat their bagels plain and warm from the oven, but they are just as tasty with a generous shmear of cream cheese or softened butter. While New York is known for their egg and cheese bagel breakfast sandwiches, in Montréal you can find many varieties but the most notable bagel sandwich has cream cheese, smoked salmon, tomatoes and onions!
Recommended Bagel Recipes

Bagels

Breakfast & Brunch

Bagels
Bagels
If you enjoyed this recipe, please leave a star rating and let me know how it goes in the comments below! I love hearing from you and your comments make my day!
Montreal Style Bagels
Ingredients
- 1 cup lukewarm water
- 2 teaspoons pure maple syrup
- 2 teaspoons active dry yeast , OR instant yeast
- 3 ¼ cups unbleached bread flour, plus more as needed
- 1 teaspoon salt
- ¾ cup sesame seeds, poppy seeds and/or everything bagel seasoning
- ⅓ cup honey
Instructions
- First, make the dough: In the bowl of a stand mixer with the dough hook attachment or in a large bowl using a wooden spoon, stir together water, maple syrup, yeast, flour and salt until a firm dough forms. Continue to knead dough in stand mixer on medium speed 6-8 minutes, OR knead by hand on a clean surface 8-10 minutes, until dough is soft, smooth, elastic and only slightly sticky. If necessary, you can knead in up to 1/4 cup more flour if dough seems too sticky.
- Shape dough into a ball; transfer to a lightly oiled large bowl. Cover with plastic wrap and let rise in a warm place until doubled, about 1 1/2 hours.
- Meanwhile, place a large sheet of parchment paper on an upside-down baking sheet. Place sesame/poppy/everything bagel seeds into shallow bowls.
- Next, shape the bagels: Punch down risen dough to deflate. Divide dough into 8 equal-sized pieces. Roll each piece into a ball; poke a hole in the center of each ball and gently tug to form a rough bagel shape with a 2-inch circle in the center (see Post above for a link to a video tutorial on how to shape bagels!). Place bagels on parchment; cover loosely with plastic wrap and let rise until slightly puffy, about 20 minutes. In the meantime, heat oven to 475°F.
- Next, boil the bagels: In a large saucepan, bring honey and roughly 3 quarts of water (enough to fill the pan by about 3 inches) to a boil. Reduce heat to a simmer.
- Using a slotted spoon, transfer 2 to 3 bagels at a time to simmering water; cook on one side for about 1 minute, then flip and cook for another minute. Use slotted spoon to transfer each bagel to one of the bowls with seeds; dip and turn the bagels to coat in the seeds, then return, seed side-up, to parchment-lined baking sheet. Repeat with remaining bagels.
- Finally, bake the bagels: With bagels still placed on parchment-lined upside-down baking sheet, carefully transfer to oven. Bake bagels 15 to 20 minutes, rotating baking sheet halfway through baking, until bagels are a deep golden brown. Cool bagels completely on a cooling rack before slicing.
- Store fresh-baked bagels in a paper bag for up to 1 day; after that, slice each bagel in half and freeze for up to 2 months.
Notes
Nutrition
Nutrition information is automatically calculated, so should only be used as an approximation.
 Like this recipe? Rate & comment below!
Before You Go
I hope you enjoyed this homemade bread recipe. Check out all our bagel recipes or explore more creative breakfast and brunch recipes!
So sad this ranks #1 on Google. The Montréal bagel comes from Europe, it has nothing to do with maple syrup.. For the real thing check out
https://cooking.nytimes.com/recipes/6795-montreal-bagels
Or
https://www.cbc.ca/life/greatcanadianbakingshow/recipe-montreal-bagels-1.5051491
Calm down. She said they are a variation , in other words, her take on the a recipe. And they are an easy to follow delicious recipe for people to try.
Yeah!
Nuh uh. Go somewhere else if you’re gonna put on an idiot jerk face show
Haha! I am the new owner, so I have zero skin in the game here but I have eaten the bagels at St-Viateur Bagel in Montreal and Bartek isn’t wrong, but he is rude. 🙂 And we’ll have none of that!
This recipe was great and I can’t wait to try it again. And I don’t want to get on sides, but Bartek, you’re rude (but maybe right), Tennille, you’re right (that this is an variation and it isn’t supposed to be what Bartek is talking about), and Lindsay, this recipe is great! I don’t know if you’re in charge, but you should post more!
Hi Cara! We’re glad you love the recipe! Chef Lindsey took over the blog about a year ago, and we’ve got a ton more posts in the queue! 🙂 ~gvd team
These don’t look like Montreal bagels at all. It’s just bread shaped like a donut, just like the imposter NY bagel.. Look up st-viateur or Fairmont bagels, you will see the difference.
Calm down. She explained this is an inspired variation of original style. It’s an easy to follow, delicious bagel recipe for even the most inexperienced baker to try.
Idiot. ??
Dude, you seem like a jerk. Just shut up ok? Being aggressive with the ladies will nooot get you popular. I’m speaking from experience bruh
Could I make the dough in a bread maker?
My wife simply love it!! we’re living in Charlevoix and now we eat the real St-Viateur or Fairmount bagel bakery right out from my wood oven.
I’ve made triple batch and frozen them!! They have the same taste and density of the real one!!
Merci beaucoup pour cette merveilleuse recette!!
Thanks a lot
Martin, Thank you so much! I’m so glad you enjoyed the recipe!
Can I make this dough recipe a day ahead of baking them?
Louise, I have not tested this method so I don’t know if it could work. If you try it, I’d recommend refrigerating the dough after the first rise, then bringing it back to room temp the next day to shape. Hope that helps!
Salt in a Montreal bagel? A shonda!
Mitchell, As I mentioned in the post, this is just an inspired variation, so there will be some adjustments to the traditional recipe!
Made these for the first time today. Thanks for the easy to follow directions. The bagels came out delicious.
Question: why is the baking sheet upside down? Just wondering.
I ventured into bread thanks to your no knead bread recipe. Thanks from my family too!
Ann, Thank you for your comment! The baking sheet is upside-down to act as a baking stone of sorts, so the rim on the baking sheet doesn’t interfere with the bake of the bagels. You can also use a rimless baking sheet (aka a cookie sheet) or a baking stone.
OMG what an amazing recipe, absolutely delicious!! Thanks so much for the shaping technique as well, much easier way of doing.
Will definitely be making them again. five star recipe for sure?
Lori, Thank you so much! 🙂
These look amazing, I can’t wait to make! Have you ever tried making them with non-savory toppings or fillings? I’m thinking cinnamon sugar, blueberries, etc. Curious how versatile they might be!
Kenleigh, I have not, but I can safely assume they would be AMAZING with any non-savory toppings/fillings.
Rated 5 although not made yet,,,however, this is the easiest bagel recipe I have come across and now will attempt to make bagels. Stephanie, I love your site, you’re my “go to” site for breads. Thank you
Lynn, Thank you so much! 🙂 I hope you enjoy this recipe as much as I do!