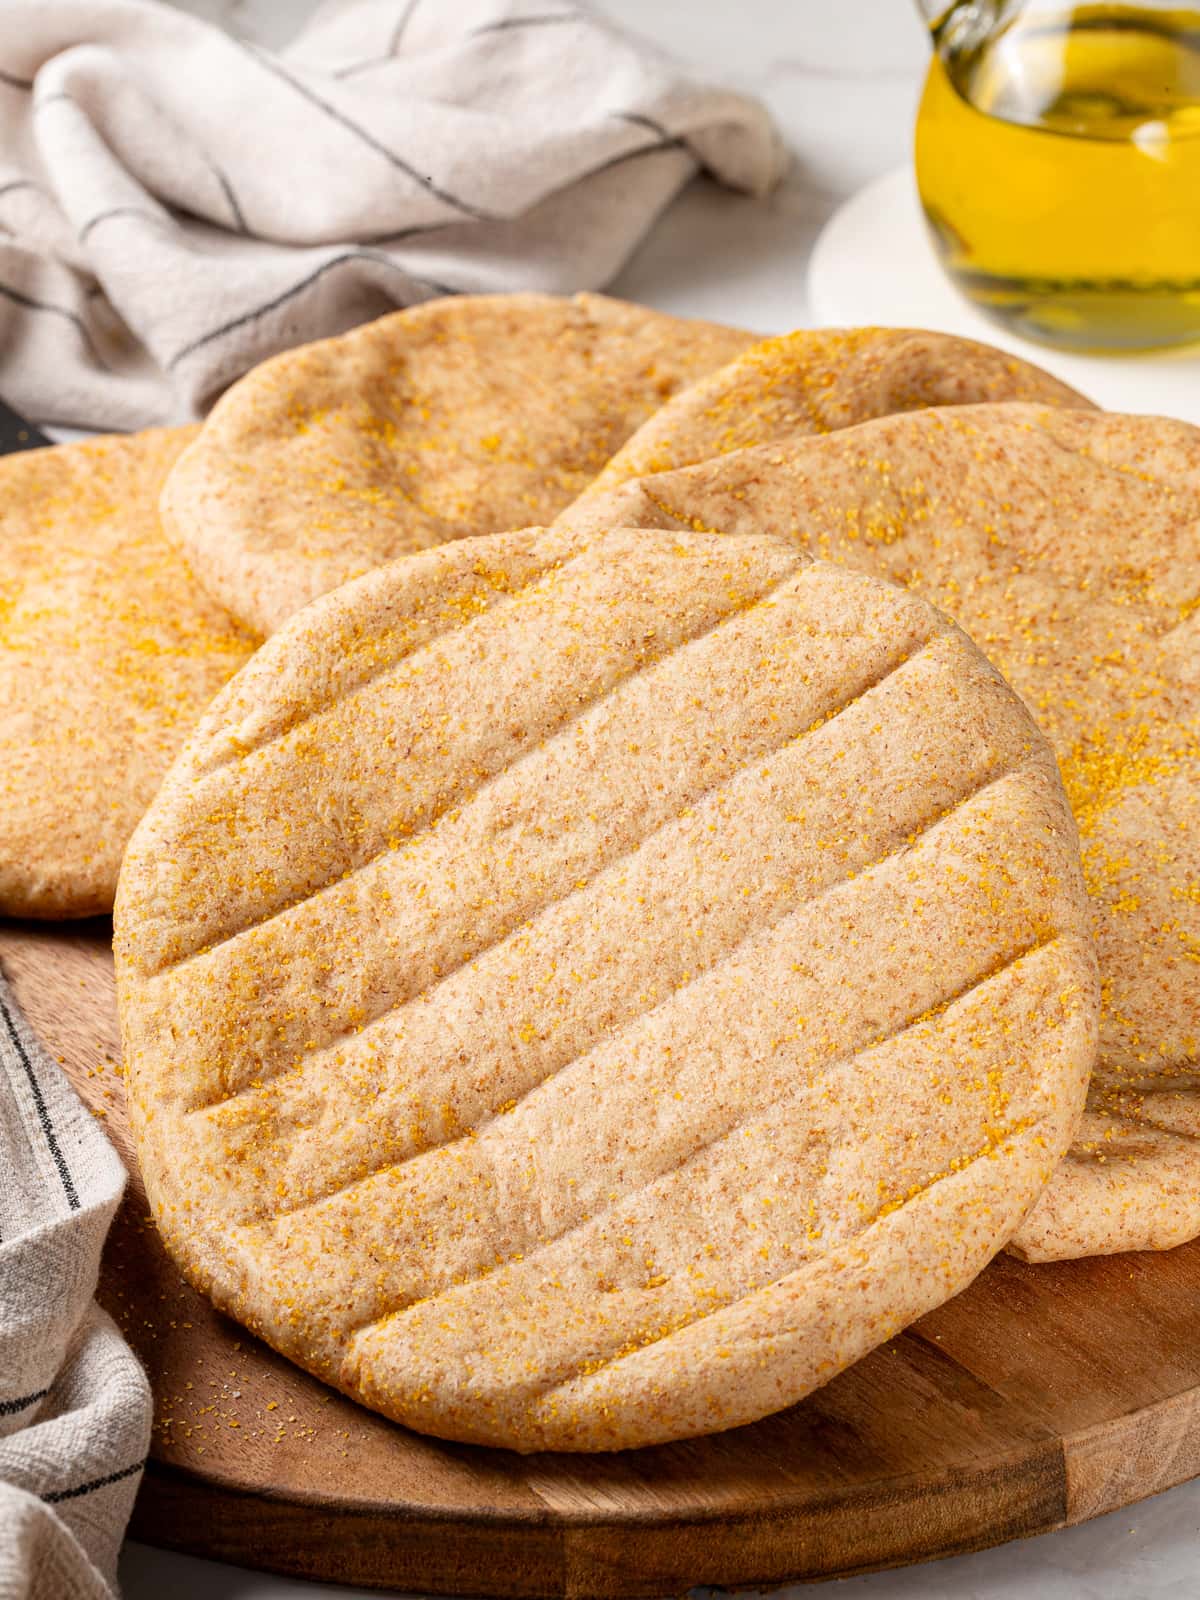
This whole wheat pita bread recipe makes perfectly tender pitas with a hearty, nutty flavor from whole wheat flour. Use them for wraps, sandwiches, or dipping in hummus.

A Quick Look At The Recipe
This is a brief summary of the recipe. Jump to the recipe to get the full details.
Prep Time
15 minutes
Cook Time
5 minutes
Rise Time
2 hours 30 minutes
Total Time
2 hours 50 minutes
Servings
8 pitas
Difficulty
Intermediate. The dough is straightforward, but rolling and baking require attention.
Calories *
228 kcal per serving
Technique
Mix, knead, rise, divide, roll, and bake at high heat.
* Based on nutrition panel
These pitas were so much better than store-bought! They puffed beautifully and stayed soft even the next day. I used them for falafel wraps, and my family devoured them. The whole wheat gives them such a nice, hearty flavor. I will definitely make these again! ⭐⭐⭐⭐⭐
Lauren
Why You’ll Love This Recipe
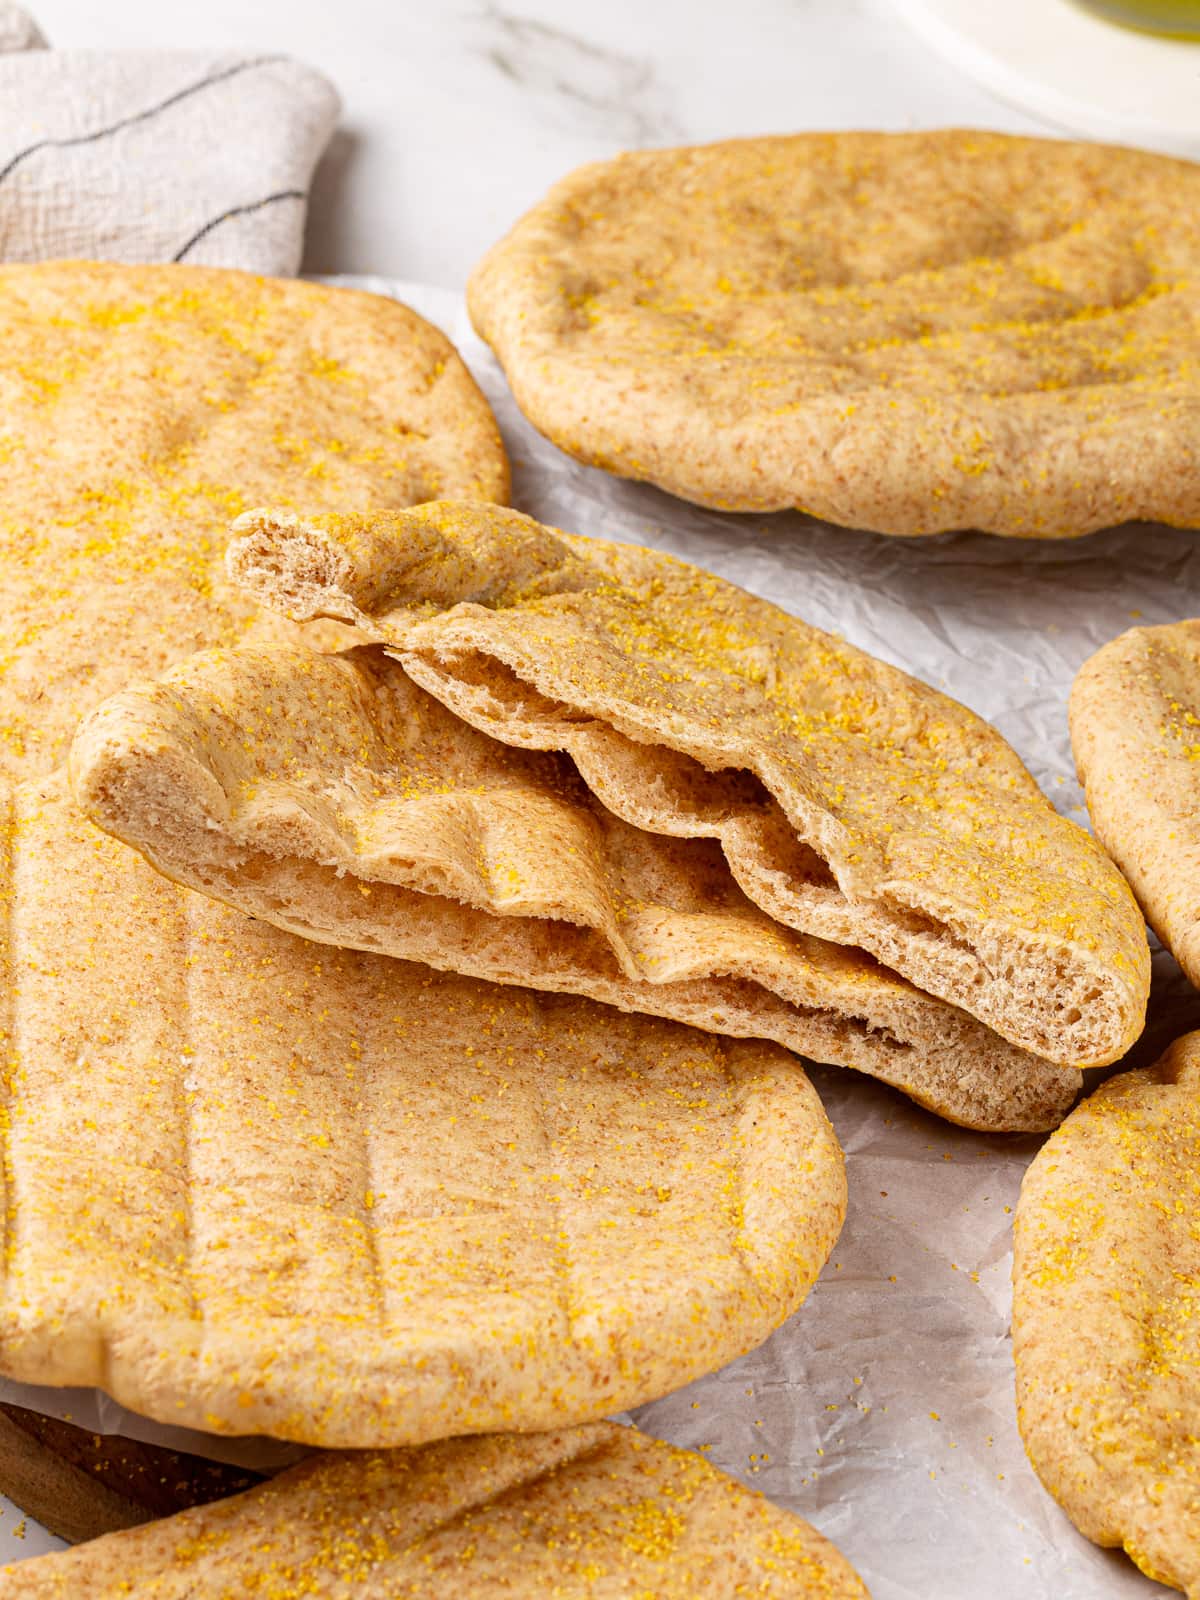
- Soft, pliable whole wheat pitas. These pitas are tender enough to fold and wrap without cracking, making them perfect for sandwiches and wraps. The whole wheat flour adds a subtle nutty flavor and wholesome texture.
- They actually puff! High heat and proper rolling create that signature pocket that makes pitas so versatile. Watch them balloon in the oven for a little kitchen magic.
- Healthier than store-bought. With a blend of whole wheat and bread flour, these pitas pack more fiber and nutrients than typical white flour versions. Plus, you control exactly what goes into them.
- Versatile and freezer-friendly. Make a big batch and freeze it for quick lunches. Use them for gyros, falafel wraps, pizza bases, or torn into pieces for dipping.
Table of Contents
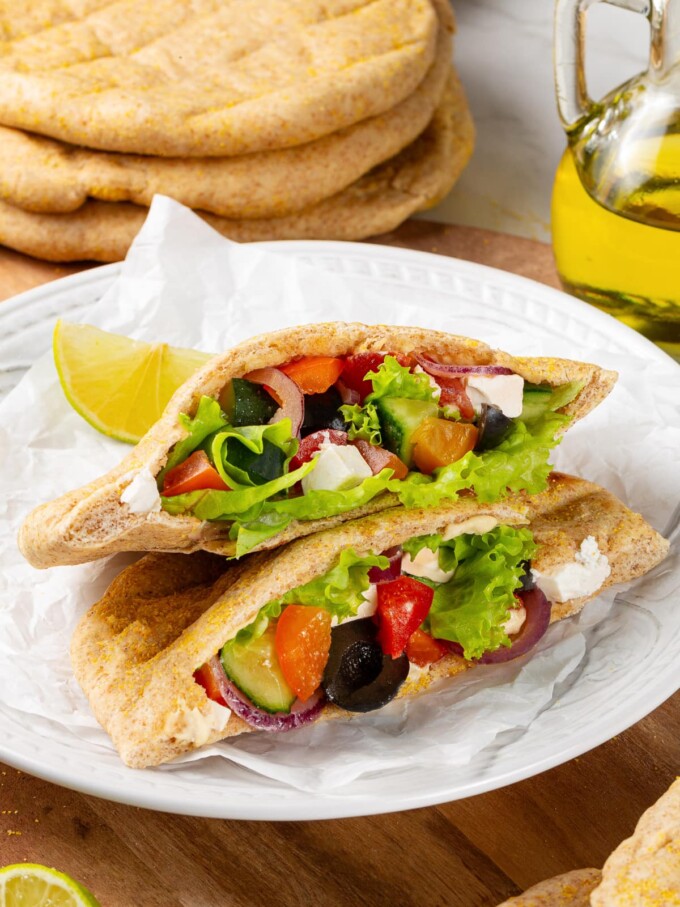
If you’re looking for something wholesome and flavorful, easy yet homemade, this whole pita bread recipe is for you! They are pillowy soft and are perfect for sandwiches or for scooping up soups and stews. Pair them with your favorite from Mediterranean cuisine like Greek salad, roasted vegetables, or grilled meats.
If you enjoyed these whole wheat pitas, you’ll love exploring more homemade bread recipes! For a no-knead option that’s equally impressive, try this no-knead focaccia or this no-knead naan. And if you’re craving more whole-grain goodness, this whole wheat bread makes the perfect sandwich loaf for your lunchbox.
Ingredients & Substitutions
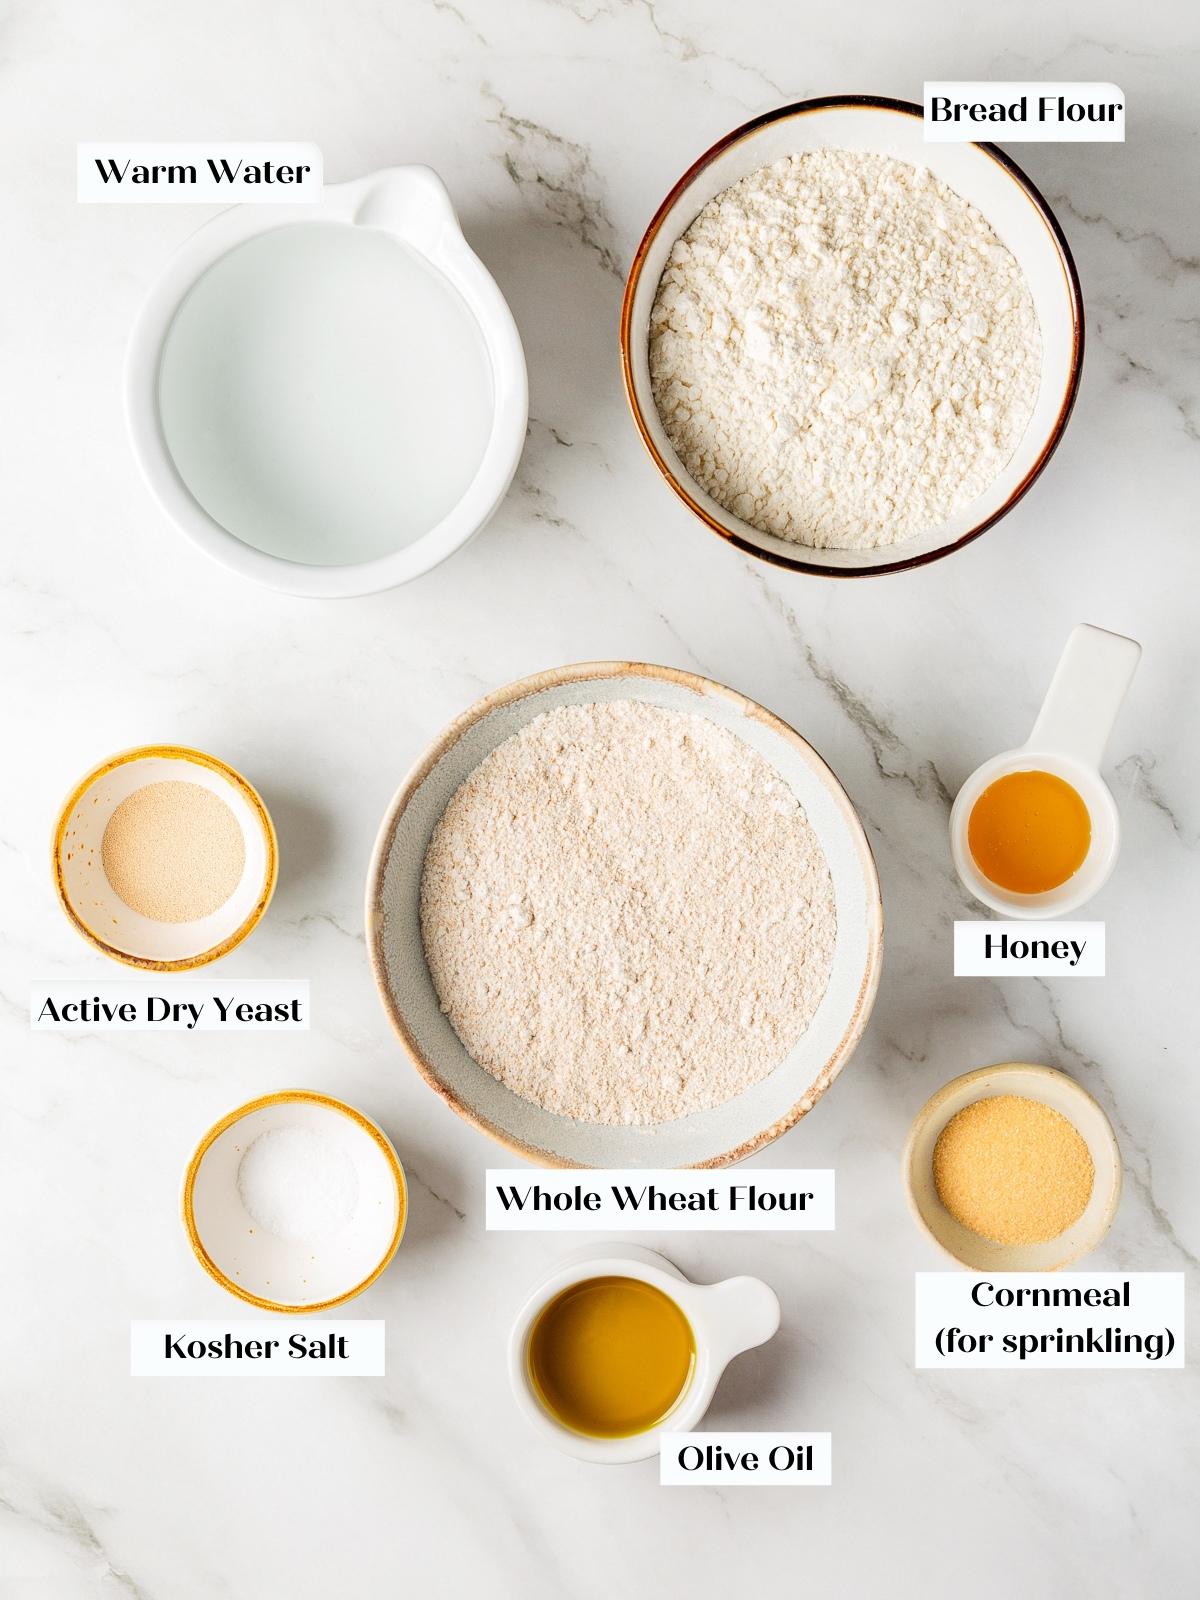
- Active Dry Yeast: The yeast gives these pitas their lift. If using instant or fresh yeast, you can skip the blooming step and mix it directly with the flour. Make sure to double the weight of fresh yeast or half the weight of instant yeast.
- Honey: Feeds the yeast and adds a subtle sweetness. You can swap in sugar or maple syrup if that’s what you have.
- Warm Water
- Bread Flour: The higher protein content creates structure and helps the pitas puff. All-purpose flour works in a pinch, but you’ll get slightly less dramatic pockets.
- Whole Wheat Flour: Brings hearty flavor and nutrition. Using 50% whole wheat gives them a lighter texture with all the flavor of whole wheat.
- Olive Oil: Keeps the dough tender and adds flavor. You could use vegetable oil, but olive oil is traditional and tastes better.
- Kosher Salt
Variations
- Use 100% all-purpose flour. Swap all the whole-wheat flour for bread flour or all-purpose flour to make traditional white pitas.
- Add herbs. Mix in some dried herbs or spices such as za’atar (hello, zaatar focaccia!), oregano, or rosemary to flavor pitas. Try adding minced garlic, like this rosemary garlic bread.
- Try them as pizza bases. Top with sauce, cheese, and your favorite toppings, then bake for personal-sized homemade pizzas. You can also use this flatbread recipe or my sourdough discard pizza dough!
- 100% whole wheat! You can make this recipe 100% whole wheat. Adjust the hydration slightly or reduce the flour a touch because whole wheat flour hydrates differently. For more 100% whole wheat recipes, check out this whole wheat sourdough bread or these whole wheat biscuits.

Professional Tips
- Roll them thin and even. Aim for about a ¼-inch thickness. Too thick or thin, and they won’t puff properly; uneven rolling means inconsistent air pocket.
- Crank the oven high. That oven temperature is no joke! Pitas need serious heat to create steam and puff quickly. Preheat your baking sheet or pizza stone for the best results.
- Watch them closely. They bake in just 3-4 minutes. Once they puff, they’re done. Overbaking makes them crispy instead of soft.
- Keep them soft. Stack warm pitas and cover with a kitchen towel immediately after baking. The steam keeps them pliable.
How to Make Whole Wheat Pita Bread
Use these instructions to make soft, pillowy homemade pitas! Full measurements are in the recipe card at the end.


Step 1: Bloom the yeast. In the bowl of a stand mixer, whisk together the yeast, honey, and ½ cup of warm water. Let it sit for 5 minutes until foamy (photo 1).
If there are no bubbles after 5 minutes, this means the yeast is dead, so grab new yeast and try again!
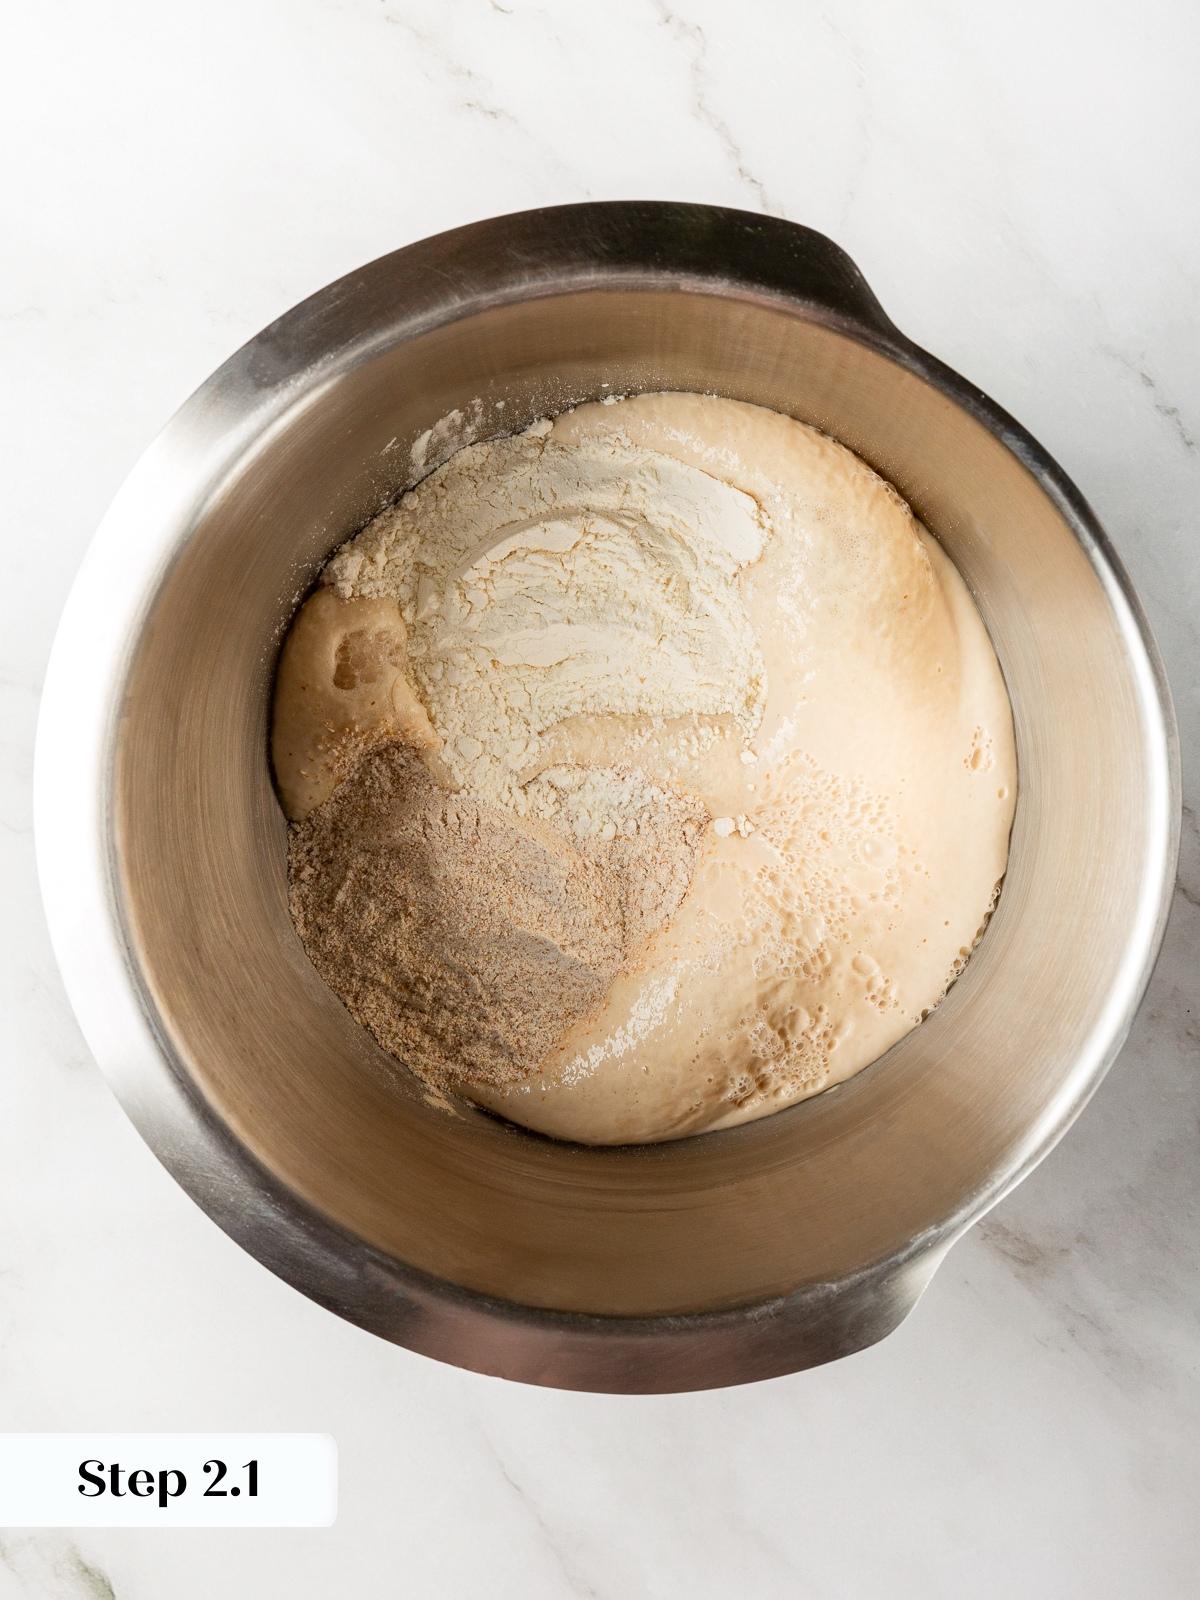
Step 2: Add 1/2 cup bread flour and 1/2 cup whole wheat flour; stir until smooth. Cover bowl with plastic wrap and let rise in a warm place until doubled, about 45 minutes (photos 2 & 3).
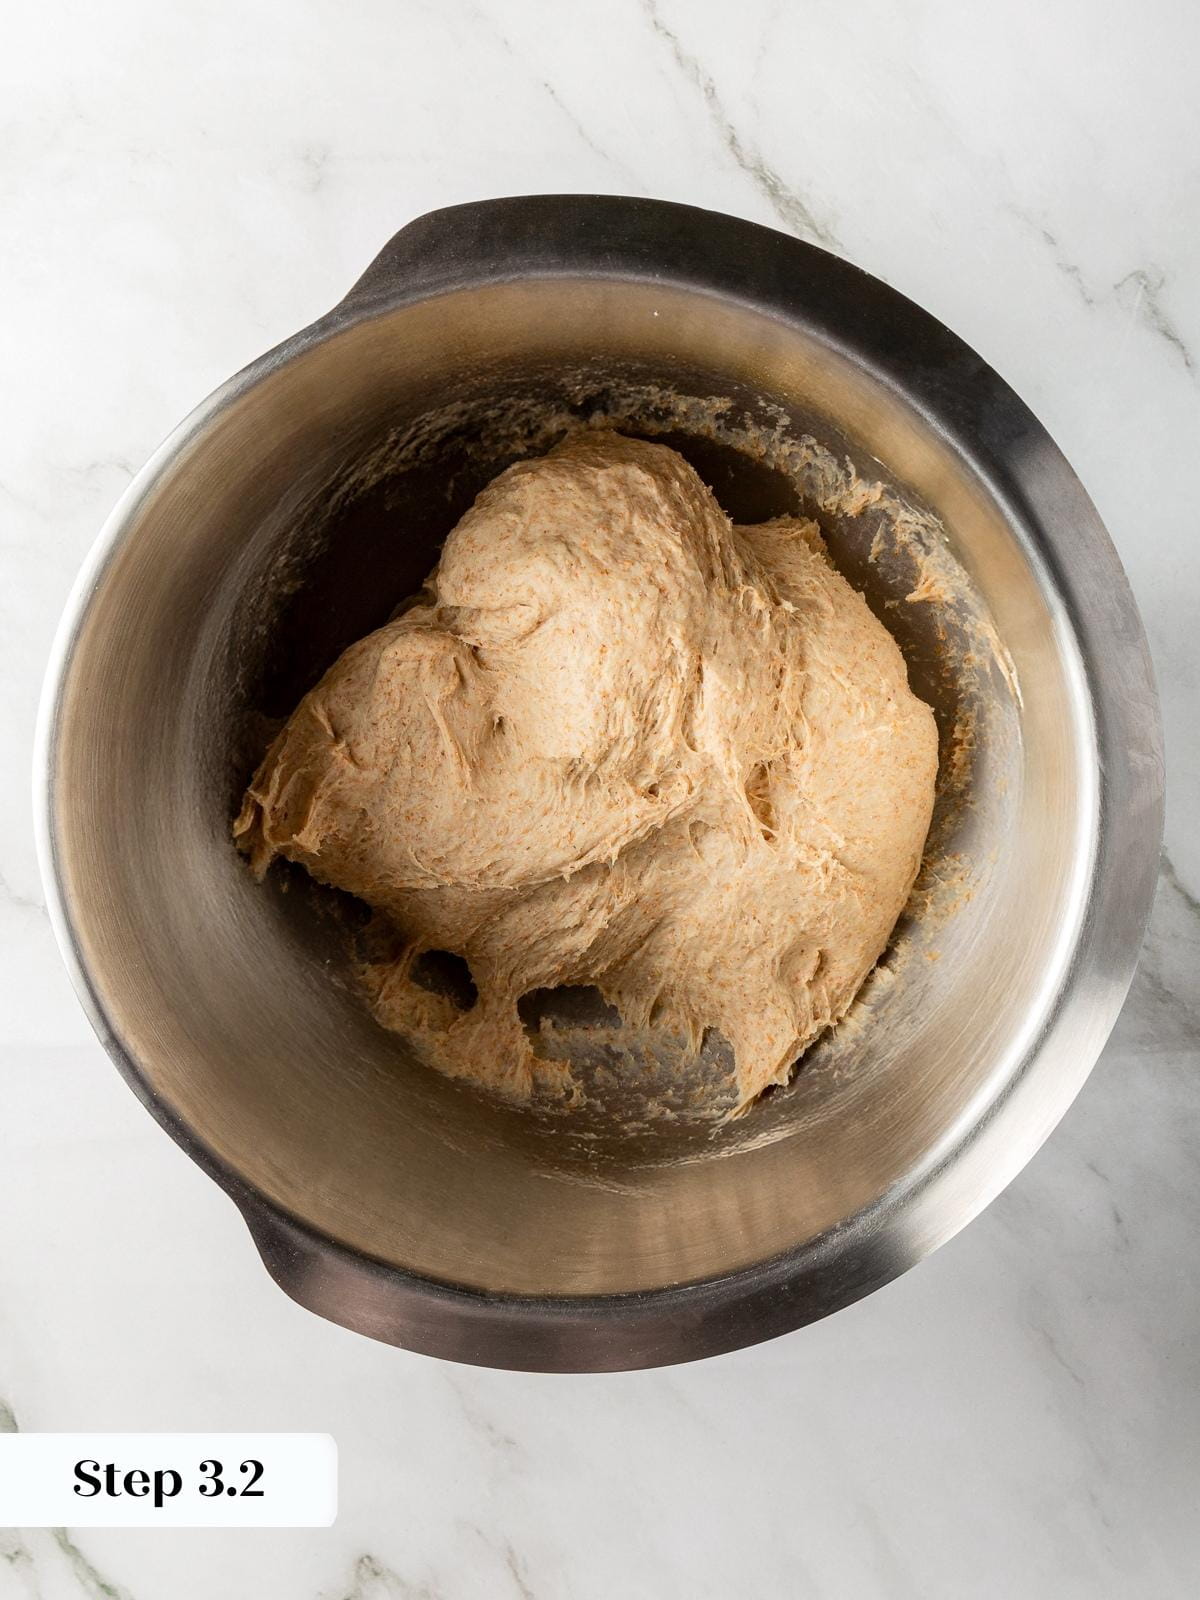


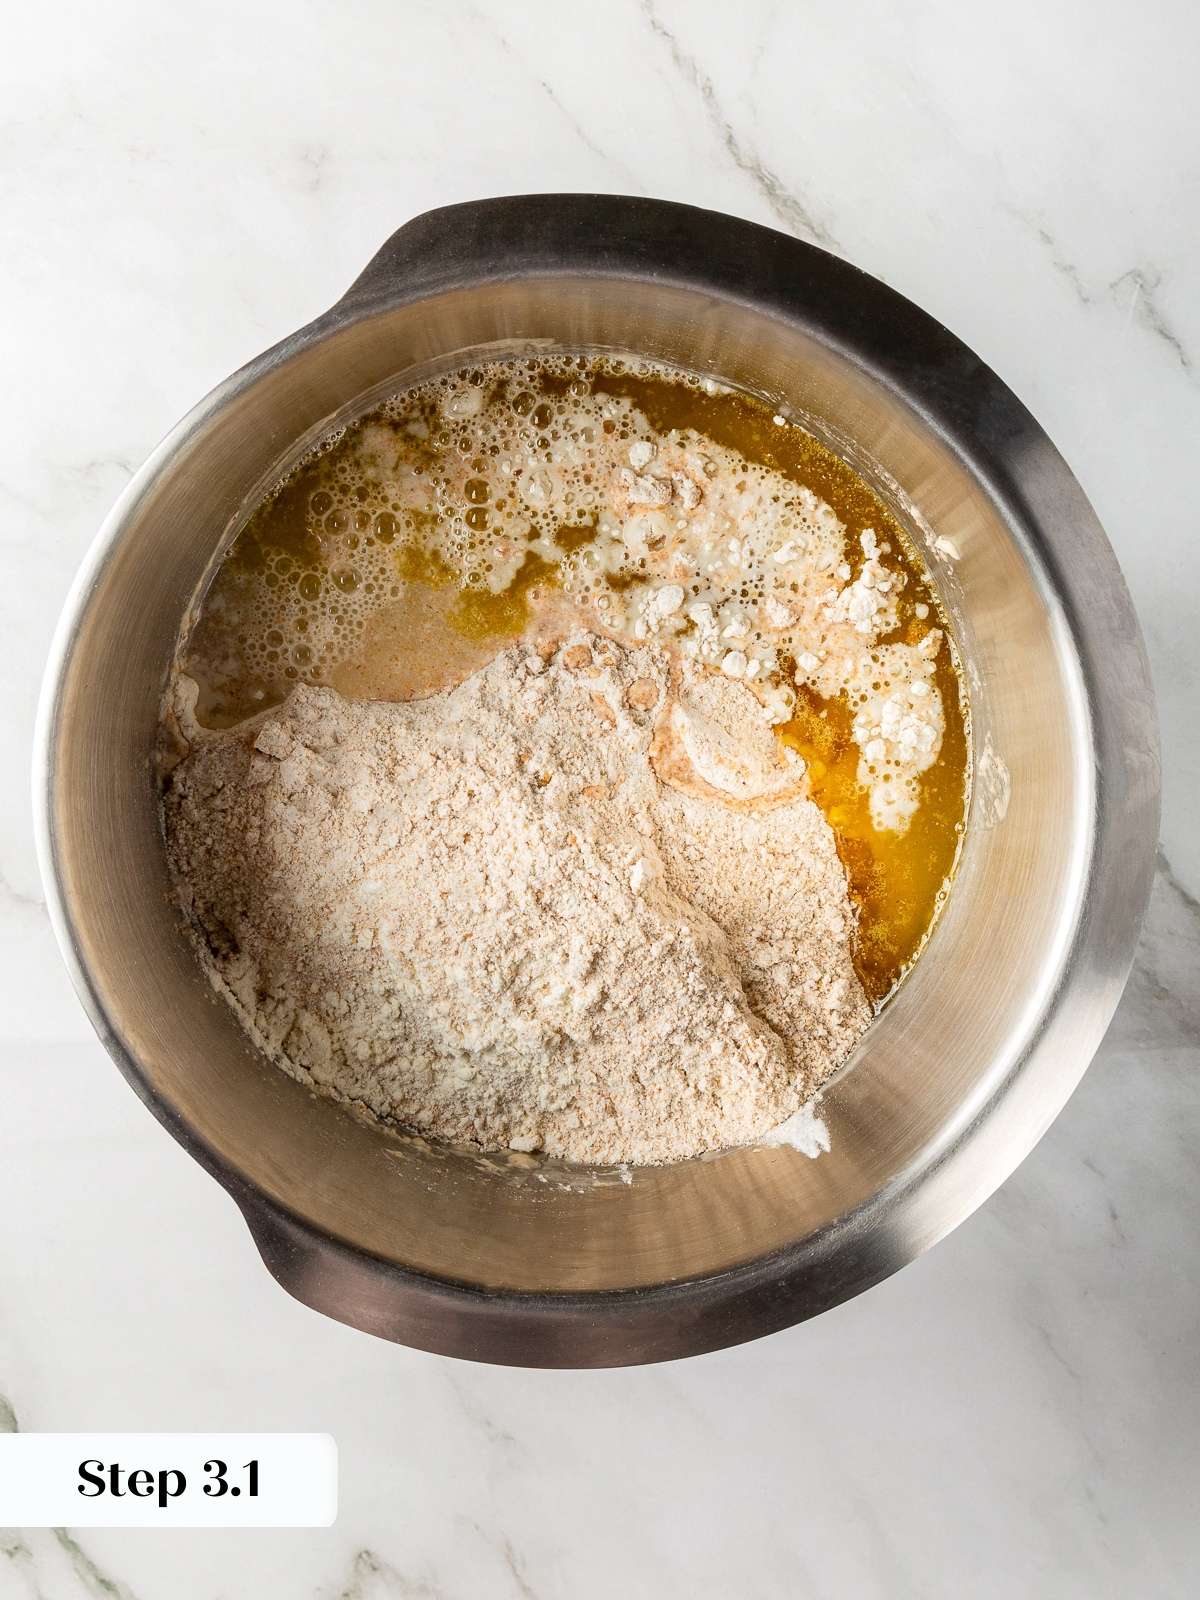
Step 3: Mix and Knead. When the yeast mixture is doubled, add the remaining warm water, flours, olive oil, and salt; attach the dough hook to the stand mixer and knead on low speed, adding more flour as needed until a smooth, elastic, and only slightly sticky dough forms. This should take about 8 minutes (photos 4 & 5).
This can also be done by kneading by hand on a lightly floured work surface. It will take a bit more time, but it is possible!
Step 4: First rise. Shape into a ball and place the dough ball into a lightly greased bowl, turning once to coat. Cover with plastic wrap or a damp towel. Let rise in a warm spot until doubled, about 1-1½ hours (photos 6 & 7).
Step 5: Preheat the oven. Set your oven to 500°F and place a pizza stone, cast iron skillet, or a baking sheet on one rack in the lower third of the oven.
If using a pizza stone, allow the oven to preheat for at least 20 to 30 minutes to allow the stone to properly heat.
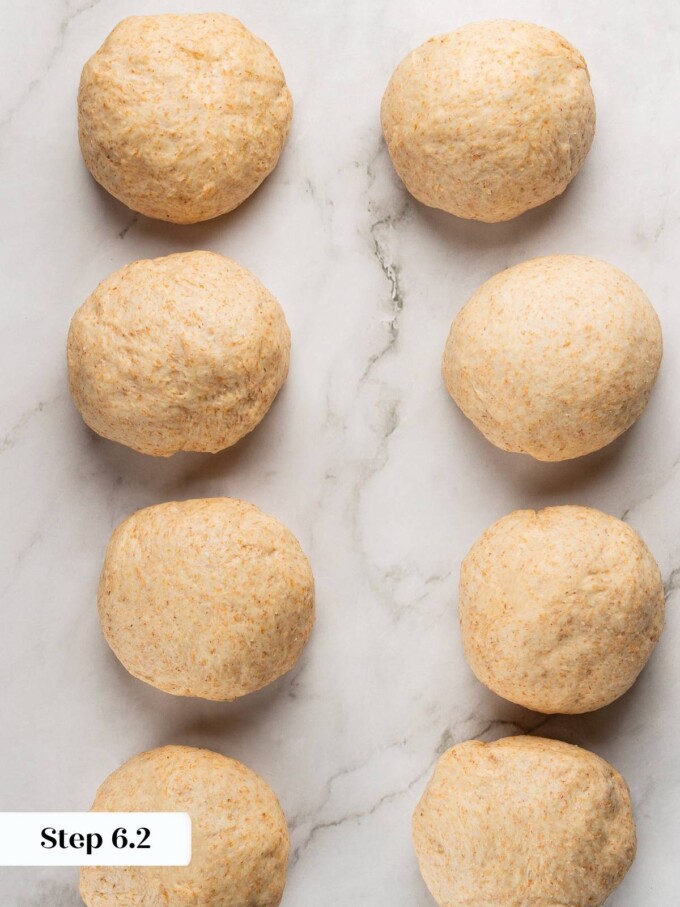

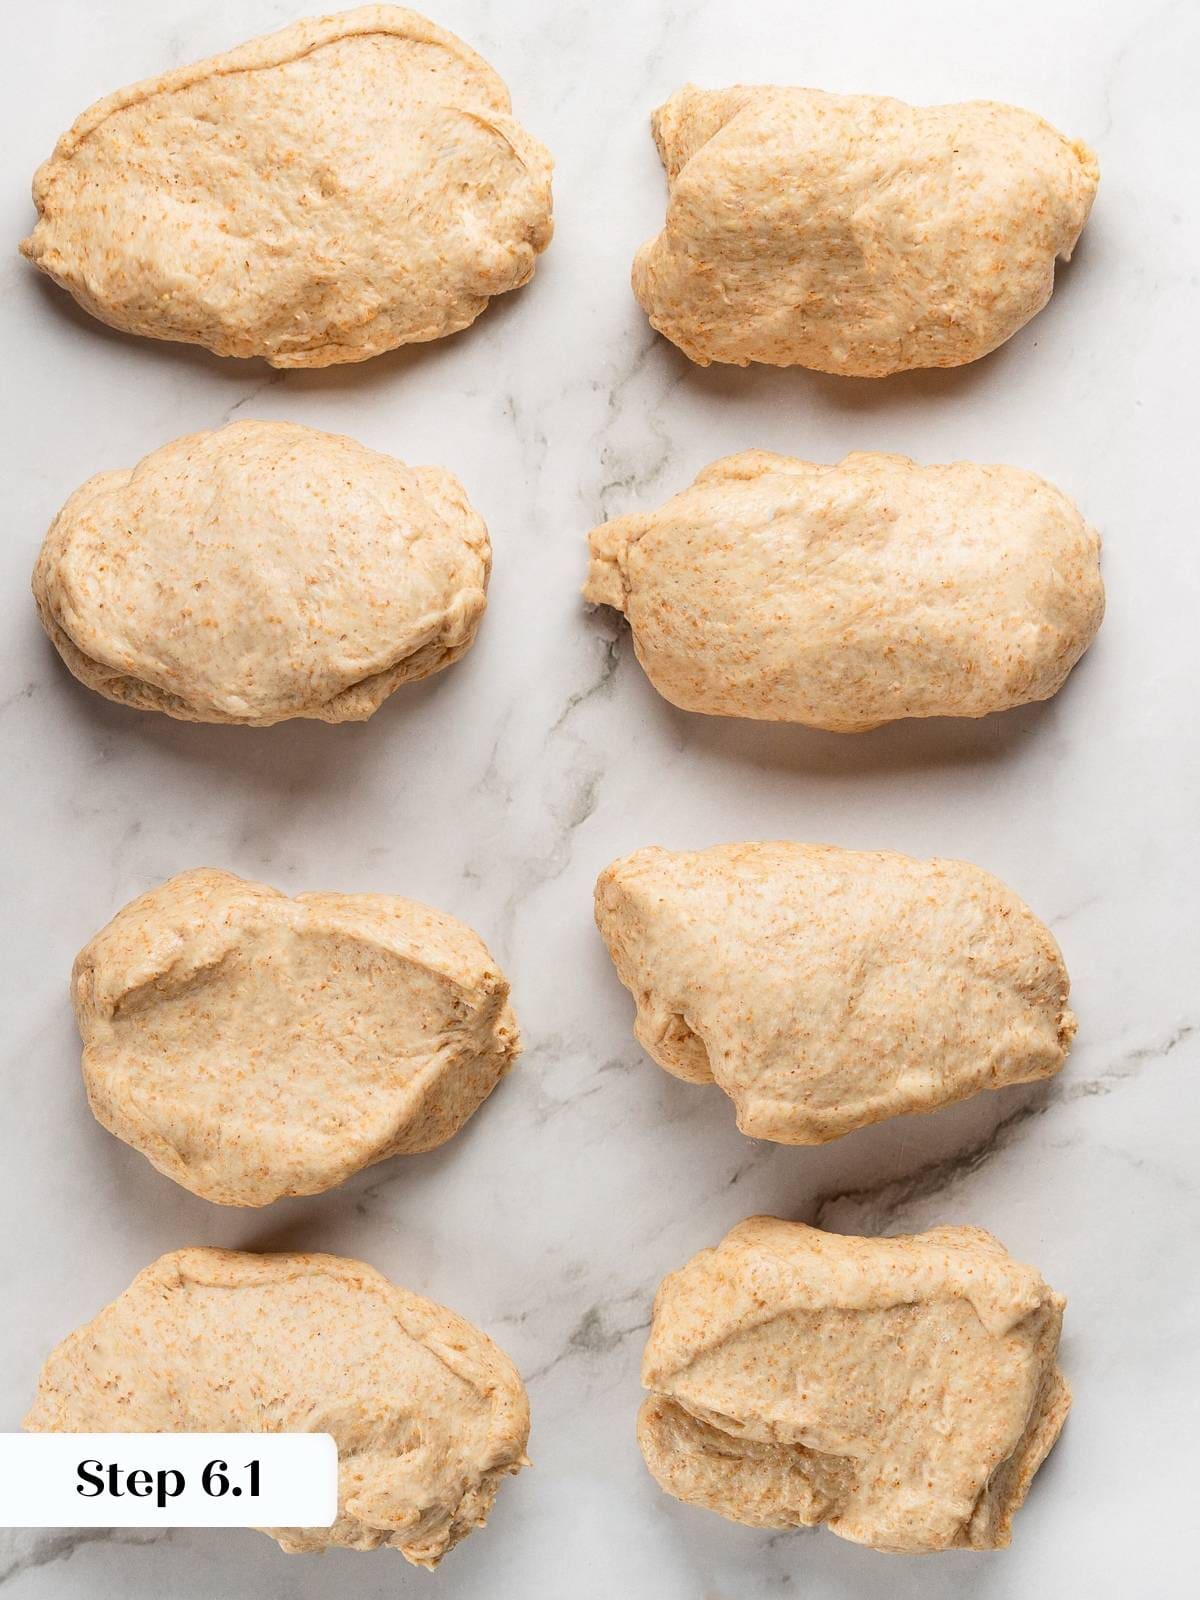
Step 6: Divide the dough. Divide the dough into 8 equal pieces. Pre-shape each into a ball and allow to bench rest for 10 minutes (photos 8 & 9).
Step 7: Roll out pitas. On a lightly floured surface, roll each ball into a 7-8-inch circle using a rolling pin, about ¼-inch thick. Don’t roll too thin or they won’t puff (photo 10).
Step 8: Bake until puffed. Carefully place 2-3 rolled pitas on the baking stone or straight onto the oven rack. Bake for 2-3 minutes, until puffed and lightly golden. Using tongs, flip the pitas and bake 1 minute more.
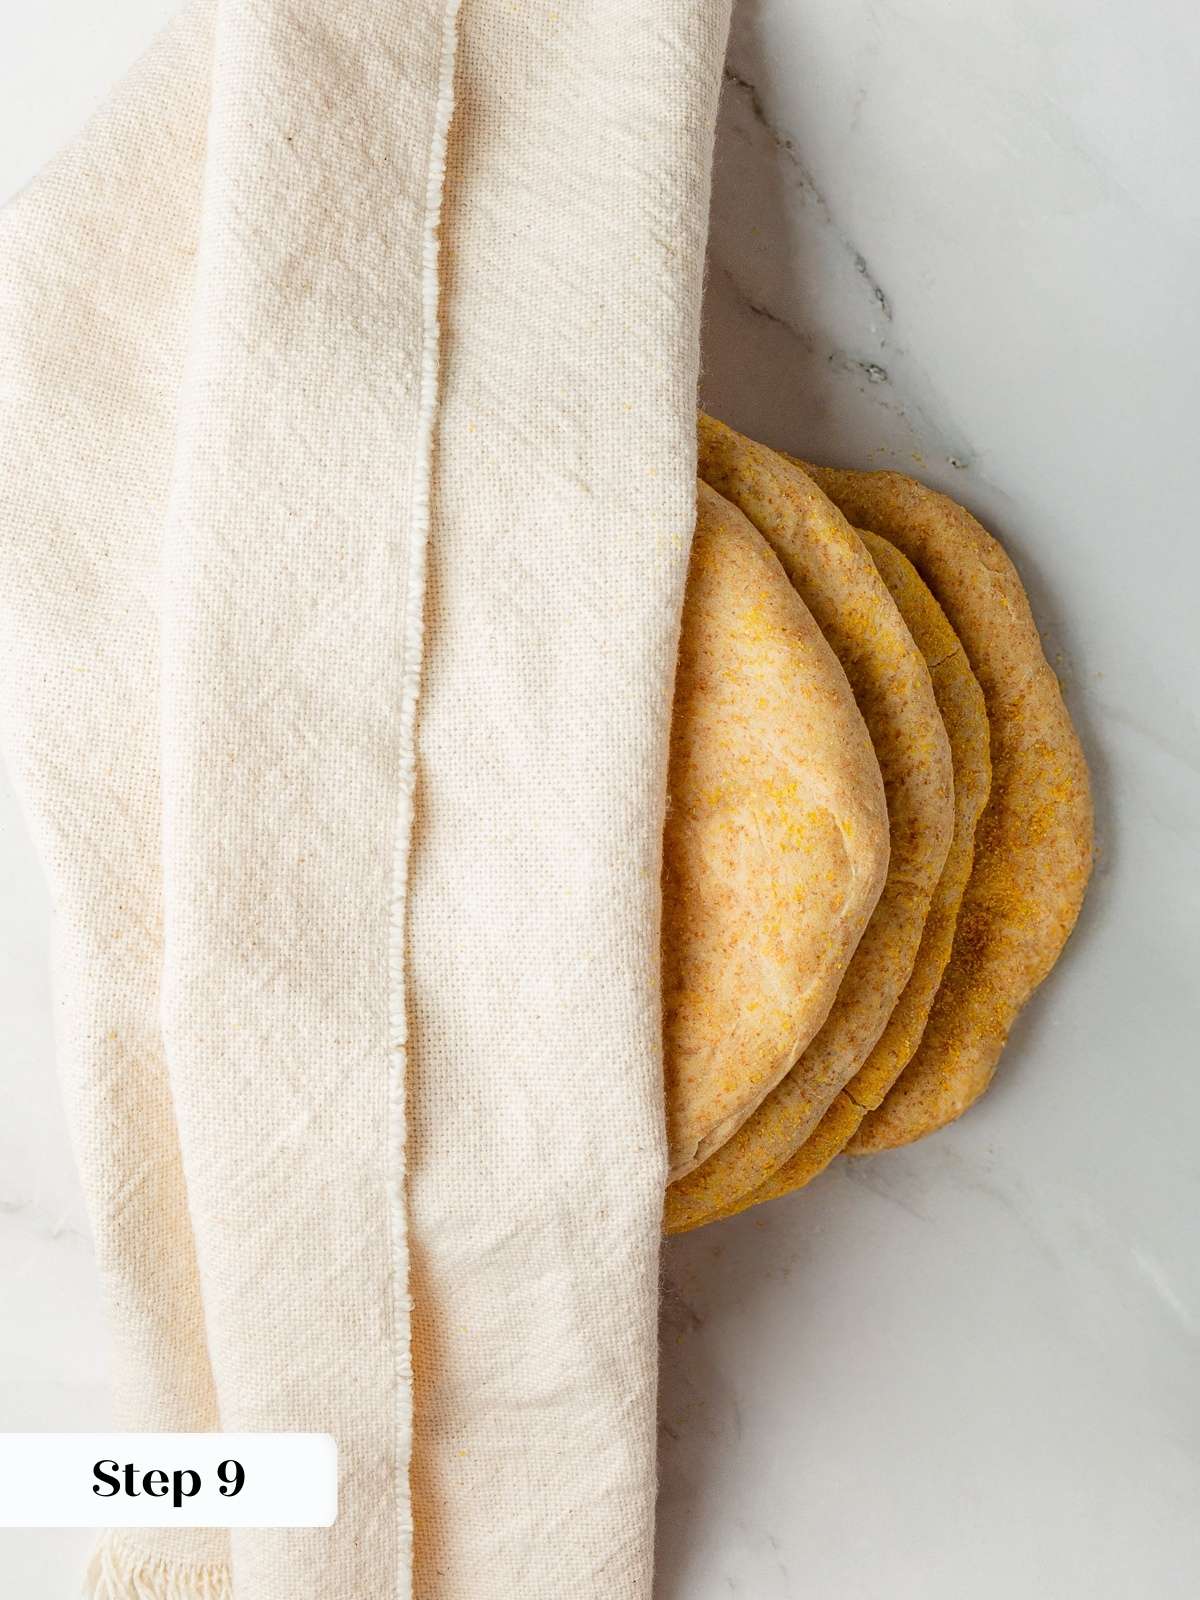
Step 9: Transfer to a plate and cover with a clean kitchen towel to trap steam. Repeat with the remaining pita dough (photos 11 & 12).
How to Serve Whole Wheat Pita Bread
These pitas are incredibly versatile! Stuff them with falafel, grilled chicken, or veggies for wraps. Cut them into wedges and serve alongside hummus, baba ganoush, or this tzatziki recipe. Serve warm pitas alongside dishes like spiced lentils with poached eggs for scooping and dipping. For casual snacking spreads, pitas pair well with other hand-held breads like a soft pretzel or crunchy pretzel sticks. Use them as a base for homemade flatbread pizzas or fill with the tuna salad from the best tuna melt recipe. Or toast them and use them for breakfast sandwiches or use them to make stuffing.
Recipe FAQs
Immediately remove baked pitas and wrap them in a clean kitchen towel. This traps steam, keeping them soft and pliable. For longer storage, store in an airtight container or plastic bag at room temperature for up to 3 days, or freeze for up to 3 months.
The oven might not have been hot enough, or the dough might have been rolled too thick or too thin. Make sure your oven is fully preheated to 500°F, then roll the pitas to an even ¼-inch thickness.
Yes! You can refrigerate the dough after the first rise for up to 24 hours. Bring to room temperature before rolling and baking. Baked pitas freeze beautifully for up to 3 months.
You can, but the pitas will be denser and less likely to puff dramatically. The bread flour provides gluten structure that helps create those pockets. For best results, stick with the 50/50 blend.
Recommended Bread Recipes

Yeast Breads

No-Knead Breads

Yeast Breads
Yeast Breads
If you enjoyed this recipe, please leave a star rating and let me know how it goes in the comments below! I love hearing from you and your comments make my day!
Whole Wheat Pita Bread
Ingredients
- 2 ¼ teaspoons active dry yeast, 1 packet
- 1 ½ teaspoons honey
- 1 ¼ cups warm water, 110-115°F, divided
- 1 ½ cups bread flour, divided
- 1 ½ cups whole wheat flour
- ¼ cup olive oil
- 1 teaspoon salt
Instructions
Mix and Knead the Dough:
- In a large bowl or a stand mixer, whisk together the yeast, honey, and ½ cup of warm water. Let it sit for 5 minutes until foamy.
- Add 1/2 cup bread flour and 1/2 cup whole wheat flour; stir until smooth. Cover bowl with plastic wrap and let rise in a warm place until doubled, about 45 minutes.
- When the yeast mixture is doubled, add the remaining warm water, flours, olive oil, and salt; attach the dough hook to the stand mixer and knead on low speed, adding more flour as needed until a smooth, elastic, and only slightly sticky dough forms. This should take about 8 minutes.
Let It Rise:
- Shape into a ball and place in a lightly greased bowl, turning once to coat. Cover with plastic wrap or a damp towel. Let rise in a warm spot until doubled, about 1-1½ hours.
Shape and Bake:
- Preheat the oven. Set your oven to 500°F and place a pizza stone on one rack in the lower third of the oven.
- Divide the dough into 8 equal pieces. Pre-shape each into a ball and allow to bench rest for 10 minutes.
- On a lightly floured surface, roll each ball into a 7-8-inch circle, about ¼-inch thick. Don’t roll too thin or they won’t puff.
- Carefully place 2-3 rolled pitas on the pizza stone or straight onto the oven rack. Bake for 2-3 minutes, until puffed and lightly golden. Using tongs, flip the pitas and bake 1 minute more.
- Transfer to a plate and cover with a clean kitchen towel to trap steam. Repeat with the remaining pita dough.
Notes
- Yield – 8 pitas
- Presentation – If you have a pizza stone, use it; it will help create the best puff and crust on your pita bread!
- Variations – Make pita chips by cutting them into wedges, brushing with olive oil, and baking at 375°F until crispy. Perfect for dipping!
- Storage – Store cooled pitas in an airtight container at room temperature for up to 3 days, or freeze for up to 3 months.
Nutrition
Nutrition information is automatically calculated, so should only be used as an approximation.
 Like this recipe? Rate & comment below!
Before You Go
I hope you enjoyed this whole wheat pita bread recipe! Check out more flatbread recipes like this flour tortilla recipe, or explore all our bread recipes for more homemade inspiration.


These pitas were so much better than store-bought! They puffed beautifully and stayed soft even the next day. I used them for falafel wraps, and my family devoured them. The whole wheat gives them such a nice, hearty flavor. I will definitely make these again!
Virginia — Hmm, I’ve never heard of that before! The flour I used was not “with yeast,” so I’m not sure how that flour will behave with this recipe. Maybe the yeast is already mixed into the flour, so you don’t have to add any more? I’d check the packaging and see. Otherwise… I’m clueless.
I live in Germany, and the only whole wheat and bread flour I could find were ones that said “with yeast” on them. Is that normal for this kind of bread, and is that the kind of flour that you used, or did I get the wrong stuff? Thanks!!
Made these and LOVE them. Used canola oil instead of olive. Also majorly simplified method….proofed yeast, mixed together dry ingredients, made a well poured in wet and mixed. Let rise until doubled then followed the rest of her instructions about rolling, rising, etc.
Julia — I have not, but I’m sure you easily could. Just wrap them in plastic wrap and foil to freeze; to thaw, leave them on a countertop (you can also sprinkle a little water on them and microwave them for a few seconds).
Have you (or anyone else) tried freezing these? It would be great to be able to make a bunch and then pull out of the freezer when needed.
They look great, can’t wait to try them!