An easy sourdough discard pizza dough recipe that is made in under 10 minutes by hand! You can make this recipe using old, refrigerated discard or more active discard, depending on what you have on hand.

Sometimes the best pizza night starts with the leftovers—like the jar of sourdough discard sitting in the fridge. This sourdough discard pizza dough takes that forgotten starter and transforms it into a chewy, flavorful crust that rivals your favorite pizzeria. The long cold ferment means the flavor develops while you go about your week, and whether you bake it same-day or after 72 hours, you’ll end up with a crust that’s crisp on the bottom and tender inside.
If you love baking with discard, don’t miss my sourdough discard crackers, sourdough sandwich bread, or even a sweet treat like sourdough cinnamon rolls. I even made an entire post dedicated just to sourdough discard recipes! But for tonight, let’s talk pizza, because this dough is about to become your new favorite way to turn sourdough scraps into something spectacular.
Why This is the Best
- Balanced sourdough flavor without overwhelming tang. Because the discard is paired with yeast and cold fermentation, the flavor is nuanced, not overly sour. It’s the perfect bridge between classic pizza crust and artisan sourdough bread!
- Beginner-friendly recipe with restaurant-quality results. This recipe uses lower hydration and is super easy to mix, knead and shape without compromising on texture. Looking for a set it and forget it pizza dough? Make this no-knead pizza dough.
- You can use your discard at any stage. During testing I used various stages of sourdough discard. Ultimately I ended up using sourdough discard from the refrigerator that hadn’t been fed in weeks.
- You can save up your discard and make pizza dough when you’re ready! This is not true of most sourdough discard recipes because they rely on the more neutral flavor, leavening potential and lower gluten of more recently fed discard.
Table of Contents
Ingredients & Substitutions

- Can I use unfed sourdough starter from the fridge? Yes! Just like my sourdough discard bagels, this recipe uses an unfed starter from the fridge or a recently fed room-temperature active starter. I also suggest heading over to my sourdough starter recipe to dive deeper into your sourdough journey.
- Water: I always use tap water for feeding sourdough starter, but I live and work in New York City. If you live somewhere with hard water (a lot of minerals), you should use distilled water, bottled water or filtered water.
- Flour: I used Caputo flour for all of my tests. It is what I recommend for people who are serious about their pizza. That and semolina flour for shaping.
See the recipe card for full information on ingredients and quantities.
Variations for Sourdough Pizza Crust
- Make a 5-hour version with instant yeast. The same recipe can be mixed and cooked in 5 hours if you substitute 2 teaspoons of instant yeast (rapid rise) for the dry active yeast. I still let it proof in the fridge. You can also make this pizza dough recipe.
- Skip the yeast and use starter alone. You can omit the yeast entirely, but I recommend using active sourdough starter or discard that has been fed in the past 18 hours, just like when making this sourdough pretzel recipe. (aka the day before)
- Prep a personal pan pizza. Instead of stretching the dough thin, press the dough into an oiled cast-iron skillet or baking pan. Let rise at room temp for 30–60 minutes, then bake for a thick-crust pizza. It’ll turn out more similar to my easy sourdough focaccia!

Professional Tips for Sourdough Pizza Dough
- Scale your ingredients by weight. The volume of 200g of sourdough starter varies drastically. In my experience 200g of starter discard fed equal parts flour and water will be 1 cup approximately 48 hours after feeding and the same mass of stored discard that hasn’t been fed for a week or more will be ¾ cup. Active and bubbly starter at its peak can also vary in volume. I used 200g no matter what stage my discard was.
- I added a bench rest in an unconventional place! I bench rest the dough after mixing, but before dividing and shaping. This allows the gluten to relax and will make a smoother, better formed pizza dough ball. I didn’t count this in the total time – less than 10 minutes of active time.
- Shaping dough is tricky, but please avoid using a rolling pin. The trickiest part is shaping the dough, but I break it down for you in the recipe! Don’t use a rolling pin; it hurts my heart and keeps it from getting that beautiful NY Slice crust.
How to Make Sourdough Discard Pizza Dough
Can I use sourdough discard to make pizza dough? Yes, and let me show you how! Further details and measurements can be found in the recipe card below.
Step 1: Oil a rimmed baking sheet with olive oil (you can line it with parchment paper first, if you want); set aside.
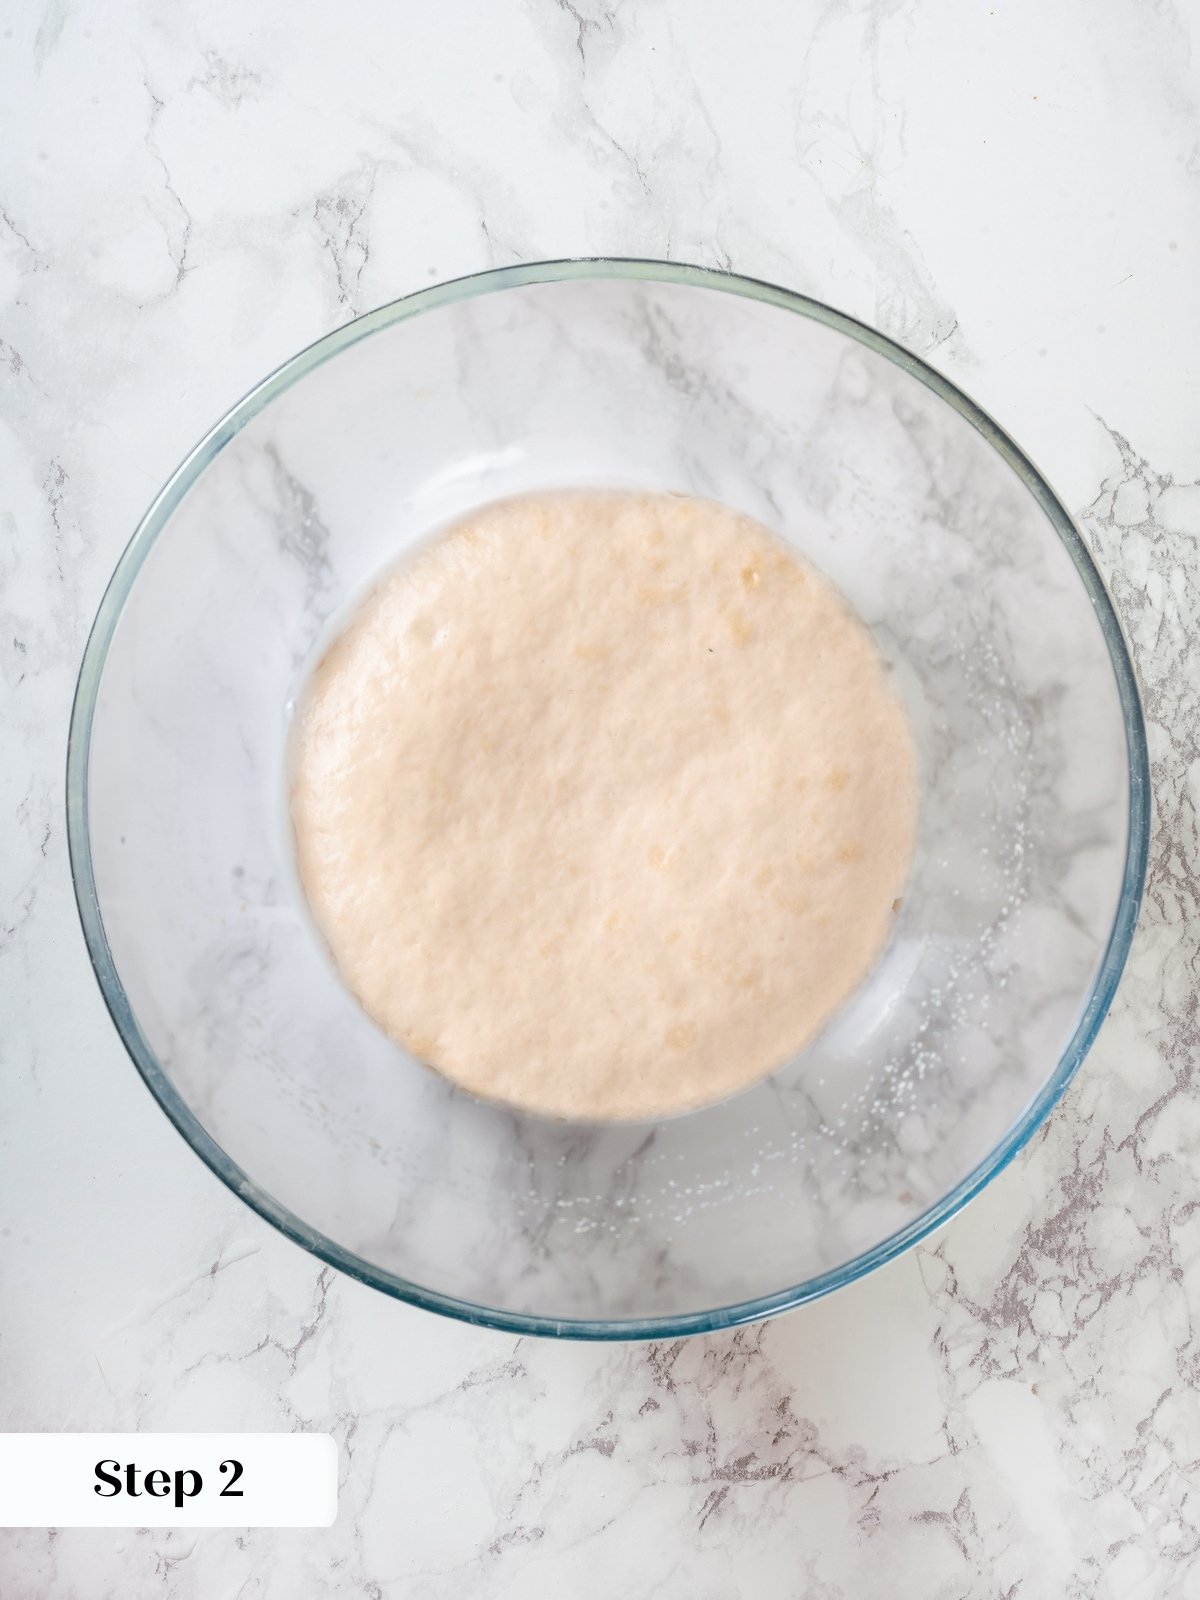
Step 2: Combine yeast and warm water. In a small mixing bowl combine the active dry yeast and warm water (photo 1). Let sit 5-10 minutes.
If using instant yeast, no need to bloom in water. Mix directly with flour.
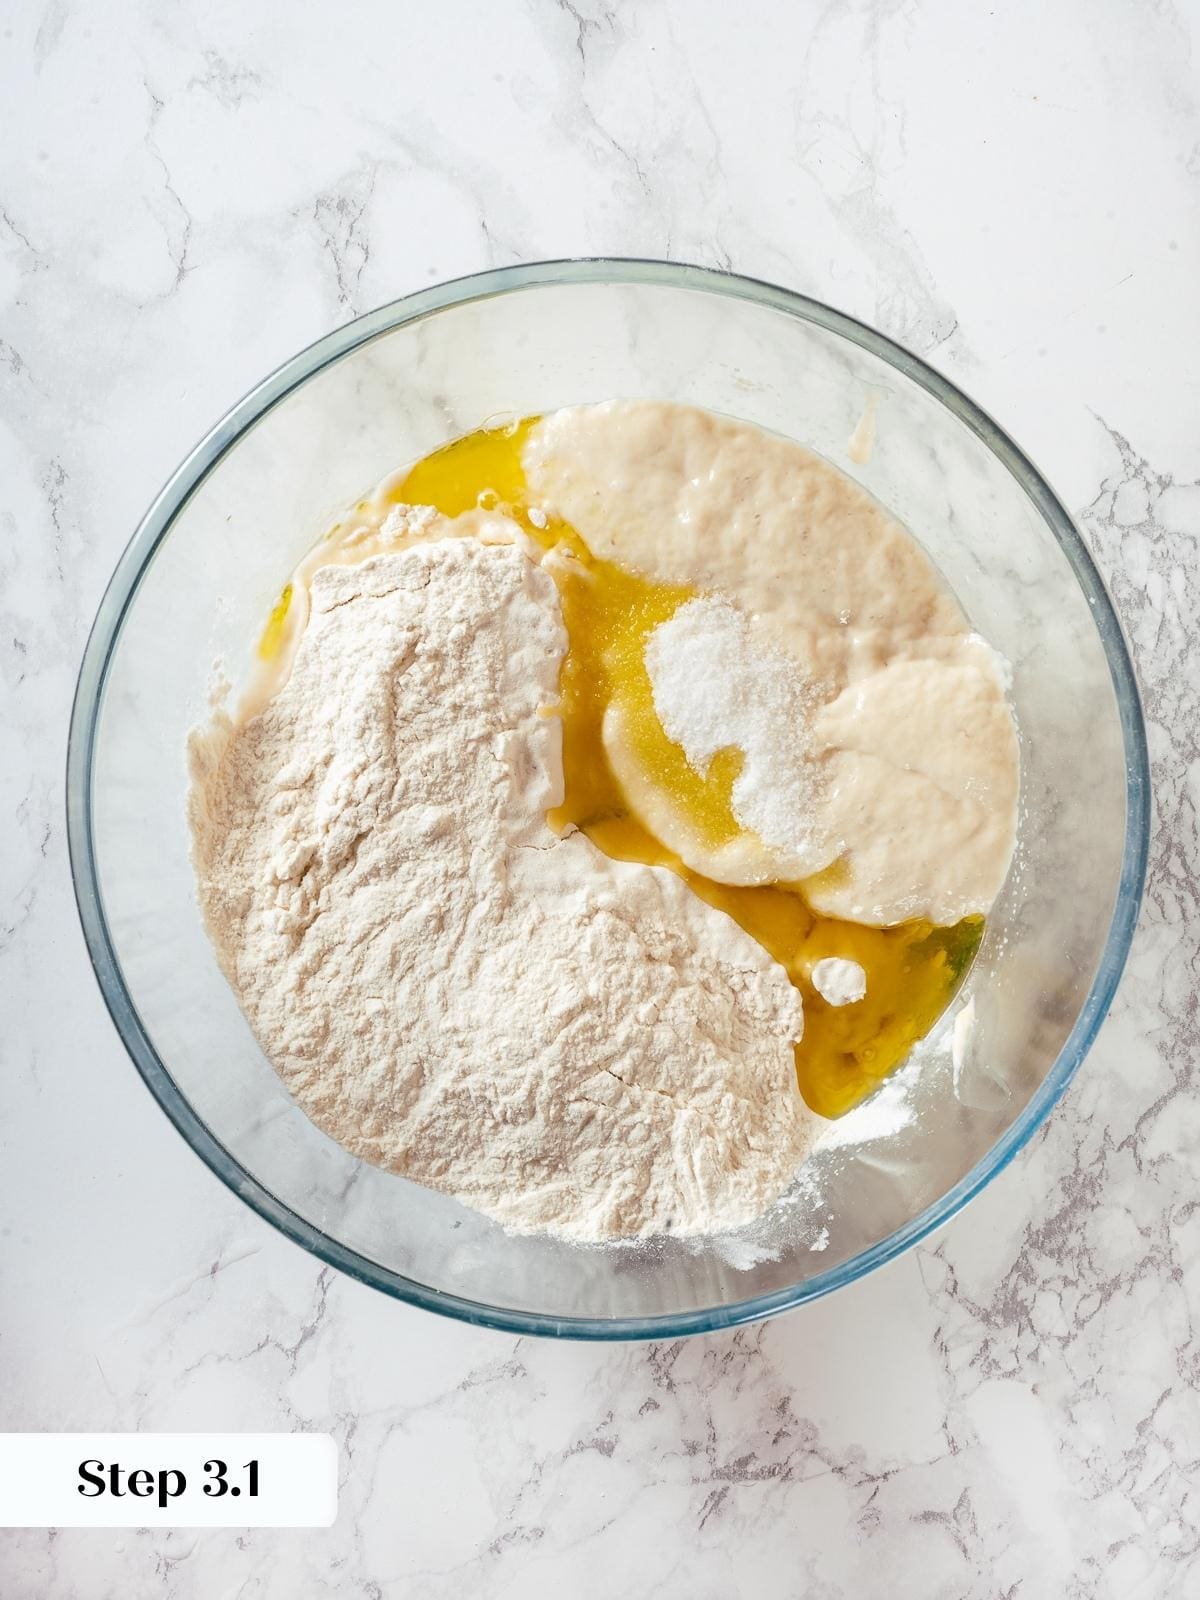
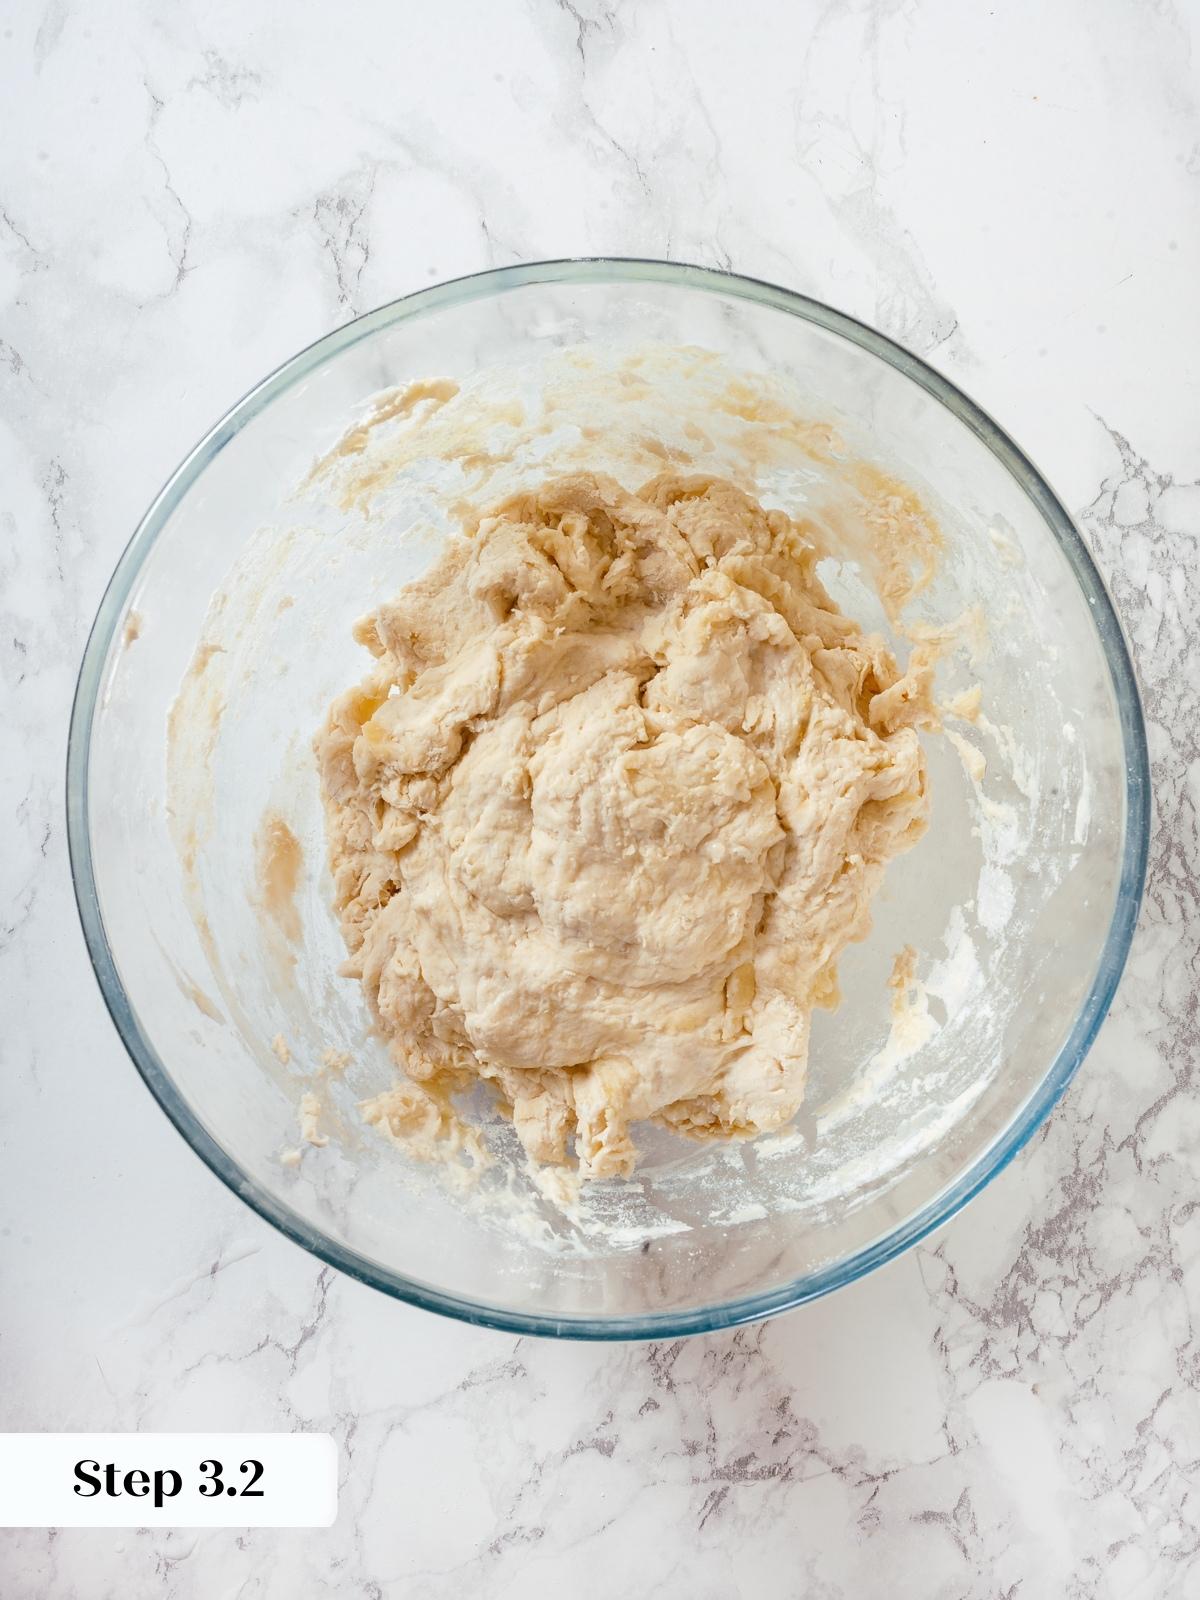
Step 3: Mix ingredients. In a large mixing bowl, combine the yeast mixture, sourdough discard, flour, salt and olive oil (photo 2). Stir the ingredients together with a spoon until a shaggy dough forms (photo 3).
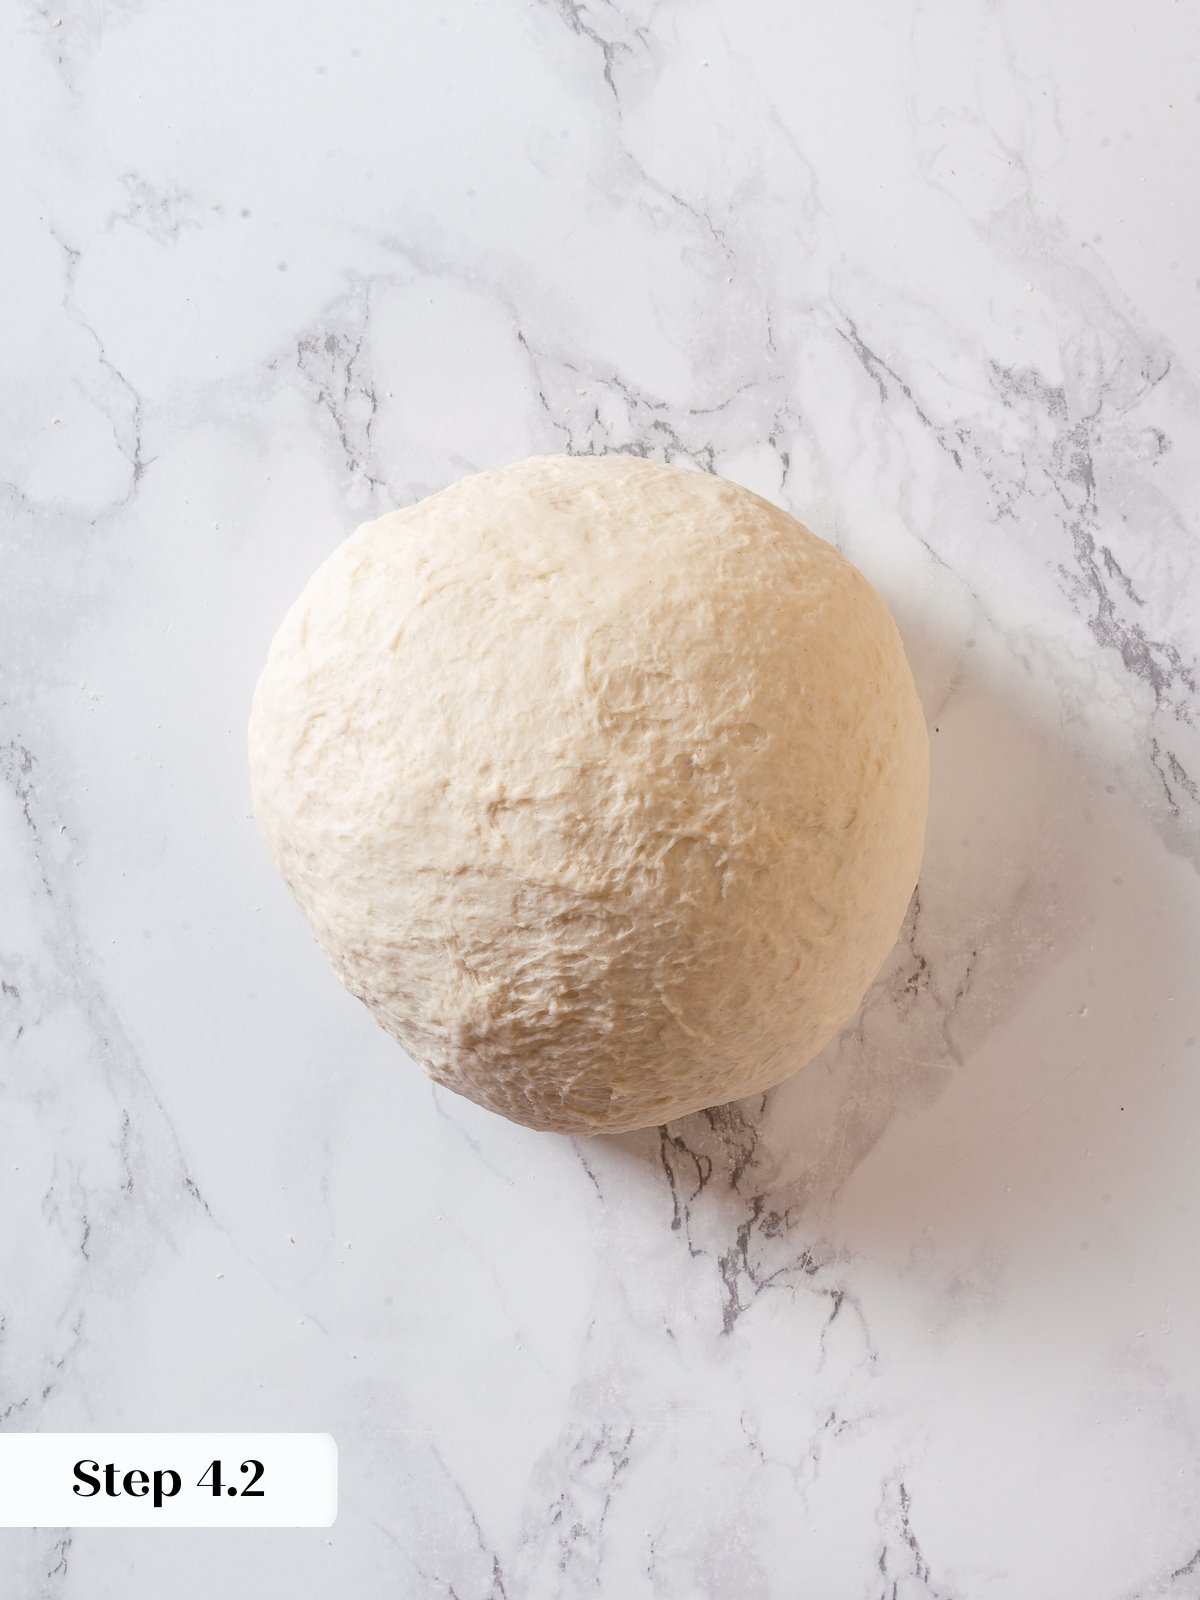
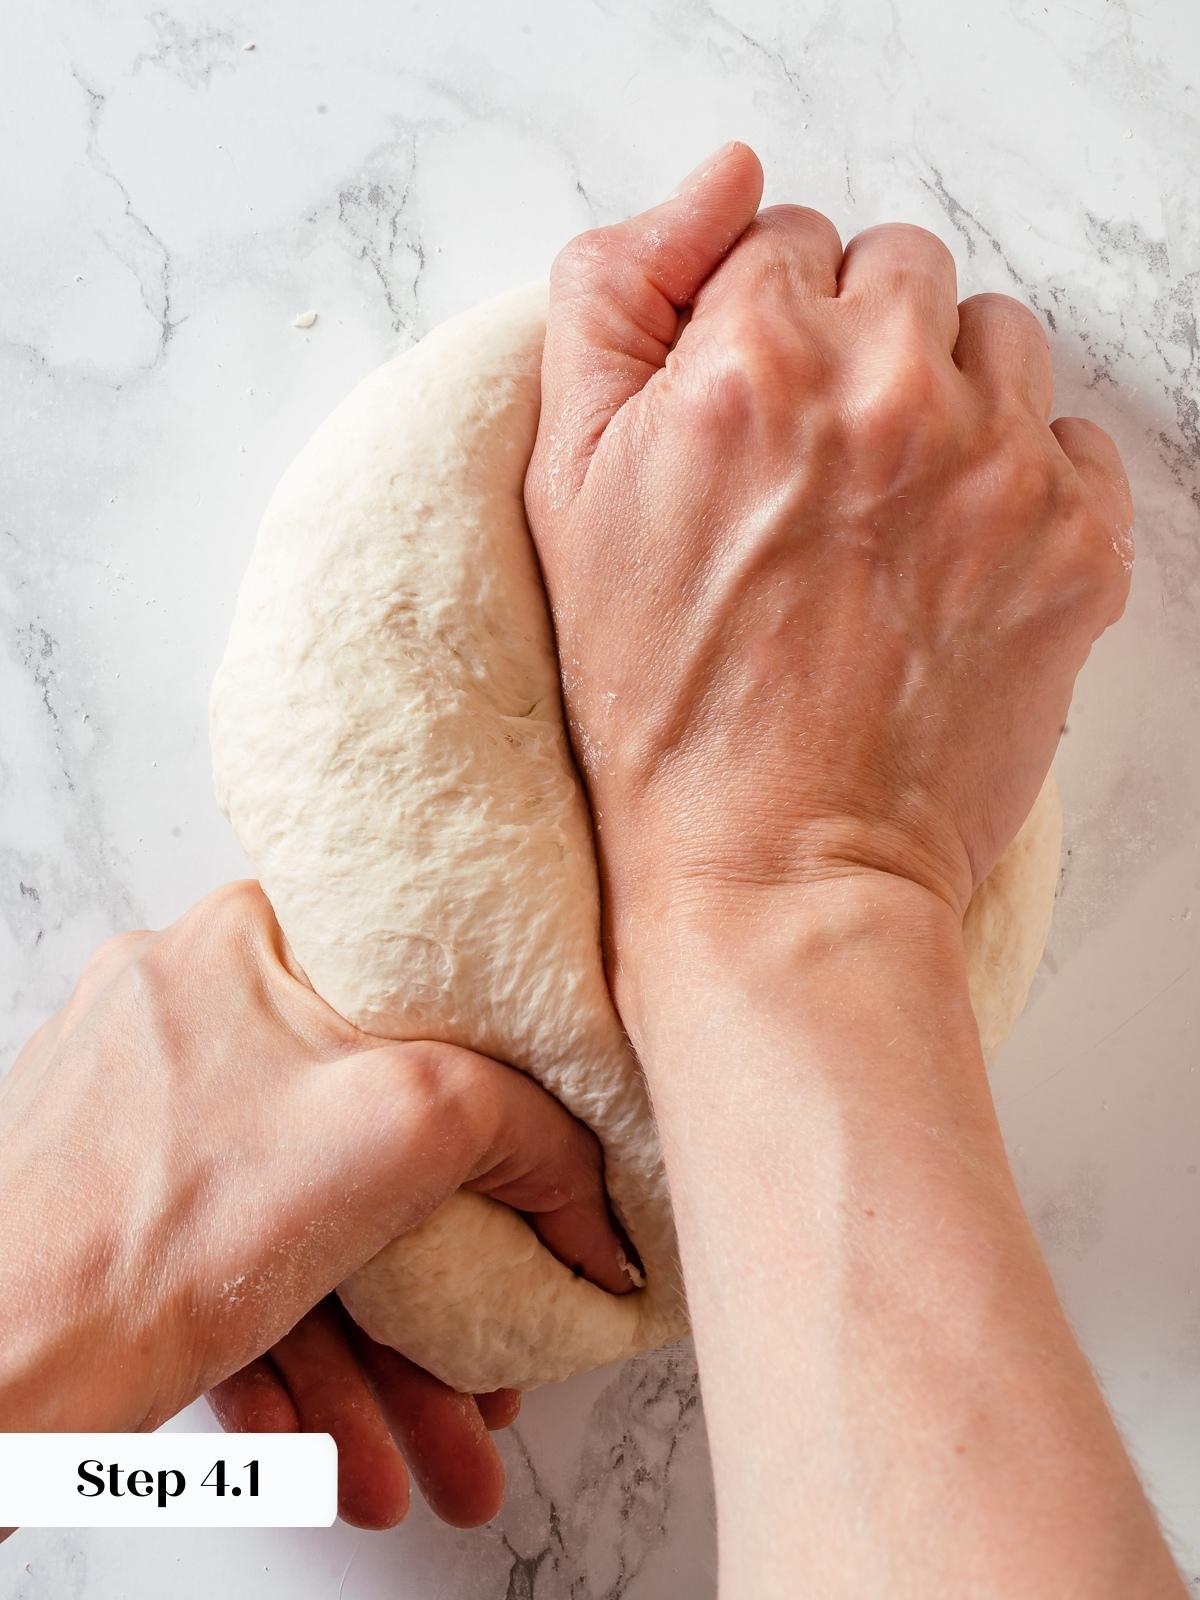
Step 4: Knead the dough. Turn out the dough onto an unfloured work surface, and knead by hand 3-4 minutes until a cohesive and semi-smooth dough forms (photo 4). It will still have a slightly rough surface but it will make a nice dough ball (photo 5). Bench rest 10 minutes covered.
At this point I knead this recipe purely by time. I set a 4 minute timer and then knead away. It will be slightly sticky at first but after a minute it will start to clean the dough off your hands and will become less and less sticky. By 4 minutes, you’ll have a nice, fairly smooth dough.
The bench rest does give it enough time to relax so you can easily final shape it. If instead using a stand mixer, let the dough hook do the kneading on low speed.
Step 5: Divide it into the desired number of portions, depending on the size of the pizzas you want to make. This recipe yields enough for 2 medium-sized pizzas or 4 individual pizzas.
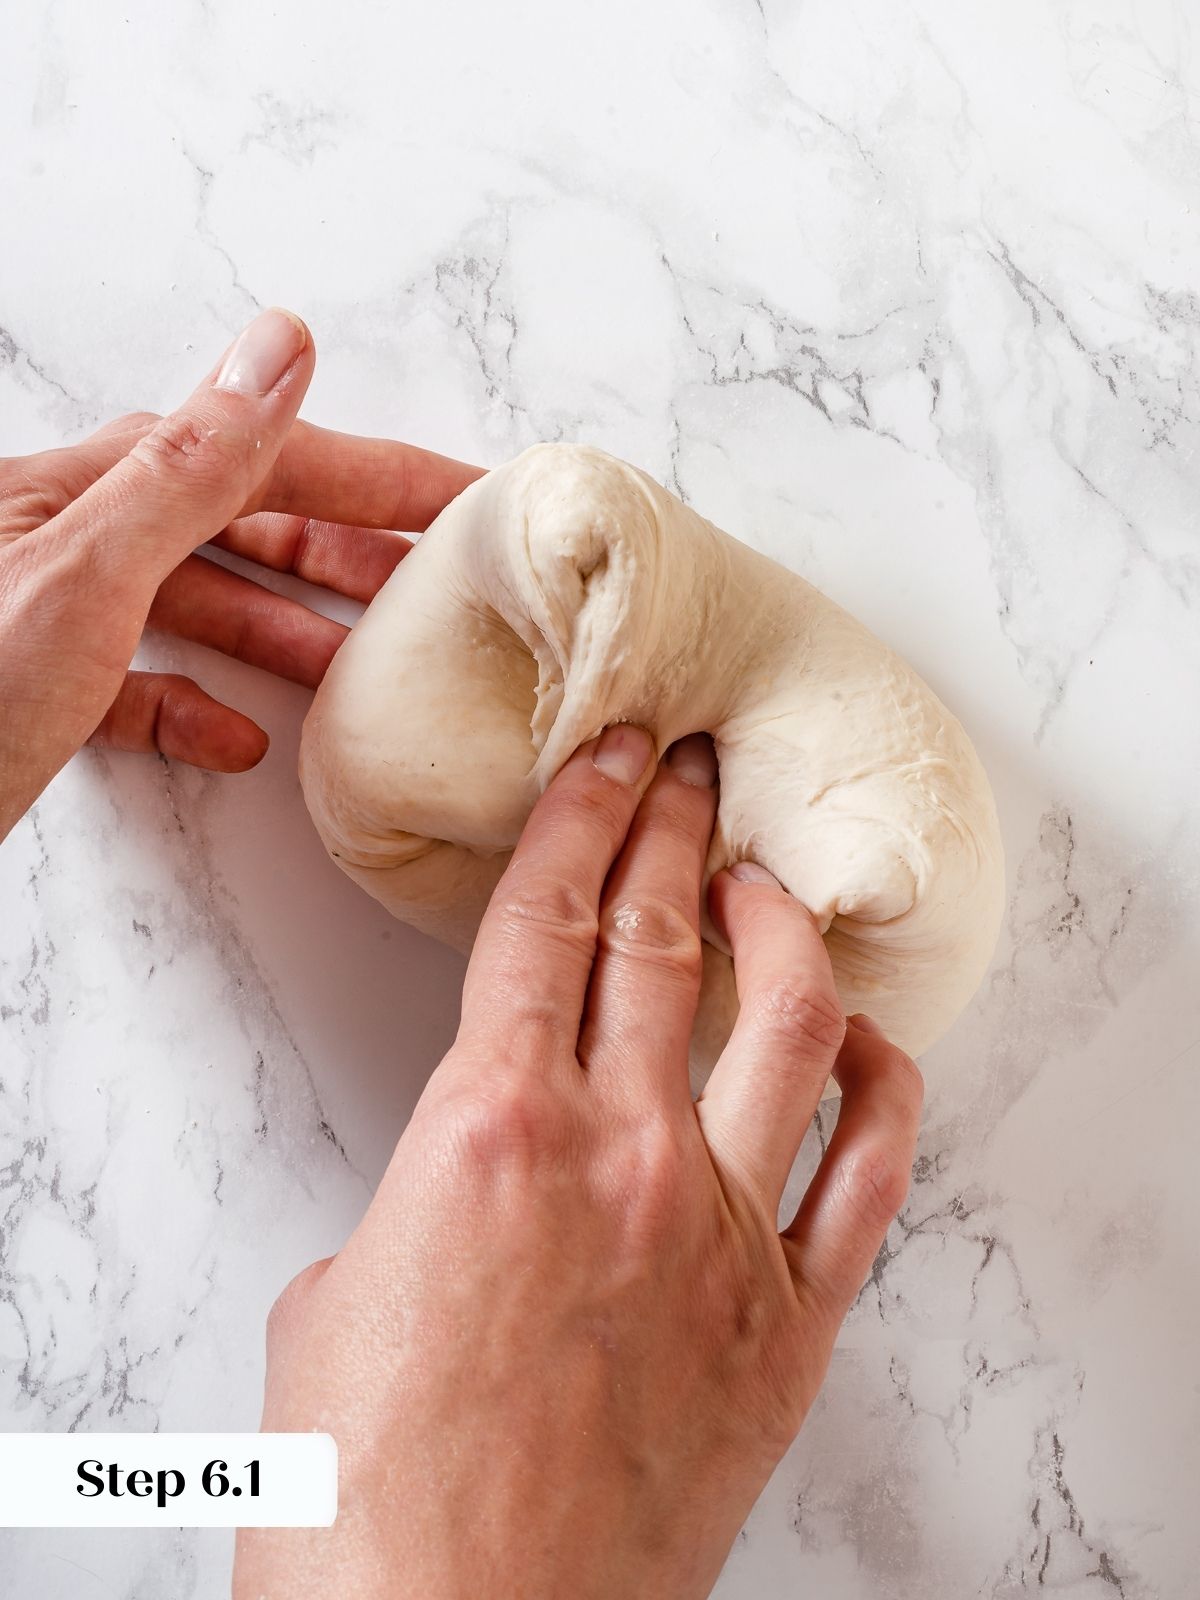
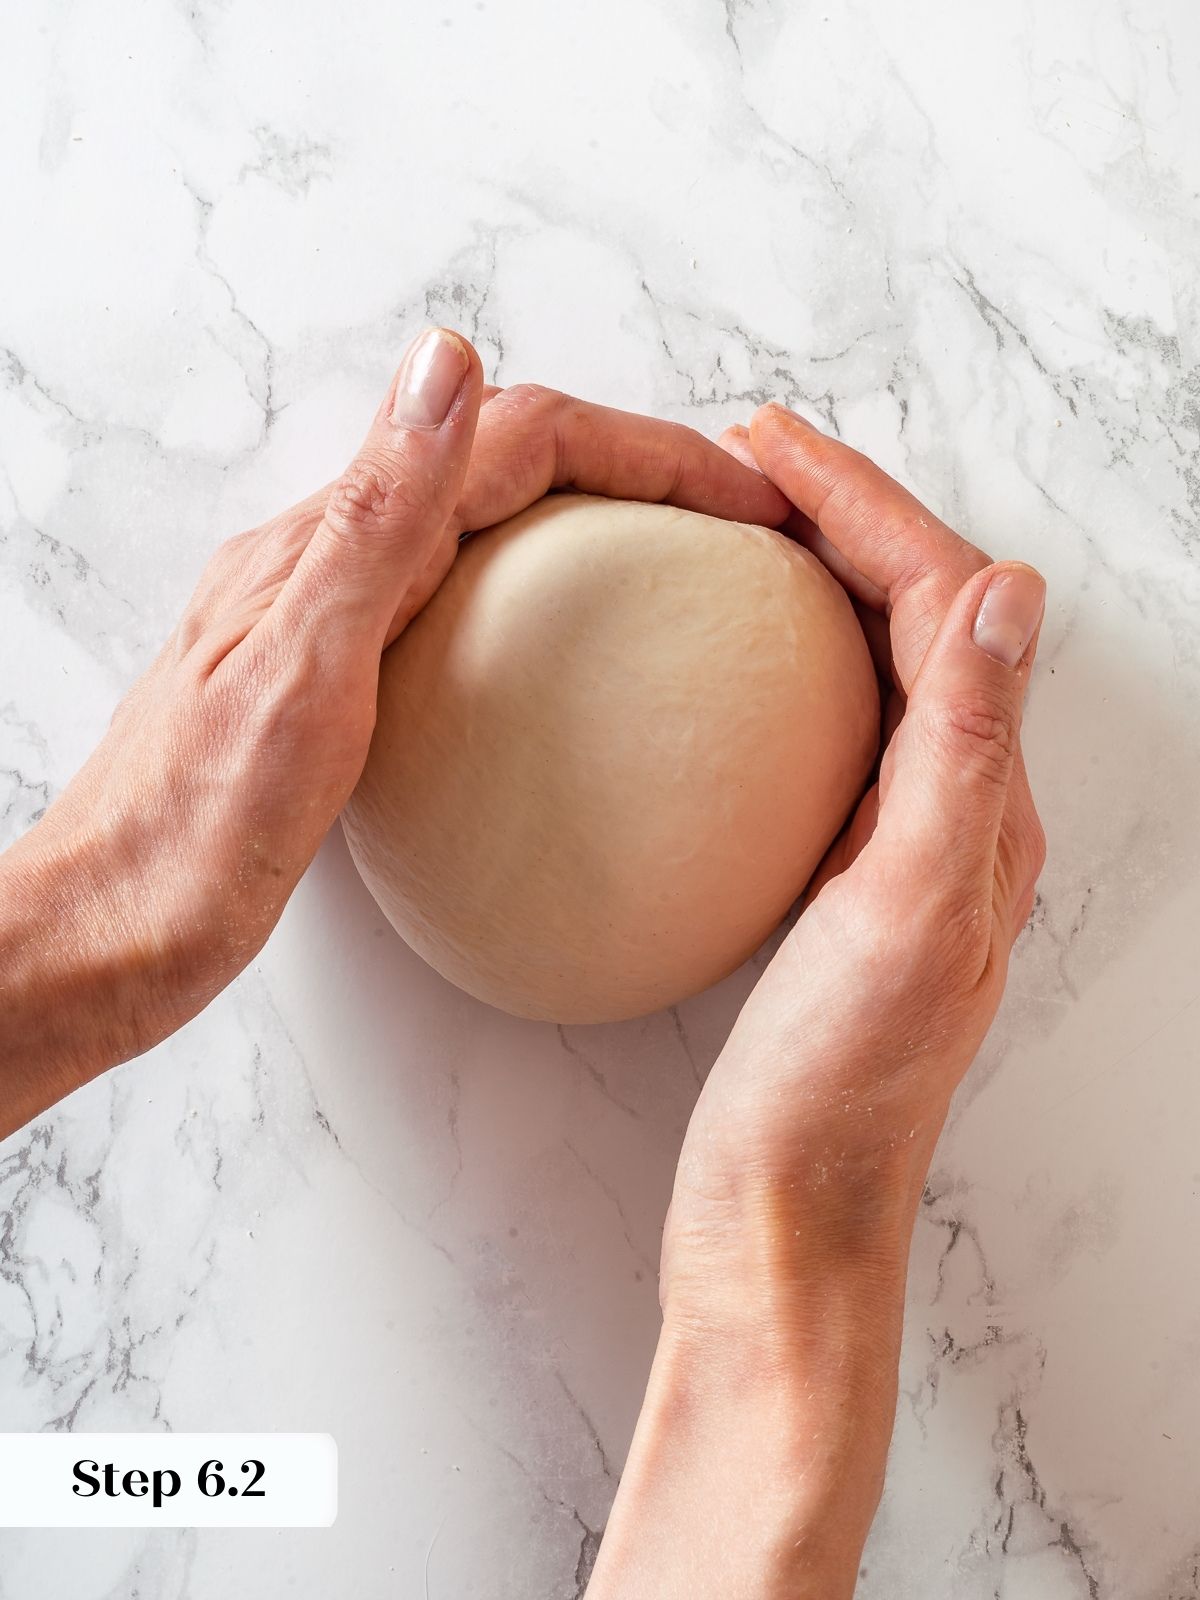
Step 6: Shape the dough: Start with one piece of dough and fold all four corners into the center (photo 6). Flip it over, seam-side down and then tighten the dough into a ball by cupping it in both hands and pulling it towards you (photo 7). Rotate and repeat. Place shaped dough on an oiled baking sheet and repeat with remaining pieces.
Step 7: Oil and wrap. Place each ball on the oiled sheet. Rub a little olive oil on the top of the dough. Wrap each tightly in plastic wrap (this prevents skin from forming on the dough) and place in the refrigerator for 24-72 hours.
Step 8: Remove from refrigerator. About 30 – 60 minutes before you plan to shape and cook the pizzas, remove the dough from the refrigerator.
After the dough rising period, allowing it to come to room temperature will give you bigger bubbles in the crust and it will be easier to shape. Let sit at room temperature for 2–4 hours before shaping for best results. I have found that the cold dough is actually more difficult to stretch and shape and the crusts do not rise as much during the baking even in a pizza oven.
How to shape this pizza dough:
Step 9: Preheat oven and prep ingredients. Before I shape and build my first pizza, one of my personal preferences is to make sure I have all of my ingredients on hand and my oven is preheated to at least 500°F with a stone or baking sheet inside.
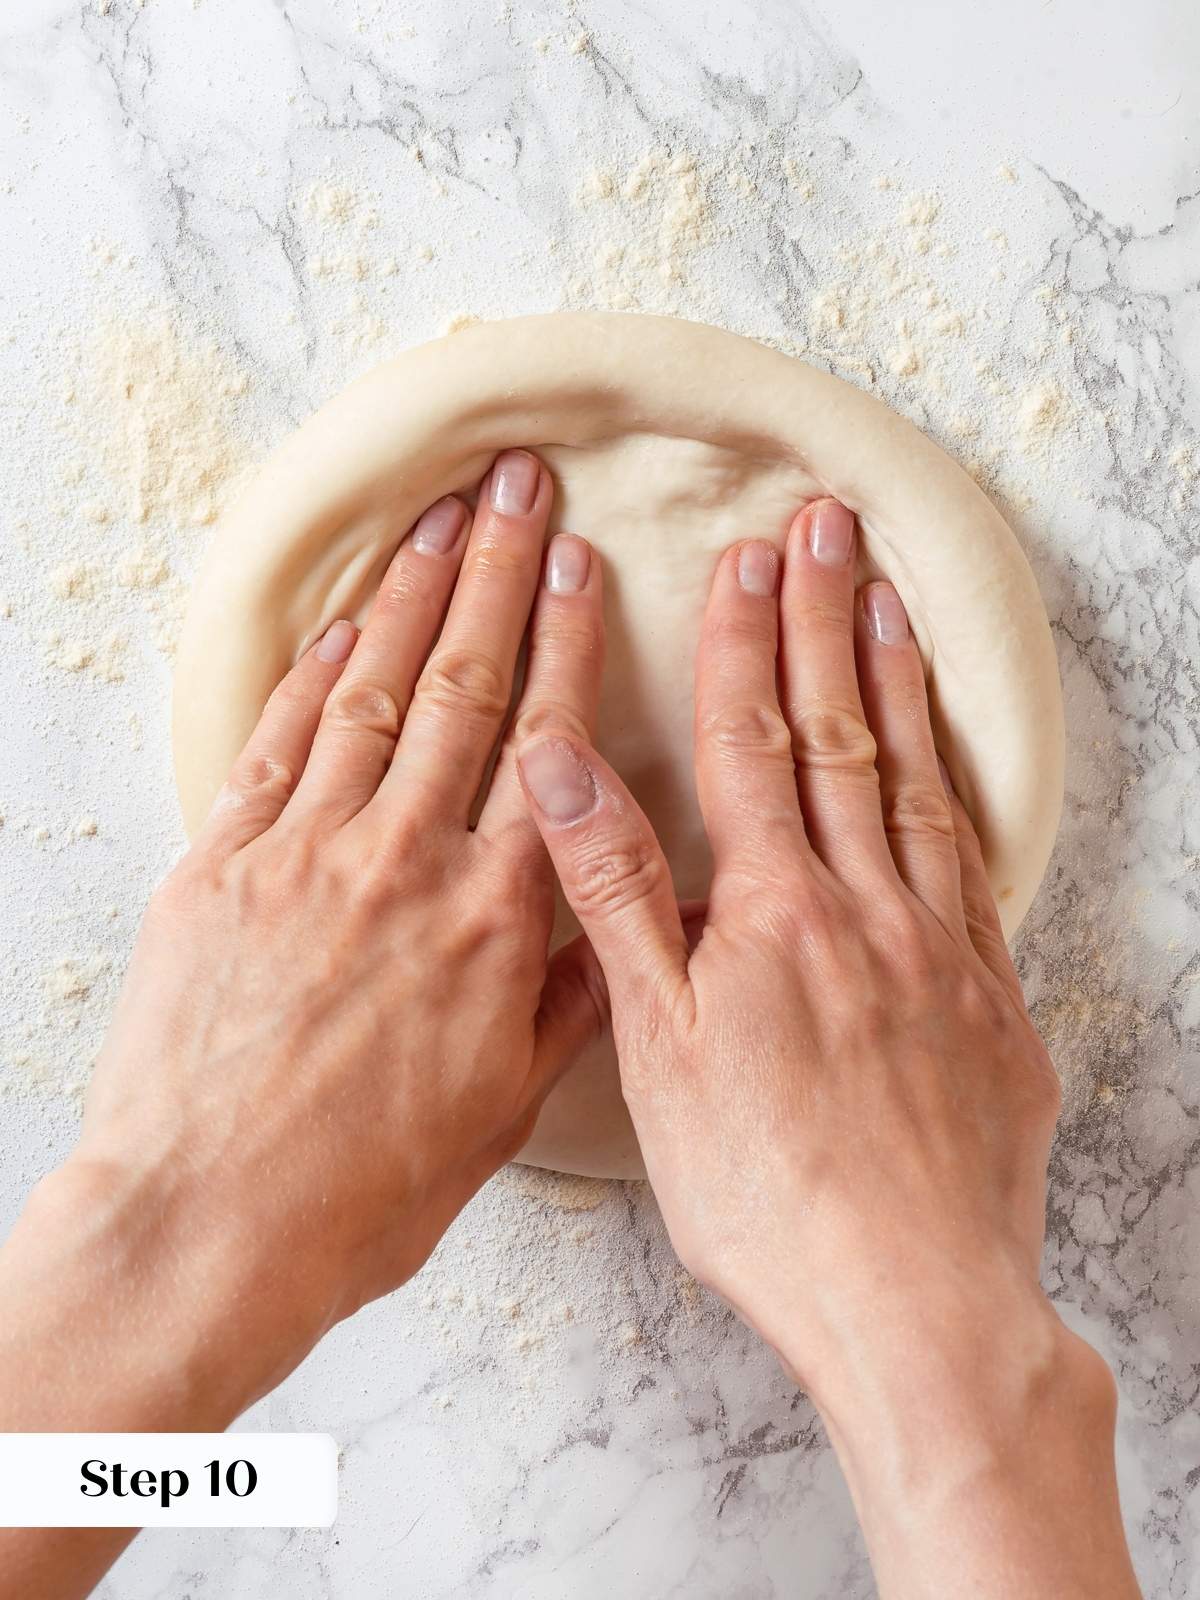
Step 10: Prep the dough. Lightly dust a work surface with semolina flour. Take one piece of dough and place on the semolina. Lightly flour your hands in either Caputo flour or semolina and make an indentation around the dough where you want the crust to end (photo 8). This allows you to maintain a fatter crust while you thin and stretch the rest of the pizza dough. I typically make the crust about ½ inch thick for a 12 inch pizza, but it is up to you. A thinner crust will allow you to make a larger pizza but you will not get as thick and fluffy a crust.
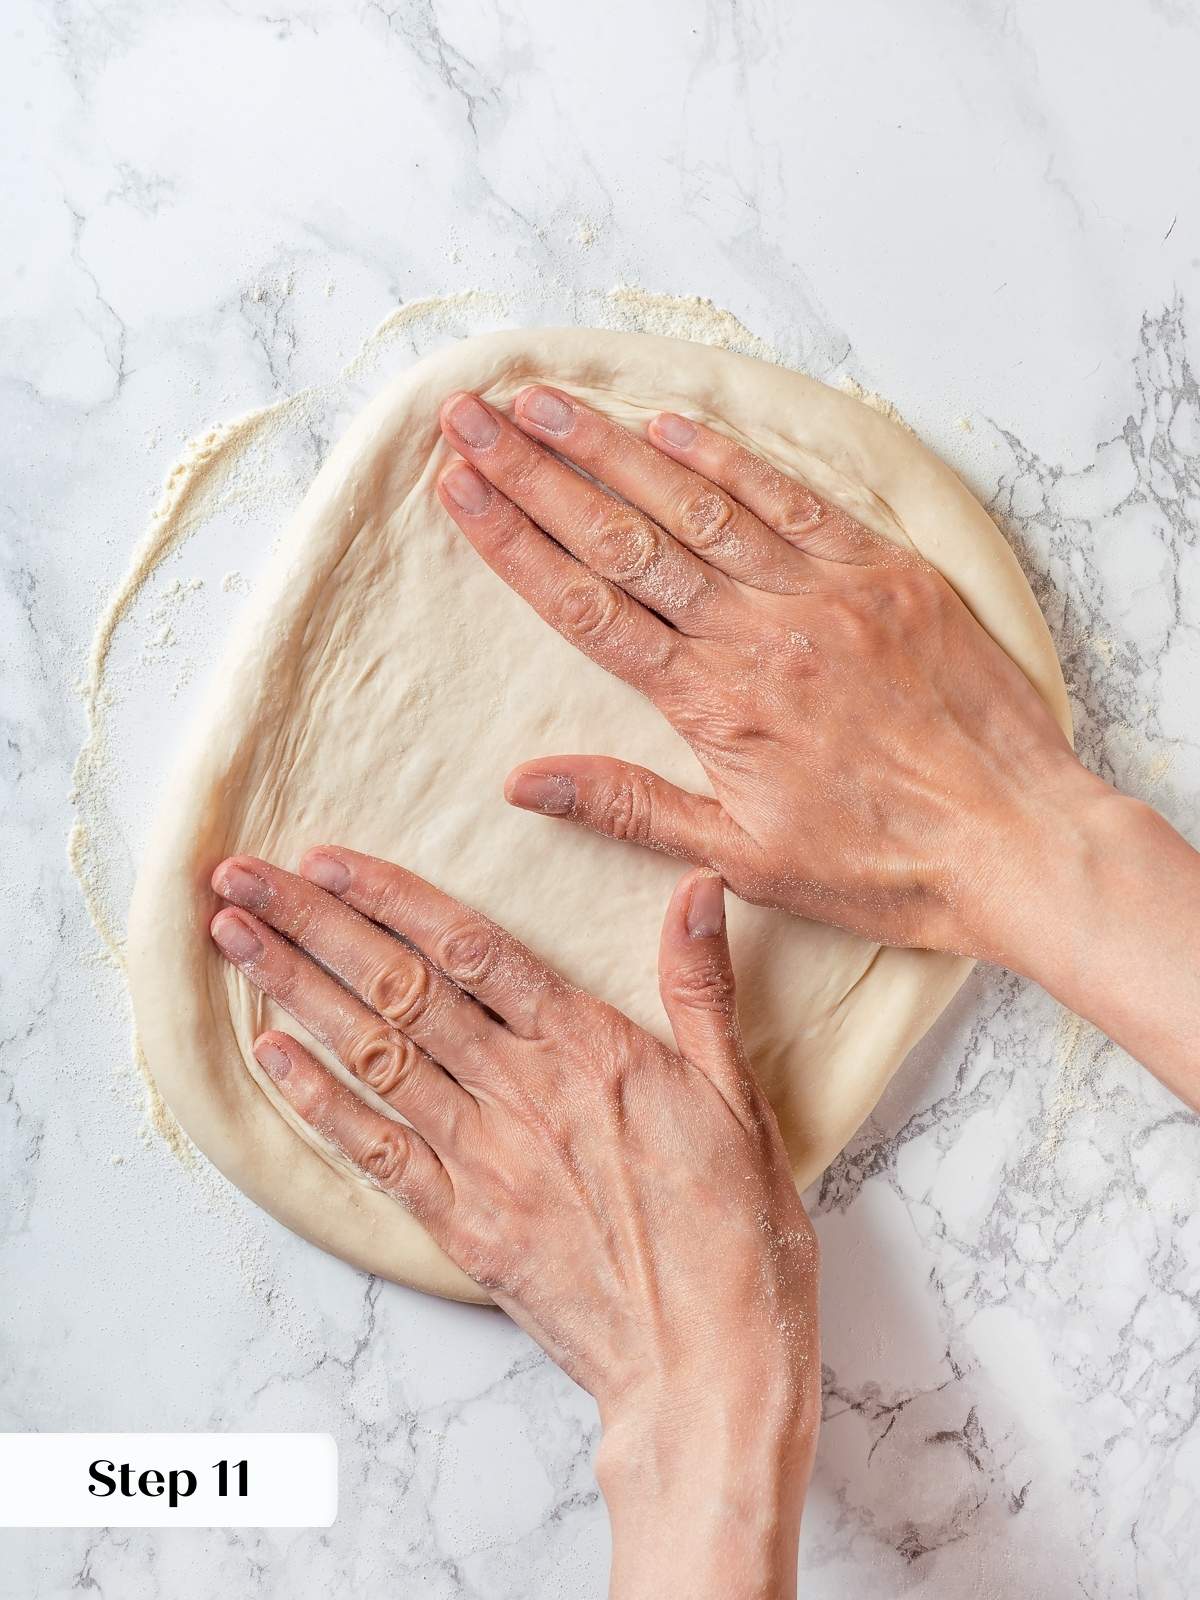

Step 11: Stretch the dough. Starting from the outside edges, underneath the crust indentation, gently begin stretching the dough by placing the fingers of both hands on the dough and pulling apart while it is still resting on the work surface (photo 9). Rotate the dough counter clockwise and then repeat the stretching and pulling, gradually making the pizza larger and the center dough thinner.
If you make one spot too thin, it will not support the toppings and will essentially make a hole in your pizza when you remove it from the oven. It will still taste great, so just try to make it a little thicker the next time.
Step 12: Stop when your pizza diameter is approximately 10-12 inches.
You can make a larger pizza, but it will be crispier and the thin crust will be crunchy. If you want a thin-crust pizza, great, but if you are looking for a New York slice, try to stay under a foot wide.
Step 13: Transfer the pizza with extra bench flour or semolina onto a pizza peel for easy transfer and a nice crispy crust. I like to build the pizza on the peel to maintain the shape and make it easier!
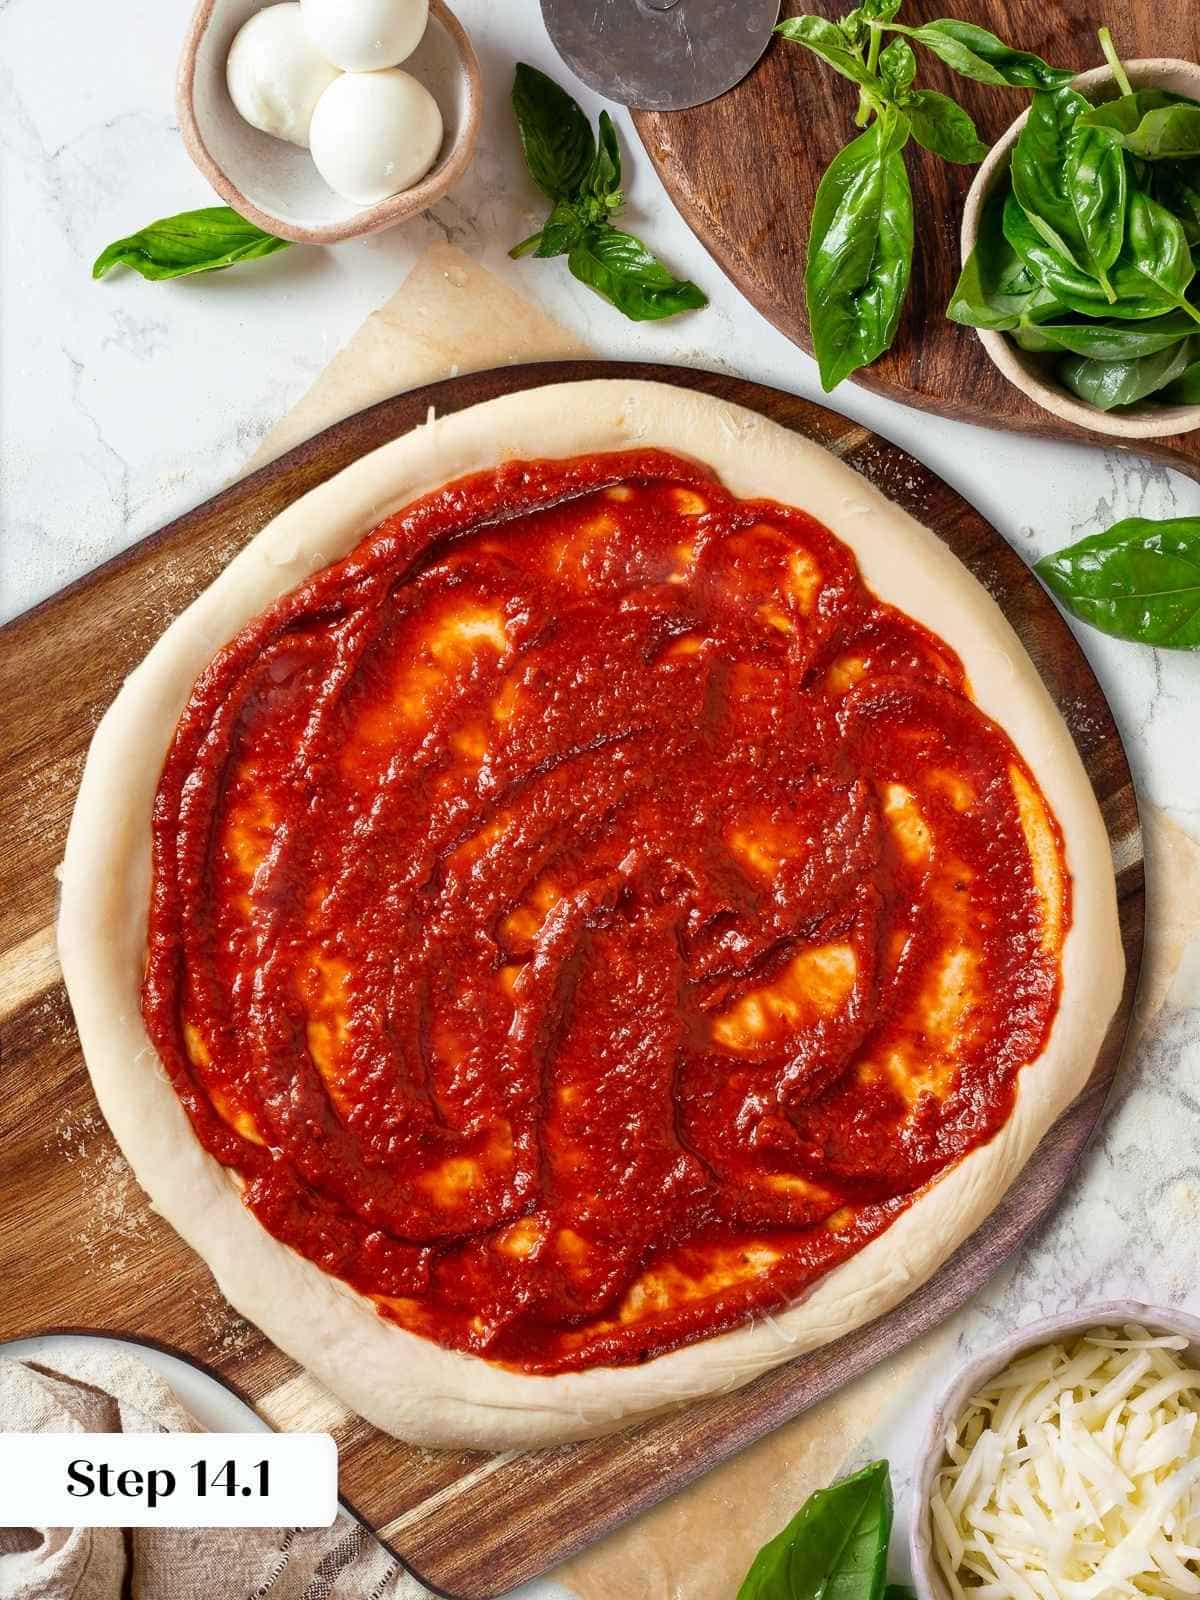
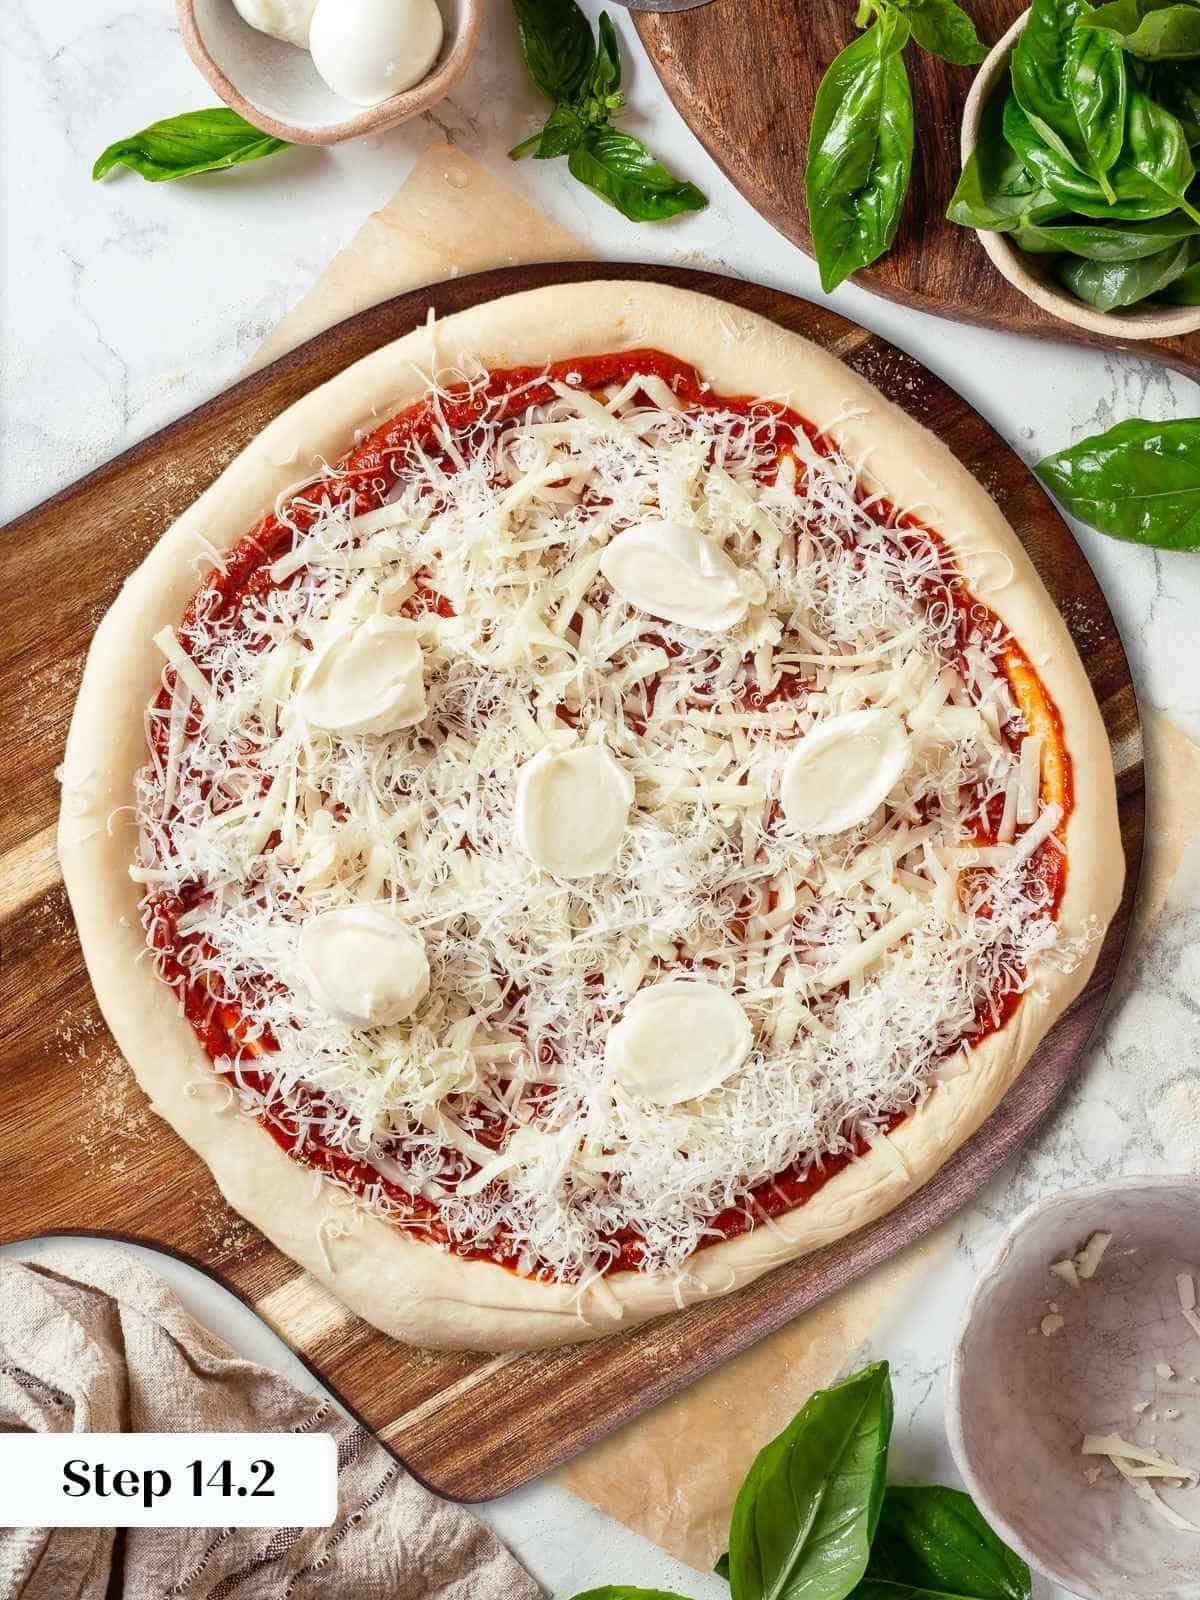
Step 14: Add toppings. Spread up to 1/3 cup pizza sauce on the pizza (photo 10), top with shredded low-moisture mozzarella and any other desired toppings (photo 11).
Favorite toppings in my house include: fresh sliced mozzarella, sliced mushrooms, onions and peppers; pepperoni or homemade turkey sausage; and leftover vegetables. Ok, maybe the last one is just me trying to sneak more veggies on my son and husband’s pizza!
How to bake:
Step 15: Give the pizza peel a little shake to check and make sure that the pizza moves freely. If not, the trick is to lift and toss a little flour or semolina under the spot that is sticking.
Step 16: Slide pizza into oven. Open the door of the preheated oven and slide the pizza onto the preheated pizza stone using the peel. I find it easiest to line it up in the back and let it slide off the peel into place as you remove the peel. Alternately just put the baking sheet with the pizza in the preheated oven.
Step 17: Bake. 500°F is hot, so a pizza of this size will bake quickly. It will only take 5-7 minutes on a pizza stone. Baked on a baking sheet, it will be closer to 8-10 minutes.
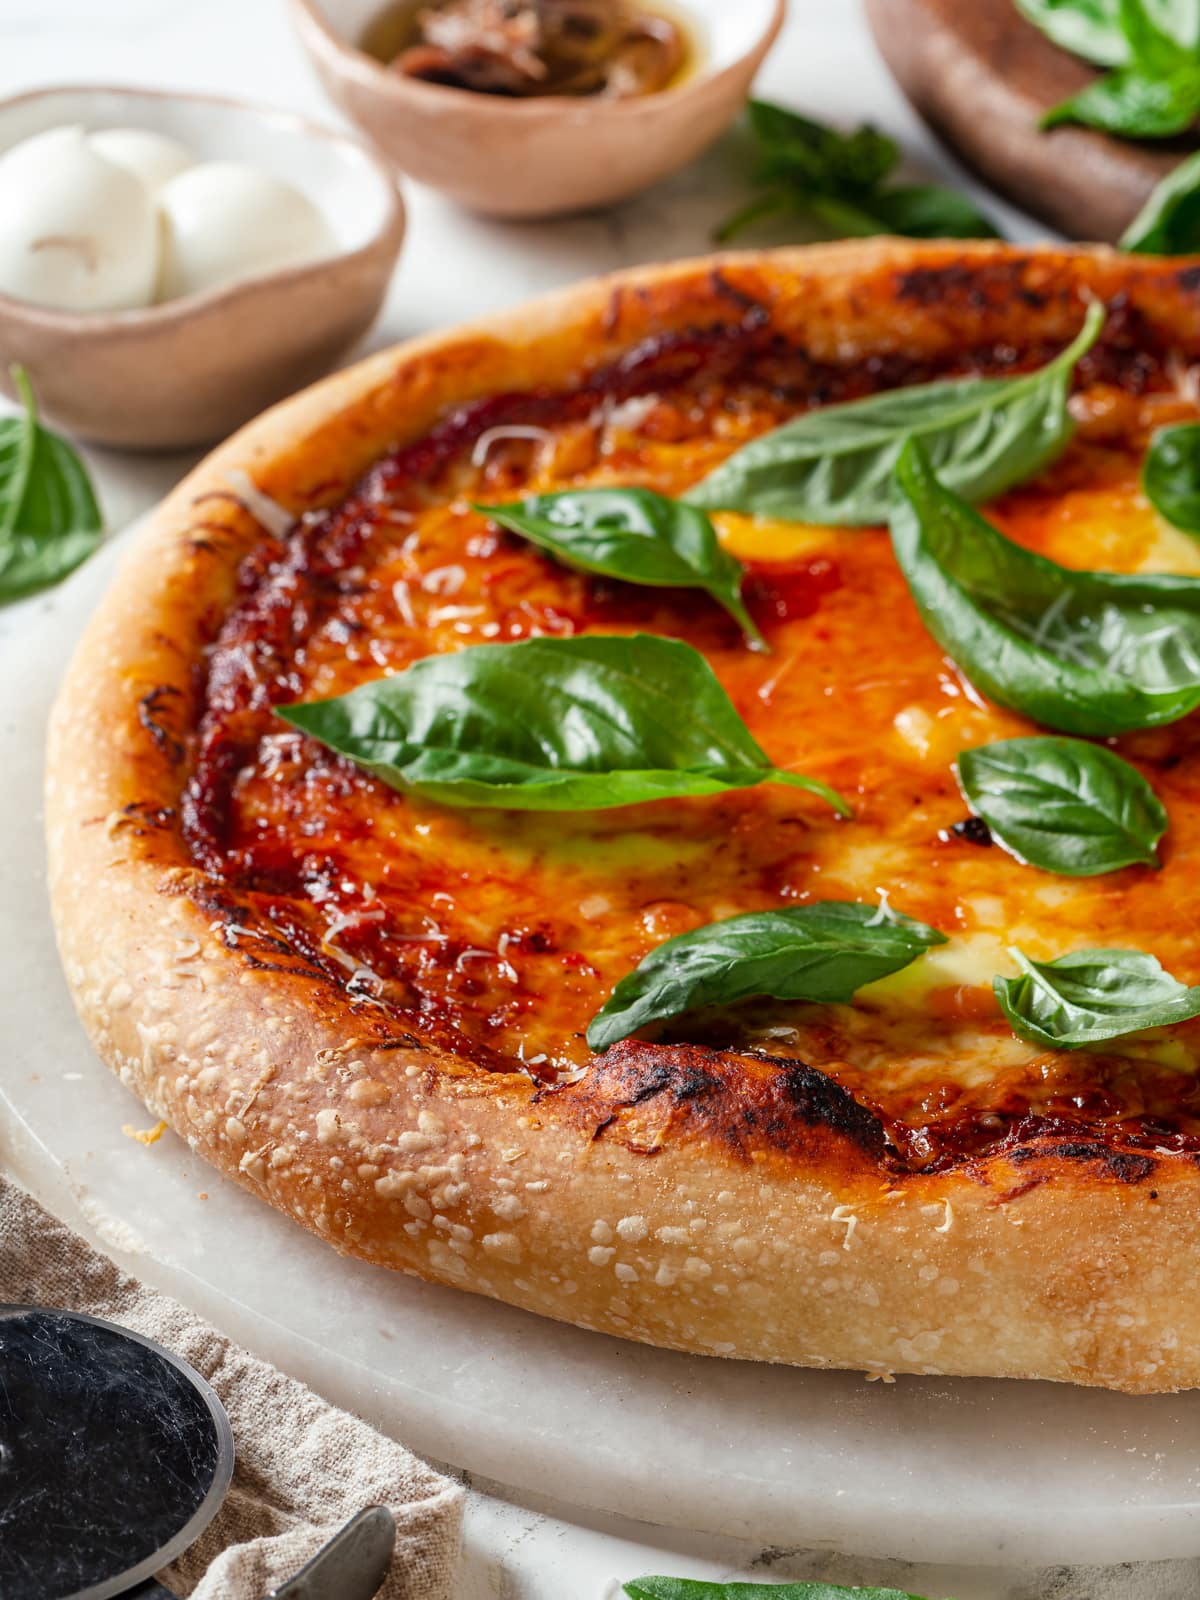
Step 18: Check for doneness. When the pizza crust is golden brown and puffed, take a peek underneath the crust using tongs. If the bottom is crispy and golden, then the pizza is done (photo 12)!
Step 19: Remove and slice. Use tongs to remove it from the stone, or oven mitts to remove the baking sheet from the oven. Use tongs to transfer the pizza to a cutting board, and slice!
Eat hot! But not too hot, we’ve all burned the roof of our mouth and aren’t looking for 1st degree burns from cheese.
Recipe FAQs
You can leave the dough well-wrapped or in an airtight container in the refrigerator for up to 72 hours. I find 36–48 hours ideal for the best flavor and texture.
After 72 hours, the dough may become overproofed and develop a sour flavor that’s too strong.
You can take the dough, wrap it in plastic wrap or freezer-safe bags and then put it in your freezer and it’ll keep frozen for two months, so you can enjoy fresh homemade pizza anytime. I do recommend freezing the dough immediately for the longest storage.
Recommended Recipes for Top Pizzas

Yeast Breads

Lunch & Dinners

Lunch & Dinners

Yeast Breads
If you enjoyed this recipe, please leave a star rating and let me know how it goes in the comments below! I love hearing from you and your comments make my day!
Sourdough Discard Pizza Dough

Ingredients
- 2 ¼ teaspoons dry active yeast, 1 packet
- 1 cup sourdough starter discard
- ¾ cups warm water, around 110°F or 43°C
- 2 ¾ cups all-purpose flour*
- 2 teaspoons kosher salt
- 2 tablespoons olive oil
- semolina flour, for shaping, optional
Instructions
- Oil a rimmed baking sheet with olive oil (you can line it with parchment paper first, if you want); set aside.
- In a small mixing bowl combine the active dry yeast and warm water. Let sit 5-10 minutes.
- In a large mixing bowl, combine the yeast mixture, sourdough discard, flour, salt and olive oil. Stir the ingredients together with a spoon until a shaggy dough forms
- Turn out the dough onto an unfloured work surface, and knead by hand 3-4 minutes until a cohesive and semi-smooth dough forms. It will still have a slightly rough surface but it will make a nice dough ball. Bench rest 10 minutes covered.
- Divide it into the desired number of portions, depending on the size of the pizzas you want to make. This recipe yields enough for 2 medium-sized pizzas or 4 individual pizzas.
- Shape the dough: Start with one piece of dough and fold all four corners into the center. Flip it over, seam-side down and then tighten the dough into a ball by cupping it in both hands and pulling it towards you. Rotate and repeat. Place shaped dough on an oiled baking sheet and repeat with remaining pieces.
- Place each ball on the oiled sheet. Rub a little olive oil on the top of the dough. Wrap each tightly in plastic wrap (this prevents skin from forming on the dough) and place in the refrigerator for 24-72 hours.
- About 30 – 60 minutes before you plan to shape and cook the pizzas, remove the dough from the refrigerator.
How to shape this pizza dough:
- Before I shape and build my first pizza, one of my personal preferences is to make sure I have all of my ingredients on hand and my oven is preheated to at least 500°F with a stone or baking sheet inside.
- Lightly dust a work surface with semolina flour. Take one piece of dough and place on the semolina. Lightly flour your hands in either Caputo flour or semolina and make an indentation around the dough where you want the crust to end. This allows you to maintain a fatter crust while you thin and stretch the rest of the pizza dough. I typically make the crust about ½ inch thick for a 12 inch pizza, but it is up to you. A thinner crust will allow you to make a larger pizza but you will not get as thick and fluffy a crust.
- Starting from the outside edges, underneath the crust indentation, gently begin stretching the dough by placing the fingers of both hands on the dough and pulling apart while it is still resting on the work surface. Rotate the dough counter clockwise and then repeat the stretching and pulling, gradually making the pizza larger and the center dough thinner.
- Stop when your pizza diameter is approximately 10-12 inches.
- Transfer the pizza with extra bench flour or semolina onto a pizza peel for easy transfer and a nice crispy crust. I like to build the pizza on the peel to maintain the shape and make it easier!
- Spread up to 1/3 cup pizza sauce on the pizza, top with shredded low-moisture mozzarella and any other desired toppings. Favorite toppings in my house include: fresh sliced mozzarella, sliced mushrooms, onions and peppers; pepperoni or homemade turkey sausage; and leftover vegetables. Ok, maybe the last one is just me trying to sneak more veggies on my son and husband’s pizza!
How to bake:
- Give the pizza peel a little shake to check and make sure that the pizza moves freely. If not, the trick is to lift and toss a little flour or semolina under the spot that is sticking.
- Open the door of the preheated oven and slide the pizza onto the preheated pizza stone using the peel. I find it easiest to line it up in the back and let it slide off the peel into place as you remove the peel. Alternately just put the baking sheet with the pizza in the preheated oven.
- 500°F is hot, so a pizza of this size will bake quickly. It will only take 5-7 minutes on a pizza stone. Baked on a baking sheet, it will be closer to 8-10 minutes.
- When the pizza crust is golden brown and puffed, take a peek underneath the crust using tongs. If the bottom is crispy and golden, then the pizza is done!
- Use tongs to remove it from the stone, or oven mitts to remove the baking sheet from the oven. Use tongs to transfer the pizza to a cutting board, and slice!
Notes
Nutrition
Nutrition information is automatically calculated, so should only be used as an approximation.
 Like this recipe? Rate & comment below!
Before You Go
I hope you enjoyed this homemade pizza night upgrade. Why not check out our other delicious, sourdough recipes next?


Amazing dough! We will definitely make this again and again
Hi Kristi! I’m so glad you loved it! Thanks for baking along! ~gvd team
I’m still pretty new to sourdough, so hand-kneading this shaggy dough just 3–4 minutes felt doable. It think it was letting it rest in the fridge that gave me a crust with bubbles and chew I’ve never had in homemade pizza before. Can’t wait to make it again!