This beer pizza dough comes together with one bowl, a simple knead, and a single rise for a crust that’s crispy on the bottom, chewy in the middle, and genuinely flavorful all the way through.
A Quick Look At The Recipe
This is a brief summary of the recipe. Jump to the recipe to get the full details.
Prep Time
15 minutes
Cook Time
21 minutes
Proof/Rest Time
2 hours
Servings
24 slices
Difficulty
Intermediate
Calories *
96 kcal per serving
Technique
Yeasted dough, baked.
Flavor Profile
Savory, malty, slightly yeasty, crispy-edged.
* Based on nutrition panel
“I used a dark amber ale and the crust had so much more flavor than any pizza dough I’ve made before. The 30-minute rest before baking made a noticeable difference in the thickness and chew.”
⭐⭐⭐⭐⭐
Marcus
Why You Will Love This Recipe
- Real flavor in the crust. Most pizza dough is bland on its own, but this one has a savory, malty depth from the beer. The stronger the beer you use, the more pronounced that flavor gets. Grab a Guinness and make this pizza and this Guinness chocolate cake for dessert!
- Two crusts from one batch. This recipe makes enough dough for two full pizzas, so you can bake one tonight and freeze the other. It’s practical without any extra effort.
- You control the thickness. Bake it immediately after shaping for a thin, crispy crust, or let it rest for 30 minutes for a thicker, chewier crust. Same dough, two completely different results depending on what you’re in the mood for.
- Flexible flour options. The base recipe works with all-purpose flour, or you can swap in semolina for extra crispness or whole wheat for a nuttier flavor. If you love trying different pizza dough variations, my whole wheat pizza dough(coming soon!) is another great one to have in your back pocket.
Pizza night at our house almost always starts with homemade dough, and this beer pizza dough has become the one I reach for the most. There’s something about the way the beer works into the dough that makes the whole crust taste like it actually has something to say.
It’s the kind of recipe that works just as well on a Tuesday night as it does when you’re feeding a crowd on the weekend. If you’re a fan of baking with beer, my beer bread uses the same idea in a totally different direction, and it’s worth having in your repertoire too.
Ingredients & Substitutions
- Unbleached All-Purpose Flour: This is the base of the dough and gives the crust its chewy, sturdy structure. You can swap in semolina for a portion of the flour for a crispier, more golden crust, or use whole wheat flour in place of part of it for a nuttier, heartier result.
- Instant Yeast: This is what makes the dough rise and gives the crust a light, airy crumb. The most common mistake here is using active dry yeast and treating it the same way — instant yeast goes straight into the dry ingredients with no proofing step needed, so trust the process and just add it in.
- Baking Powder: A small amount works alongside the yeast to give the crust a little extra lift. It’s especially helpful if you want a thicker, fluffier result.
- Salt: Salt controls fermentation and sharpens every other flavor in the dough. Don’t skip it or reduce it — a flat-tasting crust is almost always a salt issue.
- Olive Oil: Oil tenderizes the crumb and keeps the crust from turning too tough or dry as it bakes. It also helps the dough come together smoothly during mixing.
- Beer: This is the liquid that brings everything together, and it does more than just hydrate the dough. The carbonation helps with texture, and the malt and hop flavors carry through into the finished crust — a stronger, more full-flavored beer gives you a noticeably more complex result. If you love baking with beer, my stout bread is another great place to put a bold dark beer to work.
Variations for Beer Pizza Dough
- Herb and Garlic Crust: Press minced garlic and fresh rosemary or oregano into the stretched dough before baking. The herbs crisp up in the hot oven and make the crust worth eating on its own.
- Thick Pan Pizza: After shaping, press the dough into an oiled rimmed baking sheet and let it rest the full 30 minutes before topping and baking. You get a soft, pillowy interior with crisp, golden edges — closer to a focaccia-style base than a traditional thin crust. If you love that style, my easy no-knead focaccia recipe uses a similar approach.
- Pizza Rolls: Divide the risen dough into smaller pieces, fill with your favorite toppings, and roll each one closed before baking. It’s the same dough in a completely different format, and they’re great for a crowd.
- Dark Beer Crust: Swap in a stout or porter for a deeper, more roasted flavor in the finished crust. It pairs especially well with toppings like caramelized onion, mushrooms, or sharp cheese.
Professional Tips for Perfect Beer Pizza Dough
- Don’t skip the pre-bake. Baking the bare crust for about 5 minutes before adding any toppings is the step that prevents a soggy bottom. It sets the crust’s structure so the sauce doesn’t seep in and weigh everything down once the toppings are added.
- Let the dough rest before topping if you want a thicker crust. That 30-minute rest after shaping isn’t just for convenience — the dough relaxes and puffs slightly, giving you a noticeably airier result. If you skip it and bake immediately, you’ll get a thinner, crisper crust, which is also great but a different outcome entirely.
- Let the pizza rest before slicing. Ten minutes out of the oven feels like a long time when you’re hungry, but it gives the cheese and toppings time to set so your slices actually hold together. Cut too soon, and everything slides off with the first piece.
How to Make Beer Pizza Crust
Use these step-by-step instructions to make a chewy, flavorful homemade pizza crust with a beautifully crispy bottom. Further details and measurements can be found in the recipe card below.
Step 1: Combine the ingredients. Add all of the ingredients to the bowl of a stand mixer fitted with the paddle attachment and mix until just combined. The dough will look shaggy and a little rough at this stage, which is completely normal. You’re just bringing everything together before the real work begins.
Step 2: Knead until smooth and elastic. Swap the paddle attachment for the dough hook and knead on medium speed for about 7 to 8 minutes. You’re looking for a dough that feels smooth, slightly tacky, and stretchy rather than sticky or stiff. If you’re working by hand, turn the dough out onto a lightly floured countertop and knead for about 10 minutes, pushing the dough away from you with the heel of your hand and folding it back over itself in a steady rhythm. The dough will feel tight and a little rough at first, then gradually soften and become more pliable as the gluten develops.
Step 3: First rise. Form the dough into a smooth ball and place it in a lightly greased bowl. Cover the bowl with plastic wrap or a clean kitchen towel and set it somewhere warm until the dough has doubled in size, about 1 1/2 to 2 hours. The dough should look visibly puffy and feel airy when you gently press it.
Step 4: Shape the dough. Preheat your oven to 450°F while you work with the dough. Turn the risen dough out onto a lightly floured surface and punch it down to release the gas. Divide it into two equal pieces and shape each one into a 10 to 12 inch round or an 8 by 12 inch rectangle, depending on what fits your pans. The dough will be soft and a little springy, so if it keeps pulling back when you stretch it, let it rest for 5 minutes and try again. Transfer the shaped rounds or rectangles onto pizza stones or parchment-lined baking sheets.
Step 5: Rest or bake depending on your preferred crust. For thin crust, move straight to baking. For a medium to thick crust, cover the shaped dough loosely and let it rest for about 30 minutes. The dough will puff slightly and the texture of the finished crust will be noticeably more pillowy and chewy.
Step 6: Par-bake the crust. Slide the bare crusts into the oven and bake for about 5 minutes before adding any toppings. The surface will look dry and just barely set, and the edges will start to show a hint of color. This step gives you a crust that can hold its toppings without turning soggy in the center.
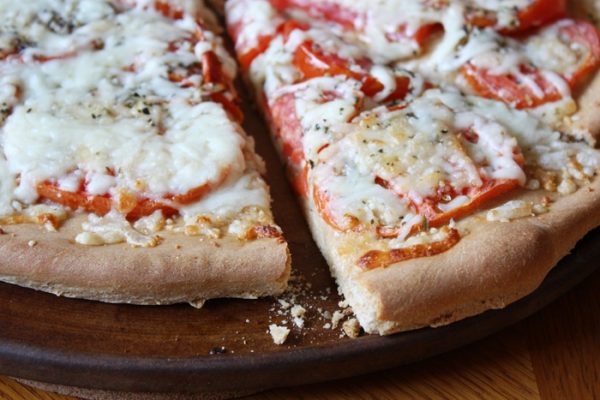
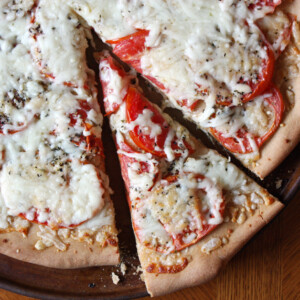
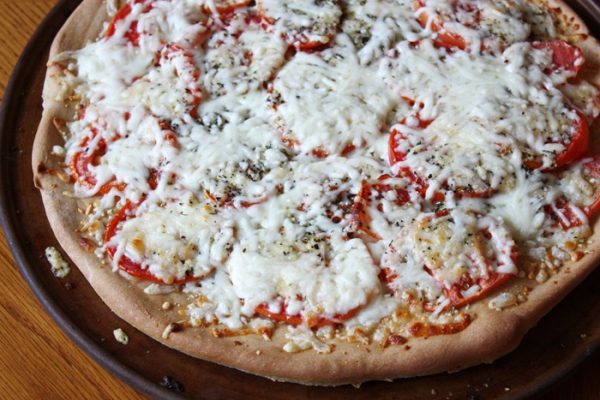
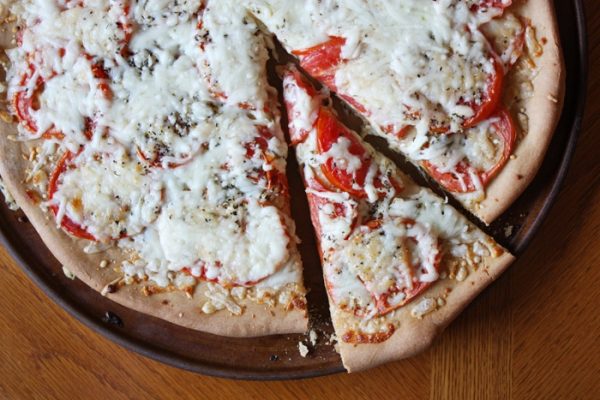
Step 7: Add toppings and finish baking. Add your meat and veggie toppings and bake for another 10 minutes, then scatter on half the cheese along with any fresh herbs and bake 3 minutes more. Add the remaining cheese and bake until it is just melted, about 3 more minutes. The edges of the crust should be deep golden and the cheese should be bubbling at the edges without being fully browned.
Step 8: Rest before slicing. Remove the pizza from the oven and let it rest on the pan for 10 minutes before cutting. The cheese will firm up just enough to hold together when you slice, and the bottom will stay crispy instead of steaming soft.
Recipe FAQs
Once the dough has risen, you can refrigerate it (tightly wrapped or in a sealed container) for up to 2 days before shaping and baking. For longer storage, freeze the dough after the first rise: punch it down, wrap it well in plastic wrap, and freeze for up to 3 months. Thaw overnight in the fridge, then let it come to room temperature before shaping, like I do when I’m planning a pizza night ahead of time.
Yes, and it actually works really well. After kneading, shape the dough into a ball, place it in a greased bowl, cover it tightly, and refrigerate it instead of letting it rise at room temperature. Pull it out about an hour before you’re ready to bake so it can come to room temperature and finish rising before you shape and top it.
The most likely culprit is underkneading or cold beer. This dough needs a full 7 minutes in a stand mixer (or about 10 by hand) to develop enough gluten structure for a smooth, elastic crust. If you cut that short, the dough won’t stretch properly, and the crust bakes up dense and chewy rather than light and airy. And cold beer will slow down the fermentation process.
The biggest difference is technique and timing. Beer pizza dough uses active kneading to build structure quickly, so you can bake the same day with a relatively short rise. A no-knead pizza dough relies on a long, slow fermentation to develop gluten without any kneading at all, which works well when you have more time to plan ahead. Both make great pizza; it just depends on how much time you’ve got.
Recommended Pizza Recipes

Lunch & Dinners

Lunch & Dinners

Yeast Breads

Yeast Breads
Beer Pizza Crust
Ingredients
- 4 cups unbleached all-purpose flour, see Note for flour variations
- 2 tsp instant yeast
- 1 tsp baking powder
- 1 ½ tsp salt
- 2 tbsp olive oil
- 1 ½ cups beer, room-temperature
Instructions
- Place all ingredients in the bowl of a stand mixer fitted with the paddle attachment and mix until just combined. Switch to the dough hook and knead until the dough is smooth and elastic, about 7 minutes. If kneading by hand, turn the dough out onto a lightly floured surface and knead for about 10 minutes.
- Shape the dough into a ball, place it in a lightly greased bowl, cover, and let rise until doubled, about 1 1/2 to 2 hours.
- Preheat the oven to 450°F. Punch down the risen dough and divide it in half. Shape each piece into a 10 to 12 inch round or an 8-by-12 inch rectangle. Place on pizza stones or parchment-lined baking sheets.
- For thin crust, bake immediately. For medium to thick crust, let the shaped dough rest for about 30 minutes before topping.
- Bake the bare crusts for 5 minutes. Add meat and vegetable toppings and bake another 10 minutes. Add half the cheese and any herbs and bake 3 more minutes, then add the remaining cheese and bake until just melted, about 3 more minutes.
- Remove from the oven and let rest 10 minutes before slicing.
Notes
Technique: Knead the full 7 minutes in a stand mixer (or 10 by hand). Cutting this short means the gluten won’t develop enough to stretch properly, and the crust will bake up dense and tough rather than light and chewy.
Beer: The stronger the beer’s flavor, the more it comes through in the finished crust. A light lager gives a mild, neutral base while a darker stout or amber ale adds real depth. Use a beer you’d actually drink.
Storage: Once risen, the dough can be refrigerated (tightly wrapped or in a sealed container) for up to 2 days. To freeze, punch it down after the first rise, wrap well in plastic wrap, and freeze for up to 3 months. Thaw overnight in the fridge, then let it come to room temperature before shaping.
Nutrition
Nutrition information is automatically calculated, so should only be used as an approximation.
 Like this recipe? Rate & comment below!
Before You Go
I hope this beer pizza dough becomes a regular part of your pizza nights. Browse our Lunch & Dinner Recipes or Bread Recipes for more to try.


I used a dark amber ale and the crust had so much more flavor than any pizza dough I’ve made before. The 30-minute rest before baking made a noticeable difference in the thickness and chew.
Dark amber ale is such a fantastic choice. The malty depth it adds to pizza dough is next level! You’ve basically unlocked the secret to an incredible crust. Thanks for sharing your tips, we’re definitely trying the amber ale next time! ~GVD team
I use one 12 oz. beer usually a honey Linneys
2 Tbsp oil
2 Tbsp land O lakes butter
yeast
4 cups Canadian whole wheat
1 1/2 Chia seeds
I knead it in my mixer then I cover it in an oiled bowl and let it sit out on the counter to season overnight. Lately I have been trying 1 cup of brown Jasmine rice flour added too three cups of whole wheat.