no knead dutch oven bread
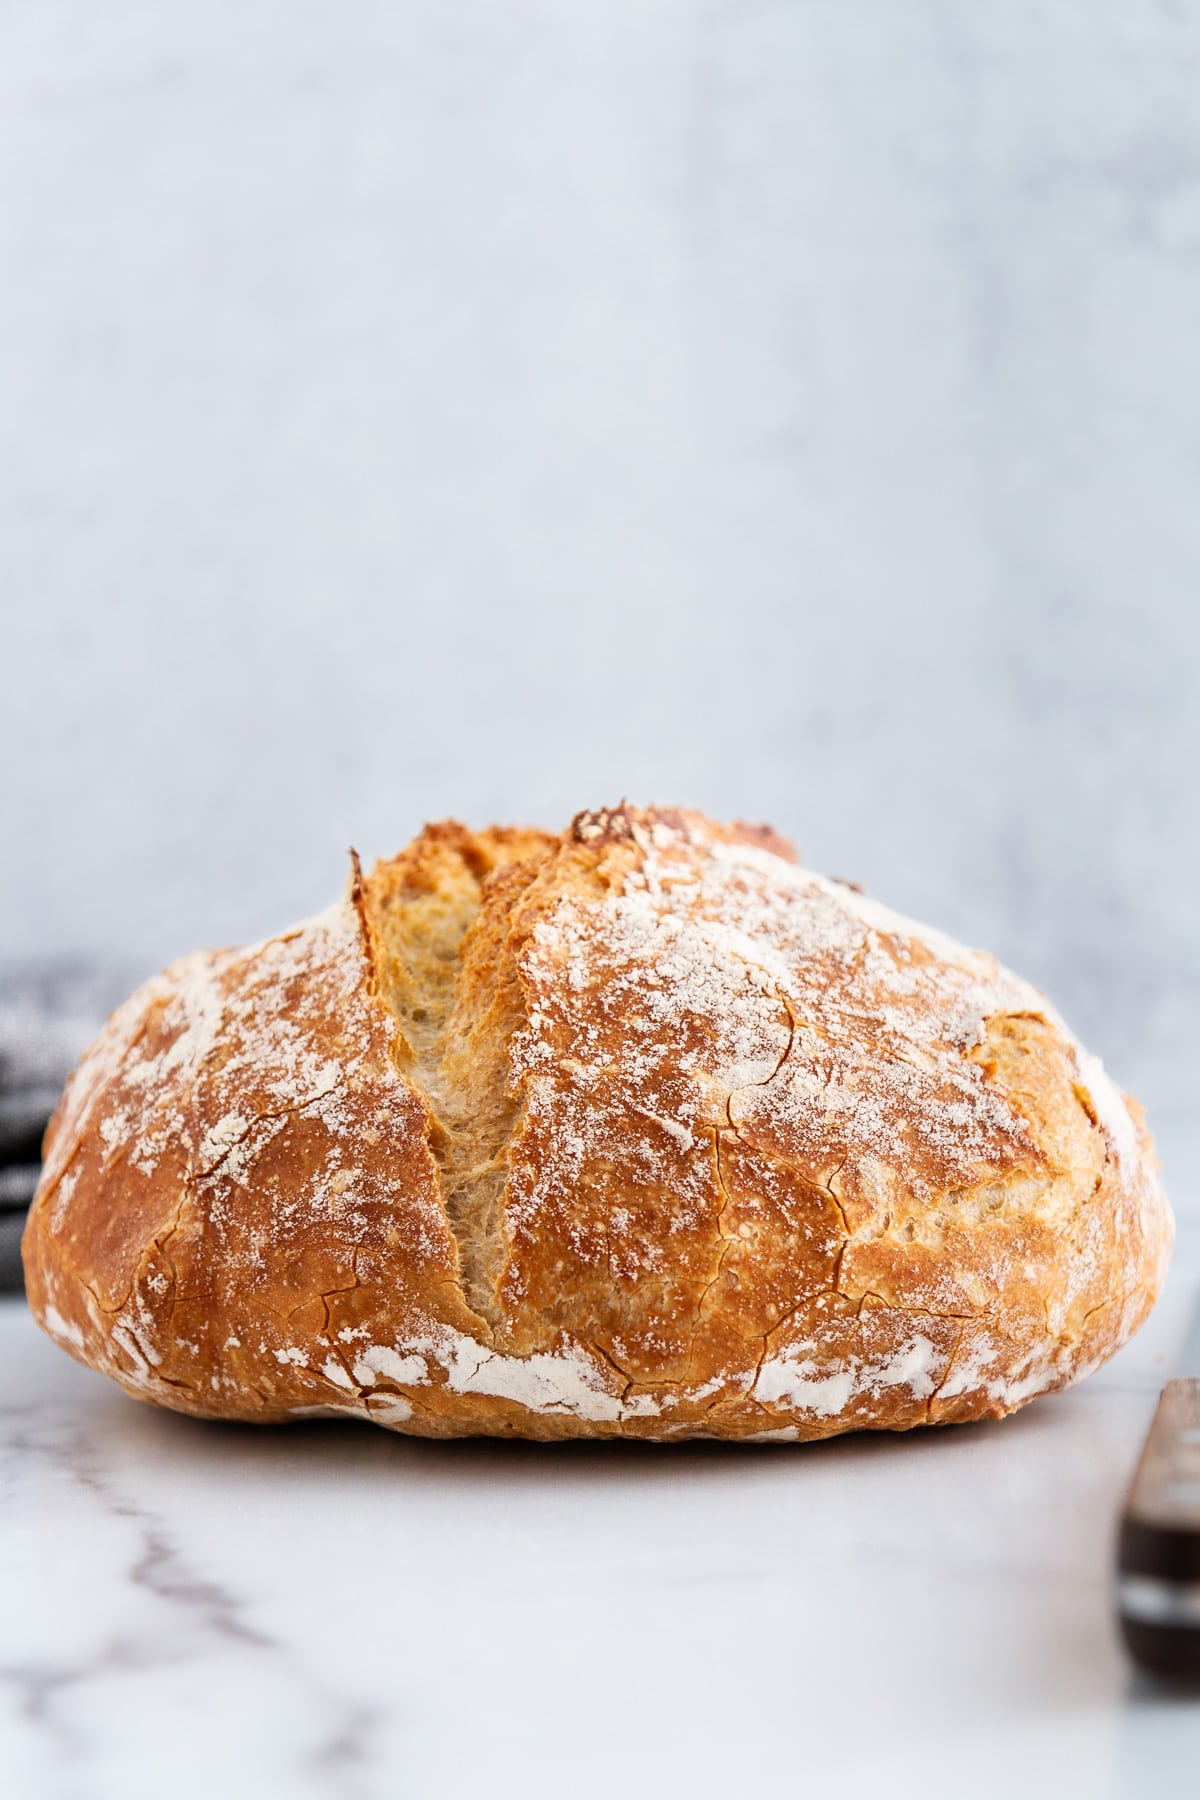
Ready to bake homemade bread in your own kitchen? This no knead Dutch oven bread is your BFF. You just need three ingredients to make this delicious recipe, and I’ll take you through it step by step. So, what are you waiting for? It’s time to get some delicious carbs in your life.
No Knead Dutch Oven Bread Recipe
If you could see me right now, you’d know I am jumping for joy for this post.
Why?
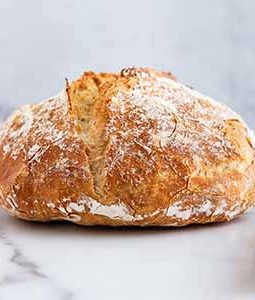
Because this beautiful loaf — this glorious no knead Dutch oven bread — might just be the very best bread I’ve ever baked. Seriously. And it also happens to be one of the easiest ever, too. And I’m going to show you, step by step, just how to do it.
Like I said, so much jumping for joy. And for carbs.
First things first: The reason I believe this may be the very best bread I’ve ever baked (the method for which, by the way, originated from the great Jim Lahey of Sullivan Street Bakery) is three-fold:
- One, the taste. It’s just amazing. It’s slightly salty and not at all boring, like some basic breads tend to be.
- Two, the texture. It’s mega-soft on the inside but with a light, tender, almost flaky crust on the outside. And the air pockets in the bread slices just slay me. You’ll soon see what I mean. AND YOU WILL LOVE IT.
- And three, the preparation. This recipe couldn’t be simpler: As in, you stir a few ingredients together, let them sit overnight, and the next morning, you bake a loaf of bread. DONE. No, I’m not joking. Yes, you need to drop everything and make this bread right now. So let’s get to it!
How to Make No Knead Dutch Oven Bread Dough
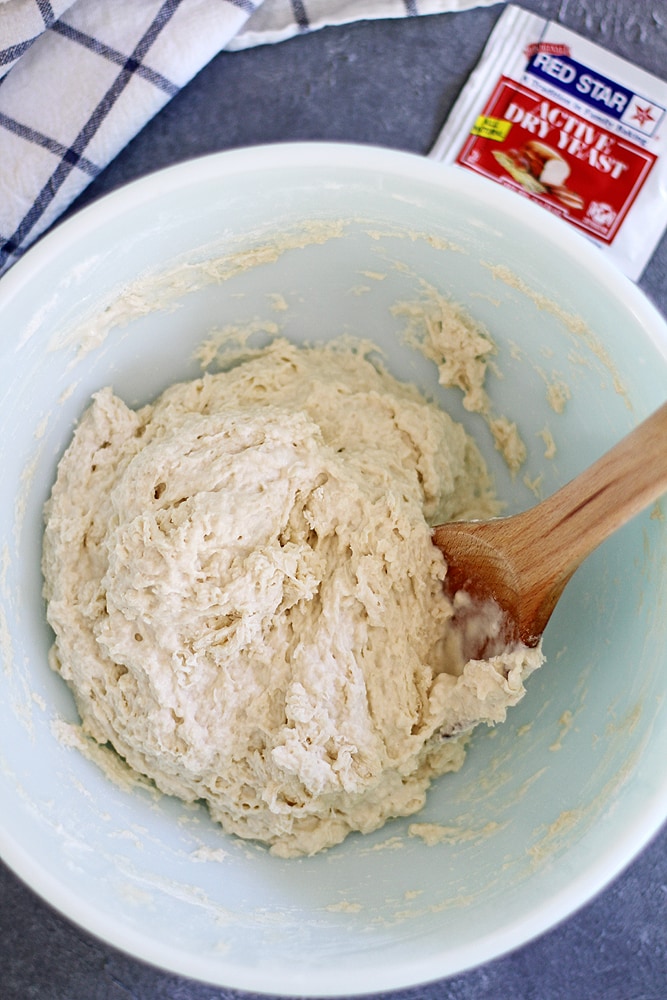
Let’s keep this sweet and simple, shall we? Here is how you make this dough:
- First, in a large bowl, whisk together flour, salt and yeast (I used my go-to Red Star active dry yeast) until well mixed. Pour in warm water (about 110 to 115 degrees F, or just slightly warmer than lukewarm) and use a wooden spoon to stir the mixture until it forms a wet, sticky and shaggy dough. That’s it! No kneading, no nothing.
- Next, cover the bowl with plastic wrap and let the dough rise for at least 8 hours (but no more than around 18 hours).
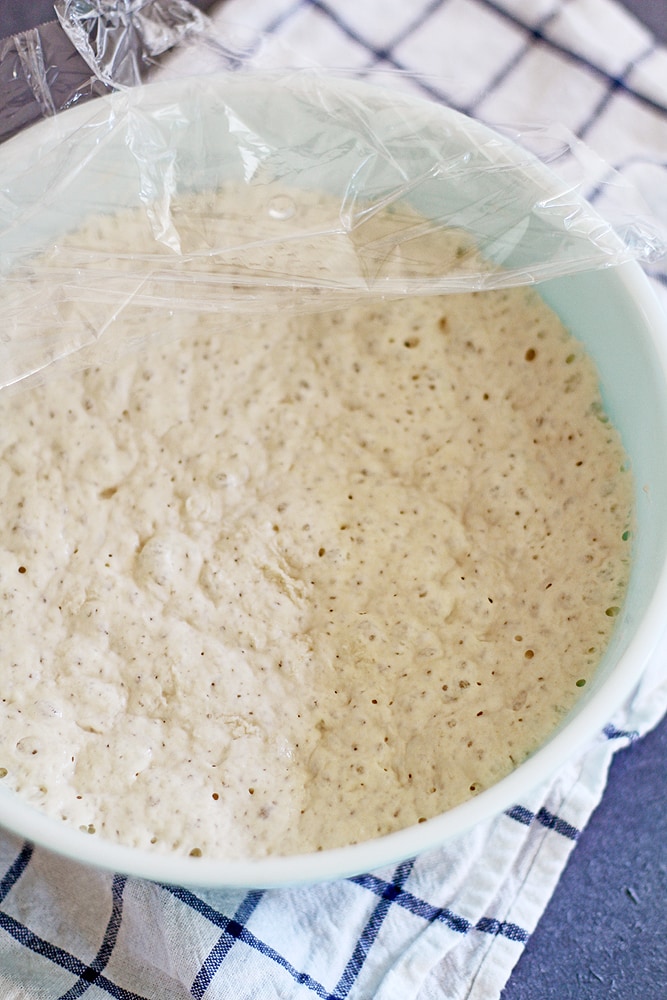
- When the dough is fully risen, it should be more than doubled in size, bubbly and flattened on top. That means it’s ready for baking! Yes, already. No, it won’t be difficult.
- Heat your oven to 450 degrees F, and place a covered Dutch oven on the center rack to preheat for about 30 minutes (I used a 6-quart Dutch oven, but even a 4-quart or 8-quart Dutch oven would work).
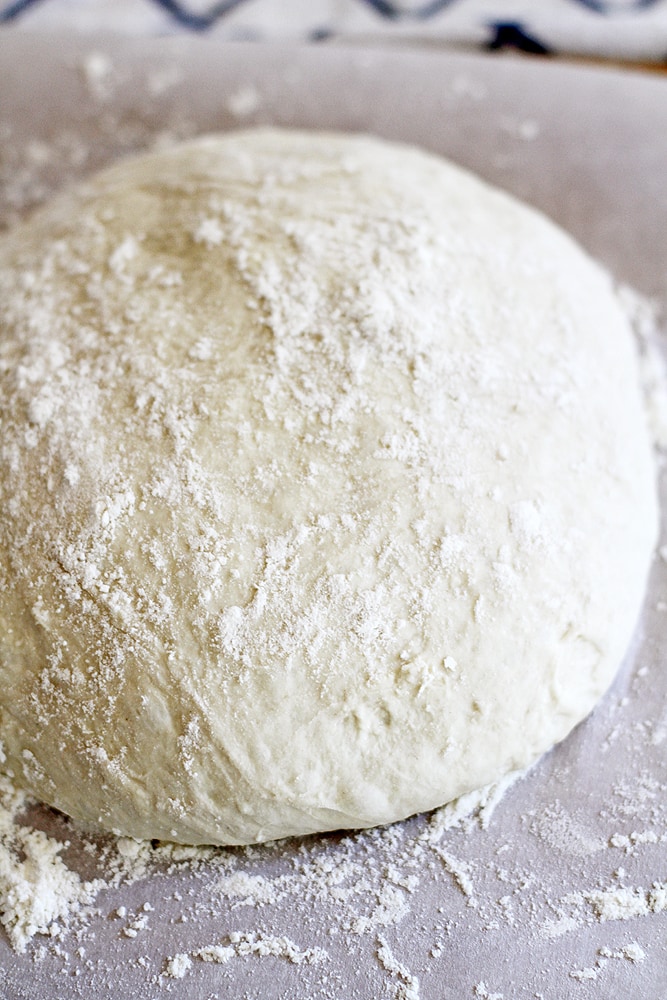
- Meanwhile, punch down the dough and, using very well-floured hands (the dough is pretty sticky, remember!), transfer the dough to a well-floured sheet of parchment paper. Shape the dough into a ball and sprinkle the top lightly with more flour.
- Cover the dough with a sheet of plastic wrap and let it rest for 30 minutes.
Watch How to Make This Recipe
[adthrive-in-post-video-player video-id=”2ohuJ1Q3″ upload-date=”2023-02-19T19:07:27.000Z” name=”No-Knead Dutch Oven Bread” description=”This no-knead Dutch oven bread is about to be your new favorite homemade bread recipe! Just three ingredients are all you need to make this magical, miraculous bread from scratch in your own kitchen.” player-type=”default” override-embed=”default”]
How to Bake No Knead Dutch Oven Bread
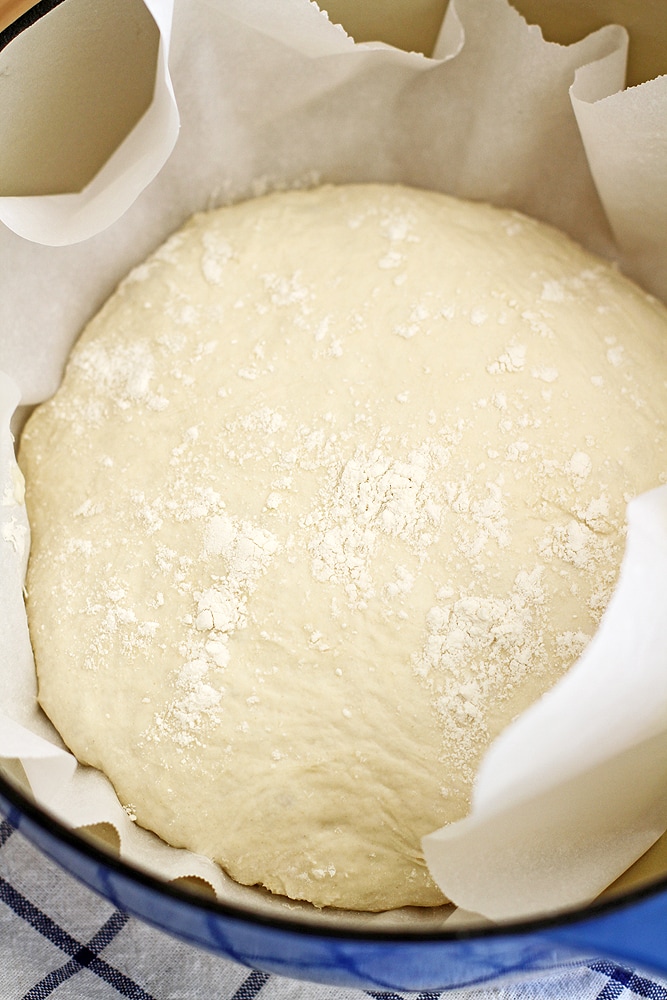
Let’s talk about the bake!
- When the dough is fully rested, remove the Dutch oven from the oven (careful, it’s insanely hot!) and either transfer the dough alone directly to the Dutch oven, or place it in the Dutch oven with the parchment paper underneath. If the bottom of your Dutch oven isn’t enamel-coated, it’s best to use the parchment paper. Mine is enamel-coated, but I find it easier to keep the round shape of the dough if I just place it in the Dutch oven with the parchment paper. Whatever works fer ya!
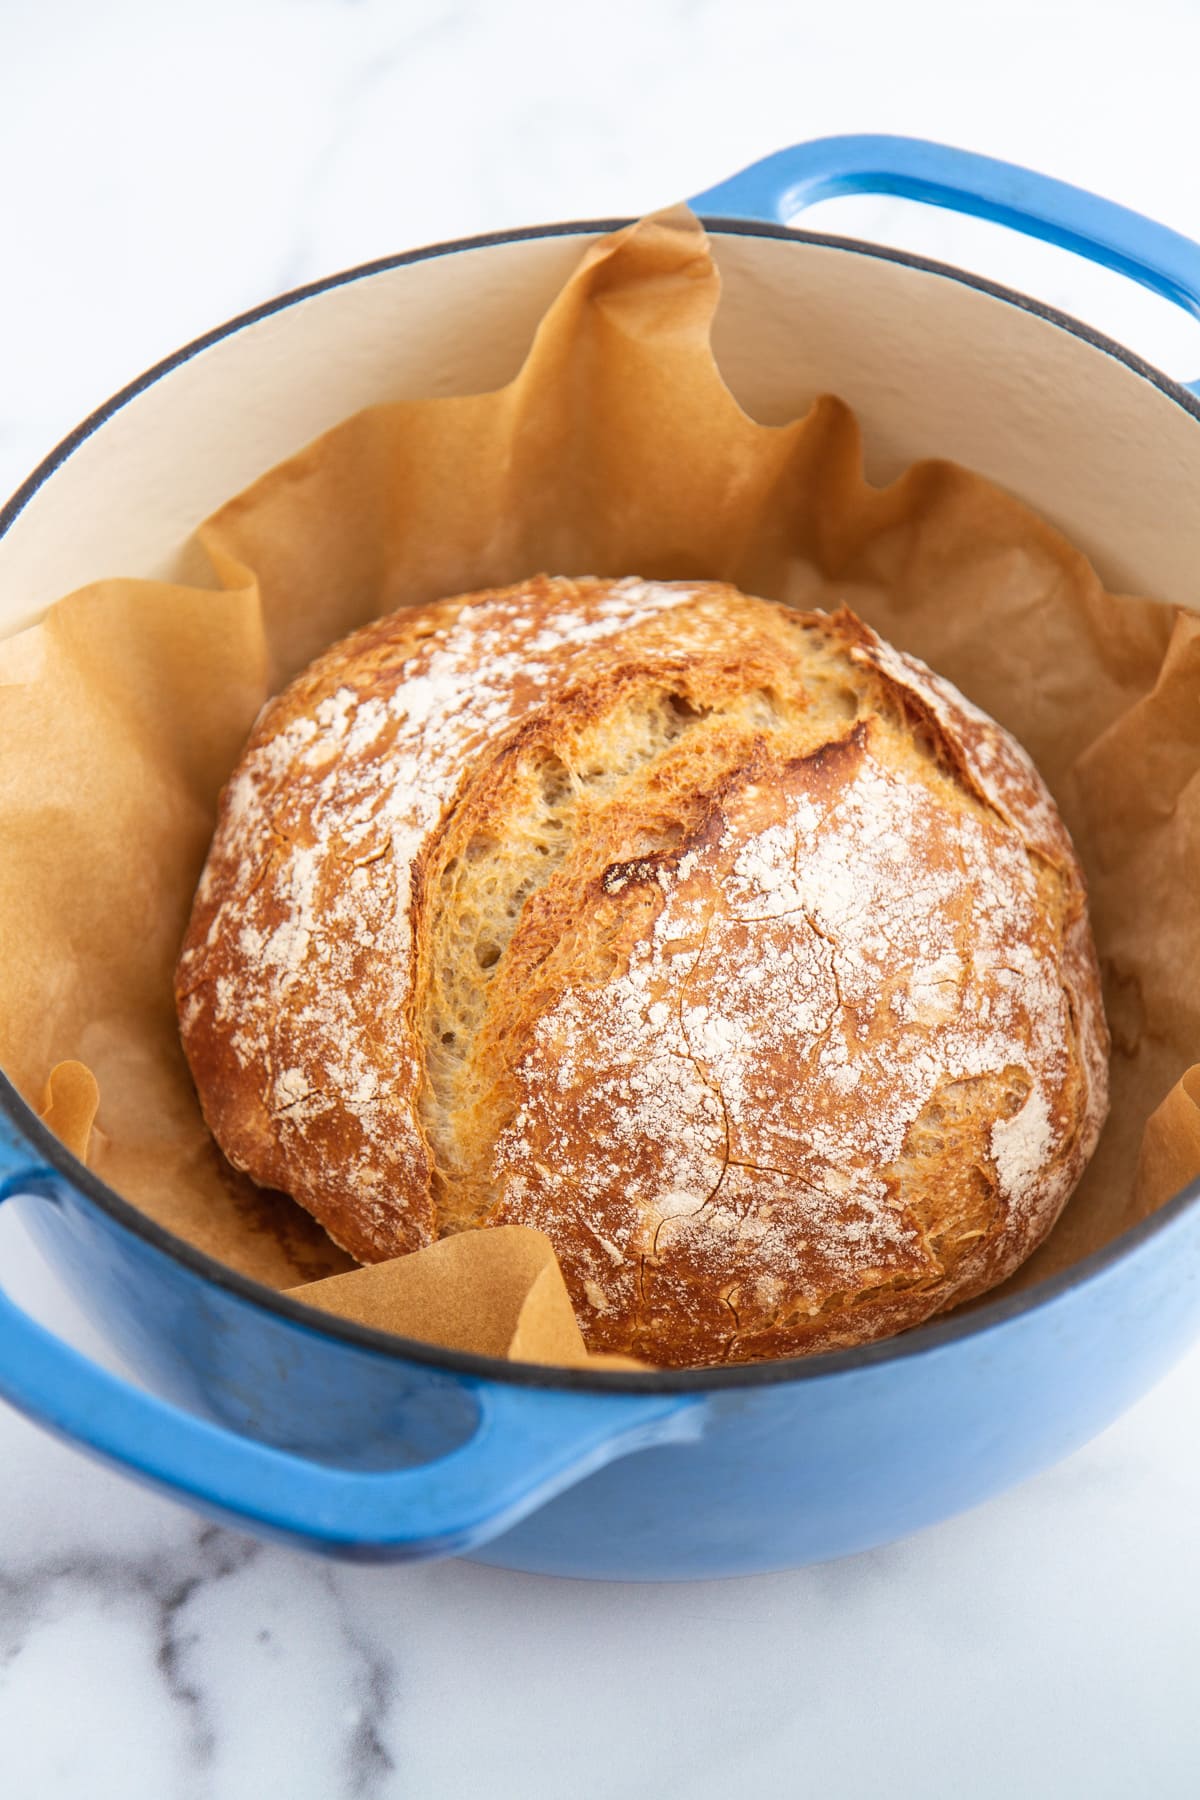
- Cover the Dutch oven and return it to the oven (how many times can I type the word “oven”?). Bake the dough 45 minutes covered, then another 10 to 15 minutes uncovered until the top of the bread is a lovely golden brown.
Can you believe it? YOU BAKED THAT. And you barely had to do anything.
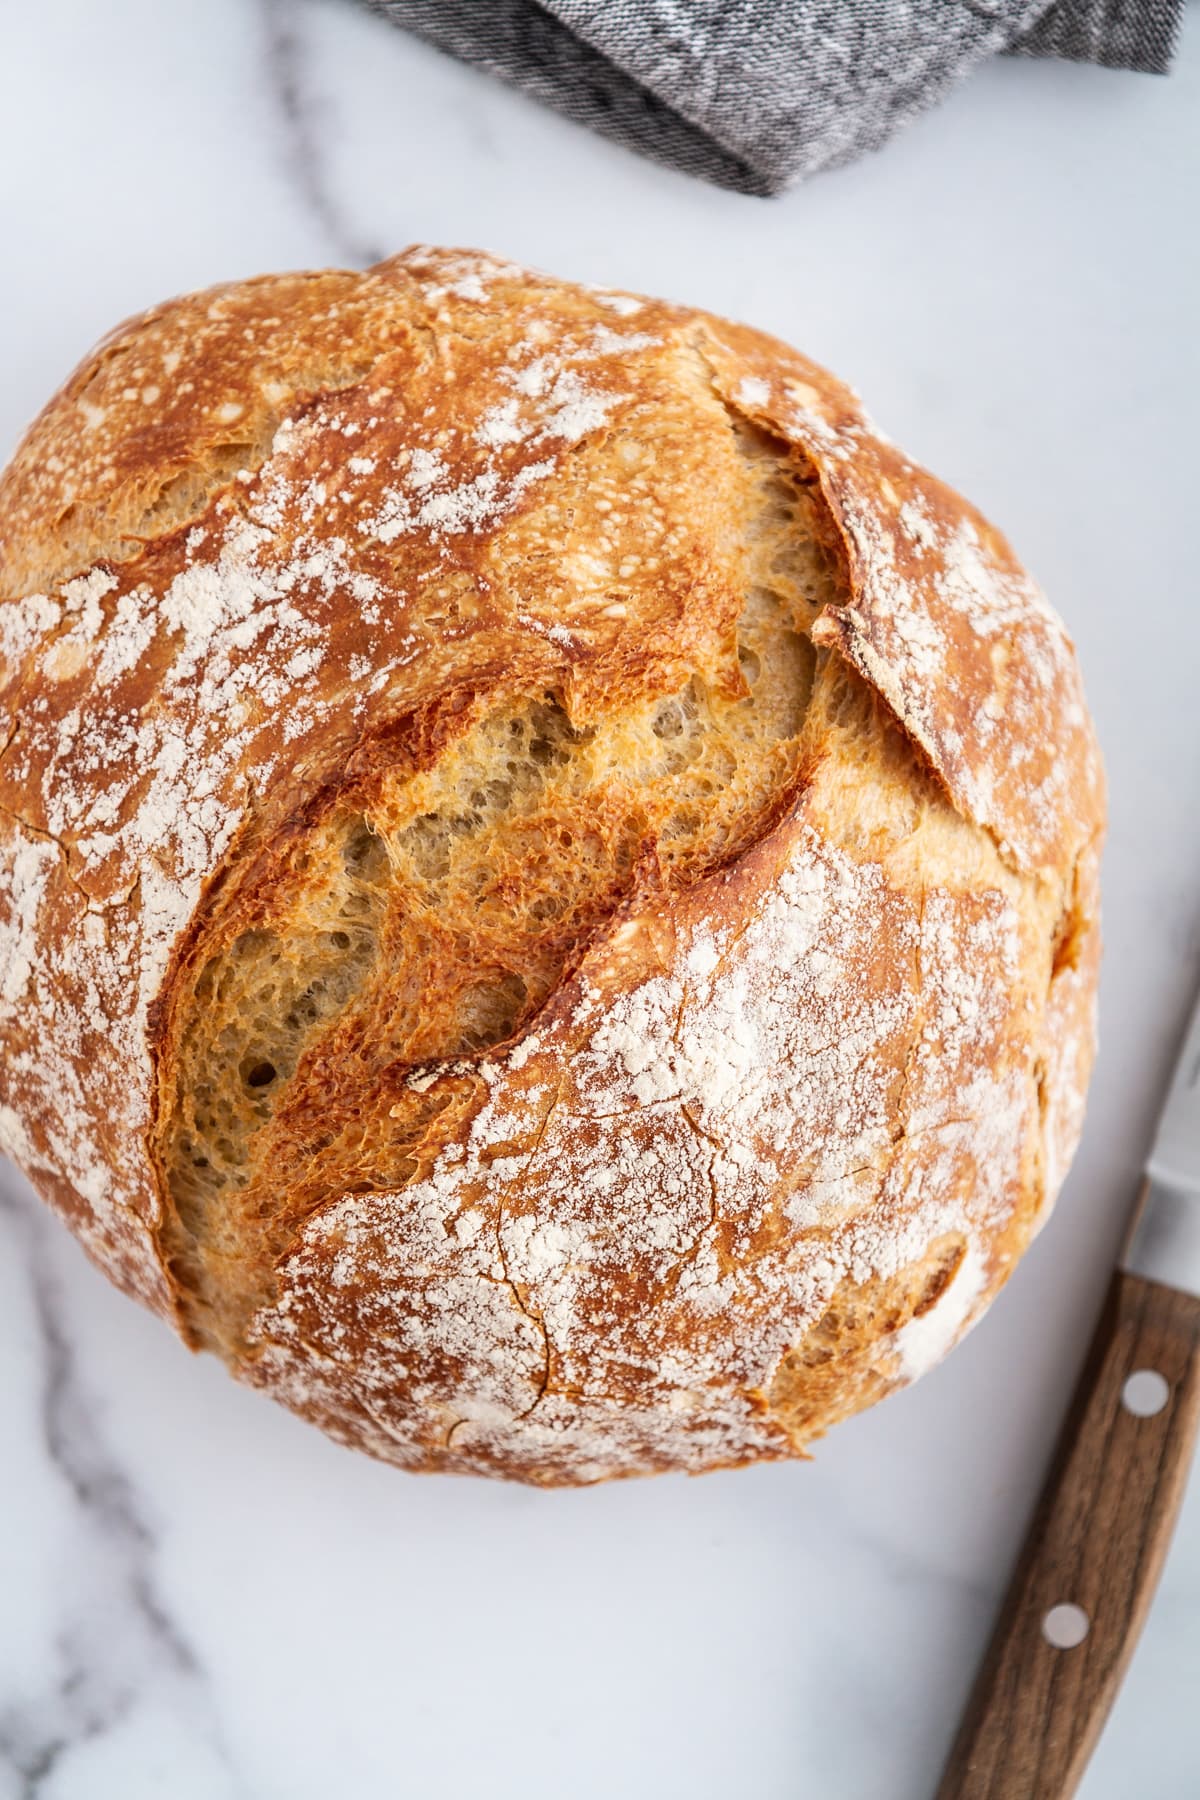
Let the bread cool for just a few minutes — basically until you can handle it without burning your fingerprints off — and then slice away.
How to Enjoy No-Knead Dutch Oven Bread
Suggestions for how to enjoy no-knead Dutch oven bread: As grilled cheese, dipped in soup, as garlic bread, spread with peanut butter (and jelly!), cut up into croutons, ripped apart and shoved right into face, etc. etc. I have done/will do all of the above.
Of course, if you also need someone to come over and assist you in eating all of this gorgeous and delicious loaf of bread you just baked, I’m your leading lady. But if you’re anything like me, I have a feeling you won’t need any help.
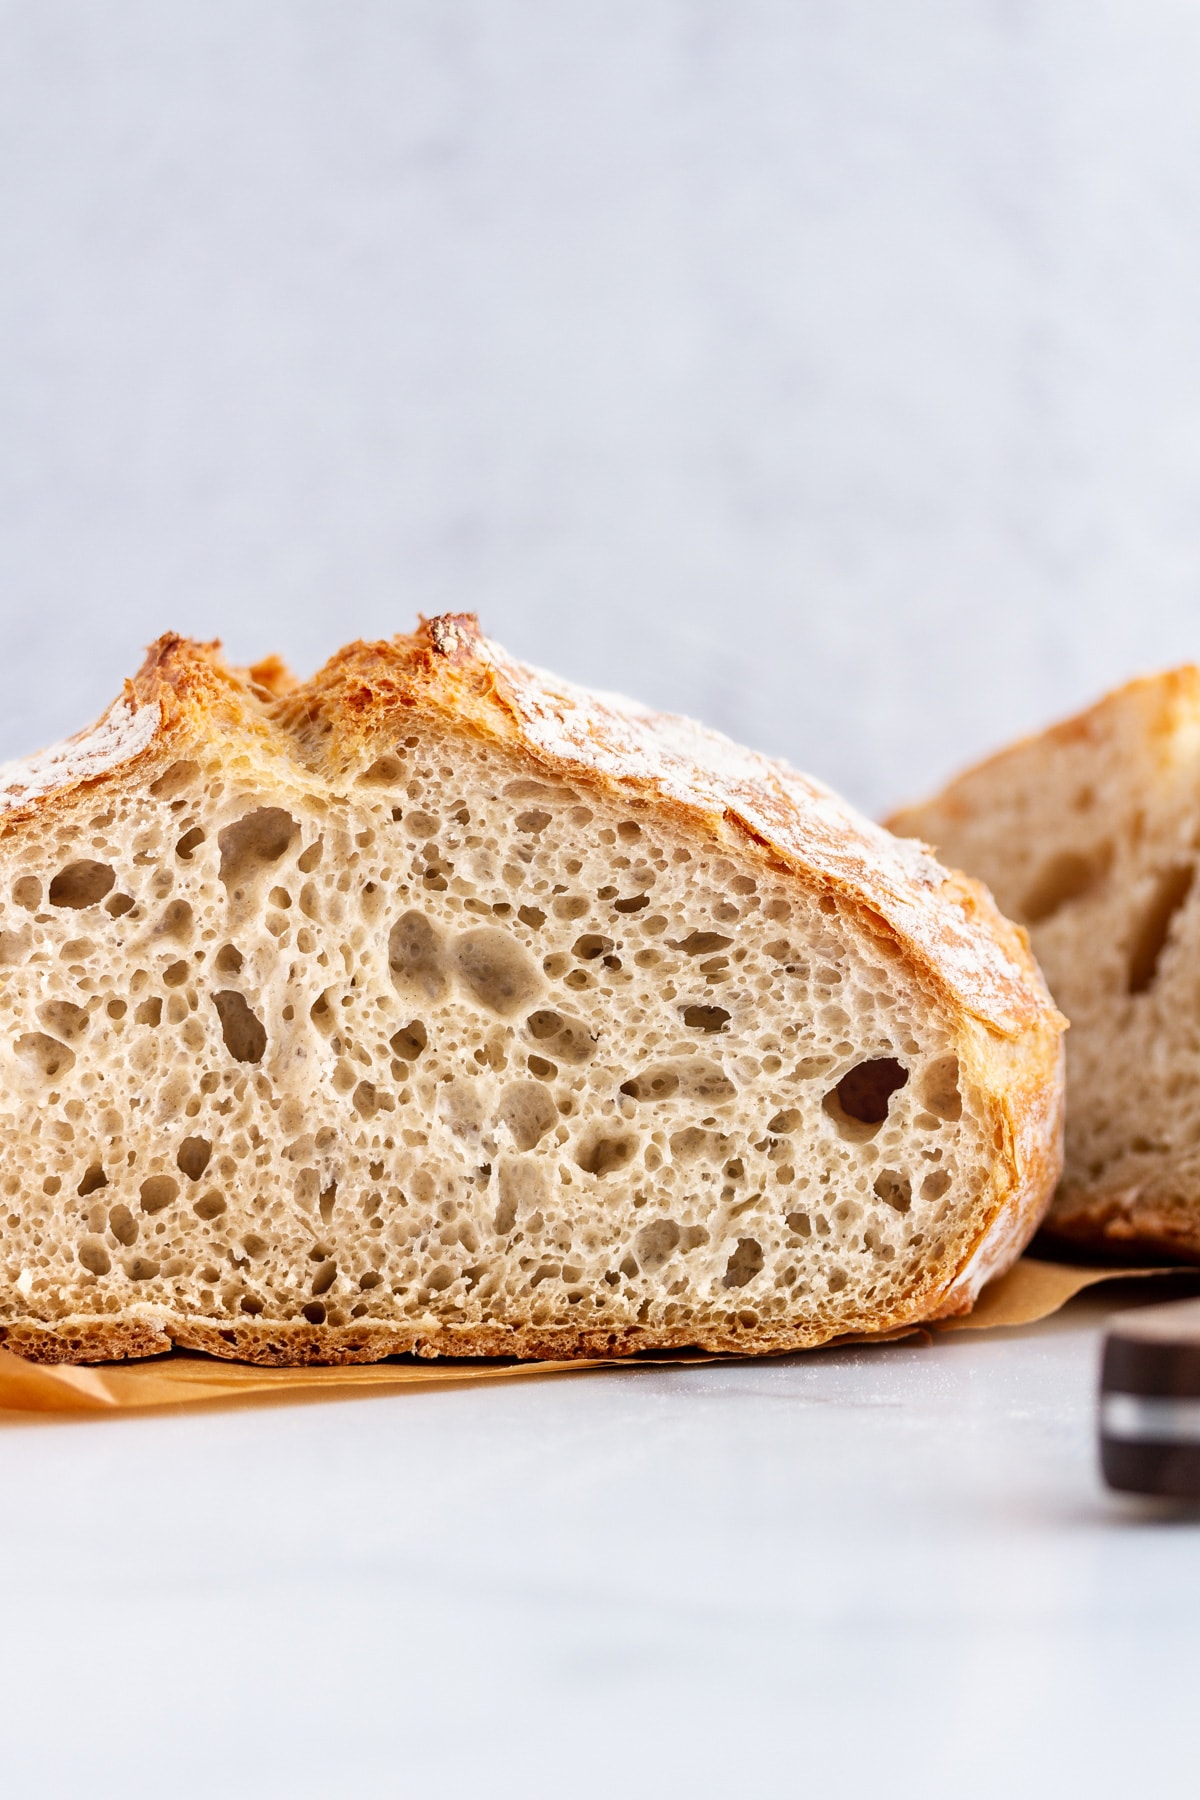
Uhhhhhhhhhh those air pockets, AMIRIGHT?
P.S. Ready for your next bread baking adventure? Try my Sourdough 101 series, which takes you step by step through the entire process of making homemade sourdough at home, from starter to loaf. Check ou this Banana Bread Recipe for my other favorite bread!
More Delicious Bread Recipes
- rosemary-garlic no-knead bread
- no knead ciabatta bread
- classic brioche loaf bread
- classic italian bread
- cinnamon raisin sourdough bread
- whole wheat bread
- potato bread
No-Knead Dutch Oven Bread
- Prep Time: 1 hour 10 mins (plus 8 hours rise time)
- Cook Time: 1 hour
- Total Time: 2 hours 10 minutes
- Yield: 1 loaf 1x
- Category: Bread
- Method: Bake
- Cuisine: American
Description
This no-knead Dutch oven bread is the easiest bread you’ll ever bake! No kneading, no fuss, just delicious carbs.
Ingredients
- 3 cups all-purpose flour, plus more for shaping
- 2 teaspoons sea salt
- 1 teaspoon Red Star active dry yeast OR 3/4 teaspoon instant yeast
- 1 1/2 cups warm water (about 110 to 115°F)
Instructions
- In a large bowl, whisk flour, salt and yeast until well mixed. Pour in warm water and use a wooden spoon to stir until a shaggy dough forms. The mixture will be wet and very sticky to the touch.
- Cover bowl tightly with plastic wrap and set aside in a warm place 8 to 18 hours until dough rises, bubbles and flattens on top.
- Heat oven to 450°F. Once oven is preheated, place a 6-quart Dutch oven (with cover) in oven 30 minutes before baking.
- Punch down dough. Generously flour a sheet of parchment paper; transfer dough to parchment and, with floured hands, quickly shape into a ball. Place dough on parchment paper and sprinkle top lightly with flour. Top with a sheet of plastic wrap and let rest 30 minutes.
- Remove Dutch oven from oven. Uncover dough and carefully transfer to Dutch oven, with or without parchment paper beneath (if bottom of Dutch oven is not coated with enamel, keep parchment paper beneath dough). Cover Dutch oven and return to oven.
- Bake bread 45 minutes covered, then another 10 to 15 minutes uncovered until dough is baked through and golden brown on top. Cool completely before slicing, at least 1 hour.
Notes
- Store leftovers in a resealable food storage bag for up to 2 days.
- Ready for the next level in flavor? Try my Rosemary-Garlic No-Knead Dutch Oven Bread recipe.
- Freeze: You can freeze this bread, fully baked and cooled. Once cooled, either place in a large resealable food storage bag or wrap tightly in plastic wrap, then aluminum foil; freeze for up to 3 months. Thaw, covered, at room temperature until ready to slice.
Disclosure: I received compensation from Red Star Yeast for recipe development purposes. All opinions are my own.

That bread is so pretty there’s no way it couldn’t taste good! What a great recipe for something notoriously tricky.
Schnackies — I mean, I would never judge if you went for that fourth slice. 😉 And no, I didn’t need to reduce the temp on my oven once it was preheated, but all ovens are calibrated differently so maybe yours just runs a little hotter than mine. I’m still so glad it turned out well for you!
Lori D — Hi! I used a 6-quart Dutch oven, but you could really use any size you have on hand. Happy baking!
I have been seeing this bread ALLLL over social media. (For good reason!) I need to make it, stat.
Pingback: no-knead dutch oven bread | My Berry Cake
This bread sounds amazing! No kneading and 4 ingredients! Sounds like a winner to me!
Stephanie!!!! Welcome back and ohhhhhhhmyyyyyygooooodnesssss what a beautiful loaf! I am picturing that warm slice with some soft butter on it and inhaling it…….sogoingtomakethistomorrow!!!!!!
I.CANNOT.BELIEVE. how easy this is! I mean – you could literally prep for this bread the night before and voila! Freshly baked bread for breakfast EVERY morning! Also, do I need to mention that heavenly aroma that’ll be floating around in the air when this beauty is getting baked? Pinning! 😀
Always love your bread recipes, and this one looks absolutely amazing! That crust… YES.
Hello is there any way to make this so its gluten free? My husband loves bread but has a gluten allergy. Can you tell me what kind of gluten free flour I could use instead of regular flour? Thank you for the help ????
Amzaing! The crust looks so crunchy, brown, and delicious!
Oh I love this!!! I am never one to bake my own bread due to the time it takes, but this looks so simple! I am definitely giving this a try. The final product looks bakery quality too. 🙂 Love this!
I have never made bread in a dutch oven but I love the idea that this bread is no knead!
Kelly — I hope you got my e-mail! I don’t know if this recipe can be made gluten free but I have had great results with Bob’s Red Mill’s 1-to-1 baking flour. Hope it works for you!
Pingback: Friday Link Love - Two Places at Once