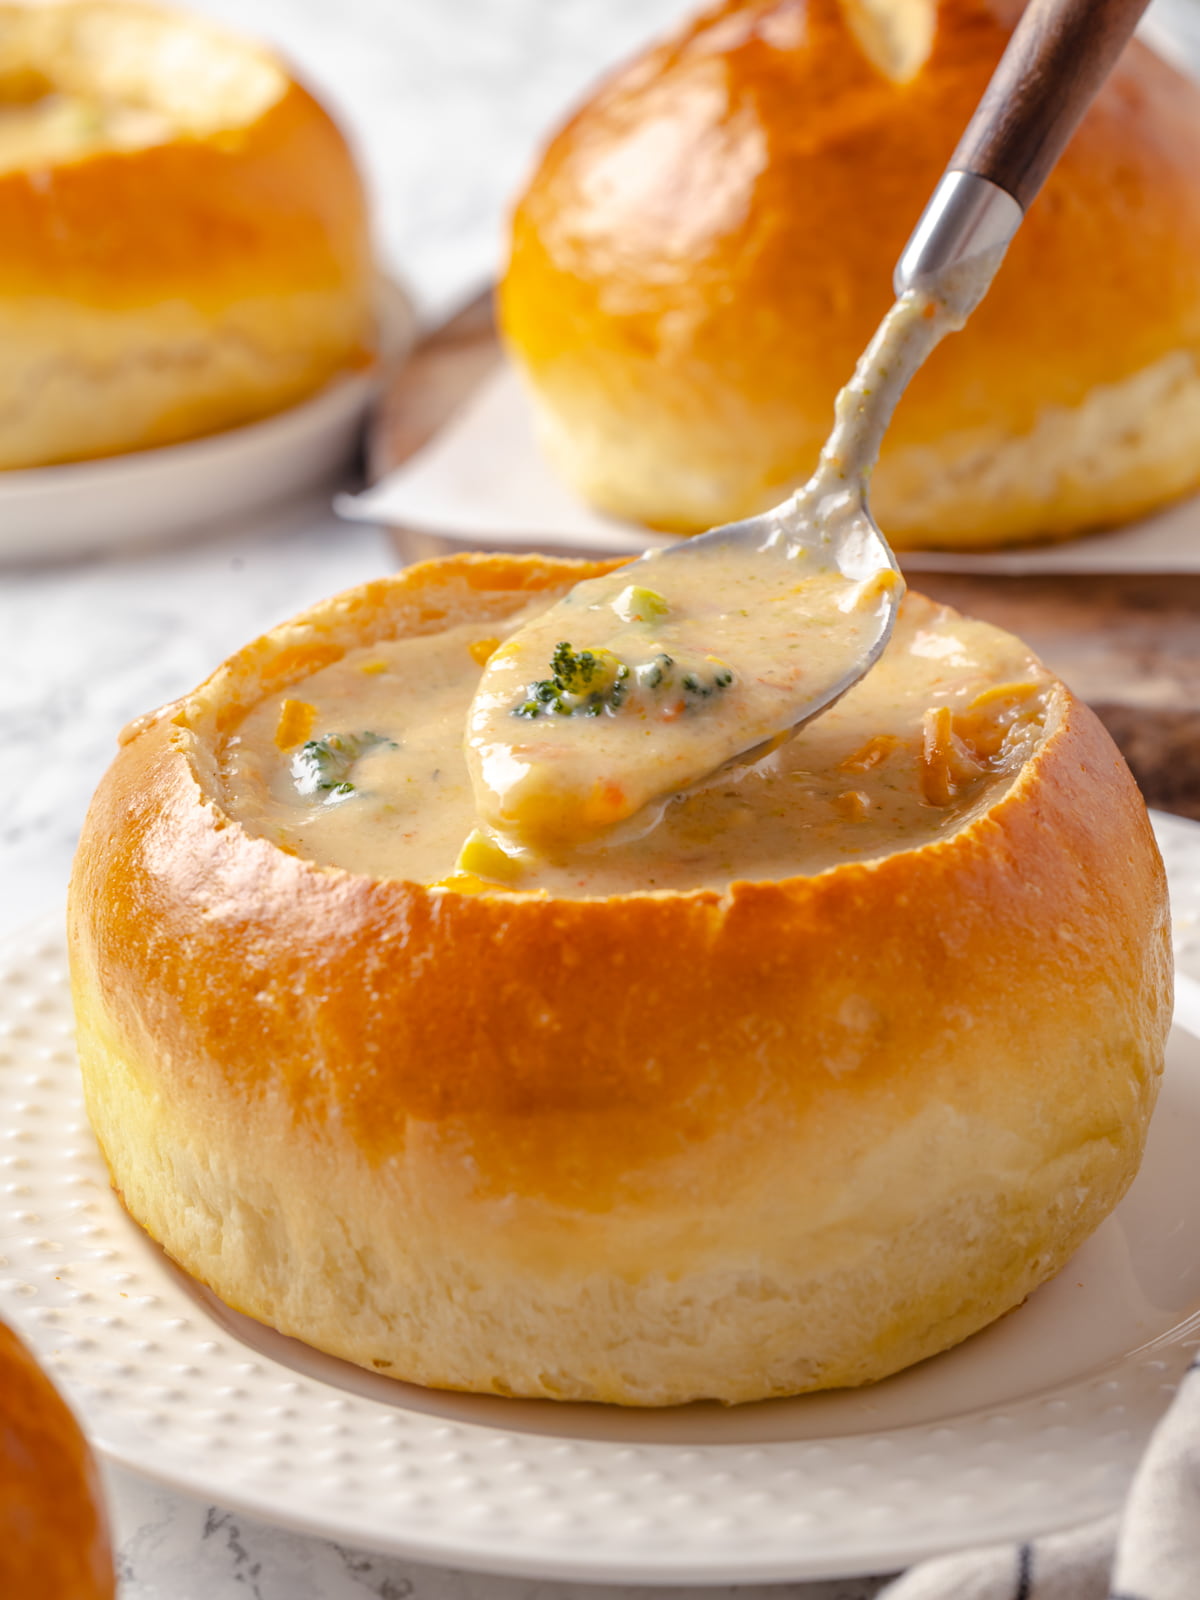
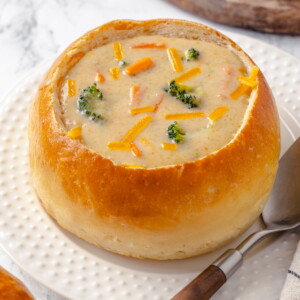
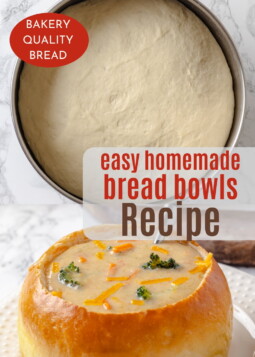
These easy homemade bread bowls are soft and tender with a crisp, golden crust, perfect for hearty soups. Made with all-purpose flour and semolina, they bake into six bakery-style bowls in under 2 hours. Whether you’re serving clam chowder, tomato soup, or beef chili, these homemade bread bowls make any meal feel extra special.
A Quick Look At The Recipe
This is a brief summary of the recipe. Jump to the recipe to get the full details.
Prep Time
20 minutes
Cook Time
20 minutes
Proof Time
1 hour 10 minutes
Total Time
1 hour 50 minutes
Servings
6 bread bowls
Difficulty
Easy, thanks to instant yeast and simple shaping steps.
Calories *
693 kcal per serving
Technique
Mix the dry ingredients, add water, knead until smooth, then proof, shape into rounds, proof again, score, and bake.
Flavor Profile
Soft, tender interior with a lightly crisp crust and subtle nuttiness from semolina.
* Based on nutrition panel
These bread bowls were delicious and super easy to make! I was especially impressed at how well they held up to second and third helpings! No soggy or leaky crusts here! Thanks for helping make a highly enjoyable and successful dinner possible! ⭐⭐⭐⭐⭐
Lori
Why You Will Love This
- Bakery-quality bread bowls in under 2 hours. No overnight proofing or complicated techniques—just mix, rise, shape, and bake! These bread bowls come together quickly thanks to instant yeast and a relatively short bulk fermentation.
- Perfectly sized for individual servings. At about 280g each, these bread bowls are the ideal size for a generous serving of soup or chili. They’re substantial enough to hold plenty of filling but not so large that you’re left with tons of leftover bread.
- Soft, tender crumb with a lightly crisp crust. The combination of all-purpose flour and semolina creates a beautiful texture—soft and pillowy on the inside with just enough structure to hold liquid without getting soggy. The egg wash gives them that signature bakery shine.
- Versatile for any season or occasion. Fill them with squash soup in fall, hearty lamb stew in winter, or fresh carrot ginger coconut soup in summer! Don’t overlook the humble bread bowl as a fantastic vessel to hold your favorite dip like this hatch chili queso!
Table of Contents
I’ve been making these bread bowls for years, and they never fail to impress! They’re inspired by those famous bread bowls you get at chain restaurants, but honestly, these taste even better fresh from your own oven.
The semolina flour gives them that perfect chewy texture and gorgeous golden color, while the all-purpose flour keeps them soft enough to tear into easily. A substantial and flavorful bread without any added olive oil or butter. Plus, you can use the scooped-out bread for dipping, making breadcrumbs, or even a seasonal panzanella salad if you’re feeling fancy!
Ingredients & Substitutions
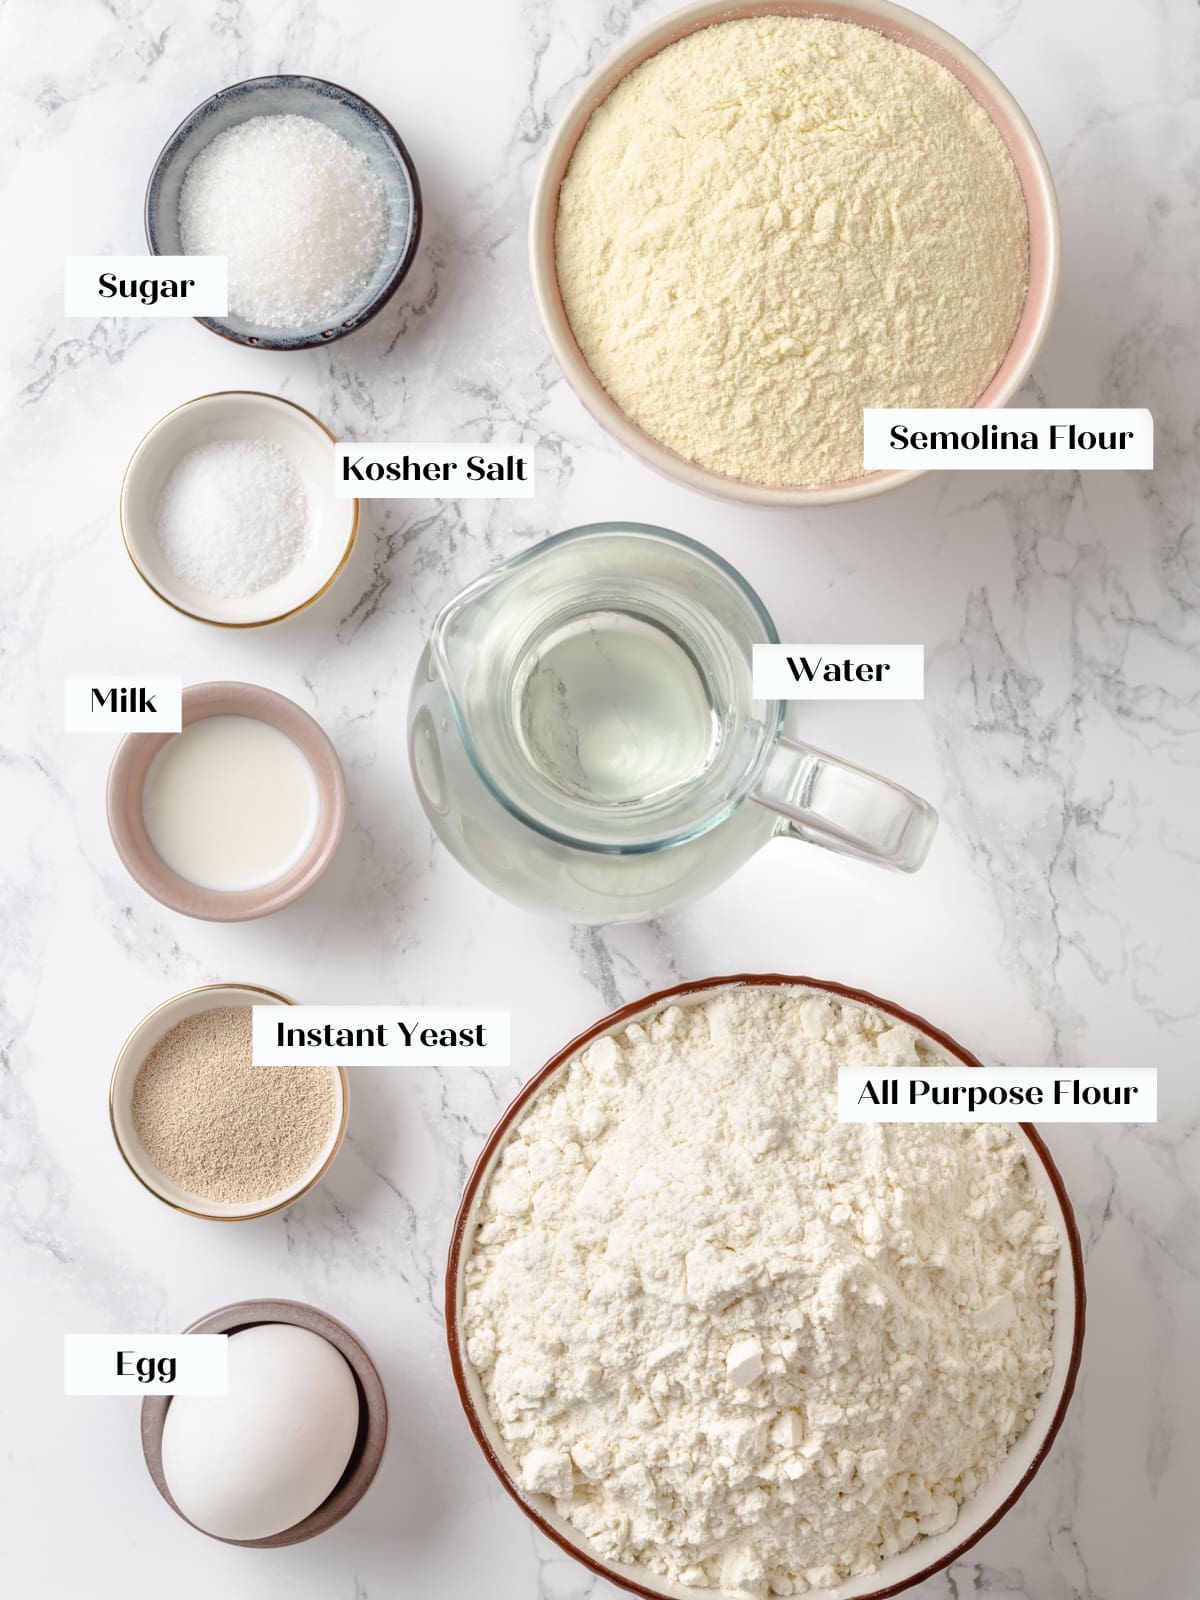
- All-Purpose Flour: The base of these bread bowls provides structure and a tender crumb. I use unbleached all-purpose flour for the best flavor and texture. You could substitute bread flour by weight. I wouldn’t recommend substituting for whole wheat flour. Use this whole wheat sourdough bread recipe to make 3 bread bowls instead.
- Semolina Flour: This is the secret ingredient that gives these bread bowls their gorgeous golden color and slightly chewy texture! Semolina flour is made from durum wheat and adds a subtle nutty flavor.
- If you don’t have semolina, you can replace it with additional all-purpose flour, though you’ll lose some of that characteristic color and chew. I always have it on hand to roll out sourdough discard pizza dough and english muffins.
- Instant Yeast: I prefer instant yeast in this recipe because it works quickly and doesn’t require blooming in water first. You can substitute active dry yeast, but be prepared for the proof times to be at least double what’s written in the recipe. If using active dry yeast, dissolve it in the warm water with the sugar before adding the yeast mixture to the dry ingredients.
- Sugar: A small amount of granulated sugar feeds the yeast and promotes browning. You can substitute malt powder if you have it, which will give an even more authentic bakery flavor!
- Kosher Salt: Salt strengthens the gluten network and enhances flavor. I always use kosher salt in my bread recipes, but you can use half the amount of fine sea salt or table salt.
- Water: Room temperature water hydrates the flour and creates the dough. The hydration level in this recipe creates a dough that’s soft and manageable—not sticky, not stiff.
- Egg & Milk: The egg wash is technically optional but highly recommended! It gives the bread bowls that beautiful golden shine you see on bakery breads. Mix one egg with 2 teaspoons of milk (or water) and brush it on before scoring and baking.
See the recipe card for full information on ingredients and quantities.
Professional Tips
- Shape them like large dinner rolls for the best structure. When shaping the bread bowls, use the same technique you’d use for sweet potato dinner rolls—tuck all four corners into the center, flip seam-side down, and tighten the ball by cupping it with your hand while rotating in small circles. Use your fingers to pull toward you and your thumb to press away in a circular motion. This creates surface tension that helps the bowls hold their round shape.
- Don’t skip the egg wash! I’ll be honest—I was lazy during testing and skipped it. But the egg wash really does make a difference in the final appearance. It gives the bread bowls that gorgeous golden, shiny crust that makes them look professionally baked.
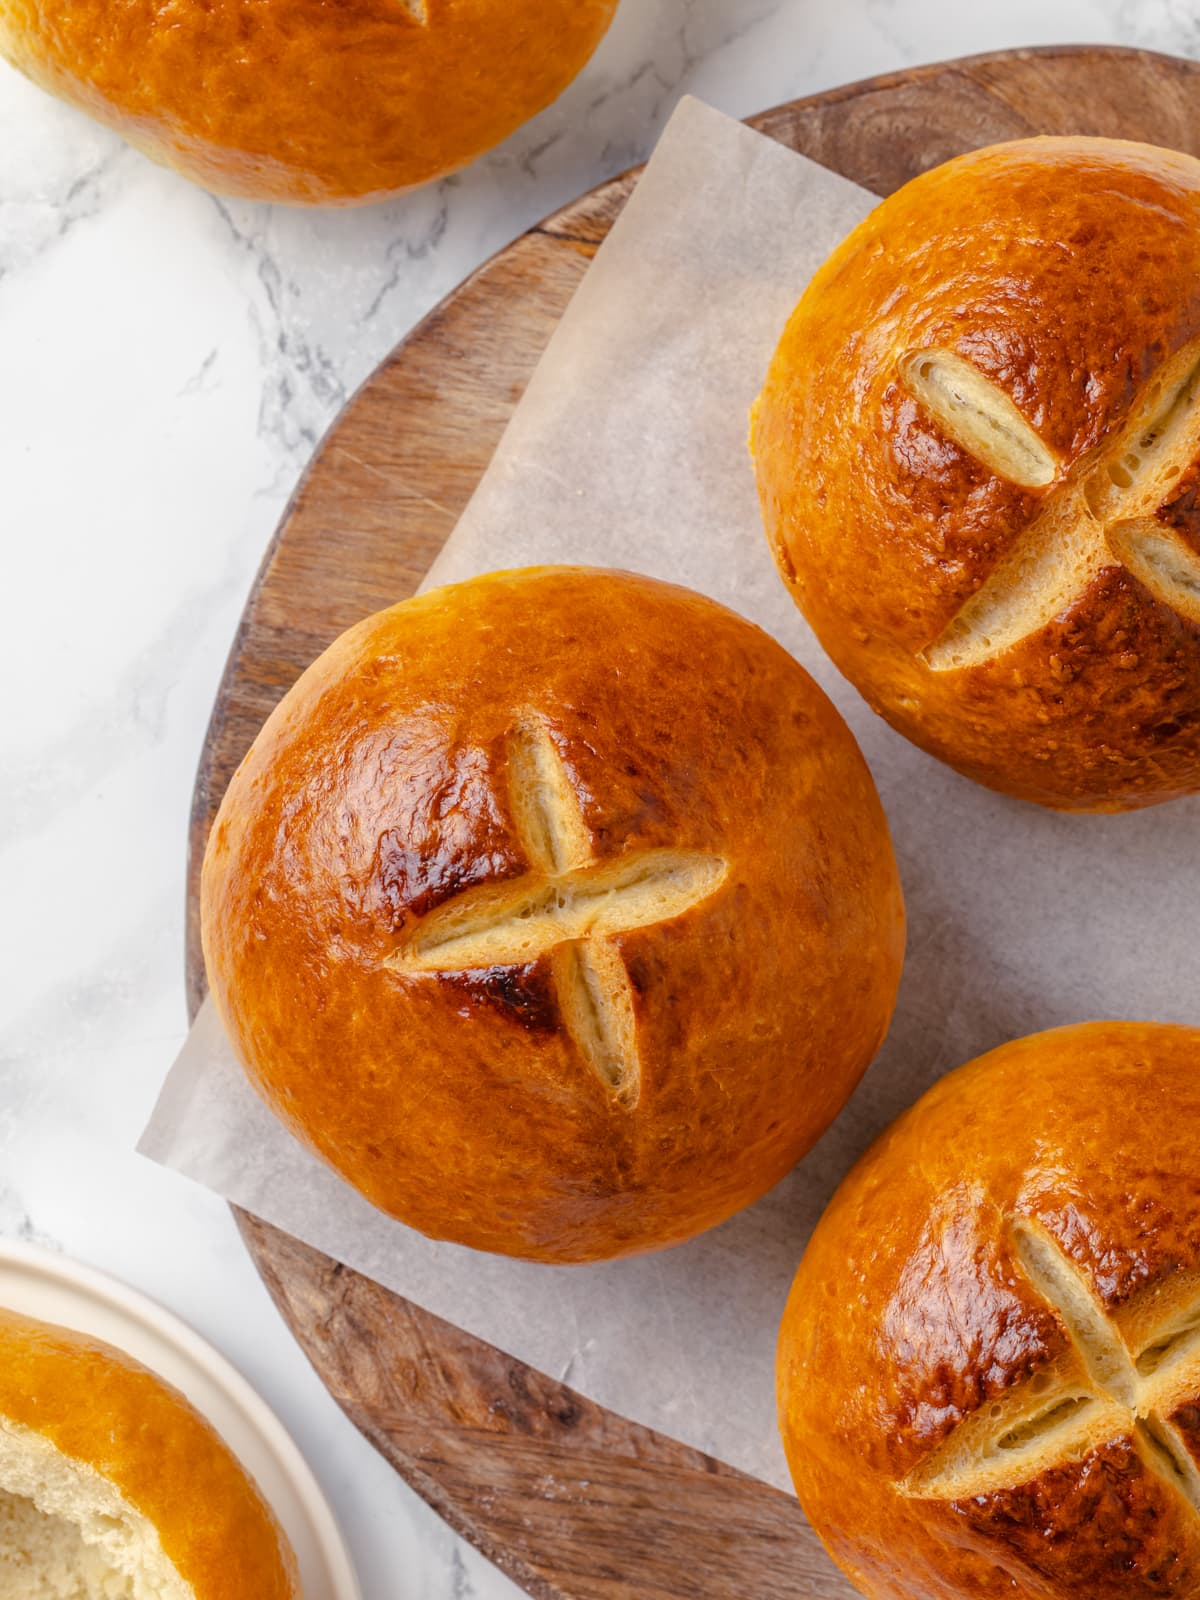
- Score with a deep X before baking. Use a sharp knife or bread lame to cut a decisive X on top of each bowl right before they go in the oven. This allows the bread to expand properly during baking and creates that classic bread bowl appearance.
- Simple, complementary variations. Add garlic, fresh chopped herbs, 1 tablespoon of Italian seasoning to the flour for extra flavor.
- I simplified the original baking instructions. The original recipe (2010) had a lot of rigmarole around spritzing with water and changing temperatures. It’s not that serious! Just bake at 425°F for 20-22 minutes, rotating halfway through, until they’re golden brown. Simple is better.

How to Make Easy Homemade Bread Bowls
Use these instructions to make perfect bread bowls every time! Further details and measurements can be found in the recipe card below.
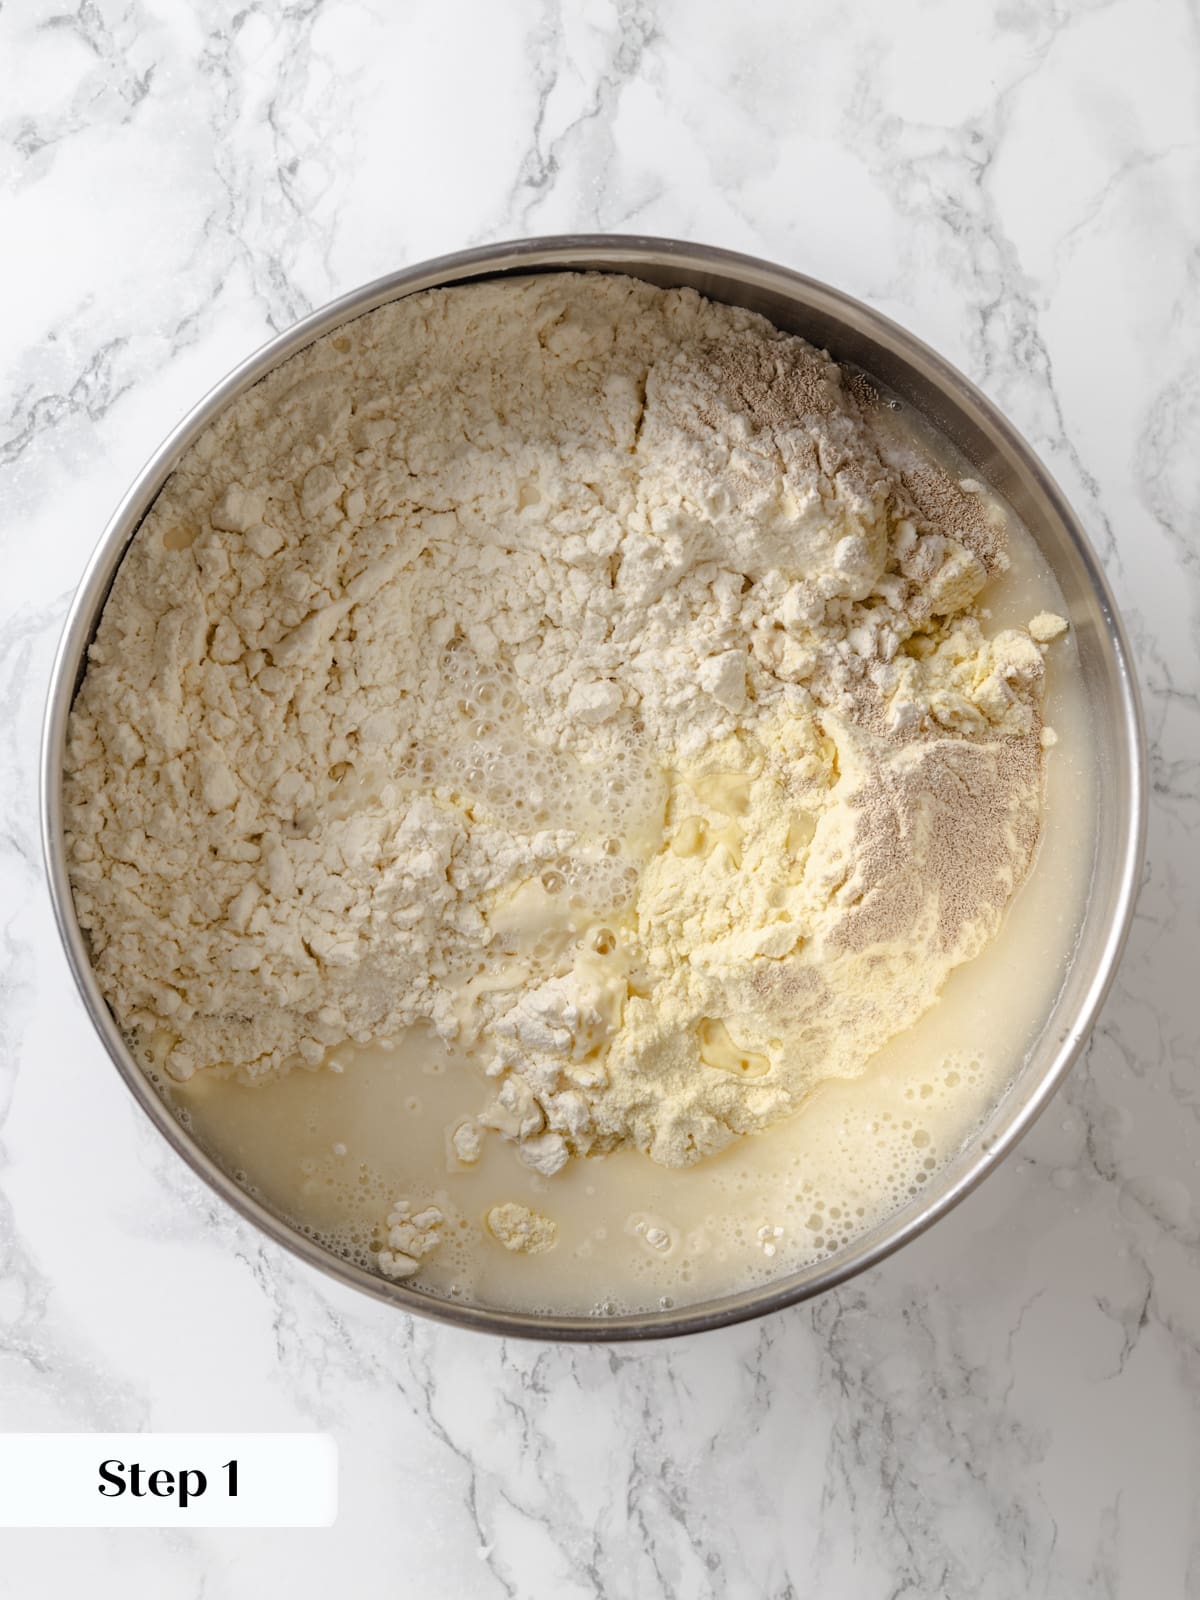
Step 1: Mix the dough. Combine all-purpose flour, semolina flour, instant yeast, sugar, salt, and water in the bowl of a stand mixer. Mix with the dough hook attachment until the dough comes together (photo 1).
In a pinch you can incorporate all the ingredients in a large mixing bowl with a spoon, then turn it out onto a lightly floured surface and knead by hand until the dough is smooth, supple and springs back when pressed.
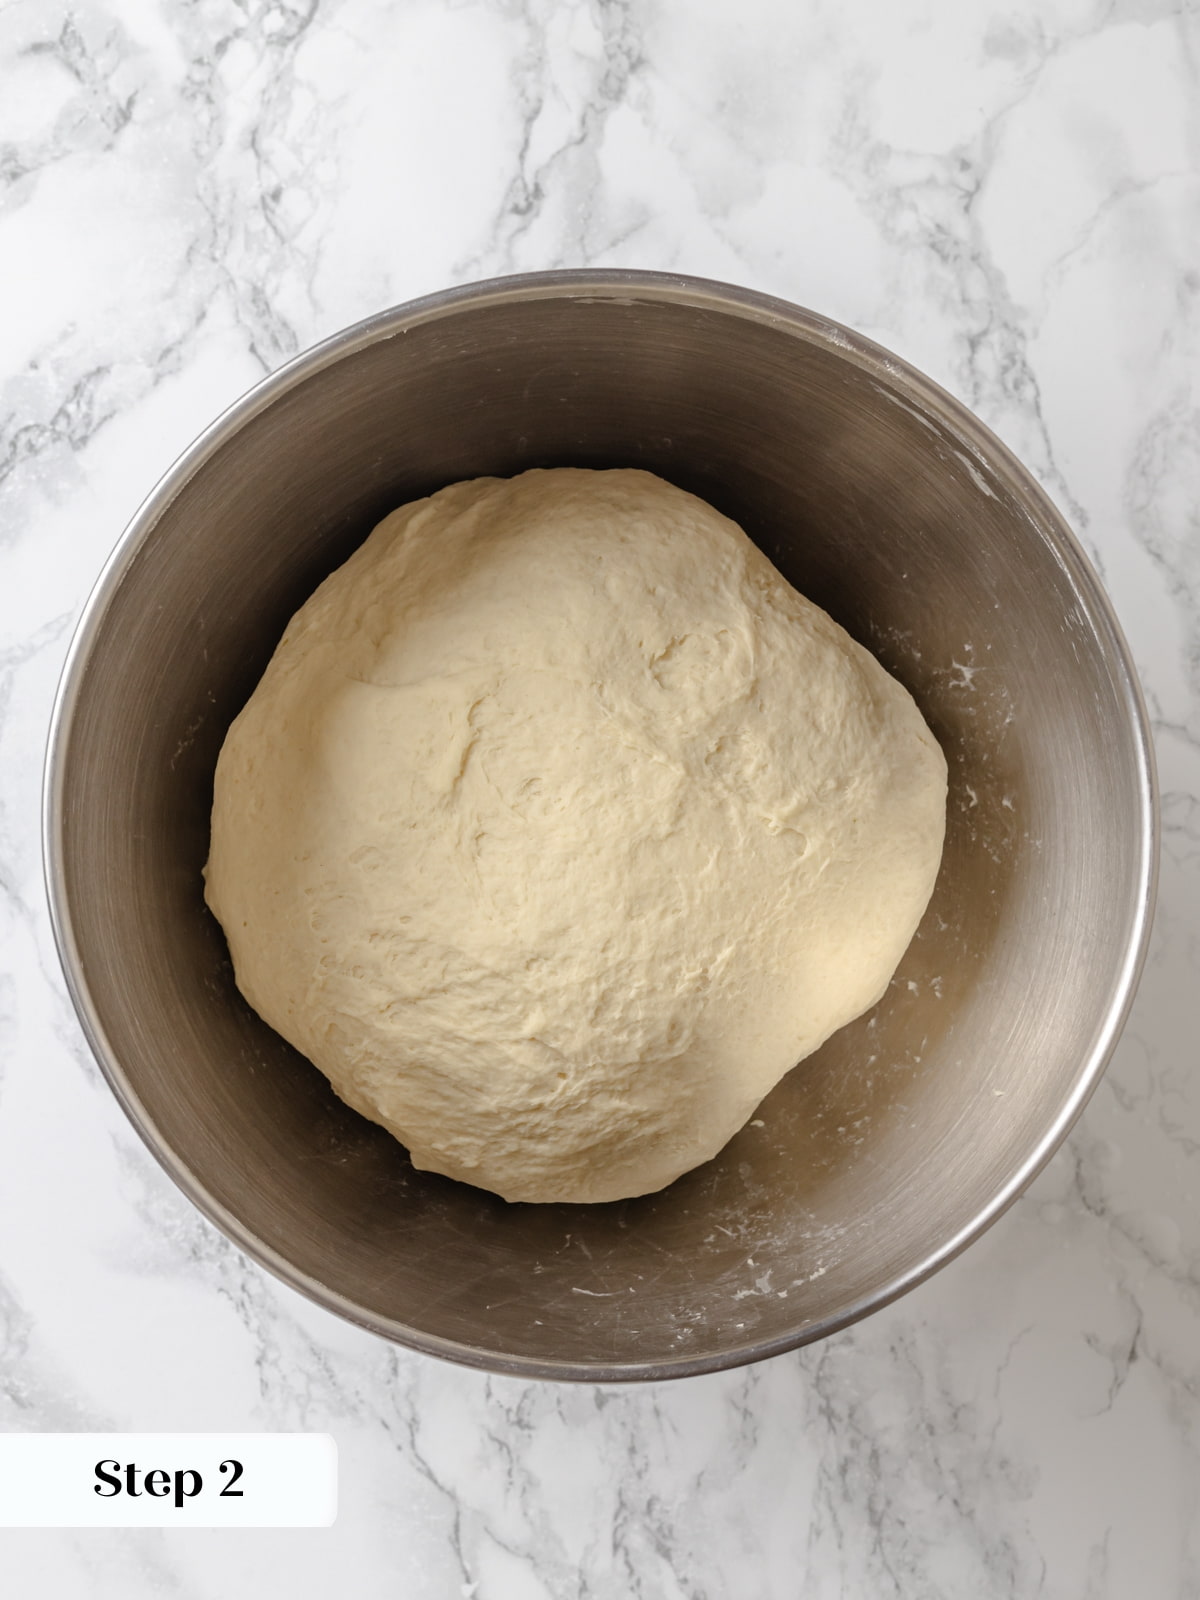
Step 2: Knead to smooth. Increase the mixer to medium speed and knead for about 4 minutes, or until the dough is soft and smooth. The dough should be supple and slightly tacky but not sticky (photo 2).
It should pass the windowpane test, though the semolina makes it a bit more challenging to pull it thin without tearing compared to an all-white flour dough.
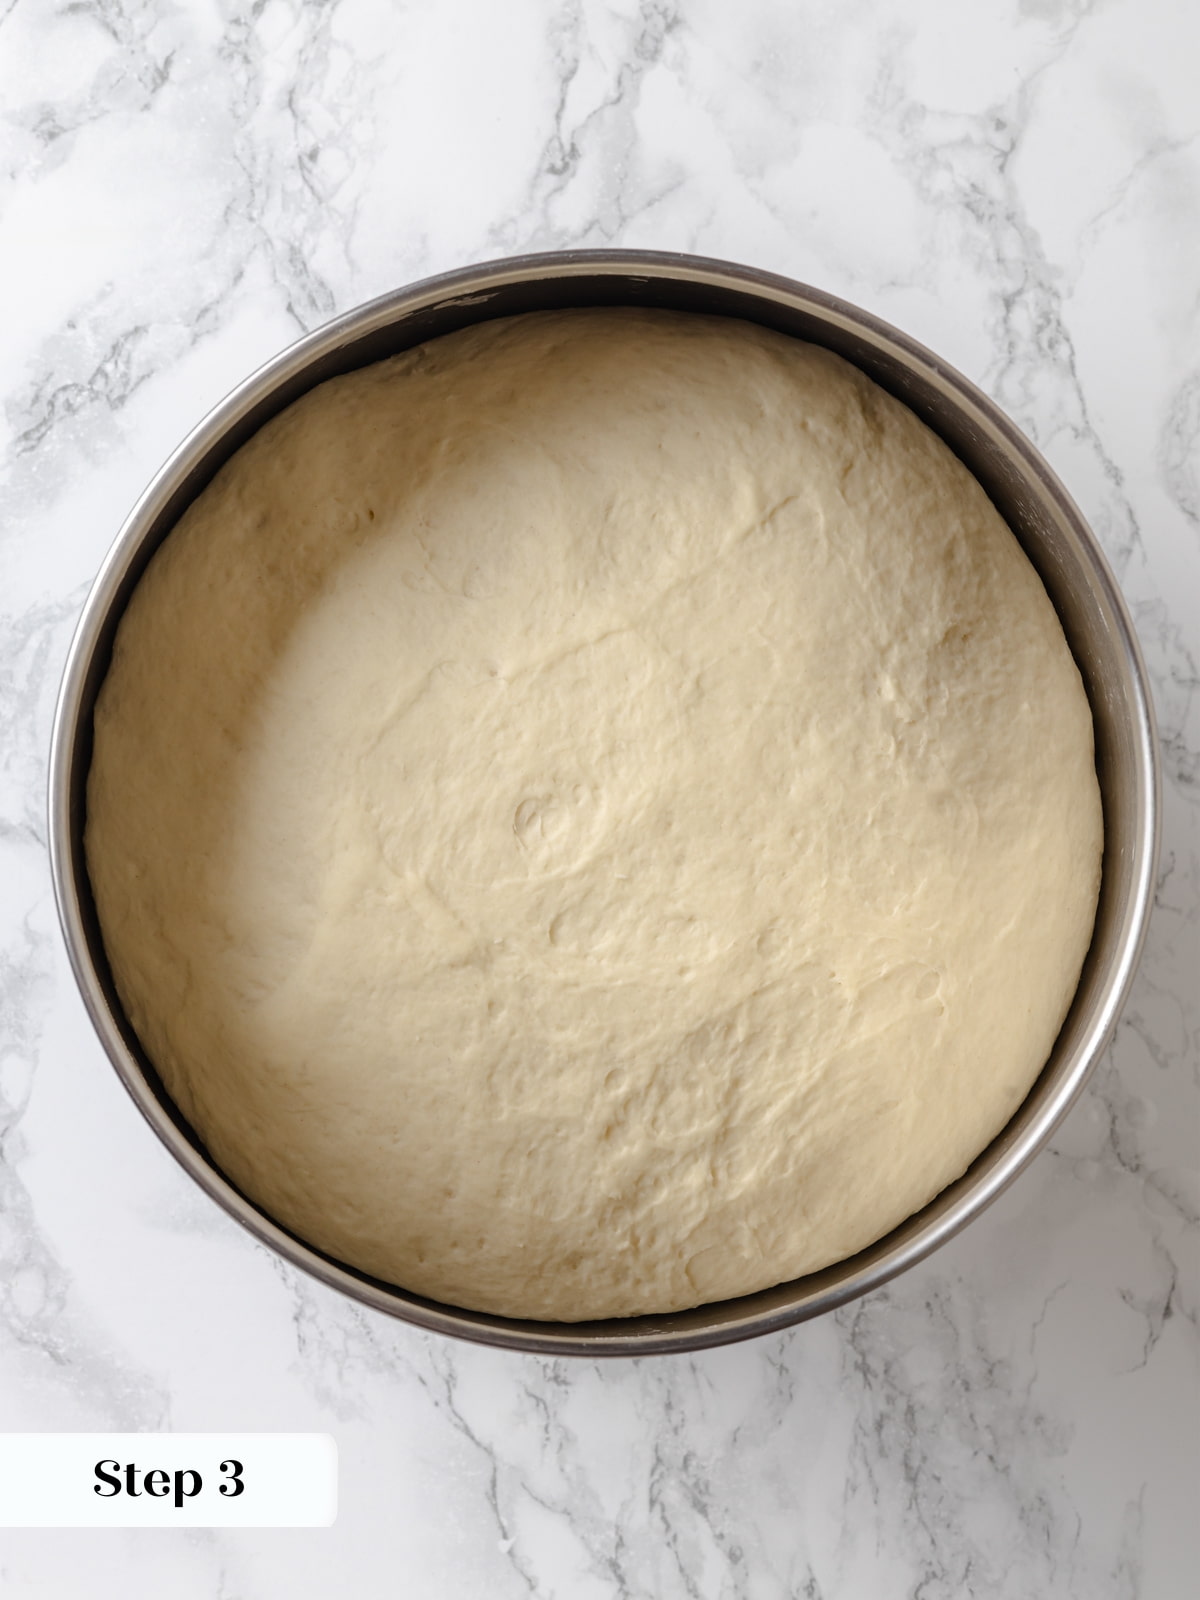
Step 3: First rise. Place the dough in a lightly greased large bowl, cover, and let rise until doubled, about 30 minutes if using instant yeast (photo 3).
Step 4: Prepare egg wash. While the dough proofs, beat together the egg and milk for the egg wash. Set aside.
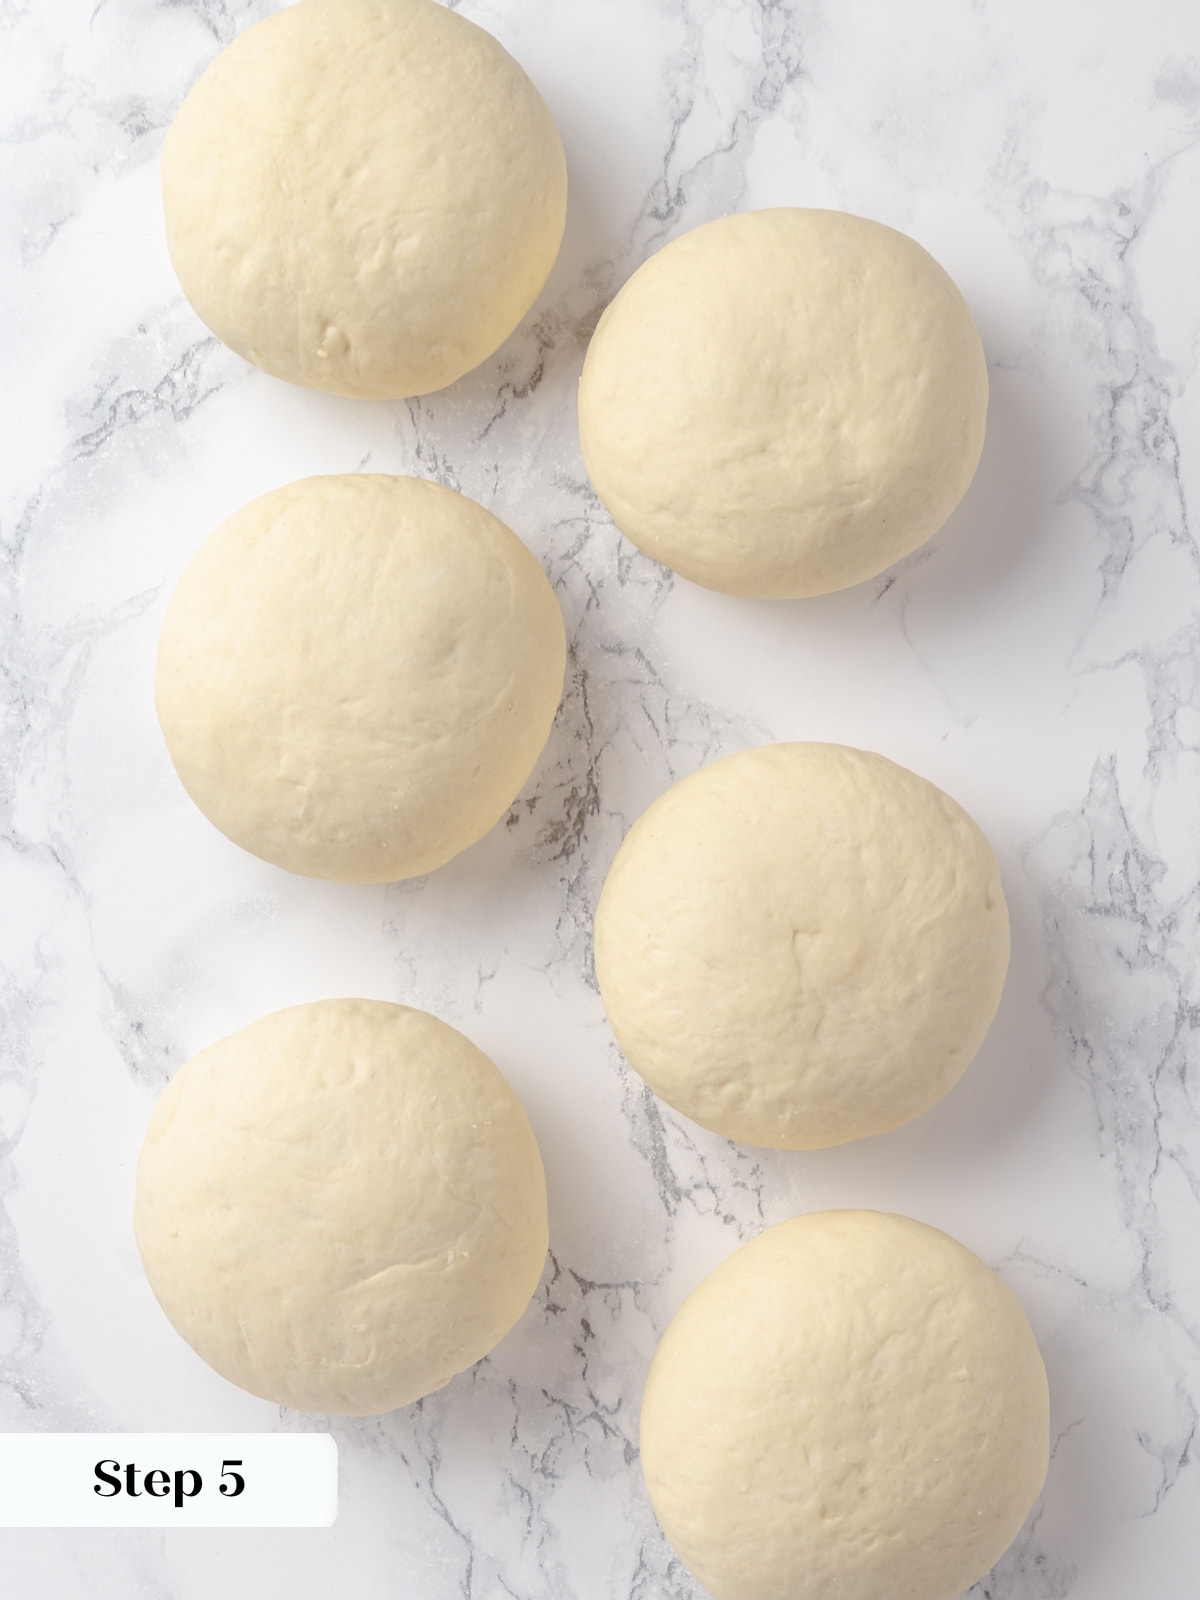
Step 5: Shape the bowls. Divide the risen dough into six pieces (approximately 280g each). Shape each piece into a round ball by tucking all four corners into the center, flipping seam-side down, and tightening by cupping and rotating against the work surface (photo 4).
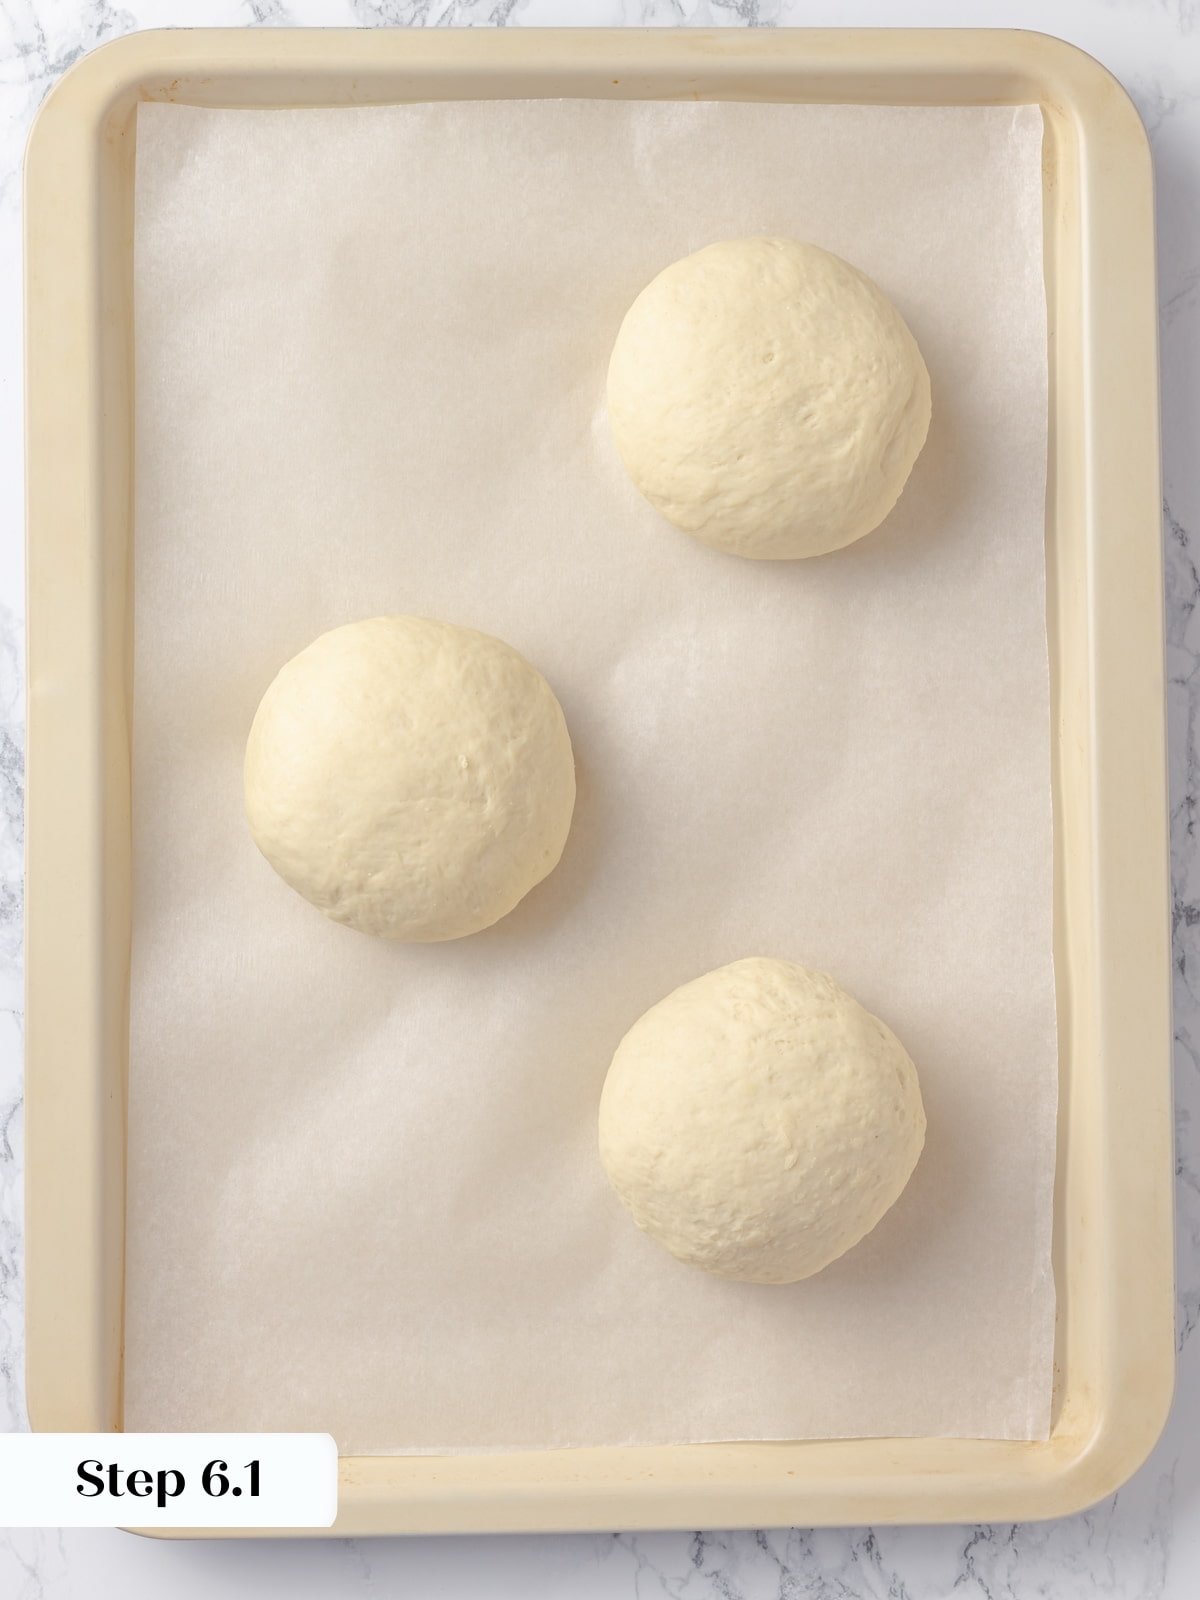
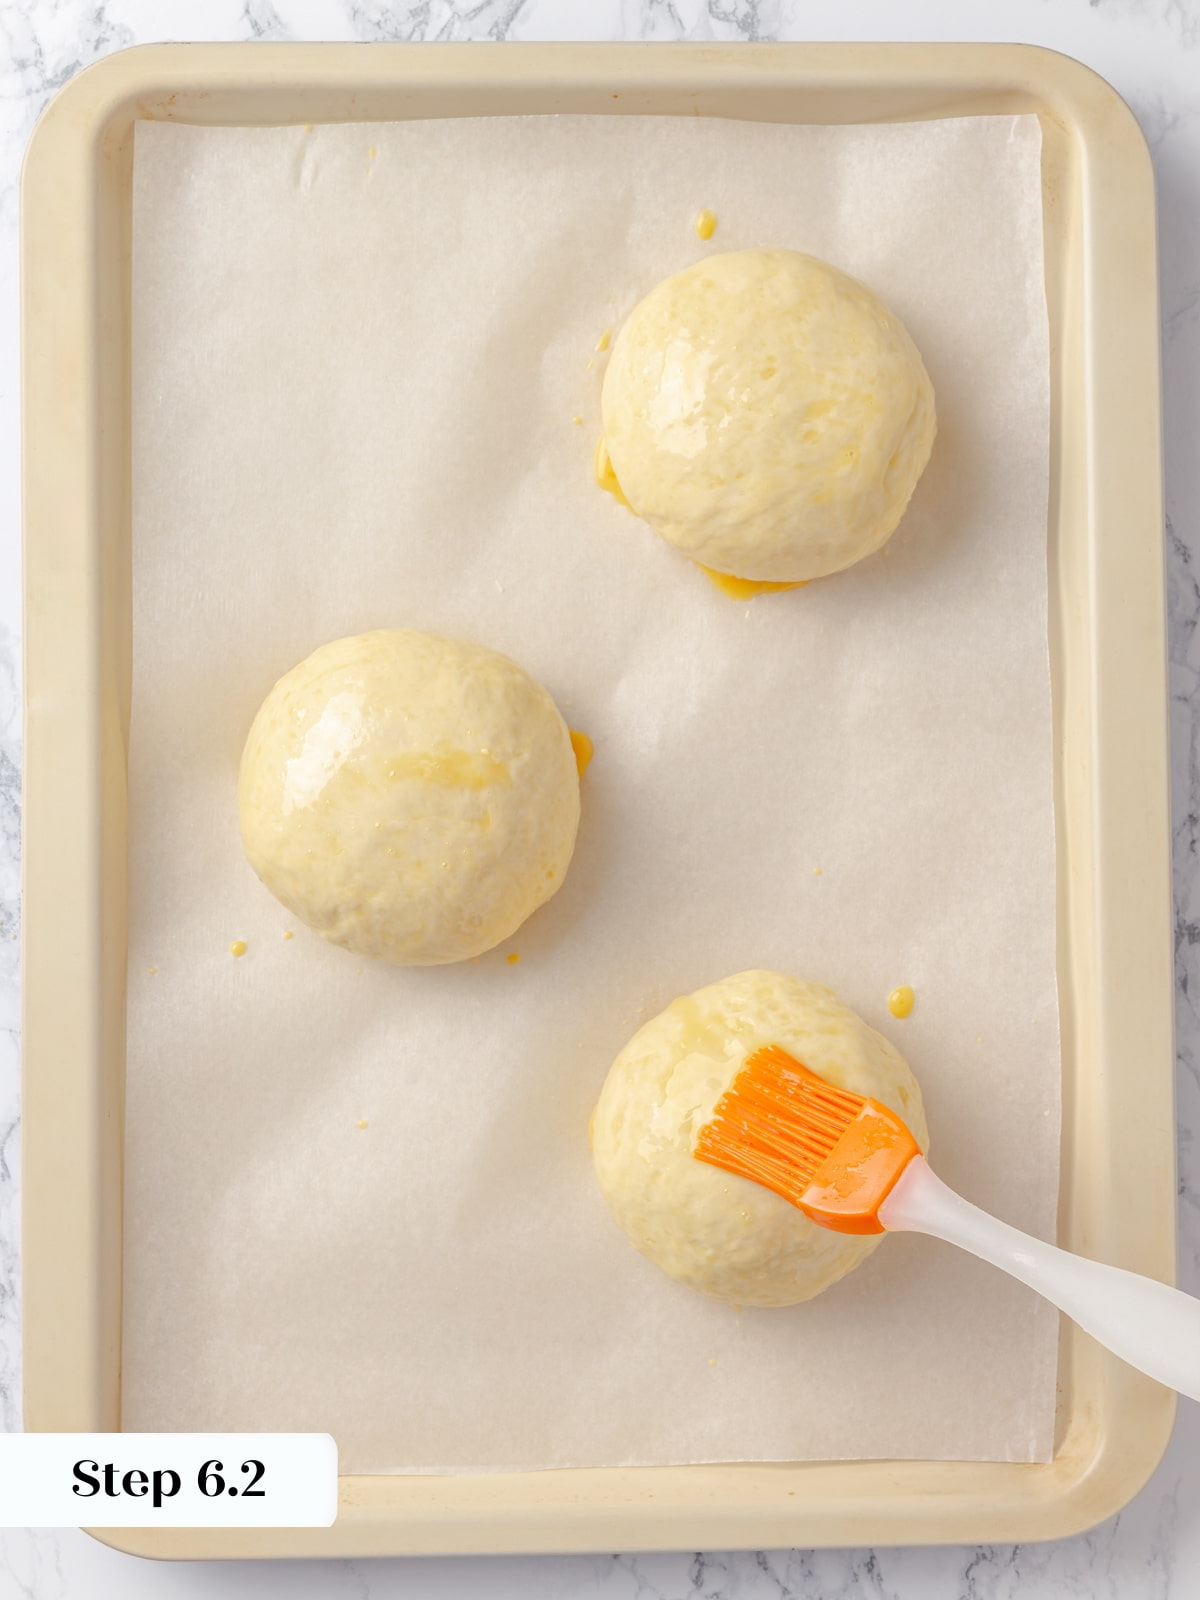
Step 6: Final proof. Place each ball on a parchment paper-lined baking sheet. Brush the tops of each dough ball with egg wash and let them rise until doubled, about 20-30 minutes (photos 5 & 6).
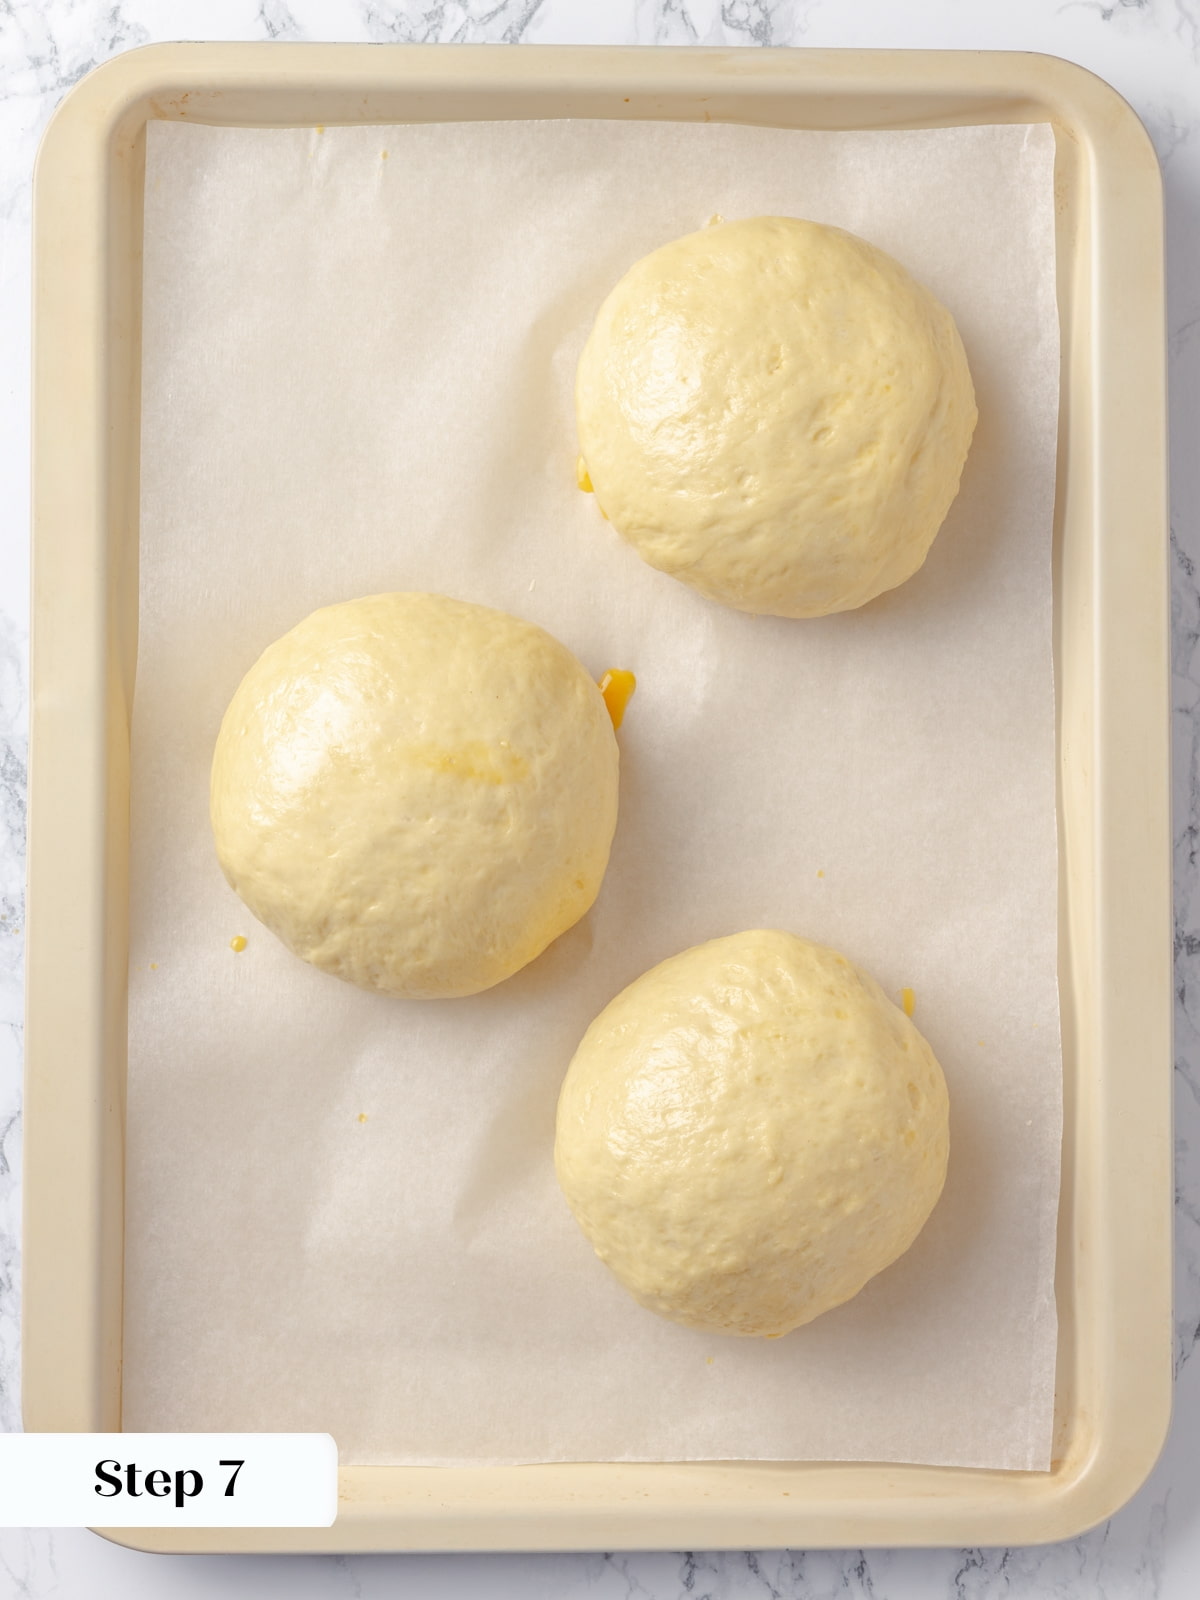

Step 7: While the dough undergoes its final proof, preheat the oven to 425°F (photo 7).
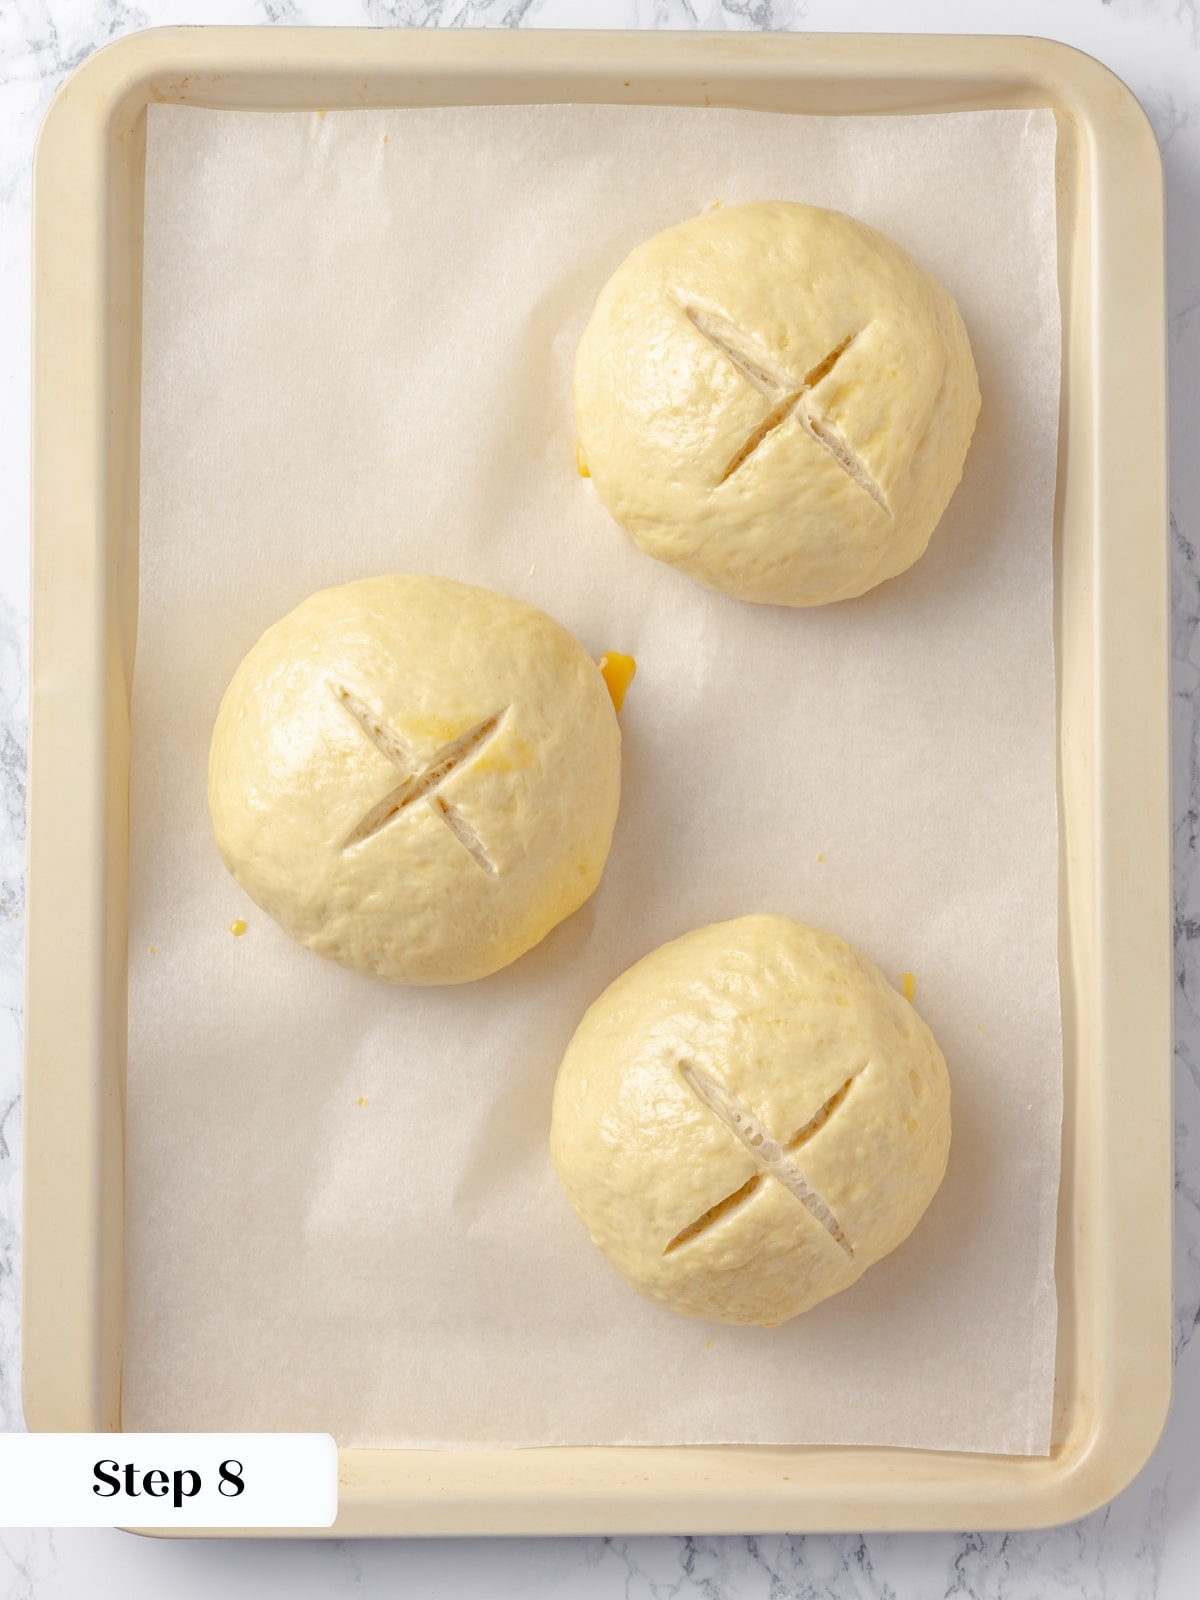
Step 8: Bake. Before placing the rounds in the oven, score each with an X on top using a sharp knife. Bake for 20-22 minutes or until golden brown, rotating the pan after 15 minutes for even browning (photo 8).
Step 9: Cool. Remove the bread bowls from the oven and let cool completely on a cooling rack before cutting (photo 9).
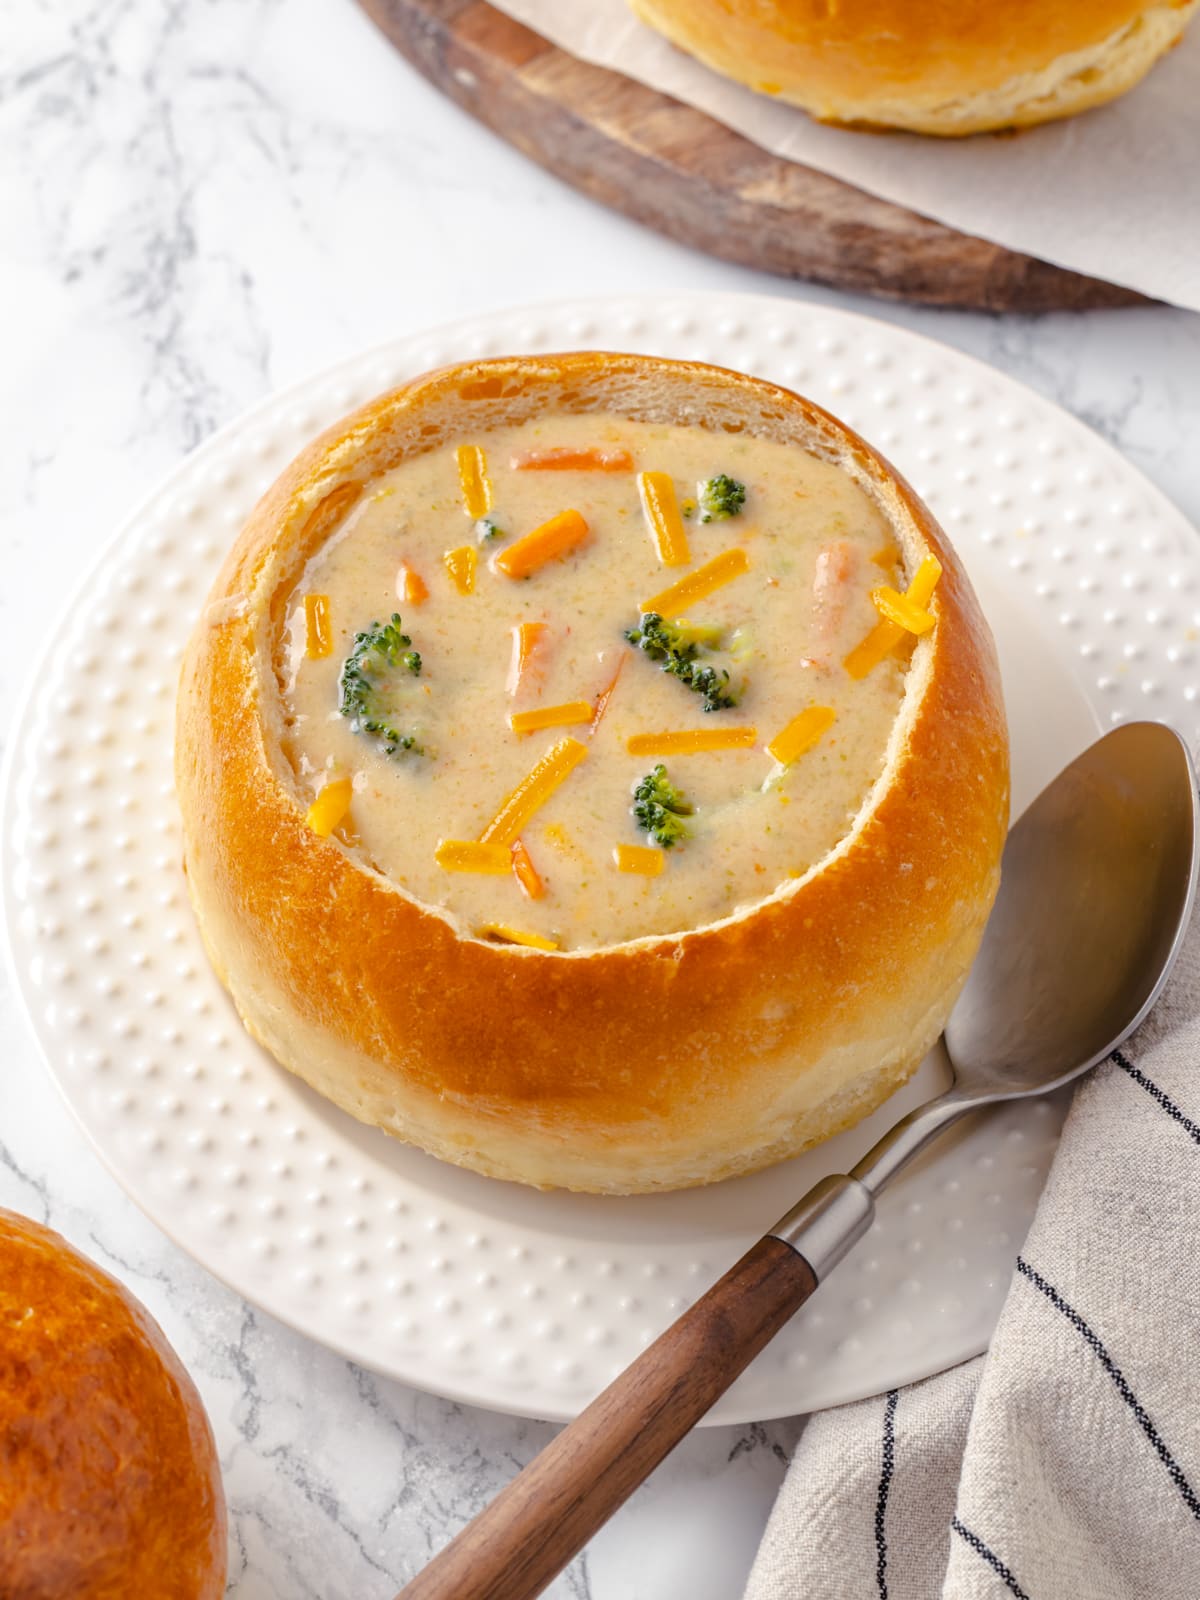
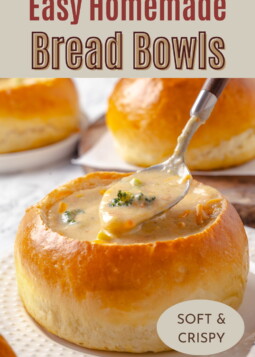
Step 10: Hollow and fill. To hollow out the bowls, cut off the tops with a small paring knife inserted at an angle to create a little wedge. Remove the insides, leaving about ¼ to ½ inch thickness all around. Fill with your favorite hearty soup or chili (photo 10)!
Recipe FAQs
Absolutely! The original recipe I adapted actually made smaller bread bowls. You can divide the dough into 8-10 pieces for smaller bowls (perfect for appetizer portions) or make 4 larger bowls for heartier servings. Just adjust the baking time accordingly—smaller bowls will bake faster, larger ones will need a few extra minutes.
Yes! Let the bread bowls cool completely, then wrap them individually in plastic wrap and place in a freezer-safe bag. Freeze baked bread bowls for up to 3 months. To use, thaw at room temperature, then warm in a 350°F oven for 10 minutes to refresh the crust before hollowing and filling.
Store unfilled bread bowls in an airtight container at room temperature for up to 3 days. The crust will soften over time. To crisp it up again, warm in a 350°F oven for 5-7 minutes before serving.
Don’t throw it away! Use the removed bread for dipping in your soup, pulse it into fresh breadcrumbs for slow cooker Italian meatballs or air fryer chicken tenders, or toss it with tomatoes and fresh herbs for a quick stone fruit panzanella salad if you’re feeling fancy!
Thick, hearty soups and stews work best because they won’t soak through the bread too quickly. Try Dutch oven beef stew, broccoli cheddar soup, beef chili, homemade tomato soup, or loaded baked potato soup. Avoid very thin, brothy soups.
Recommended Soup & Bread Recipes

Yeast Breads

Yeast Breads

Lunch & Dinners

Lunch & Dinners
If you enjoyed this recipe, please leave a star rating and let me know how it goes in the comments below! I love hearing from you and your comments make my day!
Easy Homemade Bread Bowls
Ingredients
- 6 cups unbleached all-purpose flour
- 2 cups semolina flour
- 2 ¼ teaspoons instant yeast
- 4 teaspoons granulated sugar
- 1 tablespoon kosher salt
- 3 cups water
- 1 egg
- 2 teaspoons milk, for egg wash
Instructions
- In the bowl of a stand mixer fitted with dough hook, combine all-purpose flour, semolina flour, yeast, sugar, salt, and water. Mix until dough comes together.
- Increase to medium speed and knead 4 minutes until soft and smooth.
- Place dough in lightly greased bowl, cover, and let rise until doubled, about 30 minutes.
- Beat together egg and milk for egg wash.
- Divide risen dough into 6 pieces (approximately 280g each). Shape into round balls by tucking corners to center, flipping seam-side down, and tightening against work surface.
- Place on parchment-lined baking sheet, brush with egg wash, and let rise until doubled, 20-30 minutes.
- Preheat oven to 425°F.
- Score each bowl with an X. Bake 20-22 minutes until golden brown, rotating after 15 minutes.
- Cool completely on wire rack.
- Cut off tops at an angle with paring knife. Remove insides leaving ¼-½ inch thickness. Fill with soup or chili.
Notes
Nutrition
Nutrition information is automatically calculated, so should only be used as an approximation.
 Like this recipe? Rate & comment below!
Before You Go
I hope you enjoyed these bakery-style bread bowls! Check out our other delicious yeast bread recipes like my potato bread, and then these lunch and dinner recipes for more cozy meal inspiration!


I cook for two friends on Thursdays, and I wanted to surprise them with something a little cozy. I swapped in active dry yeast and it seemed that doubling the proof time worked just fine! These were a big hit with a creamy potato soup, literally nothing collapsed or leaked. Thanks, chef!
These bread bowls were delicious and super easy to make! I was especially impressed at how well they held up to second and third helpings! No soggy or leaky crusts here!
Thanks for helping make a highly enjoyable and successful dinner possible! 🙂
Looks amazing, Steph!! I’ve got my big spoon ready for the next time you make these (they would be so perfect for fall in New England)!
Wow. Again. I am really missing your baking here and would have loved to have joined you guys in what looks like an absolutely wonderful meal. Leftovers? 🙂