This classic Italian bread recipe is soft and tender on the inside with a chewy crust on the outside. Homemade bread doesn’t get much better — or simpler — than this!
(NOTE: This post was originally published in 2014 (!). We’ve since then updated it with new photos, but it’s the same recipe you know and love.)
Table of Contents
How to Make Italian Bread from Scratch
Sometimes I wish I had one of those potions from Alice in Wonderland so I can make myself small enough to lay on a slice of this Italian bread like a pillow. A heavenly soft, carbolicious pillow.
But seriously, how wonderful would that be? Because not only are you totally comfy-cozy, you also have a snack right there to munch on as needed. And then when you want to eat the bread as a sandwich or make it into a yummy baked French toast or strata or something, you can take the potion that makes you big again. It’s perfect.
Aaaaaand I’ve lost you. But homemade, soft-on-the-inside-crusty-on-the-outside classic Italian bread, remember? Yes, let’s focus more on that.
Watch How to Make Homemade Italian Bread
Ingredients You’ll Need
I am fairly certain that whenever I went to my grandma and grandpa’s house as a kid, my snack diet consisted of snap peas from the garden, kohlrabi stalks (no, really, so good) and sliced Italian bread from the bakery plain or with my grandmother’s plum jam on it (that is truly one of the best things about life ever, and I hope I can get the recipe one day to share it with you). So when Red Star Yeast asked me to make a loaf of Italian bread using their yeast, I was happy to take it on because nostalgia. And homemade bread. It was a no-brainer.
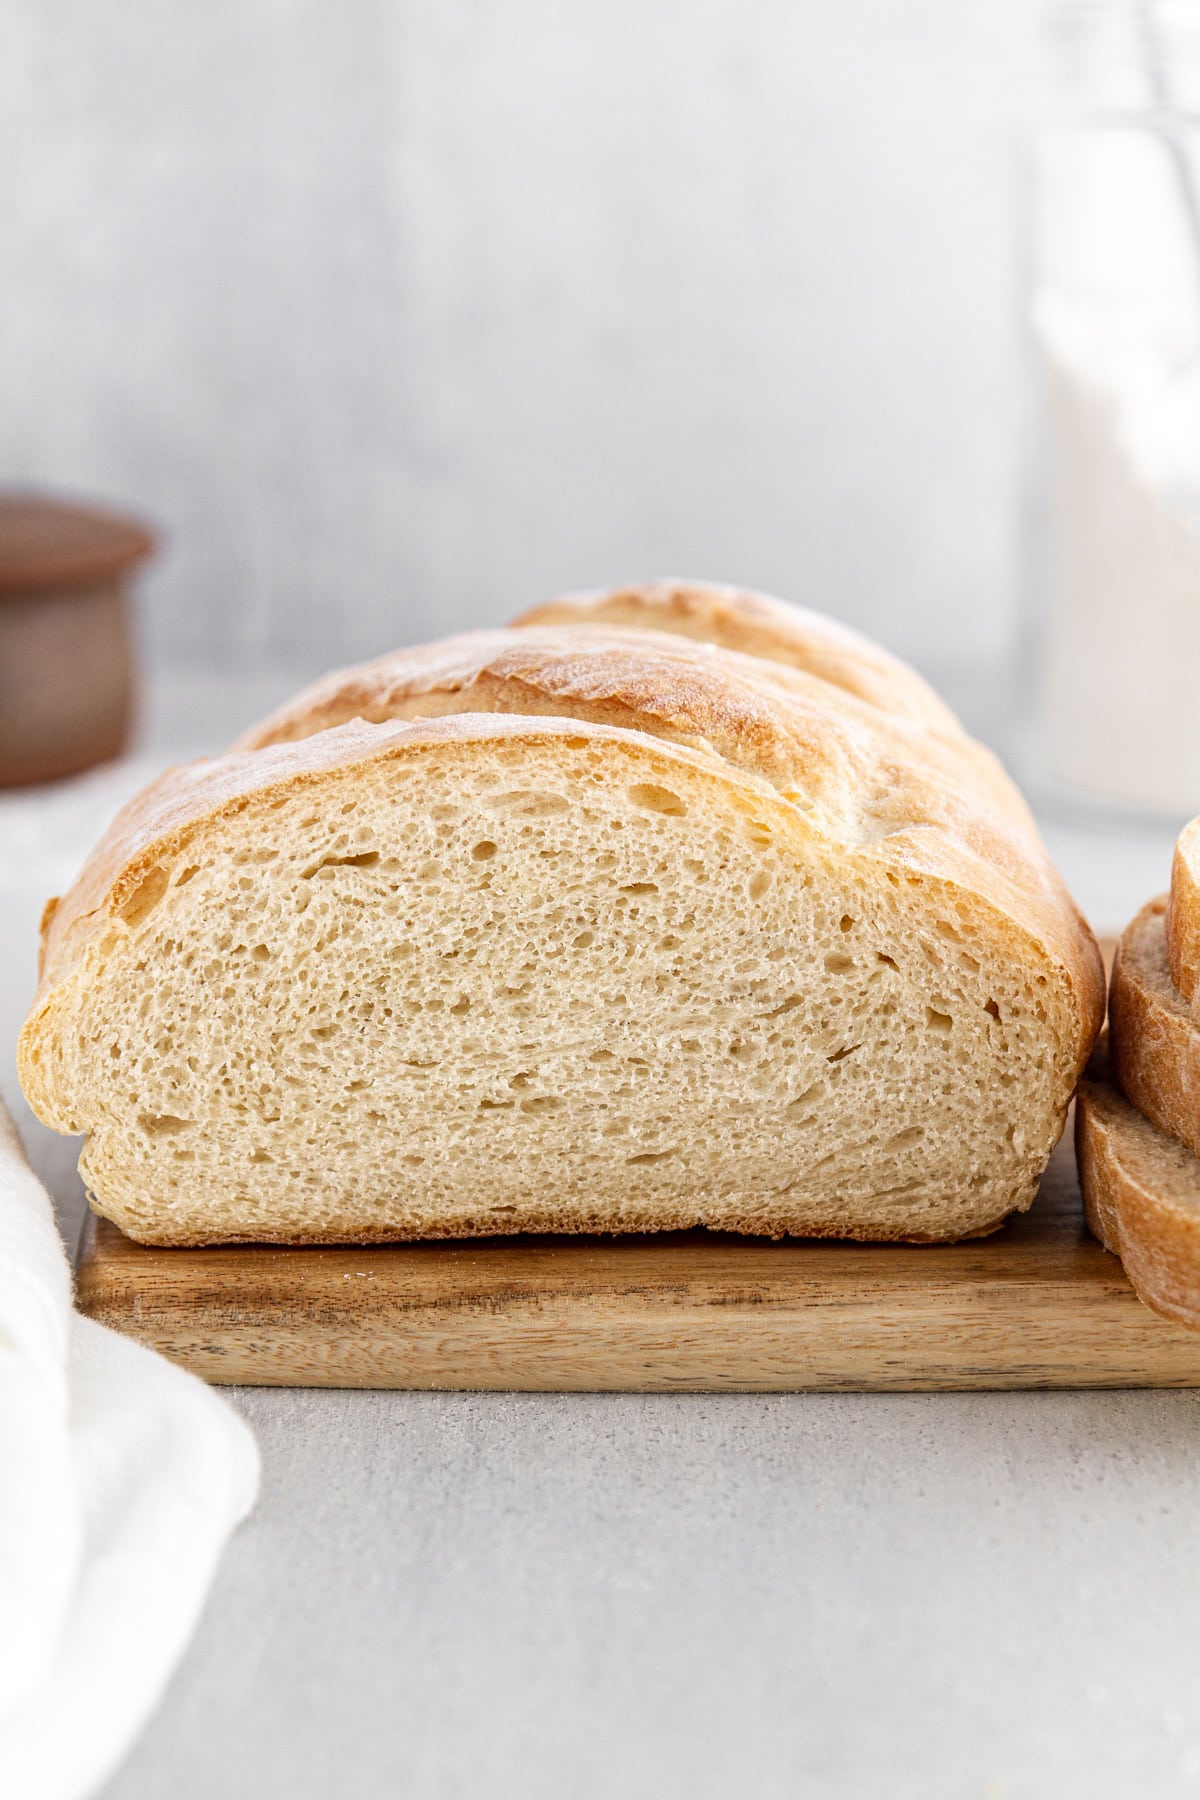
I was a little nervous that my recipe wouldn’t taste quite the same as what I remembered eating as a youth — that soft, aforementioned pillowy center with a perfectly chewy, flaky crust — but my friends, this recipe is just that and it is a glorious thing. It really doesn’t take much time, effort or ingredients to get there, either. Just a little:
- Flour (bread flour or all-purpose flour works for this recipe!)
- Yeast (Active dry yeast or instant yeast — see Recipe Notes for conversions!)
- Water
- Olive oil
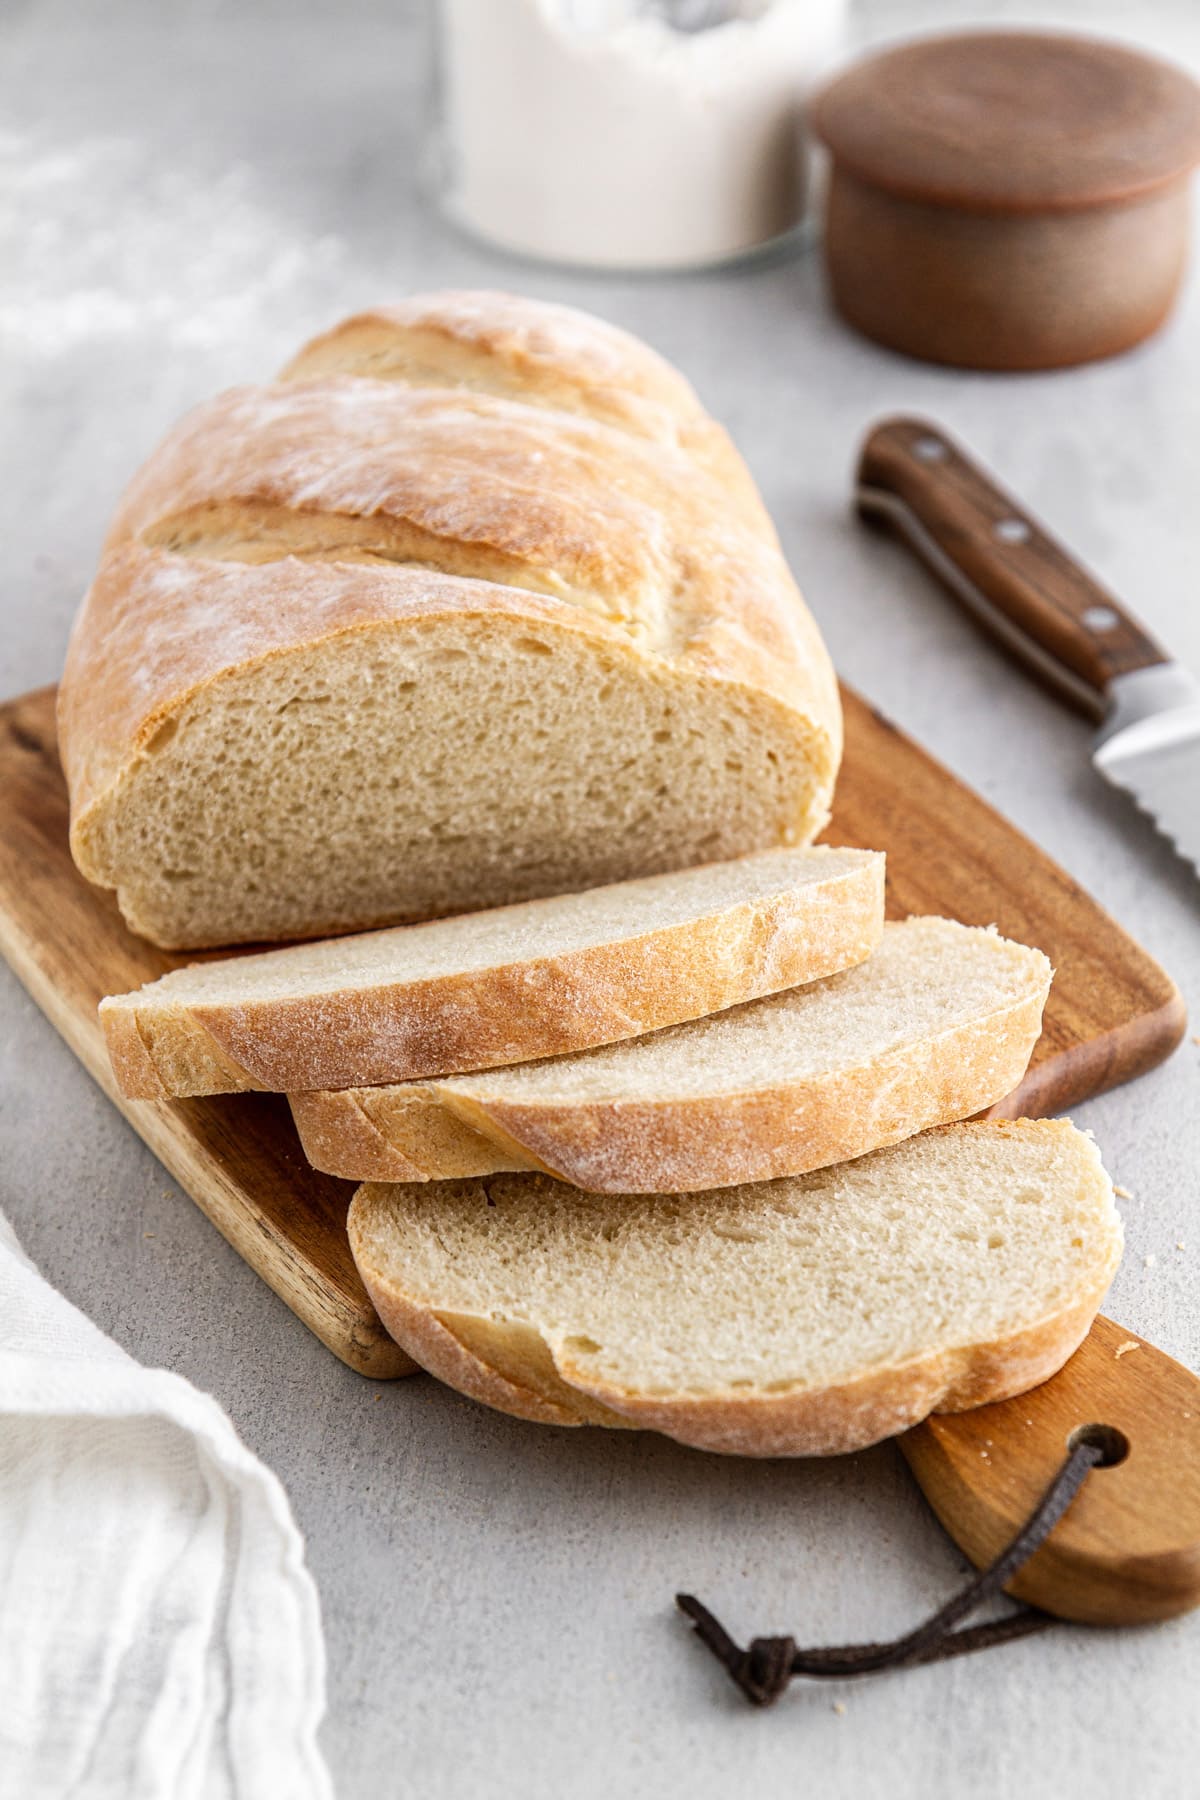
- And a little know-how on shaping it into a batard/torpedo loaf (which I show in the video above!)
And just like that, you’re well on your way to homemade bread blissdom.
How to Enjoy Italian Bread
So in conclusion, I’ll be making a loaf of this bread on the regular this fall and the Season That Shall Not Be Named. And it will be taking any and all of the following forms: Sandwich, strata, bread pudding, French toast, baked French toast casserole, croutons, grilled cheese, toast. Surely I am missing more options, but that’s just for starters.
Of course, just eating slice after slice plain (as I may or may not have done once this loaf was cool enough to cut into) is going to happen a lot, too.
If this crisp-cool weather (or in my great state of Minnesota, the weird summer-after-fall weather we’ll be having) has got you bit by the baking bug as it has me, then put this easy homemade Italian bread on your list. You can thank me for it later, with a sandwich. For dessert, keep the Italian thing going with this olive oil cake, ricotta blueberry cake or an Italian panna cotta!
More Delicious Bread Recipes
- rosemary-garlic no-knead bread
- no knead ciabatta bread
- classic brioche loaf bread
- cinnamon raisin sourdough bread
- whole wheat bread
- potato bread
- nostalgic banana bread
Italian Bread

Ingredients
- 2 ¼ teaspoons active dry yeast, 1 packet
- 1 teaspoon granulated sugar
- 1 cup warm water
- 2 ½ cups bread flour , or all-purpose flour
- 2 tablespoons olive oil
- 1 teaspoon salt
Instructions
- In a large bowl or bowl of a stand mixer, combine yeast, sugar and warm water (about 110°F)
- Let stand 5 to 10 minutes or until yeast is foamy.
- Add 2 cups flour, olive oil and salt. Stir with a wooden spoon or with a dough hook on low speed until a shaggy dough forms. Turn dough out onto a lightly floured surface and knead by hand 10 minutes, adding just enough of the remaining flour until a soft, smooth and elastic dough forms; OR, increase dough hook speed to medium and knead dough in stand mixer 5 minutes, adding just enough of the remaining flour until a soft, smooth and elastic dough forms.
- Shape dough into a ball; place in an oiled bowl and turn to coat. Cover bowl with plastic wrap and let dough rise 1 hour until doubled.
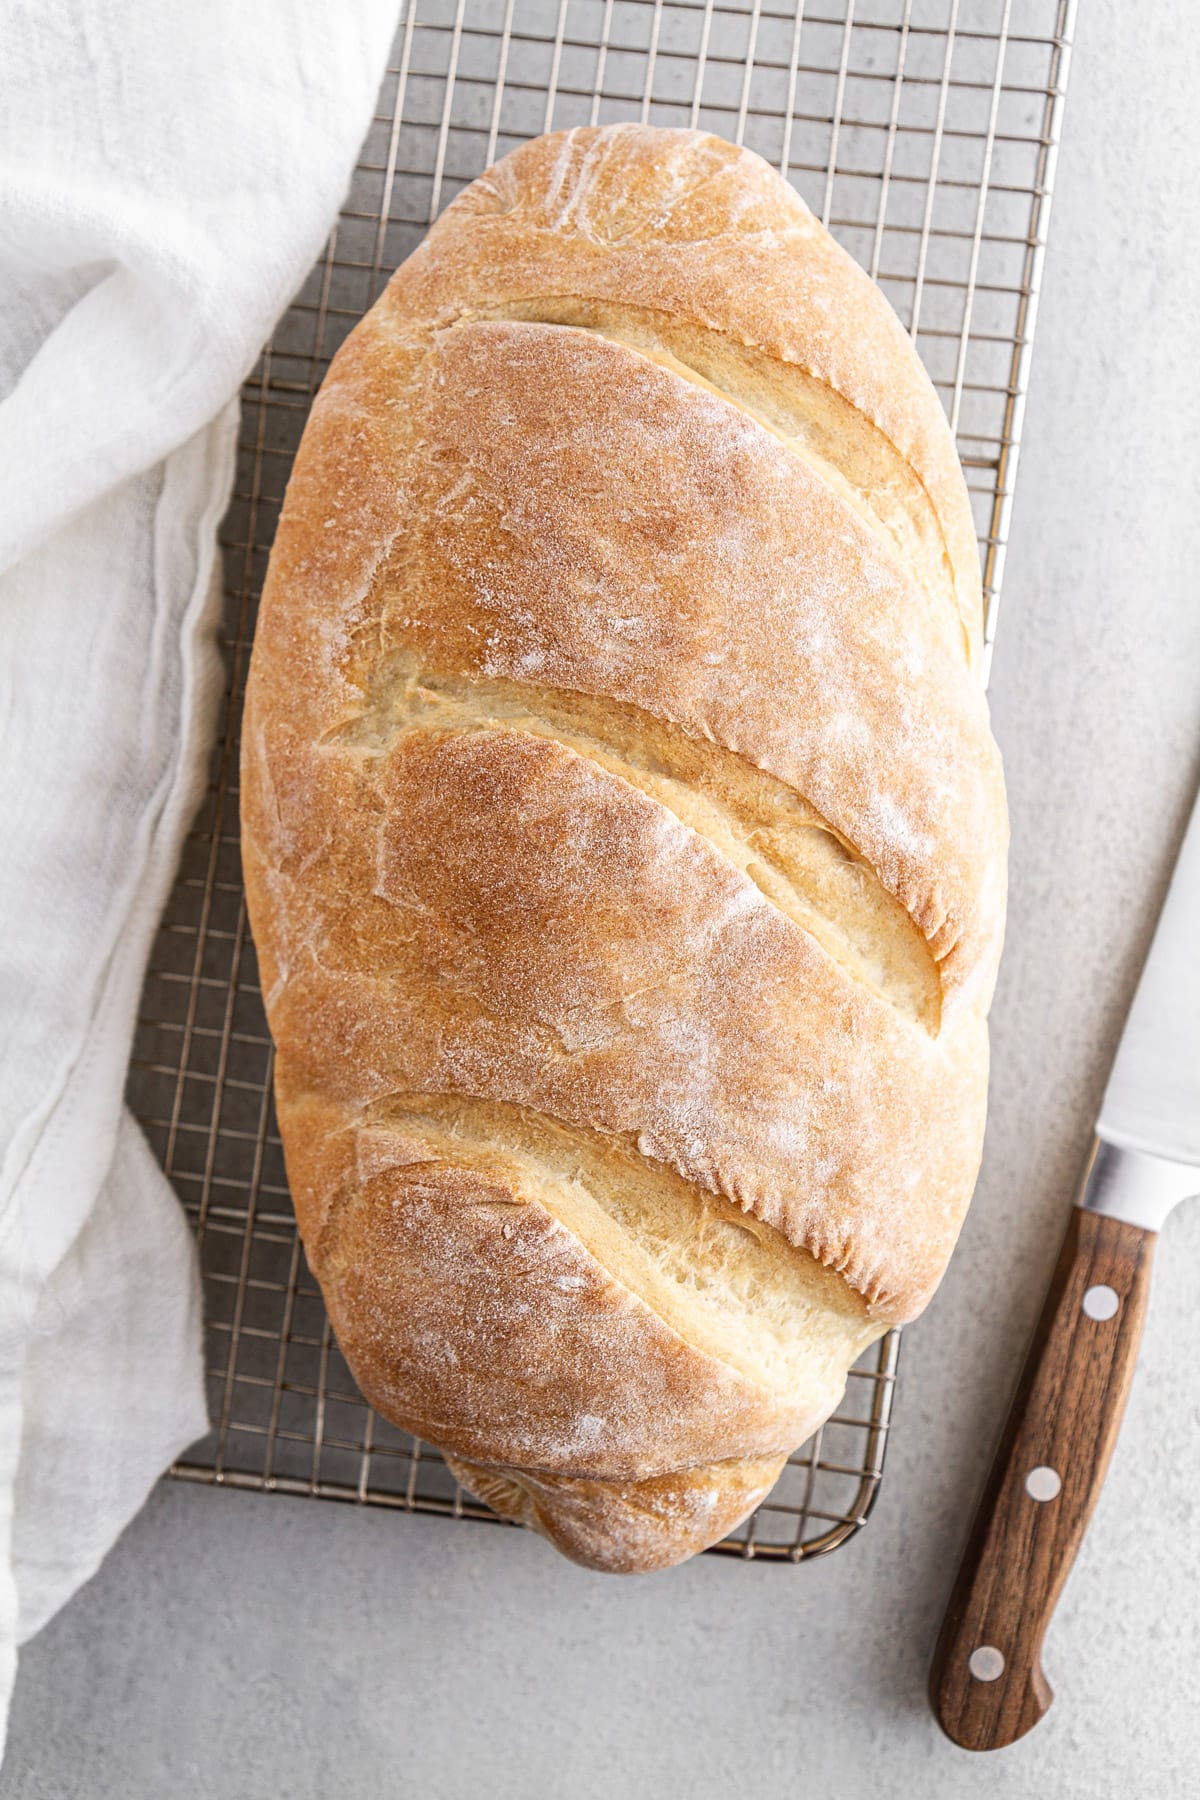
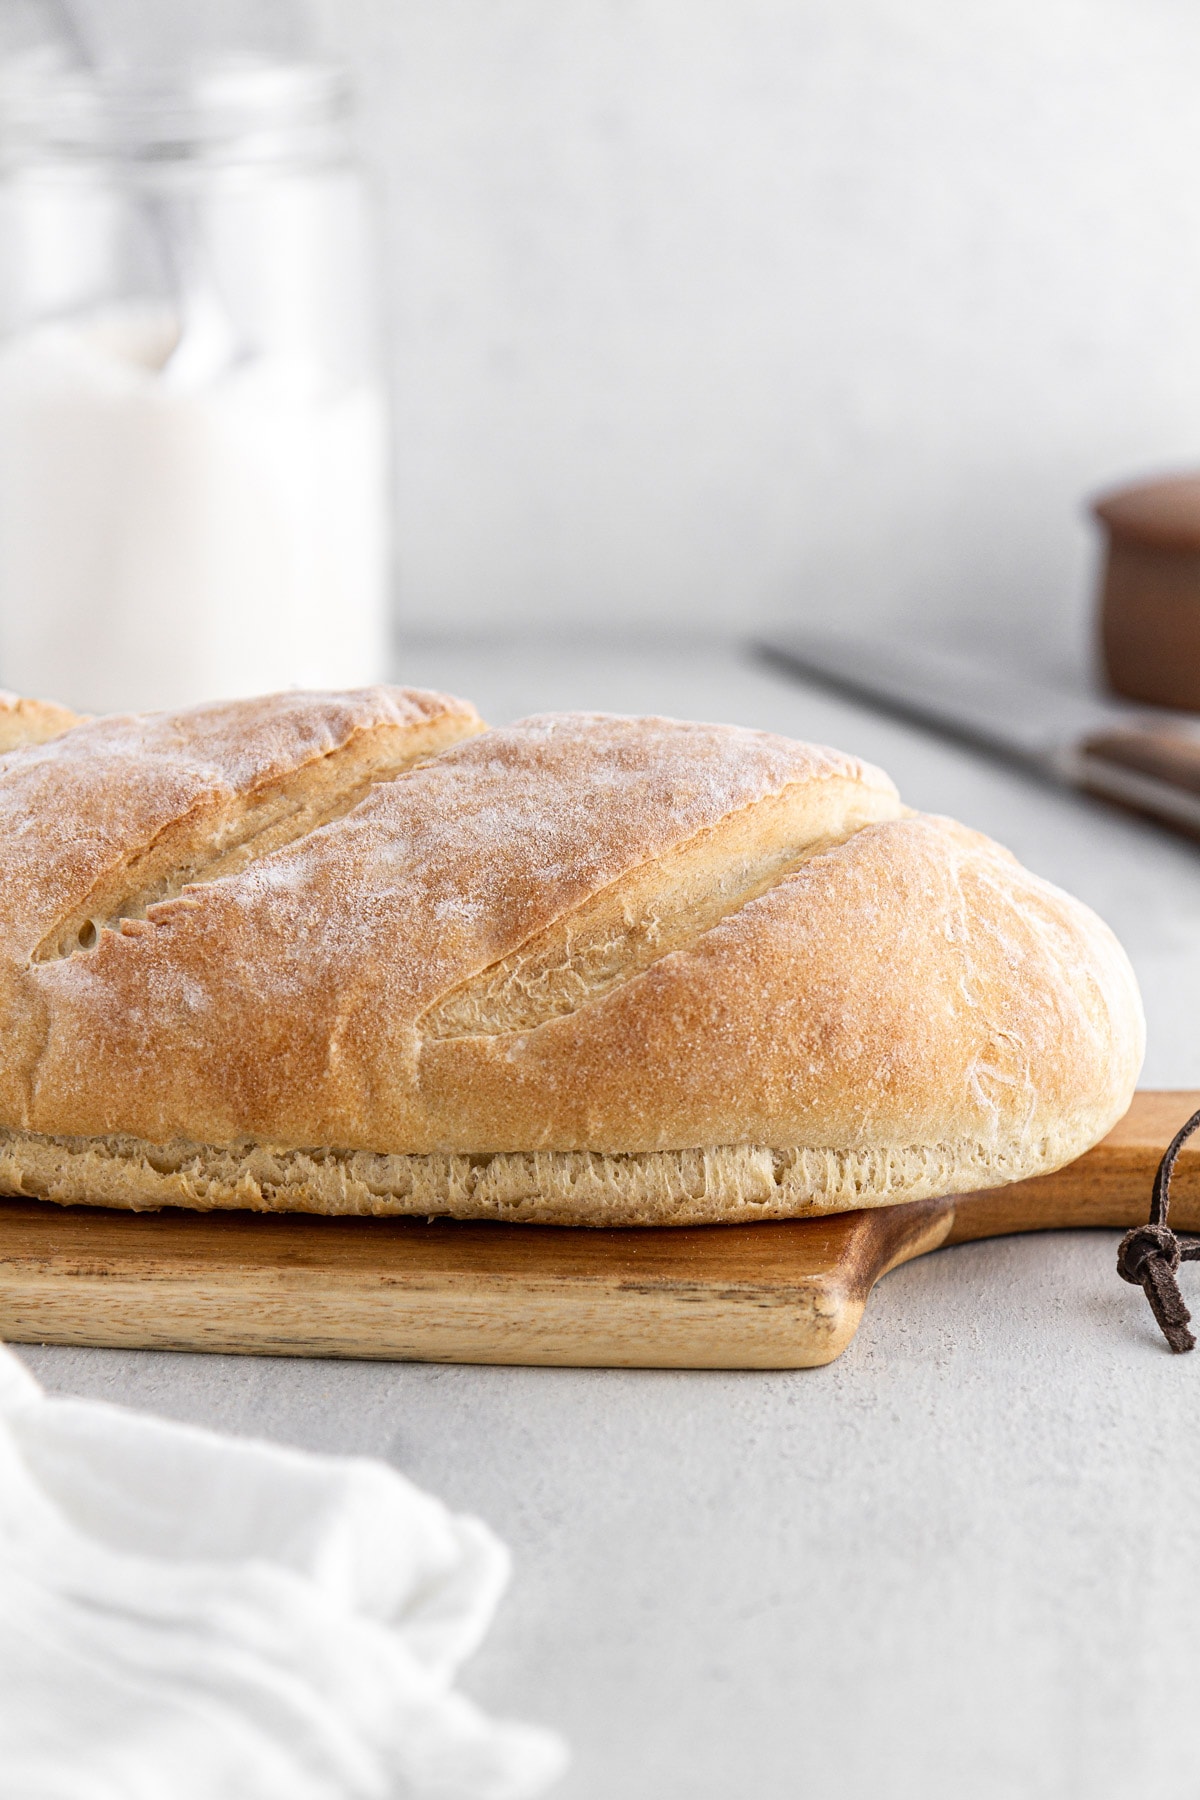
- Heat oven to 400°F. Line a baking sheet with parchment paper, a silicone mat or lightly grease the surface with oil or cooking spray. On a lightly floured surface, punch down dough, then carefully shape into a batard/torpedo about 12 inches long. Transfer to prepared baking sheet. Cover with a tea towel and let rise another 20 to 30 minutes until puffy.
- Use bread lame, razor blade or serrated knife to make a few 1/4-inch deep slits in the surface of the loaf. Bake loaf 20 to 25 minutes or until golden brown. Cool completely on a cooling rack before slicing.
Video
Notes
- Yield: 1 large loaf
- *If you only have instant yeast on hand, use 1 3/4 teaspoons of instant yeast in place of the active dry yeast.
- Use the highest quality olive oil you have on hand, if possible.
- How to store homemade Italian bread: Leave unsliced bread uncovered (or covered with a tea towel) at room temperature 1-2 days. If sliced, store bread cut side-down on a cutting board at room temperature 1-2 days. Beyond 2 days, store bread in a paper or plastic bag, sealed, at room temperature another 1-2 days. You can also freeze homemade Italian bread in a sealed plastic bag for up to 3 months.
Nutrition
Nutrition information is automatically calculated, so should only be used as an approximation.
 Like this recipe? Rate & comment below!
Disclosure: I received compensation from Red Star Yeast for recipe development purposes. All opinions are my own.


Can this dough be used for pizza dough?
Hi Jeannine! Yes, it can work in a pinch, but it’s not ideal. This dough is designed for a loaf, so it’s lower hydration than typical pizza dough. You can stretch it after the first rise, but expect a thicker, bread-style crust. For best results, I’d recommend our No-Knead Pizza Dough or pizza dough recipe instead.
I made a loaf of this as a gift. It smelled wonderful and came out looking quite perfect. I’ve been baking bread for over 50 years now, but I’m wondering if I can double this recipe and then make 2 regular-sized loaves? I think the other poster was looking to make 2 small loaves? All of my bread freezes well. I slice them first, wrap them well, and then hubby takes out 2 pieces before going to bed and puts in the fridge for his breakfast toast. Frozen tastes much better than refrigerated, and last longer. Thanks!!
Hi Suzy! Yes, you can double the recipe and make two regular-sized loaves. Mix and let the dough complete the first 1-hour rise, then divide, shape, and give each loaf the final 20–30 minute rise before baking. The earlier comment was about splitting one batch into smaller loaves. Your freezing method is perfect, too. Happy baking! ~gvd team
I made four loaves this weekend. One recipient started munching on it from the bag I put it in when I delivered it! He said it was incredible! I gave away the 2nd loaf, and then kept 2 for us. This is such a great recipe – thank you so much – and Happy New Year!
Hi Suzy! This made my day, thank you so much for sharing! I love that one loaf didn’t even make it out of the bag! So glad it was a hit all around. Happy New Year to you, too, and happy baking! ~gvd team
Could you make a batch of two an then just split it into 2 different sections?
HI Amanda! Yes, you can make one batch and split it into two smaller loaves. After the first rise, shape each portion, let them proof the final 20–30 minutes, and bake — just expect a slightly shorter bake time for the smaller loaves. Happy baking! ~gvd team
Yeah letting that cool wasn’t gonna happen. PERFECT crunchy crust. Hubs and I just ate about half the loaf while warm with a wonderful oil to dip it in. Amazing bread! Winner Winner!!
Hi Mary! That sounds exactly right! I love it! And I’m fully on board with enjoying it warm with good olive oil. So glad it was a winner for you both! Happy baking! ~gvd team
Have not tried recipe yet, but want to use it for a stuffed bread.
Have you ever rolled out the dough after the first rise? Asking since you state to carefully shape into loaf and wasnt sure if it would rise the last 30 mins if i did this. Thanks
Hi Amy! Yes, you can roll the dough out after the first rise to make a stuffed bread. Since the recipe already has you punch down dough, then carefully shape into a batard/torpedo, the dough is meant to be degassed and reshaped at that stage and will still rise during the final 20–30 minute proof. Just be sure to seal the filling well before shaping. If it helps, you can find more tips in my stuffed cheesy bread before baking. Report back with what you make and happy baking!
The Italian bread was delicious! I sprinkled some sesame seeds on top before baking. Can’t wait to try your other recipes!
Hi Lynn! So happy to hear that, thanks for circling back to share your experience! ~gvd team
Bread was great. Issue however with the recipe. States 1 1/2 hours total time. Should be close to 2 1/2. Hour rest after mixing. 30 minute rest after shaping. 25 minute cook time. Not complaining just want others to be aware in case you are crunched on time.
Hi David! I’m so happy you enjoyed the bread and thanks so much for pointing that out. The recipe card lists the active prep, bake time, and the main 1-hour rise, but depending on your pacing and kitchen temp, it can definitely feel closer to 2+ hours start to finish. I really appreciate you sharing that for anyone planning ahead and happy baking! ~gvd team
I saved my email as directed but never received anything in my inbox.
Is the site still active?
Hi Diana! Thanks for checking in — yes, the site is absolutely still active. Sometimes emails get caught in filters, so it’s worth checking spam or promotions just in case. If you still don’t see anything, feel free to try signing up again or let me know and I can take a look from my side. Happy to help! ~gvd team
Did it again and it’s going to be a Thanksgiving winner. Second time was easier and I felt totally confident.
Hi Sandy! Nothing better than that second-time confidence boost! And I love that it’s earning a spot on your Thanksgiving table. Thanks for reporting back and happy baking! ~gvd team
Best bread I’ve ever made! Will always use this recipe now
Hi Anna! This makes my whole day. Thank you for baking with us, and I’m glad it’s your new go-to! ~gvd team