
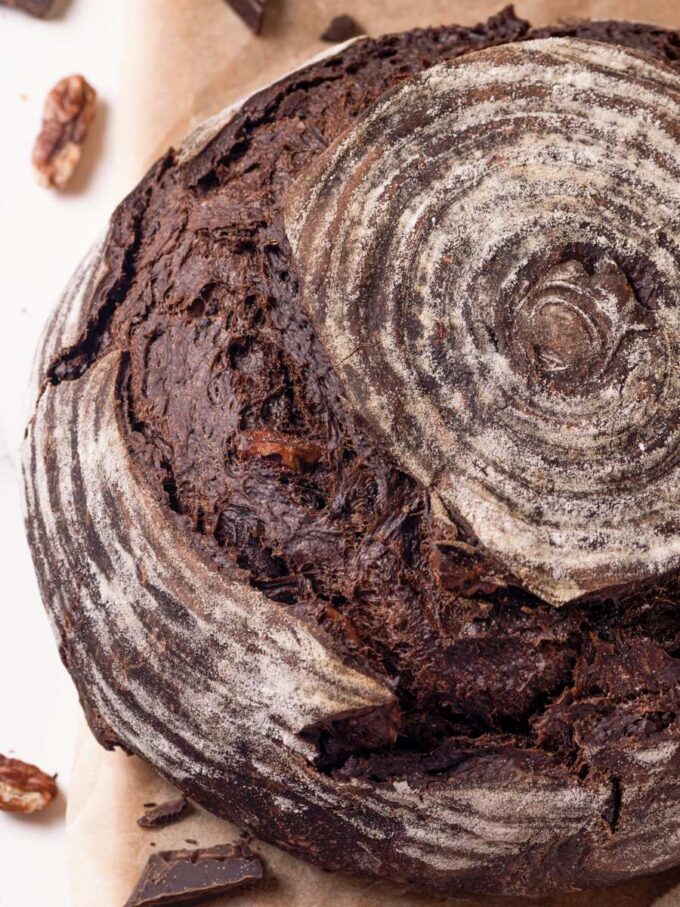
Chocolate sourdough bread is one of the most satisfying loaves you can make with an active starter. It leans savory as much as sweet, with deep cocoa, coffee, and dark chocolate woven through every slice.
A Quick Look At The Recipe
This is a brief summary of the recipe. Jump to the recipe to get the full details.
Prep Time
30 minutes
Cook Time
45 minutes
22 hours
Total Time
23 hours 15 minutes
Servings
12 Slices
Difficulty
Intermediate
Calories *
250 kcal per serving
Technique
Sourdough fermentation with stretch and fold
Flavor Profile
Deep chocolate, tangy, nutty, subtly sweet
* Based on nutrition panel
“I was nervous this would taste like dessert bread, but it is much more complex than that. The coffee really deepens the chocolate flavor without making it sweet, and the crust was beautiful to score and it puffed and baked so beautifully, not what I was expecting from a chocolate sourdough!” ⭐⭐⭐⭐⭐
Margot
Why You Will Love This Recipe
- Deep chocolate flavor. This loaf tastes richly chocolatey in a savory, complex way rather than like a dessert. The cocoa powder and coffee work together to deepen the flavor in a way that neither ingredient could achieve on its own.
- A crackly crust with a chewy, soft interior. The crust is perfectly crisp and the interior stays tender and chewy. That contrast comes from baking inside a preheated Dutch oven, which traps steam in the first 20 minutes.
- Coffee makes it genuinely exceptional. Skipping the coffee produces a noticeably flatter chocolate flavor. It blooms the cocoa powder producing a more well round chocolate flavor just like when using coffee extract in these peanut butter brownies!
- It works as a base for both sweet and savory toppings. Serve it with salted butter and jam, or use it to build a savory sandwich. If you want to build a sourdough foundation 1st this easy no-knead sourdough bread is a great place to start.
Testing this bread was one of the more obsessive recipe development stretches I have had in a while. This chocolate sourdough bread is robust, tangy, and deeply chocolatey—without ever tipping into bitterness. The secret is using cocoa powder in the dough (never in the preferment!) and a splash of coffee to amplify all that chocolate flavor.
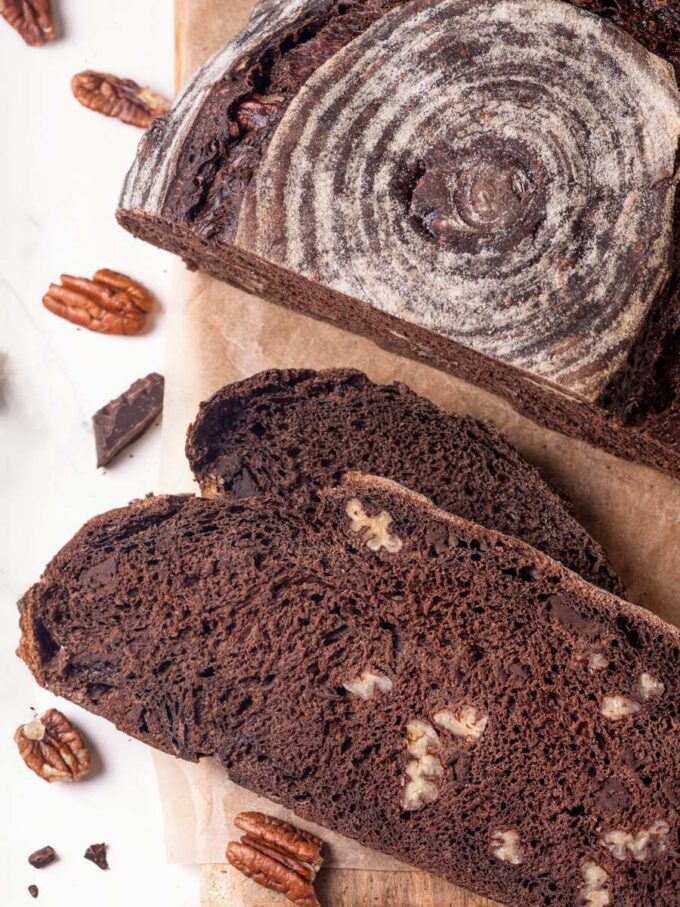
With a crackly crust and chewy, soft interior, this loaf walks the line between savory and treat, especially when you fold in chocolate chips and toasted pecans. It is a loaf that earns a place at the cheese board or the breakfast table with equal confidence, and it also happens to make a spectacular sourdough bread bowl or this cinnamon raisin sourdough if you want to take it somewhere unexpected.
Ingredients & Substitutions
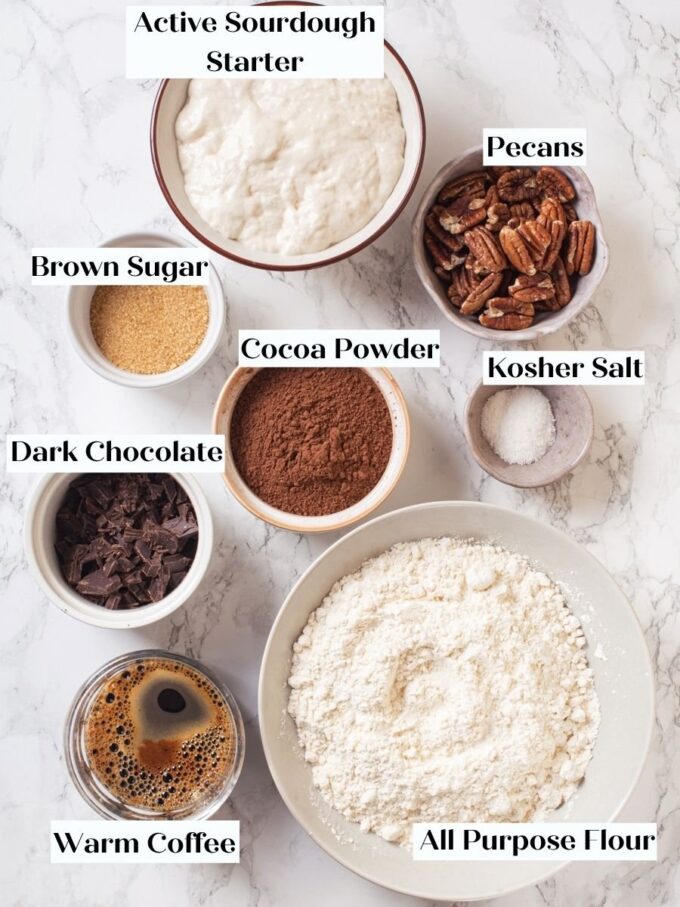
- Active Sourdough Starter: This is the natural leavening agent for the entire loaf, providing rise and the characteristic tang that makes this bread complex rather than one-dimensional. Your starter needs to be active and recently fed, not discard. If you are still building a consistent starter routine, my same day sourdough bread recipe walks through how to read starter activity before mixing.
- Warm Coffee: Coffee blooms the cocoa powder and deepens the chocolate flavor in a way that water simply cannot replicate. If you cannot use coffee, a combination of water and high-quality coffee extract or instant espresso can work.
- Bread Flour: Bread flour provides the higher protein content this loaf needs for gluten development, giving the crumb its chewy, open structure. Substituting all-purpose flour will produce a softer, less chewy result and may affect how much the loaf rises.
- Cocoa Powder: This is what gives the loaf its deep color and rich, savory chocolate flavor. Standard (not Dutch-processed) cocoa works with no change to process, but the loaf will bake up lighter in color, slightly more bitter, and less richly chocolatey just like when making this chocolate bread. Do not add cocoa to the preferment the night before. Testing showed that fermenting the cocoa in the biga produced a tighter crumb and, counterintuitively, a weaker chocolate flavor. Adding it to the final dough mixes more easily and delivers a noticeably richer result.
- Light Brown Sugar: Brown sugar adds a gentle sweetness that keeps the loaf from tasting purely bitter or savory. It is not enough to push this toward dessert territory, which is exactly the point.
- Dark Chocolate, Chopped or Chips:These add pockets of melted chocolate throughout the crumb and reinforce the cocoa flavor. If you love chocolate bread, make sure you try this chocolate chip bread next! Do not increase the amount.
- Pecans, Lightly Toasted: Toasted pecans add texture and a nutty bitterness that balances the chocolate. Toasting them before mixing is worth the extra step since raw pecans taste flat by comparison.
Variations for Chocolate Sourdough Bread
- Nuts Swapped for Dried Cherries: Replace the pecans with an equal weight of dried tart cherries for a classic chocolate-cherry flavor profile. The cherries add a fruity acidity that cuts through the cocoa, complementing the sourdough tang.
- Sweet Chocolate Version: Use milk chocolate or semi-sweet chips instead of dark chocolate to pull the loaf toward dessert territory. This pairs well with a spread of mascarpone or cream cheese rather than savory toppings.
- No Mix-Ins. Omit both the pecans and chocolate chips entirely and bake the loaf as a pure cocoa-and-coffee sourdough, which is how I tested it at first. The base loaf holds its own beautifully and has a cleaner, more savory chocolate flavor.
- Change the mix-ins! Maybe if you want to go in more dessert territory. You could swap the chocolate chips for peanut butter chips and add roasted peanuts for a chocolate and peanut butter loaf, and if you love chocolate and peanut butter, be sure to check out these Revel bars!
Professional Tips for Perfect Chocolate Sourdough Bread
- Proof at room temperature, not in a warm oven. I normally use my oven’s proof box setting for efficiency, but this dough needs to stay cool enough that the chocolate chips hold their shape. A warm environment will melt the chips into the dough during bulk fermentation, weakening the structure and muddying the crumb. Room temperature, ideally between 70 and 75°F, is the right environment here.
- Do not rush fermentation because of the cocoa. Cocoa powder noticeably slows fermentation, so the bulk proof will take longer than you might expect in other sourdough recipes. Wait until the dough has visibly doubled and feels light and slightly domed before moving on, and use essential sourdough tools for baking like a clear, straight-sided container to track the rise accurately.
- Score at a 45-degree angle with overlapping edges. A straight down score traps the rise and produces a tight loaf. Cutting a square pattern at 45 degrees, with the blade angled rather than vertical, gives the dough room to bloom upward and outward as it bakes in the Dutch oven.
- Keep the cocoa out of the preferment, no matter what. Fermenting the cocoa powder in the overnight biga produced a tighter crumb and a weaker chocolate flavor in testing. If you have sourdough discard on hand and are curious about other ways to use your starter, my ultimate sourdough discard recipes roundup covers a wide range of options, but for this loaf, the cocoa belongs in the final dough only.
- Do not increase the chocolate beyond the listed amount. Testing with 200g of chocolate caused it to work into the dough, break down gluten structure, and produce a gummy, dense crumb, especially as the dough warmed during bulk fermentation.
How to Make Chocolate Sourdough Bread
Use these instructions to make a deeply chocolatey, crackly-crusted sourdough loaf with a soft and chewy interior. Further details and measurements can be found in the recipe card below.
Step 1: Build the sourdough starter the night before you plan to mix your dough. Set a clean jar or container on a kitchen scale and zero it out, then add the water, active sourdough starter, and all-purpose flour. Stir well until no dry spots remain. The mixture will look thin and a little lumpy at first, which is completely normal. Cover loosely and let it sit at room temperature for 10 to 12 hours. By morning, it should have more than doubled in volume and look bubbly and active.
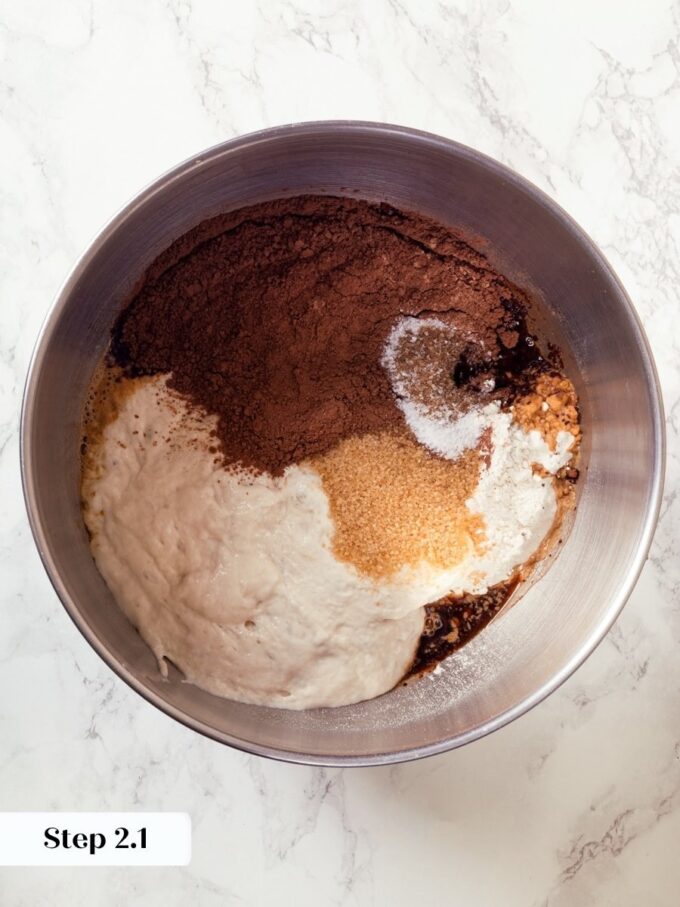
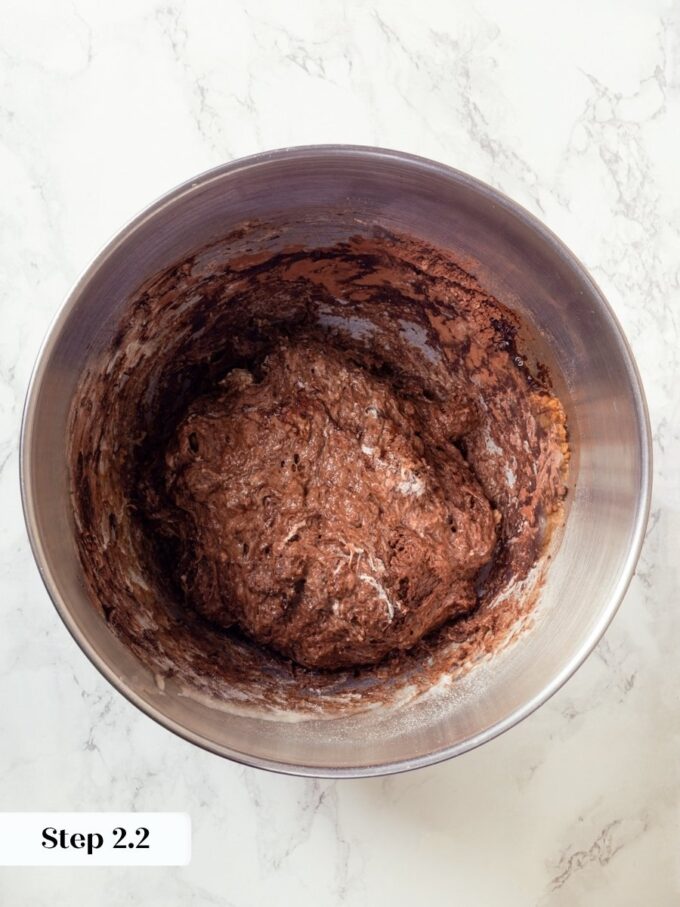
Step 2: In the bowl of a stand mixer fitted with the dough hook, combine the sourdough build, warm coffee, bread flour, cocoa powder, light brown sugar, and salt. Mix on low speed until everything comes together into a shaggy mass. (photos 1 & 2)
The dough will look dark, rough, and a little mottled at this stage. Do not panic — that is just the cocoa powder distributing unevenly at first.
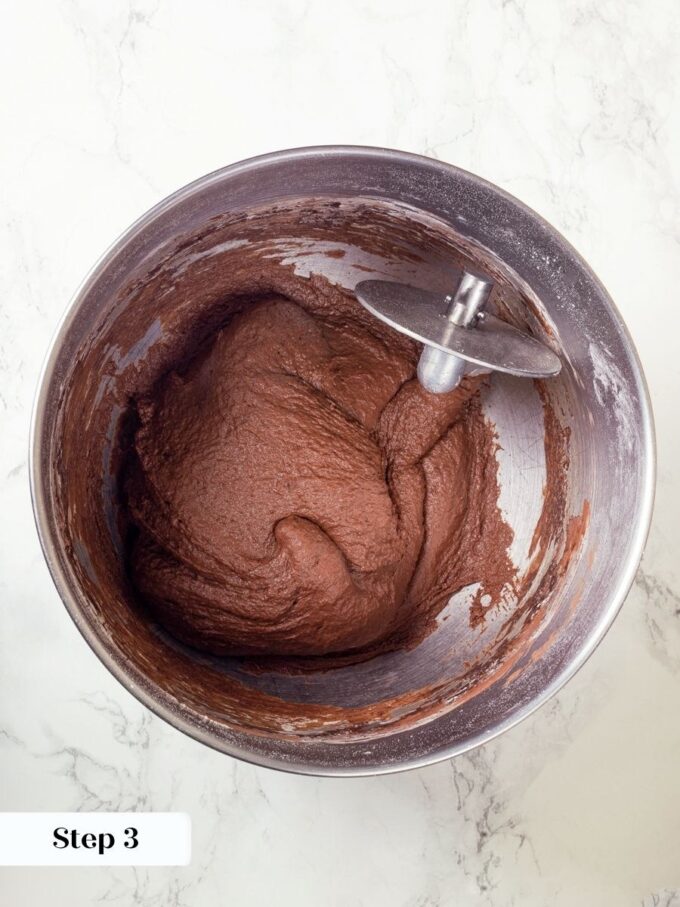
Step 3: Increase to medium speed and mix for about 5 minutes to develop the gluten. The surface of the dough will transform from mottled and rough to smooth and elastic, though the cocoa powder means you will not get a perfect windowpane (when the dough stretches thin without tearing) the way you would with a plain loaf. A smooth, stretchy surface that springs back when poked is your cue that the gluten is developed. The dough will still feel slightly sticky, and that is fine. (photo 3)
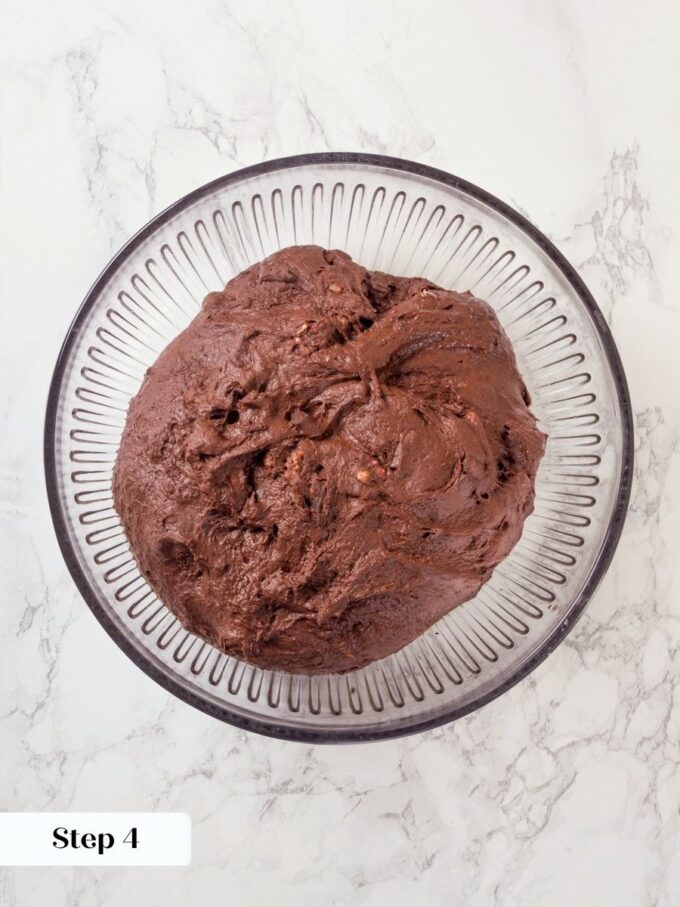
Step 4: Add the pecans and chopped dark chocolate or chocolate chips. Mix on low speed until just incorporated, about 1 to 2 minutes. You can do this step by hand if you prefer, but this dough is sticky enough that the mixer genuinely makes it easier. (photo 4)
Step 5: Lightly oil a medium mixing bowl. Scrape the dough into the bowl using a bowl scraper or stiff spatula, clean as much dough from your hands as you can, and cover the bowl with plastic wrap. Set the bowl in a cool spot in your kitchen for the bulk fermentation. (photo 5)
Do not proof this dough in a warm place. I normally use my oven’s proof box setting for efficiency, but with this dough I proof at room temperature so the chocolate chips do not melt into the dough and compromise the structure. A spot around 70-75°F is ideal.
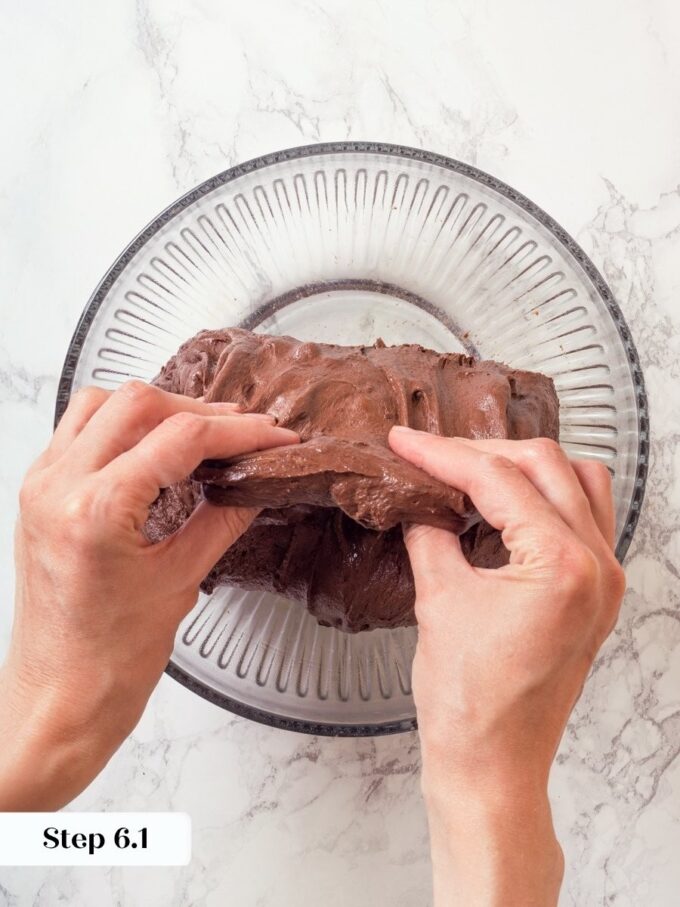
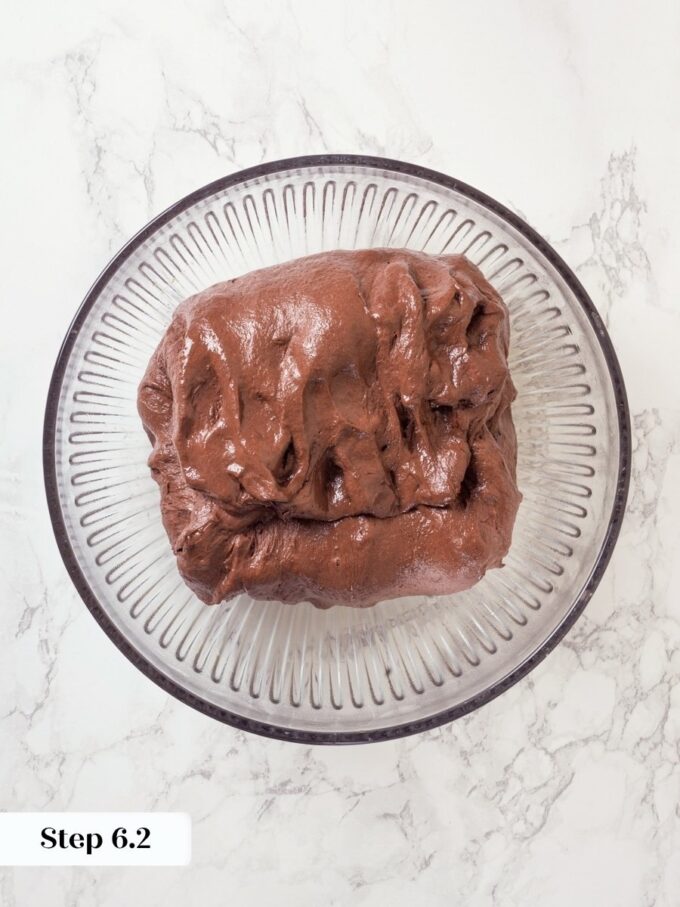
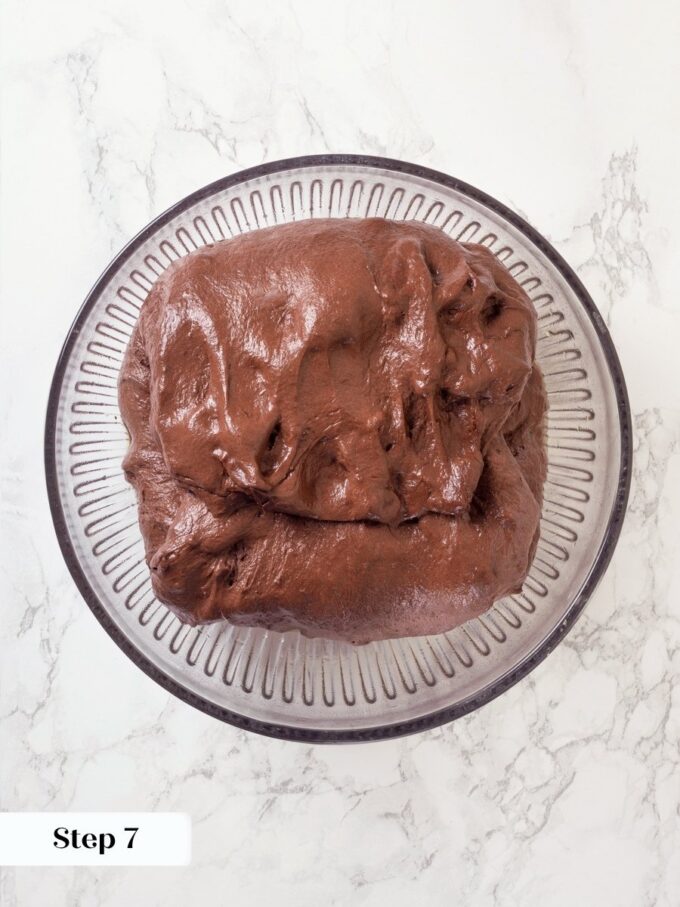
Step 6: After about 1 hour, fold the dough using lightly oiled hands. Slide your fingers under one side of the dough, stretch it up gently, and fold it over itself toward the center. Rotate the bowl 90 degrees and repeat, working your way around all four sides. The dough will feel a little slack and extensible at this stage — that is exactly right. Cover the bowl again with plastic wrap and continue the bulk fermentation. (photos 6 & 7)
The cocoa powder slows fermentation, so do not rush this phase. The dough needs the full bulk fermentation time to develop properly. Watch for the dough to visibly double in volume, which will take roughly 3 to 4 hours total from when you first mixed it, depending on your kitchen temperature. Trust the visual cue over the clock.
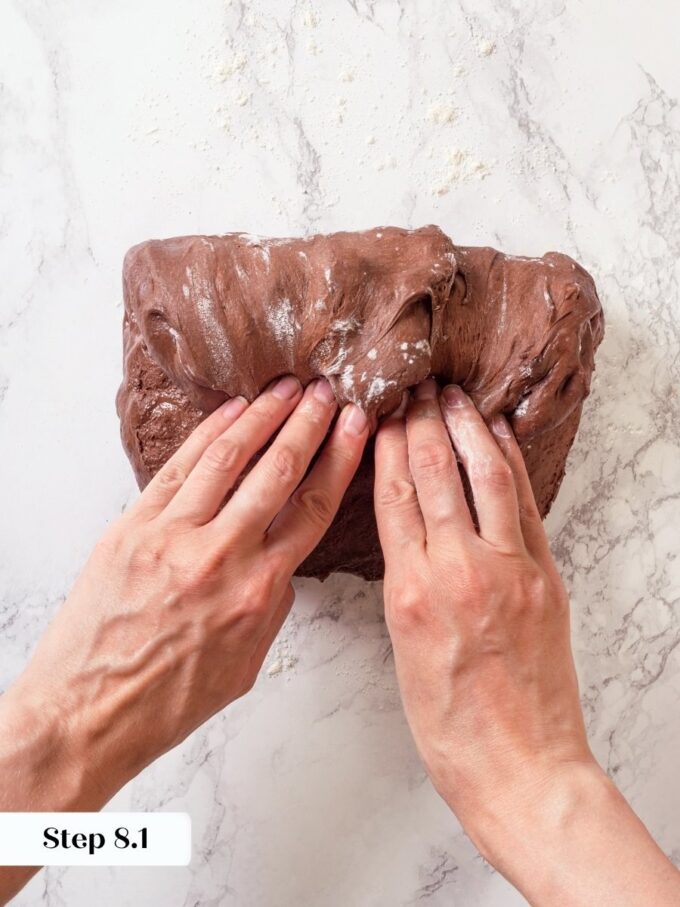
Step 7: Shape and Cold Proof. Once the dough has visibly doubled, remove the plastic wrap and dust the top generously with bread flour — this is the stickiest part of the whole process, and the flour helps you manage it. Lightly flour your countertop and use a bowl scraper to turn the dough out. (photo 8)
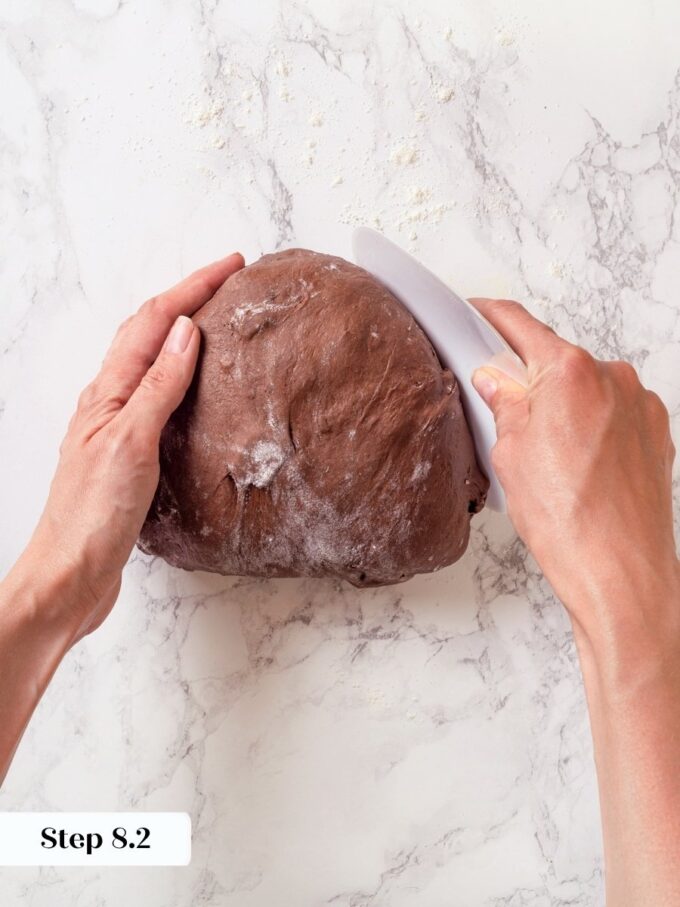
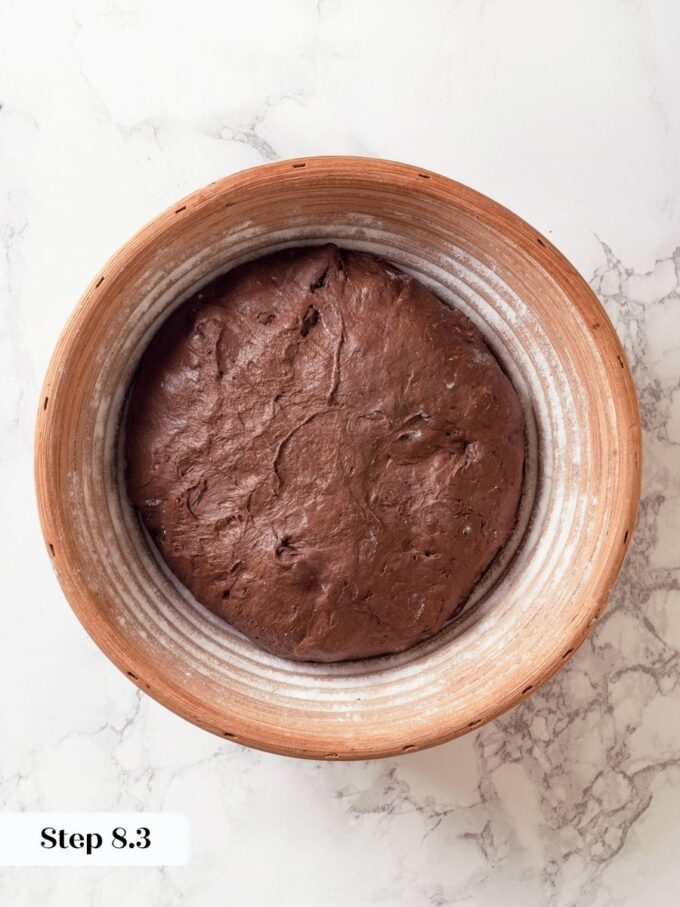
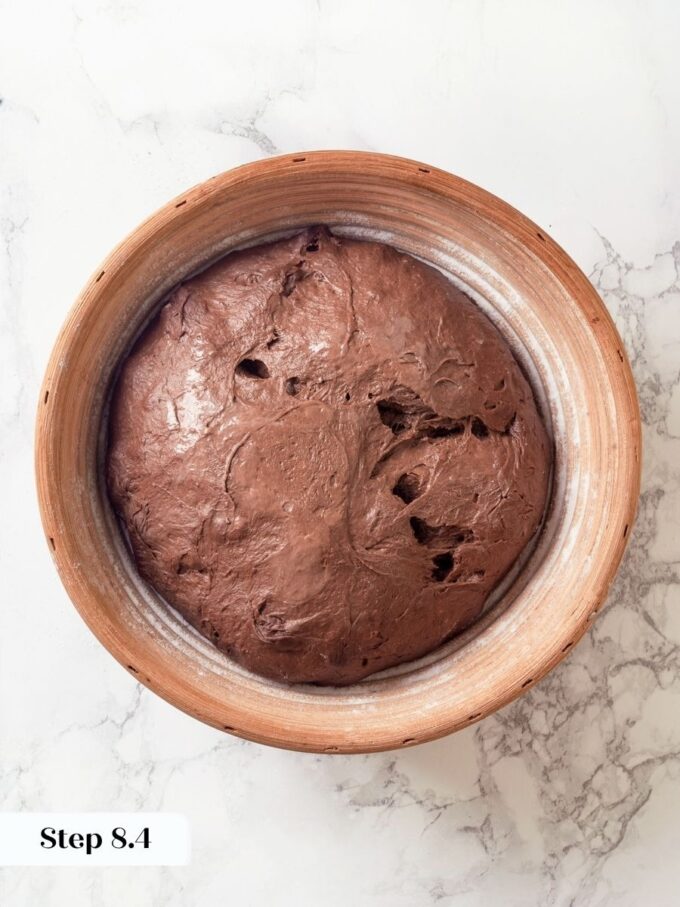
Step 8: With floured hands, fold each corner of the dough into the center, flipping it seam-side down. Rotate the dough between each fold so you are always folding toward yourself — this builds a tighter, more even shape. The dough will still want to stick to the counter, so use a bench scraper in your right hand and your left hand as a guide to coax it into a round. (photos 9-12) Flip the dough upside down, seam-side up, into a generously rice-floured banneton (proof basket). Cover with plastic wrap and refrigerate overnight, or for 16 to 18 hours.
Step 9: Preheat and Score. When you are ready to bake, place your Dutch oven with its lid inside the oven and preheat to 425°F. The Dutch oven needs to preheat fully alongside the oven — do not add it after the oven comes to temperature.
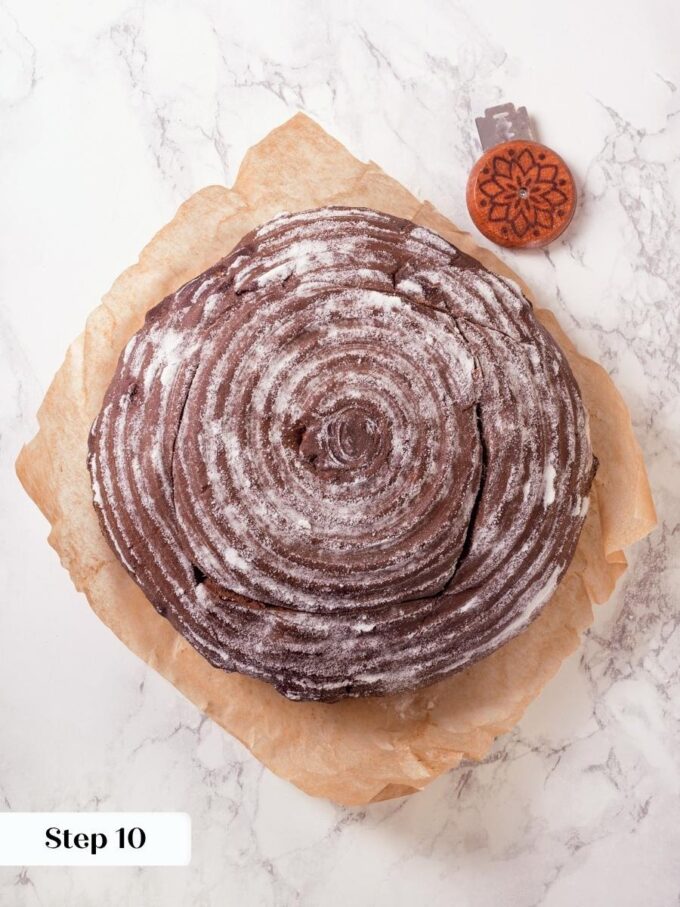
Step 10: Cut a piece of parchment just larger than the base of your Dutch oven. Remove the plastic wrap from your dough and gently loosen the edges with floured fingers. Turn the dough out onto the parchment. Score the top with a razor blade in a square pattern, with overlapping edges angled at about 45 degrees. (photo 13)
Score decisively and quickly. Hesitant cuts drag through the dough and close back up rather than opening during the bake. One firm motion per cut is all you need. This specific cut encourages the bread to rise upward and outward rather than splitting unpredictably along the sides.
Step 11: Bake. Working quickly and carefully, remove the Dutch oven from the oven and take off the lid. Using the parchment as a sling, lower the dough into the Dutch oven without letting it touch the sides. Replace the lid and bake for 20 minutes. (photo 14)
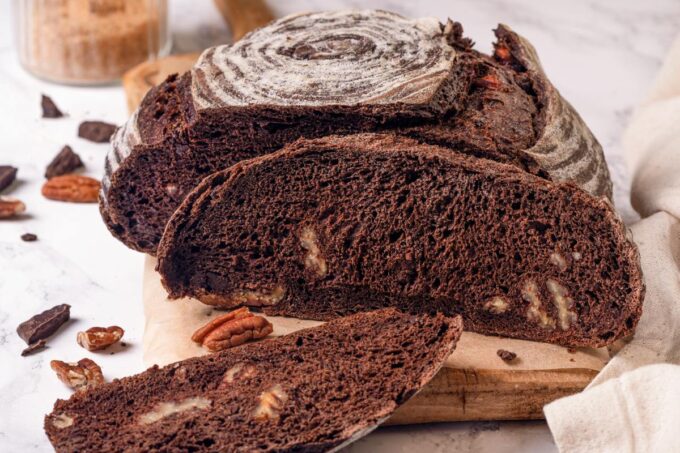
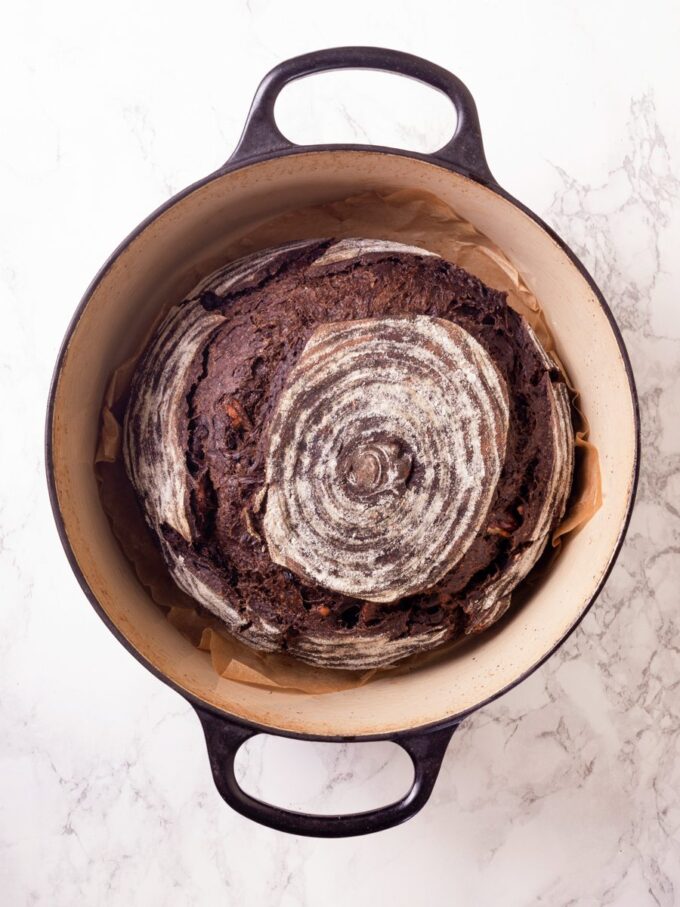
Step 12: After 20 minutes, remove the lid and lower the oven temperature to 400°F. Bake for an additional 20 minutes. The loaf is done when the crust is deeply crackly and set, with a rich, dark color across the surface — remember the cocoa means this bread bakes darker than a plain sourdough, so color alone is not your only cue. The finished loaf will have a crackly crust, a soft and chewy interior, and a deep, dark chocolate flavor that reads as savory and complex rather than sweet.
Step 13: Remove the bread from the Dutch oven using tongs or your hands and transfer it to a wire rack. Let it cool completely before slicing with a serrated knife. Slicing too early releases the steam that keeps the crumb soft, resulting in a gummy interior, so resist the urge. (photo 15)
Recipe FAQs
Store the cooled loaf wrapped at room temperature for up to 3 days. For longer storage, freeze the whole loaf or individual slices for up to 2 months. Reheat frozen slices at 350°F for about 10 minutes, or in the microwave like I do when I just need one slice right now.
Yes, and the recipe is already built for it. The overnight cold proof in the refrigerator is the intended make-ahead stage, so you can shape the dough and hold it there for up to 18 hours before baking. If you want to freeze the unbaked dough, do so after shaping and before scoring, then thaw it in the refrigerator overnight and bake directly from cold.
The most common reason is rushing the bulk fermentation. Cocoa powder noticeably slows fermentation, so this dough simply needs more time than a plain sourdough loaf. Wait until the dough has clearly doubled and feels light before shaping, and trust that visual cue over any time estimate in the recipe.
You can, though the crust will be noticeably thinner and less crackly without the trapped steam a Dutch oven provides. To approximate it, bake the loaf on a preheated baking stone or heavy sheet pan, and add steam by placing a shallow pan of boiling water on the rack below for the first 20 minutes, then remove it to finish baking. The interior will still be soft and chewy, but the signature shattery crust is harder to replicate without the enclosed environment.
Recommended Sourdough Recipes!
Bread
Bread
Sourdough
Rolls & Biscuits
Chocolate Sourdough Bread
Ingredients
For the Sourdough Build:
- ¾ cup water
- 2 tablespoons active sourdough starter
- 1¼ cups all-purpose flour
For the Dough:
- 1 ⅓ cups sourdough build
- 1 cup coffee, warm approximately 105°F
- 2 ⅓ cups bread flour
- ½ cup cocoa powder
- ¼ cup light brown sugar
- 2½ teaspoons kosher salt
- ½ cup dark chocolate, chopped or chips
- ¾ cup pecans, lightly toasted
Instructions
- The night before mixing, combine the water, active starter, and all-purpose flour in a clean jar or container. Stir until no dry spots remain. Let sit at room temperature for 10 to 12 hours until more than doubled.
- In the bowl of a stand mixer fitted with the dough hook, combine the sourdough build, warm coffee, bread flour, cocoa powder, light brown sugar, and salt. Mix on low until combined, then increase to medium and mix for about 5 minutes until the surface transforms from mottled to smooth and elastic. The dough will remain slightly sticky.
- Add the pecans and chocolate. Mix on low until incorporated.
- Lightly oil a medium bowl and scrape the dough in. Cover with plastic wrap and proof at room temperature (not a warm oven or proof box) for about 1 hour.
- With lightly oiled hands, fold the dough: slide your fingers under one side, stretch it up, and fold it over itself. Rotate the bowl 90° and repeat around all four sides. Cover and continue bulk proofing for about 3 more hours, until the dough has visibly doubled.
- Dust the top of the dough with bread flour. Turn it out onto a lightly floured surface. With floured hands, fold each corner into the center, rotating the dough between folds so you are always folding toward yourself. Use a bench scraper in one hand and your other hand as a guide to shape the dough into a round. Flip seam-side up into a generously rice-floured banneton, cover with plastic wrap, and refrigerate overnight.
- After 16 to 18 hours, place a Dutch oven with its lid inside the oven and preheat to 425°F.
- Cut a piece of parchment just larger than the Dutch oven base. Loosen the edges of the dough with floured fingers, then turn it out onto the parchment. Score the top with a razor blade at a 45° angle, using a square pattern with overlapping edges to encourage upward rise.
- Carefully remove the Dutch oven from the oven, lift the lid, and lower the dough (using the parchment) into the pot. Replace the lid and bake for 20 minutes.
- Remove the lid, lower the oven temperature to 400°F, and bake for an additional 20 minutes.
- Remove the loaf from the Dutch oven and cool completely on a wire rack before slicing with a serrated knife.
Notes
Chocolate amount: Stick to 85g of chocolate. Testing showed that 200g worked into the dough and broke down the structure, especially if the dough warmed up during proofing.
Proof temperature: Proof at room temperature rather than in a warm oven or proof box. Heat causes the chocolate chips to melt into the dough, which compromises structure.
Storage: Store at room temperature up to 3 days. Freeze up to 2 months. Reheat frozen slices at 350°F for 10 minutes.
Nutrition
Nutrition information is automatically calculated, so should only be used as an approximation.
 Like this recipe? Rate & comment below!
Before You Go
If Chocolate Sourdough Bread has you hooked on baking with an active starter, there is so much more waiting for you. Browse our Sourdough Recipes or make this whole wheat sourdough next!


I was nervous this would taste like dessert bread, but it is much more complex than that. The coffee really deepens the chocolate flavor without making it sweet, and the crust was beautiful to score and it puffed and baked so beautifully, not what I was expecting from a chocolate sourdough!
The coffee is the quiet secret here: it blooms the cocoa and pulls the flavor in a deep, savory direction rather than a sweet one. And beautiful oven spring from a chocolate sourdough is such a reward for the patience the long fermentation asks of you. We are so glad it delivered! ~GVD team