
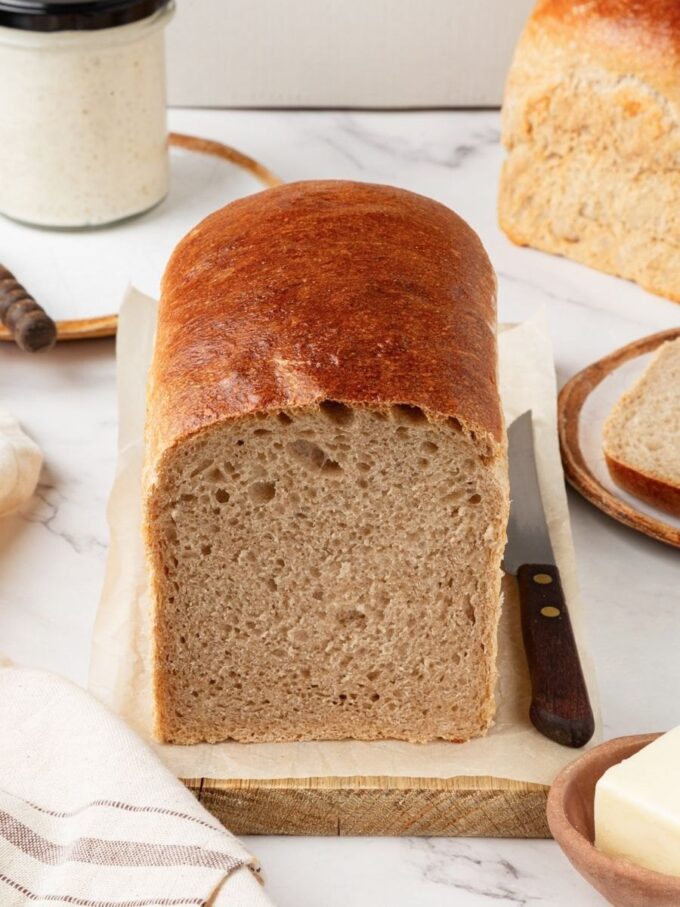
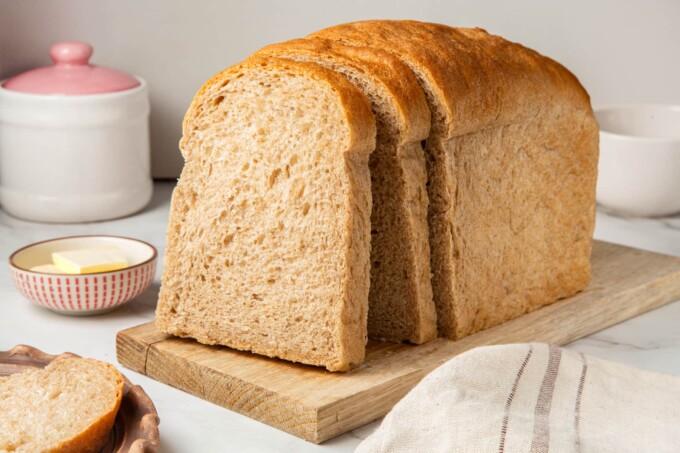
Sourdough rye bread with a hearty, chewy crumb and real tangy depth, and ready same day. This 50% rye loaf is built for sandwiches and slices cleanly without crumbling.
A Quick Look At The Recipe
This is a brief summary of the recipe. Jump to the recipe to get the full details.
Prep Time
30 minutes
Cook Time
45 minutes
Proof/Rest Time
2 hours 45 minutes
Total Time
4 hours
Servings
24 Slices
Difficulty
Intermediate
Calories *
172 kcal per serving
Technique
Stand mixer kneading, shaping boules
Flavor Profile
Hearty, tangy, earthy, slightly sour
* Based on nutrition panel
“I have tried so many rye loaves that turn out gummy in the middle, but this one baked all the way through with a firm, chewy crumb. I made this twice: once in the sandwich loaves and once into rolls! Perfect both times my husband won’t stop asking for more.” ⭐⭐⭐⭐⭐
Marta
Why You Will Love This Recipe
- Same-day bake, real sourdough flavor. This bread is table-ready the same day! The sourdough build delivers genuine tang without an overnight fermentation window. If you love same-day sourdough baking, my same day sourdough bread recipe is another great option to have in your back pocket.
- Complex flavor with a balanced rye note. The tangy sourdough finish and earthy rye come through clearly without either overpowering the other. That balance is what makes this bread work equally well under butter and jam or stacked with deli meat.
- A shaped alternative for rye lovers. If you want something visually dramatic with a similar rye flavor, my braided rye bread is worth a look. This loaf pan version is the one I reach for when I want clean, even slices for the week.
There is something quietly satisfying about pulling two full loaves of sourdough rye bread from the oven on a Sunday afternoon, knowing they will carry you through the whole week. I developed this recipe as a sourdough adaptation of my classic rye bread recipe, keeping the same hearty character and adding a tangy sourdough depth that makes every slice a little more interesting.
This bread is the one I keep sliced and frozen so there is always something worth toasting on a weekday morning. It holds up beautifully under everything from smoked salmon and cream cheese to a thick swipe of salted butter.
Ingredients & Substitutions
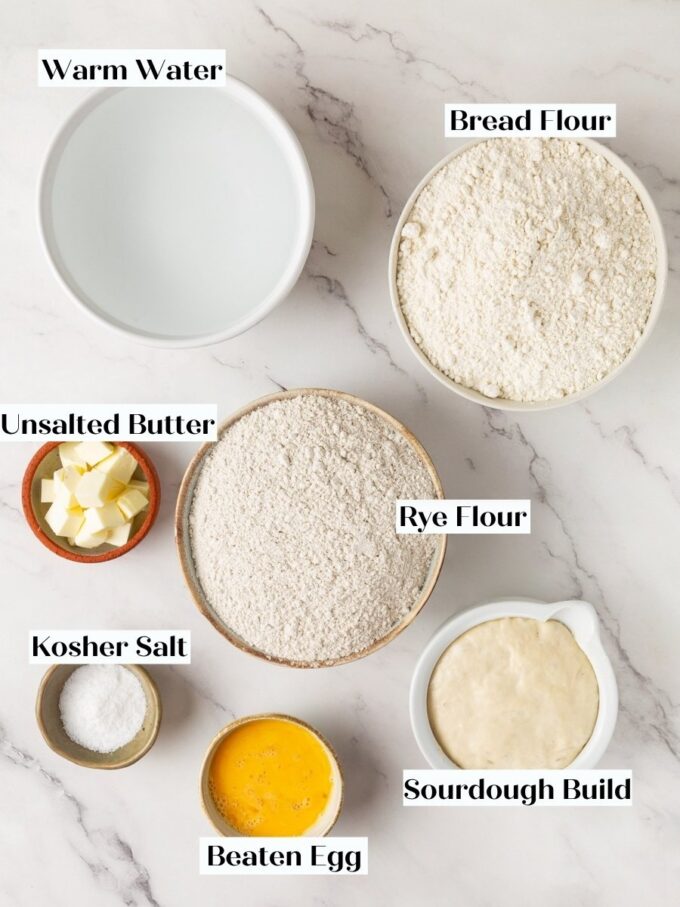
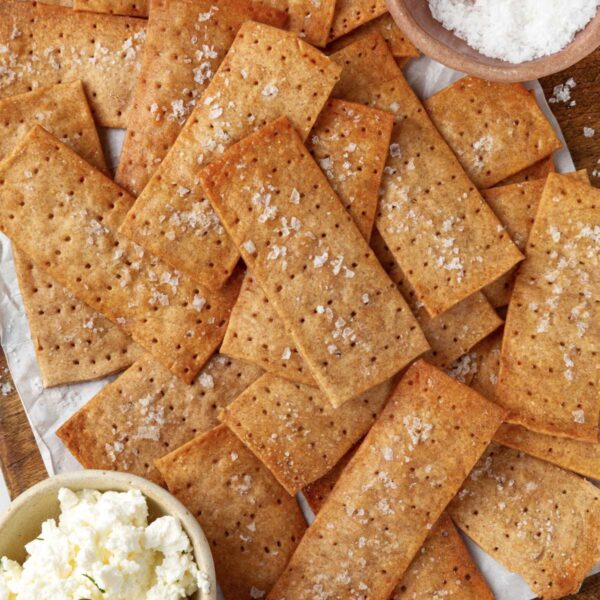
- Medium Rye Flour: This is the backbone of the recipe, contributing the earthy, slightly sour flavor and dense chew that define a true rye loaf. Do not swap it out or adjust the ratio with bread flour; rye’s gluten protein structure is fundamentally different from wheat, and changing the balance will affect both the crumb and how the dough handles. If you love baking with rye, check out this easy rieska or this sweish knackebrod!
- Bread Flour: Bread flour provides the gluten strength the dough needs to hold its shape, compensating for rye’s naturally lower gluten content. Swapping it for all-purpose flour will produce a less stable loaf with a softer, less defined crumb. If you love deeply flavored rye breads and want to explore a darker variation, my steakhouse style pumpernickel bread uses a similar high-rye approach with a bolder, molasses-forward flavor.
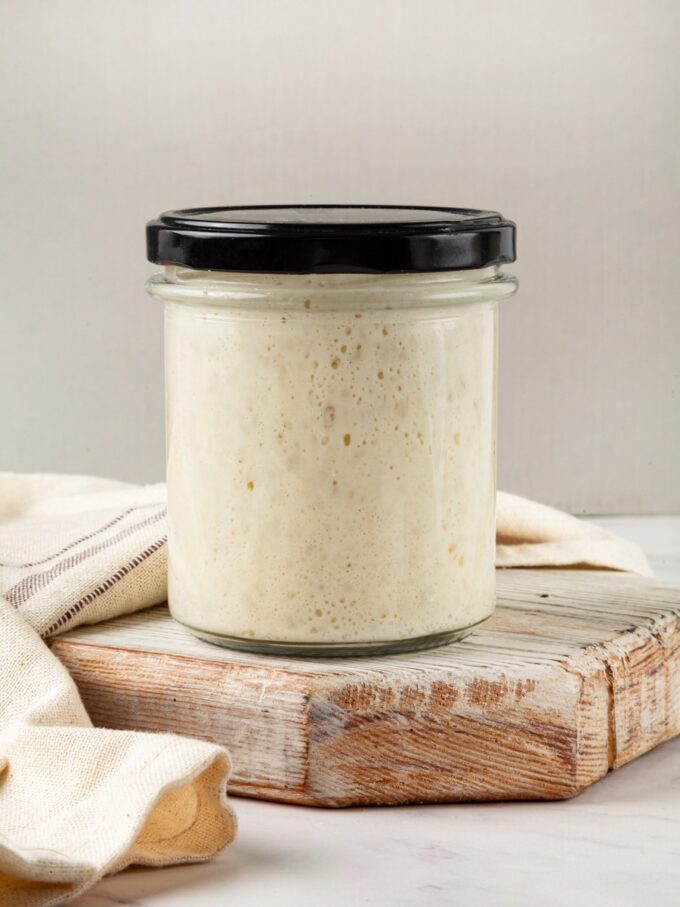
- Active Sourdough Starter: The active starter leavens this loaf and gives it a balanced tang. Using discard instead will result in a denser loaf with a weaker rise and less pronounced sour note.
- Butter: Butter adds a subtle richness and slightly softens the crumb. Substituting with a neutral oil will change the texture and remove the faint buttery undertone that rounds out the rye flavor.
- Egg: One beaten egg is brushed over the tops of the loaves before the final proof. It keeps the surface from drying out during proofing and gives the finished crust a light golden sheen.
Variations for Sourdough Rye Bread
- Seeded Crust: Press caraway seeds, sesame seeds, or a mix of both into the top of each loaf just before baking. The seeds add a toasty, aromatic crunch that pairs naturally with the earthy rye flavor. Or you could use the seed mix from this whole grain seeded bread
- Dutch Oven Bake: Bake the shaped dough in a preheated Dutch oven rather than a loaf pan for a crustier, thicker crust. You will get a more rustic result rather than sandwich-ready slices, so this is the version to reach for when you want a showpiece loaf rather than a weekday workhorse.
- Individual Bread Bowls: Divide the dough into smaller rounds and bake them as individual sourdough bread bowls instead of loaves. The dense rye crumb holds soup without going soggy, which is exactly what you want.
Professional Tips for Perfect Sourdough Rye Bread
- Loaf pans are worth it here. Loaf pans give you even, sliceable results that are hard to achieve with a free-form rye loaf, which tends to spread rather than rise. If you want a crustier exterior, a Dutch oven works, but you will trade those clean sandwich slices for a thicker, rougher crust.
- Do not look for the windowpane test. Rye flour does not develop gluten the way wheat flour does, so the dough will tear before it ever stretches thin. Go by timing and feel instead: after 5 minutes at medium-low speed, the dough should feel soft and supple, even if it tears easily when pulled.
- Watch the proof, not the clock. The second proof is done when the dough has risen above the edge of the loaf pan in most places and looks visibly puffy. Kitchen temperature swings of even 5 to 10 degrees can push or pull that timing by 20 minutes or more, which is fine, so trust your eyes over the timer.
- Pull the loaves at 185°F. Because of the high rye percentage, this bread will not spring dramatically in the oven, and the crust can look done before the crumb is fully set. An instant-read thermometer takes the guesswork out completely.
How to Make Sourdough Rye Bread
Use these instructions to make two hearty, sandwich-ready sourdough rye loaves with a pleasantly dense crumb and a tangy, mildly earthy flavor. Further details and measurements can be found in the recipe card below.
Mix the Dough
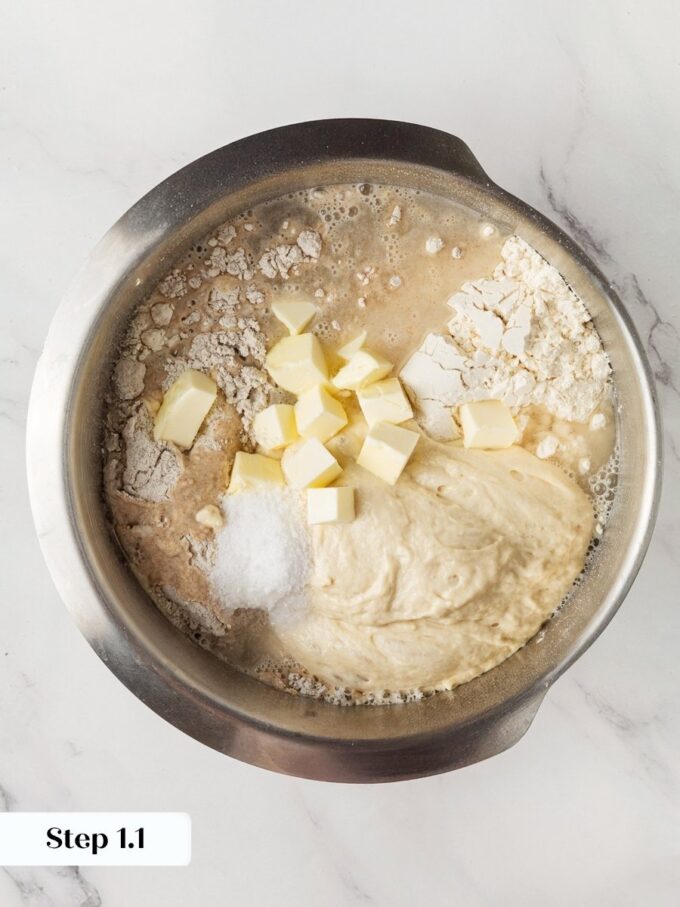
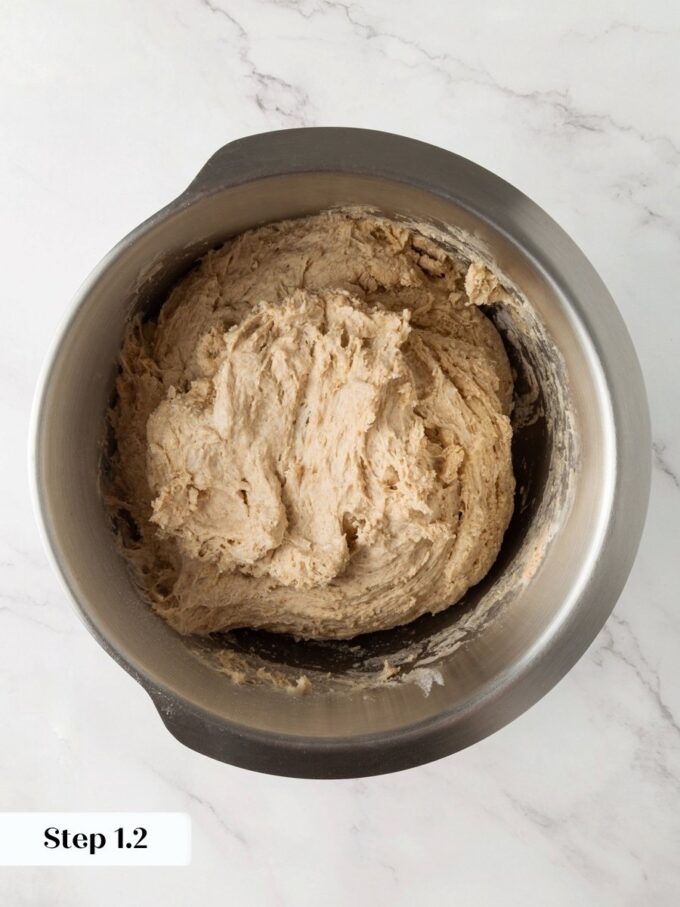
Step 1: Combine the rye flour, bread flour, kosher salt, butter, water, and sourdough build in the bowl of a stand mixer fitted with the hook attachment. Mix on low speed until a cohesive dough forms. The dough will look shaggy and rough at first, and that is completely normal. Keep the mixer running and give it a minute or two to pull together before you judge it. (photos 1 & 2)
Rye flour absorbs water more slowly than bread flour, so the dough may feel stickier than expected in the first minute of mixing. Resist adding extra flour and let the mixer run.
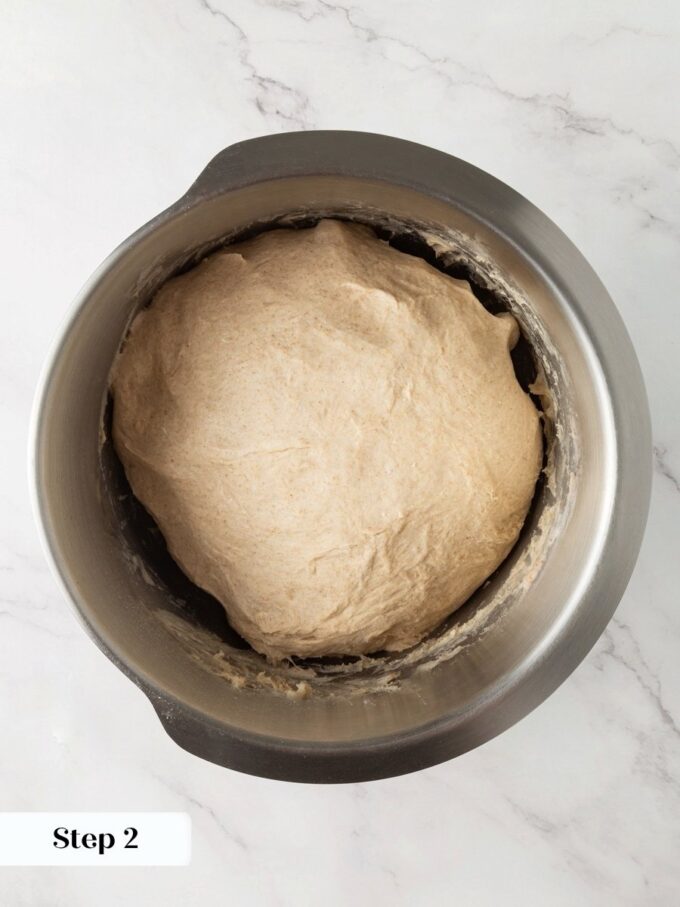
Step 2: Knead Until Soft and Supple. Increase the mixer speed to medium-low and knead for 5 minutes. The finished dough should feel soft and supple, but do not expect it to behave like a standard wheat dough. Because of the high rye content, the dough will tear easily if you try to stretch it thin, and that is exactly as it should be. (photo 3).
Skip the windowpane test (when dough stretches thin without tearing) here. Rye flour has a lower gluten content than wheat, so the dough simply will not pass it. Go by feel and timing instead. If it is smooth and soft after 5 minutes, it is ready.
Bulk Proof
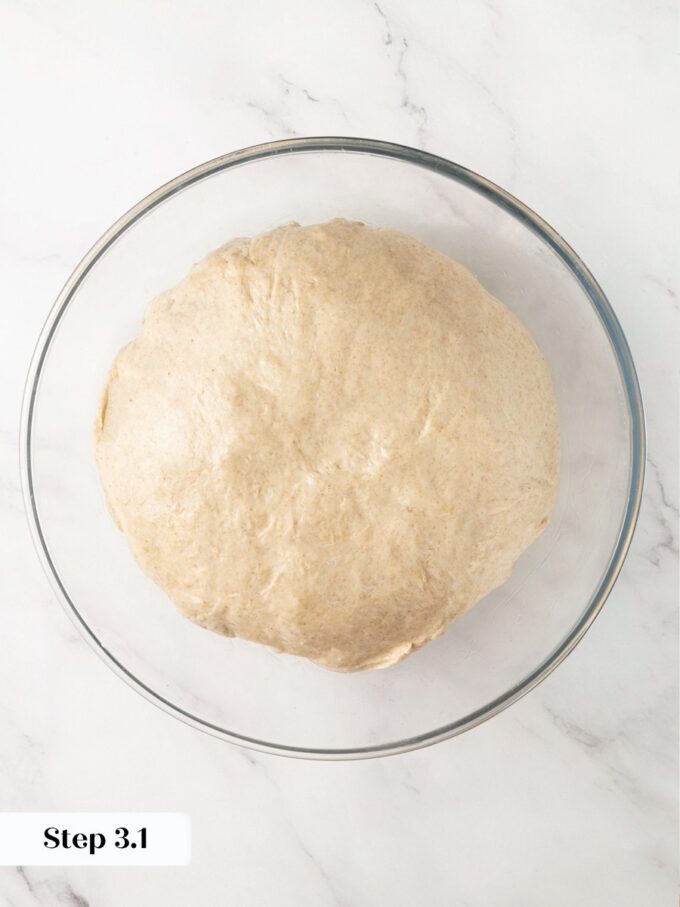
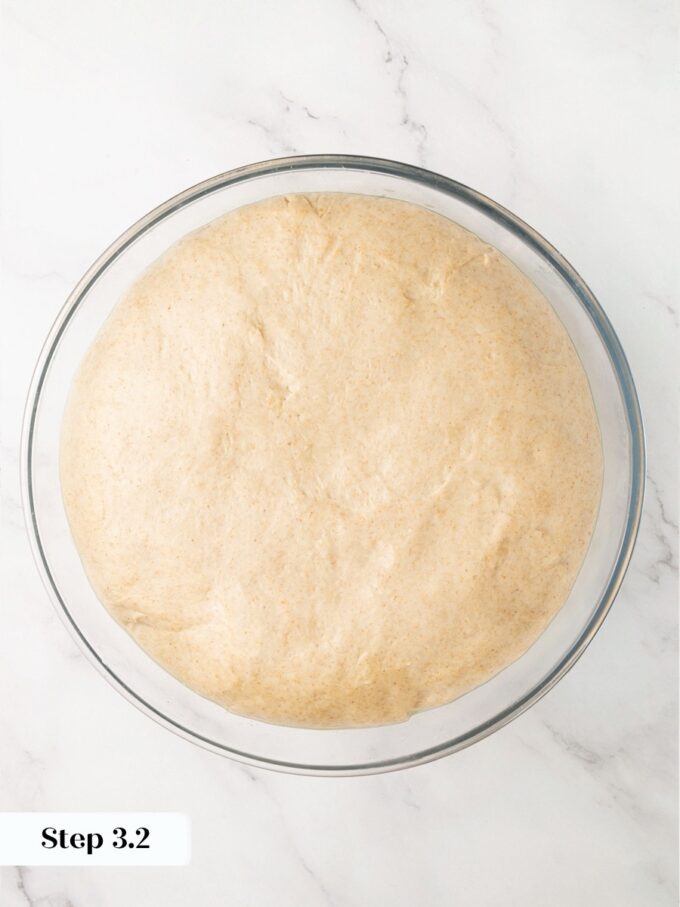
Step 3: Turn the dough out into a lightly oiled large bowl. Flip the dough once to coat the top with oil, then cover the bowl with plastic wrap. Set it in a warm spot and allow it to bulk proof for 45 minutes, or until the dough has doubled in size. (photos 4 & 5)
Proof times depend on your kitchen temperature. A cooler kitchen will push the bulk proof well past the 45-minute mark. Trust the visual cue: the dough should look noticeably puffed and clearly doubled before you move on.
Divide and Preshape
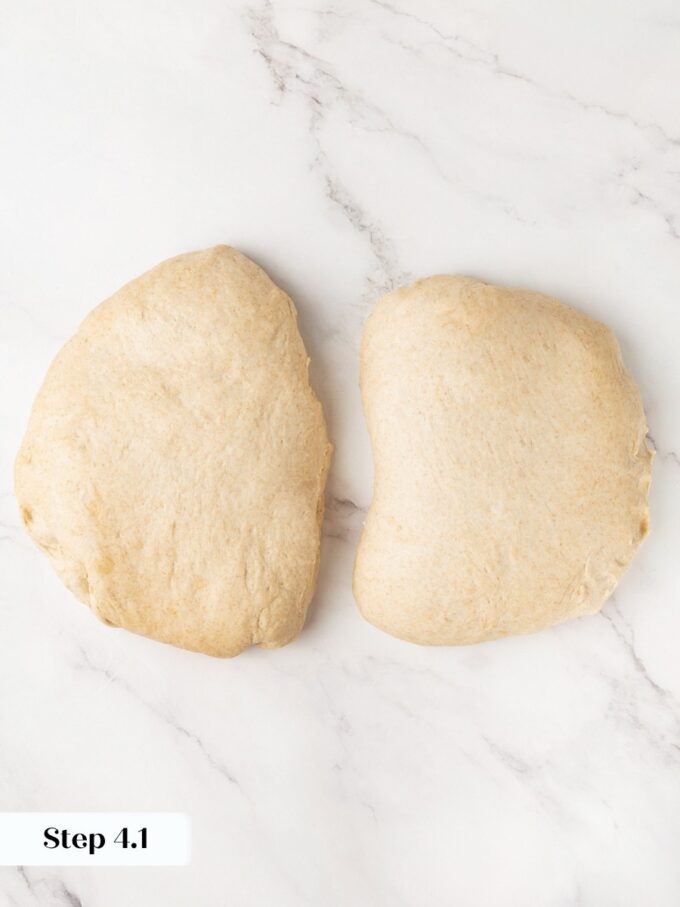
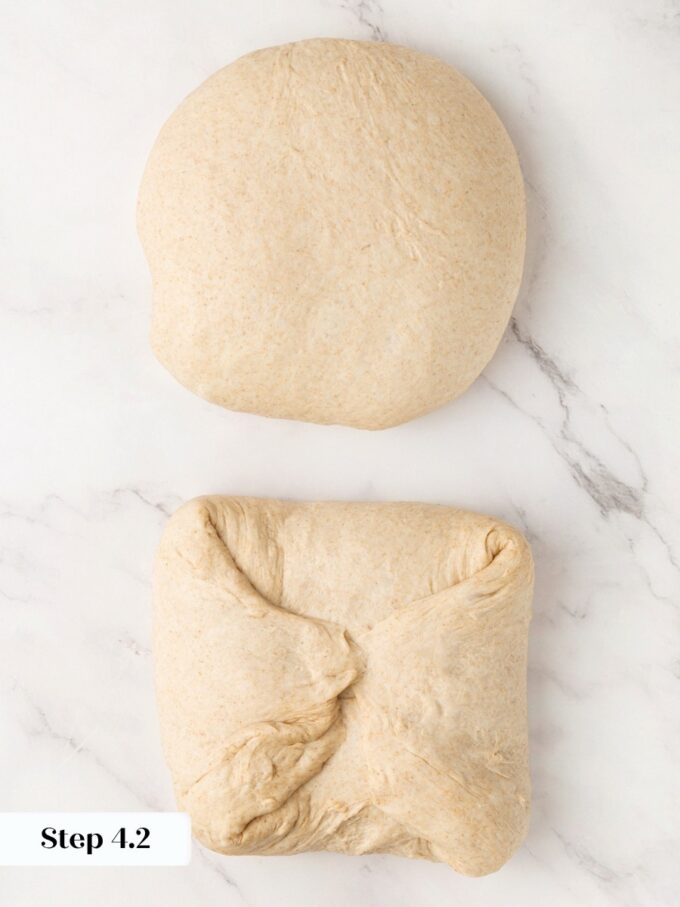
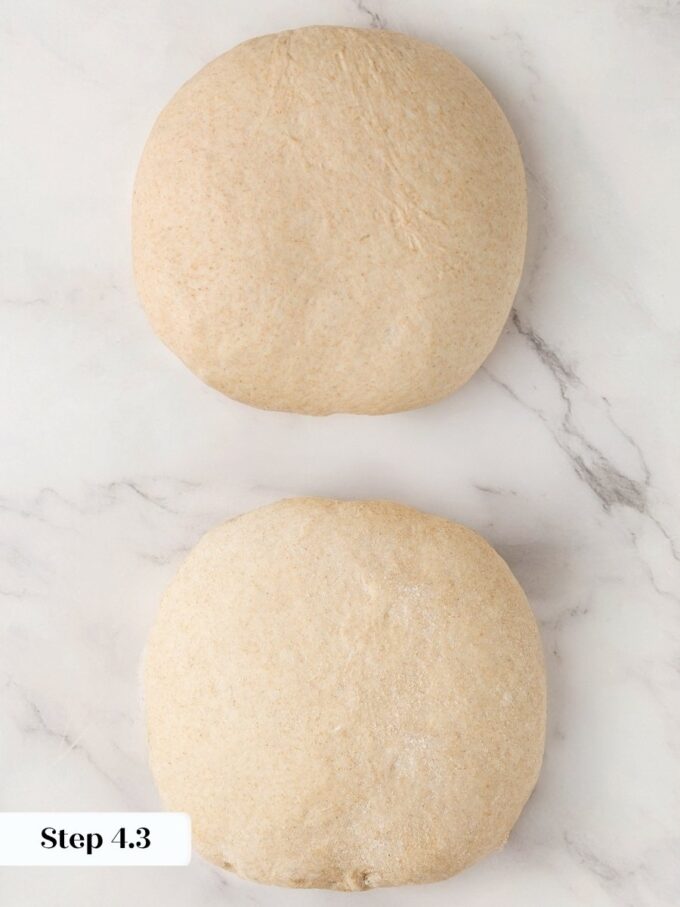
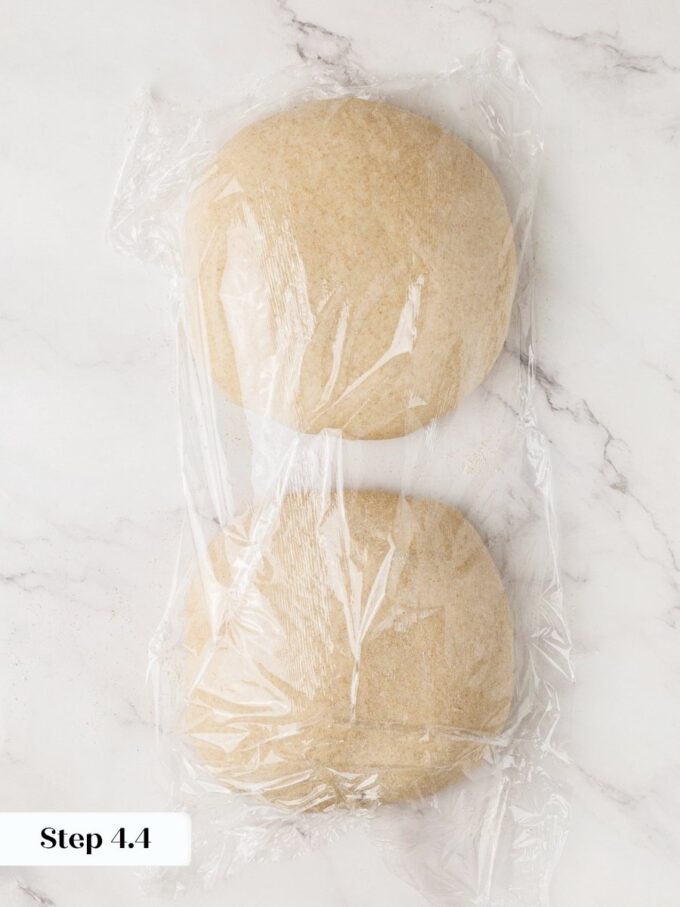
Step 4: Turn the dough out onto a lightly floured surface and divide it into two pieces, aiming for about 900g each. Preshape each piece into a boule by folding each of the four sides toward the center, then flip it over so the seam side is down. Use lightly floured hands to gently tighten the shape against the work surface. Cover with plastic wrap and let it bench rest for 15 minutes. (photos 6-9)
Final Shape
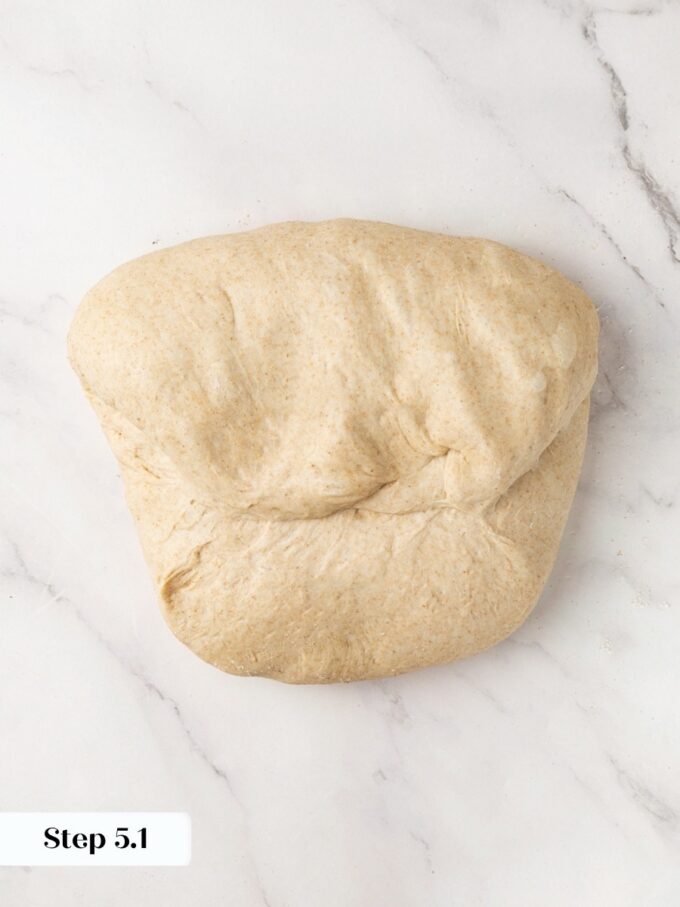
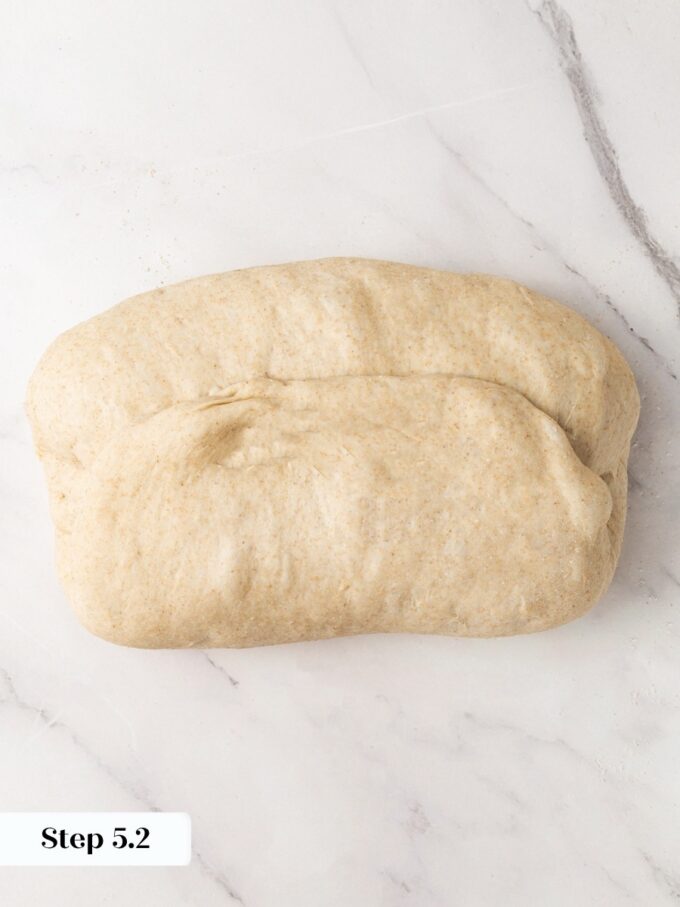
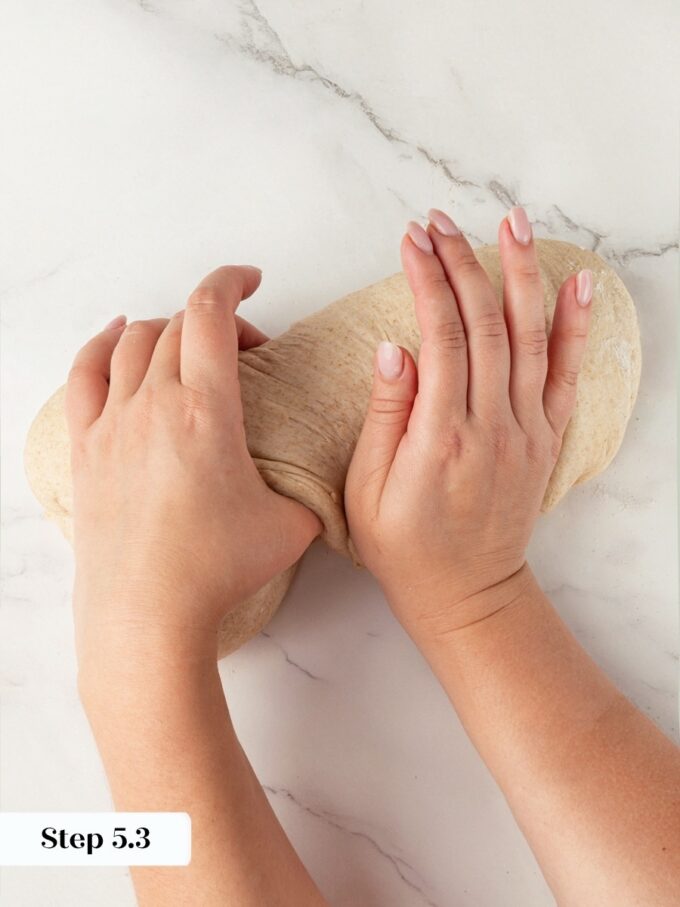
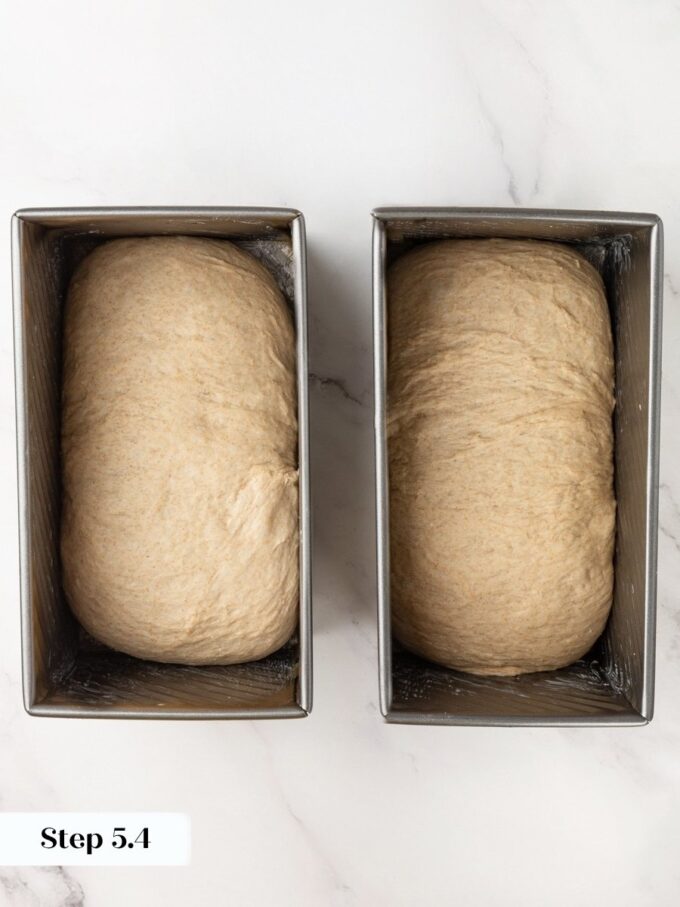
Step 5: Work with one piece at a time. Take the side furthest from you and fold it down to the center, then rotate the dough 180 degrees and repeat with the other side. Next, perform two thumb folds: wrap the dough around your left thumb and seal the edge with the heel of your right hand, moving from right to left. The first fold will not fully close the dough log, and that is expected. One more thumb fold will finish the job. Place each shaped log seam side down into an 8 to 9 inch loaf pan sprayed with non-stick cooking spray, then repeat with the second piece (photos 10-13).
Egg Wash and Final Proof
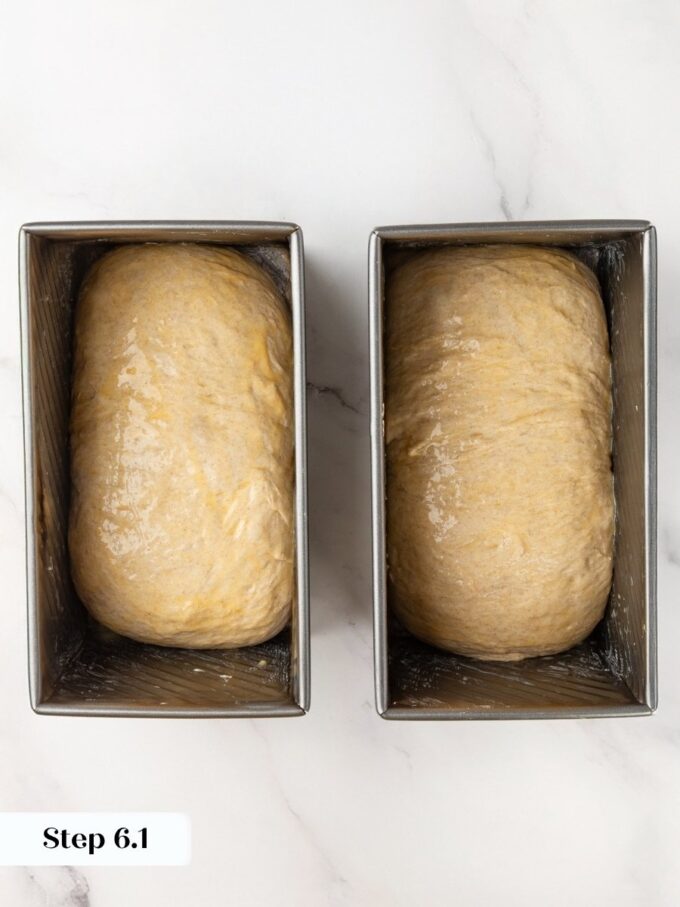
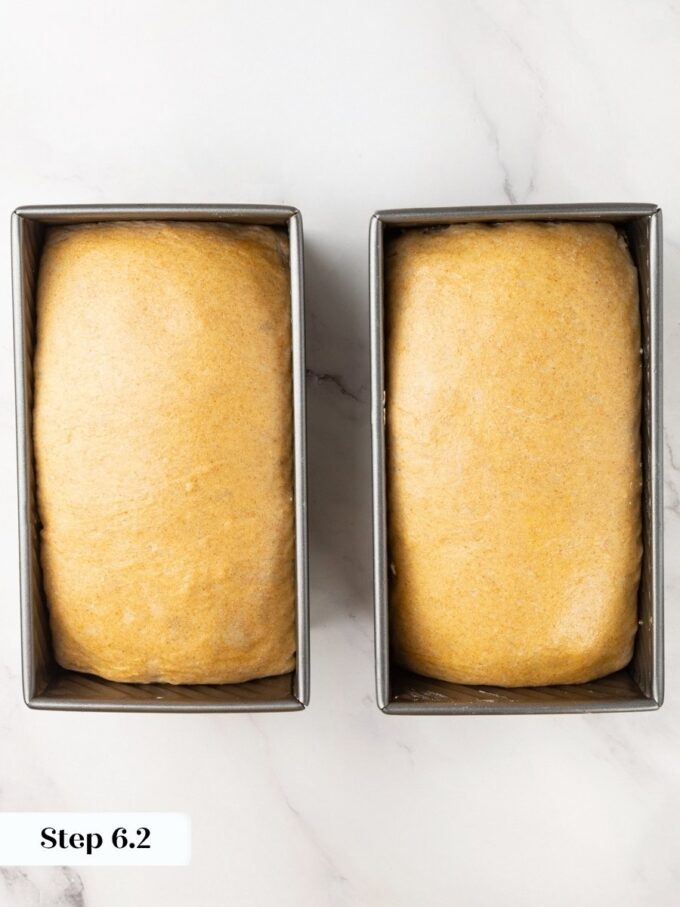
Step 6: Brush the tops of both loaves generously with the beaten egg. The egg wash does double duty here: it gives the crust a warm golden color and keeps the surface from drying out during the proof. Once the egg wash is applied, there is no need to cover the loaves. Set them in a warm spot and proof for 45 to 60 minutes, until the dough has risen above the rim of the loaf pan in most places. (photos 14 & 15)
This bread won’t get much oven spring because of the high rye percentage, so the final proof is where the real rise happens. Don’t move on until the dough is visibly puffed above the pan’s edge.
Step 7: Preheat the Oven. While the loaves are finishing their proof, preheat your oven to 375°F, conventional setting with no fan.
Bake
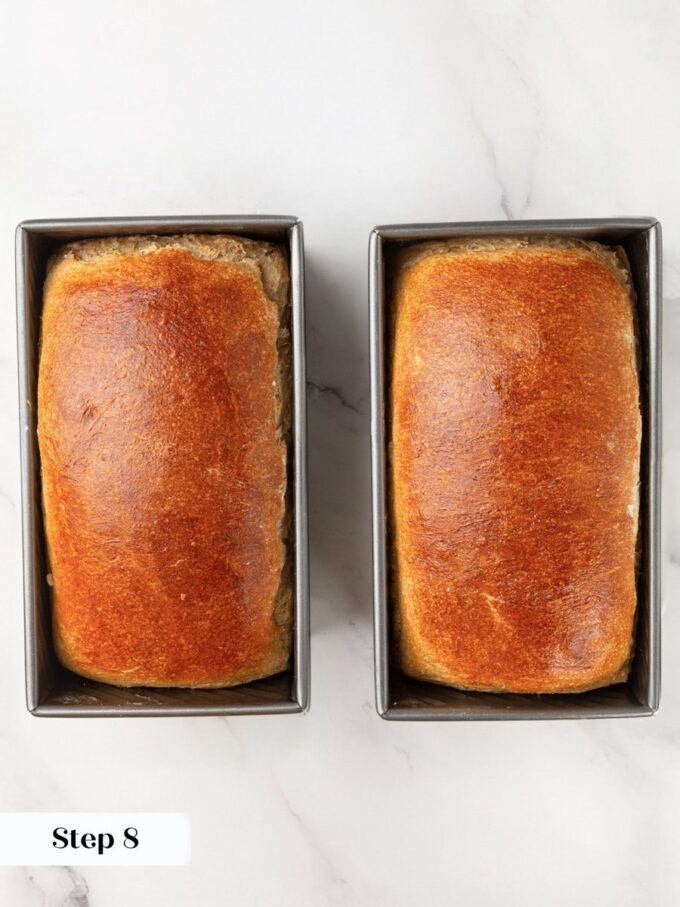
Step 8: Bake the loaves for 40 minutes, until the crust is a light golden brown. The most reliable way to confirm doneness is to insert an instant-read thermometer into the center of a loaf: you are looking for 185°F. If the crust colors before the time is up, that is fine, but pull the thermometer out before you take the loaves out of the oven. (photo 16)
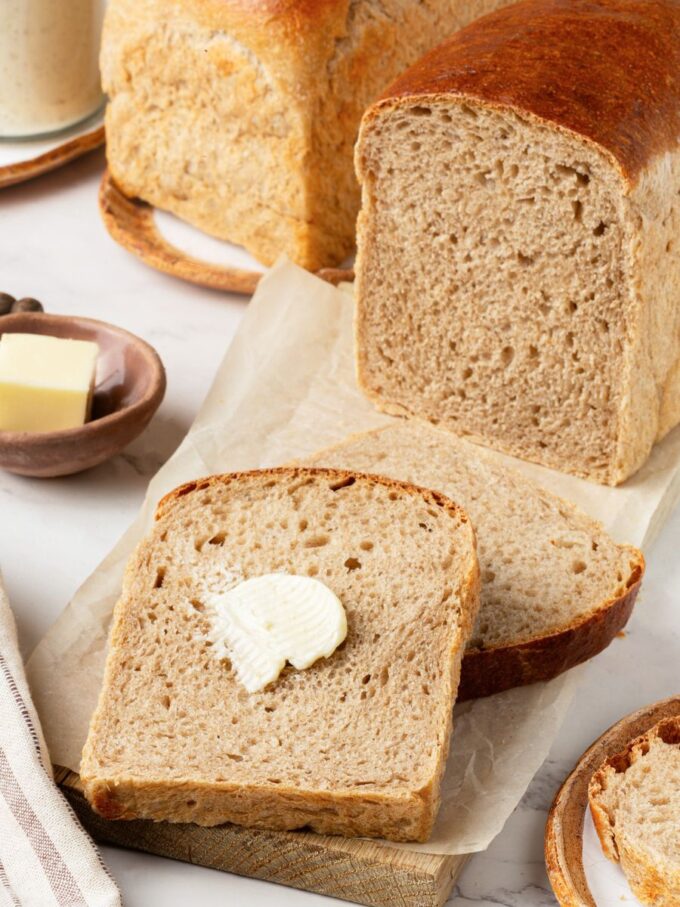
Step 9: Cool. Remove the loaves from the oven and turn them out immediately onto a wire rack. Cooling on the rack rather than in the pan prevents a soggy bottom and lets the crust set properly. Allow both loaves to cool completely before slicing. (photo 17).
Recipe FAQs
This bread keeps beautifully at room temperature for up to a week, tightly wrapped. For longer storage, let the loaves cool completely, slice them, then wrap tightly in plastic wrap and place in a zip-top freezer bag for up to 3 months. I like to freeze the loaves in slices so I can pull out exactly what I need, toast one straight from frozen, and not think twice about it.
Yes, you can shape into the loaf pans and place them in the fridge overnight wrapped without the egg wash. Then bake straight from the fridge. If you can I prefer to transfer to a new loaf oan before baking. If you want to freeze an unbaked loaf, shape it into the pan, skip the egg wash and final proof, wrap tightly, and freeze. Thaw overnight in the refrigerator, then proof at room temperature until the dough rises above the rim of the pan before baking.
The two loaves serve different purposes. My easy sourdough sandwich bread has a soft, pillowy crumb with mild tang and a fine, even texture that works for everything from PB&J to grilled cheese. Sourdough rye bread has a denser, chewier crumb with a more pronounced earthy and sour flavor that stands up to stronger toppings like smoked salmon, aged cheese, or cured meats. The rye loaf also has a longer shelf life at room temperature, staying fresh up to a week compared to the softer sandwich bread, which is at its best in the first three or four days.
Recipes using Rye Flour
Yeast Breads

Breakfast & Brunch

Yeast Breads

Yeast Breads
Sourdough Rye Bread
Ingredients
For the Sourdough Build:
- ½ cup water
- 3 tablespoons active sourdough starter
- 1 cup all-purpose flour
For the Dough:
- 4 cups medium rye flour
- 4 cups bread flour
- 4 teaspoons kosher salt
- ¼ cup butter, cubed
- 2½ cups warm water
- 1½ cups sourdough build, all of it
Instructions
Make the Dough and Bulk Proof
- Combine the rye flour, bread flour, kosher salt, butter, warm water, and sourdough build in the bowl of a stand mixer. Fit with the hook attachment and mix on low until a cohesive dough forms.
- Increase speed to medium-low and knead for 5 minutes. The dough will feel soft and supple but may tear easily when stretched. That is normal with a high rye percentage.
- Transfer the dough to a lightly oiled large bowl, flip to coat the top, and cover with a kitchen towel or plastic wrap. Bulk proof in a warm spot for 45 minutes, or until doubled in size.
Divide and Preshape
- Divide the dough into two pieces, about 900g each.
- Preshape each piece into a boule by folding each of the four sides toward the center. Flip seam side down and gently tighten with lightly floured hands. Cover and bench rest for 15 minutes.
Final Shape and Proof
- For final shaping, fold the side furthest from you down to the center, then rotate 180 degrees and repeat. Perform two thumb folds: wrap the dough around your left thumb and seal the edge with the heel of your right hand, moving right to left. The first fold will not fully close the log. The second will finish it.
- Place each log seam side down in an 8 to 9 inch loaf pan sprayed with non-stick cooking spray.
- Brush the tops with beaten egg. Proof uncovered in a warm spot for 45 to 60 minutes, until the dough has risen above the rim of the pan in most places.
Bake
- Preheat the oven to 375°F (conventional, no fan) while the dough proofs.
- Bake for 40 minutes, until the crust is light golden brown or an instant-read thermometer inserted into the center reads 185°F.
- Turn the loaves out immediately onto a wire rack and cool completely before slicing.
Notes
Proofing: The second proof is done when the dough has risen visibly above the rim of the pan. A 65°F kitchen can push this to 75 to 90 minutes, so watch the dough rather than the clock.
Flour ratio: Do not adjust the ratio of rye flour to bread flour. Rye behaves differently from wheat, and shifting the balance will change both the crumb structure and how the dough handles.
Storage: Wrap cooled loaves and store at room temperature for up to 1 week. For longer storage, slice thin, wrap tightly in plastic wrap and a zip-top bag, and freeze for up to 3 months.
Nutrition
Nutrition information is automatically calculated, so should only be used as an approximation.
 Like this recipe? Rate & comment below!
Before You Go
If this sourdough rye bread earns a regular spot in your weekly rotation, there is plenty more to keep you baking. Browse our Bread Recipes or make this whole wheat sourdough bread next!


Beautiful
Thank you for taking the time to share! ~GVD team