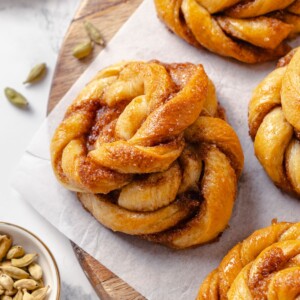
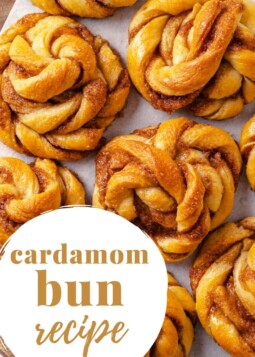
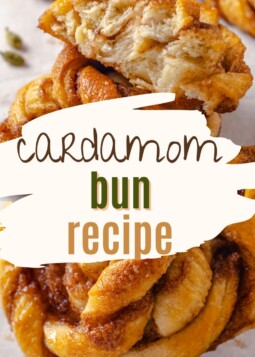
A step-by-step knotted cardamom bun recipe. A flavorful cardamom brioche dough layered with a cinnamon cardamom filling, elaborately shaped and baked into the perfect breakfast treat in under 2 hours.
A Quick Look At The Recipe
This is a brief summary of the recipe. Jump to the recipe to get the full details.
Prep Time
20 minutes
Cook Time
15 minutes
Total Rise Time
45 minutes
Total Time
1 hour 20 minutes
Servings
12 buns
Difficulty
Moderate (easy steps!)
Calories *
326 kcal per serving
Technique
Mix dough, add filling, twist buns, rise, brush with syrup, and bake.
Flavor Profile
All the flavors of cinnamon rolls with the addition of cardamom!
* Based on nutrition panel
Featured Comment
⭐⭐⭐⭐⭐This is my go-to breakfast pastry. My whole family loves them. To make the shaping easier, after I cut the slices, I just twist the whole thing and knot. This is just easier for me. Thanks for the recipe! -Cleo
Why You Will Love this Cardamom Bun Recipe
- A soft, buttery cardamom dough. This easy dough recipe combines the melt-in-your-mouth quality of overnight cinnamon rolls and the structure of a brioche loaf. It is a more tender variation of traditional cardamom buns (kardemummabullar) found in Norway and Sweden.
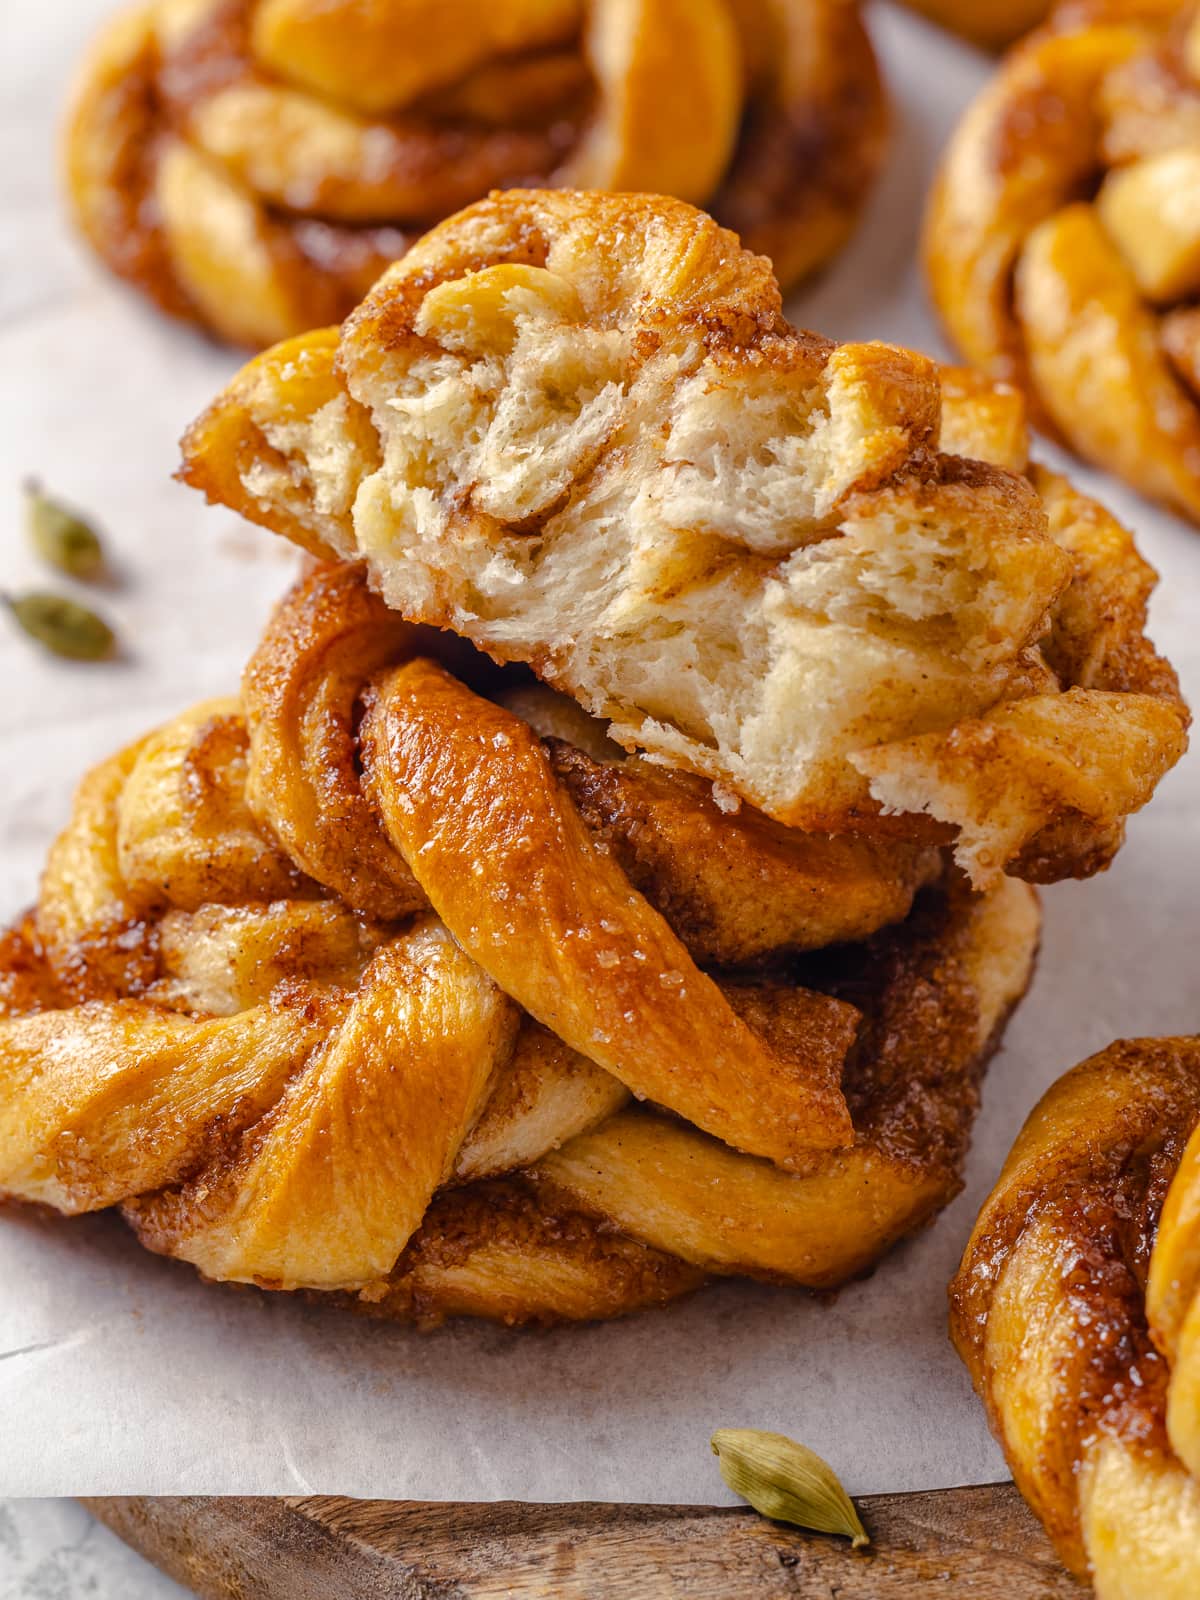
- A cinnamon roll inspired filling. I used my cinnamon roll filling as the base for the filling in this recipe. It is buttery, sweet and cinnamon-forward. The bits that caramelize on the bottom and around the edges of the buns will have you licking the pan!
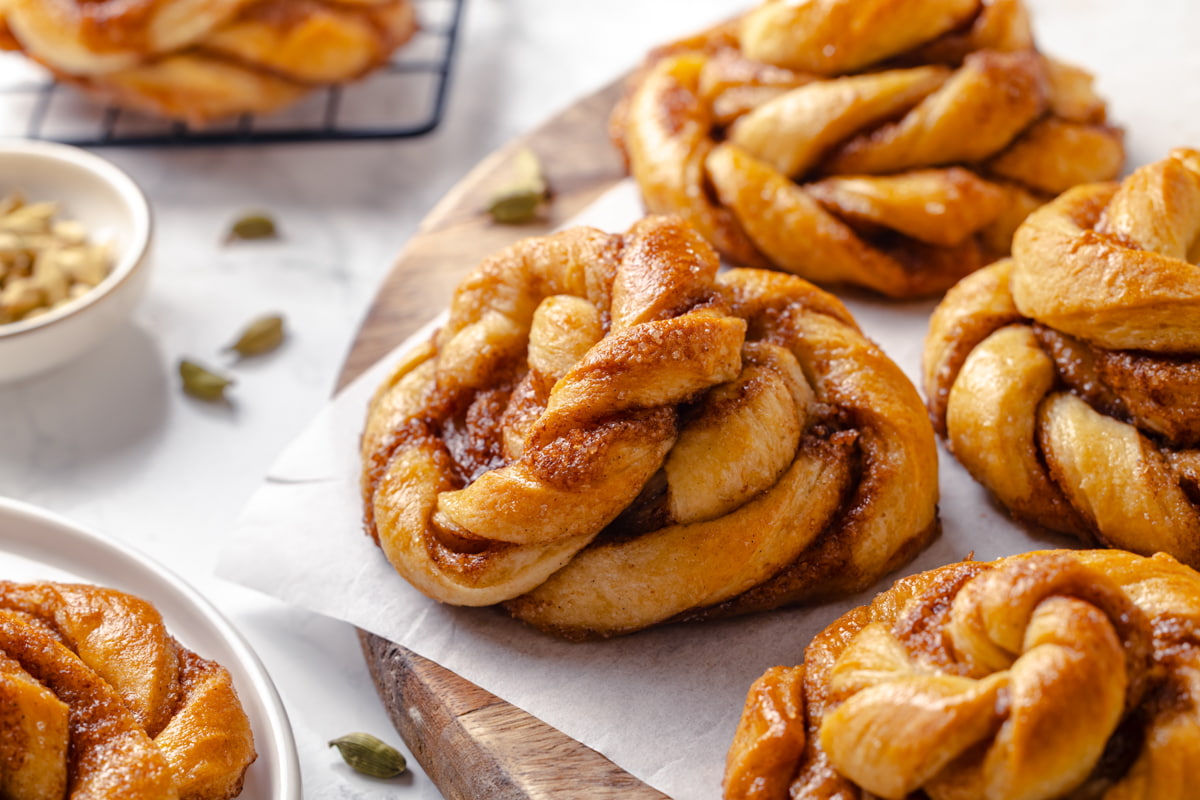
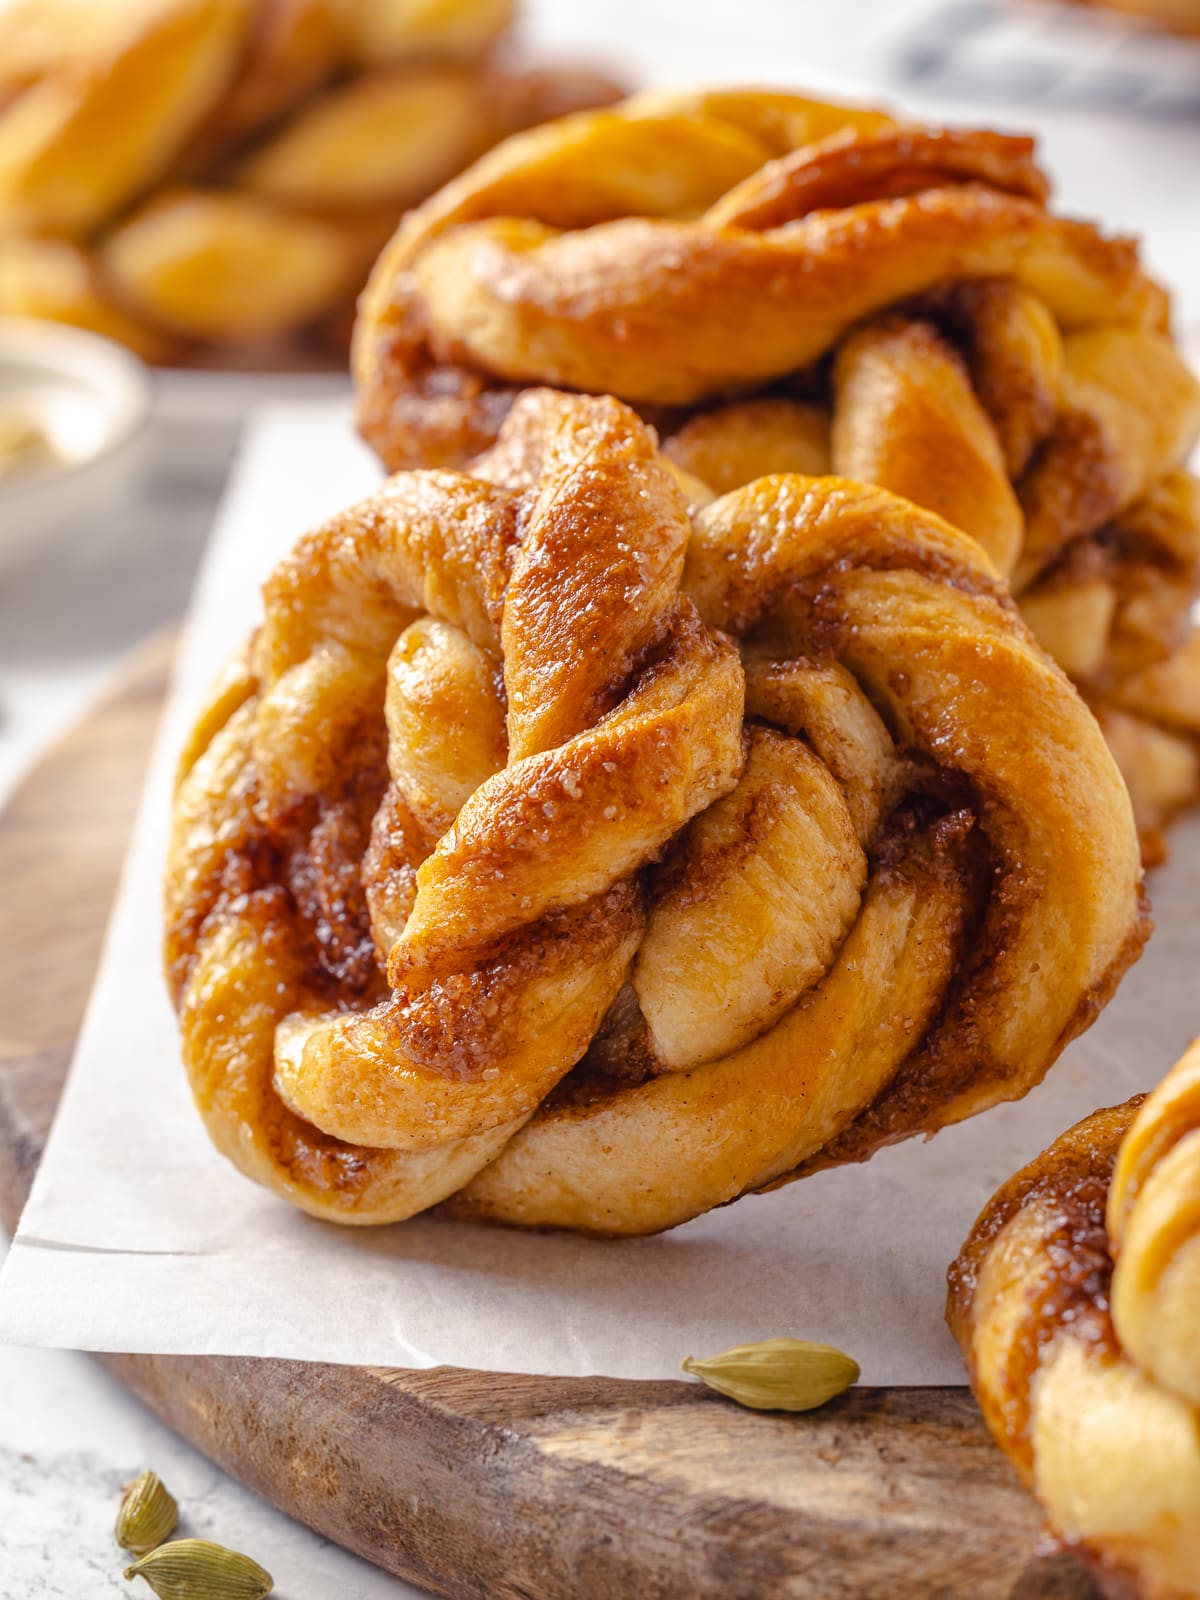
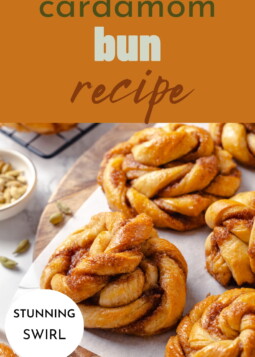
- Stunning swirl that is easier than it looks! I like to think of these buns as cinnamon rolls with attitude! I give you step-by-step photos to show you how to easily shape your own!
- The brush with simple syrup and generous amount of filling give these buns a satisfying caramelized crust contrast to the soft centers.
Table of Contents
How I developed this recipe
I inherited this post when I acquired GVD in 2023 and it was popular but there were some pretty negative reviews. I take readers’ feedback seriously and I often test and retest old recipes then adjust according to my experience.
This updated cardamom bun recipe is inspired by the cardamom cinnamon buns I ate at the now-closed Circus Bakery, in Paris with my husband. This version bridges my Paris memories with my New York kitchen, big flavor with simple tools. It is a cross between my hot cross cinnamon roll dough and a more substantial cardamom bun dough with a cinnamon-forward filling.
Ingredients & Substitutions
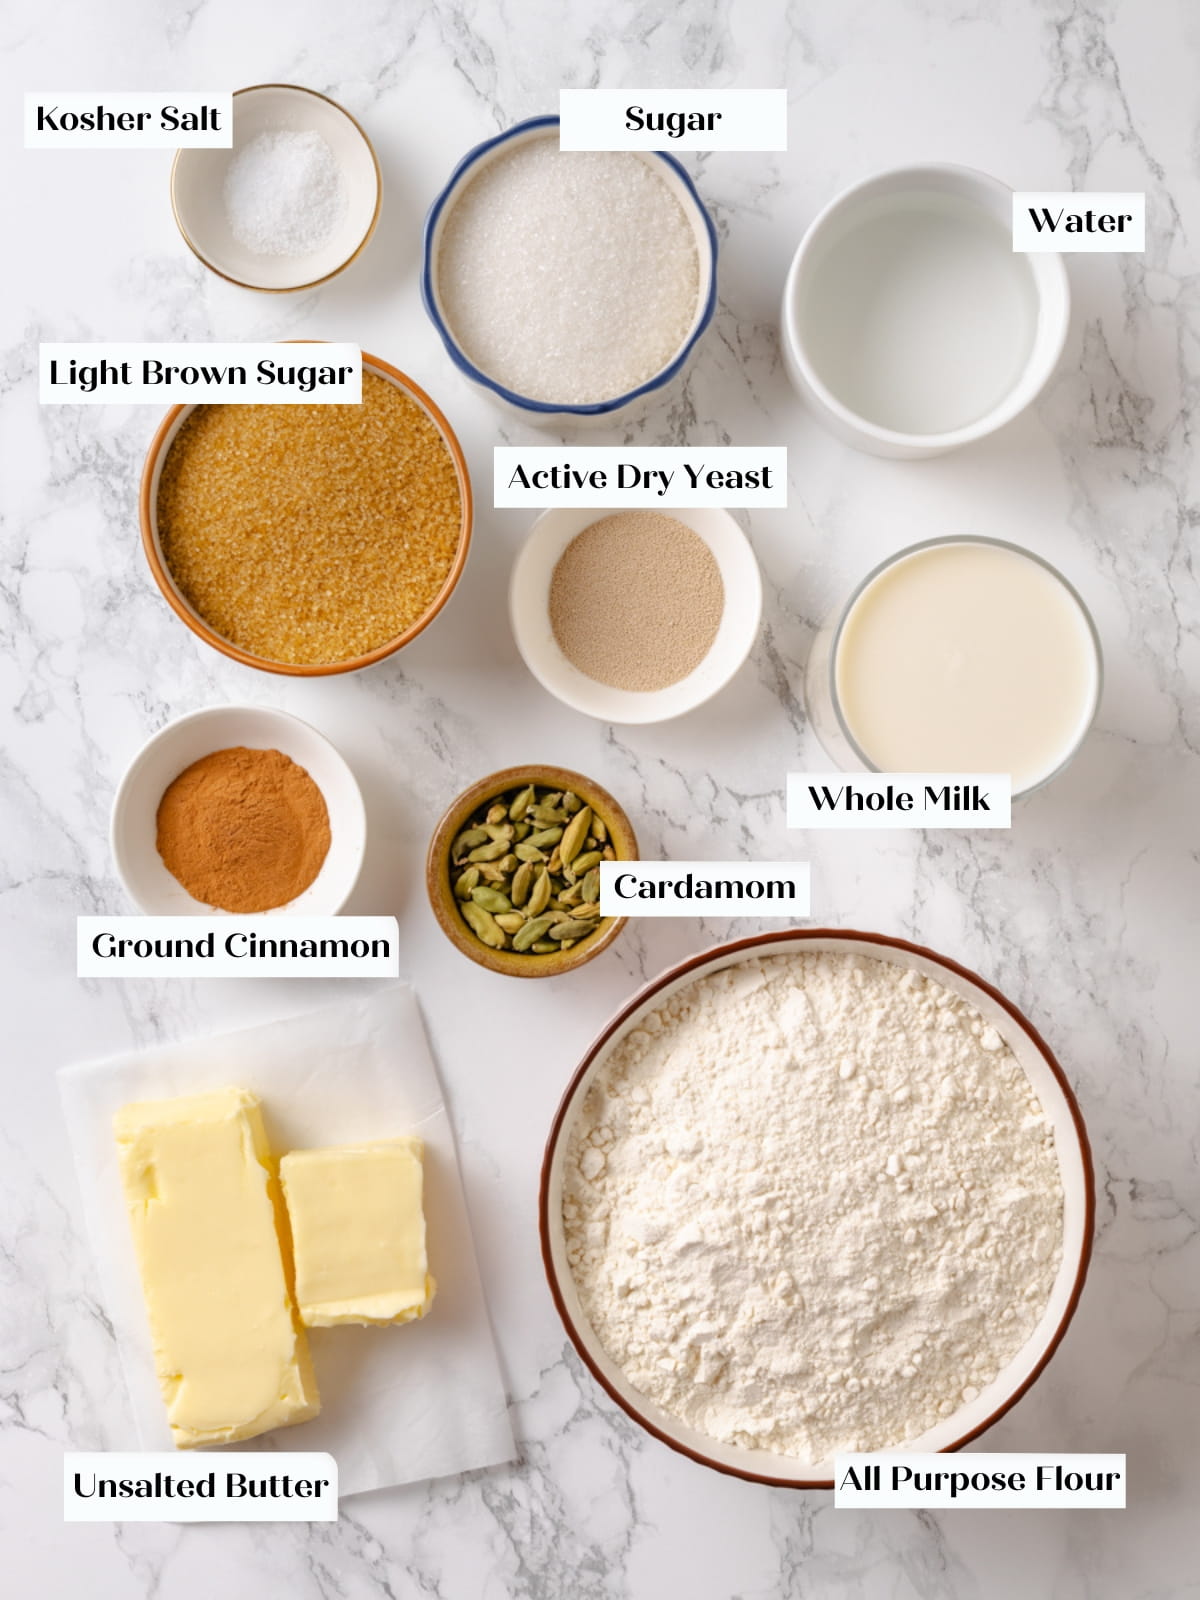
- Milk: I use whole milk in this recipe because the fat adds flavor and inhibits gluten formation. You can use a different milk or unsweetened alternative milk.
- All-Purpose Flour: Reach for the all-purpose flour over bread flour to give you the structure you need without an undesirable chewiness from extra gluten.
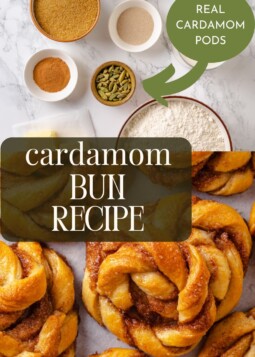
- Cardamom: Use whatever cardamom you have on hand, but grinding decorticated cardamom seeds yourself is the best. Freshly ground cardamom will add a deeper, more complex flavor just like it does in braided cardamom bread. You can also remove the seeds from the cardamom pods yourself, but it can be tedious!
- Cinnamon: Ground cinnamon might be controversial in this bun recipe but I love the combination of cinnamon and cardamom in the buttery filling. It adds extra warmth and balances out the less desirable flavor profiles in cardamom.
- Light Brown Sugar: Typically light and dark brown sugar are interchangeable in baking recipes, but I recommend using light brown sugar specifically in these cardamom buns because it adds a little molasses flavor without overpowering the cinnamon and cardamom.
- Simple Syrup: I brush the dough right before baking with homemade simple syrup and then again after baking. This gives a lovely caramelization and browning to the outside of the buns. You could use egg wash instead to make them shiny without the added sugar.
- Active Dry Yeast
See the recipe card for full information on ingredients and quantities.
Professional Tips
- Make the simple syrup in the microwave. This is one of those things that I wish I had known 10 years ago as an executive pastry chef. So simple and just as effective!
- There is no wrong way to swirl the cardamom bun. I’m just throwing that out there to take the pressure off. Even if every single bun is different like a snowflake, they will all taste fantastic. Practice makes perfect; and not just for challah.
- The dough will shrink after dividing. This makes it difficult to get 12 equally sized pieces. Try your best but don’t stress too much. I have made these buns in a rush and had very small buns baking on the same tray as larger ones, and each and every one was delicious.
How to Make this Cardamom Bun Recipe
Use these instructions to make the best Swedish cardamom buns! Further details and measurements can be found in the recipe card below.
To grind cardamom seeds: If your seeds have the green, black or white pod intact, remove the seeds from the pods. Grind the seeds in a spice grinder, clean coffee grinder or using a mortar and pestle until fine.
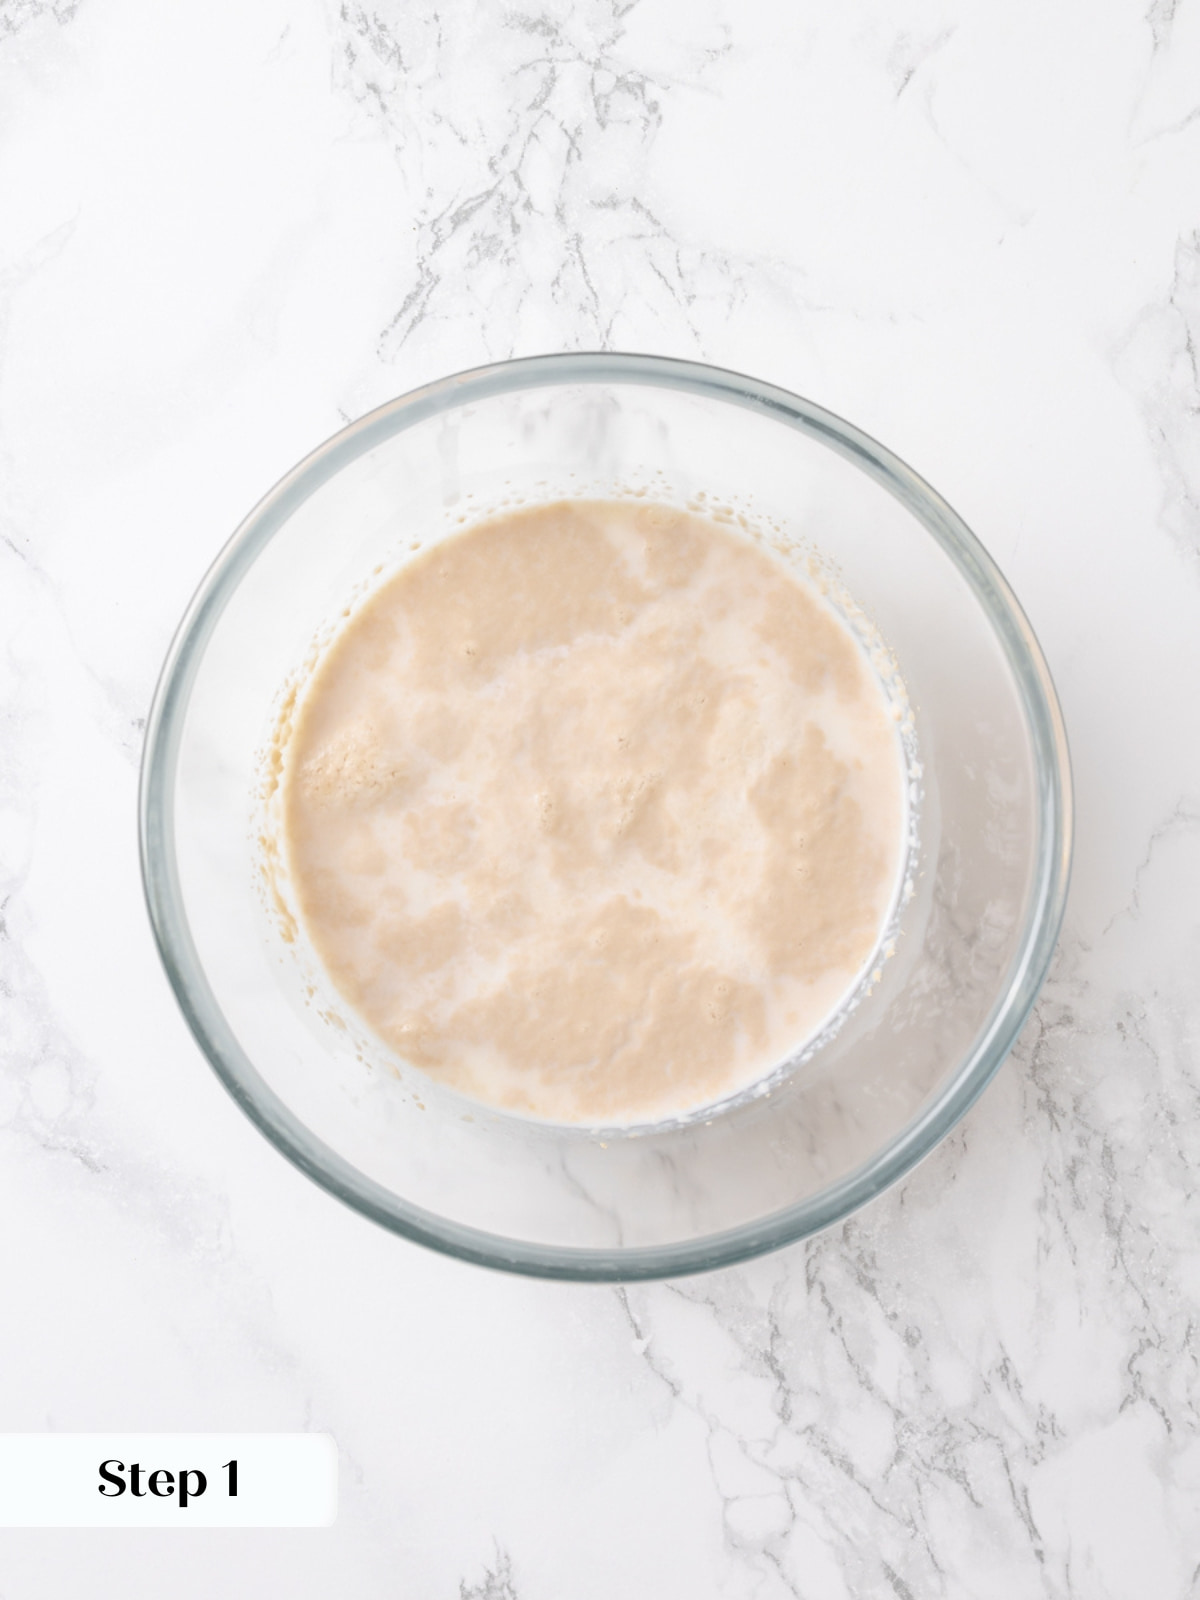
Step 1: In a small bowl whisk together yeast and warm milk. Let sit for 10 minutes or until foamy (photo 1).
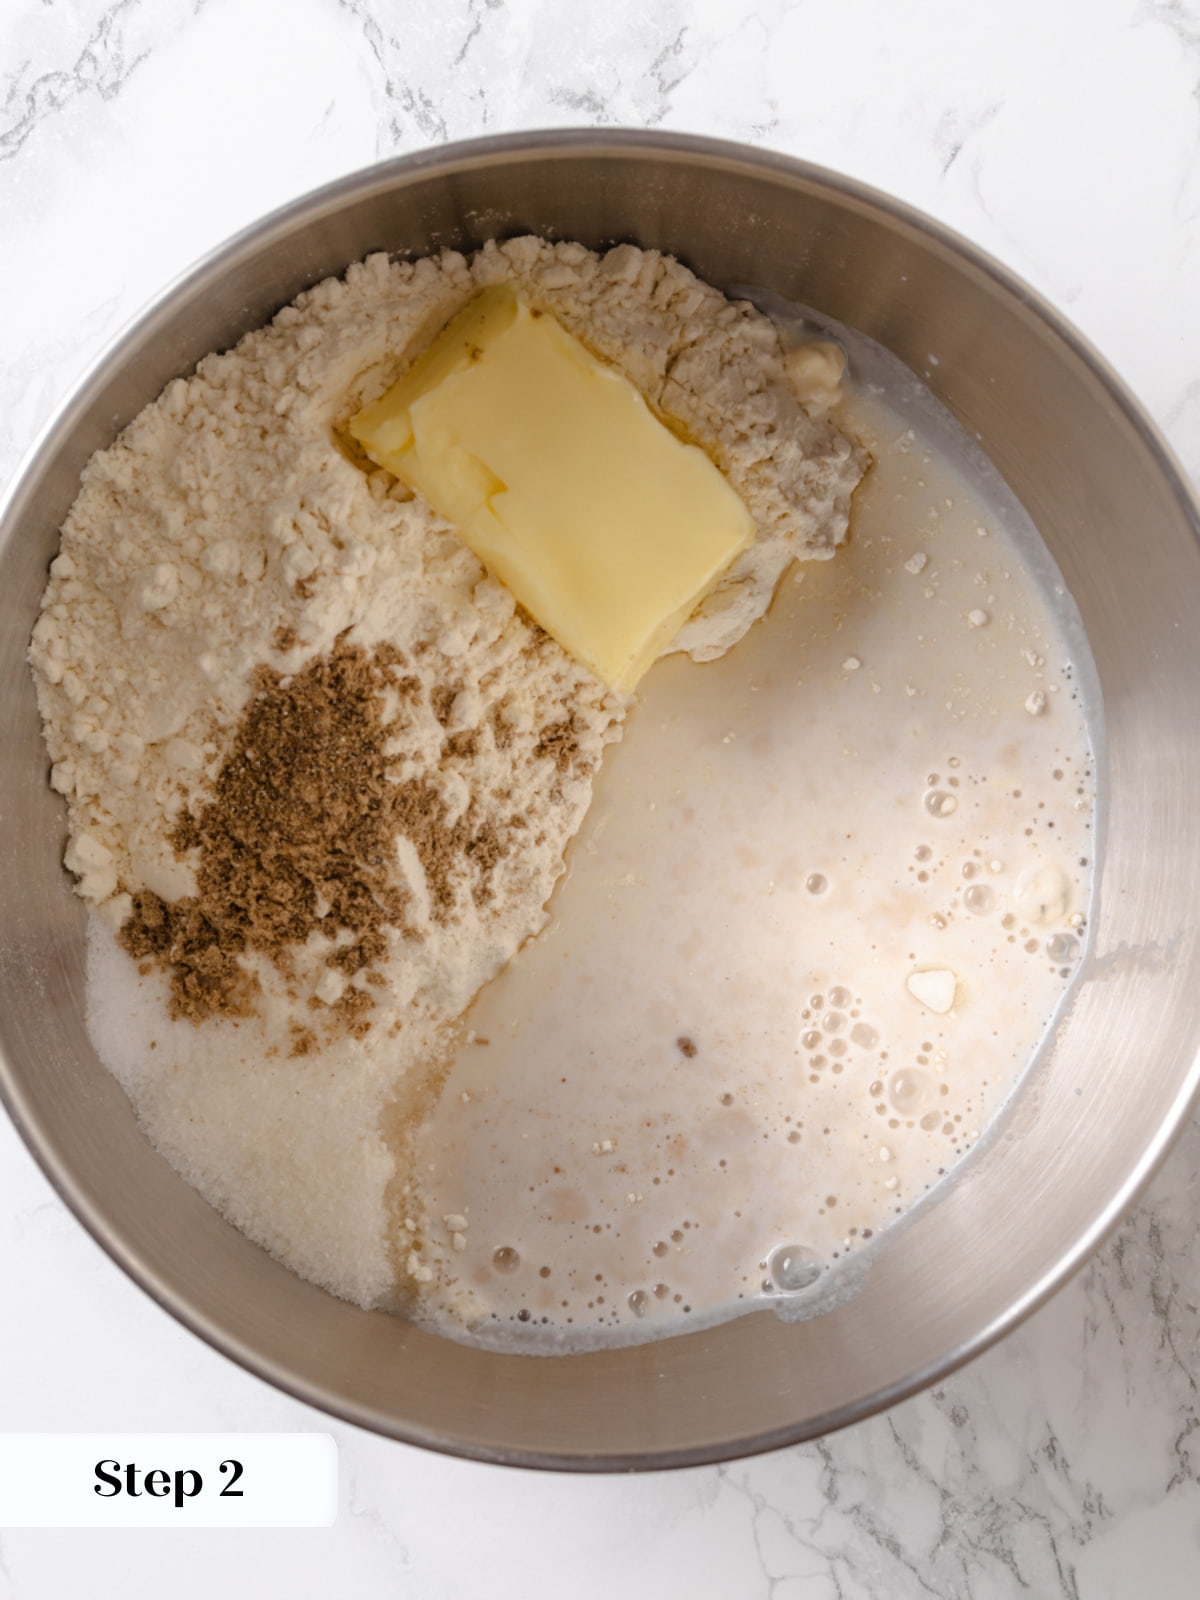
Step 2: Make the dough. Add the yeast mixture, butter, flour, sugar, cardamom and kosher salt to the bowl of a stand mixer fitted with the dough hook attachment. Incorporate the dough on low speed (photo 2).
Step 3: Once all the ingredients have mixed together, increase the mixer to medium speed and develop the gluten. Continue mixing and testing a small piece of dough to see if you can gently stretch it thin enough to see light through.
The butter will delay gluten formation, so I mixed for 4 minutes before checking using the window pane test.
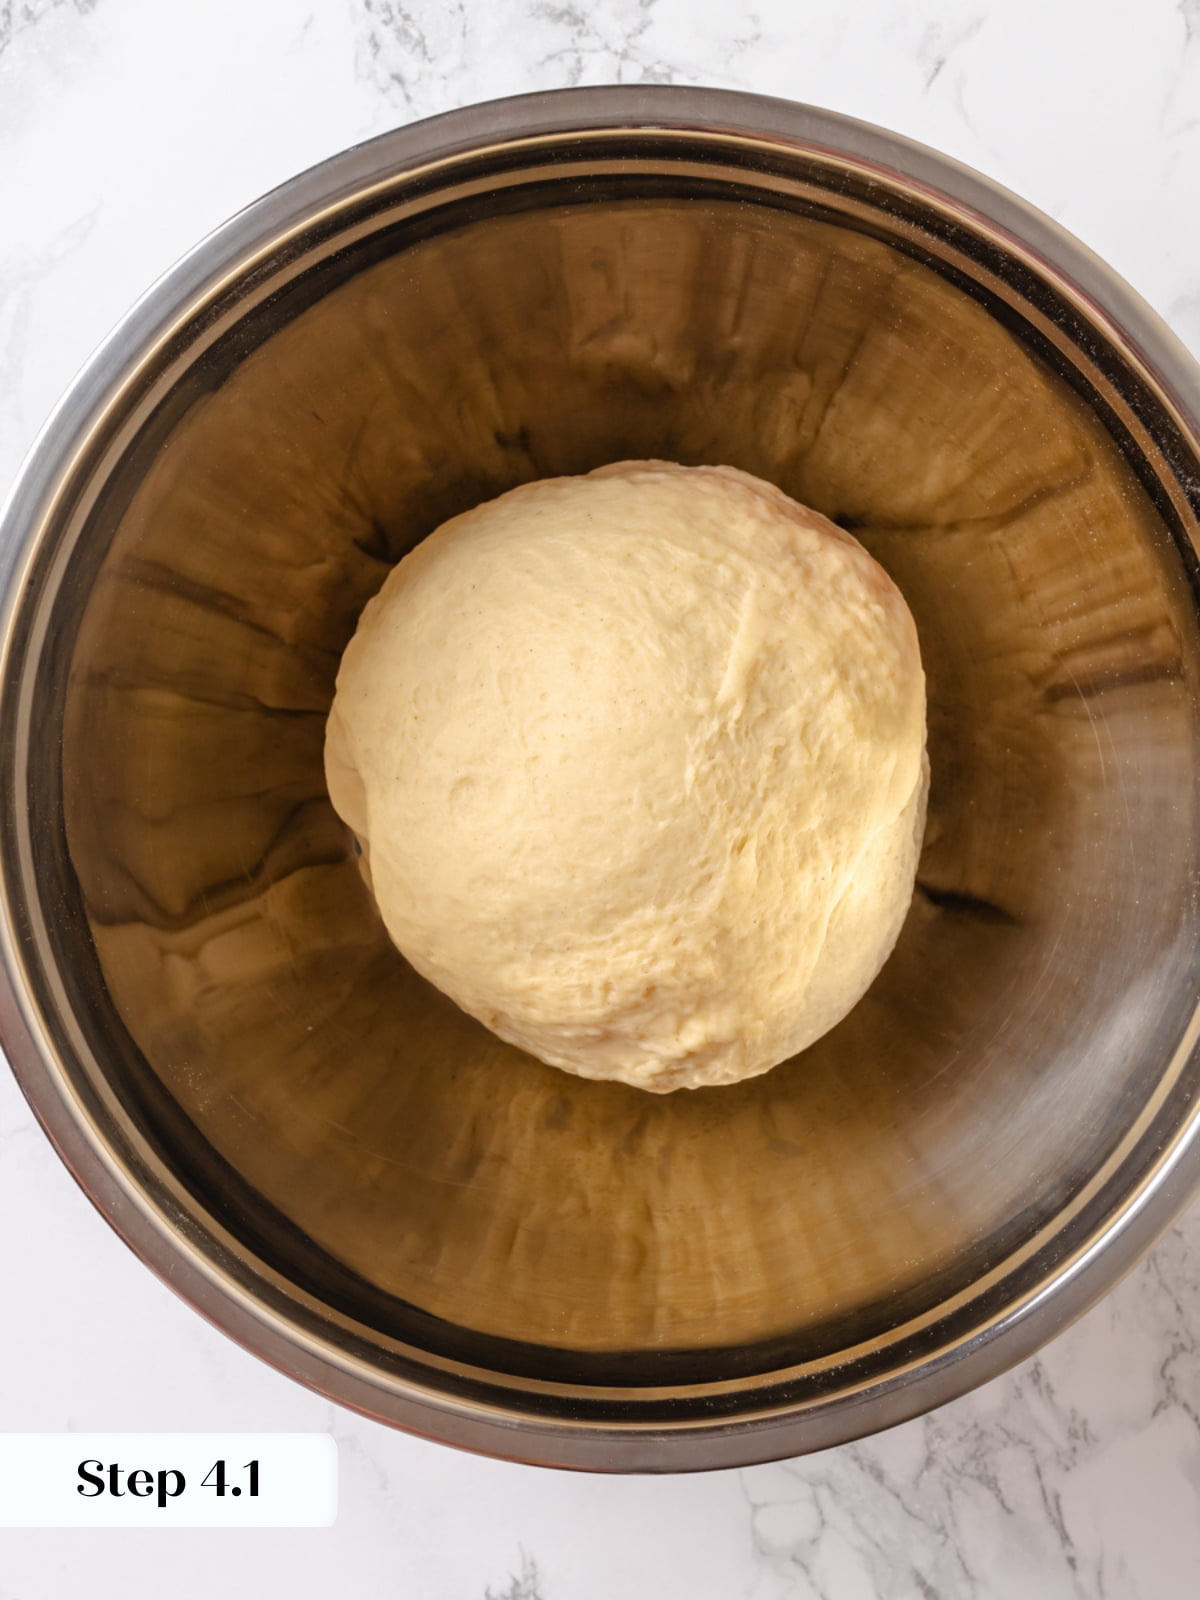
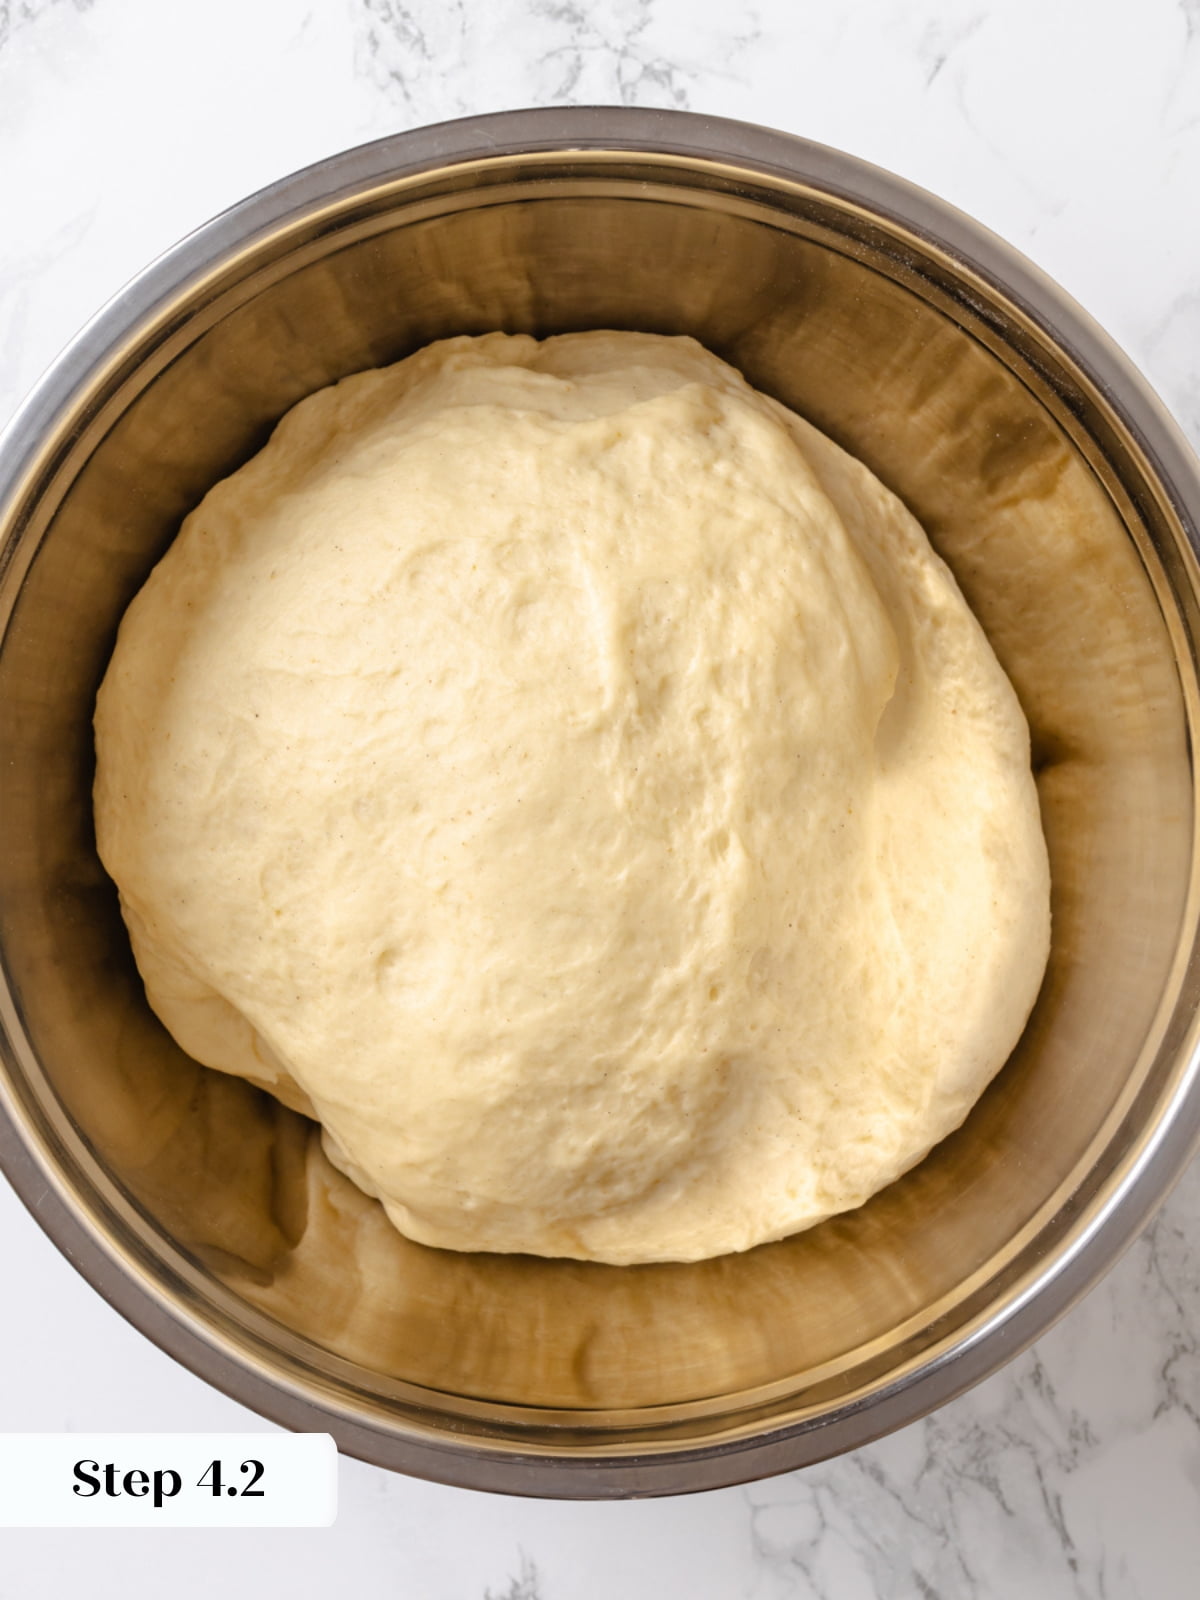
Step 4: First rise. Scoop the dough into a large bowl. You can lightly spray it with nonstick cooking spray if desired. Bulk proof the cardamom dough for 30-45 minutes or until doubled (photos 3 & 4).
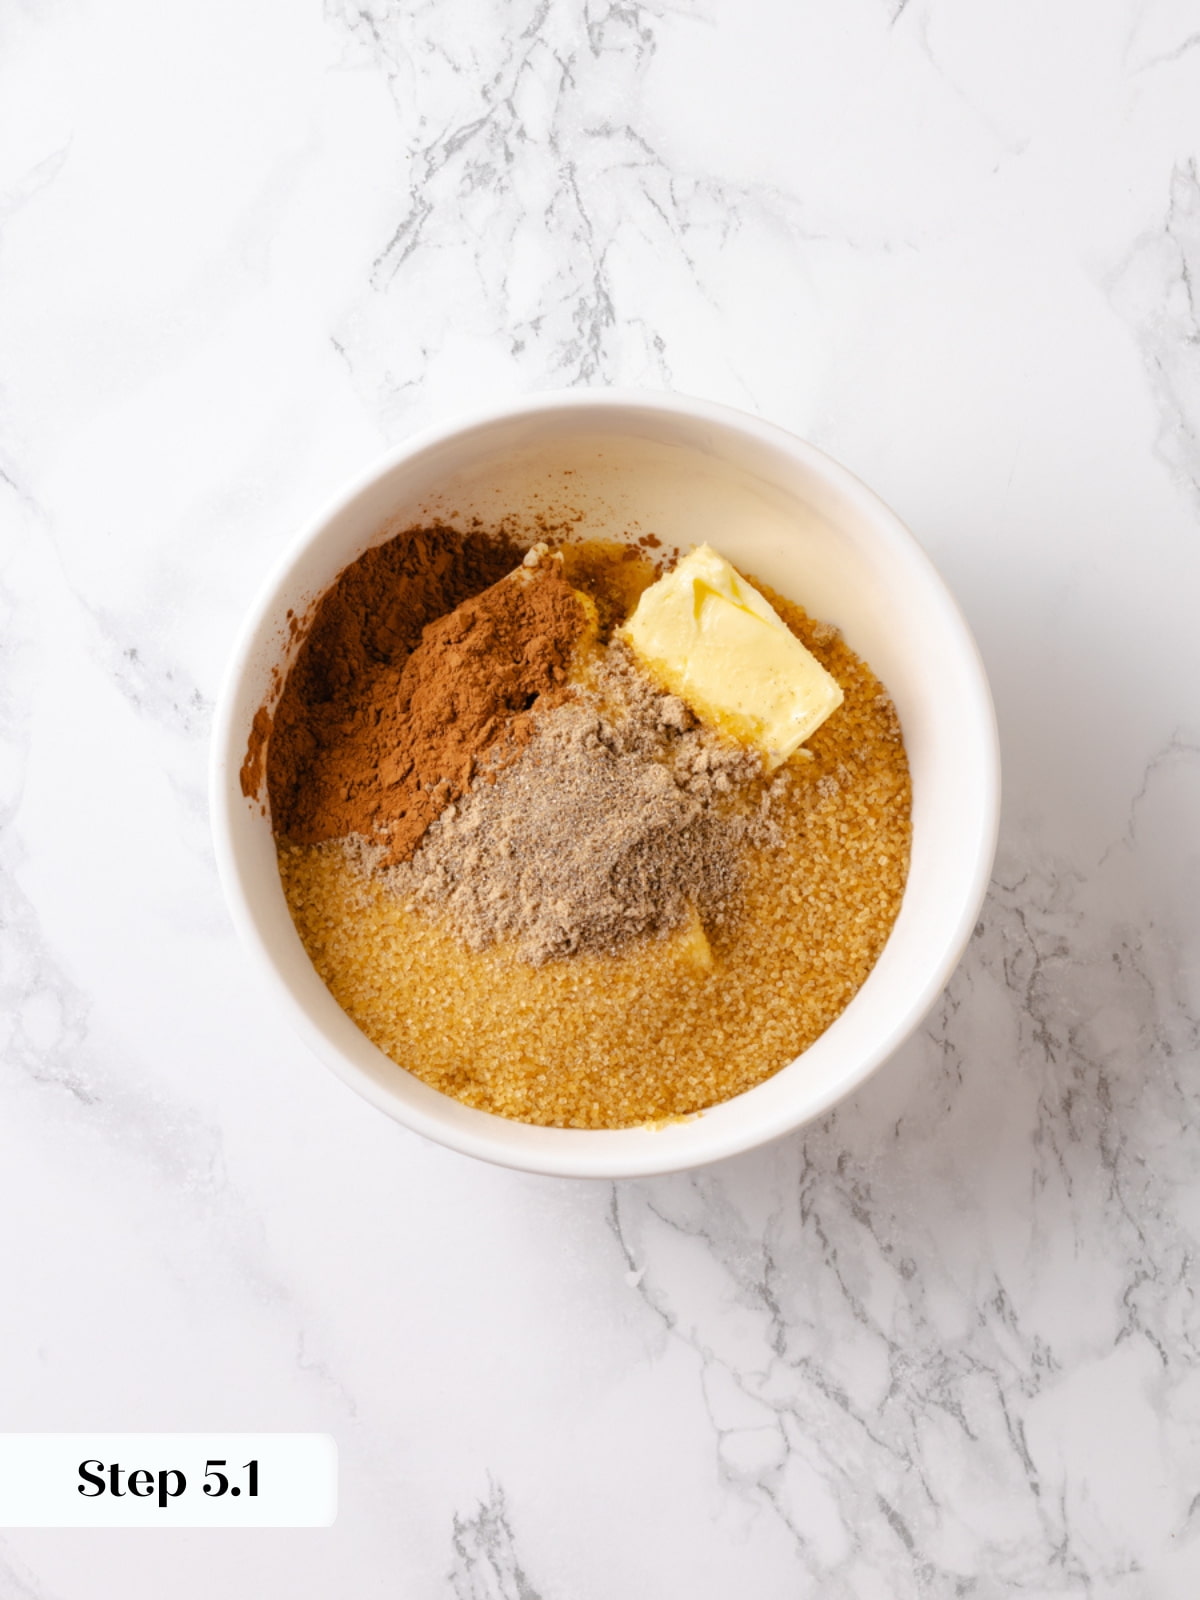
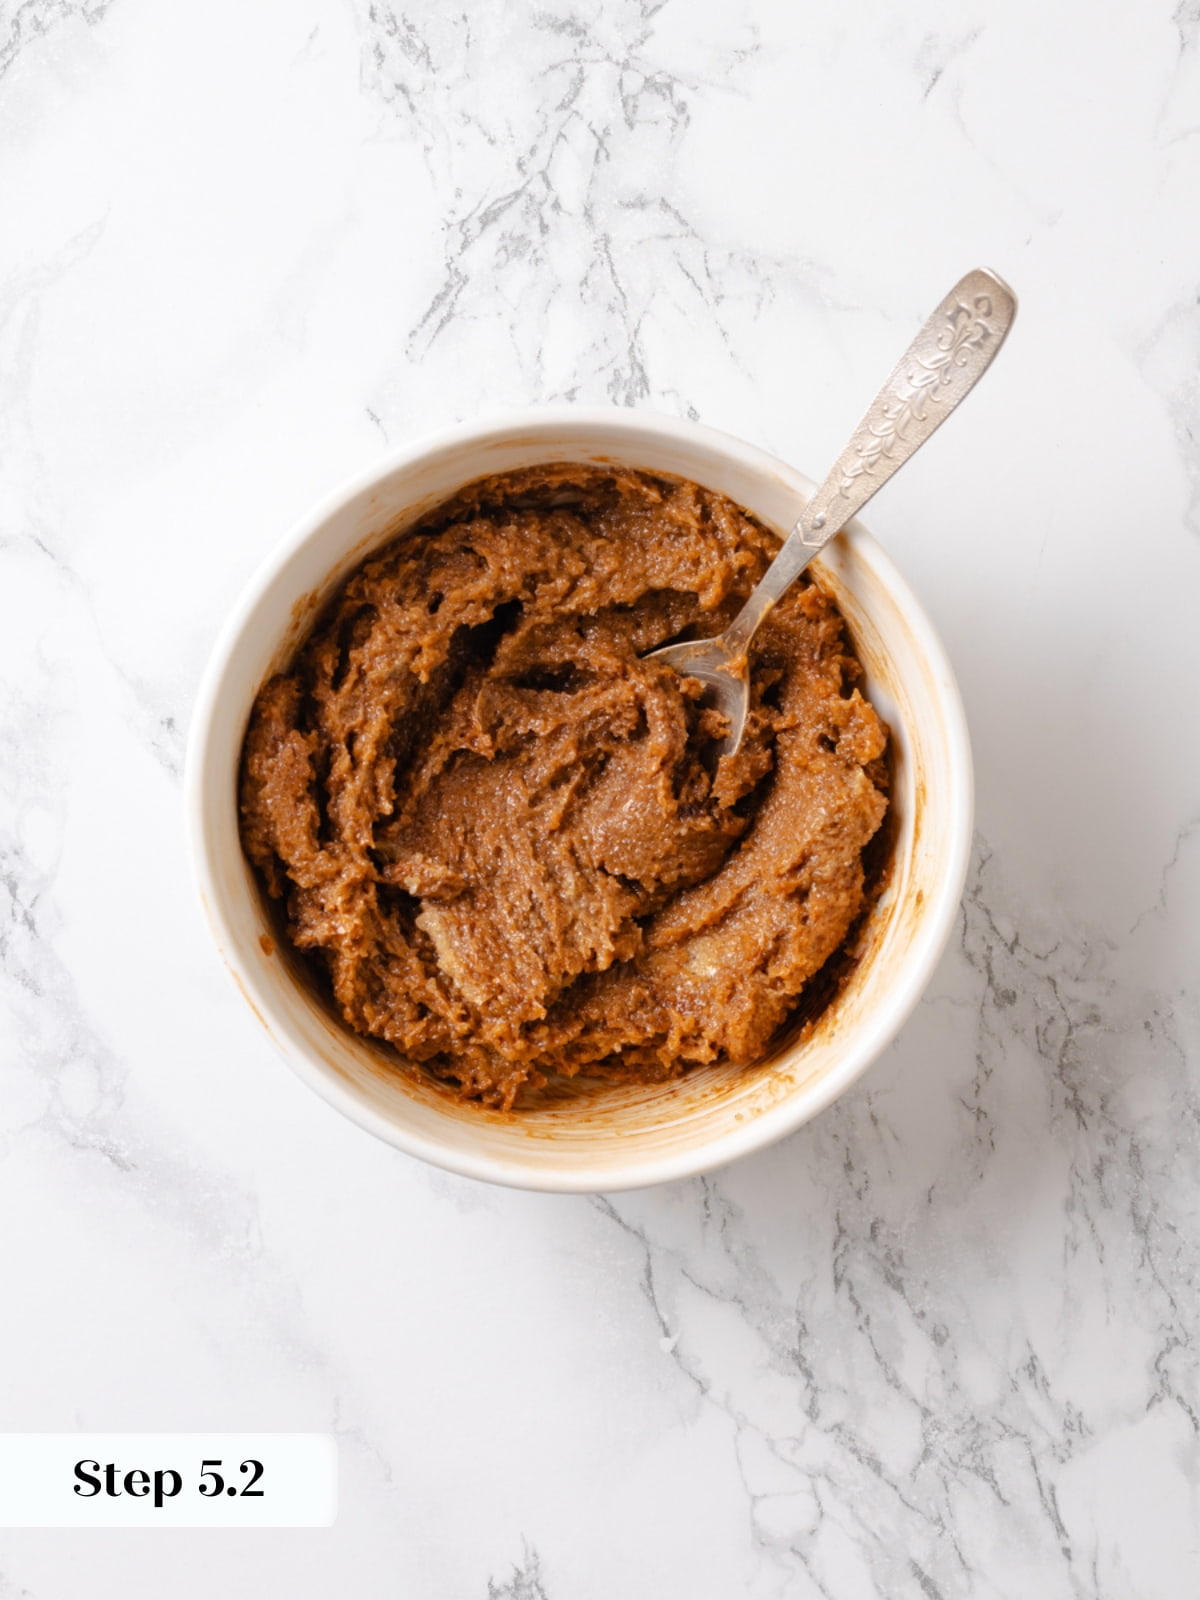
Step 5: Make filling. While the dough proofs combine all ingredients for the filling in a small bowl using a rubber spatula. It should be easily spreadable. Set aside (photos 5 & 6).
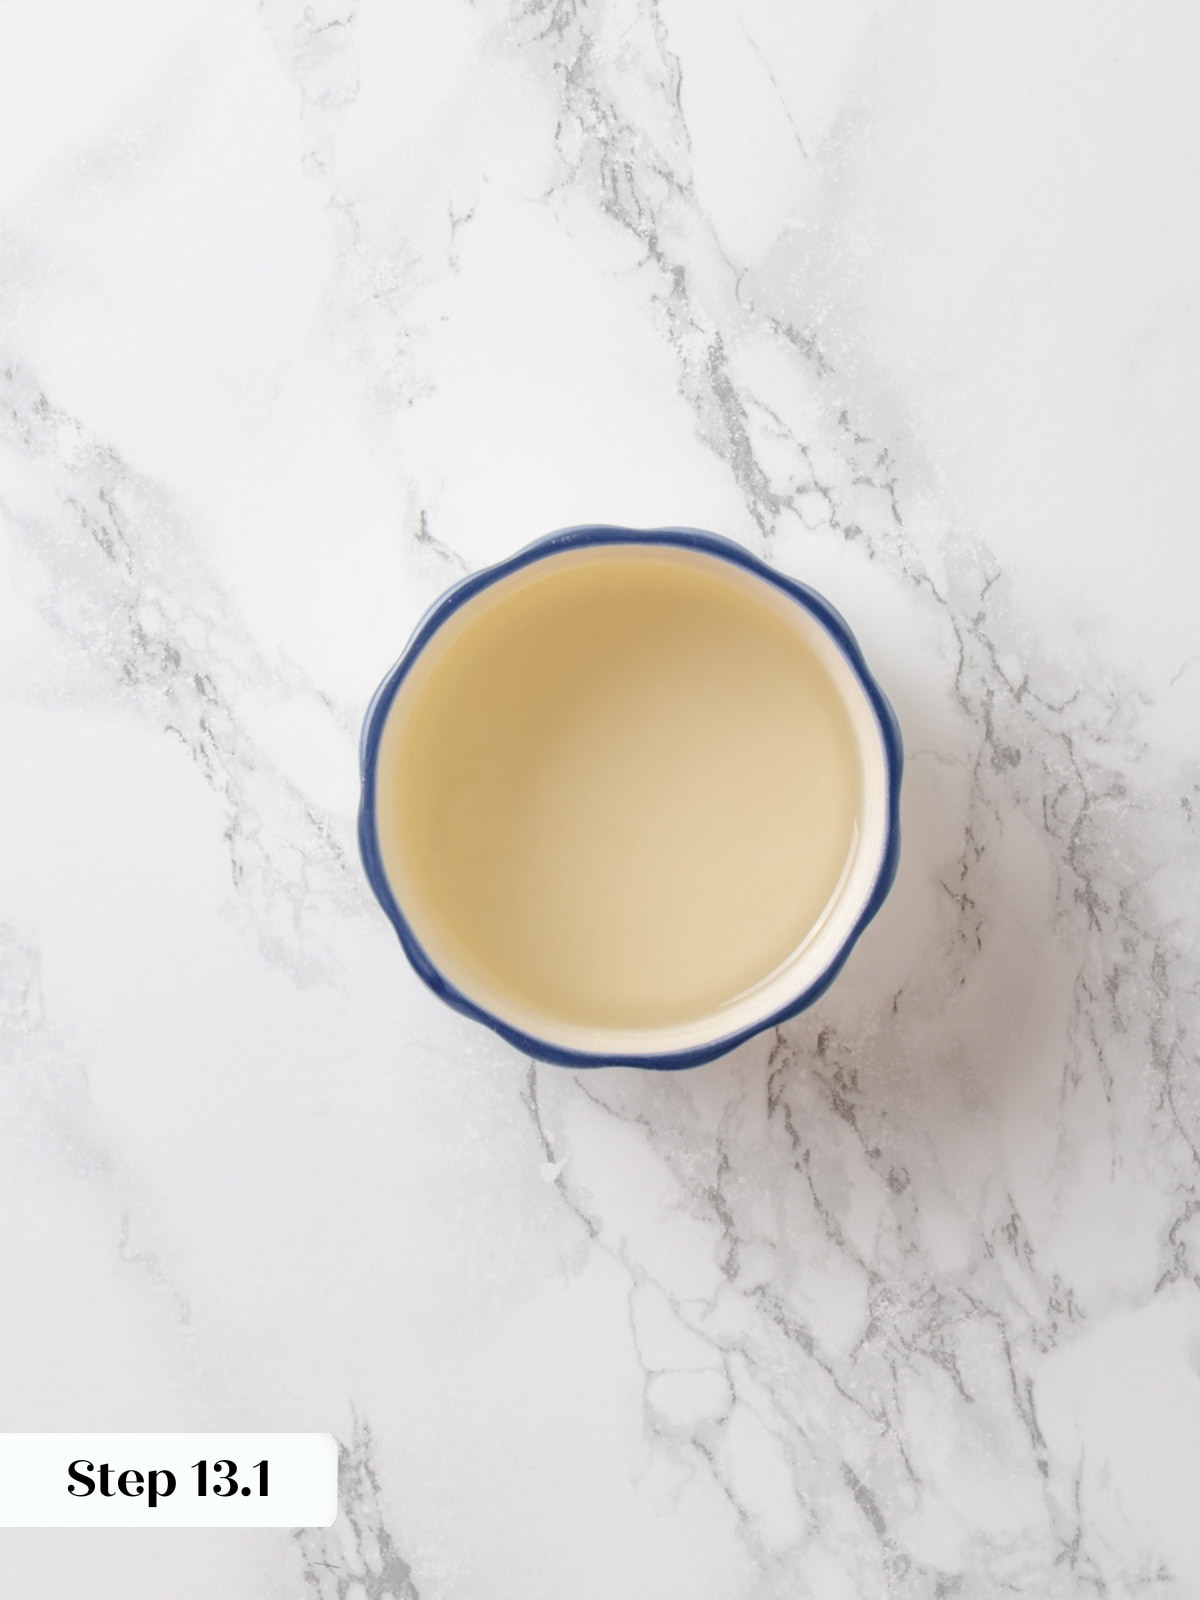
Make the simple syrup in the microwave or a small pot. Combine sugar and water, stir, and cook until boiling. This only takes 30 seconds in the microwave. Swirl the container to dissolve any remaining sugar crystals. Revolutionary! Cool it in the refrigerator. This can also be made ahead and stored in the fridge. It is also, technically, optional!
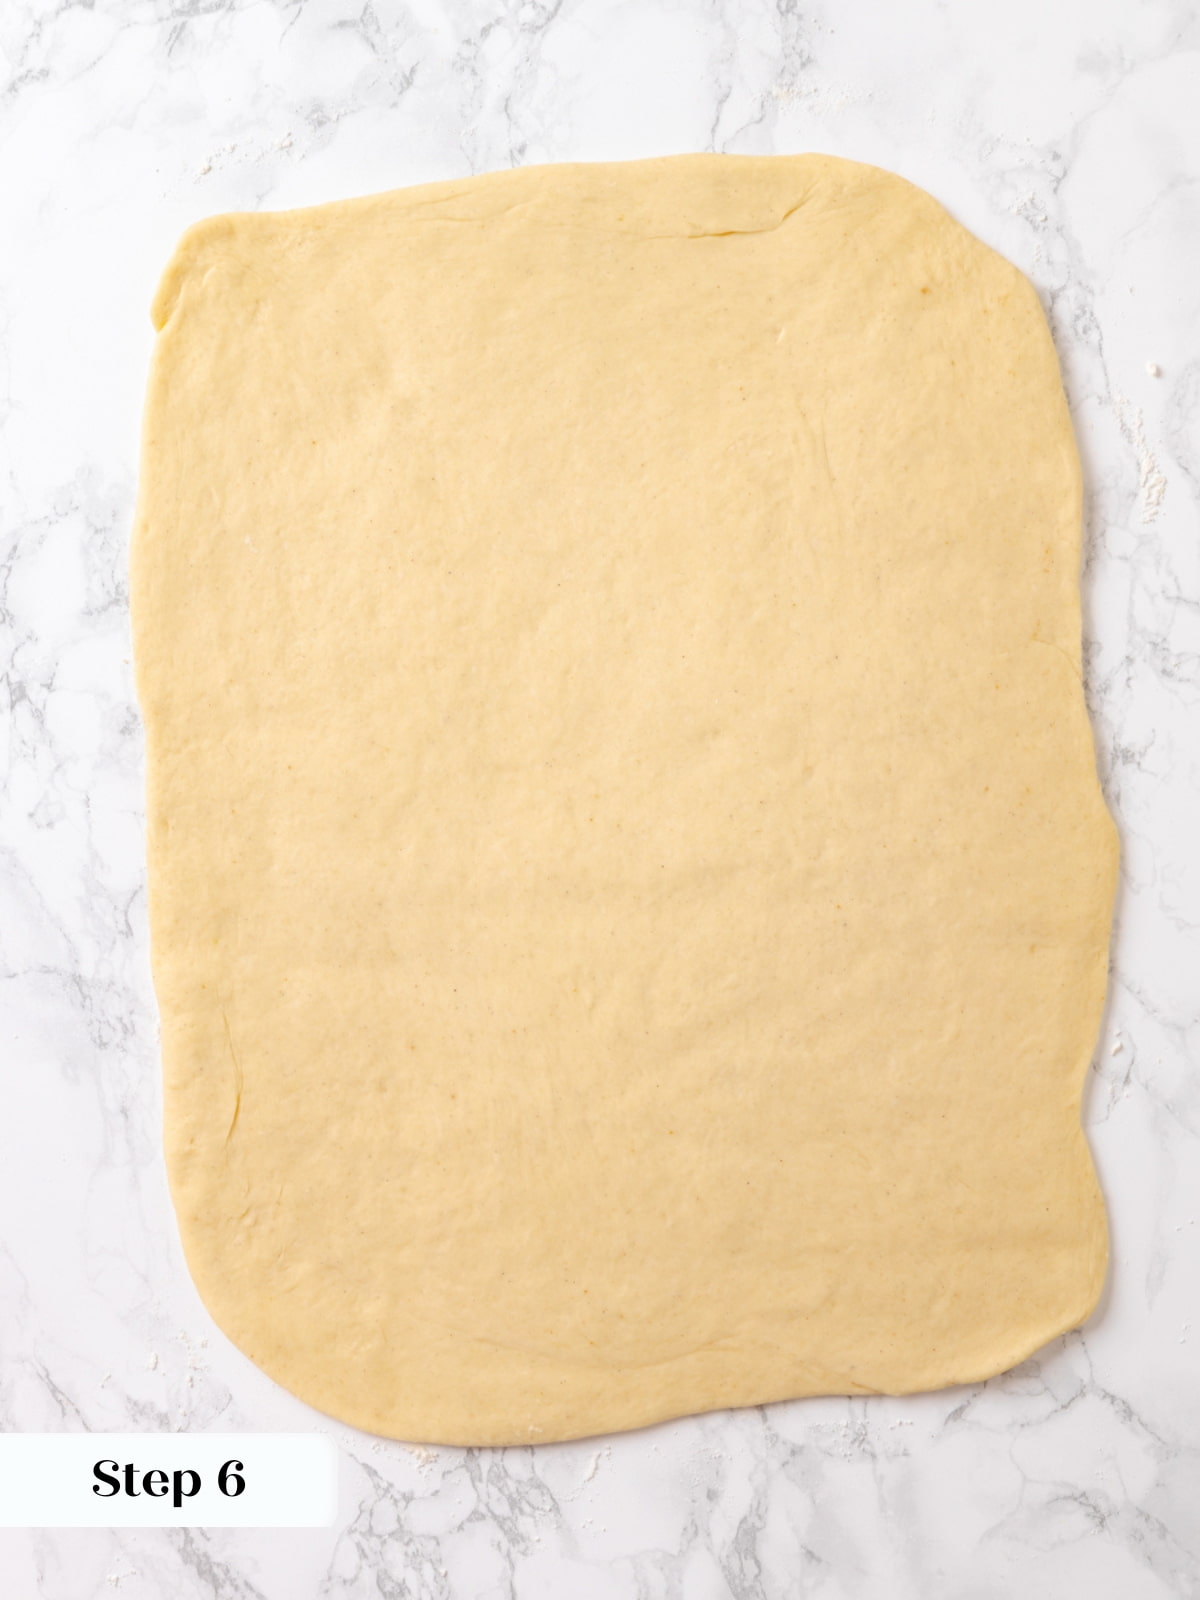
Step 6: Roll out: On a lightly floured surface, roll out the dough to 16×12 inches with the long side parallel to your body using a rolling pin (photo 7).
The dough sticking to the counter will help you achieve this size.
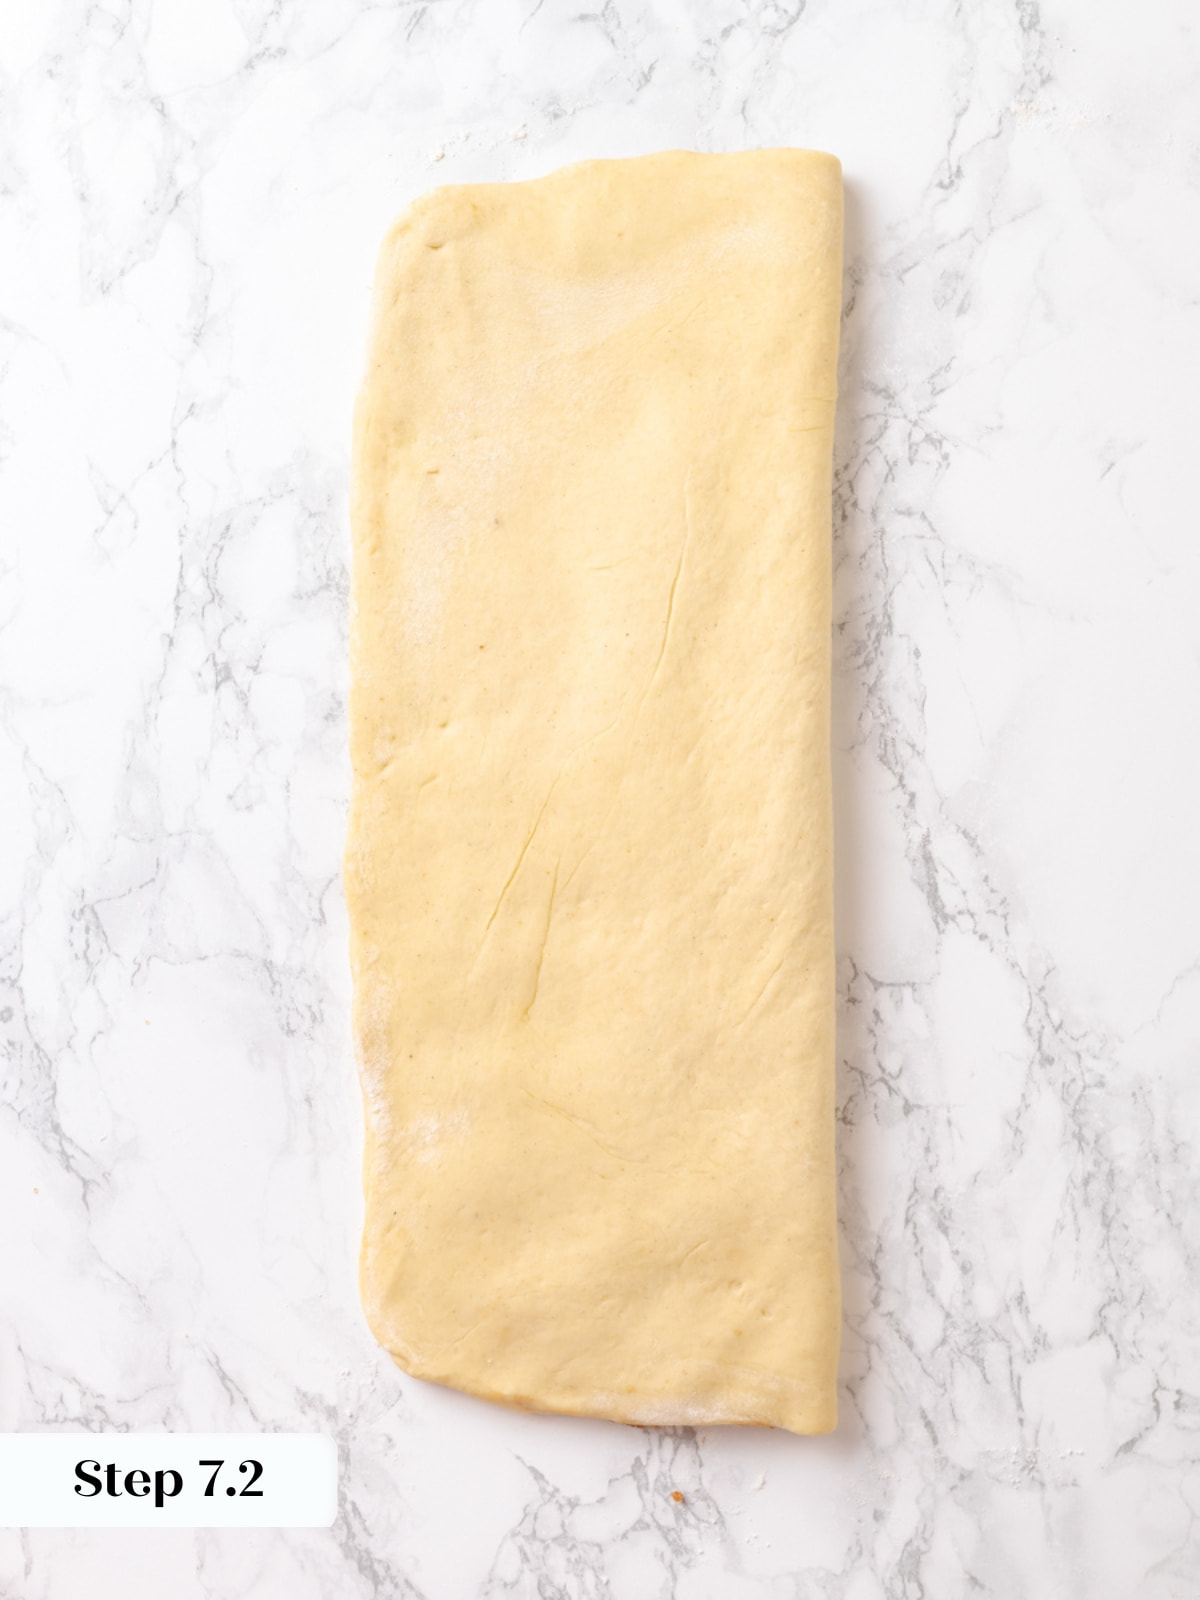
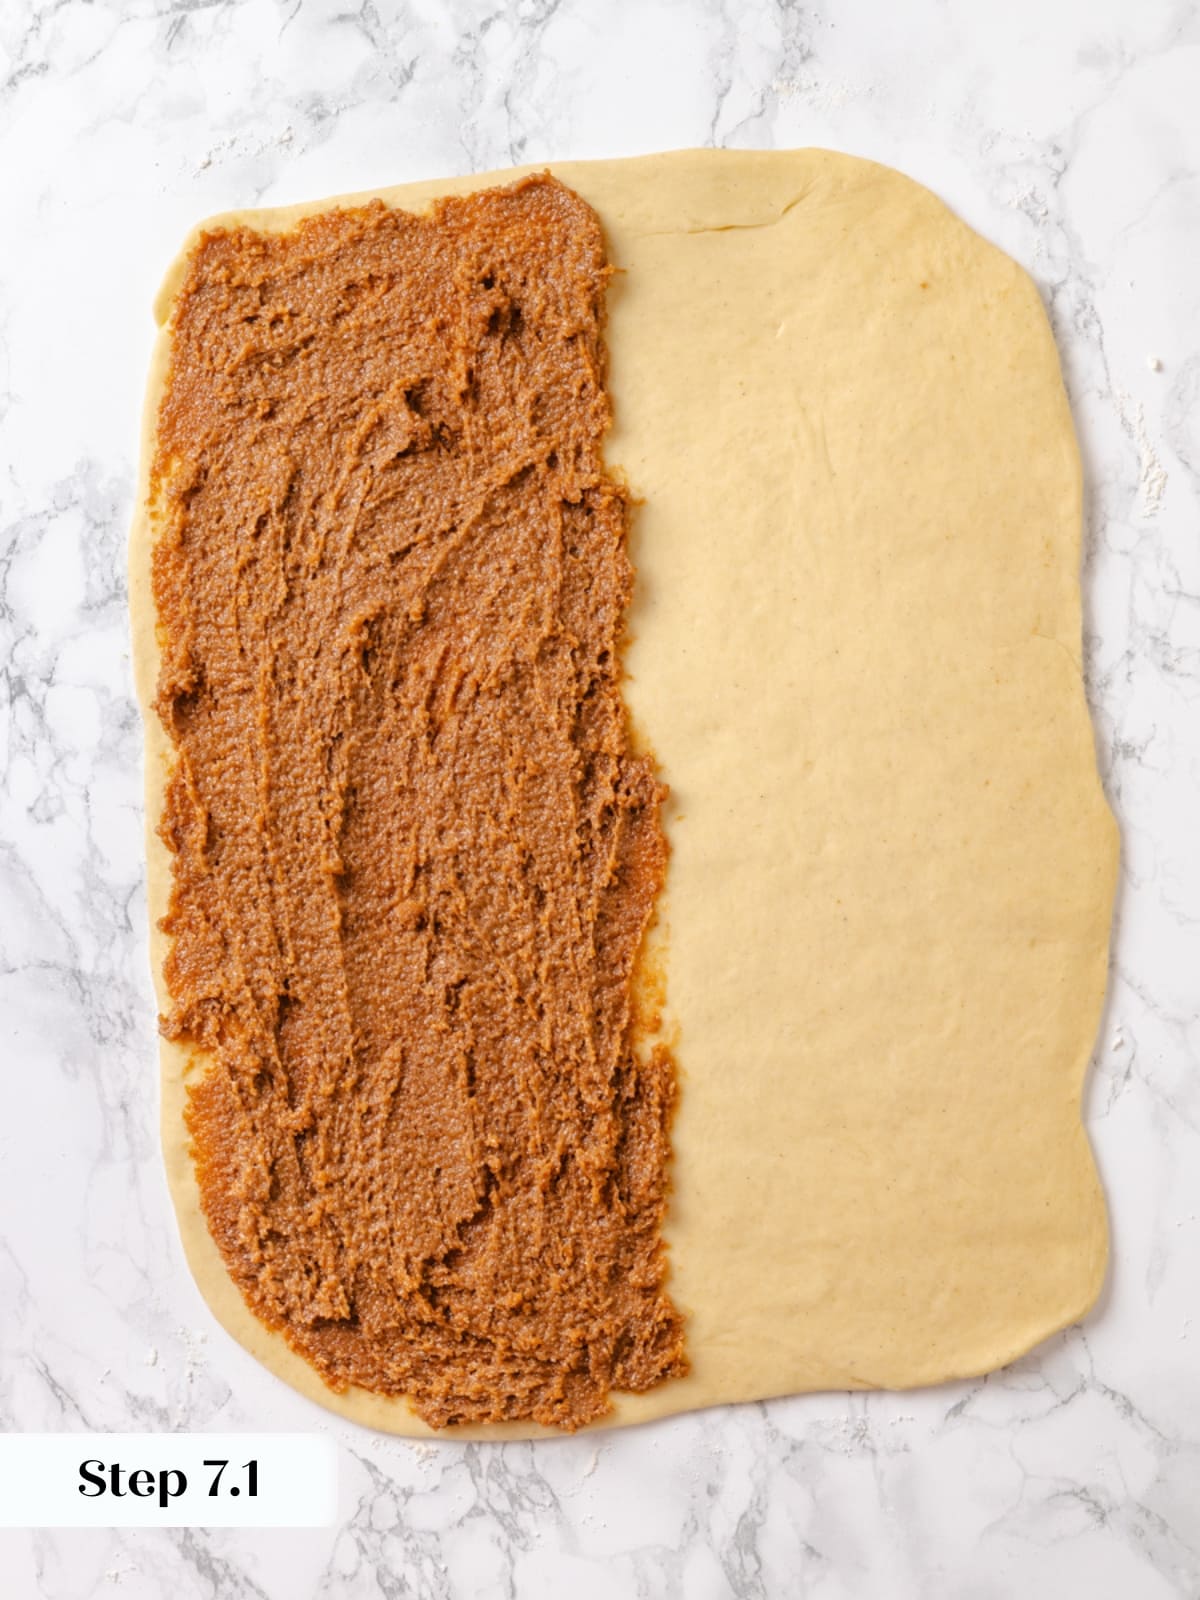
Step 7: Spread filling on the bottom half (longways) with an offset spatula then fold the top half over the bottom. You should still have a rectangle (16×6 inches) with the long side parallel to your body (photos 8 & 9).
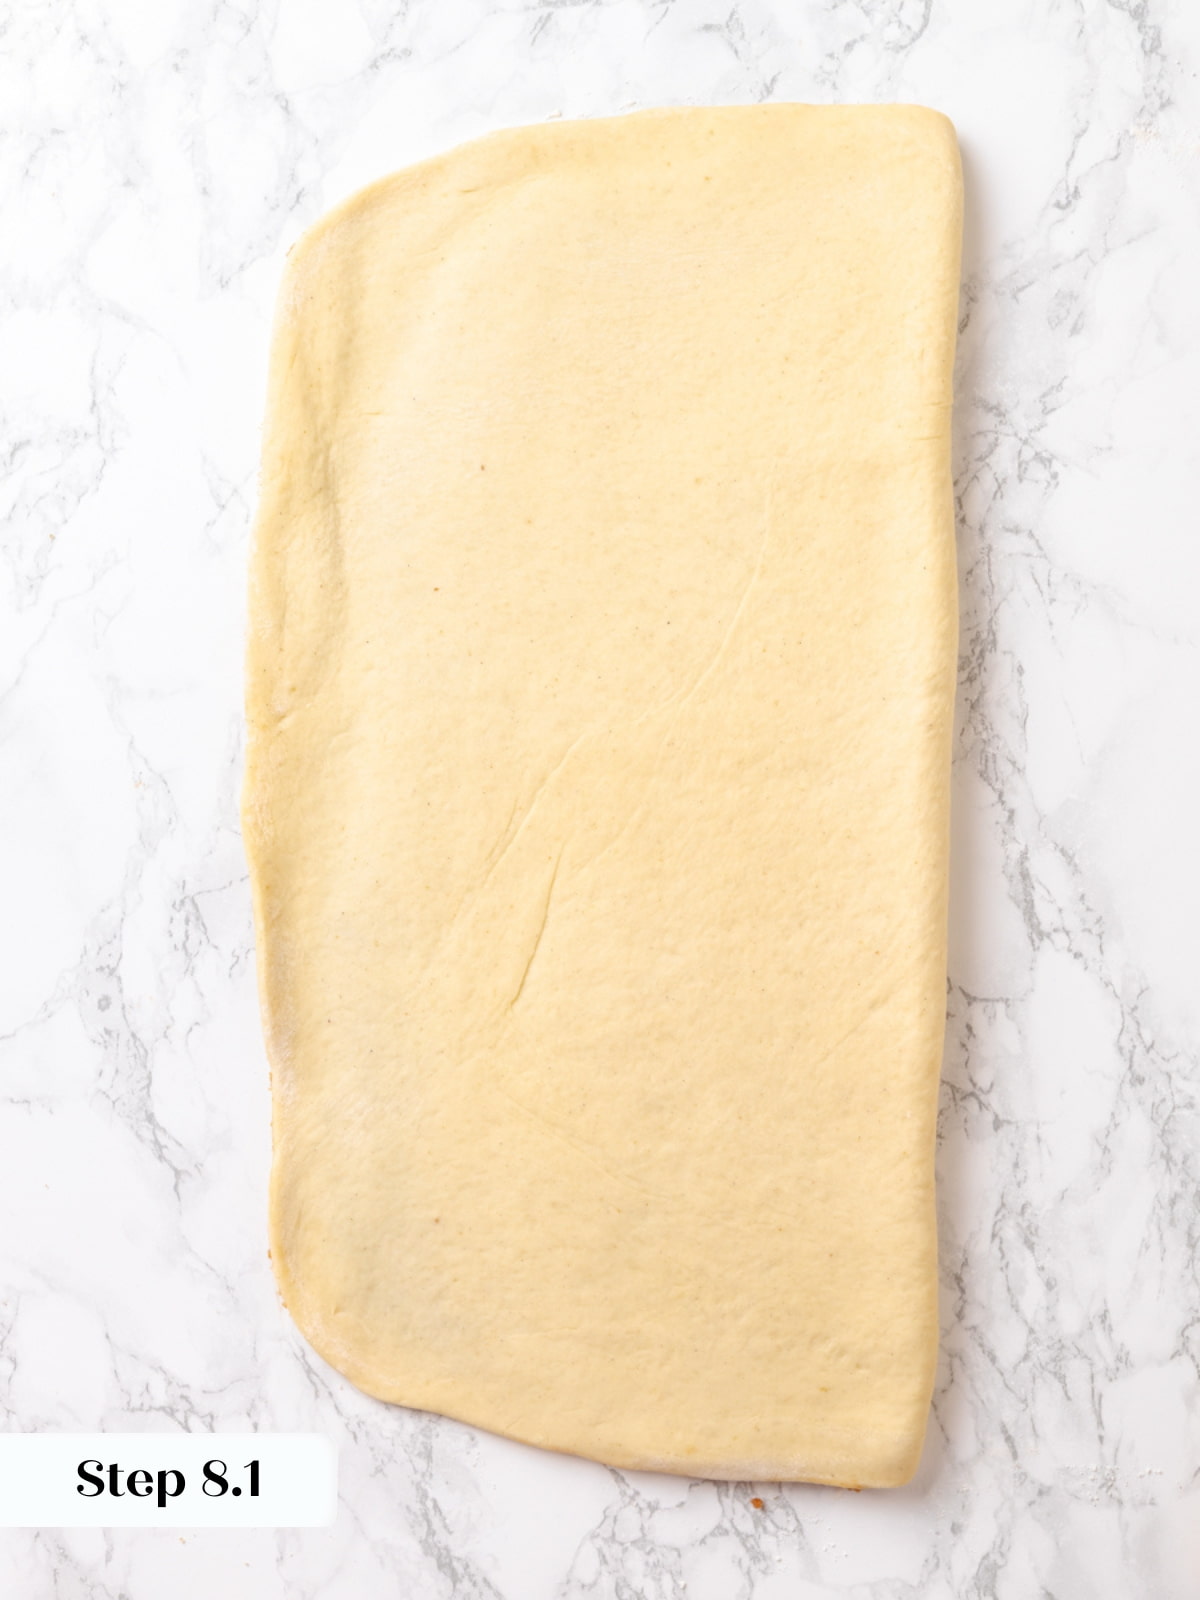
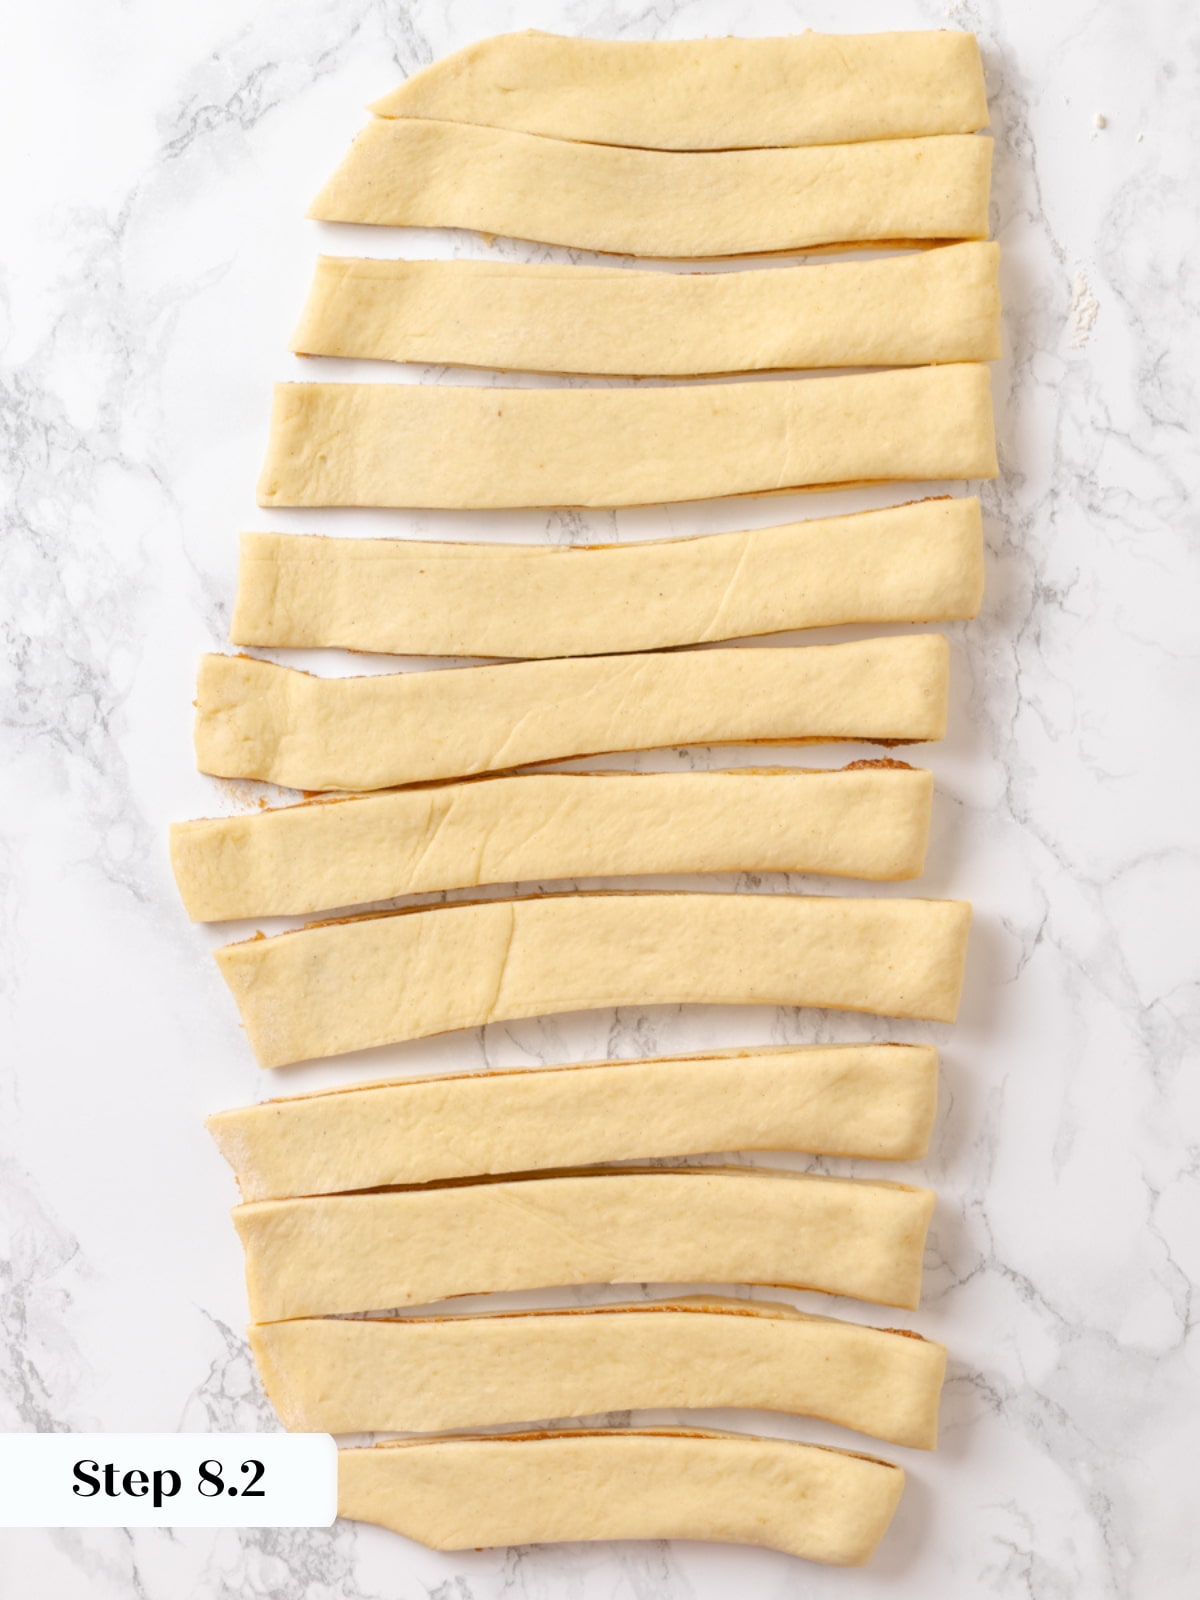
Step 8: Cut dough. Roll out dough to 12 x 8 inches. Use a pizza cutter or sharp knife to divide into 12 strips. Try your very best to keep them roughly the same size so they proof and bake together (photos 10 & 11).
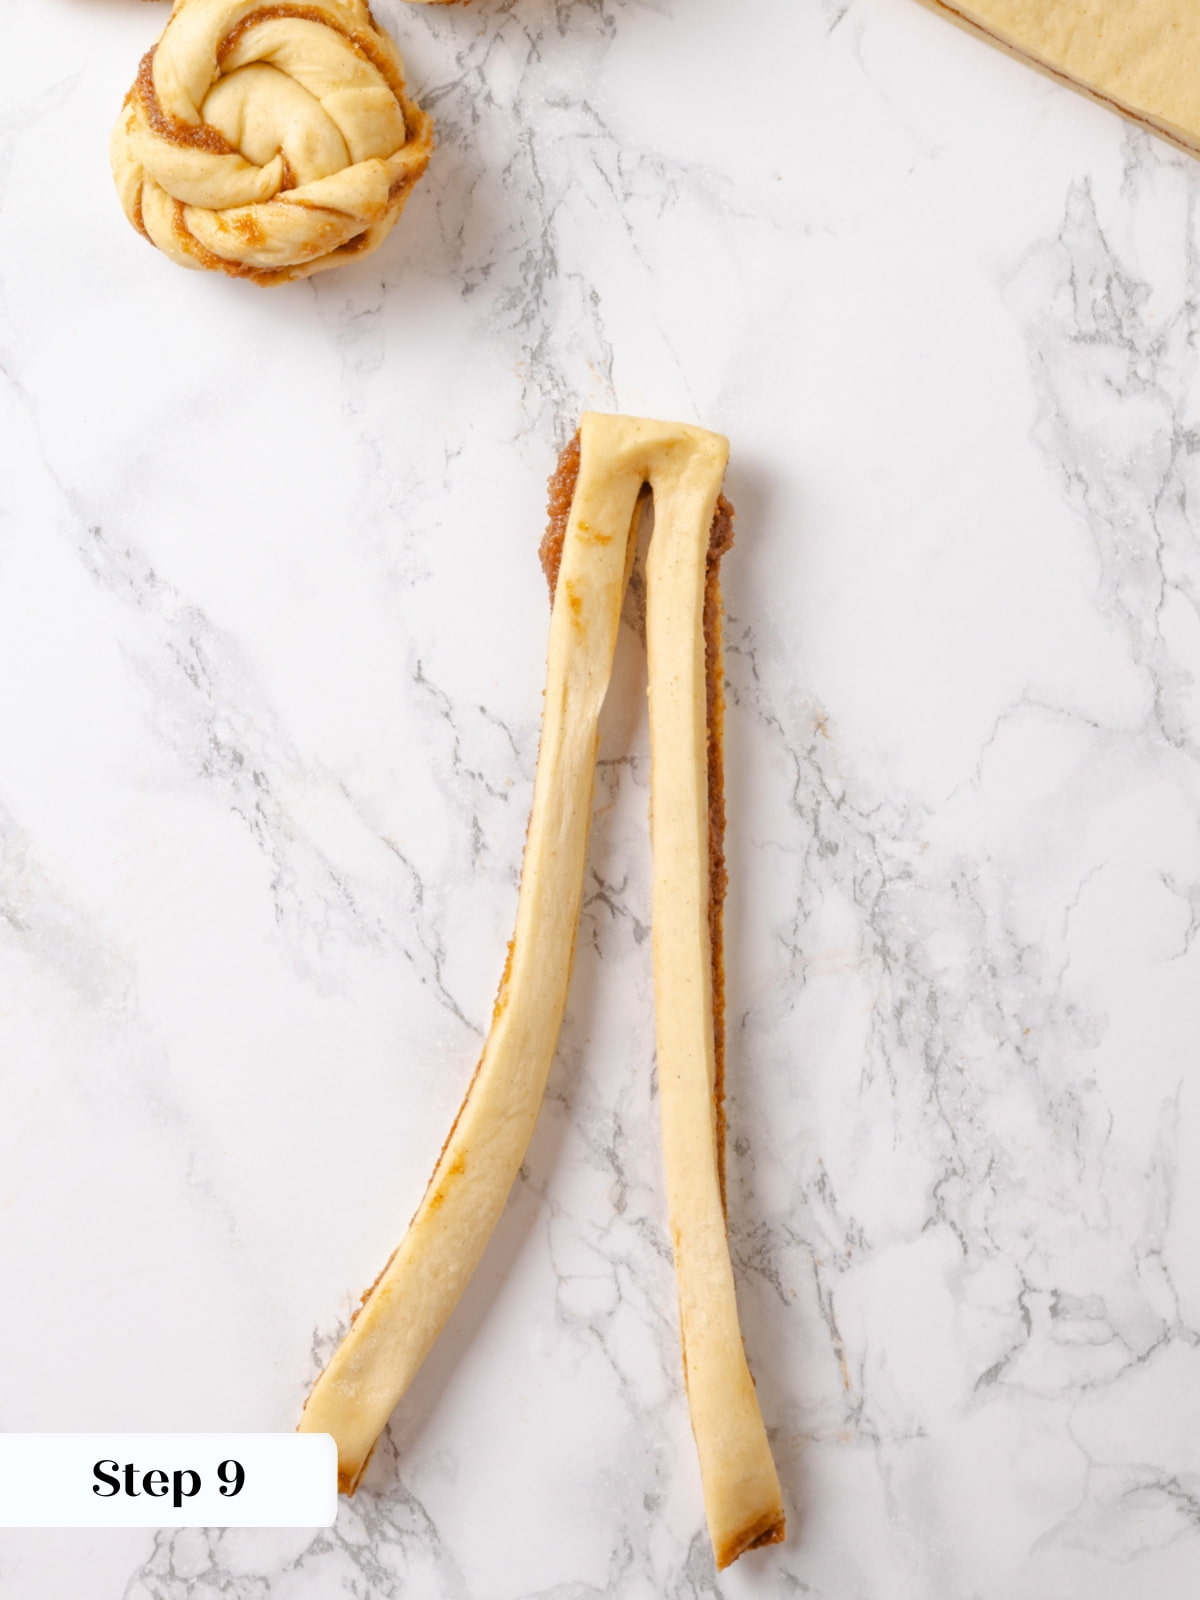
Step 9: Working with one strip of dough at a time, take a small rectangle and use the pizza cutter or knife to cut a slit up the center longways. Leave about 1/4 inch of dough uncut at the top. It will look like pant legs (photo 12).
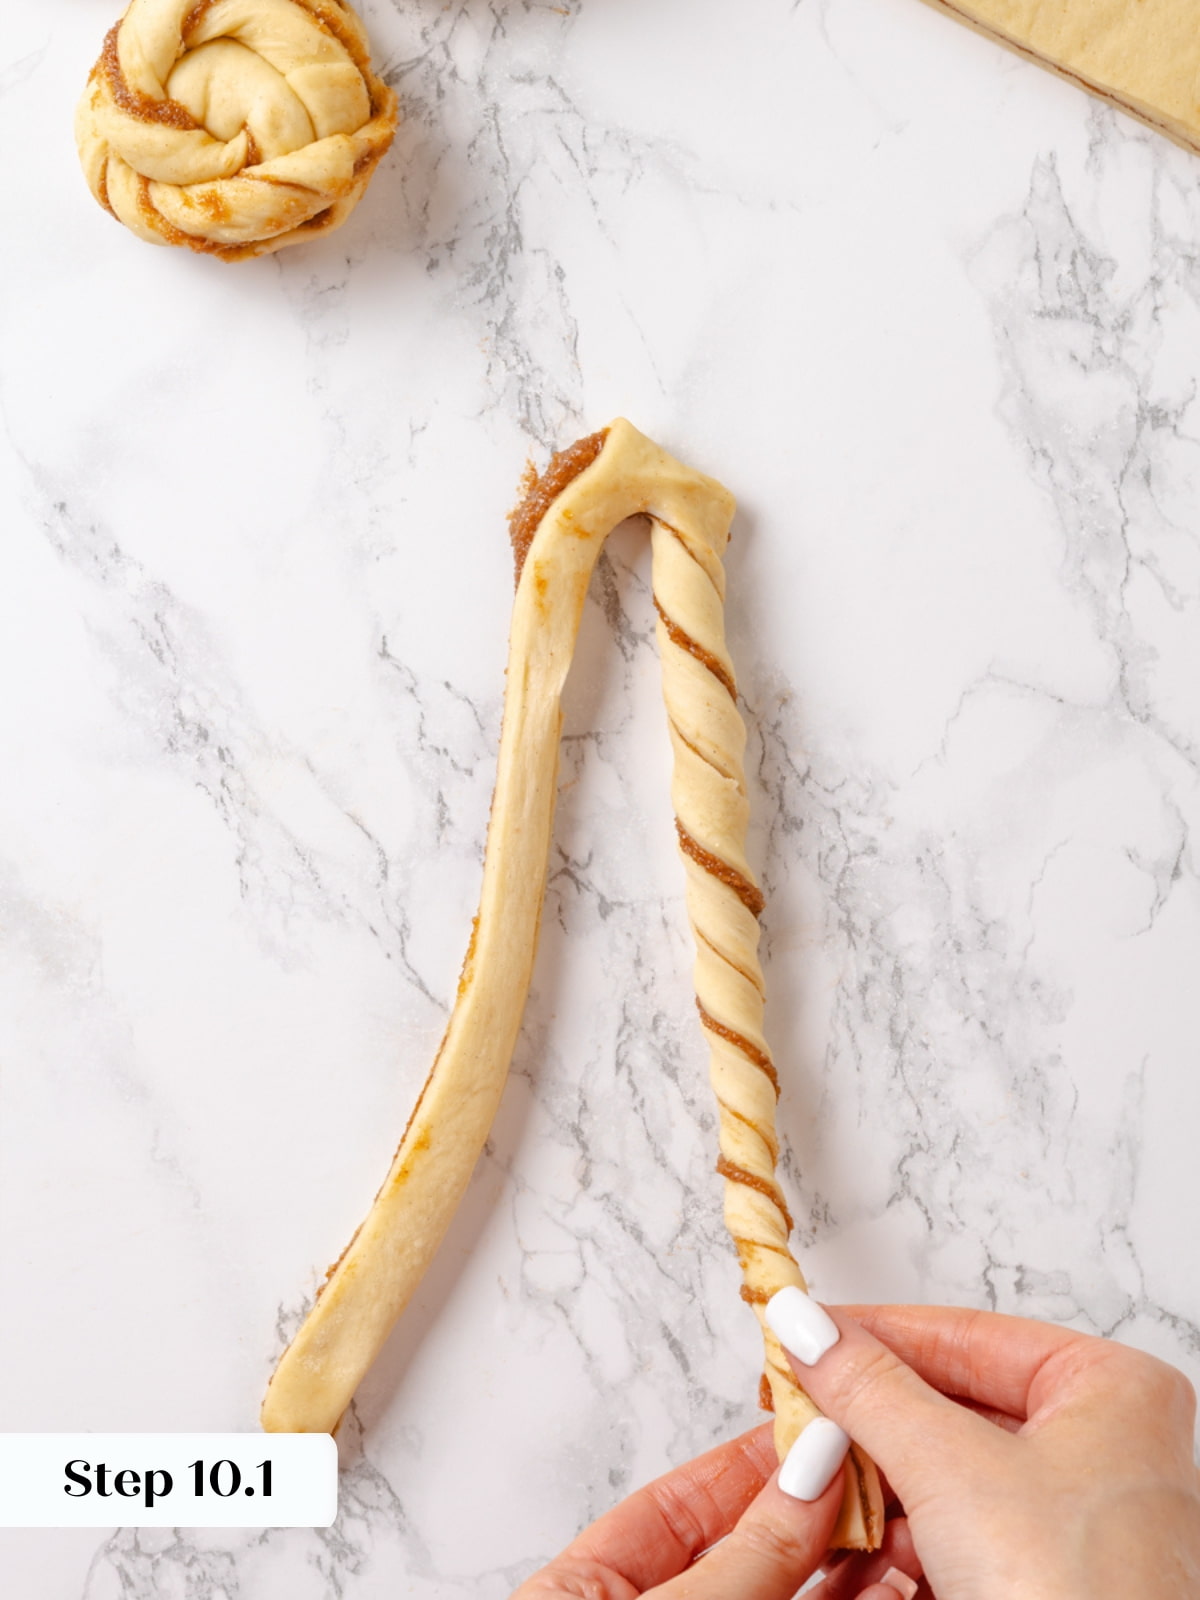
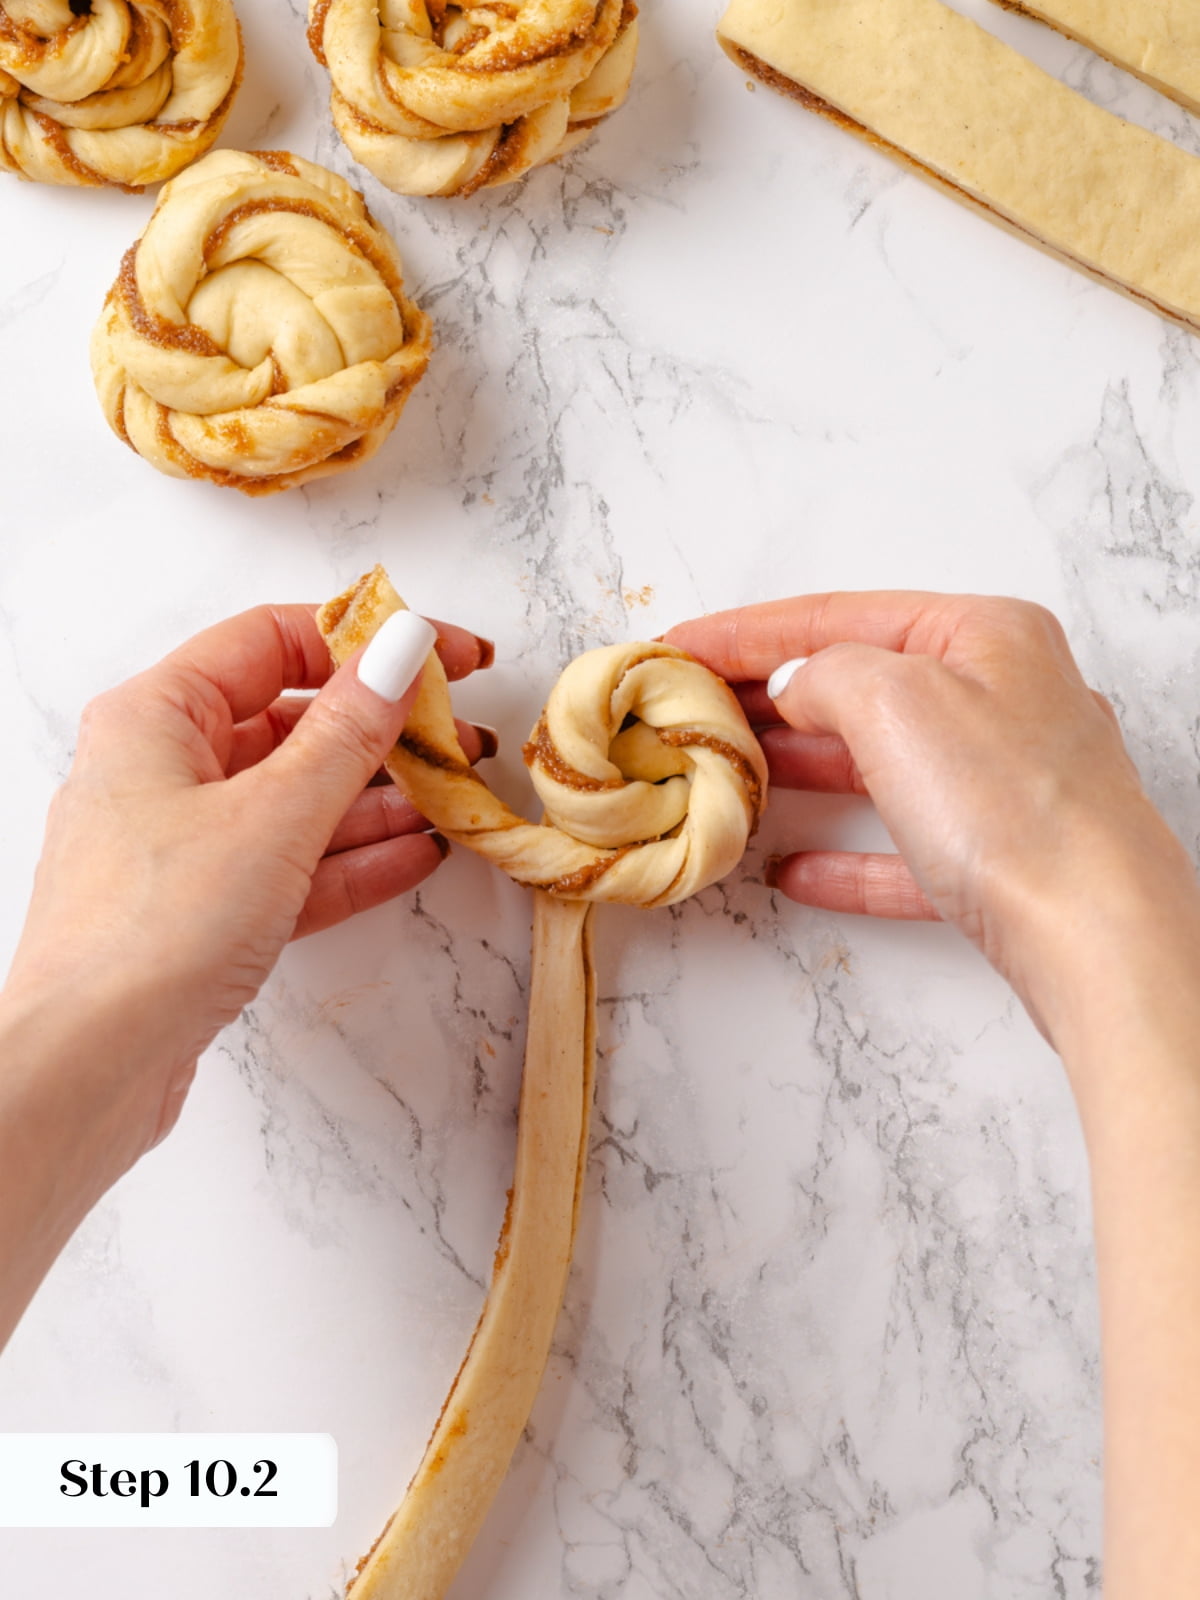
Step 10: Twist buns. Start with the right “pant leg” and gently twist it using your thumb and forefinger so the filling looks like a corkscrew, then keep twisting and wrap it around itself at the base. Continue twisting and wrapping to create a bun on one half of the “pants”. Tuck the end underneath and through the bun to secure it (photos 13, 14 & 15).
It is very much like how you would twist your hair to make a tight bun.
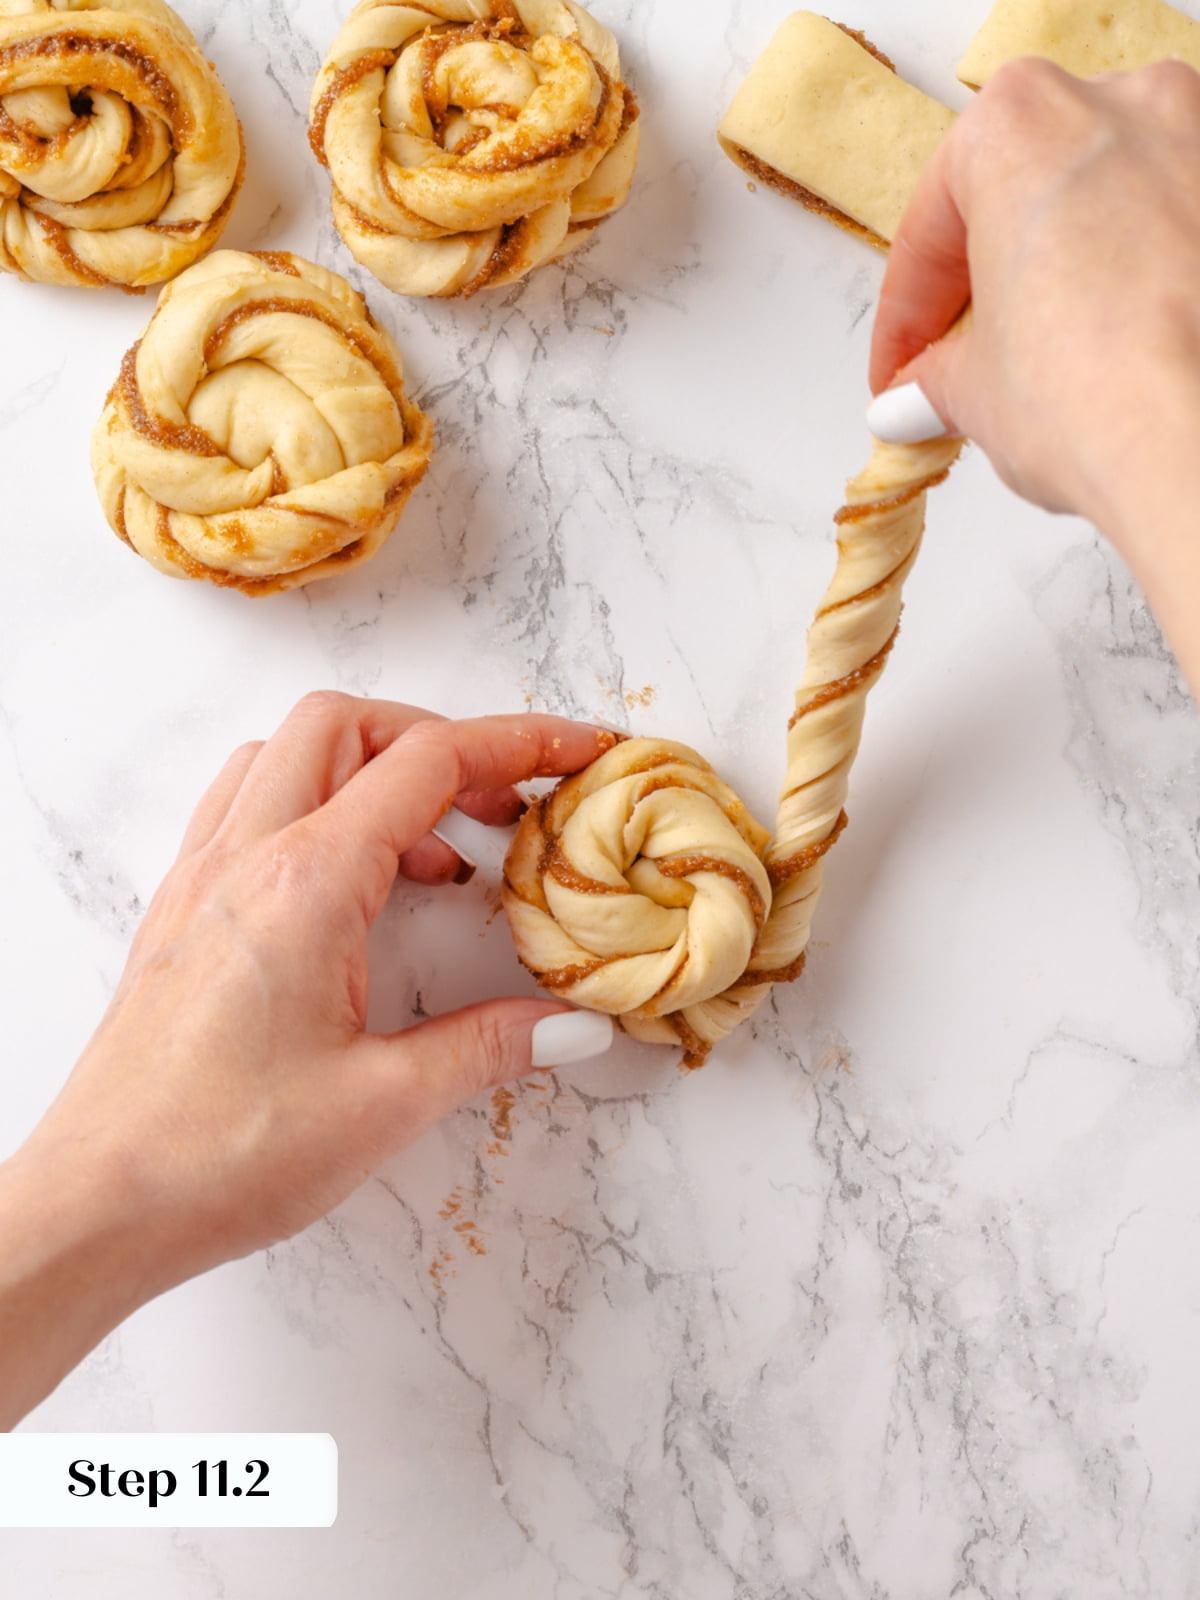
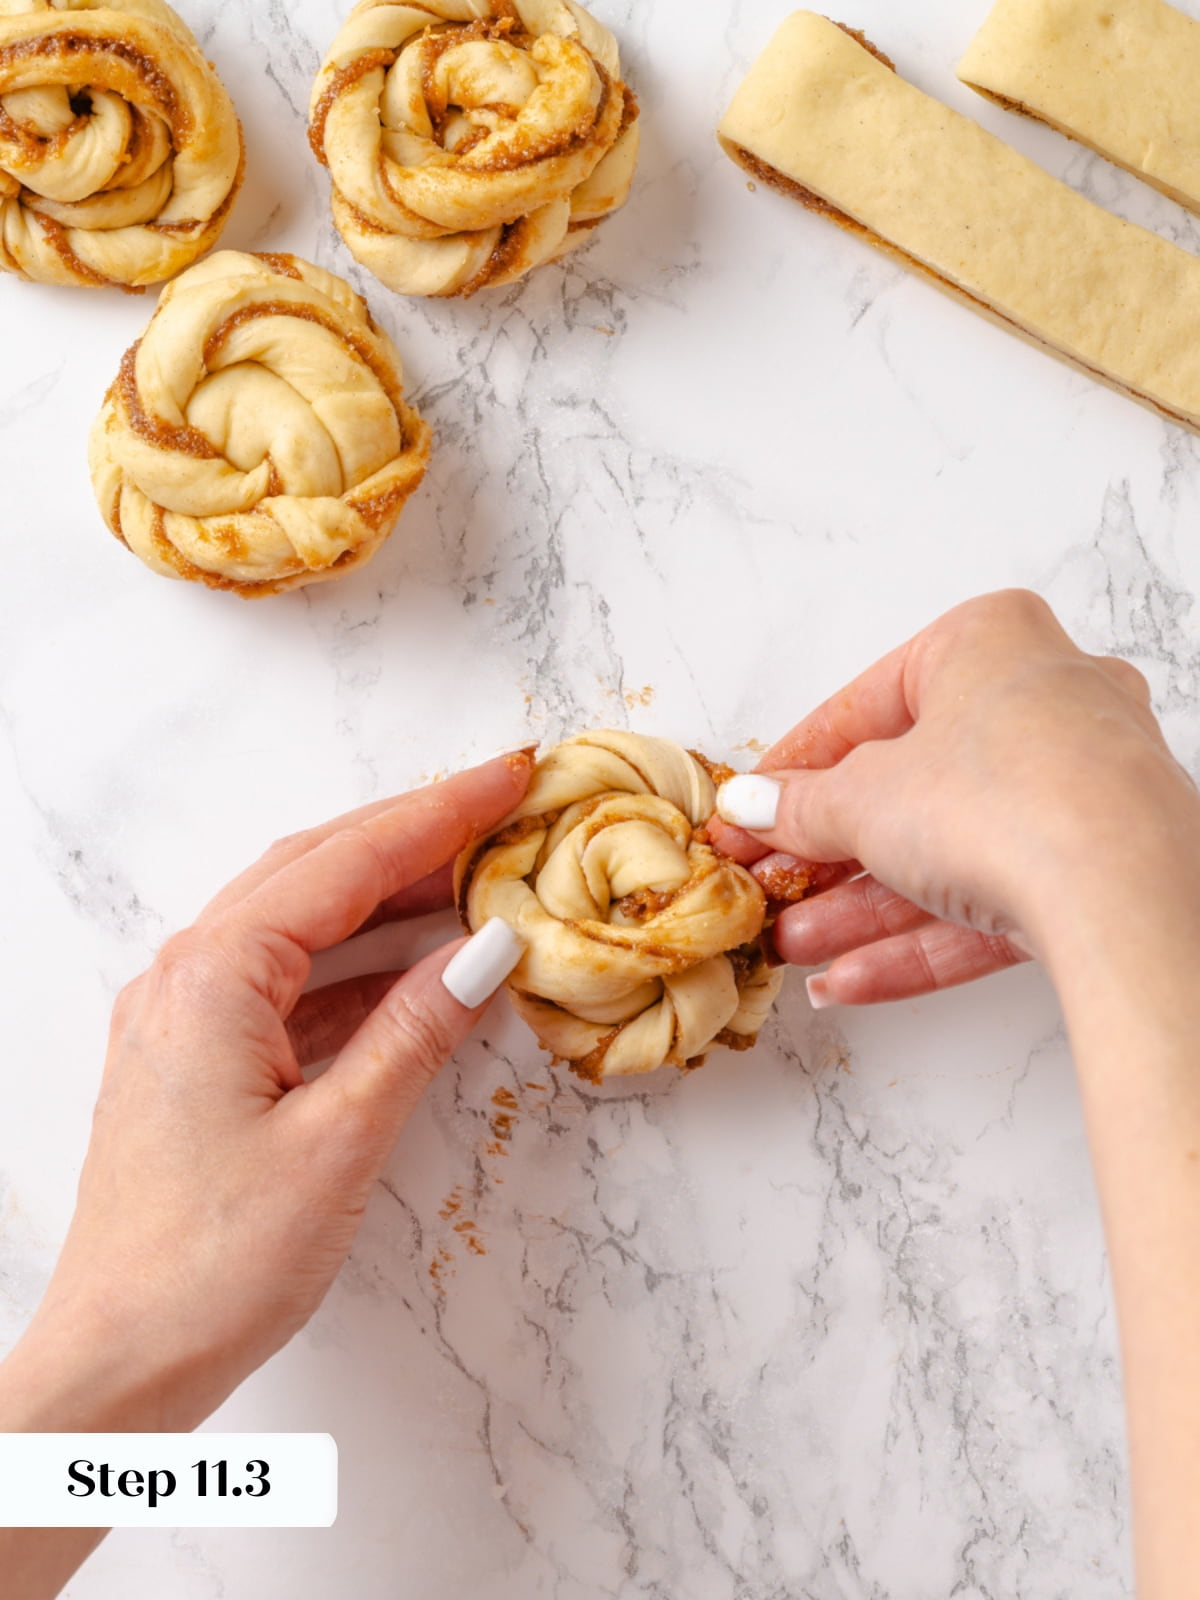
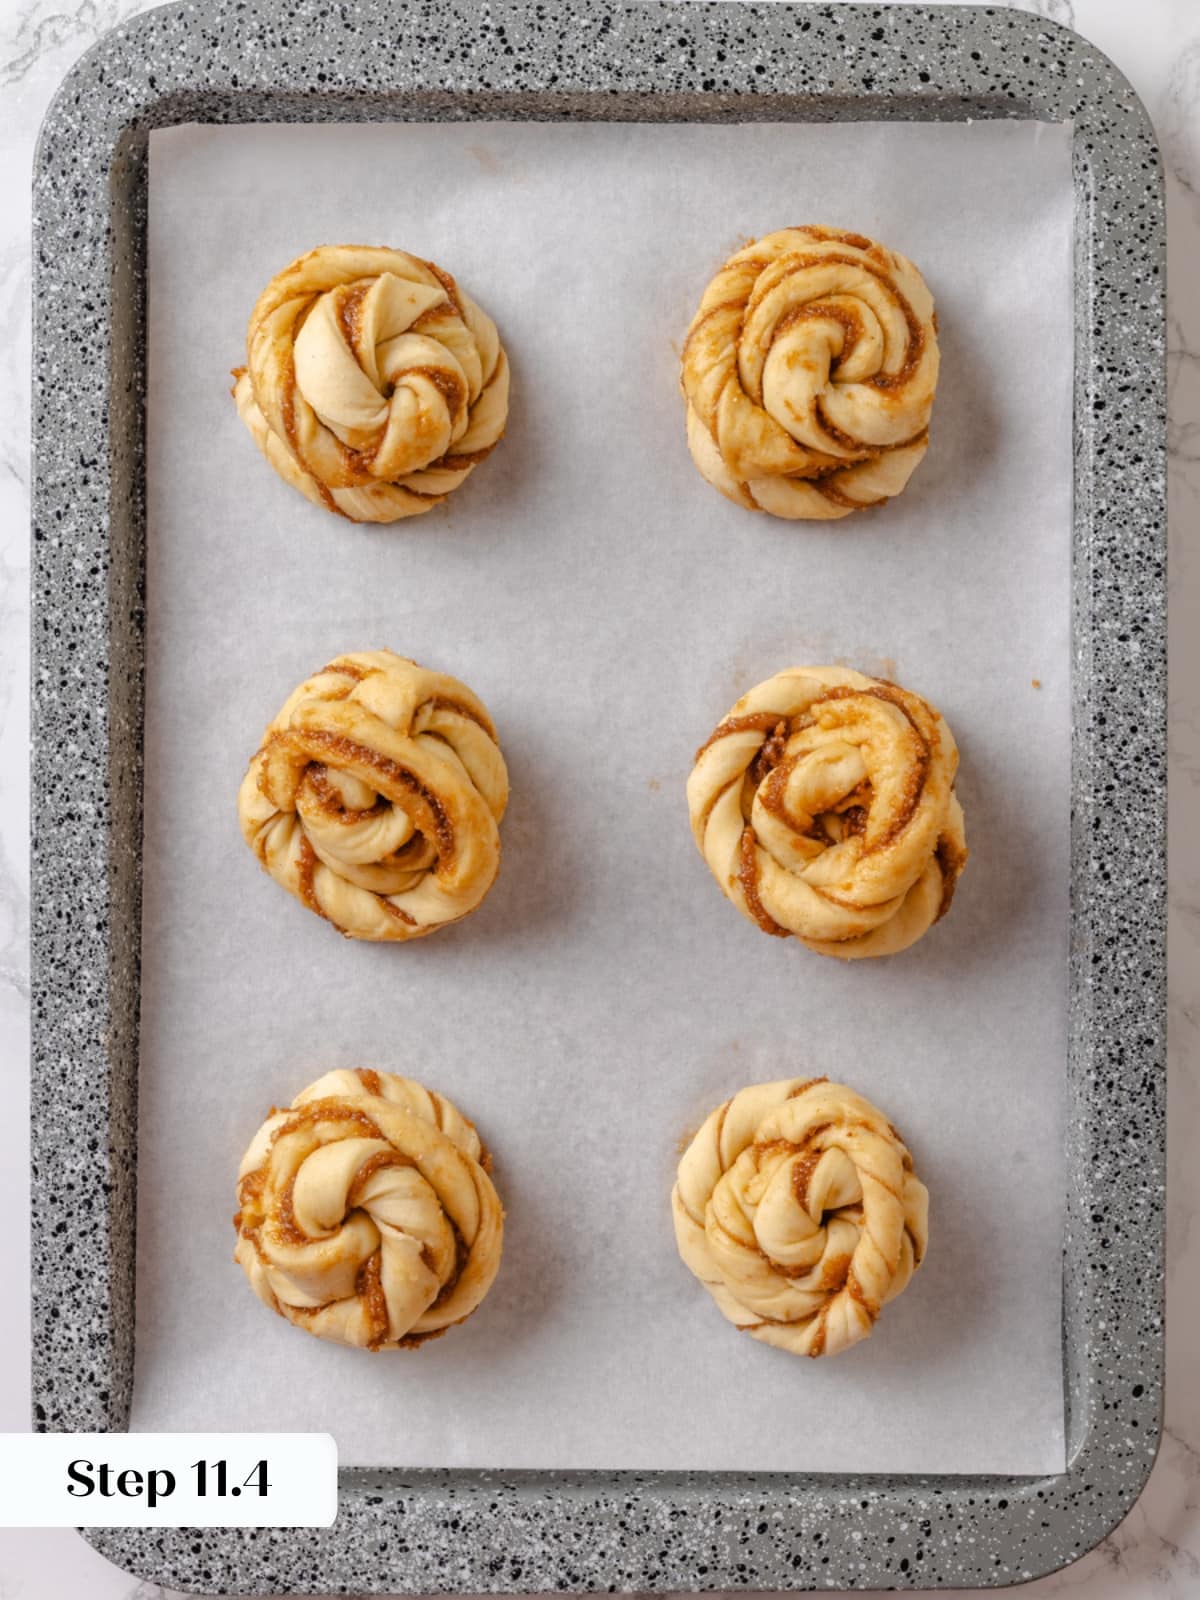
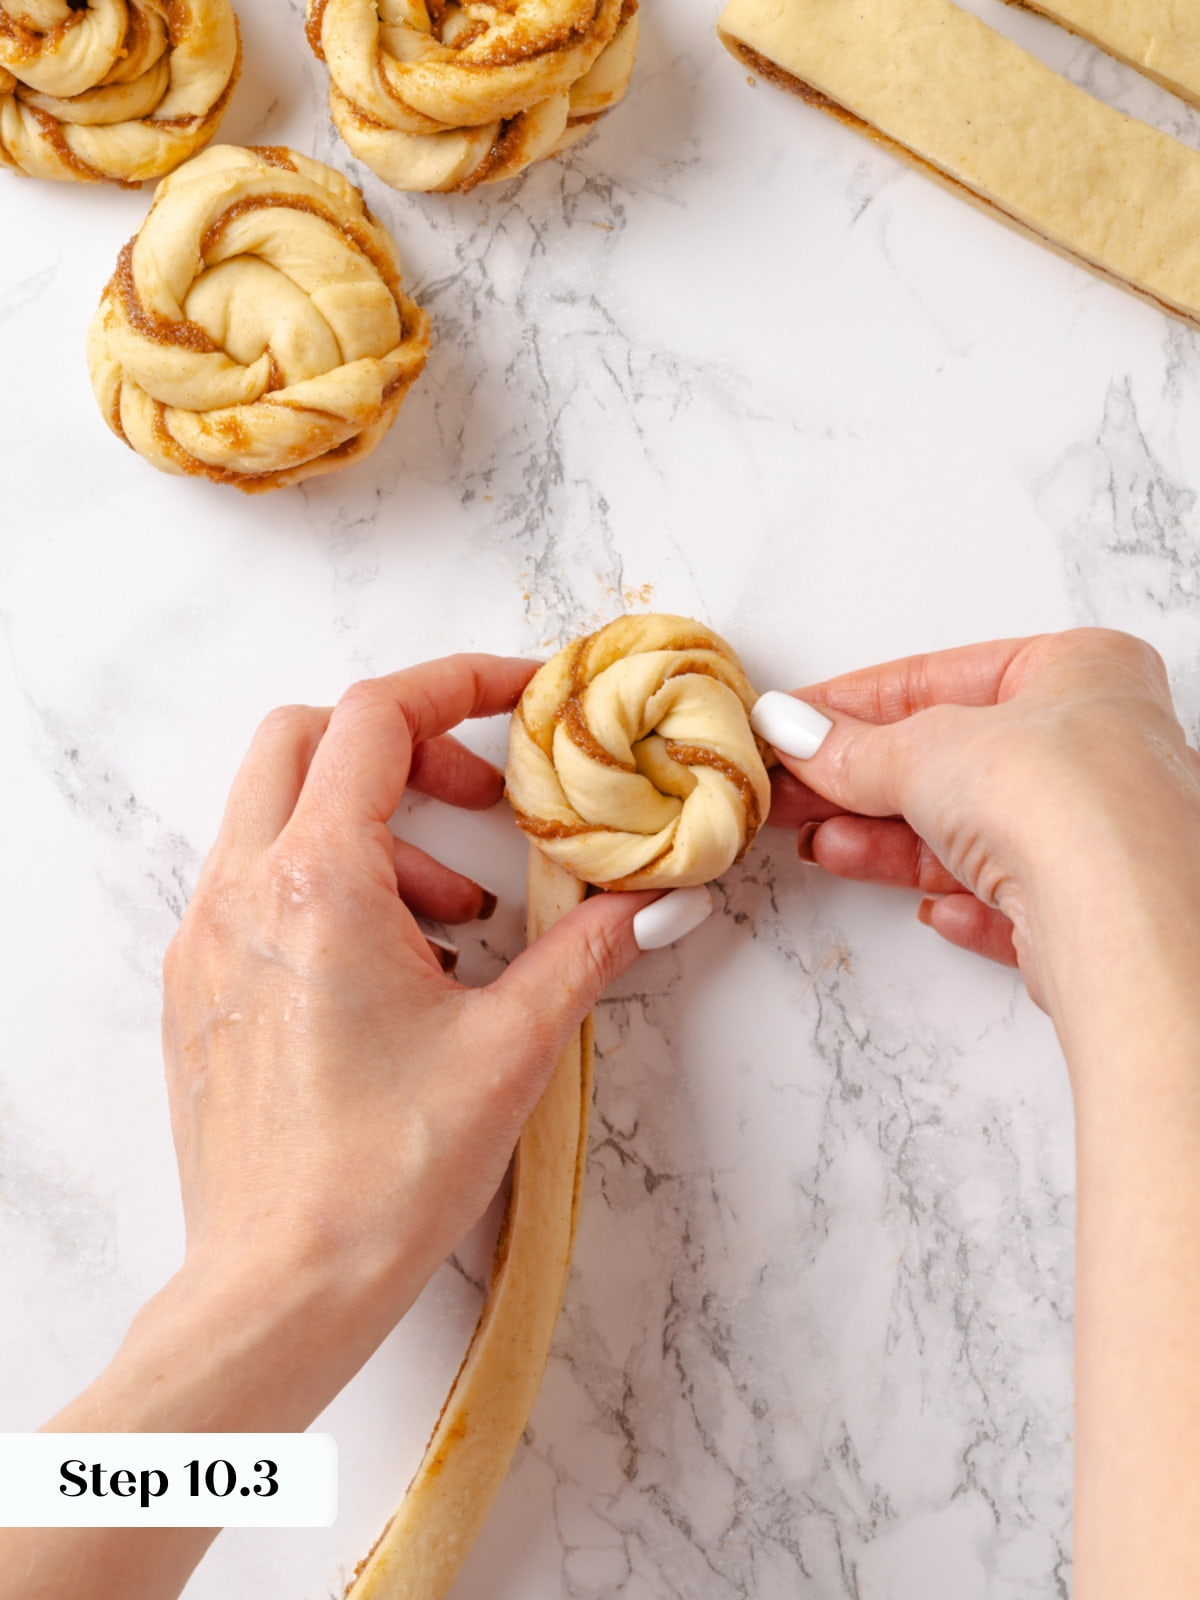
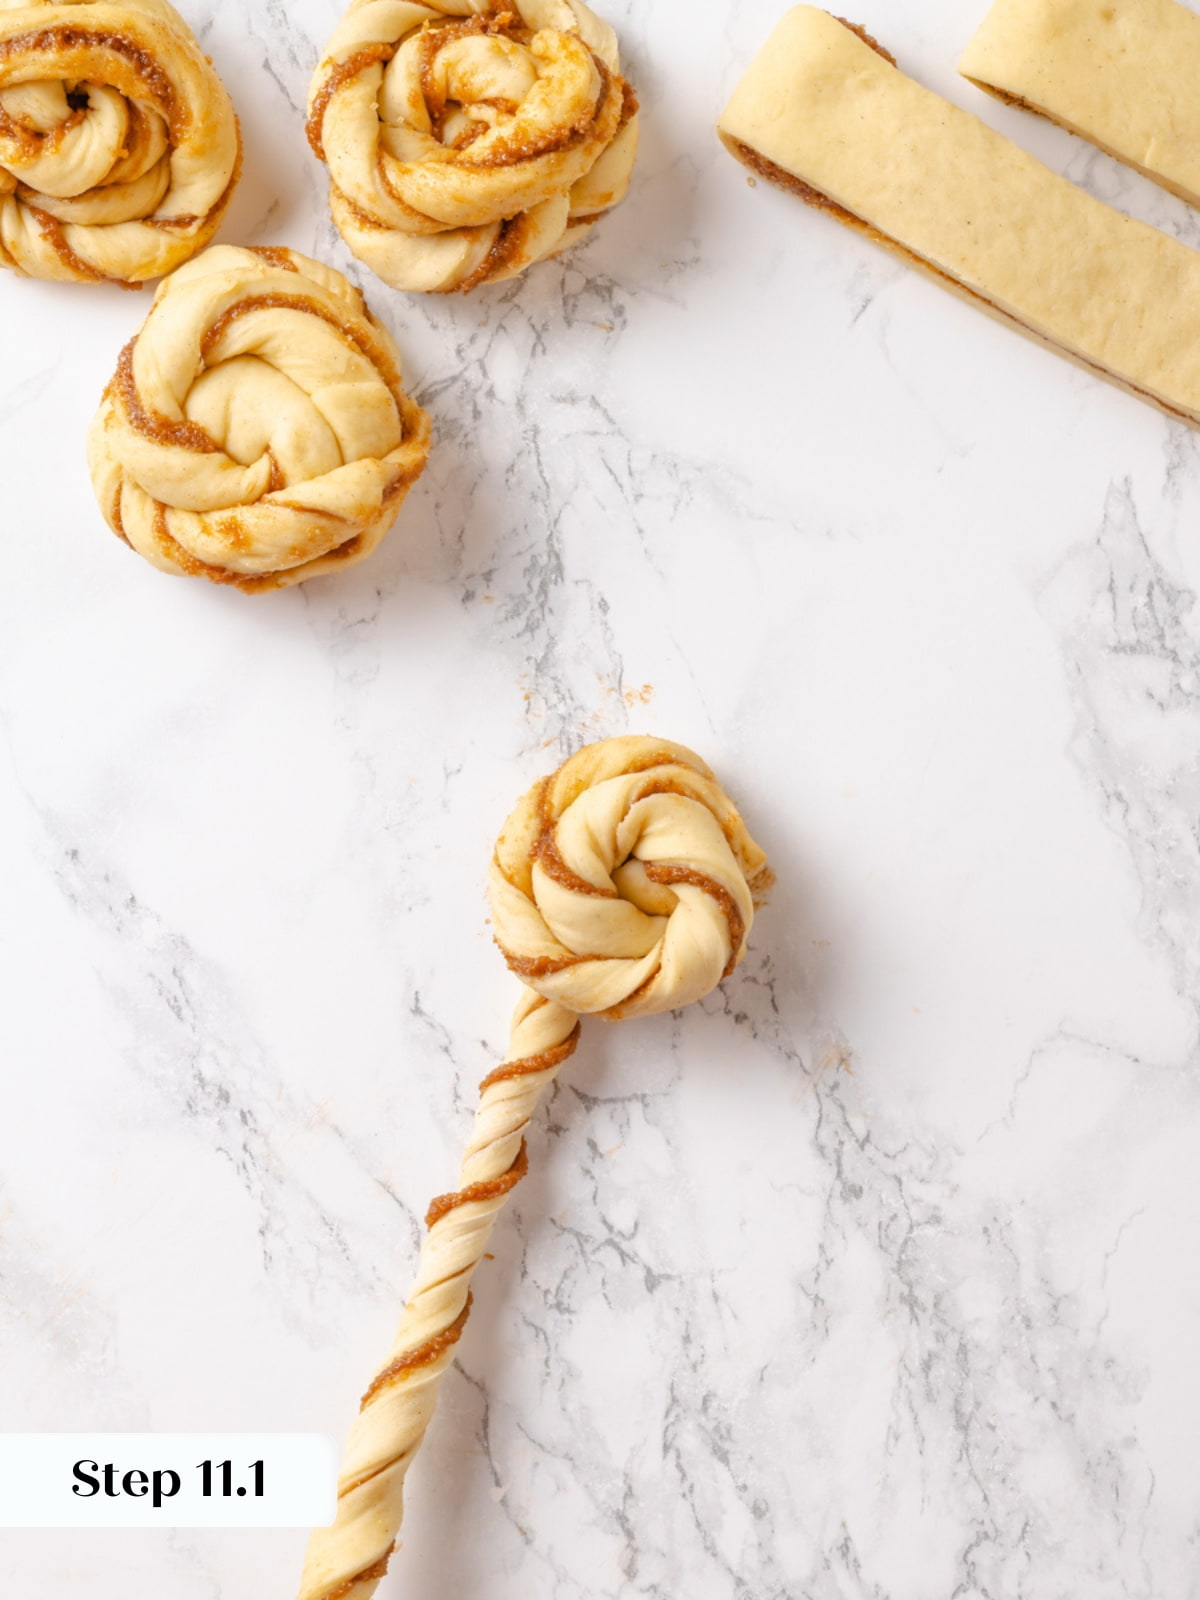
Step 11: Take the left “pant leg” and twist it like a corkscrew, then continue twisting it around the outside of the bun you just created on the right. Twist it around the outside making the bun larger, then stretch the last inch or so across the center and tuck it underneath to secure it. Place it on a parchment paper lined baking sheet (photos 16-19).
You will need two baking sheets. I placed 6 on each.
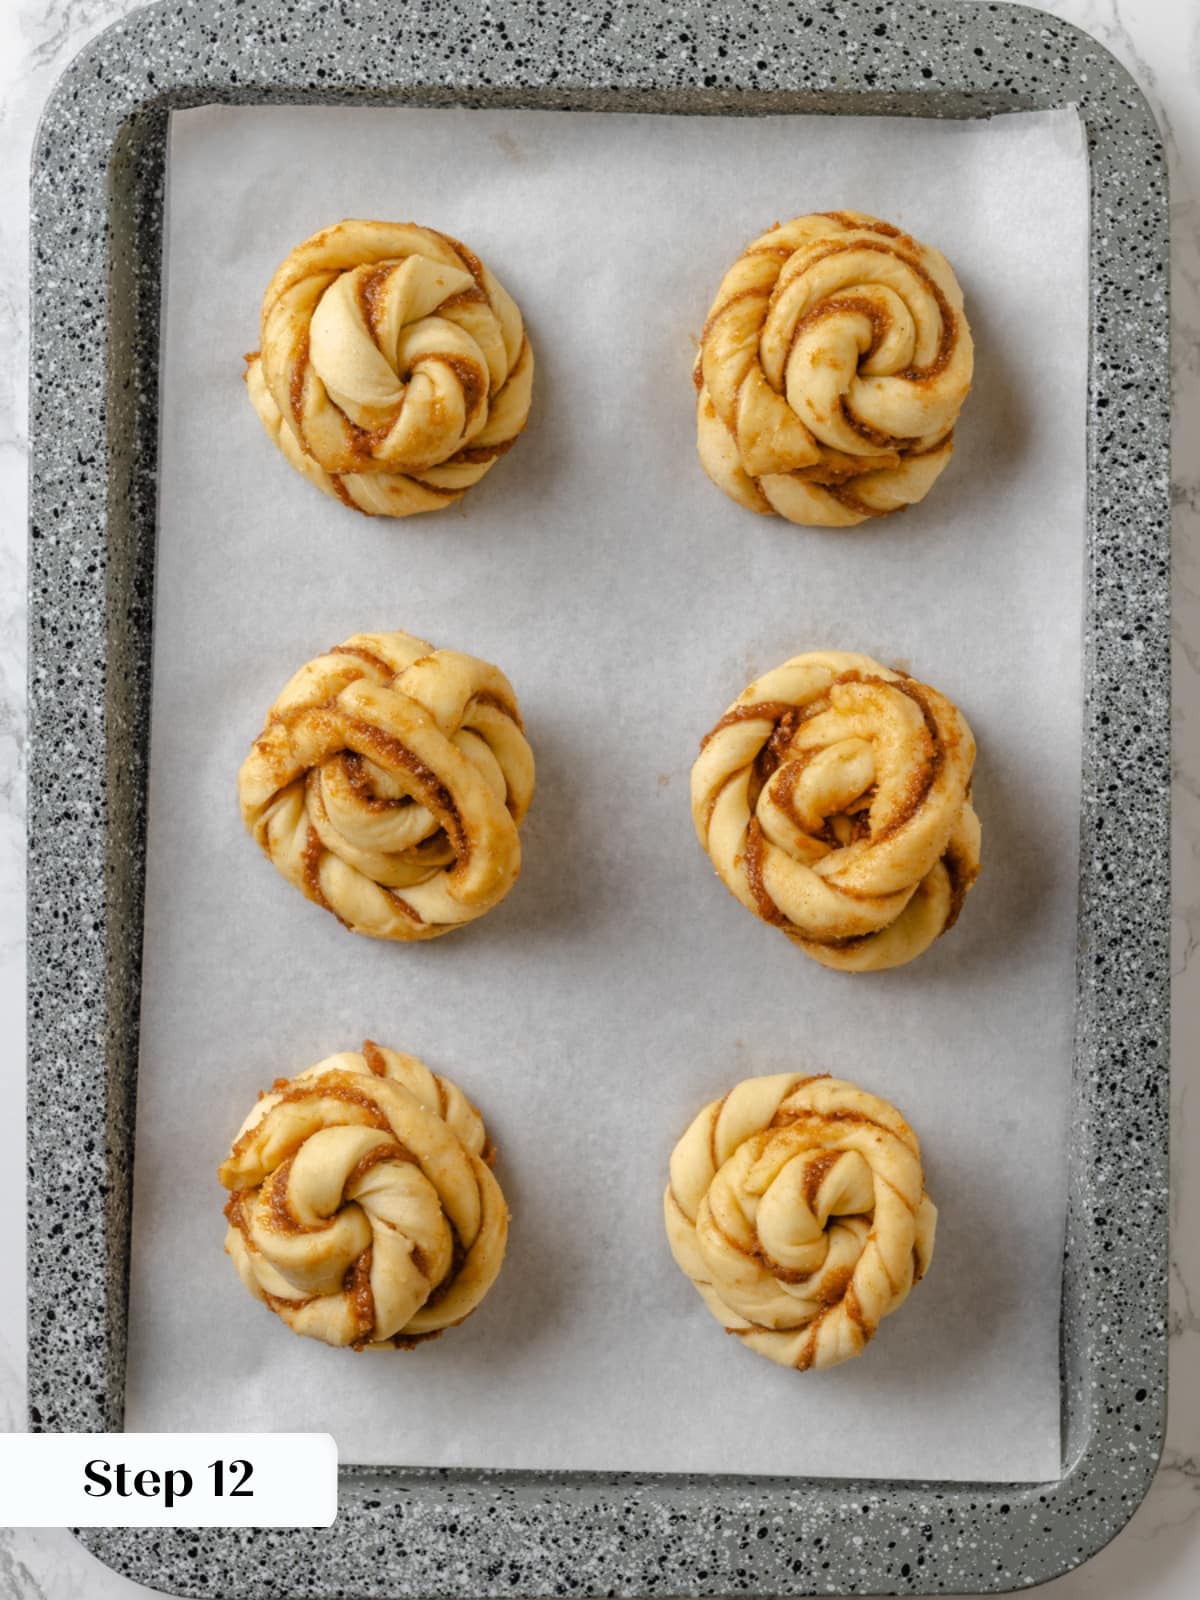
Step 12: Proof. Preheat oven to 350°F convection with the fan (this is what I did) or 375°F conventional (no fan). While the oven heats up, final proof the buns 25-30 minutes or until visibly puffed (photo 20).
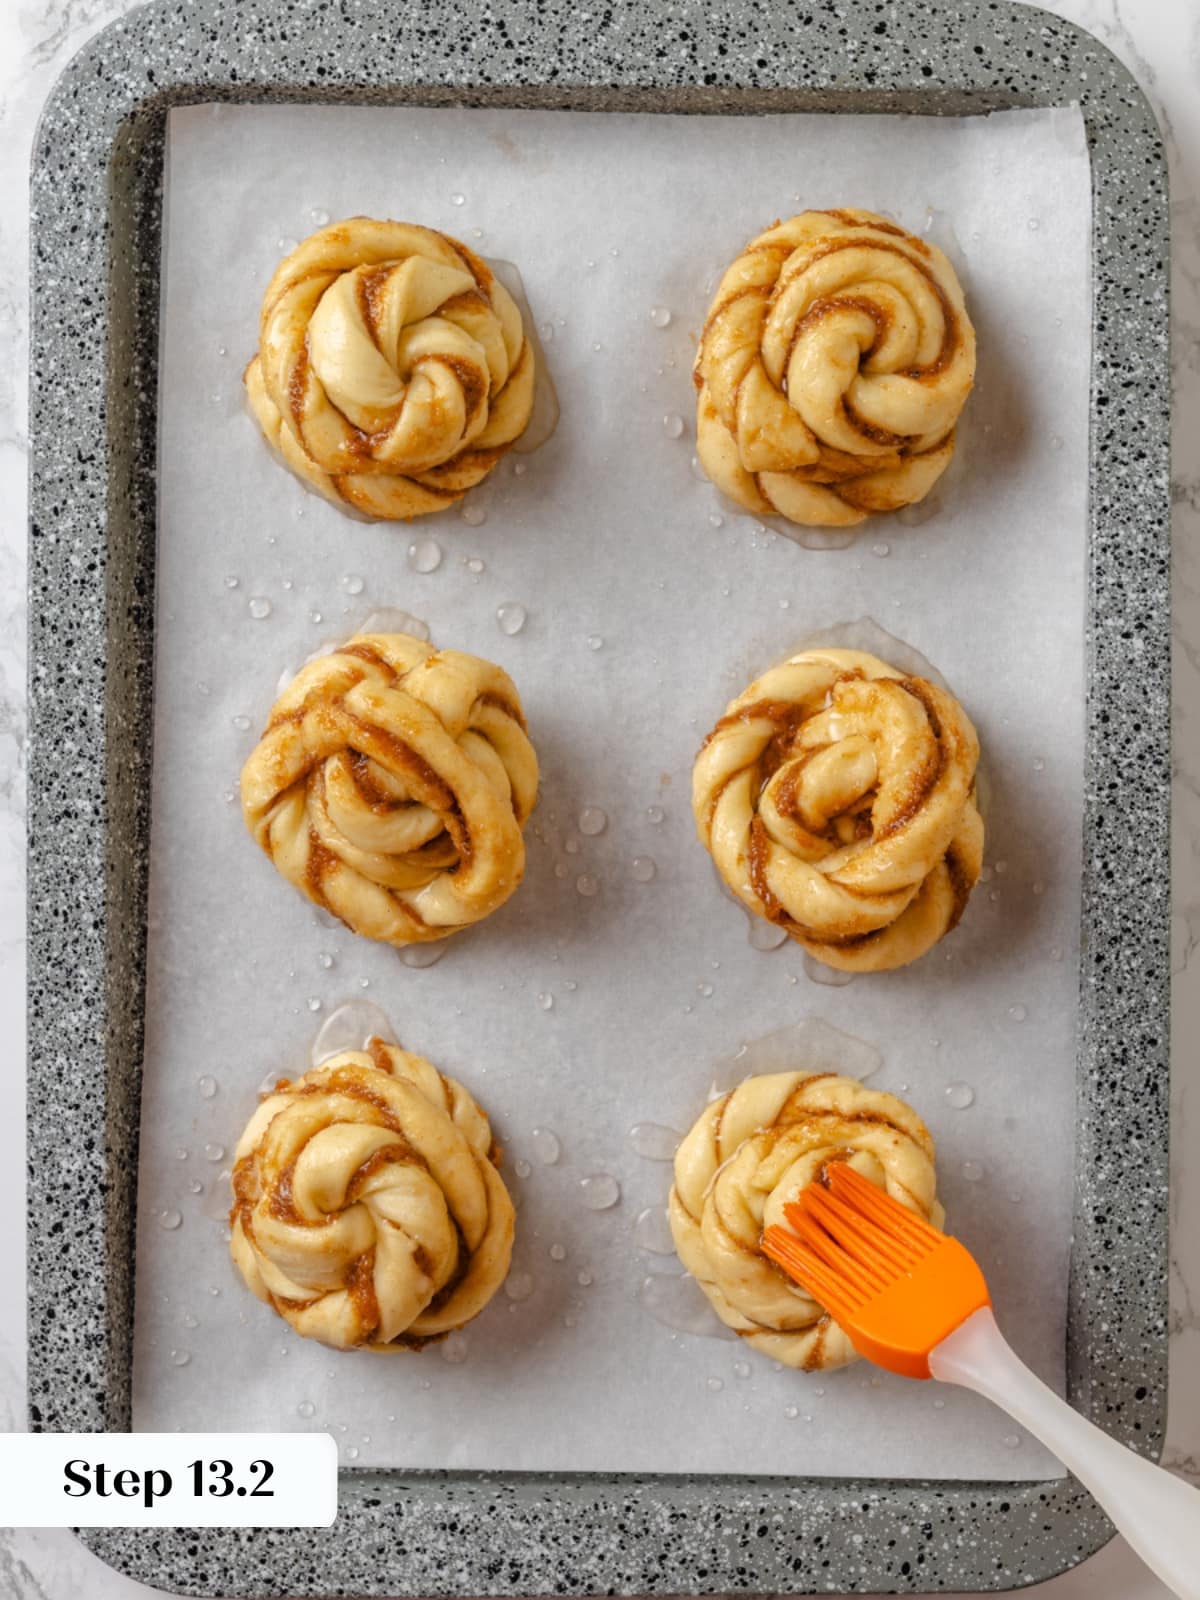

Step 13: Bake. Brush the buns with cooled simple syrup over the top and bake in preheated oven for 15-18 minutes or until golden brown (photos 21 & 22).
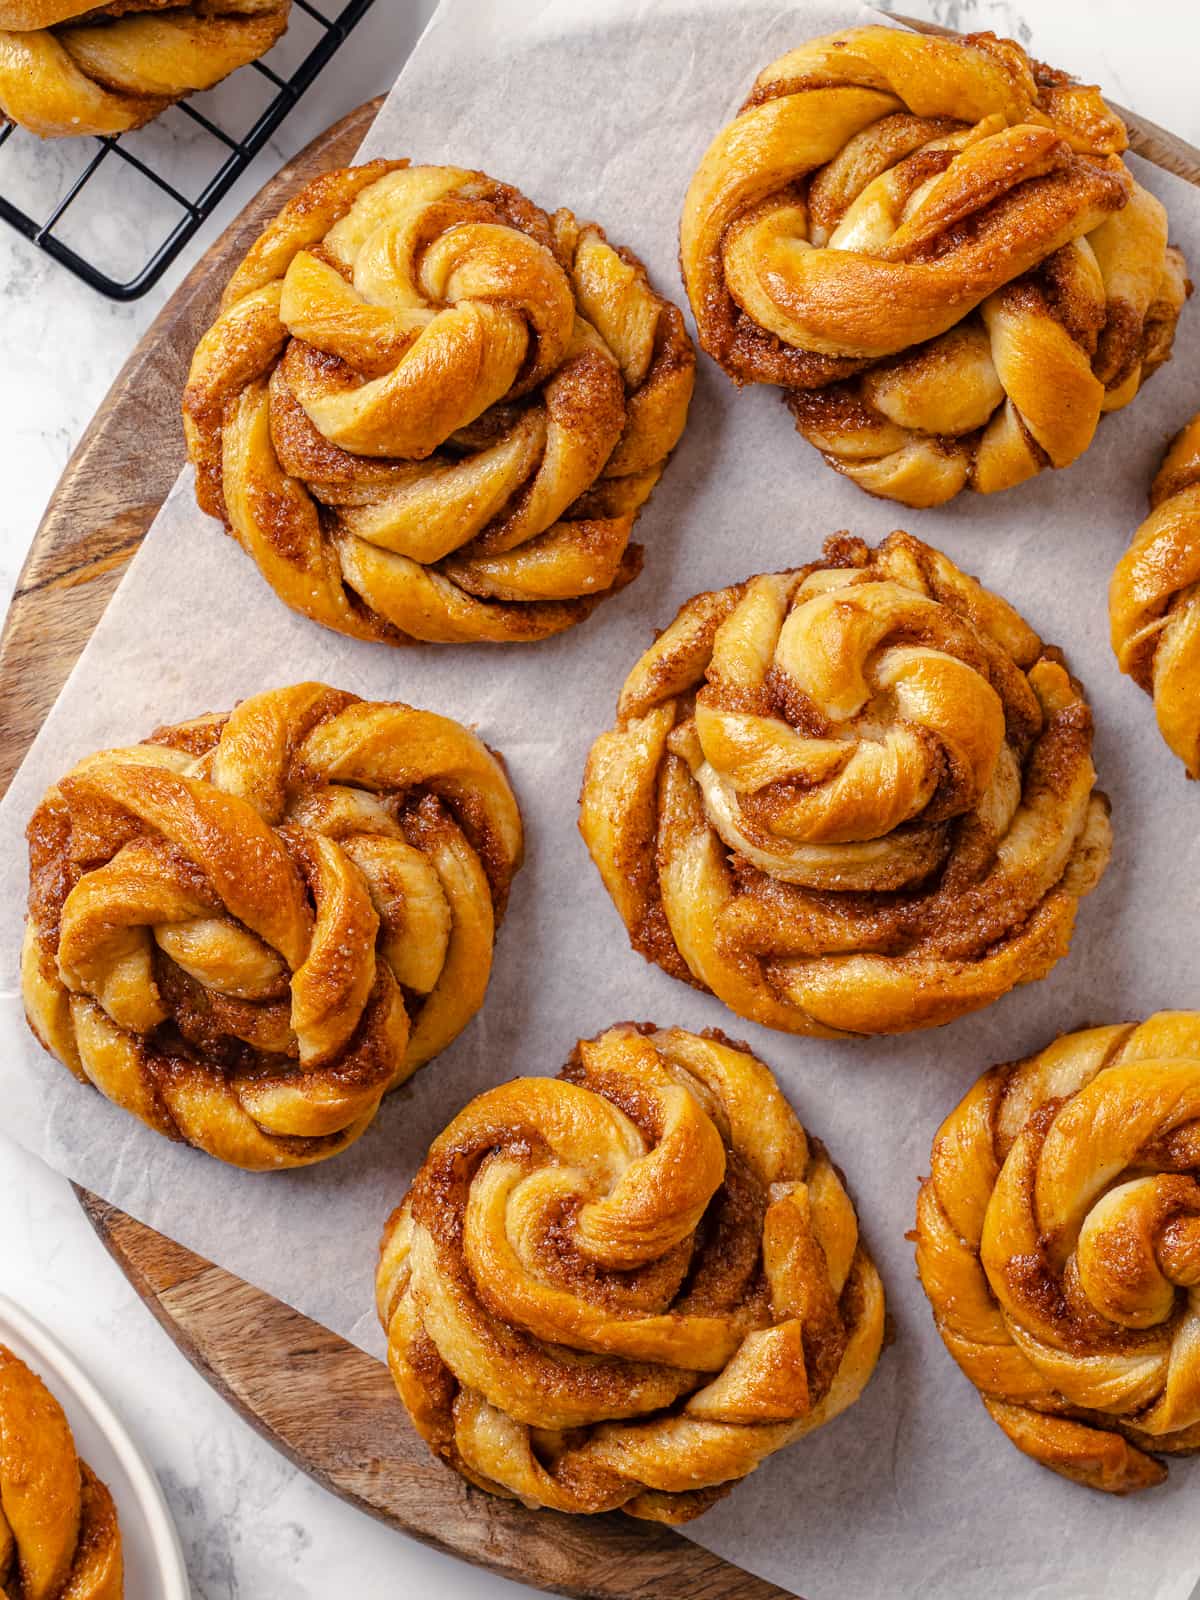
Step 14: Cool. Brush the warm buns with simple syrup and allow to cool (as long as you can) before tasting! You could sprinkle a little cardamom sugar on top if you are half the fan of cardamom as I am! (photos 23 & 24)
Recipe FAQs
Cool baked buns to room temperature, then store in an airtight container or ziptop baggie at room temperature for up to 5 days or frozen for 2 months. They are best the day they are baked but, reheating in a toaster oven would revive some of that fresh-baked charm.
These buns, like sourdough cinnamon rolls, are best fresh from the oven, but you can make them a day in advance. As soon as they are wrapped or covered, they will lose a little of that exterior crunch. You can make and shape the buns the night before baking, if desired. I recommend using half the amount of yeast in the dough. Wrap well in plastic wrap and refrigerate the buns right after shaping.
Recommended Sweet Bread Recipes

Yeast Breads

Rolls & Biscuits

Breakfast & Brunch

Breakfast & Brunch
If you enjoyed this recipe, please leave a star rating and let me know how it goes in the comments below! I love hearing from you and your comments make my day!
Cardamom Buns
Ingredients
For the dough:
- 1 cup whole milk, warm to the touch
- 2 ¼ teaspoons active dry yeast, 1 packet
- ¼ cup unsalted butter, cubed
- 3 ¼ cups all-purpose flour
- ¼ cup granulated sugar
- 2 teaspoons ground cardamom
- 1 teaspoon kosher salt
For the filling:
- ¾ cup light brown sugar
- 2 teaspoons ground cinnamon
- 1 teaspoon ground cardamom
- ½ cup unsalted butter, soft and spreadable
For the simple syrup
- ¼ cup water
- ¼ cup granulated sugar
Instructions
- To grind cardamom seeds: If your seeds have the green, black or white pod intact, remove the seeds from the pods. Grind the seeds in a spice grinder, clean coffee grinder or using a mortar and pestle until fine.
- In a small bowl whisk together yeast and warm milk. Let sit for 10 minutes or until foamy.
- Add the yeast mixture, butter, flour, sugar, cardamom and kosher salt to the bowl of a stand mixer fitted with the dough hook attachment. Incorporate the dough on low speed.
- Once all the ingredients have mixed together, increase the mixer to medium speed and develop the gluten. Continue mixing and testing a small piece of dough to see if you can gently stretch it thin enough to see light through.
- Scoop the dough into a large bowl. You can lightly spray it with nonstick cooking spray if desired. Bulk proof the cardamom dough for 30-45 minutes or until doubled.
- While the dough proofs combine all ingredients for the filling in a small bowl using a rubber spatula. It should be easily spreadable. Set aside.
- Make the simple syrup in the microwave or a small pot. Combine sugar and water, stir, and cook until boiling. This only takes 30 seconds in the microwave. Swirl the container to dissolve any remaining sugar crystals. Revolutionary! Cool it in the refrigerator. This can also be made ahead and stored in the fridge. It is also, technically, optional!
- On a lightly floured surface, roll out the dough to 16×12 inches with the long side parallel to your body using a rolling pin.
- Spread filling on the bottom half (longways) with an offset spatula then fold the top half over the bottom. You should still have a rectangle (16×6 inches) with the long side parallel to your body.
- Roll out dough to 12 x 8 inches. Use a pizza cutter or sharp knife to divide into 12 strips. Try your very best to keep them roughly the same size so they proof and bake together.
- Working with one strip of dough at a time, take a small rectangle and use the pizza cutter or knife to cut a slit up the center longways. Leave about 1/4 inch of dough uncut at the top. It will look like pant legs.
- Start with the right “pant leg” and gently twist it using your thumb and forefinger so the filling looks like a corkscrew, then keep twisting and wrap it around itself at the base. Continue twisting and wrapping to create a bun on one half of the “pants”. Tuck the end underneath and through the bun to secure it
- Take the left “pant leg” and twist it like a corkscrew, then continue twisting it around the outside of the bun you just created on the right. Twist it around the outside making the bun larger, then stretch the last inch or so across the center and tuck it underneath to secure it. Place it on a parchment paper lined baking sheet.
- Preheat oven to 350°F convection with the fan (this is what I did) or 375°F conventional (no fan). While the oven heats up, final proof the buns 25-30 minutes or until visibly puffed.
- Brush the buns with cooled simple syrup over the top and bake in preheated oven for 15-18 minutes or until golden brown.
- Brush the warm buns with simple syrup and allow to cool (as long as you can) before tasting! You could sprinkle a little cardamom sugar on top if you are half the fan of cardamom as I am!
Notes
Nutrition
Nutrition information is automatically calculated, so should only be used as an approximation.
 Like this recipe? Rate & comment below!
Before You Go
I hope you enjoyed this recipe. Check out our other delicious yeast bread recipes like these hot cross buns!


Hoping to give these a good this weekend! Two questions: could you sub regular sugar in the filling for the same amount? Also, how would you store them? Thanks!
Christina, great questions! Yes, regular sugar will work fine in place of the date sugar here. Also, I store them in an airtight container at room temperature overnight. Enjoy!
I just made these and they’re delicious. I would recommend doubling the filling (butter, cinnamon, sugar) and the cardamom in the dough. I felt they were a bit bland and dry. Great recipe though!
This recipe is fantastic! Enjoyable to make, and the final product comes out perfectly. The instructions are fantastic- first time making knots and they look very much like your photos.
Teresira — I hope the stores fulfill your request! I froze mine after baking, in an airtight container, and that worked well! Just let them come to room temperature again and warm them in the oven before eating. 🙂 Enjoy!
Just waiting for the second rising. I’ve ordered two stores in my area to stock your red mill date sugar. Buns look absolutely yummy. Many thanks for sharing this recipe.
Question: when do you freeze the bun? After baking or before baking? Does the dough freeze well?