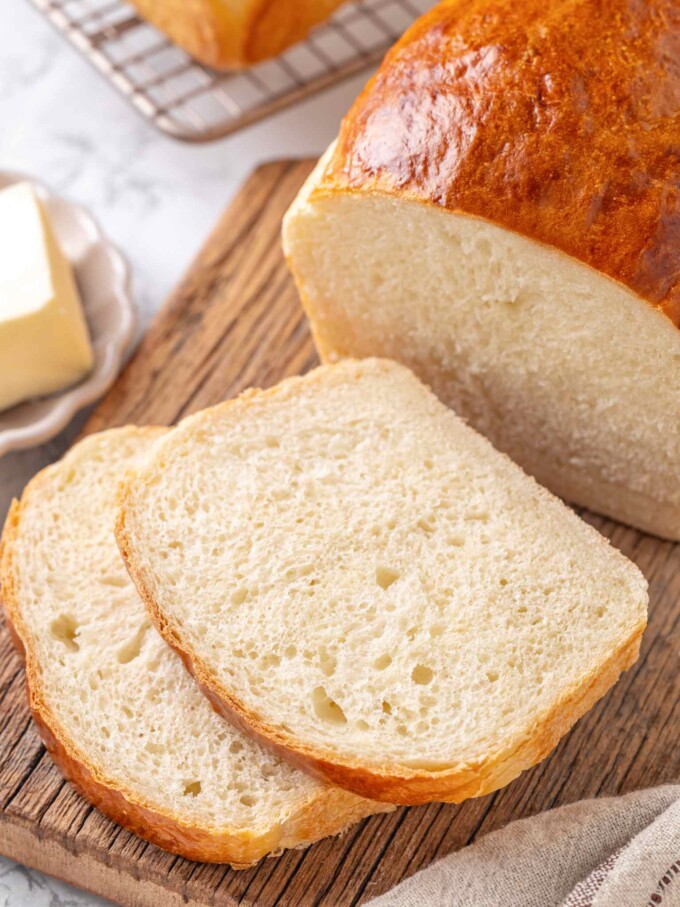
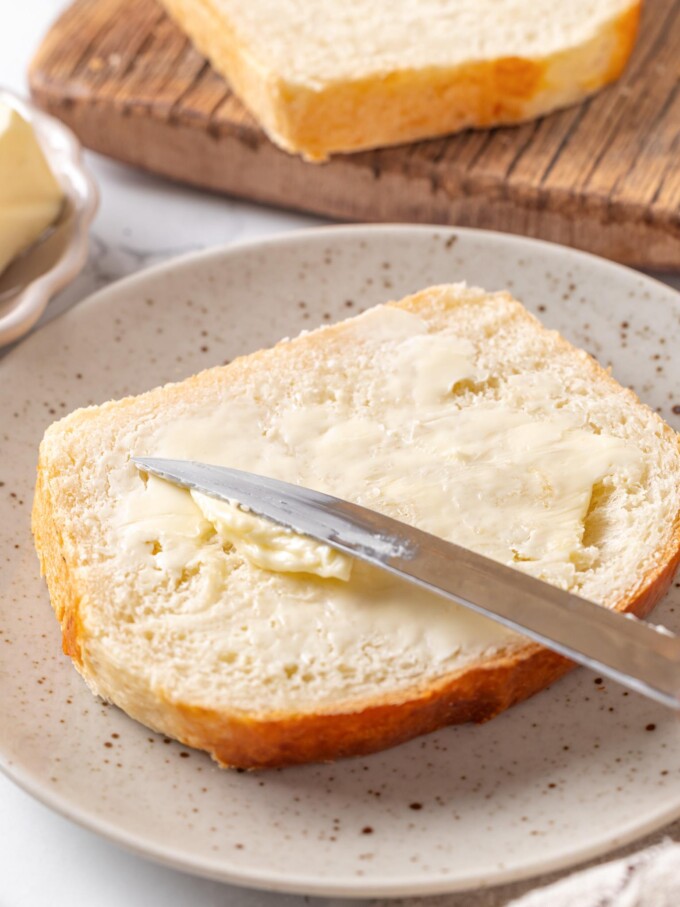
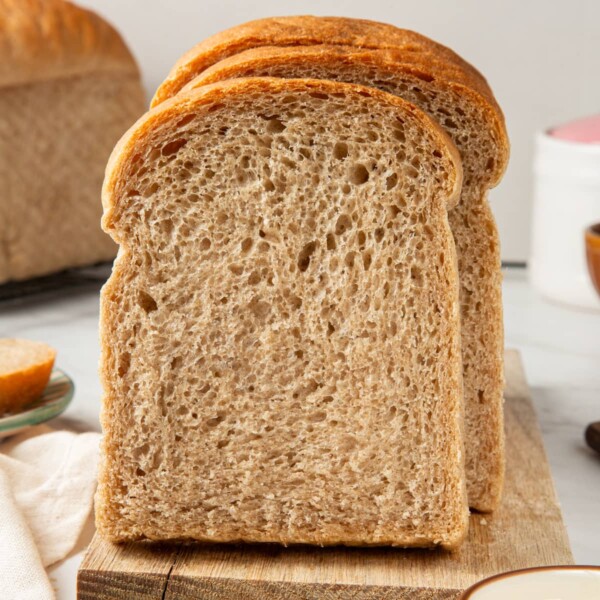
Buttermilk bread has a soft, tender crumb and a subtle tang that makes it worth keeping in your regular rotation. This loaf slices cleanly, toasts beautifully, and holds up well for sandwiches.
A Quick Look At The Recipe
This is a brief summary of the recipe. Jump to the recipe to get the full details.
Prep Time
20 minutes
Cook Time
25 minutes
Proof/Rest Time
2 hours
Total Time
2 hours 45 minutes
Servings
24 slices
Difficulty
Intermediate
Calories *
122 kcal per serving
Technique
Straight dough method: mix, knead, proof twice, bake.
Flavor Profile
Rich, mildly tangy, subtly sweet.
* Based on nutrition panel
I was nervous about the dough feeling a little sticky after mixing, but I trusted the process and kept kneading. It smoothed out beautifully and the final loaf had the softest crumb I have ever pulled from my oven.
⭐⭐⭐⭐⭐
Renata
Why You Will Love This Recipe
- Incredibly soft, tender crumb. This bread has a light, pillowy texture that holds up to slicing without falling apart. Buttermilk and butter together give the crumb a richness that plain sandwich bread simply does not have.
- Real flavor, not just sweetness. The buttermilk adds a subtle tang that keeps the loaf from tasting flat or one-dimensional. The sugar and butter balance it out so the overall flavor is rich and gently complex without being sharp.
- Endlessly useful. This bread makes outstanding toast, sandwiches, and is exceptional to use with this brioche French toast recipe. If you love recipes that pull double duty, this loaf fits right alongside my French bread as a staple to keep in rotation.
- Straightforward from start to finish. There is no complex preferment, no overnight schedule, and no specialized equipment beyond a stand mixer and two loaf pans. If you have made my English muffins or my potato bread before, you will move through this one with confidence.
Everyone in my house, including my three-year-old, went back for a second slice the first time I made this. It is the kind of bread that does not last long on the counter, which I take as the highest possible compliment.
This loaf is wonderful on its own, but it also pairs beautifully with soups, stews, or anything that benefits from a soft, absorbent bread. If you want to explore more buttermilk baking, my buttermilk cornbread and the best buttermilk biscuit recipe are a great place to start.
Ingredients & Substitutions
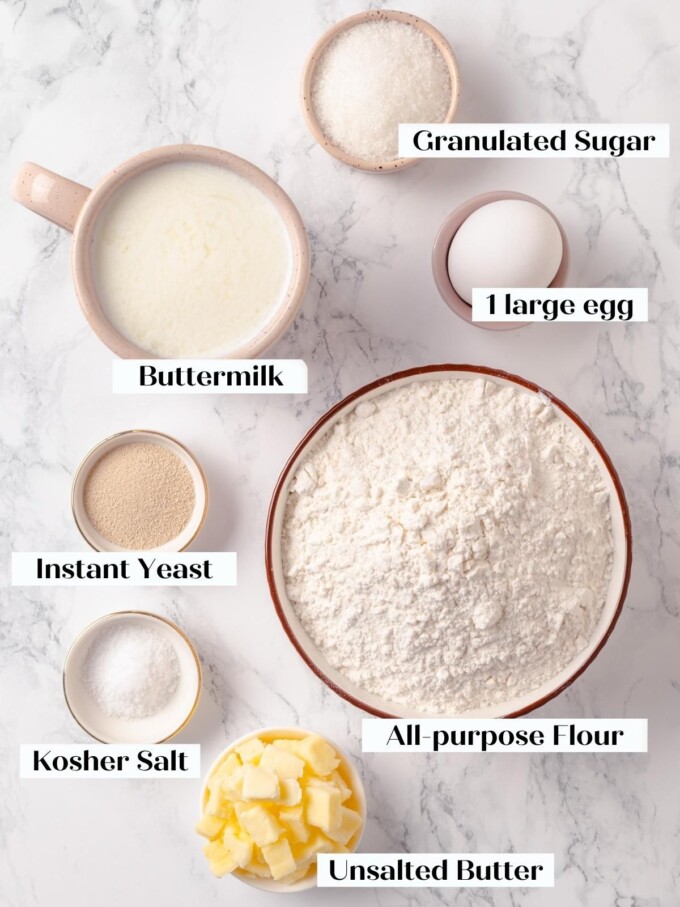
- All-Purpose Flour
- Buttermilk: The acidity in buttermilk softens the gluten, which is what gives this loaf its distinctively tender, almost melting crumb, along with a subtle tang that plain milk cannot replicate. If you love buttermilk, you must try this buttermilk pancake recipe(coming soon!) next!
- Instant Yeast: Instant yeast goes directly into the flour without a proofing step, keeping the process streamlined. If you only have active dry yeast on hand, dissolve it in a small amount of warm water first and expect the dough to take a little longer to rise.
- Granulated Sugar: Sugar feeds the yeast and contributes to the deep golden crust you want on a well-baked loaf. Reducing it will result in a paler crust and a slightly less balanced flavor.
- Kosher Salt
- Unsalted Butter: Butter adds richness and moisture, and is what separates this from a leaner sandwich loaf. If you use salted butter, reduce the added kosher salt to avoid an overly salty result. This recipe grew out of my dinner roll recipe because I wanted the richness of the butter. If you want a less decadent version, you could make my sandwich bread recipe with buttermilk in place of the whole milk.
- Egg (for egg wash)
Variations for Buttermilk Bread
- Flavor the dough: One of the easiest ways to change the flavor of this bread is to add lemon or orange zest to the dough. I zest the sugar, massage it in, then let it sit to draw out the oils from the zest, just like with this olive oil cake! You could also mix chopped herbs, shallots, or garlic in when adding the butter. Be aware that garlic will retard fermentation if used in large quantities.
- Seeded Top: Brush the egg wash as directed, then immediately sprinkle sesame seeds, poppy seeds, flaky salt, or everything bagel seasoning over the top before baking. The seeds toast as the loaf bakes and add a gentle crunch to every slice, just like with my multigrain bread.
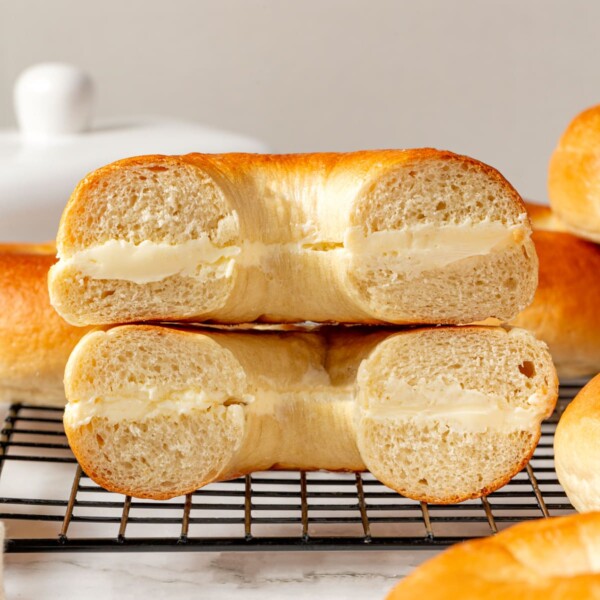
- Mix-ins! Add any combination of dried fruit and/or nuts you wish, up to one pound. You can even add chocolate chips for a delicious chocolate buttermilk bread, or try toasted pecans with dried cherries as I do with this cherry sourdough bread!
[Insert image here]
Professional Tips for Perfect Buttermilk Bread
- Develop the gluten fully before you stop mixing. The windowpane test (when the dough stretches thin and translucent without tearing) is your green light, not the timer. A dough that passes this test at 4 minutes is ready; one that tears at 7 minutes needs more time.
- Do not add bench flour when shaping. This is the single most common mistake with an enriched dough like this one. Lightly oiling your hands from the proof bowl is all you need, and the dough will cooperate without it sticking. Extra flour at the shaping stage makes the finished bread noticeably dry.
- Trust visual cues over the clock during both proofs. The first proof is done when the dough is visibly doubled and feels airy when gently pressed, which is fine! The second proof is ready when the dough has risen clearly above the rim of the pan and feels light when you nudge the pan. A cold kitchen can push either proof well past the times written in the recipe.
- Apply the egg wash gently, keeping it off the pan edges. Brush lightly across the top of each loaf; you don’t want to lose any air, like with this no-knead whole wheat bread. Do not let the egg wash pool up where the dough meets the sides of the pan. Pooled egg wash bakes into a stiff, dark band that can make the loaf stick and create an uneven crust.
How to Make Buttermilk Bread
Use these instructions to make two soft, tender loaves with a light crumb and subtle buttermilk tang. Further details and measurements can be found in the recipe card below.
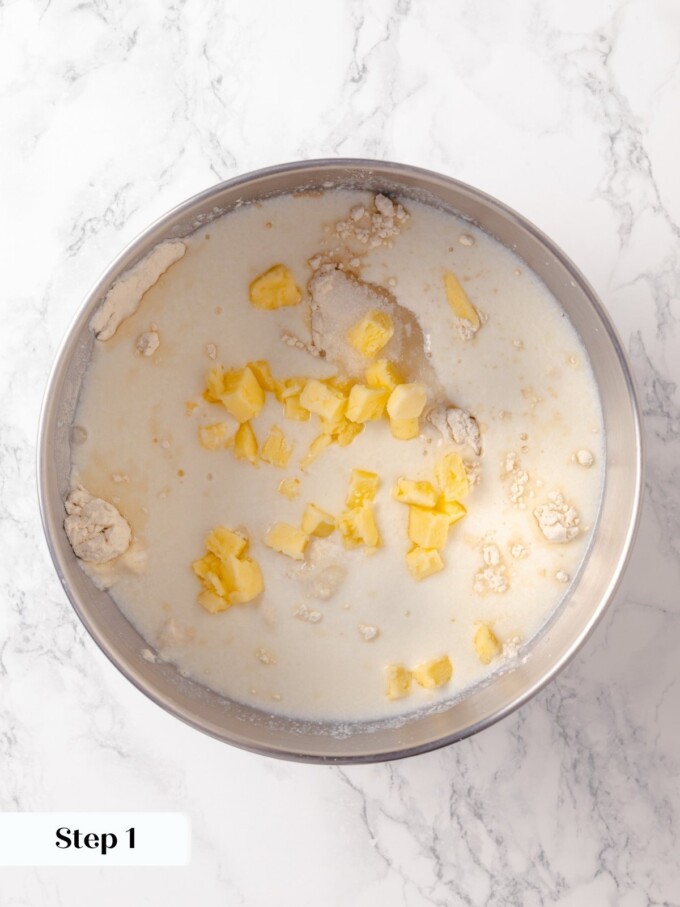
Combine the Ingredients
Step 1: Add the flour to the bowl of a stand mixer fitted with the hook attachment first, then add the instant yeast, buttermilk, sugar, salt, and cubed butter on top. (photo 1)
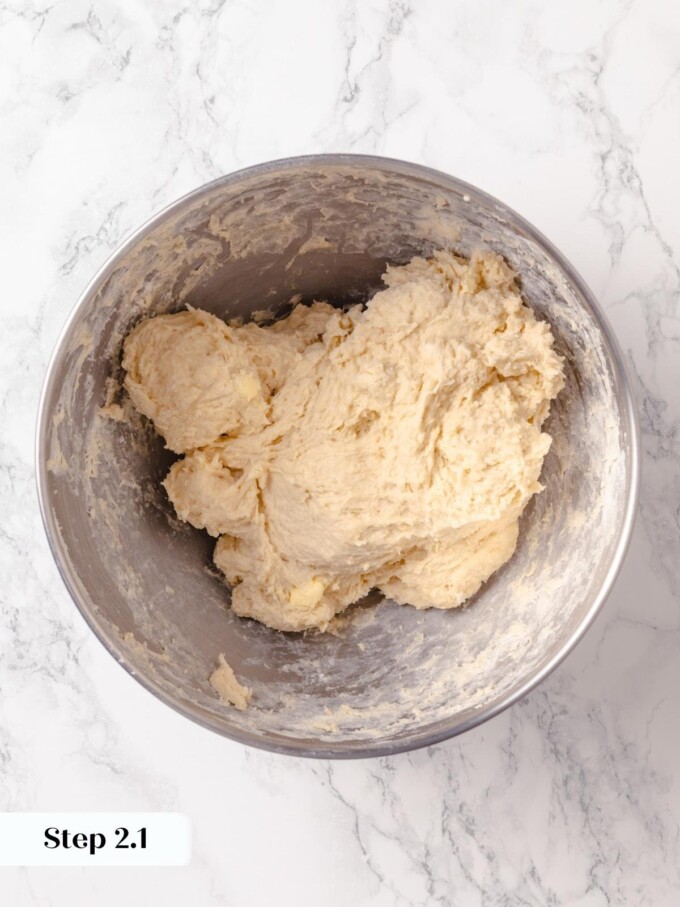
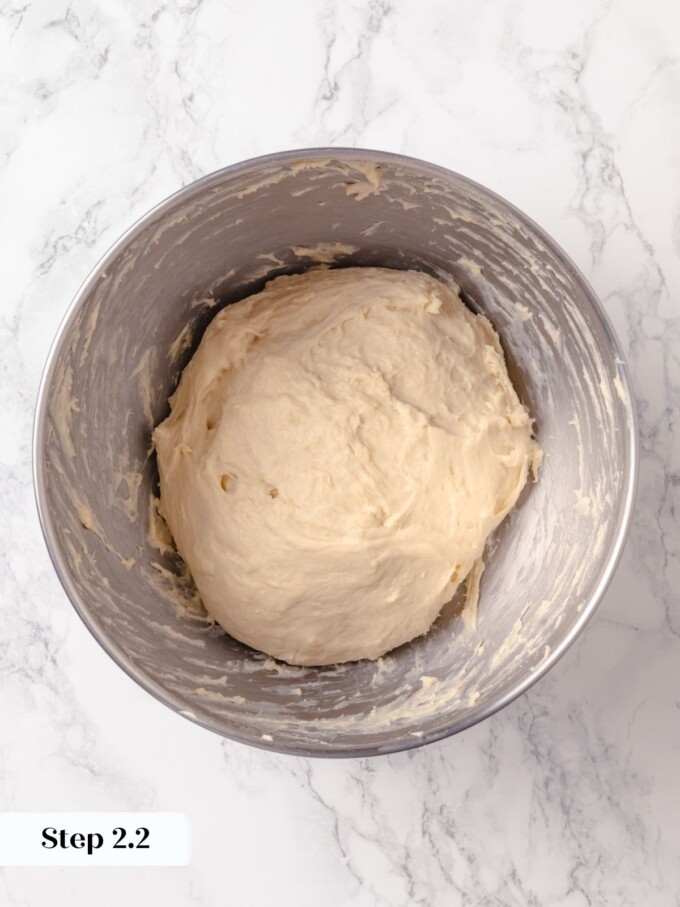
Mix and Develop the Gluten
Step 2: Mix on low speed until the ingredients come together and only a few small pieces of butter remain visible in the dough. (photo 2) Then increase the mixer to medium speed and knead for 5 to 6 minutes. You are looking for the dough to pull away from the sides of the bowl and pass the windowpane test (stretching thin and translucent without tearing) (photo 3)
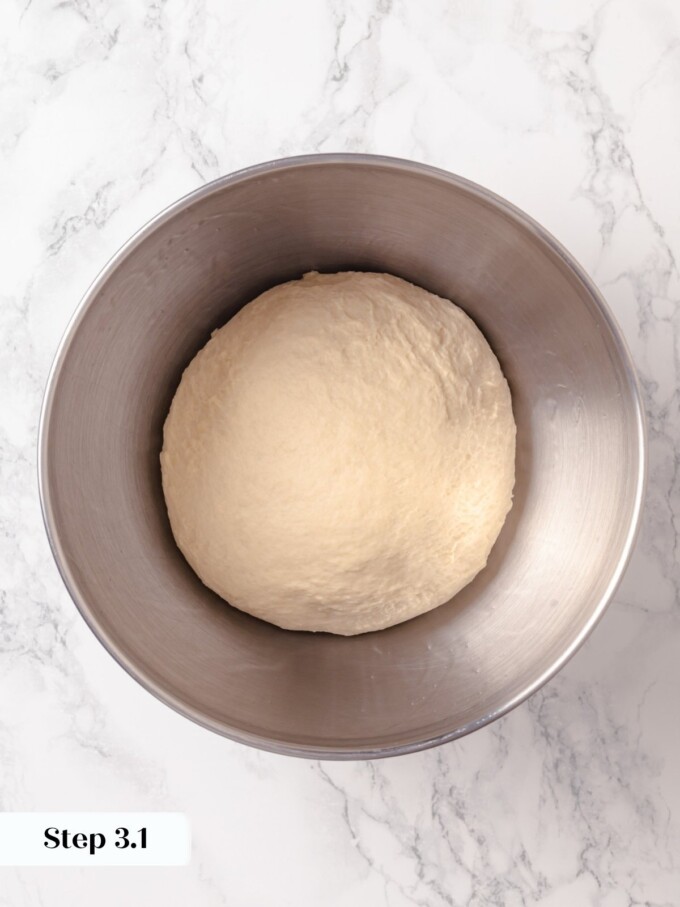
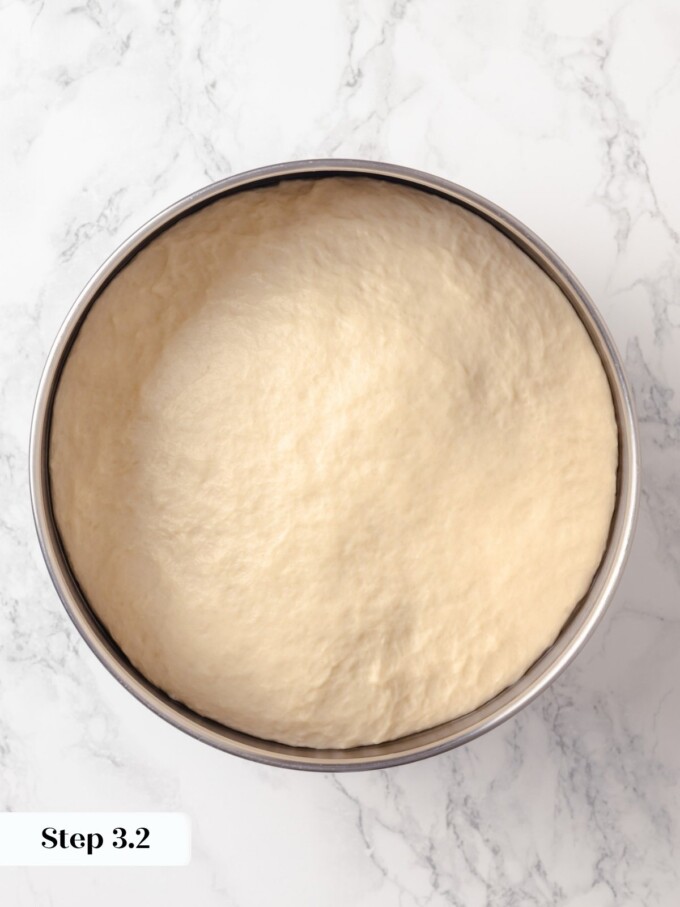
First Proof
Step 3: Scrape the dough into a large bowl sprayed with nonstick cooking spray or lightly coated in neutral oil. Cover and proof in a warm spot for 45 minutes to 1 hour, or until the dough is visibly doubled in size and feels light and airy when you gently press it. (photos 4 & 5)
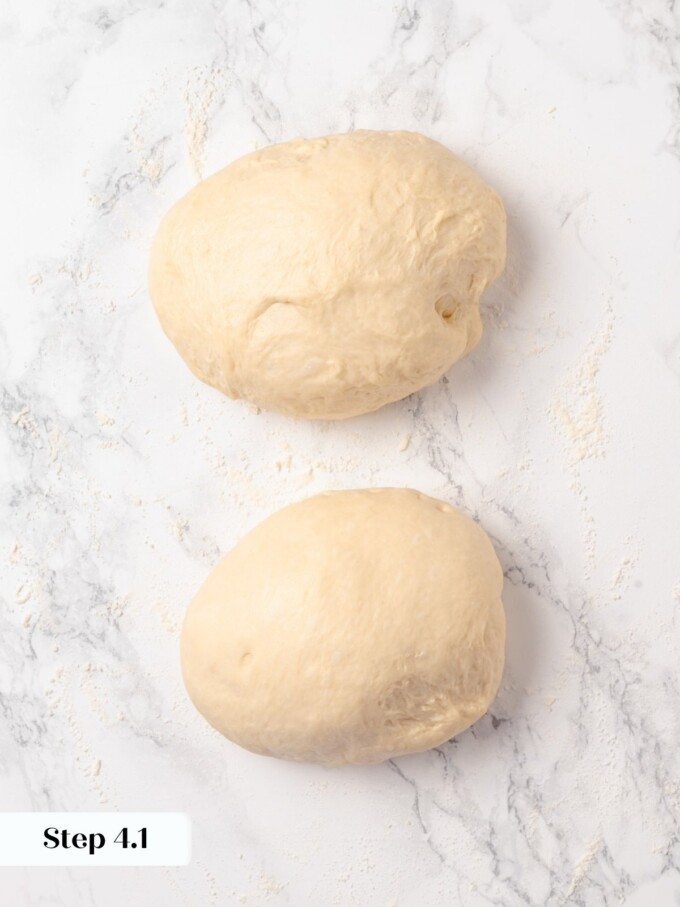
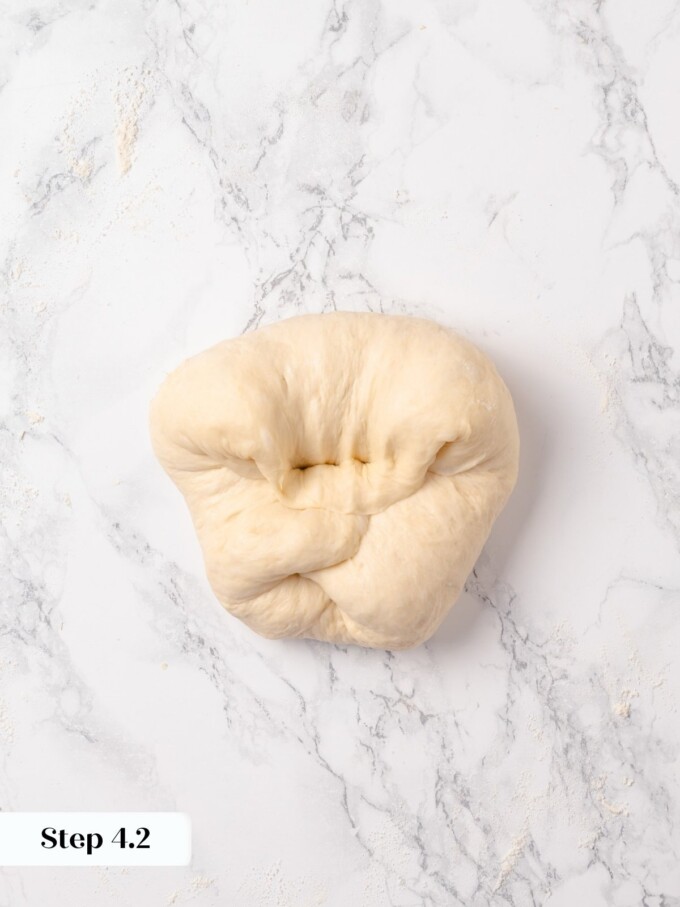
Divide and Preshape
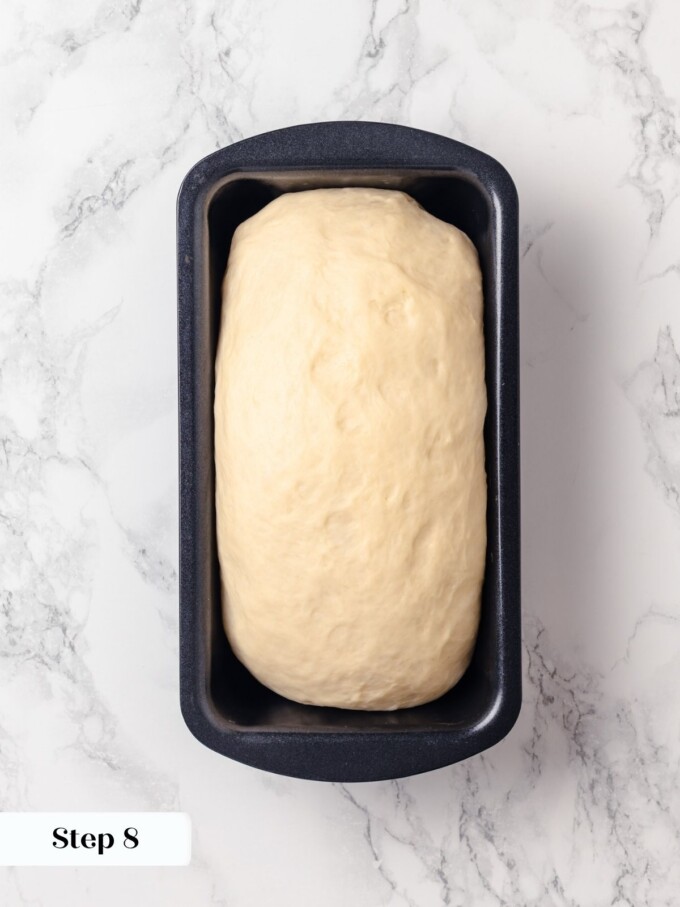
Step 4: Turn the proofed dough out onto a lightly floured work surface and divide it into 2 pieces, approximately 520g each. (photo 6) To preshape, flip each piece over and fold each of the four sides in toward the center. Flip it back over, seam-side-down, and gently shape it into a round by pulling it toward you with both hands. Rotate a quarter turn and repeat until you have a round dough ball that sits up on your work surface. (photos 7 & 8)

Bench Rest
Step 5: Cover the preshaped rounds with plastic wrap or an overturned bowl and allow them to rest for 10 minutes.
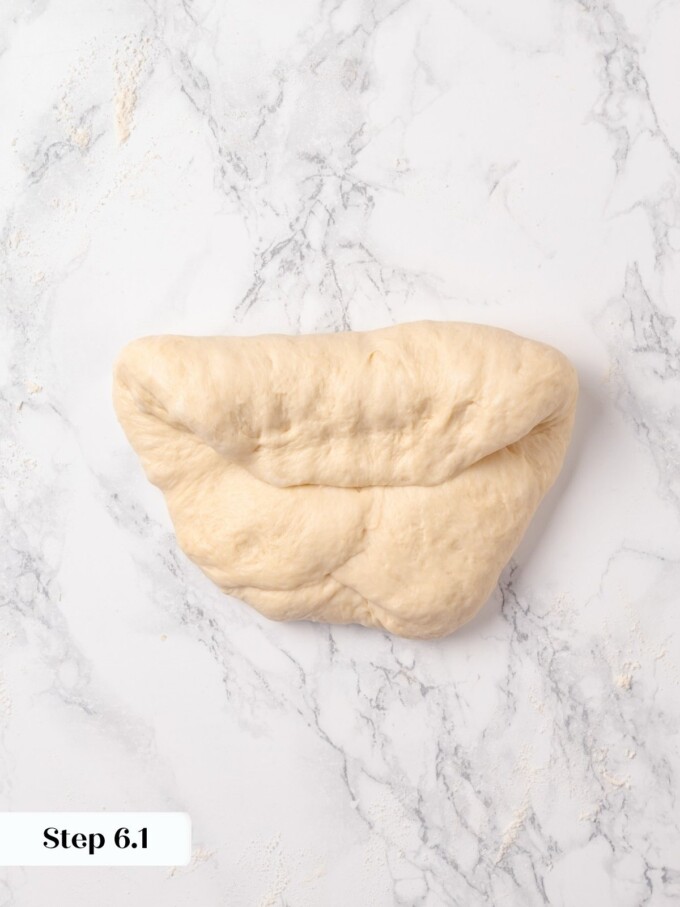
Shape and Pan the Loaves
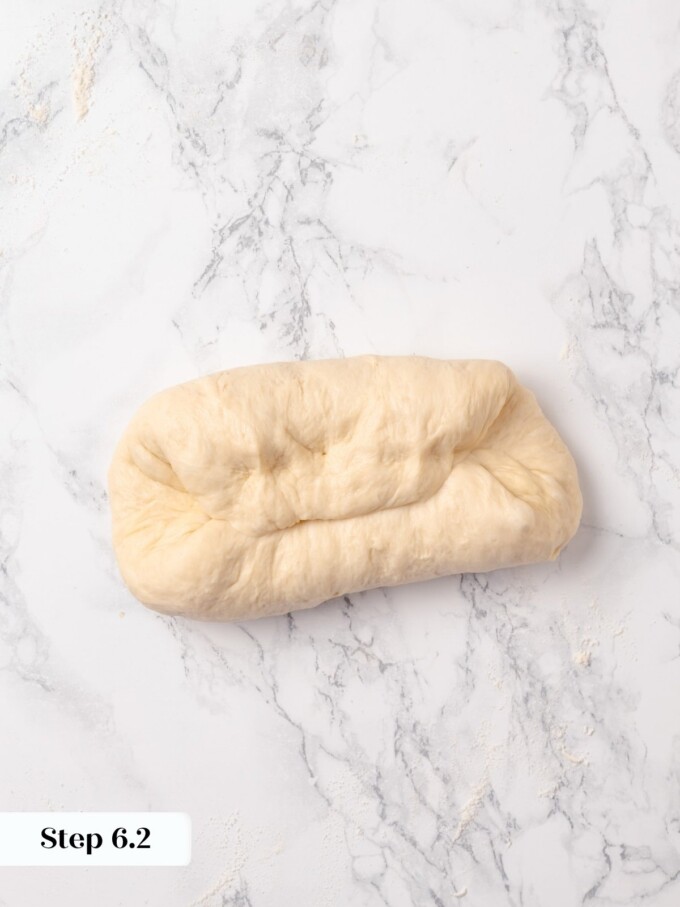
Step 6: Spray two 8 to 9-inch loaf pans with nonstick cooking spray or grease them with softened butter. Flip one rested round back over and fold the side furthest from you down to the center. Rotate the dough 180 degrees and fold the other side down toward the center. (photos 9 & 10)
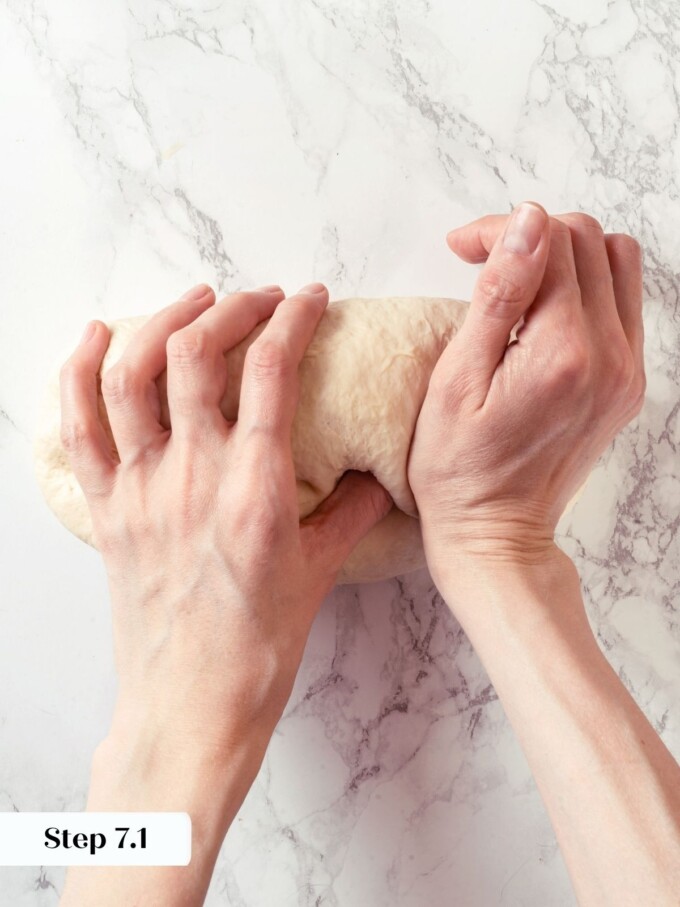
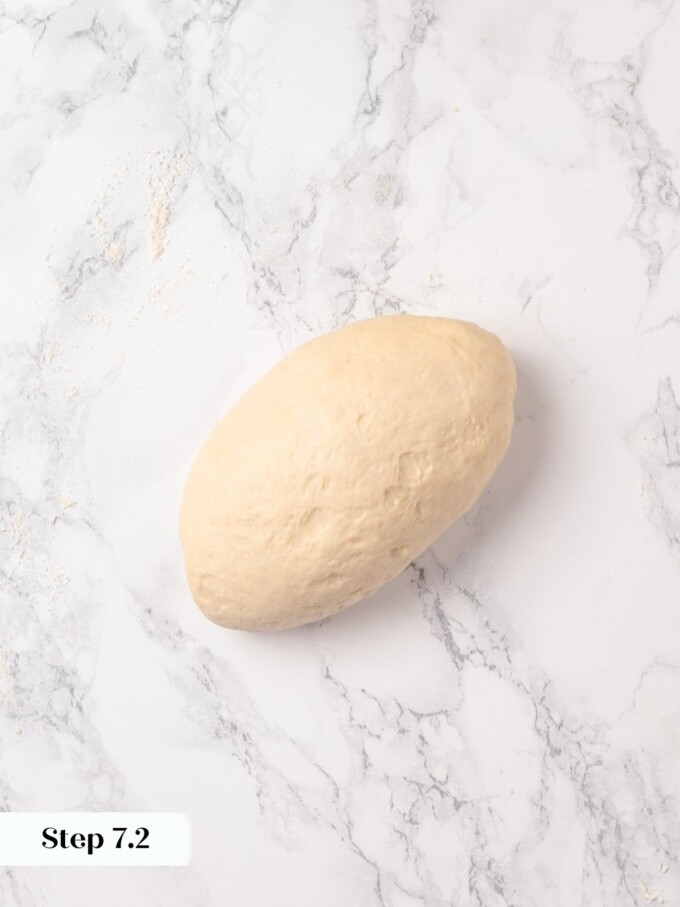
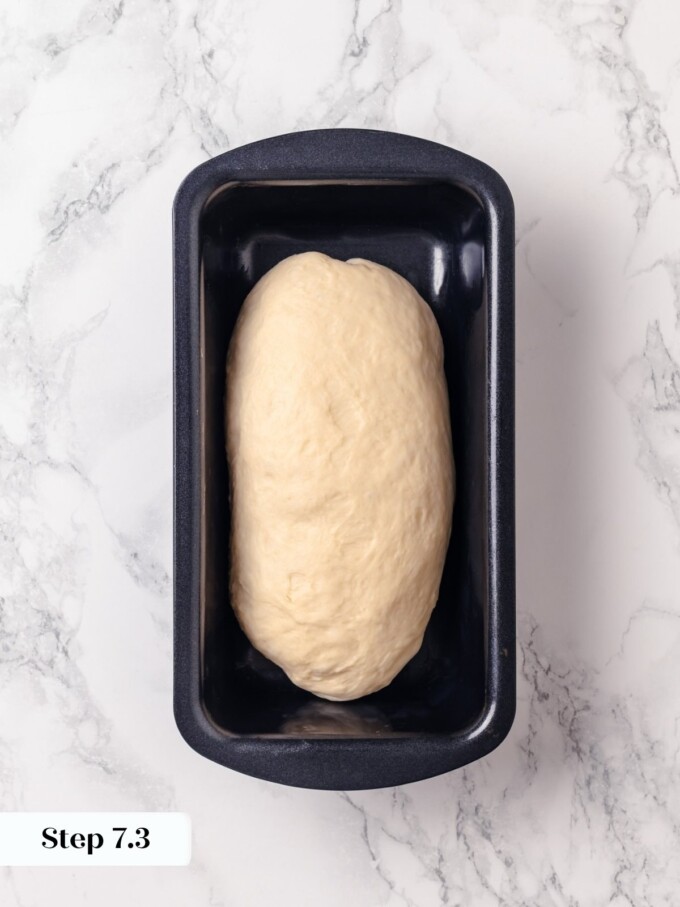
Step 7: Now perform 2 thumb folds: wrap the dough around the thumb of your left hand and seal the edge with the heel of your right hand, starting at the right side and gradually moving left, rolling and sealing as you go. The first thumb fold will not fully close the log, which is normal. Perform one more thumb fold to fully create a tight cylinder shape. (photos 11& 12) Place the loaf seam-side-down in the prepared pan and repeat with the second piece. (photo 13)
Second Proof
Step 8: Cover both pans with plastic wrap and proof in a warm spot for 1 hour, or until the dough has risen above the edges of the loaf pans in most places and feels light and airy when gently pressed. (photo 14) Meanwhile, preheat the oven to 350ºF conventional (no fan).
Egg Wash and Bake
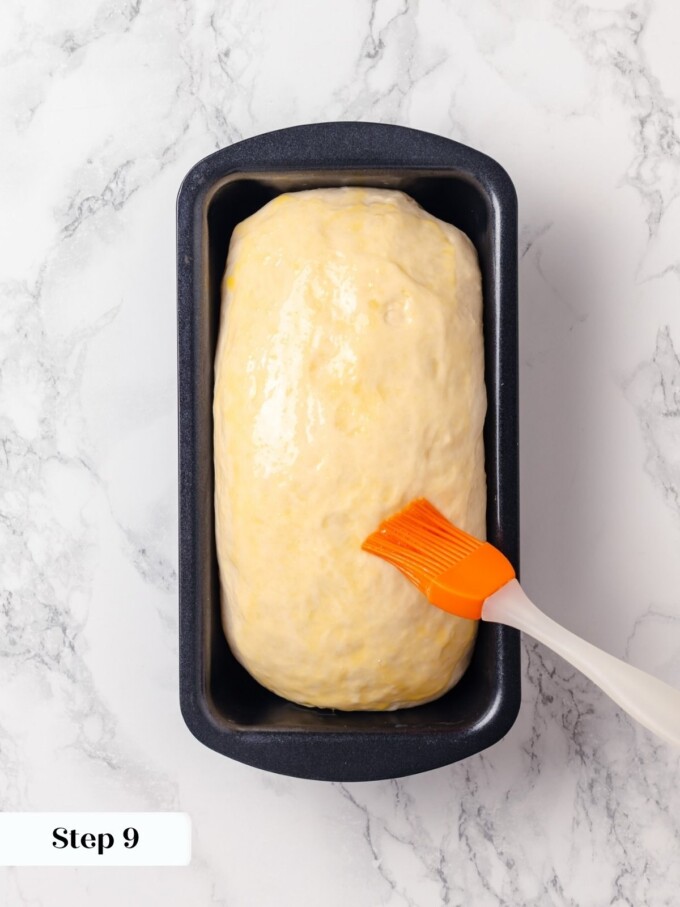
Step 9: Just before baking, brush the tops of the loaves with the well-beaten egg. Be gentle and do not let it run down the sides of the pan or pool in the corners, as this can cause uneven browning and sticking. (photo 11)
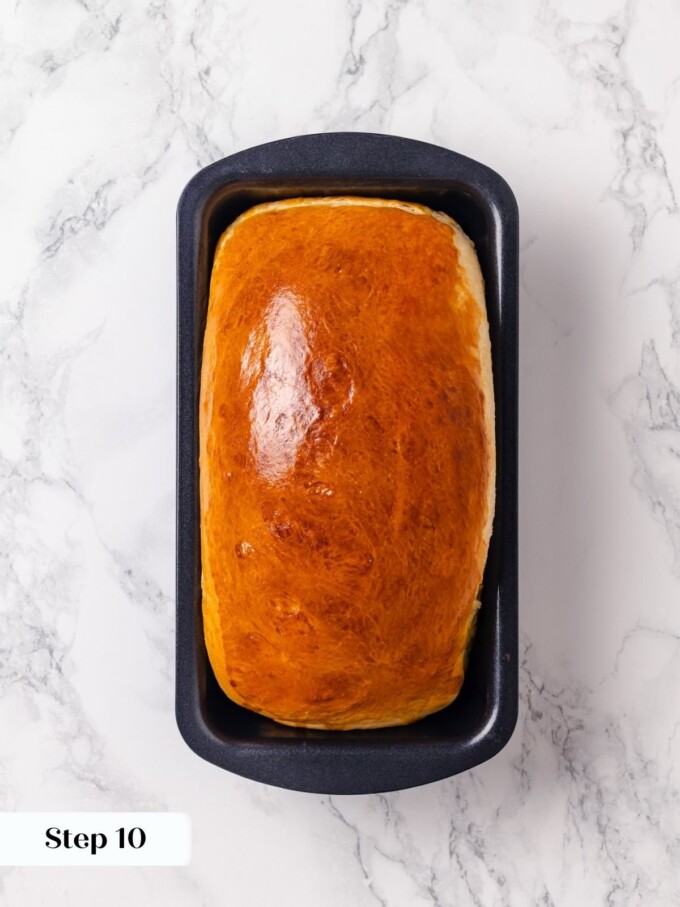
Step 10: Bake for 25 minutes until the tops are a deep, dark golden brown. For certainty, check with an instant-read thermometer: this enriched dough is done at 185ºF in the center. (photo 12)
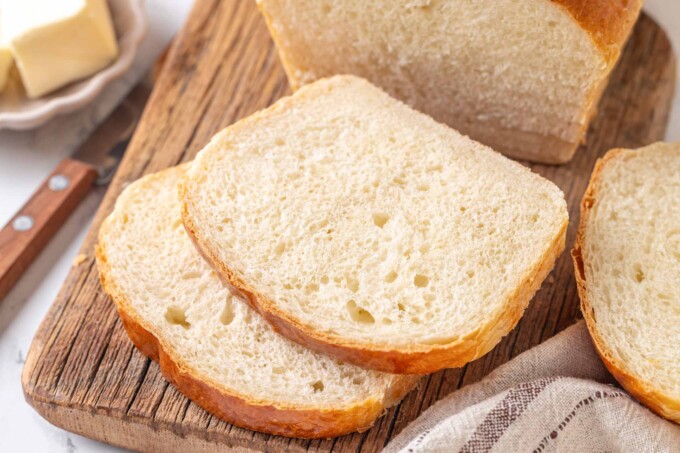
Cool and Serve
Step 11: Remove the loaves from the pans and transfer to a wire rack. Serve slightly warm or at room temperature.
Recipe FAQs
Wrap the cooled loaves tightly in plastic wrap or store them in a zip-top bag at room temperature for up to 3 days. To freeze, wrap each loaf in plastic wrap and freeze for up to 2 months. Thaw at room temperature overnight, or warm individual slices in the microwave for about 20 seconds.
When working with instant yeast, I don’t allow the dough to sit overnight, even in the refrigerator. Instant yeast can be unpredictable. If you make it with active dry yeast, you can retard the dough overnight in the fridge and bake the next morning.
The most likely cause is underproofing, either during the first rise, the second rise, or both. Dense crumb almost always means the dough did not have enough time to develop the airy structure it needs before going into the oven. A cold kitchen is the usual culprit, since it slows fermentation considerably. Watch for the visual cues: doubled and airy after the first proof, clearly risen above the pan rim, and jiggly when you nudge it after the second proof.
Both are enriched loaves with a soft, tender crumb, but they are meaningfully different. Buttermilk bread uses buttermilk as its primary enricher and contains a modest amount of butter, which gives it a lighter texture and a subtle tang. Brioche relies heavily on eggs and a much higher butter ratio, making it richer and denser in comparison. If you love enriched bread and want to try the richer end of the spectrum, my brioche buns are a great next step.
Recommended Yeasted Bread Recipes

Rolls & Biscuits

Rolls & Biscuits

Rolls & Biscuits
Bagels
Buttermilk Bread
Ingredients
- 4 ⅓ cups all-purpose flour
- 2 ½ teaspoons instant yeast
- 1 ¼ cups buttermilk
- ¼ cup granulated sugar
- 1 ½ teaspoons kosher salt
- ¼ cup unsalted butter, cubed
- 1 large egg, for egg wash, beaten
Instructions
- Add flour to the bowl of a stand mixer fitted with the hook attachment. Add instant yeast, buttermilk, sugar, salt, and cubed butter on top. Mix on low until all ingredients are incorporated and only a few small pieces of butter remain.
- Increase to medium speed and knead for 5 to 6 minutes, until the dough pulls a smooth windowpane (when a small piece stretches thin without tearing). The dough will be sticky but soft. Oil your hands lightly if needed.
- Scrape dough into a lightly oiled large bowl. Cover and proof in a warm spot for 45 minutes to 1 hour, until visibly doubled and airy to the touch.
- Spray two 8 to 9 inch loaf pans with non-stick cooking spray. Turn dough out onto a lightly floured surface and divide into 2 pieces, approximately 520g each.
- Preshape each piece into a round: flip the dough over, fold each of the four sides toward the center, then flip back seam-side-down. Pull the dough toward you with both hands, rotating a quarter turn at a time, until you have a taut round that sits up on the surface. Cover and bench rest 10 minutes.
- To final shape, flip the dough over. Fold the far edge down to the center, rotate 180 degrees, and repeat. Perform 2 to 3 thumb folds: wrap the dough around your left thumb and seal the edge with the heel of your right hand, working from right to left, rolling and sealing to form a tight log. The first pass will not fully close the seam; a second or third pass will.
- Place each log seam-side-down in a prepared loaf pan. Cover with plastic wrap and proof in a warm spot for 1 hour, until the dough has risen above the rim of the pan and feels light and airy when gently pressed. Preheat oven to 350ºF conventional (no fan).
- Gently brush the tops with beaten egg wash. Do not let it pool or run down the sides of the pan.
- Bake for 25 minutes until deeply golden brown. An instant-read thermometer inserted in the center should read 185ºF. Cool slightly before slicing.
Notes
Windowpane test: Knead until a small piece of dough stretches into a thin, translucent sheet without tearing. If it tears immediately, give it another minute or two at medium speed.
Egg wash: Brush gently and keep the wash on top of the loaf only. Egg wash that pools along the edges of the pan can cause the crust to stick.
Storage: Store at room temperature, well wrapped, for up to 3 days. Freeze whole or sliced for up to 2 months. Thaw at room temperature or warm individual slices in the microwave for 20 to 30 seconds.
Nutrition
Nutrition information is automatically calculated, so should only be used as an approximation.
 Like this recipe? Rate & comment below!
Before You Go
If this buttermilk bread earns a spot in your regular baking lineup, there is plenty more where it came from. Browse our bread recipes, or you can head right over to this milk bread recipe!


I was nervous about the dough feeling a little sticky after mixing, but I trusted the process and kept kneading. It smoothed out beautifully and the final loaf had the softest crumb I have ever pulled from my oven.
That is the greatest compliment Renata! Made our day! ~GVD team
wow, this looks very good. Bookmarking it for the next time I’m making bread!
I saw this in Vegetarian Times too. Can’t wait to give it a try! Looks delish!
Handsome loaf. Will bake this one next. Thanks.
Mmm I’ve just started experimenting with different breads- I’ll definitely check back for some pointers! Your pictures are fantastic by the way!
Heather — thanks for the comment! I checked out your blog and some of the foods you made look delicious! Thanks for visiting my site; I’ll be sure to check up on yours, too.