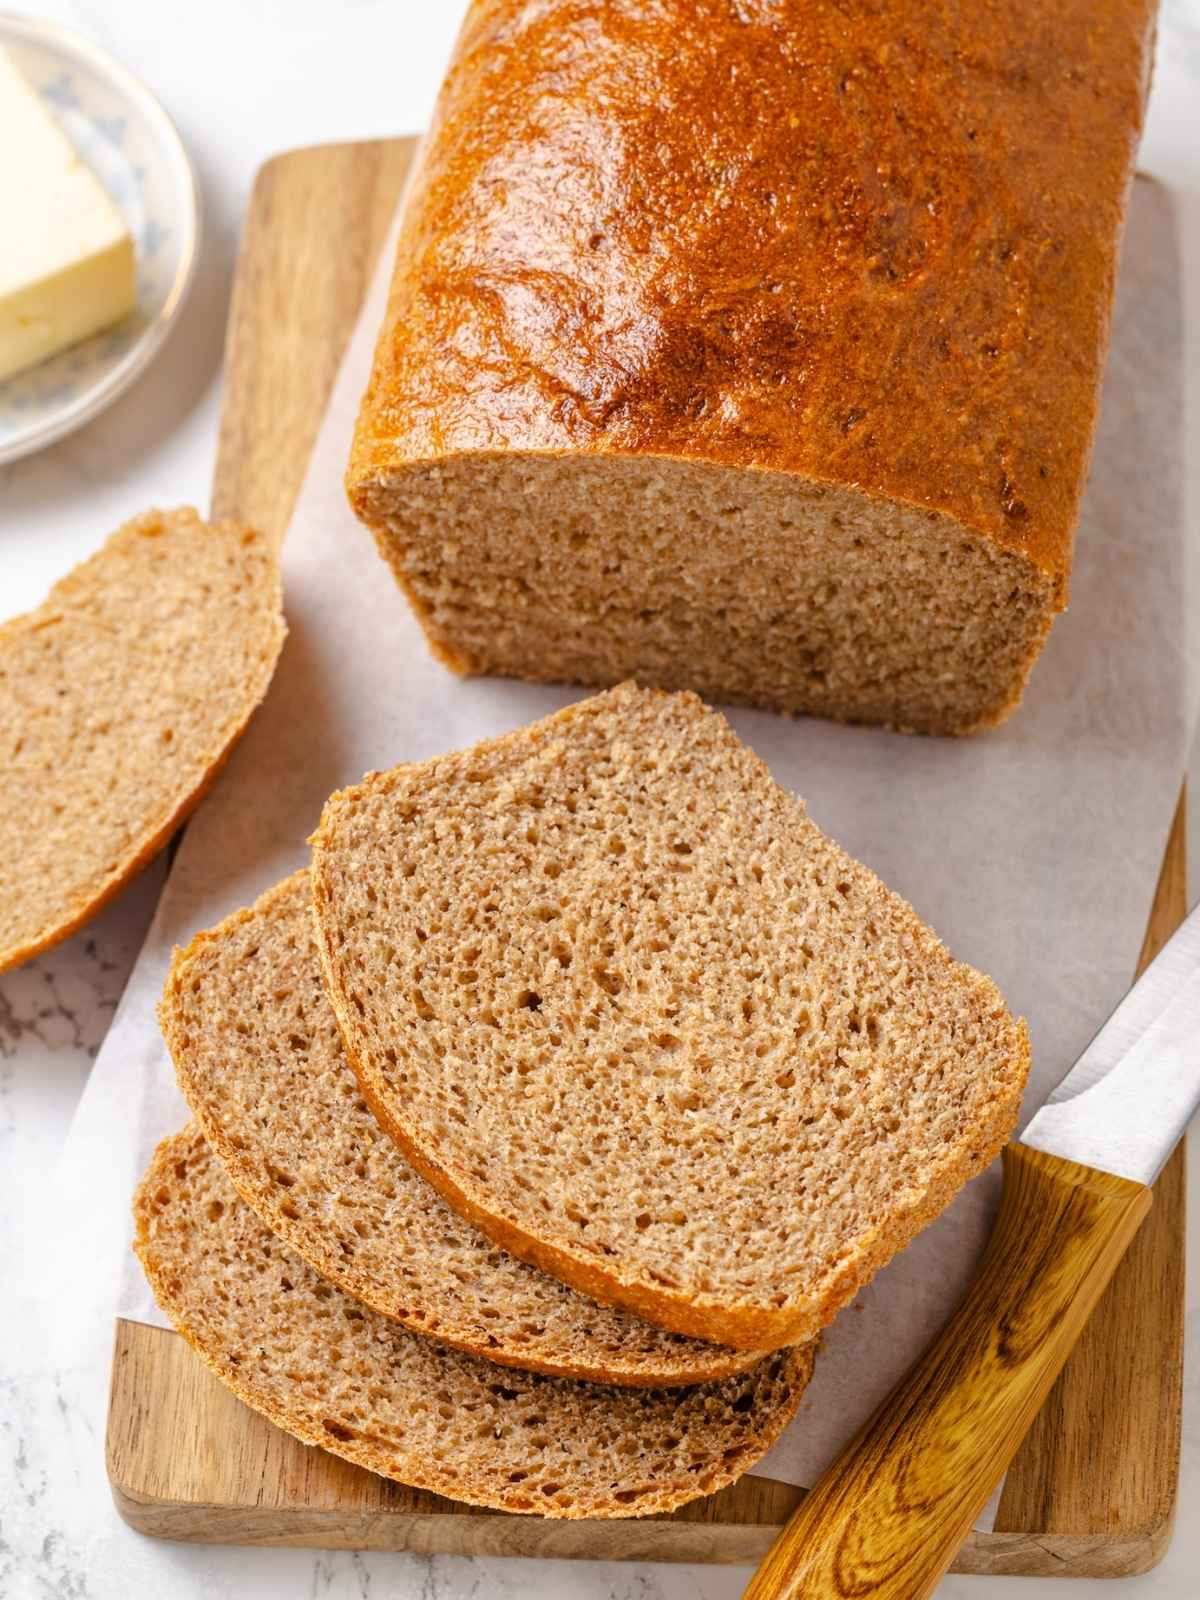
No knead whole wheat bread that is 100% whole grain, soft enough to slice cleanly, and ready in about 3 hours with almost no hands-on effort. Maple syrup keeps the crumb tender without tipping into sweet.
A Quick Look At The Recipe
This is a brief summary of the recipe. Jump to the recipe to get the full details.
Prep Time
20 minutes
Cook Time
20 minutes
Proof Time
2 hours 30 minutes
Total Time
3 hours 10 minutes
Servings
2 loaves
Difficulty
Easy
Calories *
1094 kcal per serving
Technique
Straight dough method.
Flavor Profile
Earthy, slightly sweet, whole grain.
* Based on nutrition panel
“I have made plenty of whole wheat loaves that turned out dense and dry, but this one genuinely surprised me. The crumb was soft and the loaf held together beautifully when I sliced it the next morning. No kneading and only a handful of ingredients, it is now my go-to weekly bread for my family!” ⭐⭐⭐⭐⭐
Renata
Why You Will Love This Recipe
- No kneading, no stress. This bread comes together with a wooden spoon and your hand, nothing more. The series of folds does the gluten development for you, so there is no arm workout required.
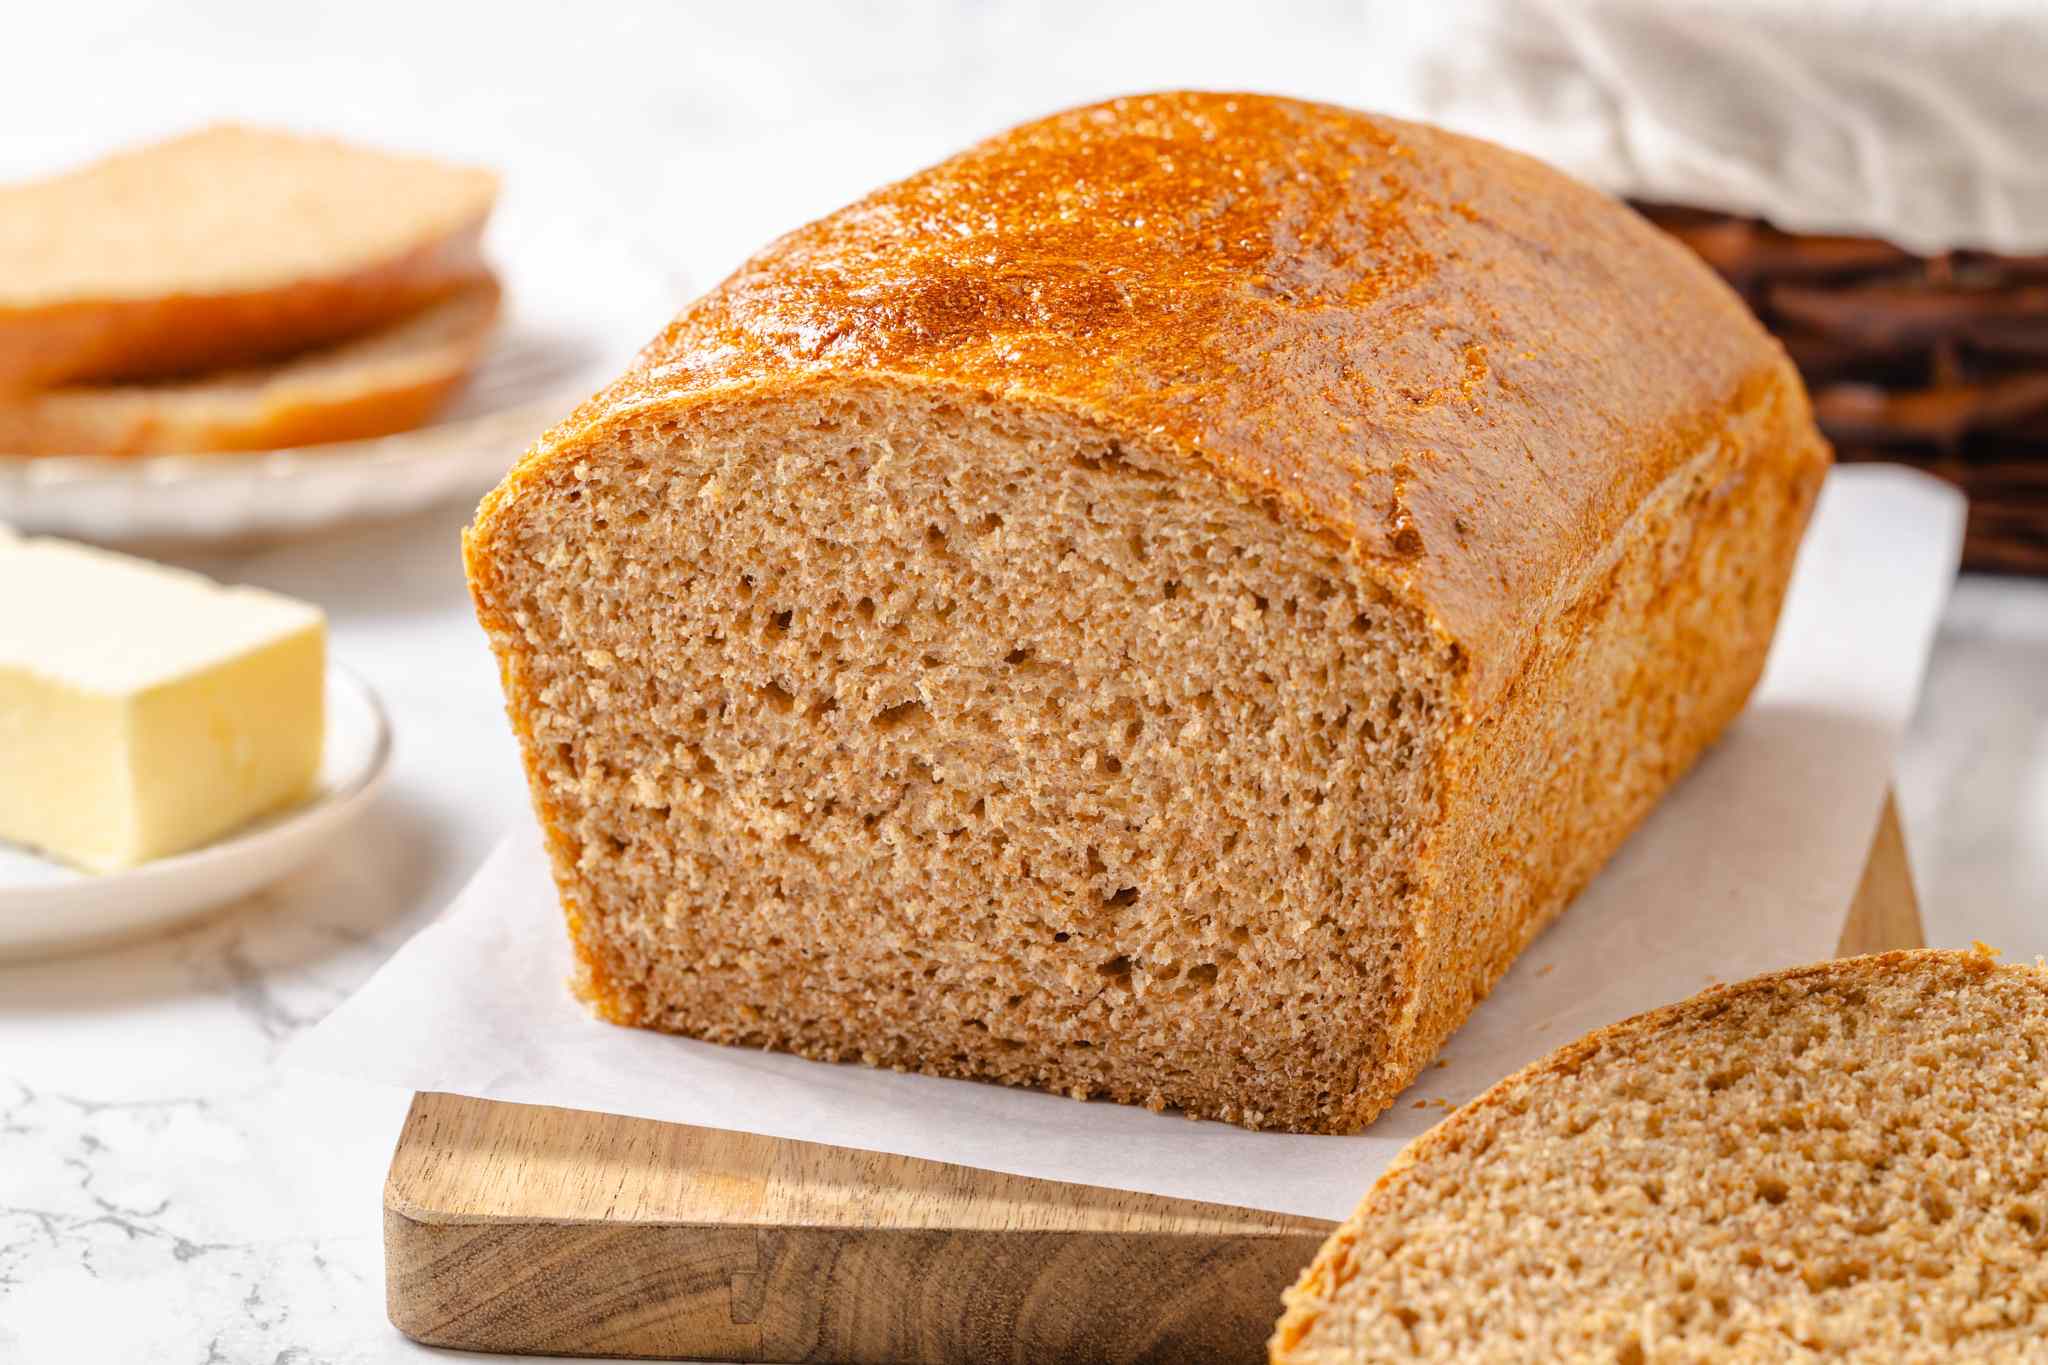
- 100% whole wheat, genuinely soft. Whole wheat bread is usually dense and dry. The canola oil and maple syrup in this recipe keep the crumb tender and almost buttery, even with nothing but whole grain flour in the dough.
- The straight dough method makes it simple. Everything goes into one bowl at once, no separate yeast blooming, no staged additions. If you want to try something similar without any shaping at all, my no knead dutch oven bread is a great companion bake.
- Maple syrup adds flavor without sweetness. It gives the loaf a subtle earthy warmth that honey does not quite replicate. If you enjoy baking with whole wheat flour, these whole wheat dinner rolls come together in just 2 hours!
There is something quietly satisfying about pulling two golden whole wheat loaves from the oven, knowing you never touched a stand mixer. I tested this recipe multiple times and kept coming back to how approachable the whole process feels, even on a busy weekend.
This bread is perfect for sandwiches or for toasting in this cinnamon toast recipe! It has a nutty, slightly sweet flavor that makes a perfect addition to a weekday lunch. If you love baking with whole wheat flour, my whole wheat bread recipe, whole wheat pizza dough, and this whole wheat pita bread should be your next stop.
Ingredients & Substitutions
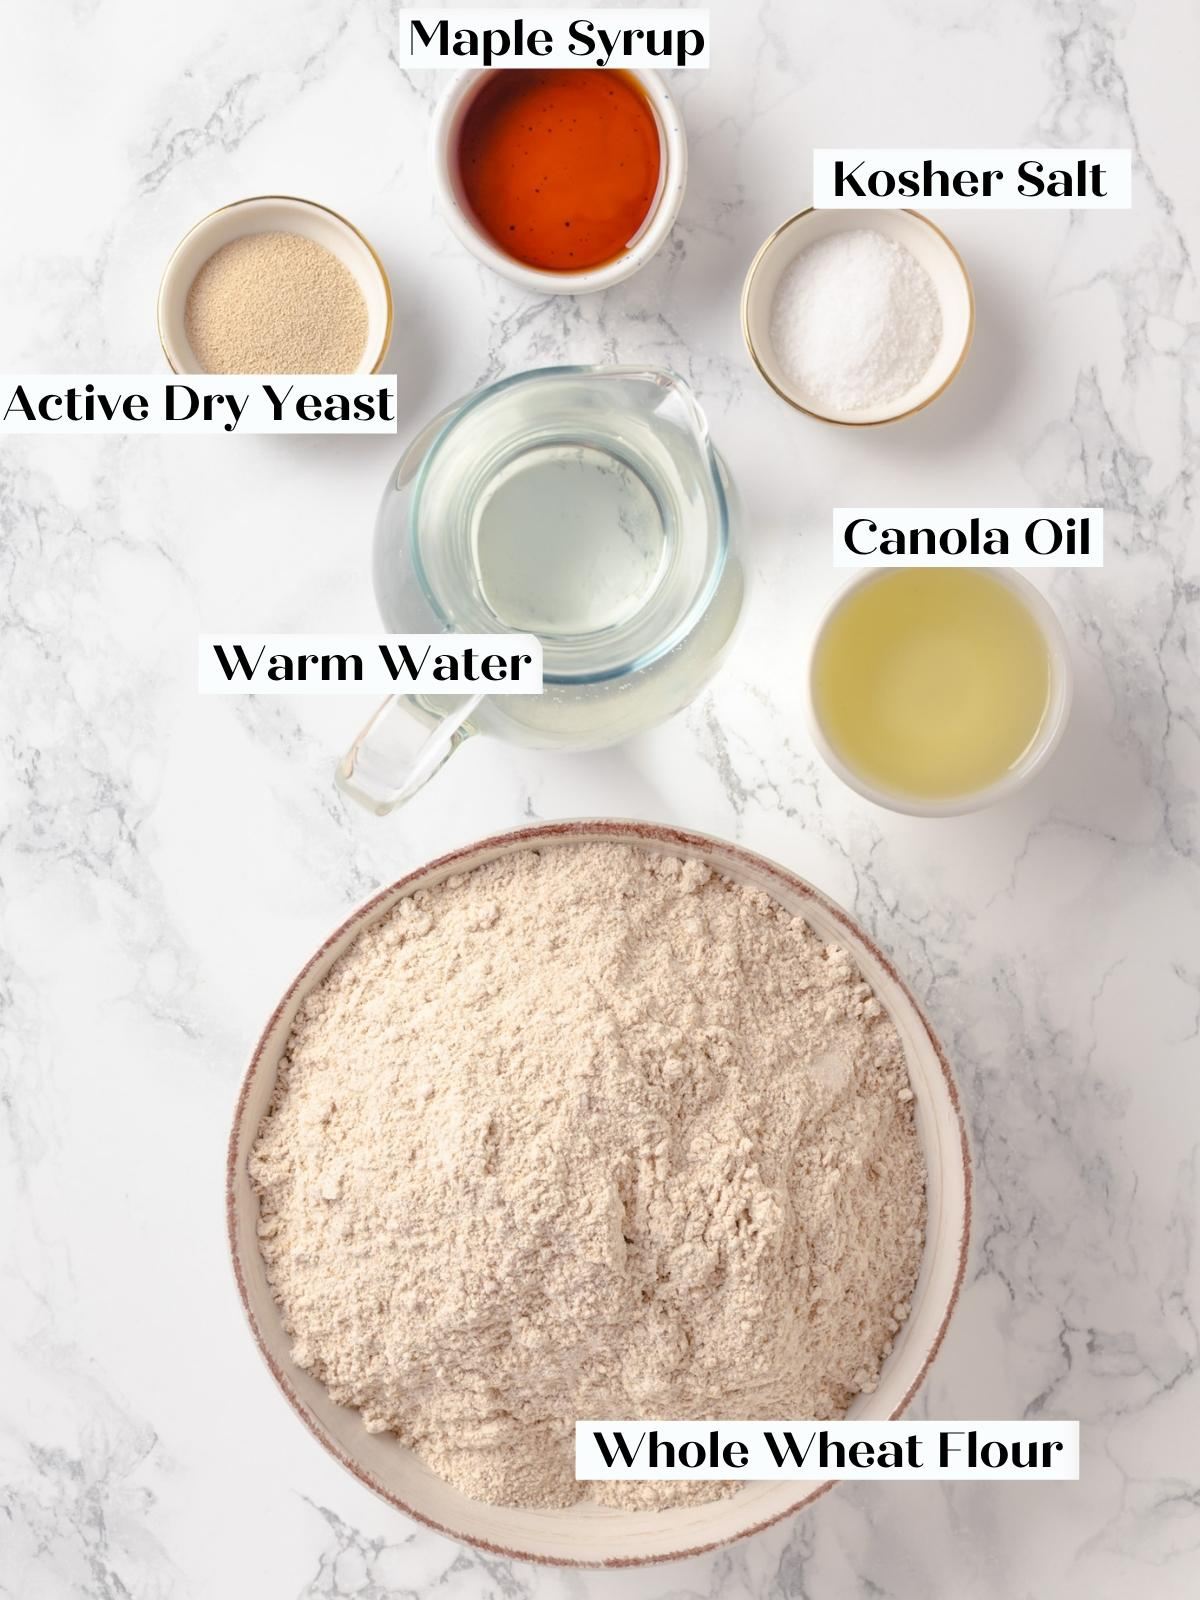
- Whole Wheat Flour: The backbone of this bread, whole wheat flour gives the loaf its earthy, nutty flavor and hearty character. If you love baking with whole wheat flour and want to try a naturally leavened version, my whole wheat sourdough bread uses a similar whole grain base with a longer, slower fermentation.
- Warm Water: Warm water activates the yeast and speeds up gluten development, which matters in a no-knead dough that relies on time and folds rather than mechanical mixing. Cold water will slow yeast activity significantly and push your proof times well beyond what the recipe calls for.
- Maple Syrup: Maple syrup feeds the yeast and adds a subtle earthy sweetness that the notes describe as something you can sense in the background but not actually taste. Honey works as a direct swap and keeps the loaf just as moist, though the flavor shifts toward something a little more floral.
- Canola Oil: Oil tenderizes the crumb and keeps the loaf soft for days. Another neutral oil, such as vegetable or sunflower oil, will perform the same way. Olive oil also works, adding a gentle, savory note that pairs well with the whole wheat.
- Active Dry Yeast: Leavens the dough and creates an open, tender crumb. Because this recipe uses the straight-dough method, in which all ingredients go into the bowl at once, the yeast hydrates and activates on its own without a separate bloom step. Instant yeast can be used in the same amount and may shorten your proof times slightly, so watch the dough rather than the clock.
- Kosher Salt: Salt controls fermentation speed and sharpens the overall flavor of the loaf. If substituting table salt, use about three-quarters of the amount called for, since table salt is finer and packs more densely by volume.
Variations for No Knead Whole Wheat Bread
- Mix in some dried fruit or nuts. Flavor this whole wheat sourdough with dried fruit, as I did in this cinnamon raisin sourdough bread, or use fresh, chopped herbs, like in this rosemary garlic bread. You can also use a combination of both, like in this cherry sourdough!
- Seeded Top. Before brushing with egg wash, press a handful of sesame seeds, rolled oats, or sunflower seeds across the top of each loaf. The seeds toast as the bread bakes and add a nutty crunch to every slice, like with my multigrain bread.
- Shape into dinner rolls: Follow the steps in my whole wheat dinner roll recipe. I would bake these in a baking dish rather than as free rolls, since it is no-knead and will need a bit of support in the oven.
Professional Tips for Perfect No Knead Whole Wheat Bread
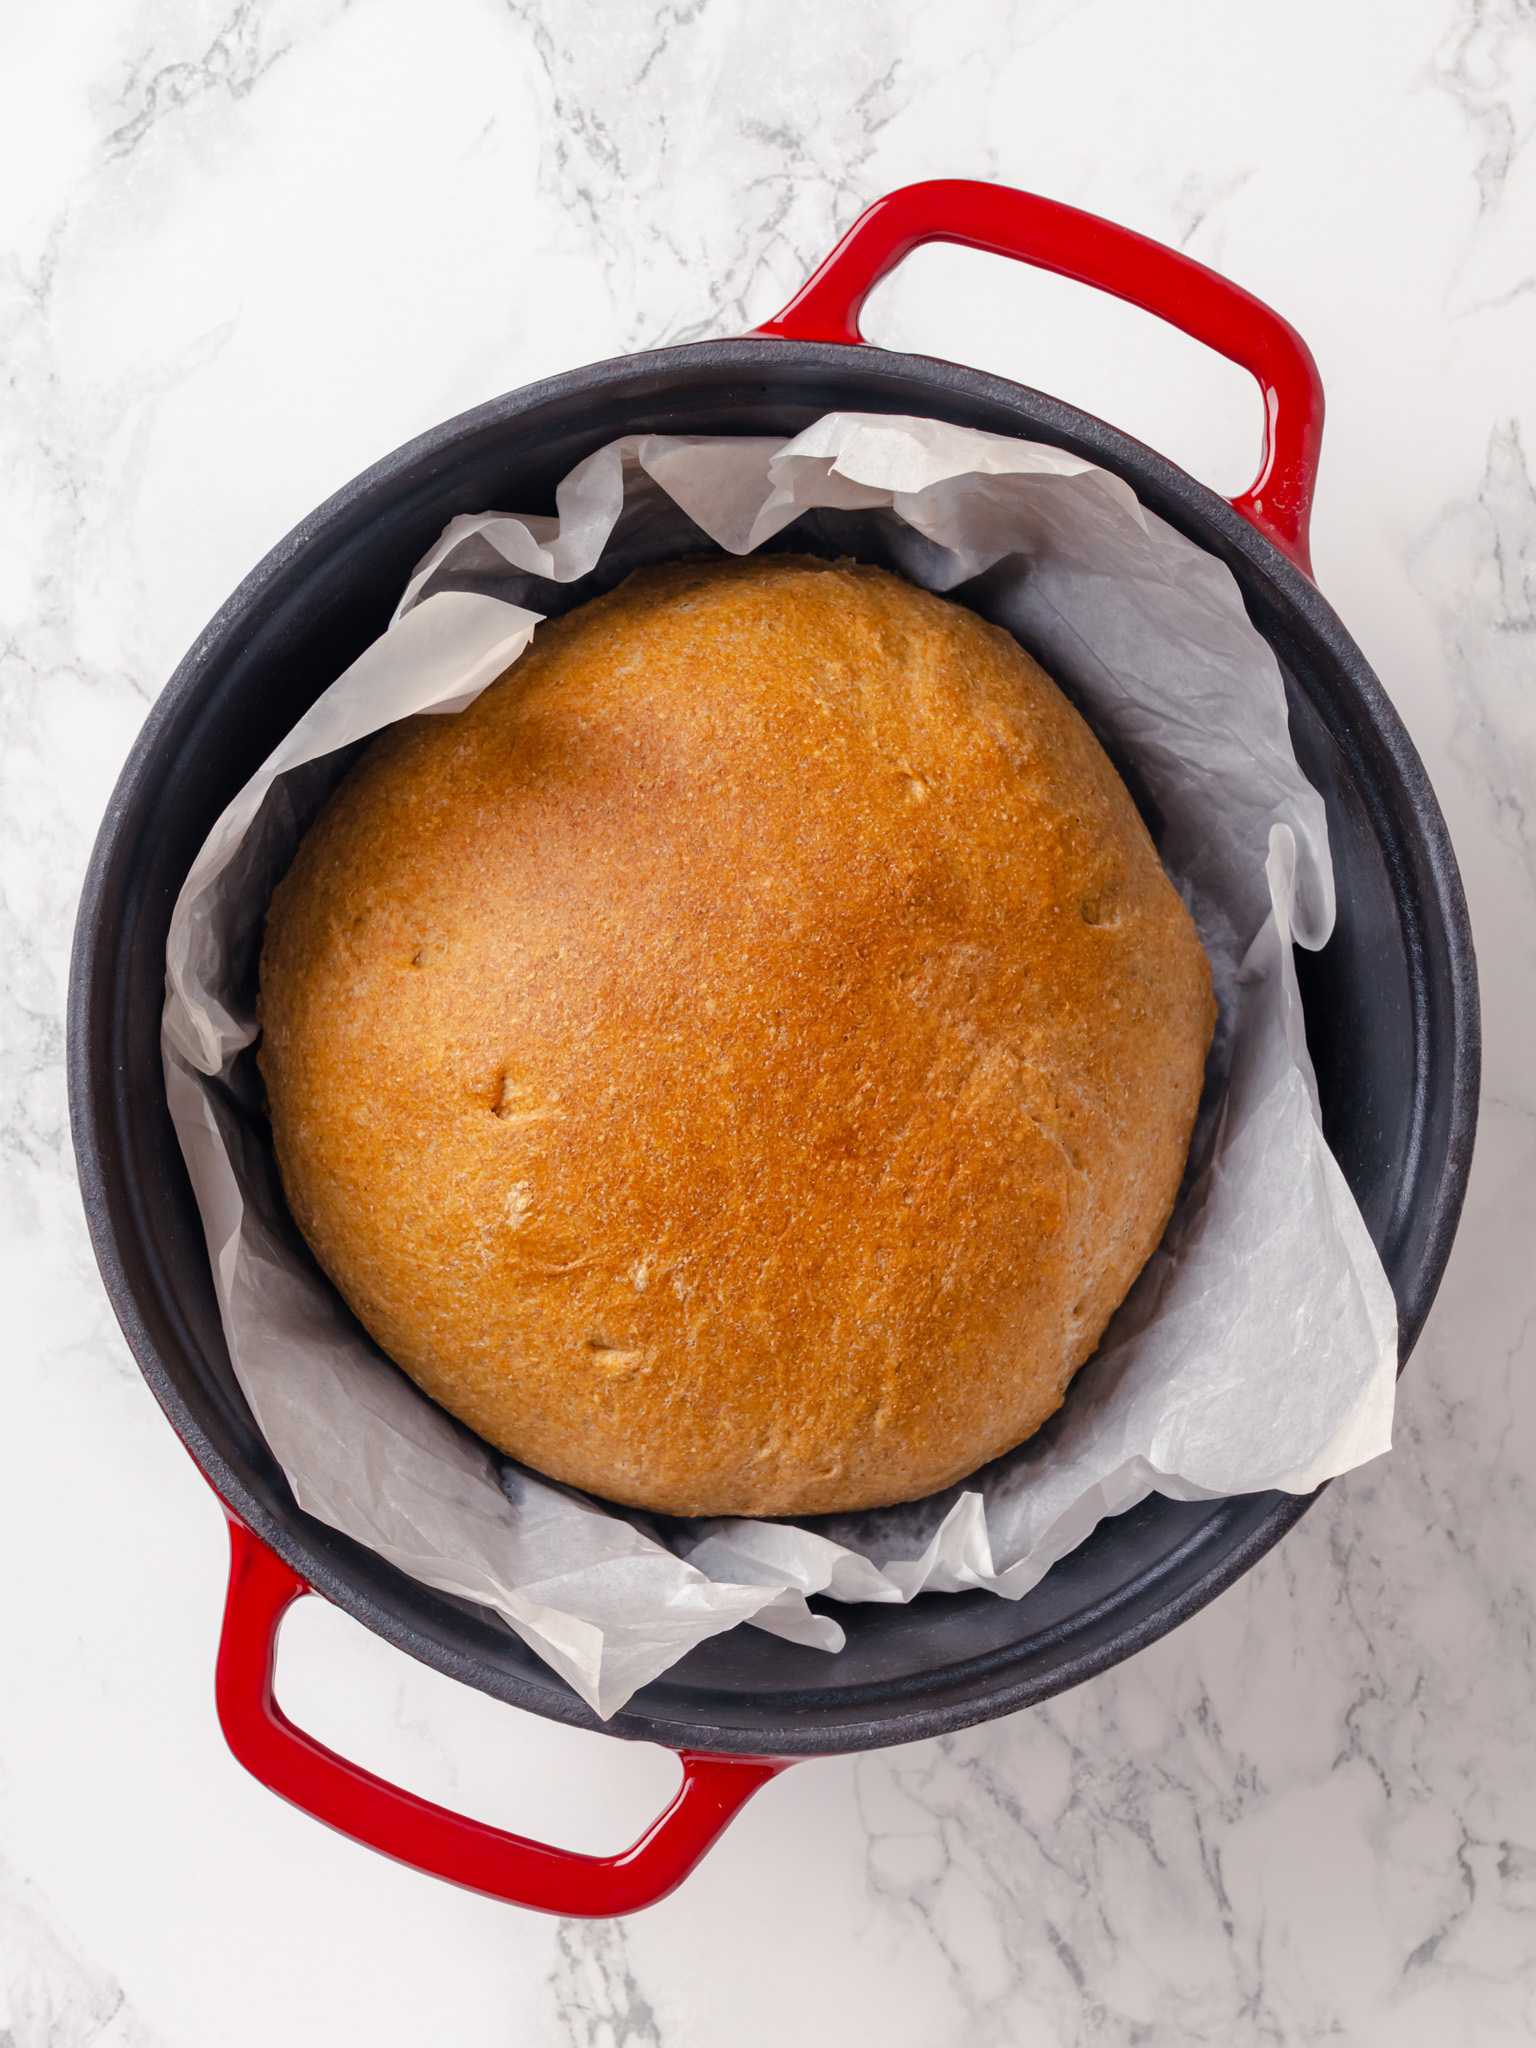
- Bake one loaf in a pan and one in a Dutch oven. You can also shape these loaves into a boule (round) and bake them in a Dutch oven. There are times when the baking method makes little difference in the final product, like with my rye bread recipe; however, it produced loaves with superior texture. The crunchy, caramelized crust contrasted with the soft, almost buttery crumb was fantastic and like something you would get at a fancy steakhouse.
- Do not skip the series of folds. The folds are listed as optional, but they are what separates a loaf that rises tall with an open crumb from one that bakes up denser. Three sets of folds take about 90 seconds of active effort and make a real, visible difference in the final loaf. If you choose not to do the fold I recommend doing a preshape like I do in sourdough sandwich bread.
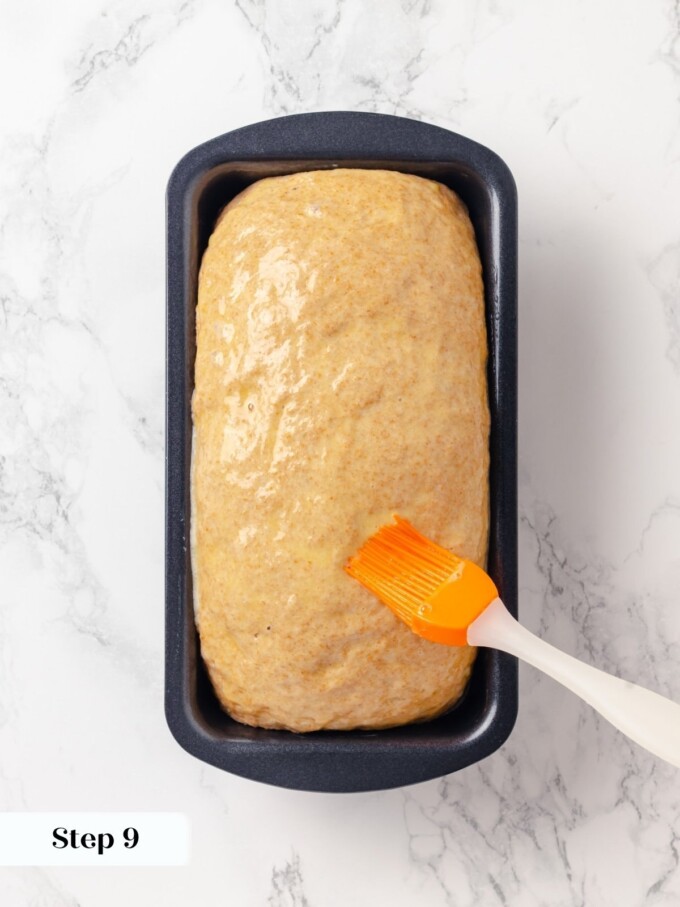
- Apply the egg wash with a feather-light hand. The dough is fully proofed and fragile when you brush it, and pressing down with a loaded pastry brush will deflate what took an hour to build. Use a very soft brush, barely loaded with egg, and stroke across the surface without any downward pressure.
- Watch the dough, not the clock. Proof times in this recipe are based on specific kitchen conditions, and a cooler home can push the final proof to 90 minutes or longer. The loaf is ready to bake when the dough has clearly risen above the edge of the pan and jiggles gently when you nudge it.
How to Make No Knead Whole Wheat Bread
Use these instructions to make two soft, golden whole wheat sandwich loaves with a tender crumb and a mild, earthy sweetness. Further details and measurements can be found in the recipe card below.
Prepare Your Bowl and Mix the Dough:
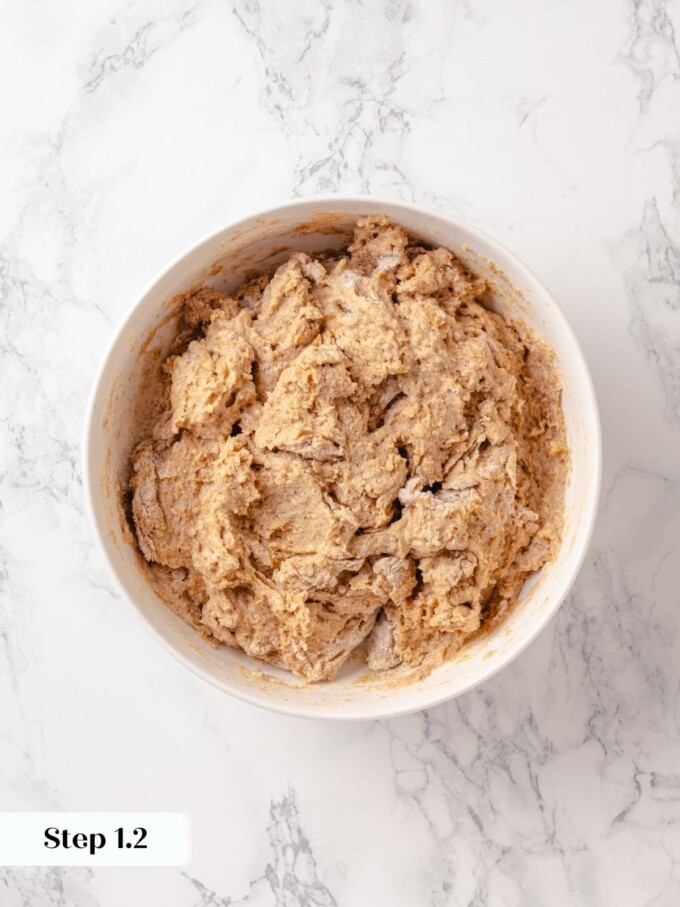
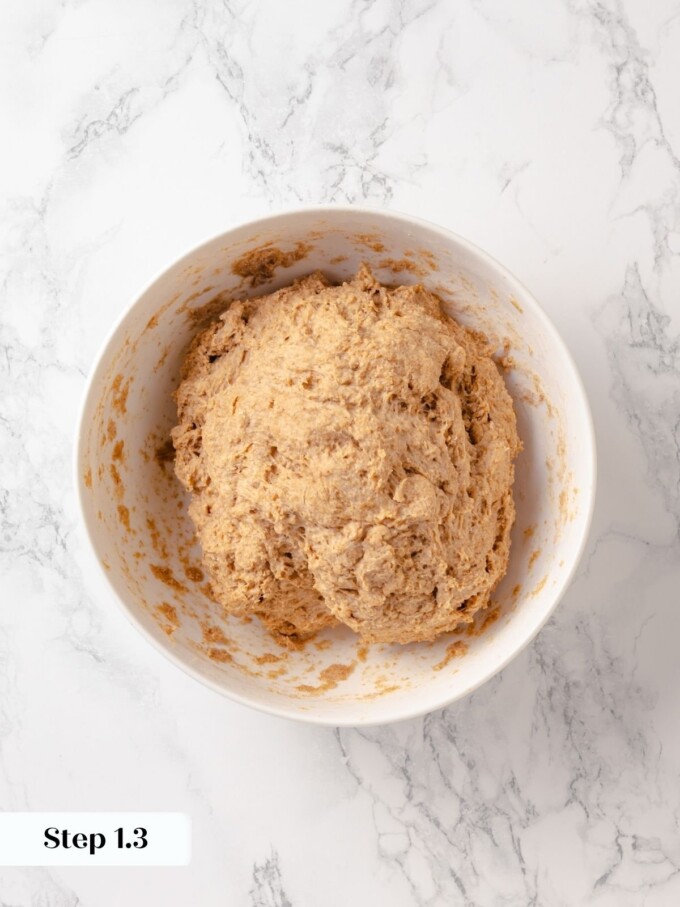
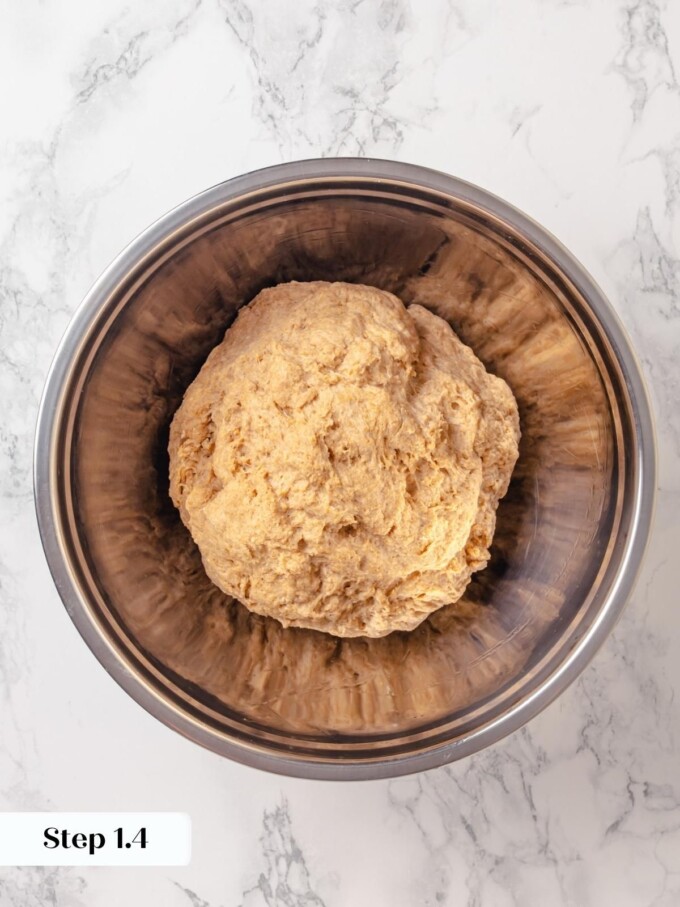
Step 1: In a large bowl, combine the whole wheat flour, warm water, maple syrup, canola oil, active dry yeast, and kosher salt all at once. Stir with a wooden spoon or a stiff silicone spatula until the dough comes together, then finish by hand, squeezing and pressing until everything is evenly incorporated. The dough will look shaggy and feel dense, almost uncomfortably stiff. That is normal. Whole wheat flour hydrates slowly, and the dough will change dramatically over the next few hours. (photos 1- 4 below)
I used the straight dough method, which simply means all the ingredients go into the bowl at once. There is no need to bloom the yeast first; they have plenty of time to hydrate and activate while the gluten develops. Using warm water not only creates a warmer environment for the yeast, but heat also develops gluten faster.

Transfer and Begin the Resting Period:
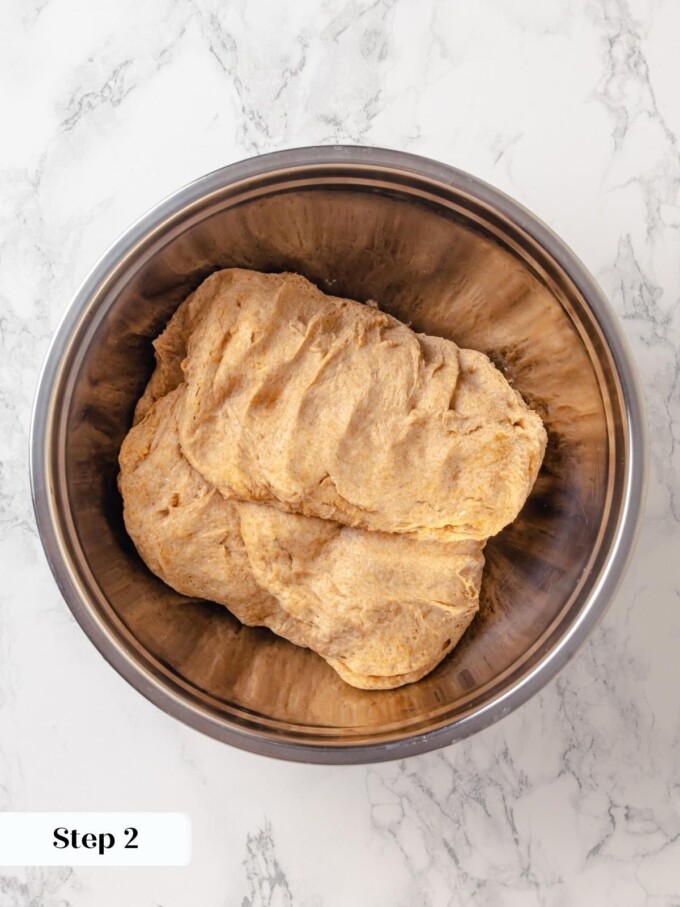
Step 2: Oil a large bowl. Using a silicone spatula or bowl scraper, scrape the dough into the clean, oiled bowl. Cover with plastic wrap and set it in a warm spot. (photo 5)
This two-bowl approach matters: the fresh, oiled surface prevents the dough from sticking aggressively to the sides, which makes the folds much easier to execute cleanly.
Perform the Series of Folds:
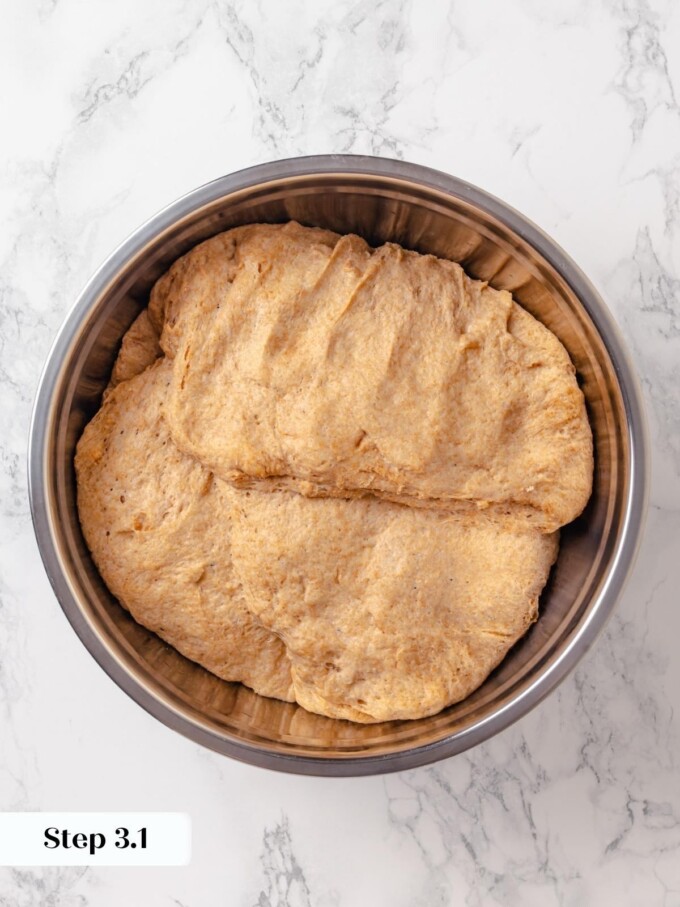
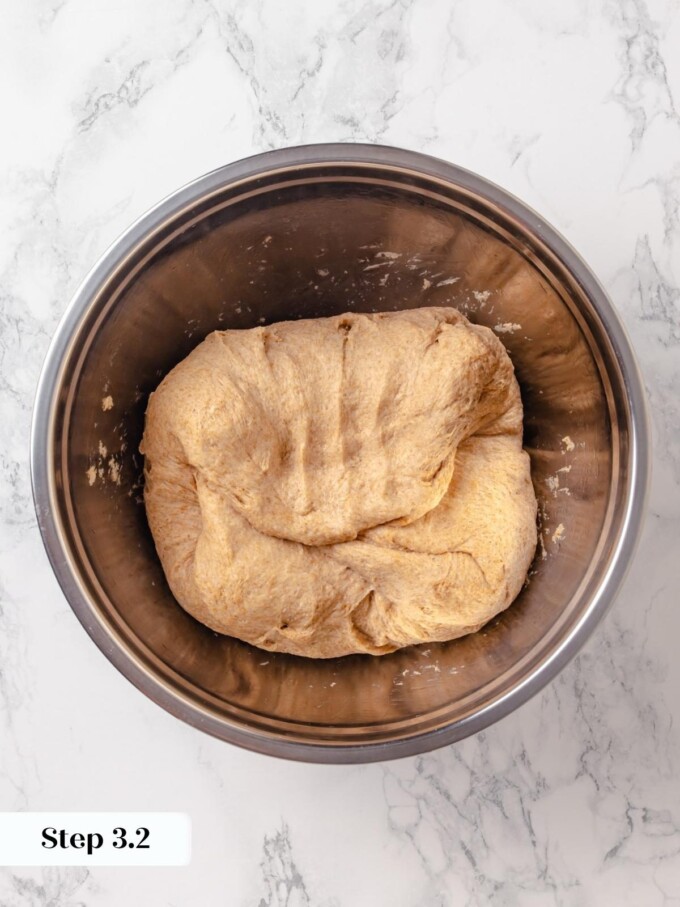
Step 3: About 30 minutes after mixing, perform the first set of folds. Use a bowl scraper like an extension of your hand: slide it down one side of the bowl, work it under the dough, then pull the dough out and stretch it up and over itself. Repeat on the remaining three sides. At this stage, the dough will still feel wet and loose, almost like it is falling apart. Stop stressing. Trust the process. Cover with plastic wrap and return the bowl to its warm spot (photos 6 & 7).
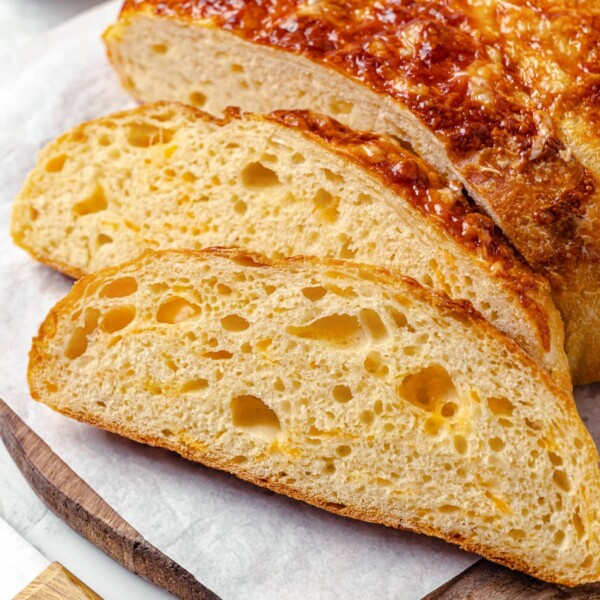
The series of folds are optional, but they make a real difference. The added gluten activation and alignment of the gluten network result in loaves that rise higher with a more tender crumb. Even one set of folds, as I do in my no knead cheese bread will make a difference. If you skip the folds entirely, be sure to finish mixing thoroughly by hand so the ingredients are fully incorporated before the bulk proof begins.
Step 4: Repeat this folding process twice more, with 30 minutes of rest between each set, for a total of three sets of folds. With each round, you will notice the dough becoming more cohesive and elastic. By the third fold, it should hold together as one smooth, supple mass and release cleanly from the sides of the bowl.
Bulk Proof the Dough:
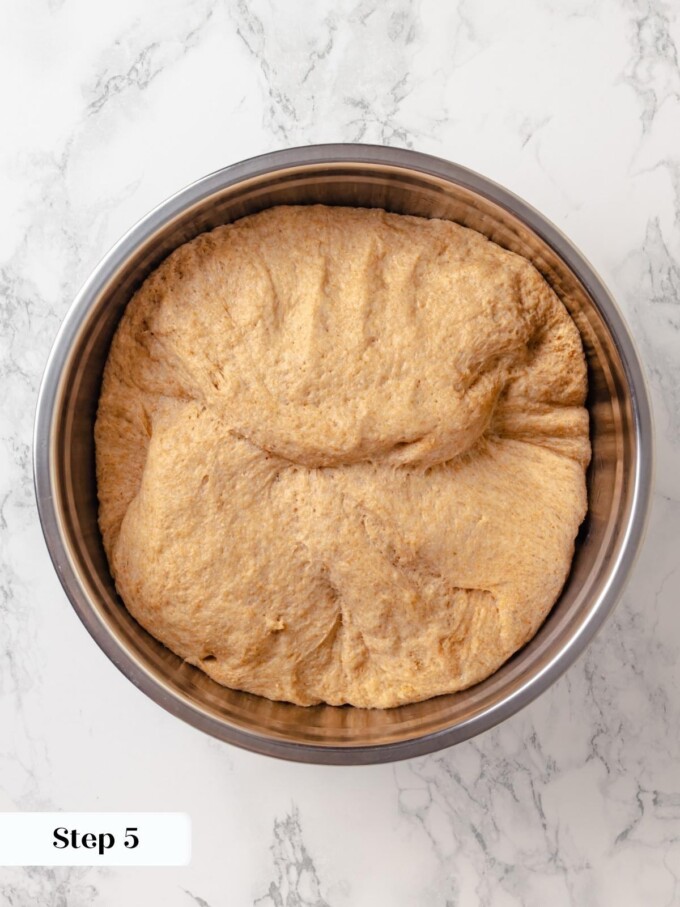
Step 5: After the final fold, cover the bowl with plastic wrap and set it in a warm spot to bulk proof for about an hour, or until the dough has clearly doubled in size. Watch the dough, not the clock. A cooler kitchen will slow things down considerably, and a warmer one will speed them up. The dough is ready when it looks puffy, feels light when you nudge the bowl, and has genuinely doubled in volume. (photo 8 above)
Divide and Shape the Loaves:
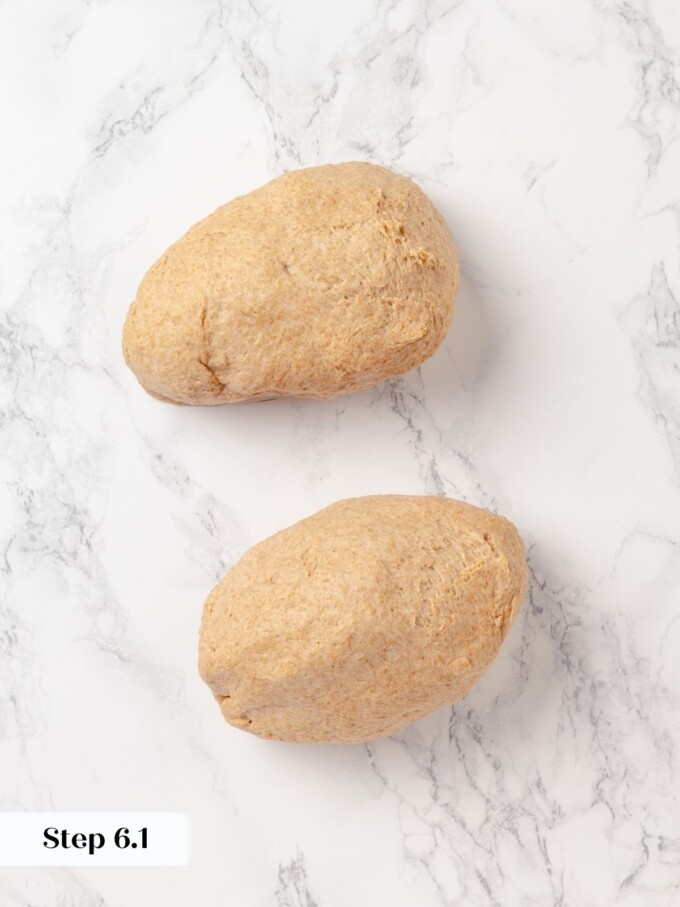
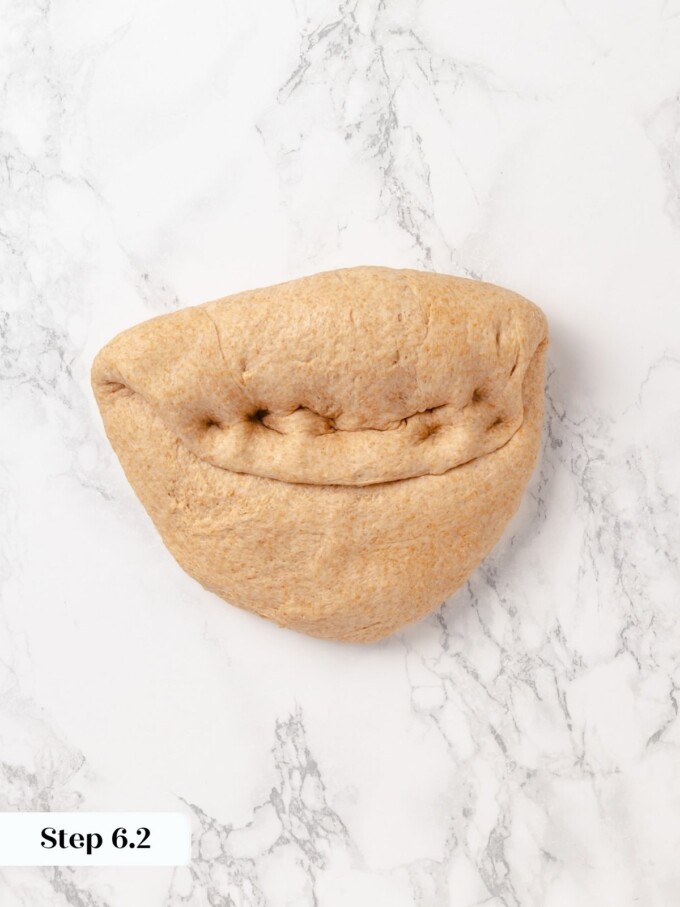
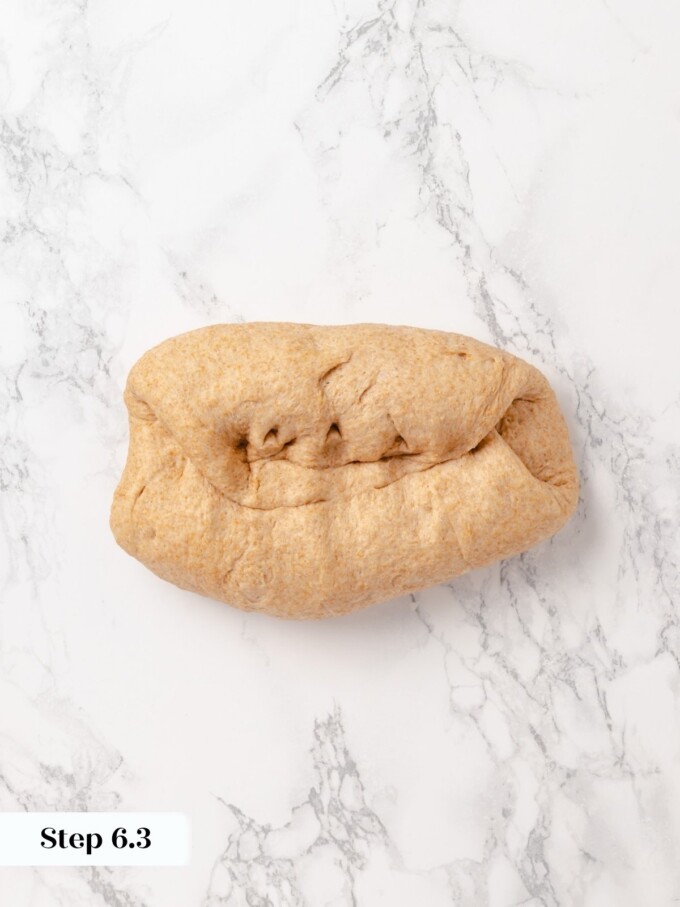
Step 6: Turn the dough out onto a lightly floured surface and divide it into two equal pieces, about 530g each. Working with one piece at a time, gently stretch the dough into a rough rectangle. Take the side furthest from you and fold it down to the center. Rotate the dough 180 degrees and repeat, folding the other side down to the center as well. (photos 9-11).
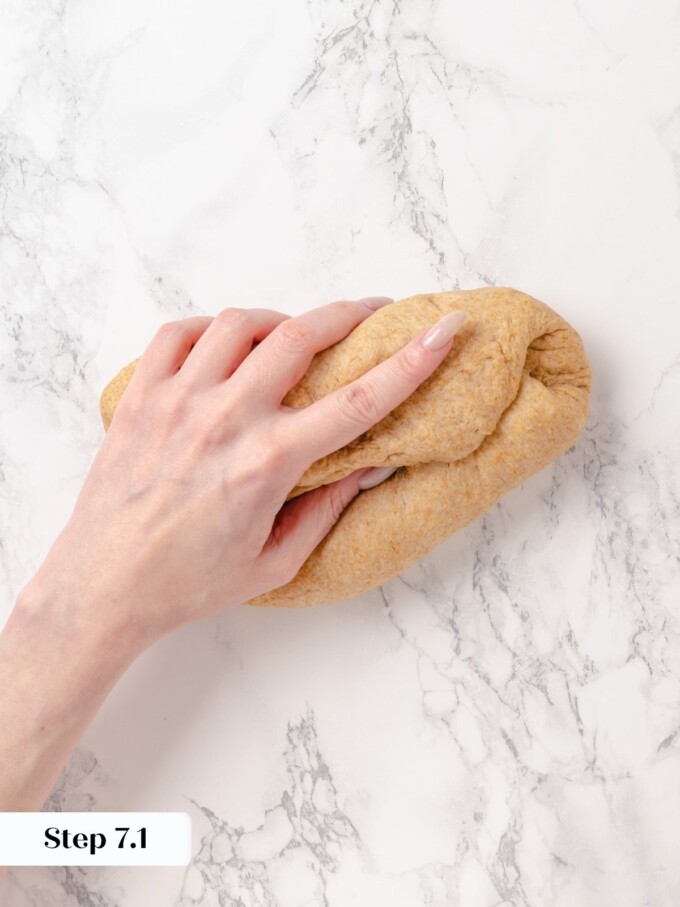
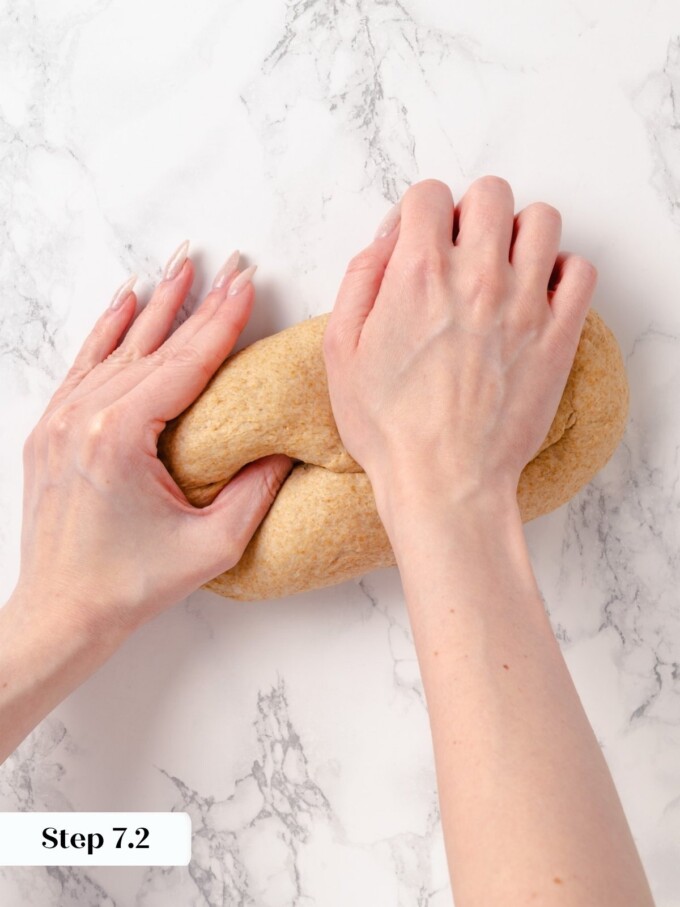
Step 7: Now perform the thumb folds. Wrap the dough around the thumb of your left hand and seal the edge against it with the heel of your right hand. Begin this motion on the right side of the dough and gradually work left, rolling and sealing as you go. The first thumb fold will not fully close the log, and that is completely normal. Perform one more thumb fold the same way to create a tight, fully sealed cylinder. Repeat the entire process with the second piece of dough. (photo 12 & 13)
Final Proof:
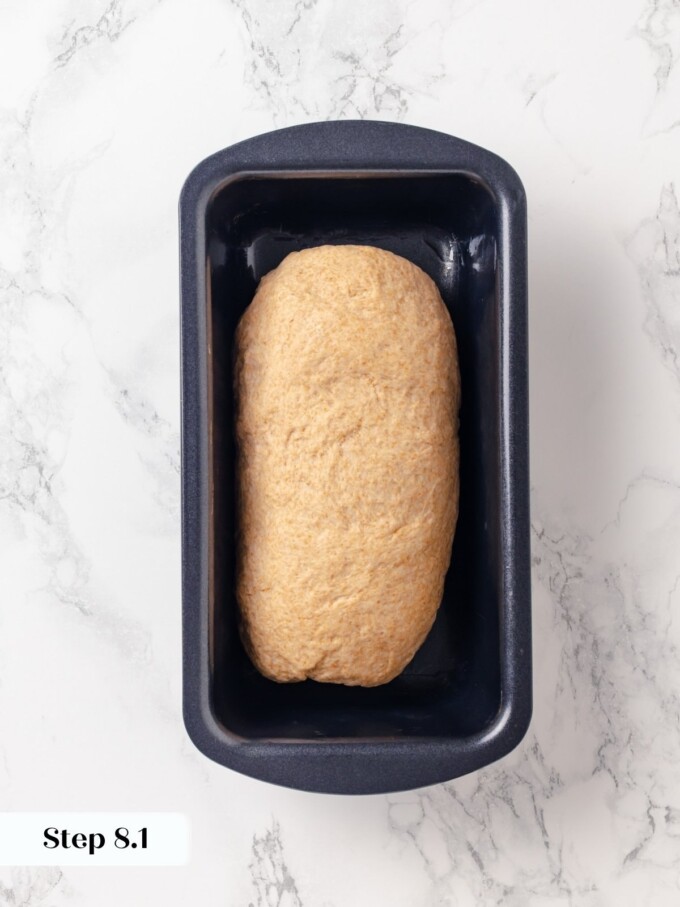
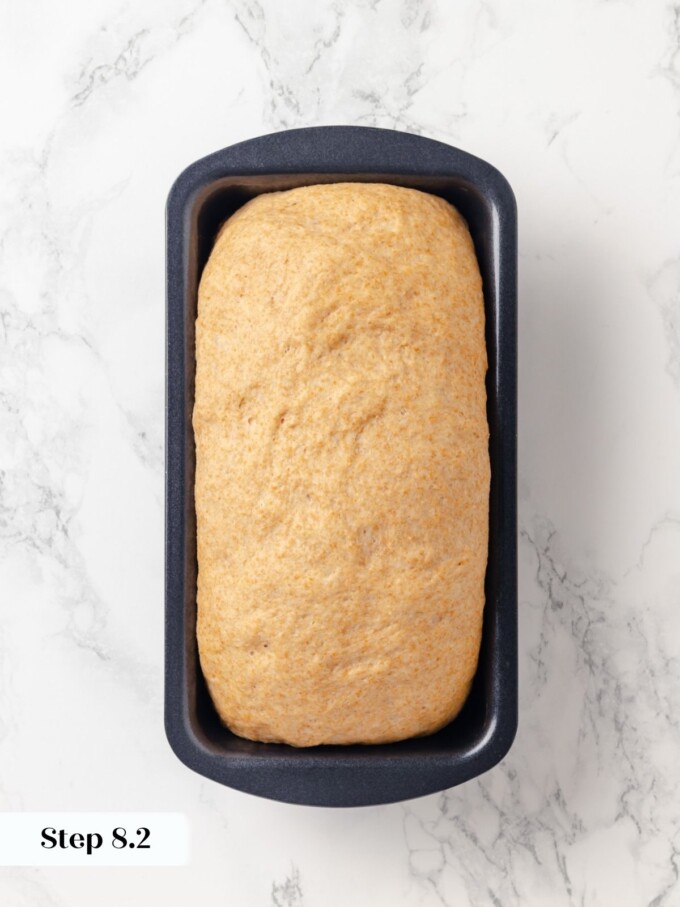
Step 8: Place each shaped loaf, seam-side down, into a greased 8 to 9-inch loaf pan. Cover loosely with plastic wrap and set in a warm spot to proof for 45 to 60 minutes, or until the dough has risen clearly above the rim of the pan in most places. While the dough proofs, preheat the oven to 350°F conventional (no fan). The oven should be fully preheated before the loaves go in, so start it with about 20 minutes to spare. (photo 14 & 15 Below)
Do not rush this final proof. The loaves need to visibly crest above the edge of the pan before they go into the oven. If they are only level with the rim, give them more time. Underproofed loaves will bake up dense and may split awkwardly along the sides.
Egg Wash and Bake:
Step 9: Just before baking, brush the top of each loaf very gently with a beaten egg. Use a light hand here. Pressing down too firmly will deflate the loaf, and the proof you worked for will be lost in an instant. Slide both pans into the preheated oven and bake for 20 to 22 minutes, or until the internal temperature reads 205°F on an instant-read thermometer (photo 16).
Step 10: Cool and Slice. Remove the loaves from the oven and immediately turn them out onto a wire rack. Let them cool completely before slicing. Cutting into a warm whole wheat loaf compresses the crumb and the texture will never fully recover, so patience here is genuinely worth it. (photo 17).

Recipe FAQs
Store the fully cooled loaves at room temperature, wrapped tightly, for up to 3 days. For longer storage, slice the loaf first, then freeze the slices in a zip-top bag for up to 3 months — that way you can pull out exactly what you need. Reheat slices in the toaster straight from frozen, or in the microwave.
Yes, and it works beautifully. After shaping the loaves and placing them in the pans, cover tightly with plastic wrap and refrigerate for up to 16 hours. When you are ready to bake, pull the pans out and let them sit at room temperature for 30 to 45 minutes, then egg wash and bake as written.
The most common culprit is skipping or rushing the folds. Without the three sets of folds, the gluten network remains weak, and the loaves cannot hold the gas produced by the yeast. Underproofing the final rise is also a cause. If the dough has not clearly crested above the rim of the pan before it goes into the oven.
The two loaves are quite different in character. This bread is soft, tender, and mild with a crumb fine enough to slice cleanly for sandwiches. A whole grain seeded bread brings a chewier texture from the toasted grains and seeds baked into and onto the loaf, with a more complex, nutty flavor throughout.
Other No Knead Recipes
Yeast Breads

Yeast Breads

No-Knead Breads

No-Knead Breads
No Knead Whole Wheat Bread
Ingredients
- 4 cups whole wheat flour
- 2 cups warm water
- 3 tablespoons maple syrup
- 3 tablespoons canola oil, or another neutral oil
- 2 ¼ teaspoons active dry yeast
- 2 teaspoons kosher salt
Instructions
- Oil a large bowl with nonstick cooking spray and set aside. In a separate large bowl, combine all ingredients: whole wheat flour, warm water, maple syrup, canola oil, active dry yeast, and kosher salt.
- Mix with a wooden spoon or stiff silicone spatula until a rough dough forms, then finish incorporating any dry bits by squeezing the dough with your hand.
- Scrape the dough into the oiled bowl, cover with plastic wrap, and set in a warm spot.
- After 30 minutes, use a bowl scraper to fold the dough: scrape down one side, pull the dough up and stretch it over itself, and repeat on all 4 sides. The dough will feel very loose and sticky. Cover and return to the warm spot.
- Repeat the fold sequence two more times at 30-minute intervals, for a total of 3 sets of folds.
- After the final fold, cover and bulk proof in a warm spot for about 1 hour, until the dough has doubled.
- Spray two 8 to 9 inch loaf pans with nonstick cooking spray. Divide the dough into 2 equal pieces (approximately 530g each).
- Shape each piece: stretch gently into a rectangle, fold the far edge down to the center, rotate 180 degrees, and fold the other edge down to the center. Perform 2 thumb folds by wrapping the dough around the thumb of your left hand and sealing the edge with the heel of your right hand, moving from right to left. The first pass will not fully close the log; a second thumb fold seals it completely.
- Place each loaf seam side down in a prepared pan. Cover loosely with plastic wrap and proof in a warm spot for 45 to 60 minutes, until the dough has risen above the rim of the pan in most places.
- While the loaves proof, preheat the oven to 350°F conventional (no fan).
- Gently brush the tops with a beaten egg, taking care not to deflate the dough.
- Bake for 20 to 22 minutes, or until the internal temperature reads 205°F on an instant-read thermometer.
- Turn the loaves out onto a wire rack and cool completely before slicing.
Notes
Nutrition
Nutrition information is automatically calculated, so should only be used as an approximation.
 Like this recipe? Rate & comment below!
Before You Go
If no knead whole wheat bread earns a regular spot in your weekly rotation, there is plenty more waiting for you. Browse our bread recipes or head right over to this no knead focaccia!


I have made plenty of whole wheat loaves that turned out dense and dry, but this one genuinely surprised me. The crumb was soft and the loaf held together beautifully when I sliced it the next morning. No kneading and only a handful of ingredients, it is now my go-to weekly bread for my family!
I’m so happy to hear that Renata! Thank you for taking the time to comment and rate!